Implementing Identity Authentication and Authorization in ASP.NET Core 8 with Scaffolding
 Anand Maurya
Introduction
When building a website, it's important to control who can access certain parts of it. This is where authentication (checking who a user is) and authorization (deciding what they can do) come in. ASP.NET Core 8 makes it easy to handle these tasks using a tool called Identity.
Identity helps you create essential features like signing up, logging in, and logging out users. What's great is that ASP.NET Core also has a feature called scaffolding, which automatically sets up these pages for you with just a few clicks.
In this blog post, we'll walk you through how to use Identity in ASP.NET Core 8 to quickly create login, register, and logout pages. We'll start by setting up a new project, then configure Identity, and finally use scaffolding to get everything up and running. By the end, you'll have a basic authentication system working on your website—even if you're new to coding!
Step 1: Setting Up the Project
Open Visual Studio and click on Create a New Project
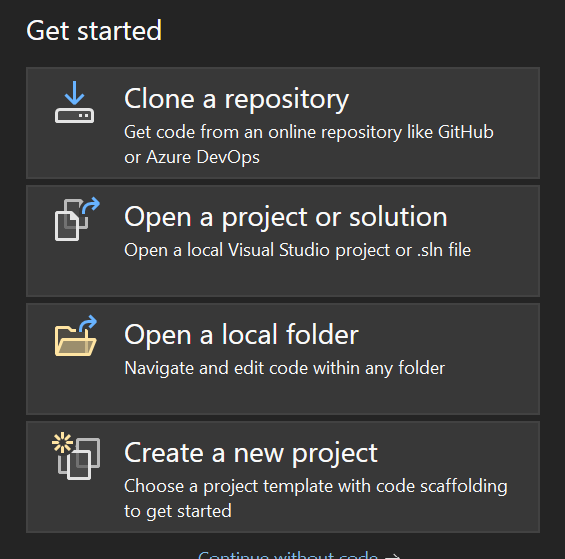
Choose "ASP.NET Core Web App (Model-View-Controller)". This template is suitable for building an MVC web application using ASP.NET Core.

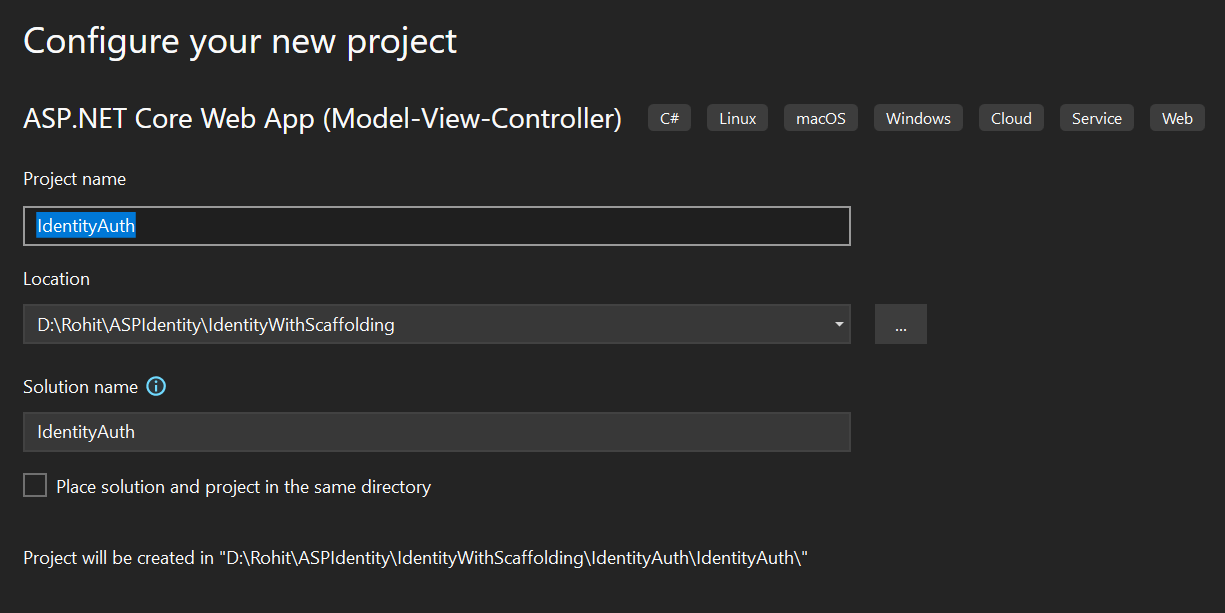
Click "Next.", Then Enter a name for your project, such as Identity and then click on Next.
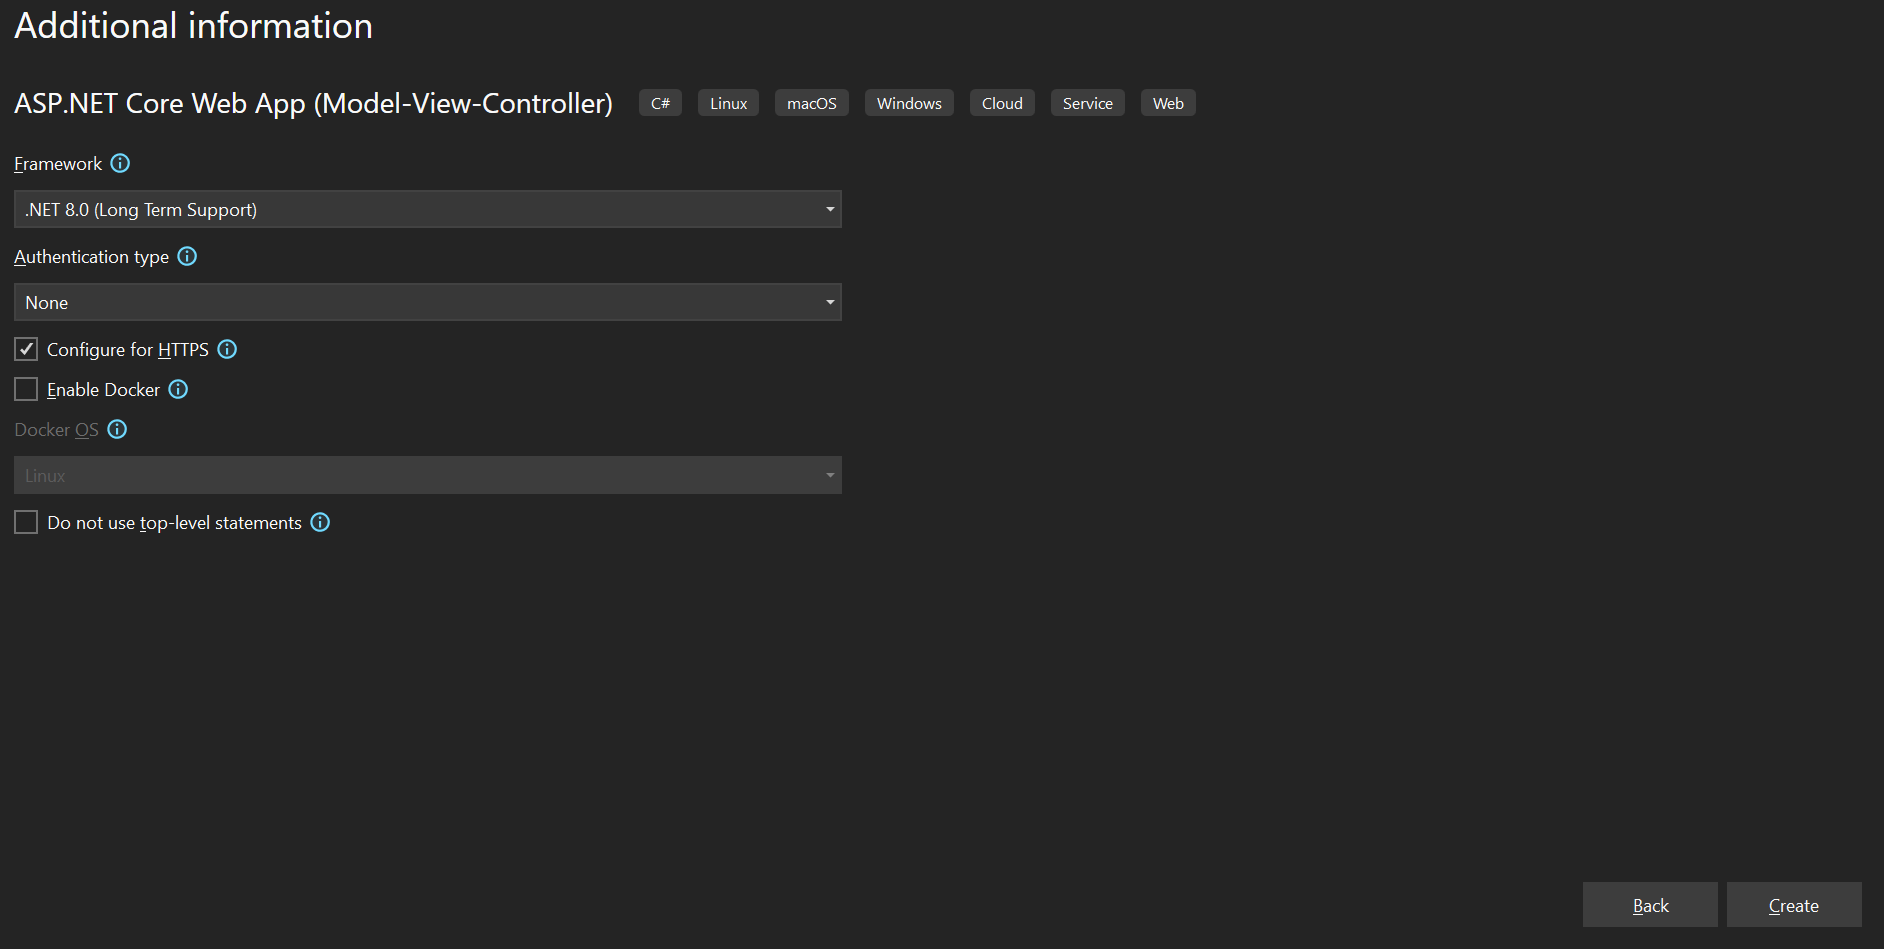
Keep The Framework & Authentication Type on Default and Click on Create
Step 2: Install Required NuGet Packages
Before we can start using Identity in our project, we need to make sure we have all the necessary tools installed. These tools come in the form of NuGet packages, which are like small boxes of code that add extra features to our project.
In Visual Studio, click on Tools in Menu bar, Select NuGet Packages Manager from the context menu and then Select Manage NuGet Packages Solution

Go to the Browse tab in the NuGet Package Manager and Install the Required Packages

Here’s a list of the packages you may need to Install:
Microsoft.AspNetCore.Identity.EntityFrameworkCore
Microsoft.AspNetCore.Identity.UI
Microsoft.EntityFrameworkCore.SqlServer
Microsoft.EntityFrameworkCore.Tools
After installing the packages, Expand the Dependencies then select Packages to confirm that the packages are listed.

Step 3: Add ASP.NET Core Identity Using Scaffolding
In this step, we'll use the scaffolding tool to automatically generate the necessary Identity files for login, registration, and other features. Scaffolding helps speed up the process by creating all the code and views needed for user authentication.
In Solution Explorer, right-click on your project.

Select Add and then Choose New Scaffolded Item.

Select Identity from the Scaffold Menu, Select Identity from the list of options on the left and then Click Add.

After Clicking To Add, Process Will Be Start And We Will See Dialog Box as Below Screenshot

In the "Add Identity" dialog, you'll need to configure several options, We will tell you line by line what you have to add
Select an exting layout page, or specify a new one:
In this step, you need to ensure that the Identity pages use your existing layout. To do this, click on the Path button,

hen expand the Views folder. Double-click on the Shared folder, and you will see the
_Layout.cshtmlfile. Select it and then click on OK.
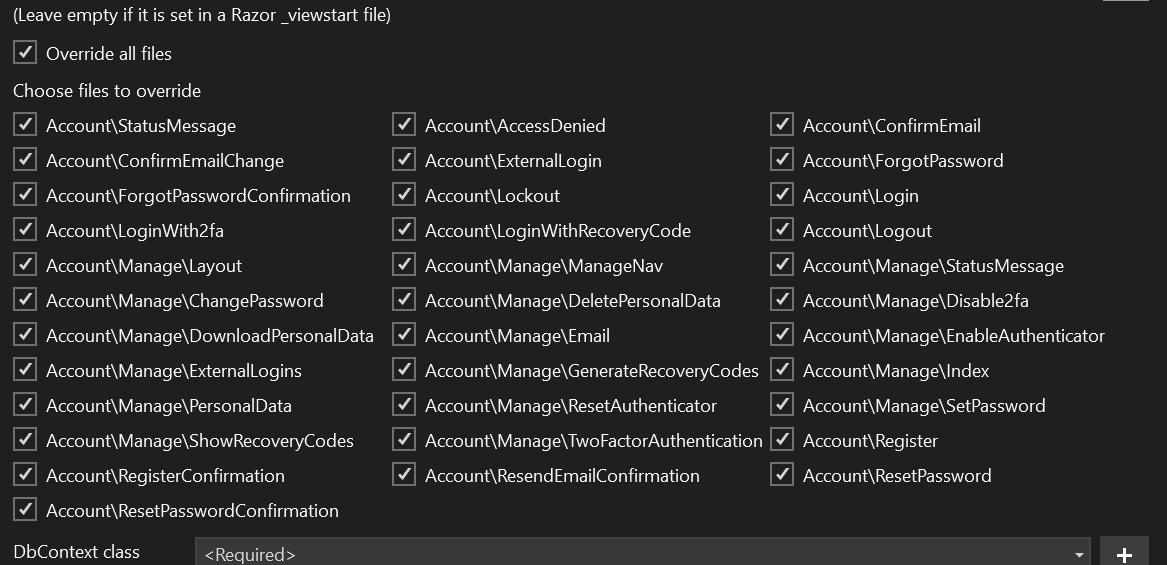
Choose files to overide:
You will see multiple options to choose. Select the options as shown in the screenshot. Select all options to scaffold all Identity pages
DbContextClass:
You have to choose DbContext class so for that Click on Plus Icon
After clicking on plus icon, You will see screen like shown below and then click on Add

User Class:
You have to choose user class so for that Click on Plus Icon
After clicking on plus icon, You will see screen like shown below and then click on Add

Note: Do not use the class name
"IdentityUser". This is a predefined class in the ASP.NET Core Identity framework, and using this name could cause conflicts in your project.
After following all the steps, Your dialog should look like below then click on Add
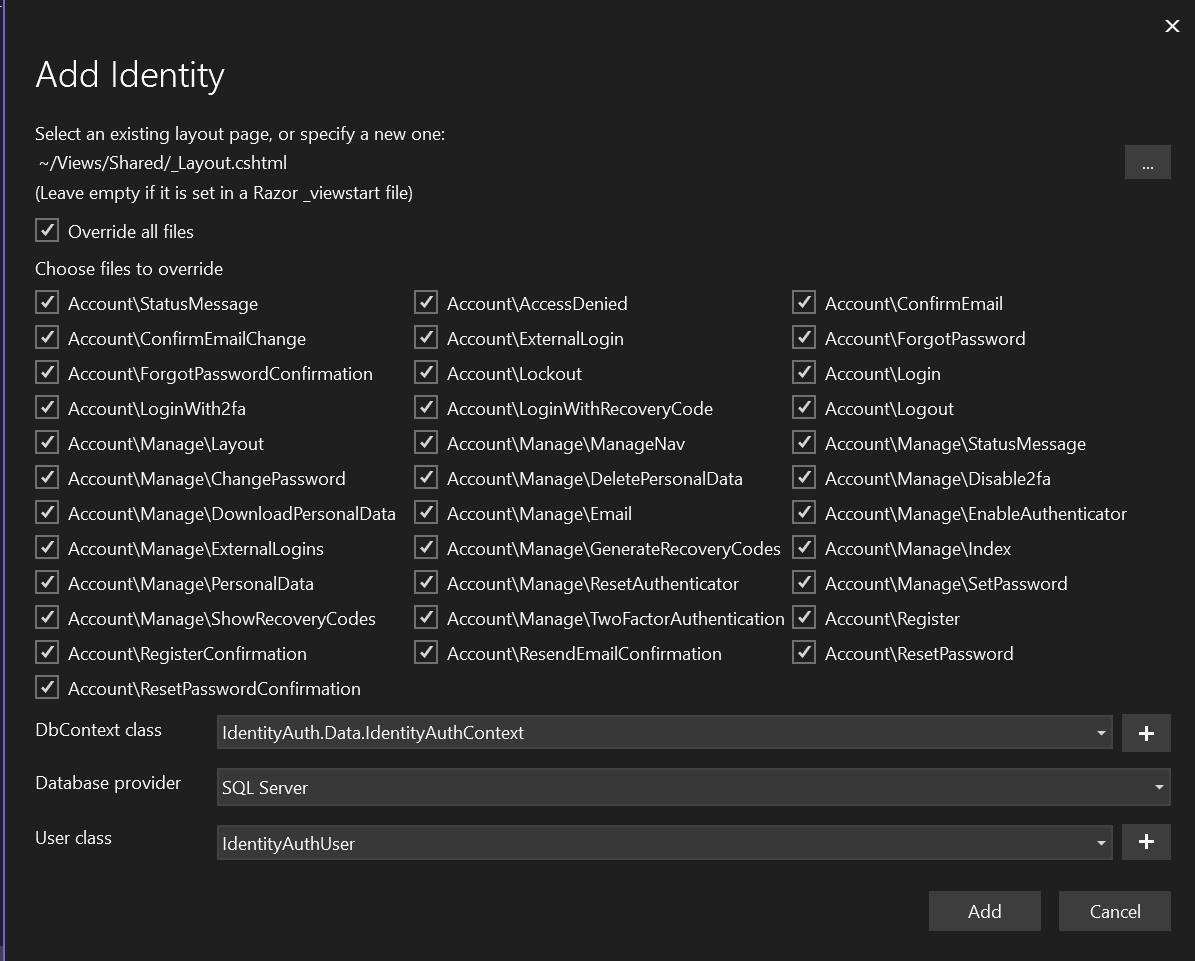
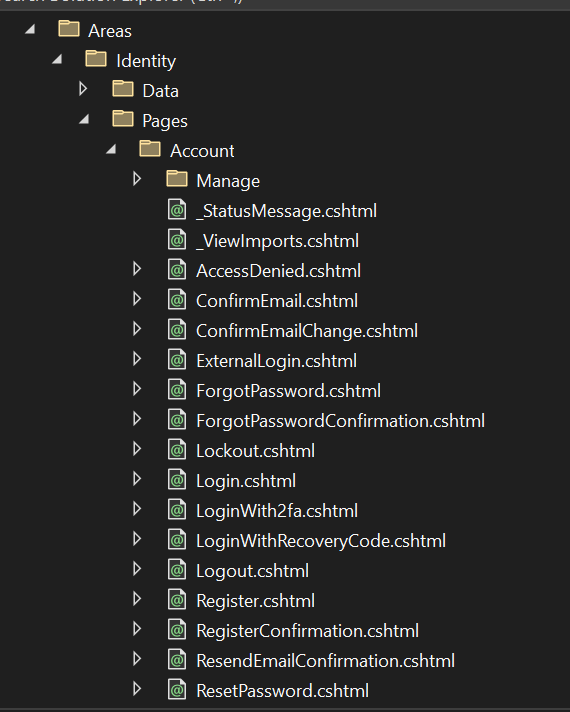
Click on Add, Process will begin. After completing process you will see new Folder name Area in Solution Exploler as below

Review Generated Files
Areas/Identity/Pages/Account: This folder contains pages like login, register, and others.
Data: If you opted to generate a
DbContext, the data context will be placed here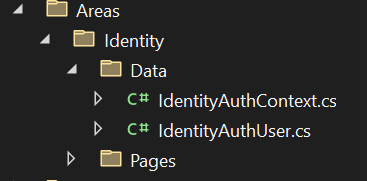
Step 4: Securing Pages with the
[Authorize]AttributeOnce you have the login, register, and logout functionality set up, the next step is to make sure only logged-in users can access certain parts of your website. This is where the
[Authorize]attribute comes in.What is the
[Authorize]Attribute?The
[Authorize]attribute is a simple way to tell your application, "Only let logged-in users access this section." You can place it above any controller or action method that you want to protect.
Open Your Controller: Go to the controller where you want to restrict access. For example, if you want to protect all actions in a HomeController, open that file
Simply place [Authorize] right above the class name. This will restrict the entire controller.
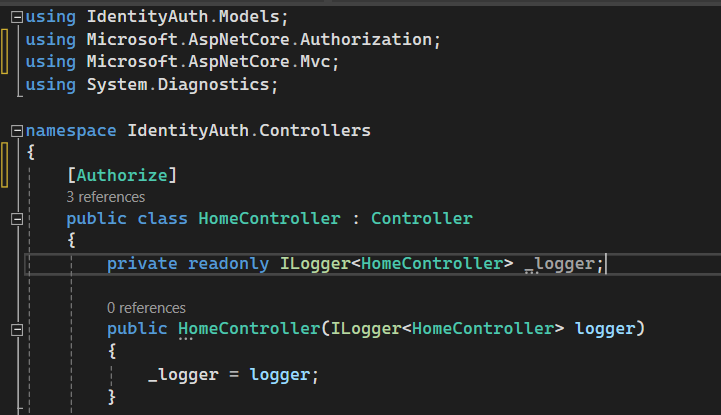
Note: If you see a red line or an error while adding the
[Authorize]attribute, it likely means that the correct namespace is missing. Don't worry—this is easy to fix. To resolve this, just add the following namespace at the top of your controller file:
using Microsoft.AspNetCore.Authorization;
Step 5: Setting Up the Connection String
To make sure our application can store user data (like usernames, passwords, etc.), we need to connect it to a database. This is done by setting up something called a connection string. A connection string tells our application where the database is and how to access it.
In your project, locate the file called appsettings.json. This is where you'll see the connection string.
"AllowedHosts": "*",
"ConnectionStrings": {
  "IdentityAuthContextConnection": "Server=YourServerName;Database=YourDatabaseName;TrustServerCertificate=True;Trusted_Connection=True;MultipleActiveResultSets=true"
}
Replace
YourDatabaseNamewith the actual name you want for your database.Important: We will be generating a new database using migrations. That’s why it’s important to write a new database name in the connection string (
Database=YourDatabaseName). After running the migration, you'll see this new database in SQL Server Management Studio (SSMS) with the tables for storing user data.Replace
YourServereNamewith the actual name of your server you will get erver name from your SQL Server Management Studio (SSMS)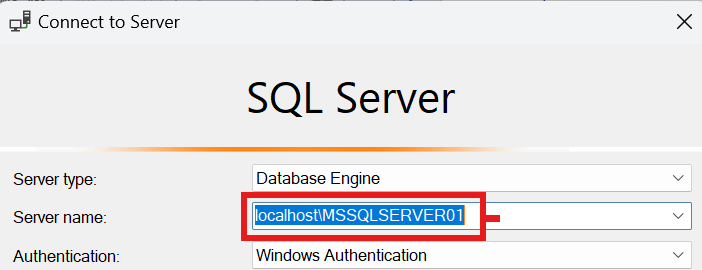
Step 7: Setting Up
Program.csNow, let's configure
Program.csto properly use Identity and set up routing for our application. During this step, you might see an error, but don’t worry! I’ll guide you through fixing it.Open
Program.csand you’ll likely see a red line or an error in the line where Identity is being added, specificallybuilder.Services.AddDefaultIdentity
To fix this, go to the top of your Program.cs file and add this line
using Microsoft.AspNetCore.Identity;
Now that we’ve fixed the error, let’s adjust the routing to make sure the application works correctly
In Program.cs, find the code that looks for app.MapControllers(); and Comment out this line by adding // in front of it just like below screenshot

Now Add The New Following Routing Code, You Will See Warning Line But You Can ignore It.
app.UseEndpoints(endpoints =>
{
    endpoints.MapControllerRoute(
        name: "default",
        pattern: "{controller=Home}/{action=Index}/{id?}");
});

app.Run();
Step 8: Adding the Migration
Now that we’ve set up the database connection and configured the Program.cs file, the next step is to create the database structure. We’ll do this using migrations. A migration is a way to update your database automatically with the correct tables and relationships that Identity needs to work.
In Visual Studio, go to the menu and select Tools. Then, click on NuGet Package Manager > Package Manager Console. This will open a command window at the bottom of your screen.

After Clicking Package Manager Console, You Will See Terminal as Below Screenshot

Add the Migration Command And Press Enter
Add-Migration "First-commit"
After Seeing Build Success, Add This Command
update-database
If you see the "done" message, it means that your migration has completed successfully.

Note: Fixing Errors During Migration
If you encounter errors while running the migration, it could be related to SSL certificates in your database connection. To fix this, add TrustServerCertificate=True; to your connection string in appsettings.json. This allows your application to trust the server's SSL certificate.
Here’s an example of what your connection string should look like:
 "AllowedHosts": "*",
"ConnectionStrings": {
    "DefaultConnection": "Server=YourServerNAme;Database=YourDatabaseName;Trusted_Connection=True;TrustServerCertificate=True;MultipleActiveResultSets=true"
  }
}
After Successfull Migration, You Have To Open SSMS to Ensure Database and Table Generated or Not.
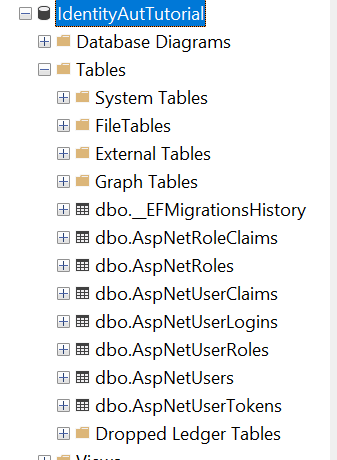
As You Can See in Above Screenshot, We Successfully Generated The New Database & Table
Now We Can Run our Project, Click on Run Button In Visual Studio
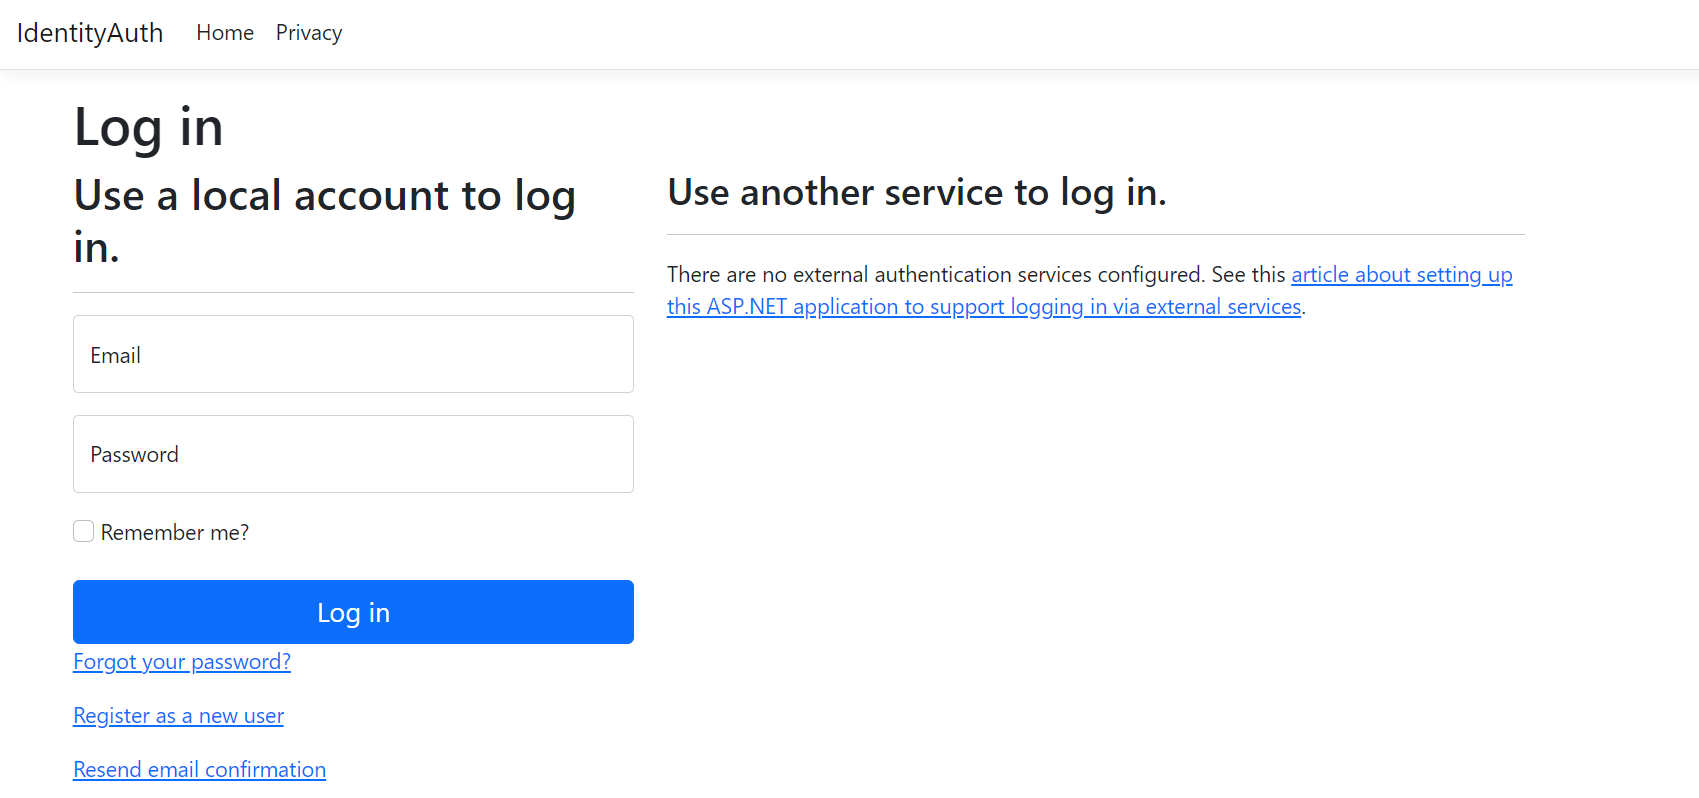
After running the project, we will see the login page. If we enter the correct email and password, we will be directed to the home page. However, before logging in, we first need to register an account.
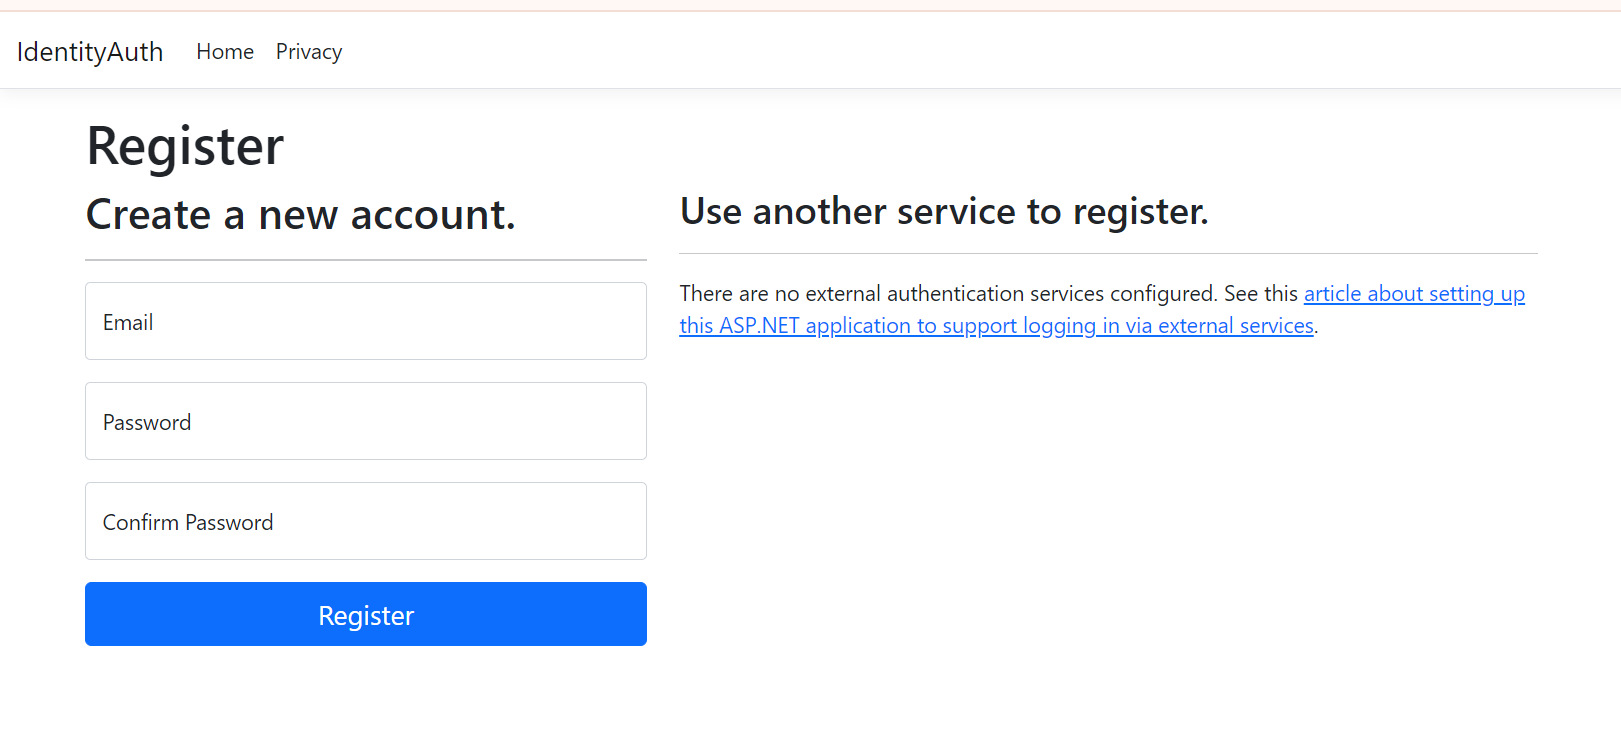
After Clicking The New User Registration We Can Create New Account
I Created New Account Now You Can See My Email In AspNetUser Table Just Like Below Screenshot
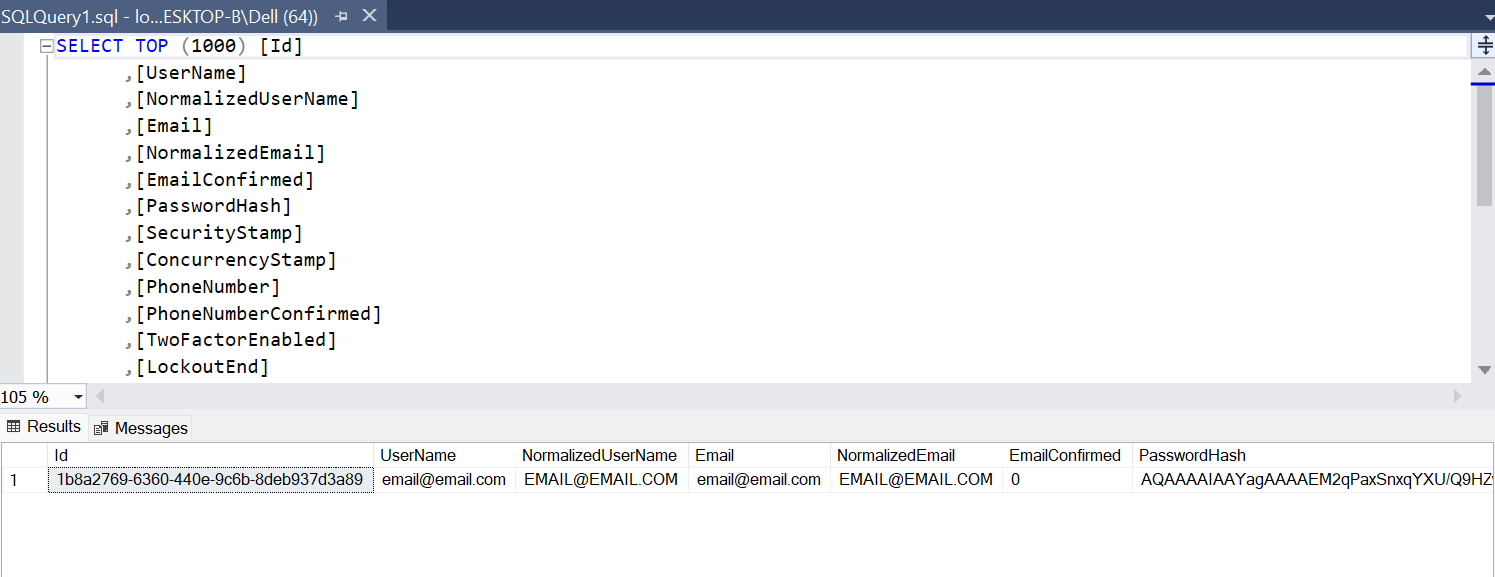
After Entering Password And Email, I Loged In Successfully In Home Page
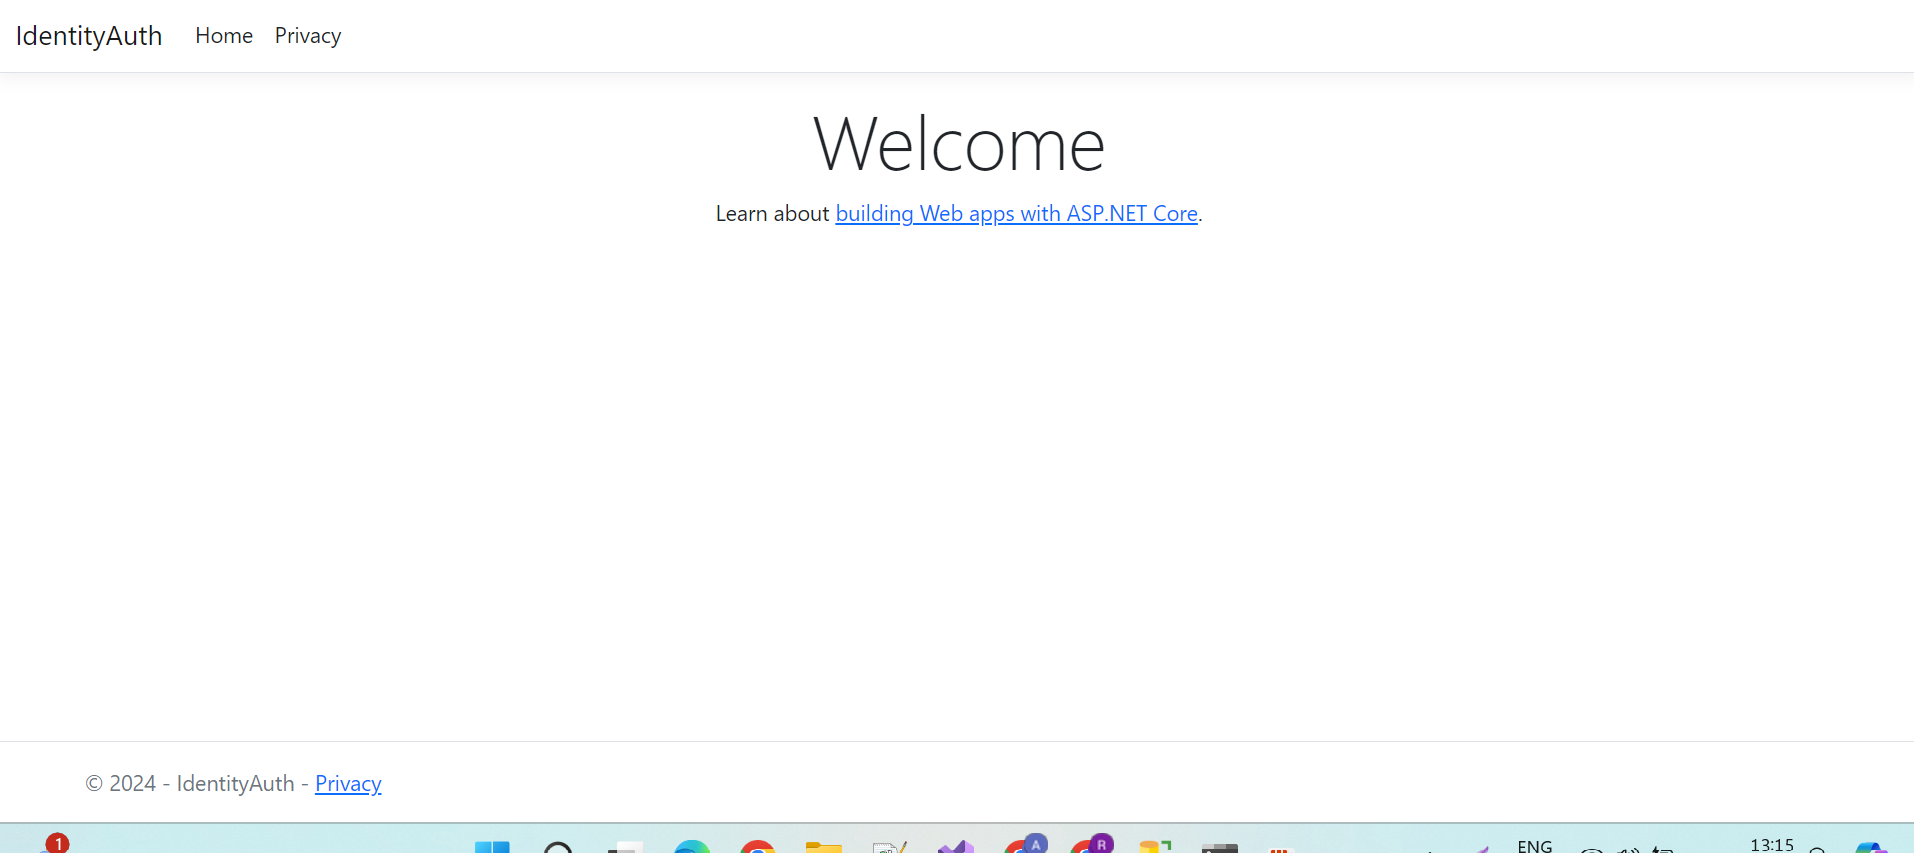
If You Want To Logout From Page. You Have To Search Logout Page In Search Bar Just Like Below Screenshot

After Searching Logout Page, You Can Logout From Page Successfully

I hope you found this guide helpful and easy to follow. If you have any questions or need further assistance, feel free to reach out in the comments or contact me directly. Happy coding!
Subscribe to my newsletter
Read articles from Anand Maurya directly inside your inbox. Subscribe to the newsletter, and don't miss out.
Written by
