Deploying .NET 8 ASP .NET Core and Blazor Web Assembly Applications to Linux VPS
 Kristiadhy
In this article, I'll show you how to manually deploy an Asp .Net Core or Blazor Web Assembly 8.0 application to your Linux VPS. If you want to set up your Linux VPS server before deploying your web apps, you can check out this guide: Guide to Hosting .NET 8 ASP.NET Core and Blazor Web Assembly on a Linux VPS. If you're interested in learning how to automatically update your web app using automated CI/CD with GitHub Actions, I've covered that in a separate article.
Publish your web app project.
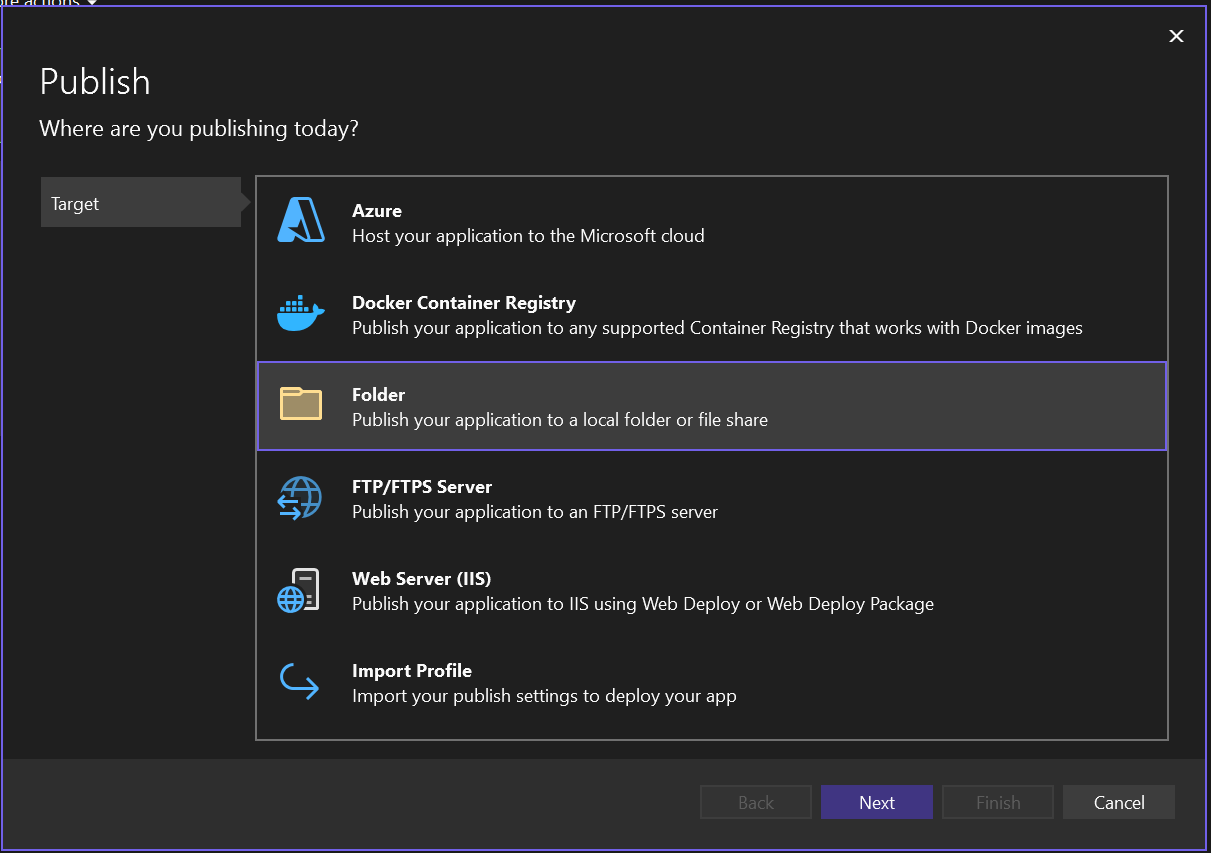
You must publish your website to a folder before deploying it to a Linux VPS. In your visual studio, you can right click on your project and select publish. Set your public profile to folder.
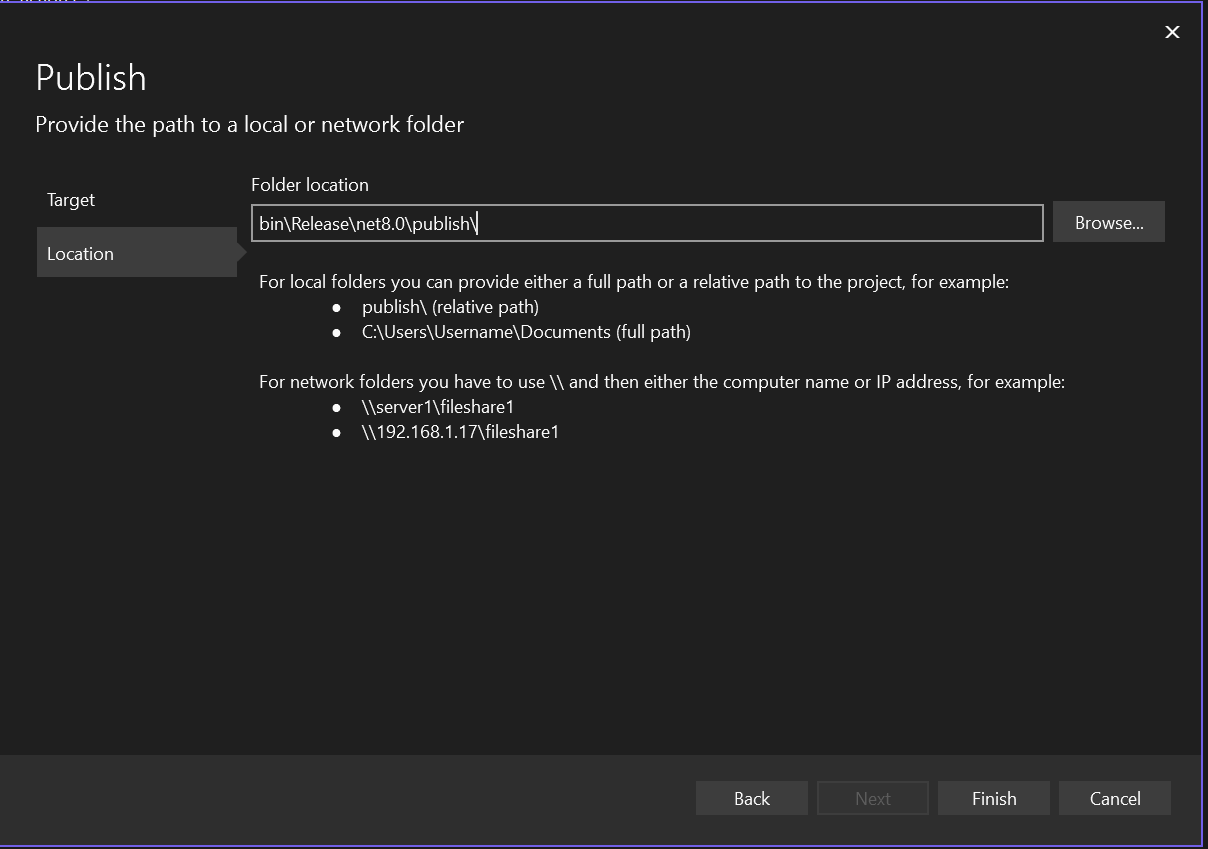
Set your folder location.
And in your publish configuration, you can set it up as follows.
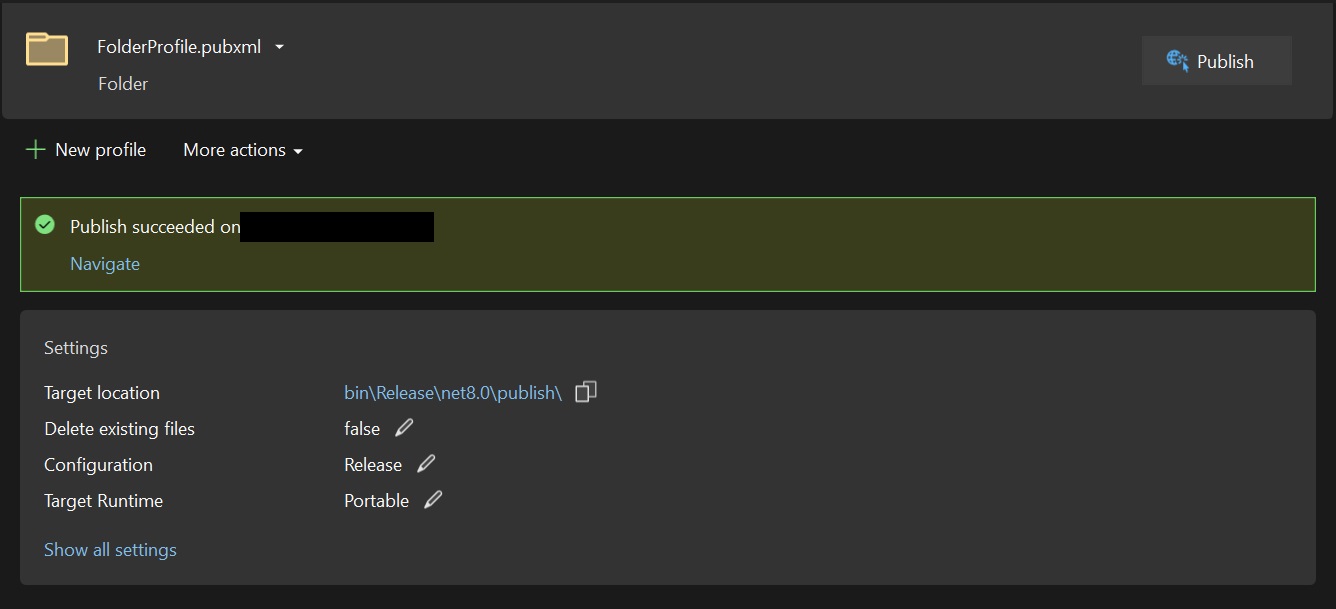
After you succeed, check it out and make sure everything is working correctly. If you need to make any adjustments, republish it.
Copy the project to your VPS.
Now please login to your Linux VPS server using FTP client, in my case I use WinSCP.
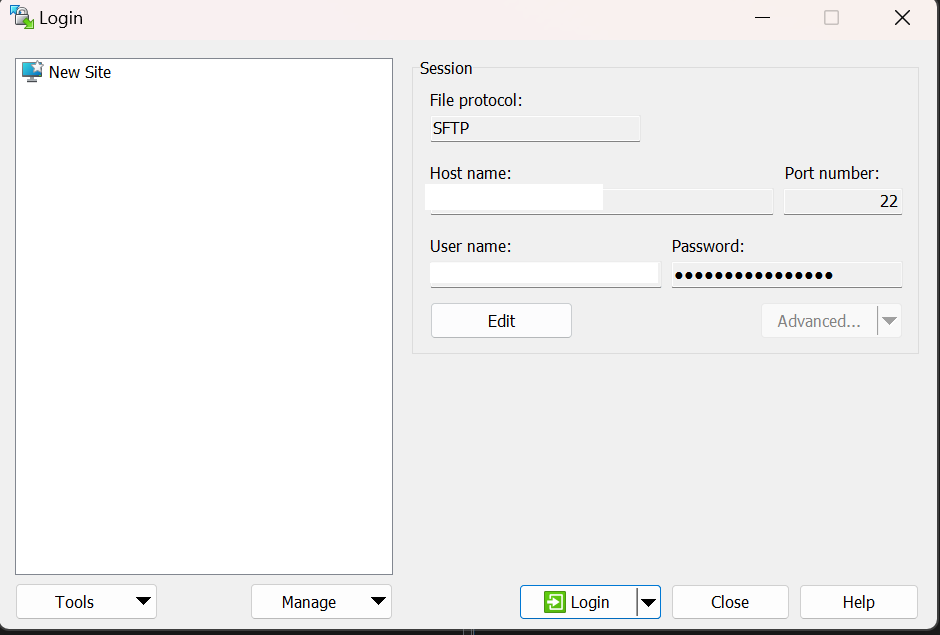
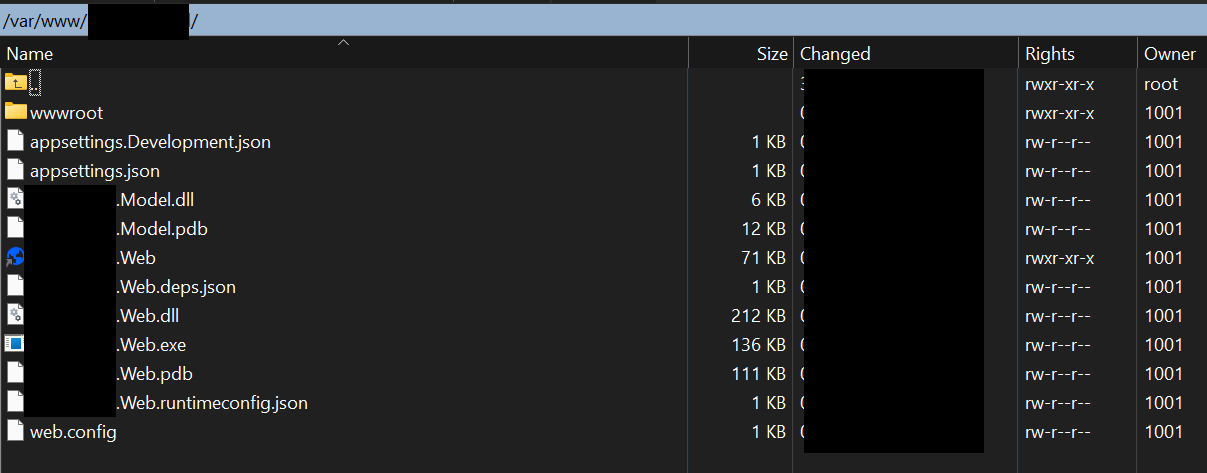
After you log in successfully, drag all the files from your 'publish' folder into your website folder location on the VPS server, for example, /var/www/yourdomainname.com/.
Edit your virtual host configuration file.
Next, you'll want to configure the virtual host file. Head over to /etc/apache2/sites-available and edit your virtual host file, yourdomainname.com.conf, by adding a few lines (I've put the comments in there for you).
<VirtualHost yourdomainname.com:443>
    ServerAdmin admin@yourdomainname.com
    ServerName yourdomainname.com
    ServerAlias www.yourdomainname.com
    DocumentRoot /var/www/yourdomainname.com/wwwroot
    # ---Start here---
    ProxyPreserveHost   On
    ProxyPassMatch      ^/_blazor/(.*) http://localhost:5000/_blazor/$1
    ProxyPass           /_blazor ws://localhost:5000/_blazor
    ProxyPass           / http://localhost:5000/
    ProxyPassReverse    / http://localhost:5000/
    # ---End here---
    ErrorLog ${APACHE_LOG_DIR}/error.log
    CustomLog ${APACHE_LOG_DIR}/access.log combined
    SSLEngine on
    SSLCertificateFile /etc/ssl/private/certificate.crt
    SSLCertificateKeyFile /etc/ssl/private/private.key
    SSLCertificateChainFile /etc/ssl/private/ca-bundle.crt
</VirtualHost>
You can read it here for more details Host and deploy ASP.NET Core server-side Blazor apps | Microsoft Learn
Enable some proxy services.
After that you need to enable some proxy services. Please run these commands using your SSH:
a2enmod proxy
a2enmod proxy_wstunnel
a2enmod proxy_http
a2enmod proxy_balancer
a2enmod lbmethod_byrequests
I got this from here Deploying DotNet Core to Linux | Coding Droplets, thanks to Coding Droplets.
Now you can run your Blazor app. You can use this command:
cd /var/www/yourdomainname.com
dotnet run YourWebAppName.dll
To register your web app as a service and running in the background, go to the next step.
Create a service unit file.
Use your FTP client again, navigate to /etc/systemd/system/ and make a service file. You can name whatever you want for example YourWebService.service. Inside the file you can write like this:
[Unit]
Description = My Blazor web app service.

[Service]
WorkingDirectory = /var/www/yourdomainname.com
ExecStart = /usr/bin/dotnet /var/www/yourdomainname.com/YourWebAppName.dll
Restart = always
RestartSec = 10
KillSignal = SIGINT
SysLogIdentifier = YourWebAppName
User = YourUserName
Environment = ASPNETCORE_ENVIRONMENT = Production

[install]
WantedBy = multi.user.target
Now, enable and Run the service.
systemctl start YourWebAppName
systemctl enable YourWebAppName
Now that your web app service is up and running in the background, go ahead and open your website to test it out!
Subscribe to my newsletter
Read articles from Kristiadhy directly inside your inbox. Subscribe to the newsletter, and don't miss out.
Written by

Kristiadhy
Kristiadhy
Experienced Full Stack .NET developer with a proven track record of designing and implementing robust business applications. Proficient in using ASP.NET Core Web API, Blazor, and WinForms to deliver high-quality, efficient code and scalable solutions. Strong focus on implementing industry best practices for cleaner and scalable outcomes.