Faster Development with JetBrains AI
 Alfredo Perez
It's safe to say that AI is everywhere these days, especially with all the coding options like GitHub Copilot, TabNine, and Cursor. So, I figured it was a good time to try out the AI features in my go-to IDE, WebStorm.
JetBrains AI Assistant is an integrated artificial intelligence feature within JetBrains' suite of IDEs, such as IntelliJ IDEA, PyCharm, and WebStorm. It provides various functionalities to enhance the coding experience, including:
Code Completion: Offers intelligent code suggestions and autocompletion to speed up coding and reduce errors.
Documentation Generation: Automatically generates documentation for classes and methods based on the code context.
AI Chat: Allows developers to interact with an AI assistant directly within the IDE to ask questions, get code examples, and receive coding advice.
Code Refactoring: assists in refactoring code by providing suggestions and automating repetitive tasks.
Error Detection: Identifies potential errors and suggests fixes to improve code quality.
These features aim to improve developer productivity, code quality, and overall efficiency in the software development process, but please note that in order to get JetBrains AI Assistant, you will need to pay for a separate subscription on top of the WebStorm or IntelliJ subscription.
Here are the goals I aimed to achieve:
Write Documentation: The first task was to write JS Docs for all the public methods and the class itself.
Create Unit Tests: Next, I wanted to add some missing tests.
Improve Code: After completing the tests, I aimed to enhance the code for better readability and reduced cognitive load.
Commit the Code: Once all the refactoring was done, I just needed to create a commit message to make a pull request.
Write Documentation
OK, let’s get started. The first thing I want to do is write documentation for all the methods in this class, as well as for the class itself.
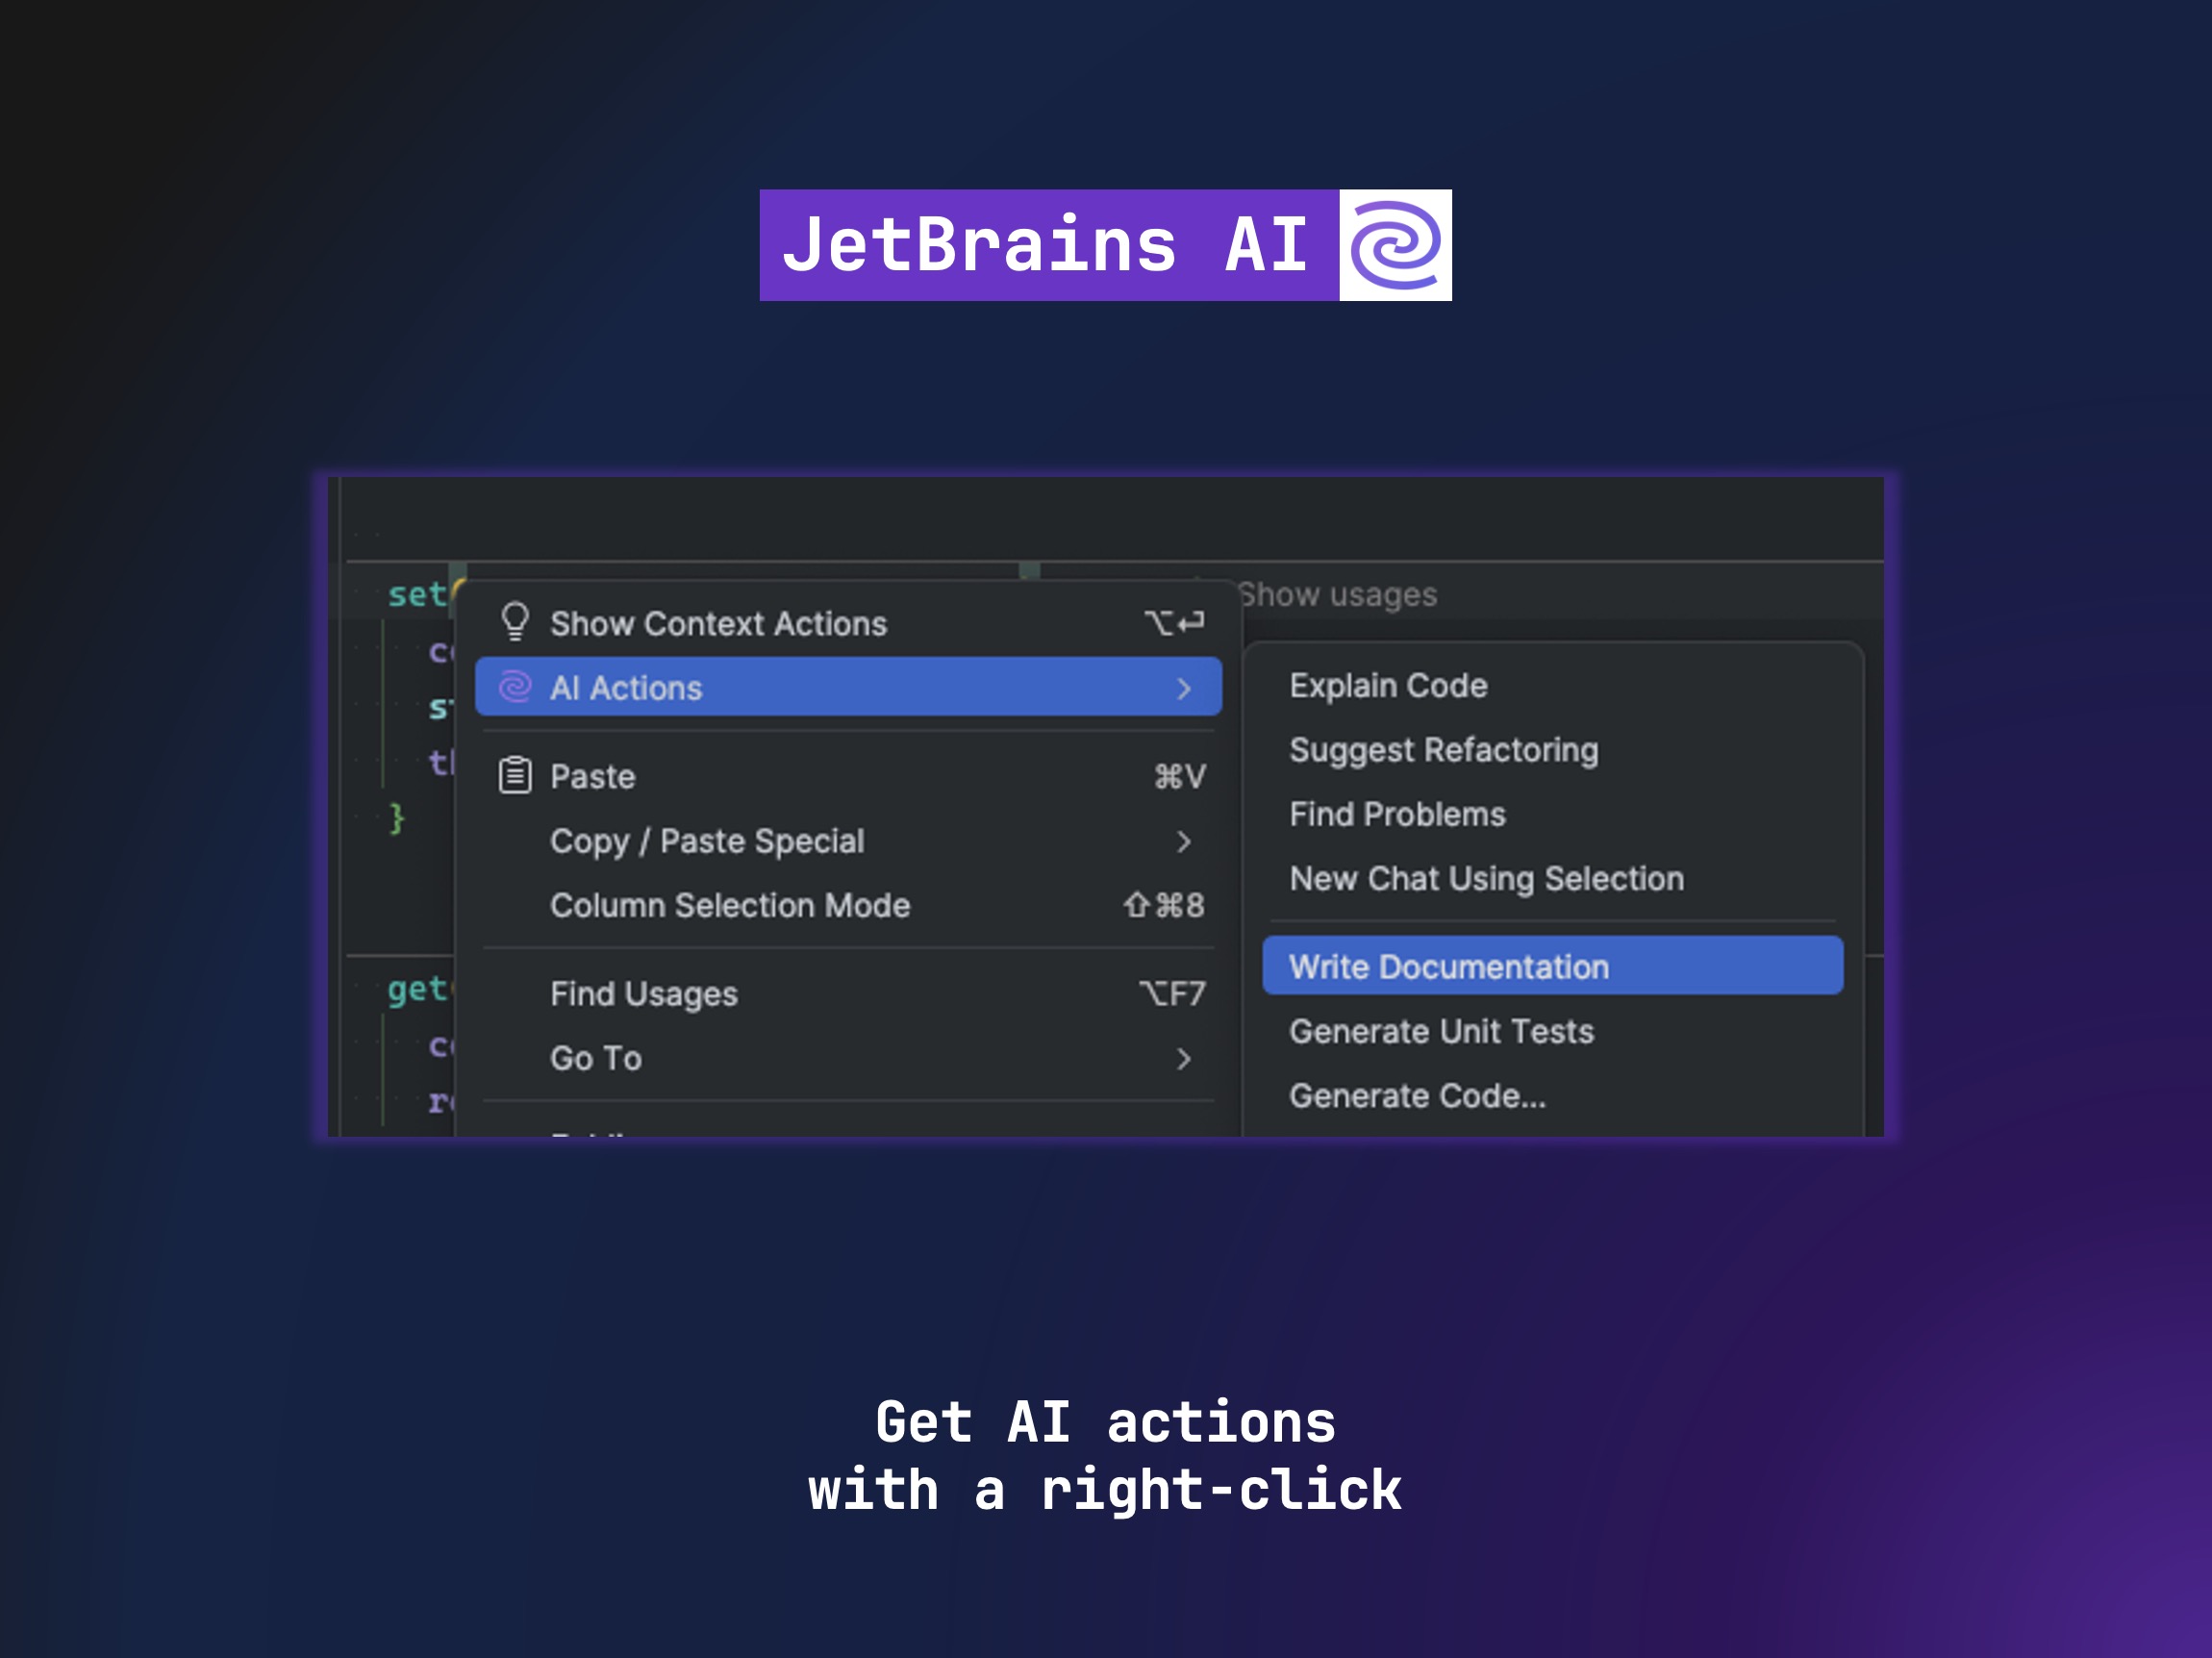
There are a couple of ways I could achieve this. I could start typing and see what the AI suggests, or open the chat and ask for the documentation. The route I took was to right-click on the method name and select the option to "Write Documentation."
Prompt Library
What's interesting about JetBrains AI is that it provides a set of actions that can be executed with just a right-click. It also has a prompt library where you can specify exactly what prompt to use while an action is being executed.
For example, when I click on "Generate Documentation," I can add a set of rules for how I want the documentation to be generated, such as not adding author, version, or any other tags I feel are unnecessary. This is really useful because I can teach JetBrains AI how I like things to be done.
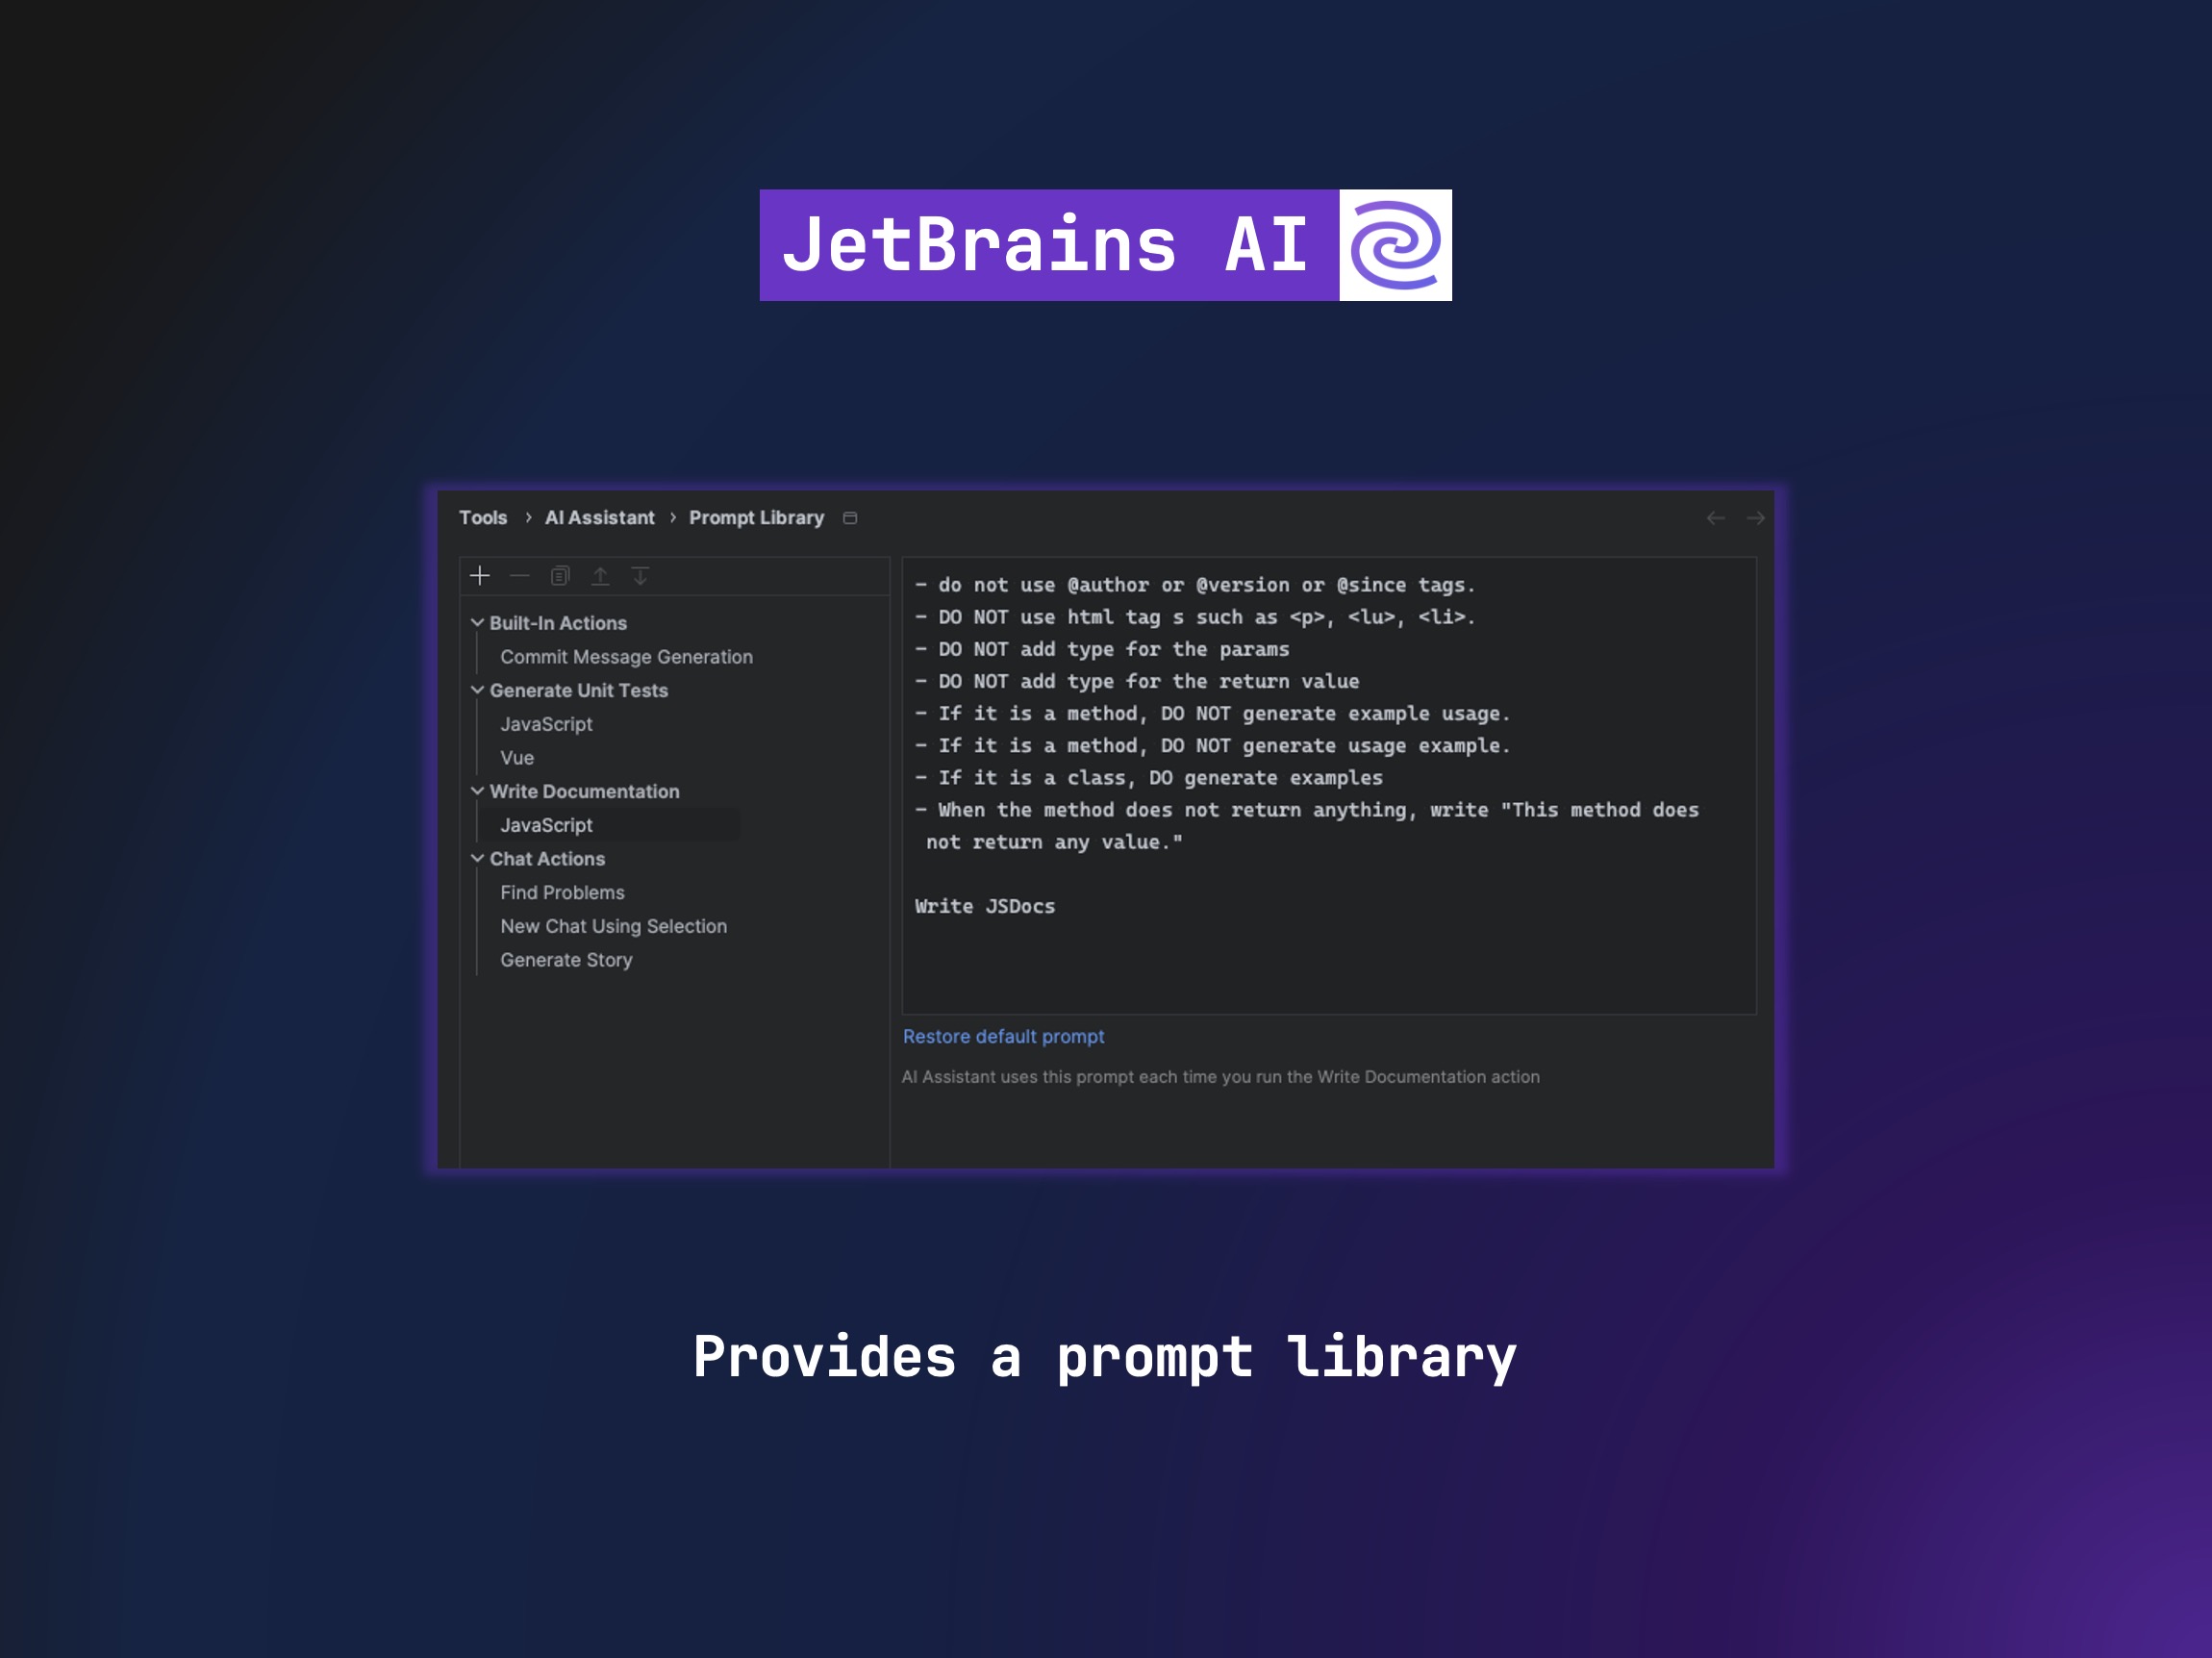
Here is an example prompt I am currently using for my documentation:
- Do not use @author or @version or @since tags.
- DO NOT use html tag s such as <p>, <lu>, <li>.
- DO NOT add type for the params
- DO NOT add type for the return value
- If it is a method, DO NOT generate example usage.
- If it is a method, DO NOT generate usage example.
- When the method does not return anything, write "This method does not return any value."

Write JSDocs
Note that I had to specify what to write when the method doesn't return anything to keep things consistent. Since it's generated with AI, it might create different messages for the same situation.
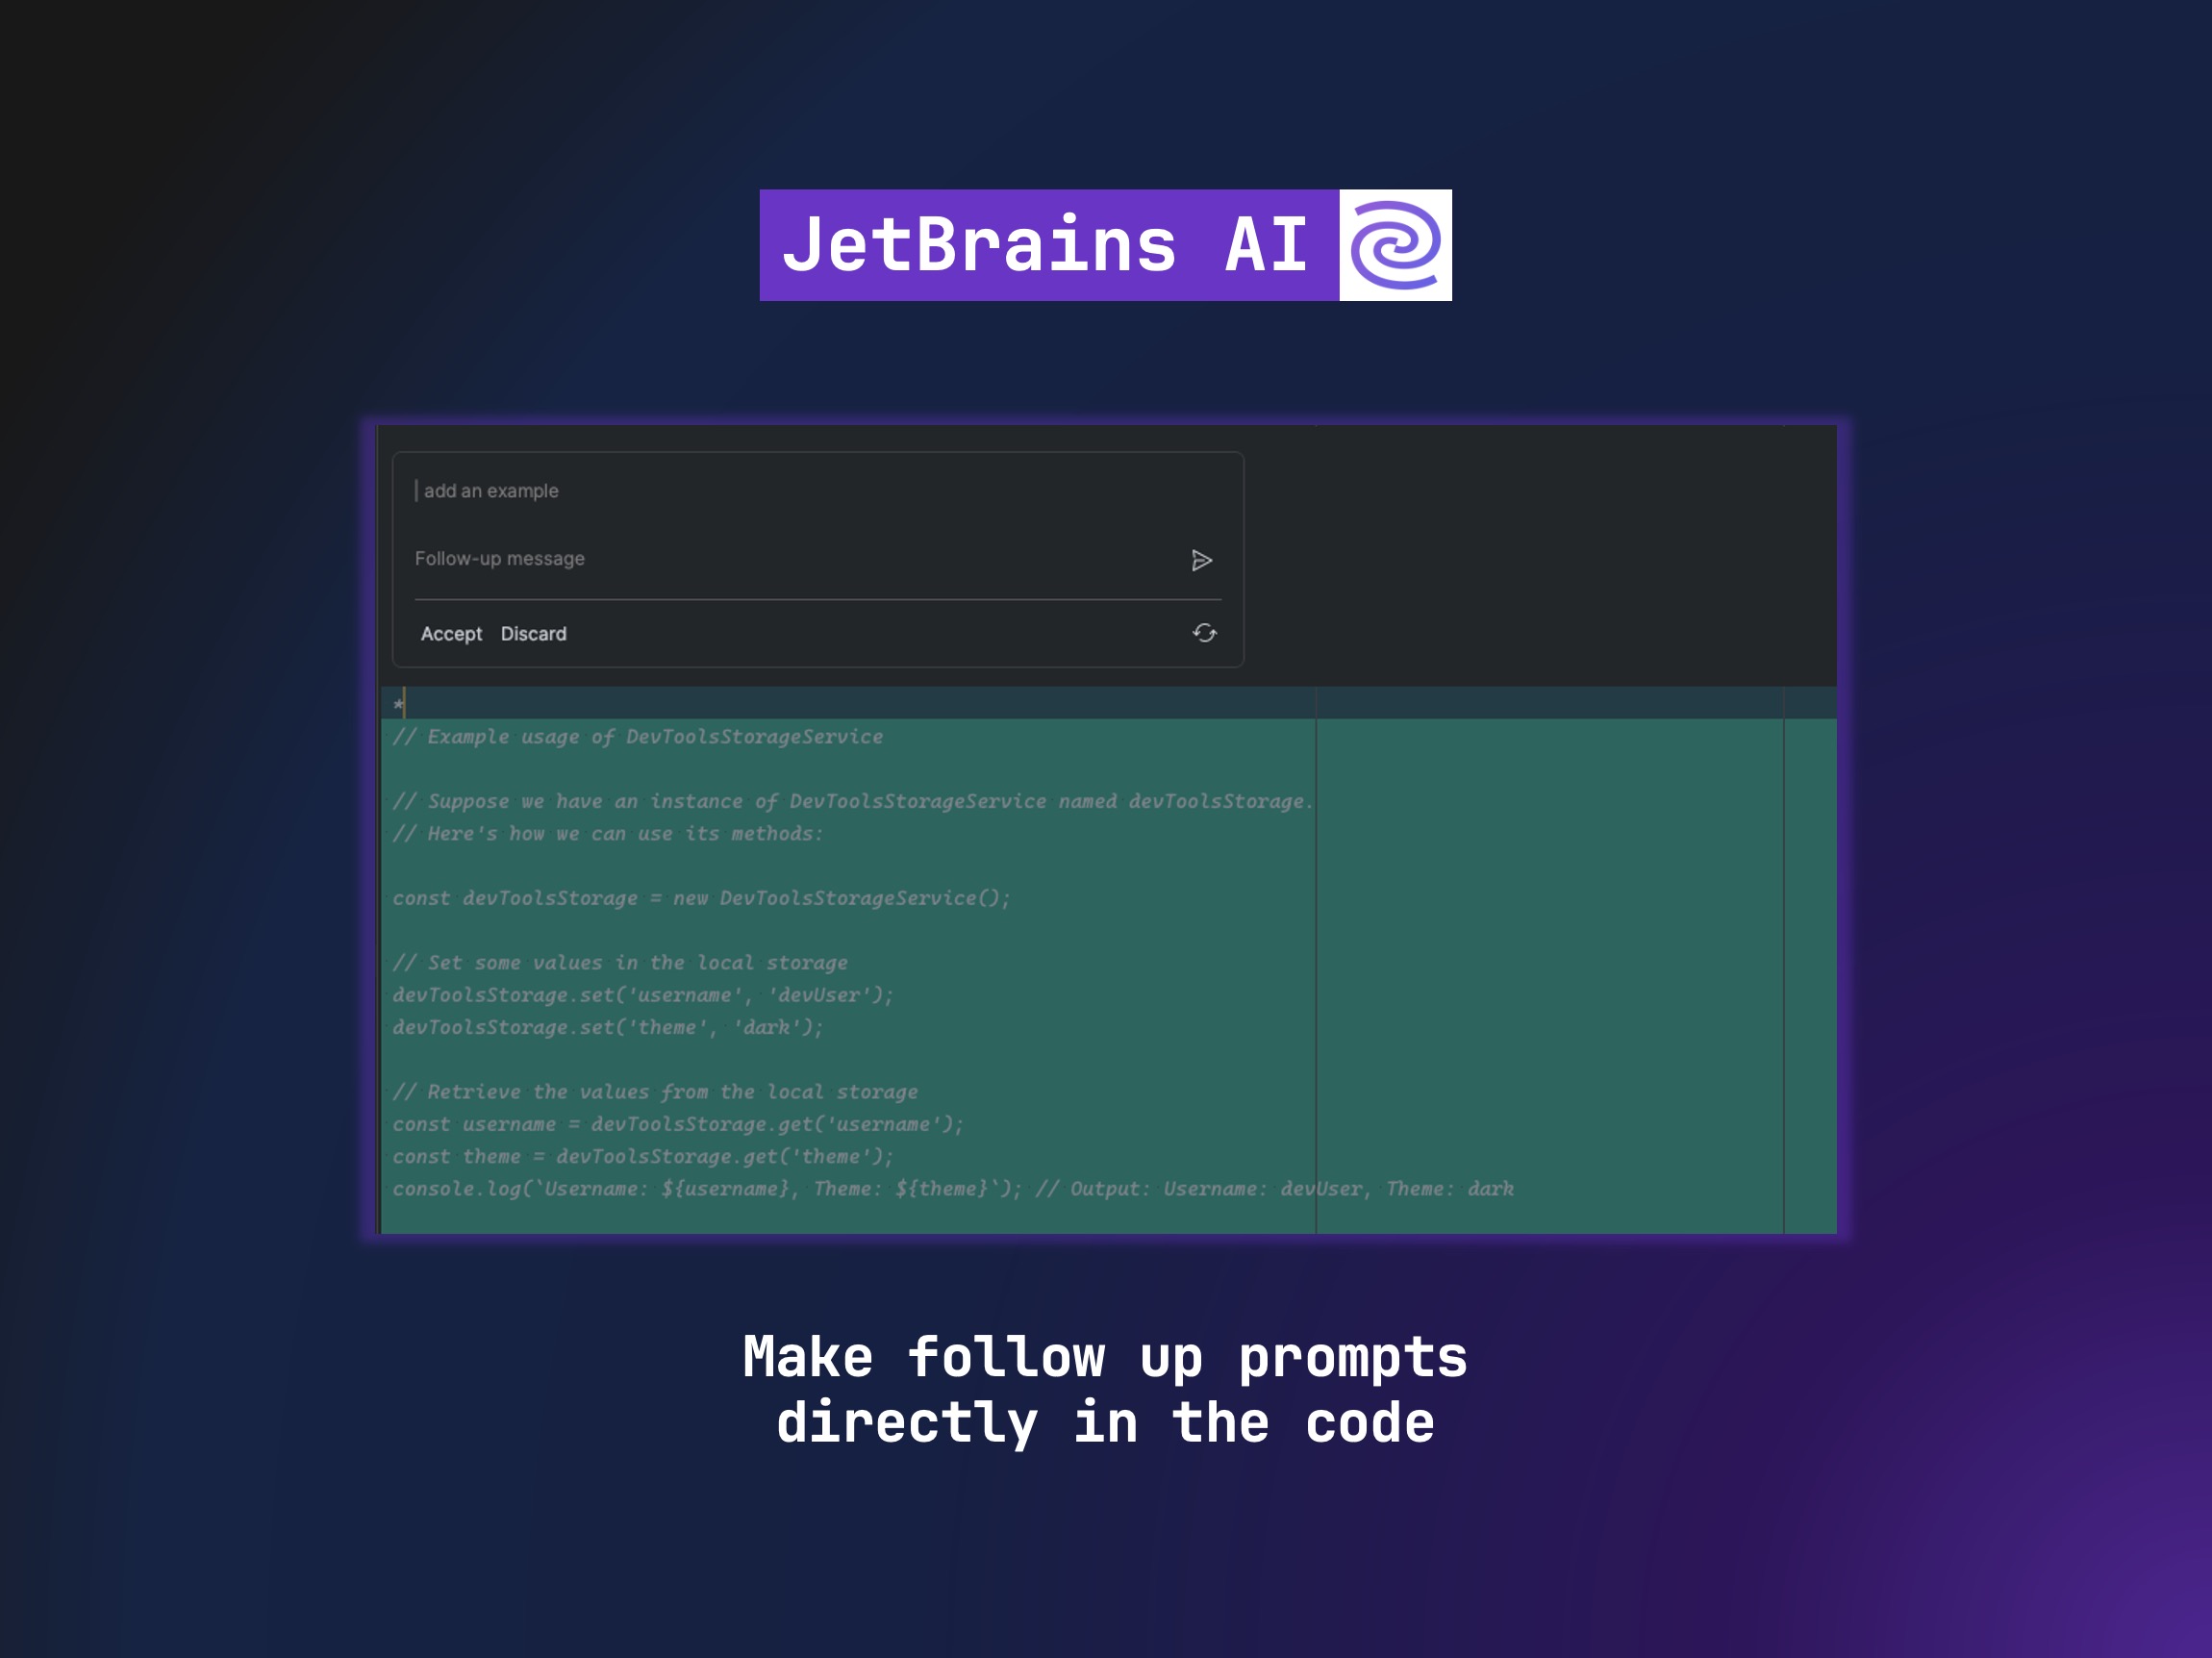
Another interesting feature is that you can ask things directly in the code. For example, if you don’t like how the documentation was generated, you can open the AI tool next to the line where the documentation was created and ask to regenerate or add anything that is missing.
In the following example, you can see how I asked it to add the example field and it was able to event document how the service should be used.
Thanks to all this, I was able to generate the service, and now whenever I hover over in the IDE, I can see beautiful documentation. ✨
Creating tests
Adding documentation is straightforward and can be accomplished with any AI tool; the Prompt library and JetBrains AI tool prove to be context-aware.
Moving on to the next task, adding unit tests becomes essential, and to everyone’s surprise, there is also a prompt available to generate them. This time, I also customized the prompt to specify the desired test structure and the testing tools in use. Here’s how the prompt ended up:
- Try to avoid brackets in arrow functions
- Use the ngMocks.faster(); before the first `beforeAll` or `beforeEach` statement, but inside the first `describe`
- Use the MockBuilder from ng-mocks and Mock every dependency
- Add an extra `beforeEach` to define the current service tha is being tested

- Group tests by the public methods in the class and create a `describe` for each
- Add `it` statements of what should be tested
- Test failing cases

- Add test implementation
- when using spies, make sure use `.toHaveBeenCalledWith`
- Put mock data should be under an object call `data`
- Use short names for the mocked data and assuming it is context aware
- Do NOT add urls and requests if the service doesnt make API requests
- Do NOT write code comments explaining the testss
- Add clear fail messages into the assertion calls.
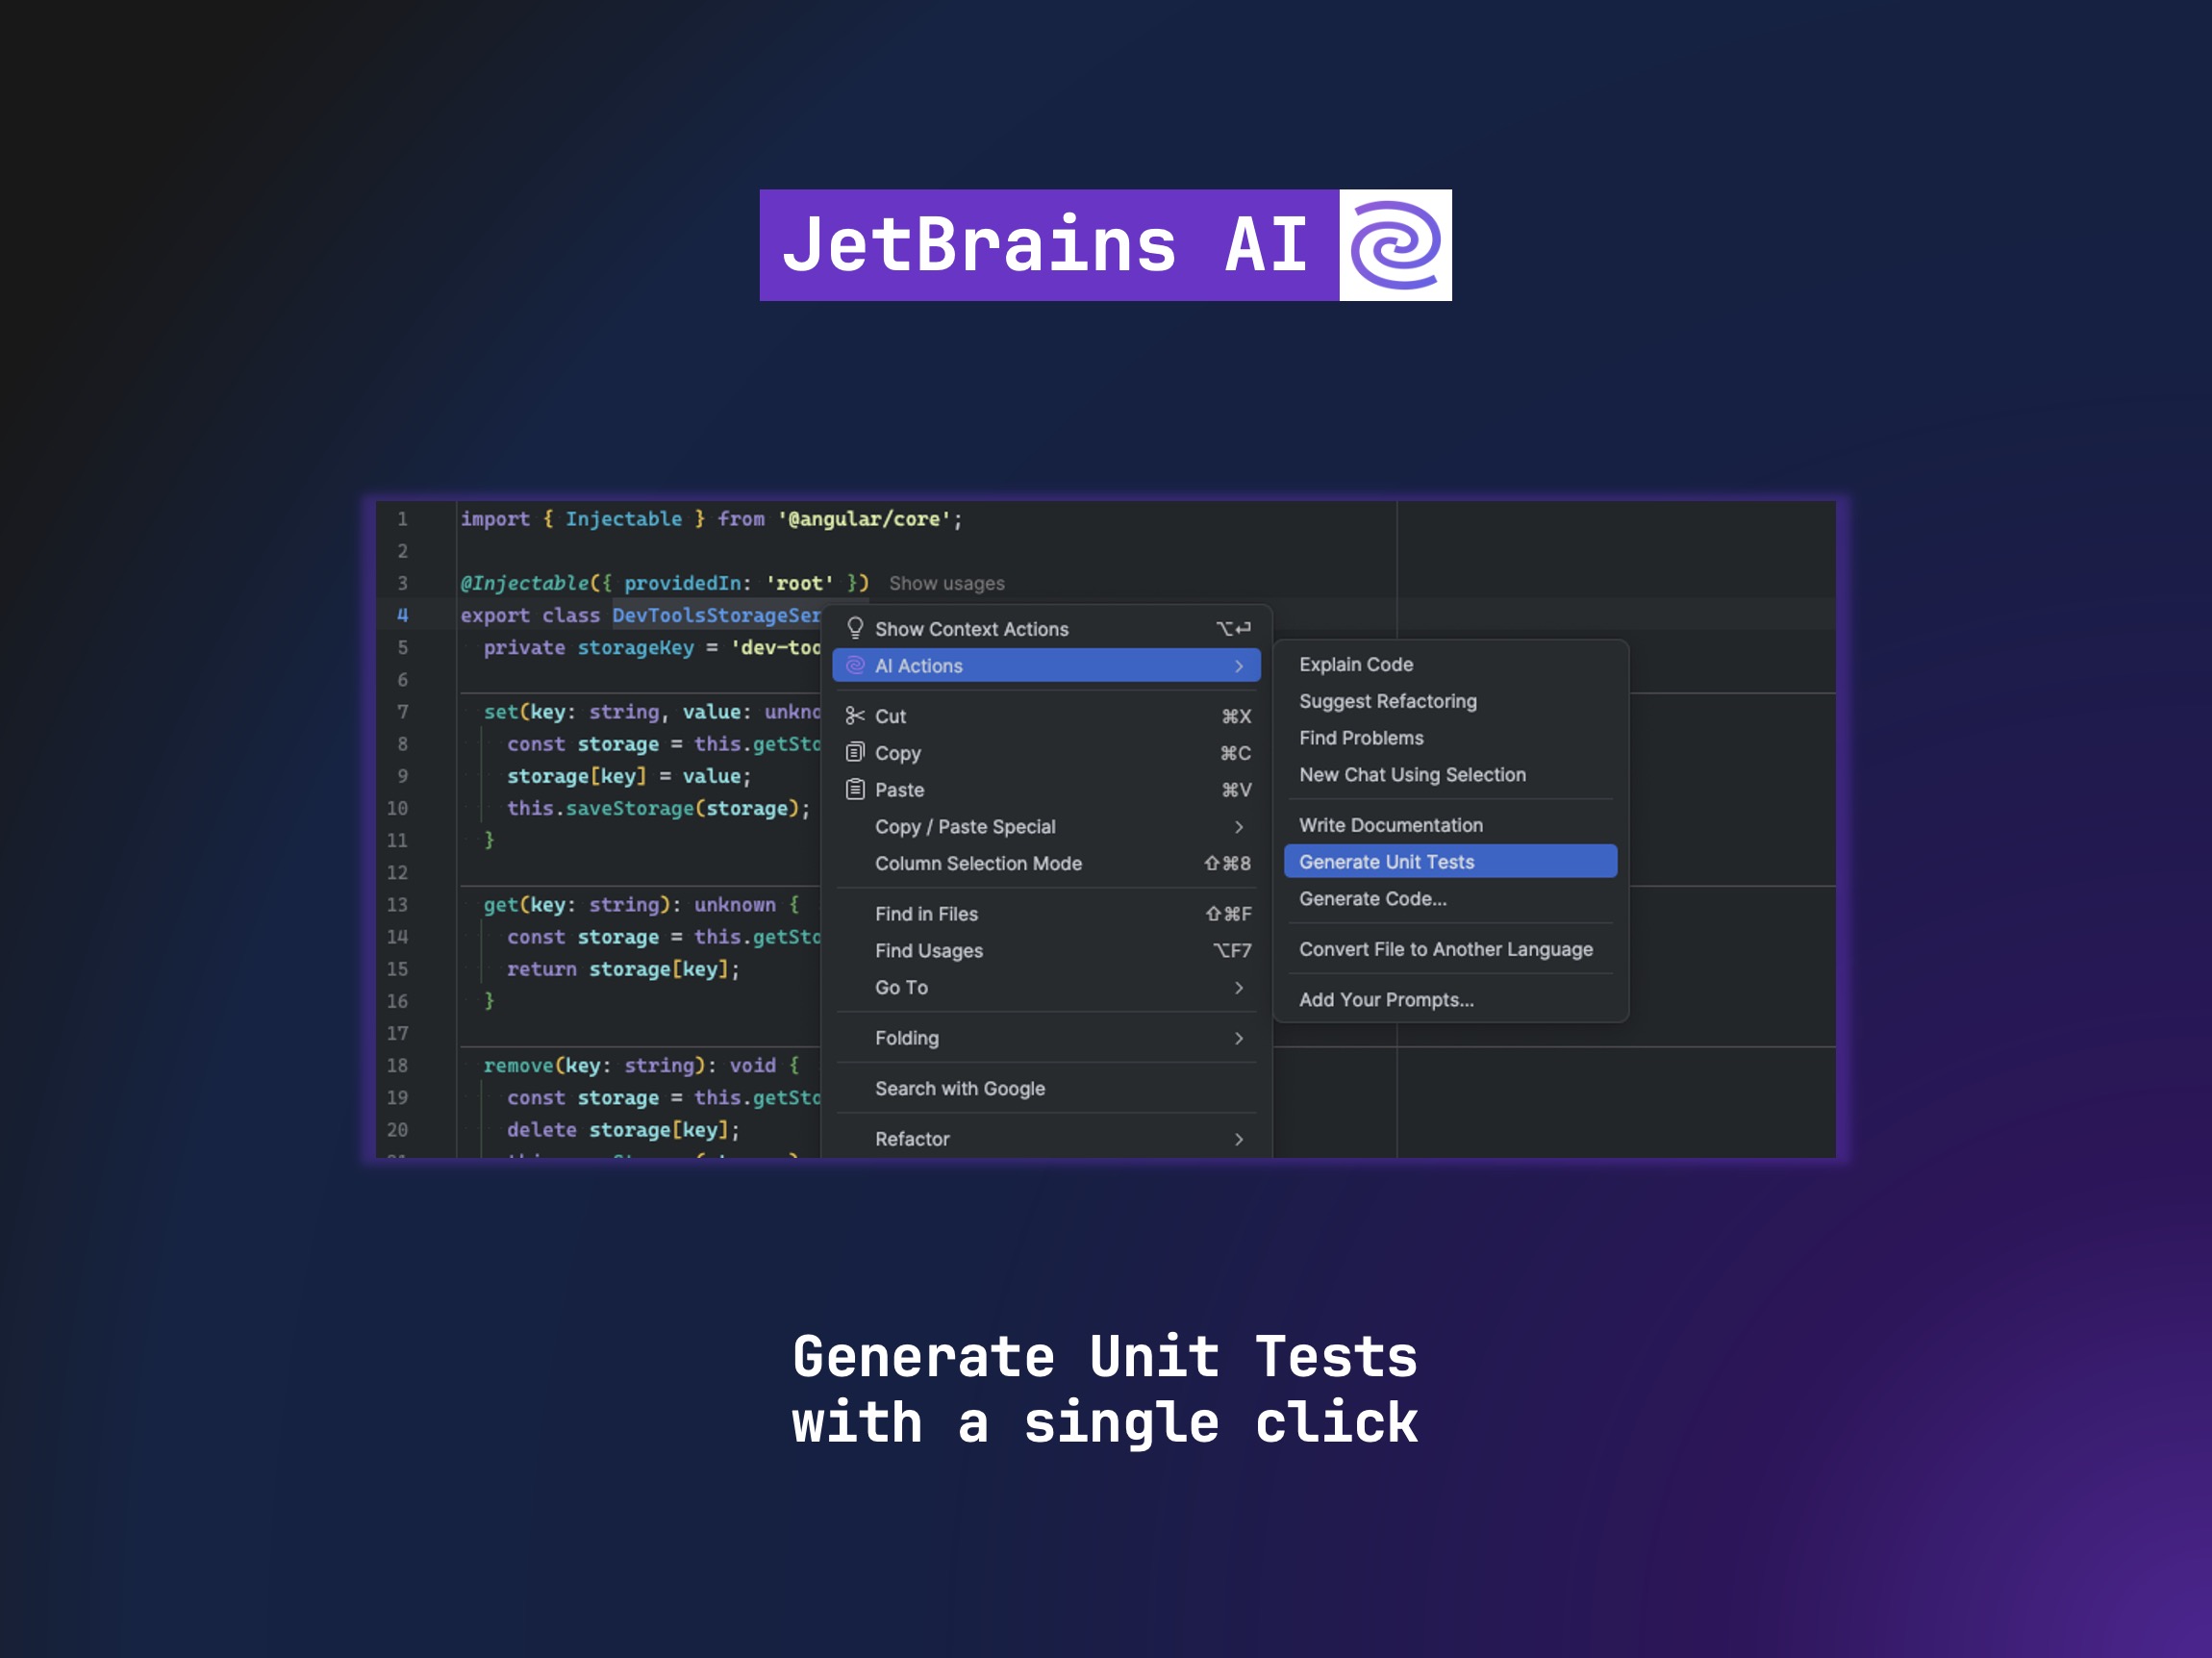
So now, with the prompt created, I right-clicked on the class name and selected 'Generate Unit Tests.' It not only generated the tests but also created a file for them. This is a huge plus for me because, with a single click, I can generate tests and then just need to review them.
Improve Code
Now that I had the unit tests ready, it was time to find ways to improve the code, knowing I could re-run the tests to ensure nothing breaks. To do this, I opened the chat and typed the prompt to improve the code. I specified the file by using # and selecting the class I was working on.
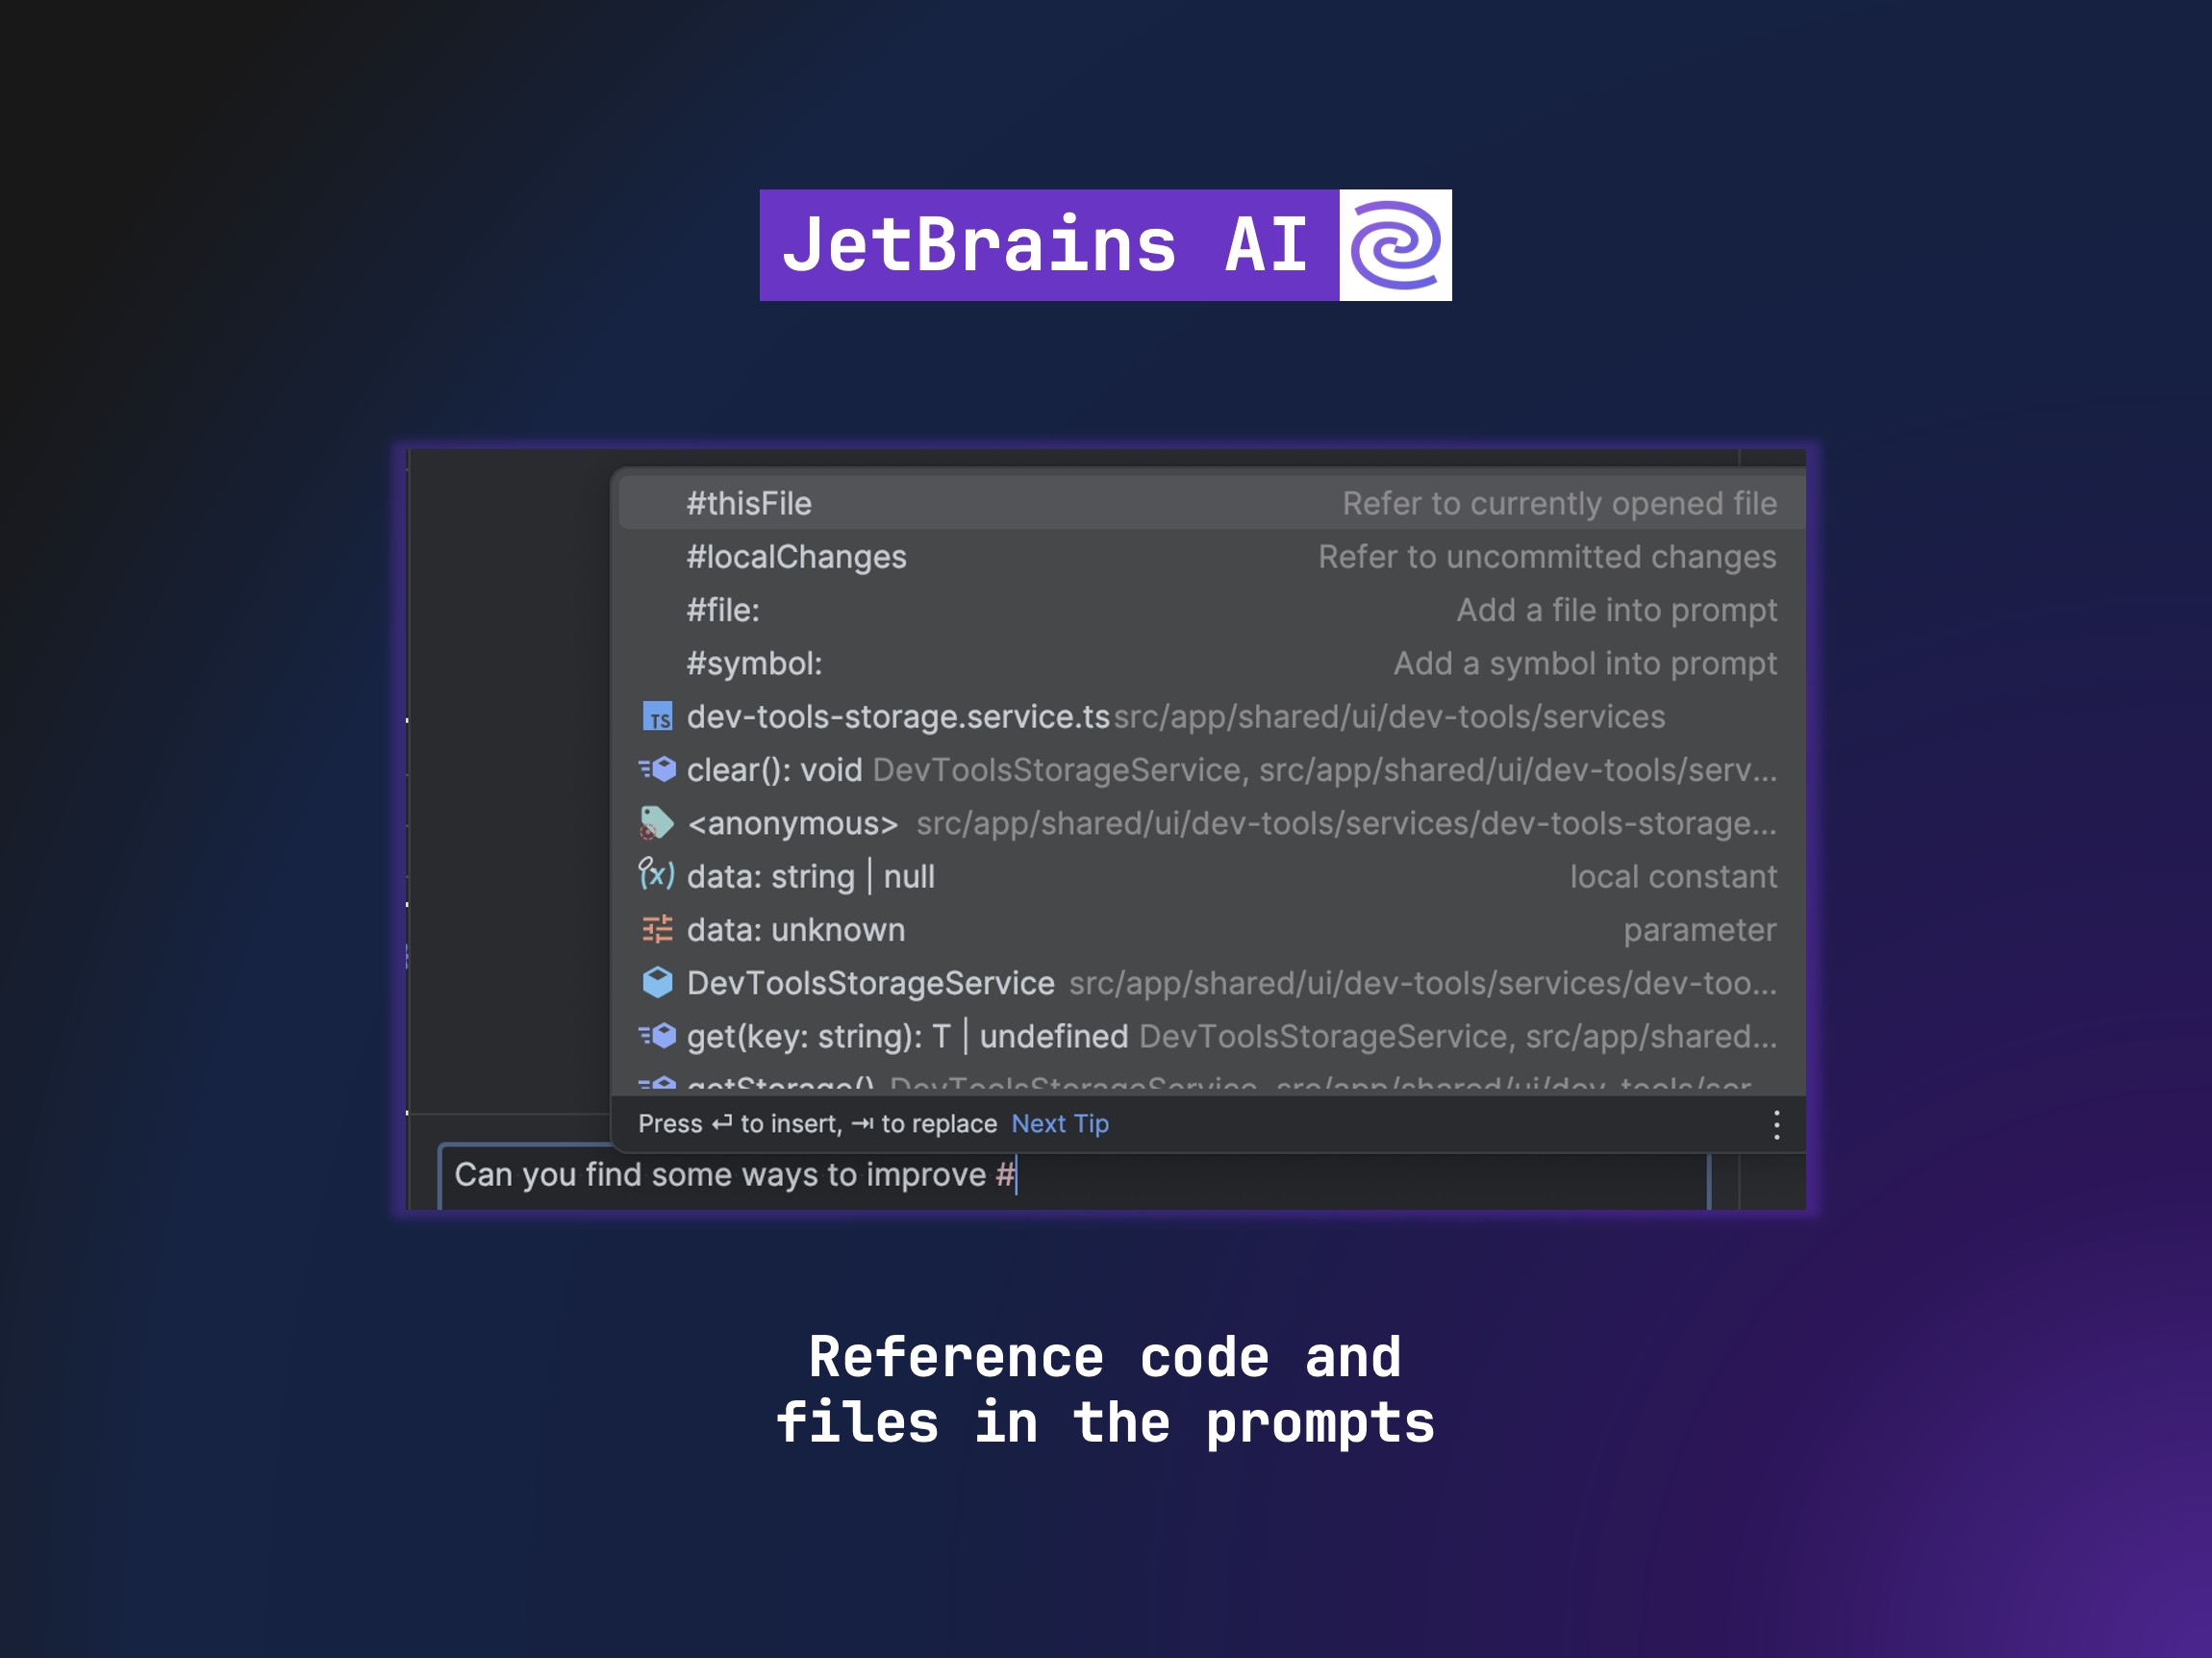
I really like that I can use autocomplete inside the chat. This allows me to create more detailed prompts where I can ask about multiple files or classes.
Once the prompt ran, it showed me several ways to improve the code and explained how each improvement was made.
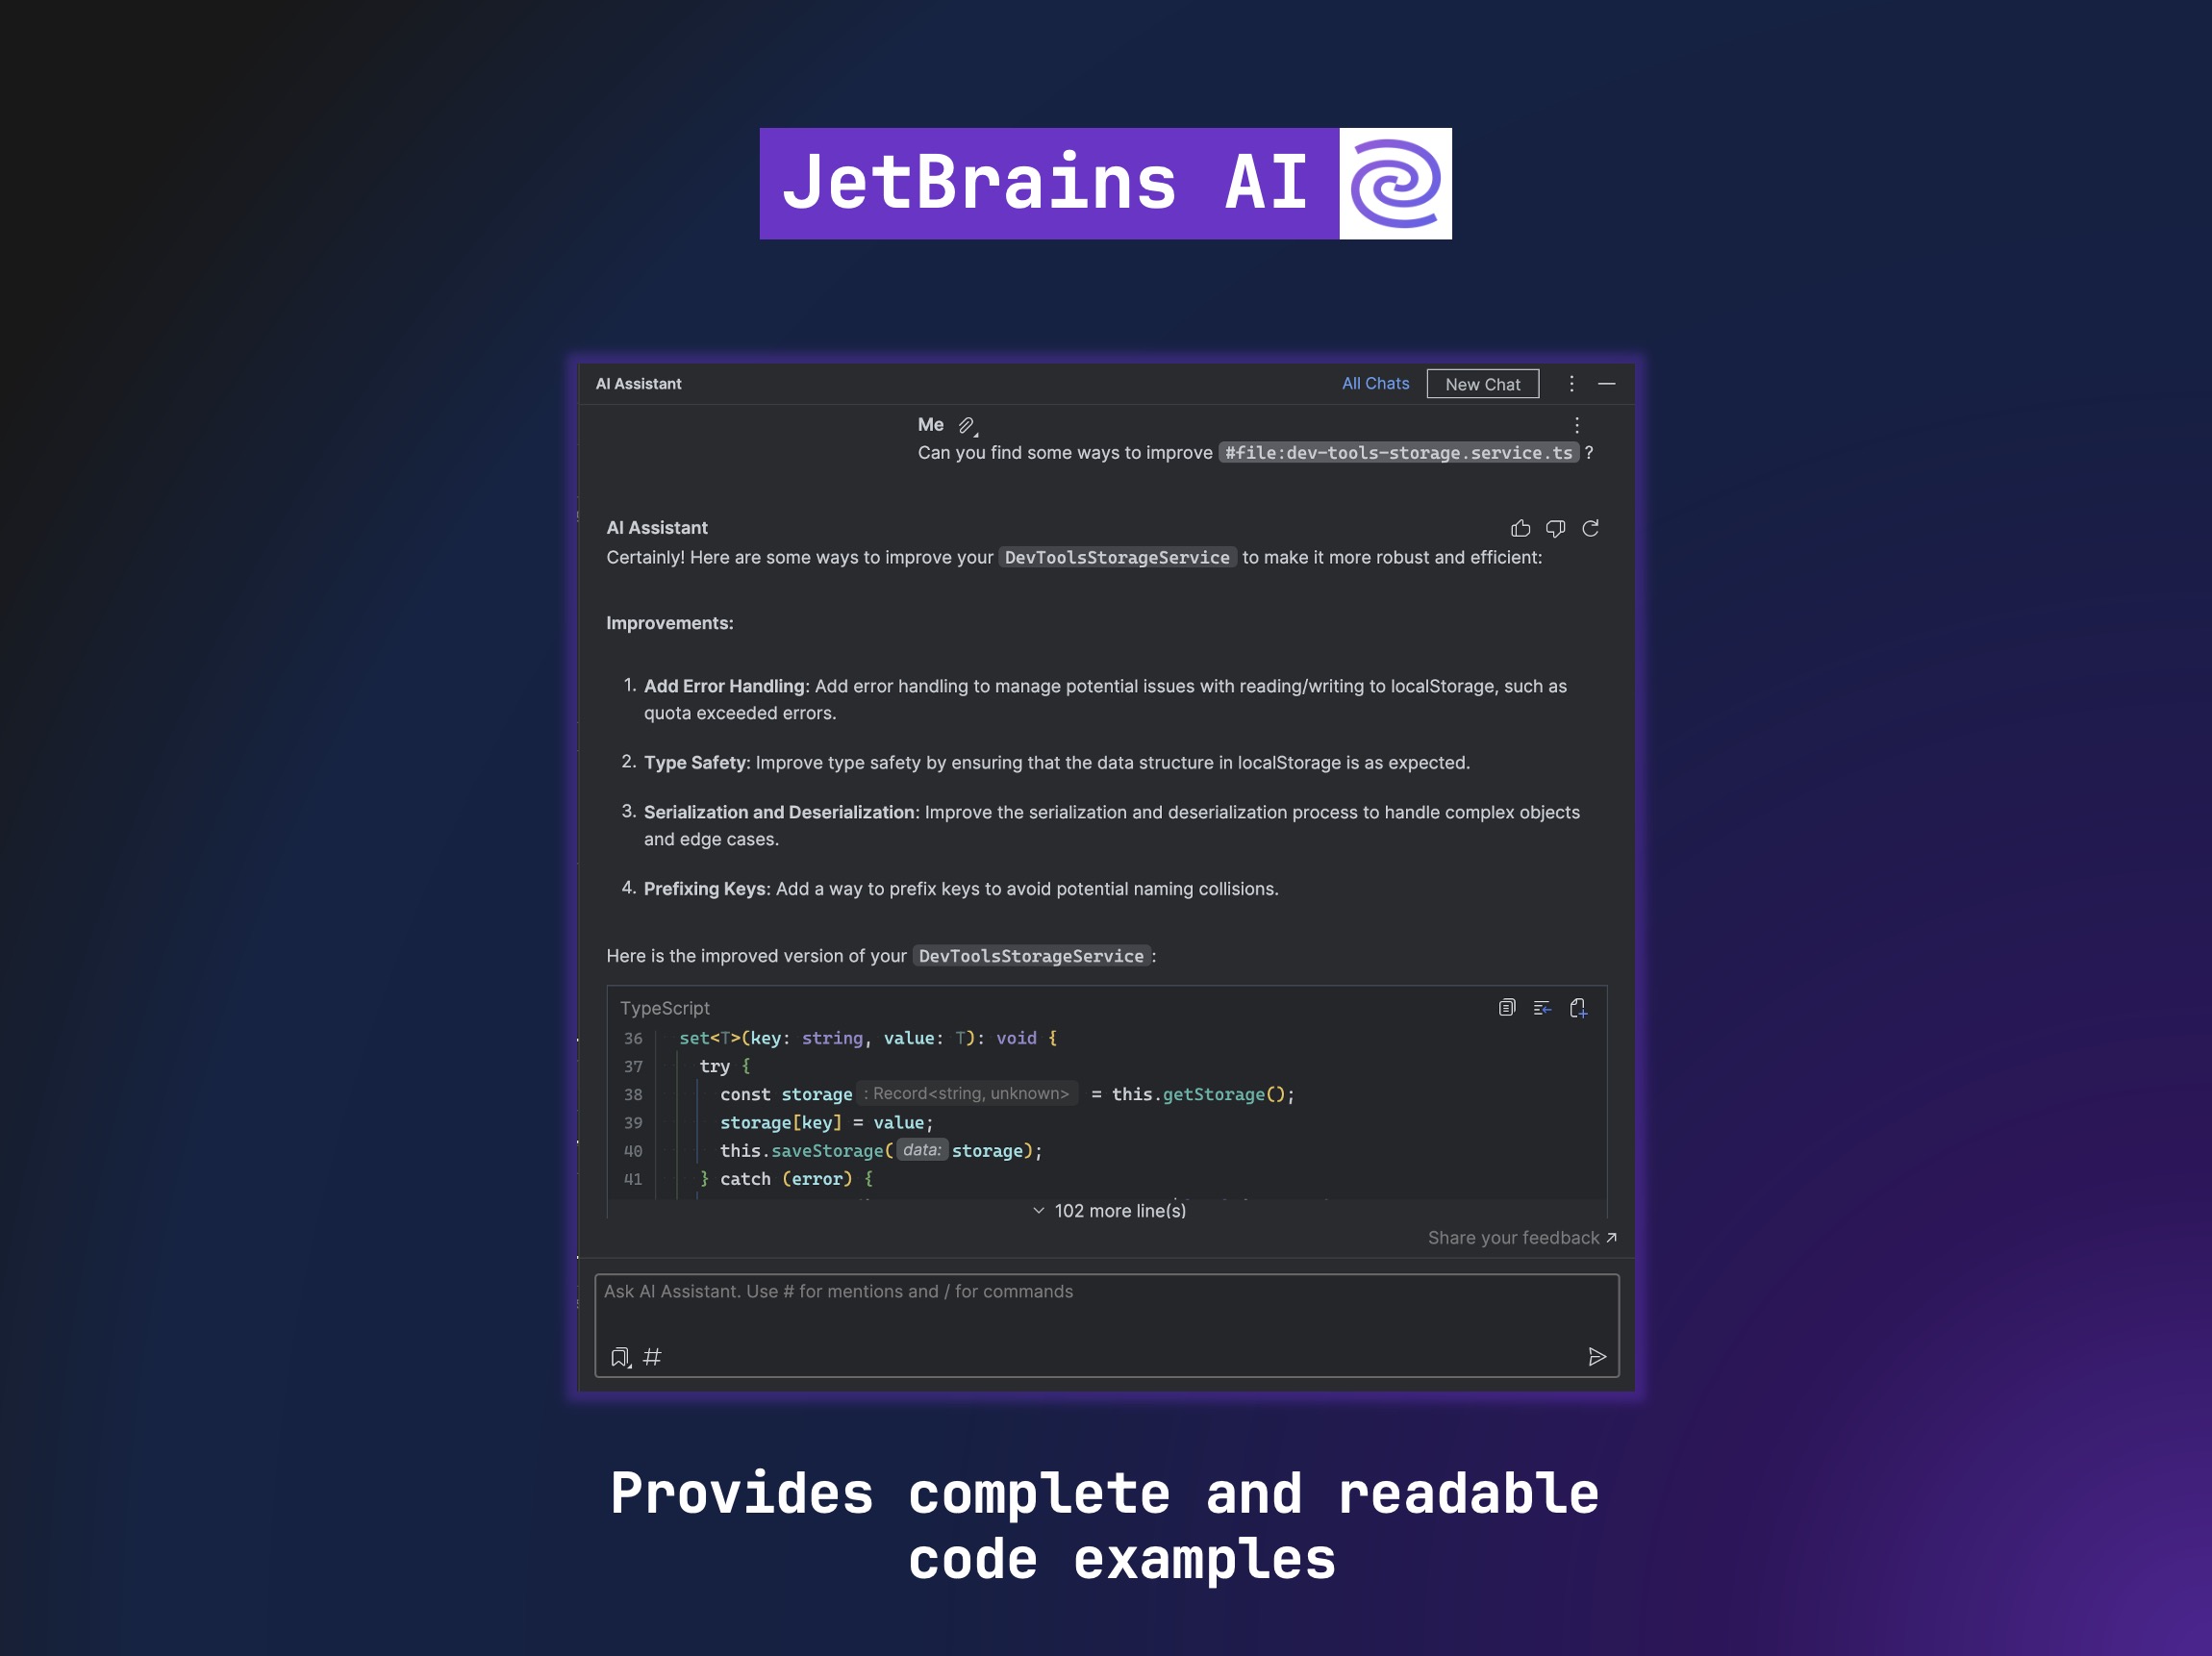
One thing I really liked is that the code is collapsible, has scrollbars, and even uses the same theme as the IDE. This makes it so easy to navigate and read.
Commit Code
The code was well-documented, tested, and improved; the next step was to commit and Let It Rip! And to accomplish this last step, I also utilized JetBrains AI, which also offers a method to generate commit messages directly from the "Commit" tool window, as you can see in the screenshot below:
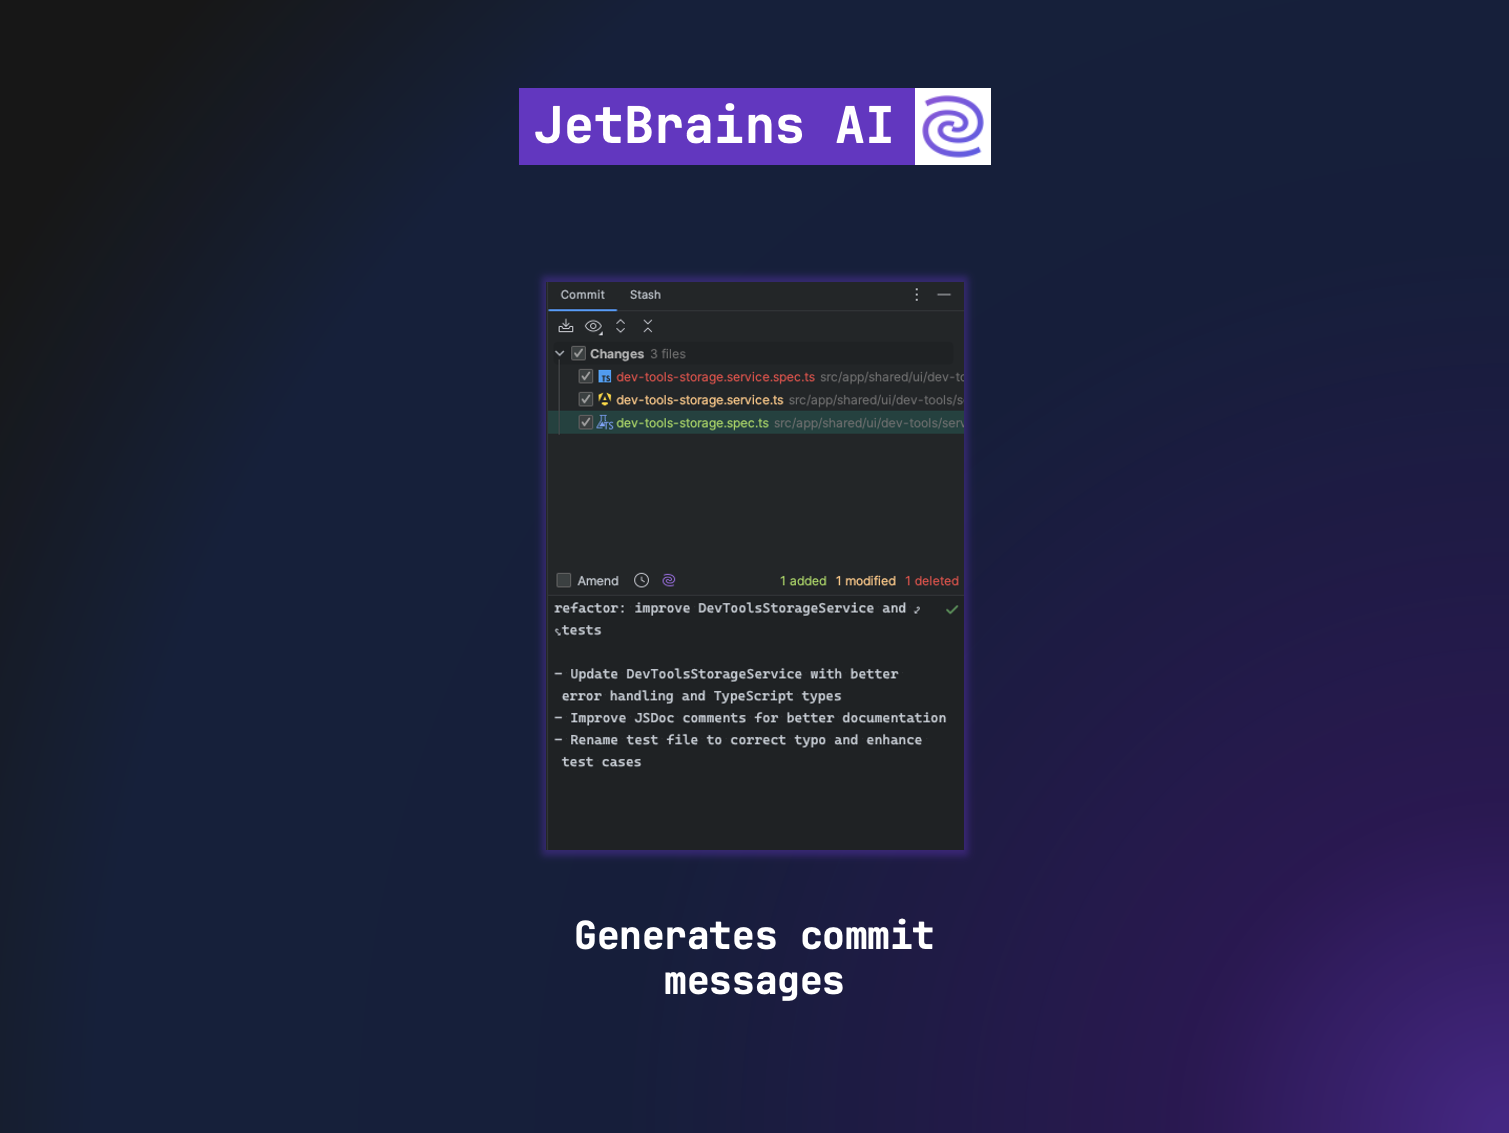
Here is the prompt I used:
- Use Conventional Commit format
- Avoid overly verbose descriptions or unnecessary details.
- Start with a short sentence in imperative form, no more than 50 characters long.
- Then leave an empty line and continue with a more detailed explanation.
- Use bullet point for  multiple changes
Extra — Creating your own prompt
I was feeling inspired and liked the results so far, so I was thinking that I could extend my usage of JetBrains AI by creating a custom prompt to create StoryBook Story for a component.
Below, you can see the prompt I created. You might notice it includes "$Selection." This tells JetBrains AI to use the selected code as the context for the prompt:
- Create a StoryBook Story for $SELECTION
- The first story should be called `Default` and should not modify any input
- Avoid using template or HTML when defining a story
- Prefer modifying just inputs in the stories
- Add one story for each input
- Do NOT add instructions about how to setup StoryBook
- Add all the stories
After selecting the component, right-clicking, and choosing the new prompt, an AI Chat tool window opened with the prompt and the story itself.
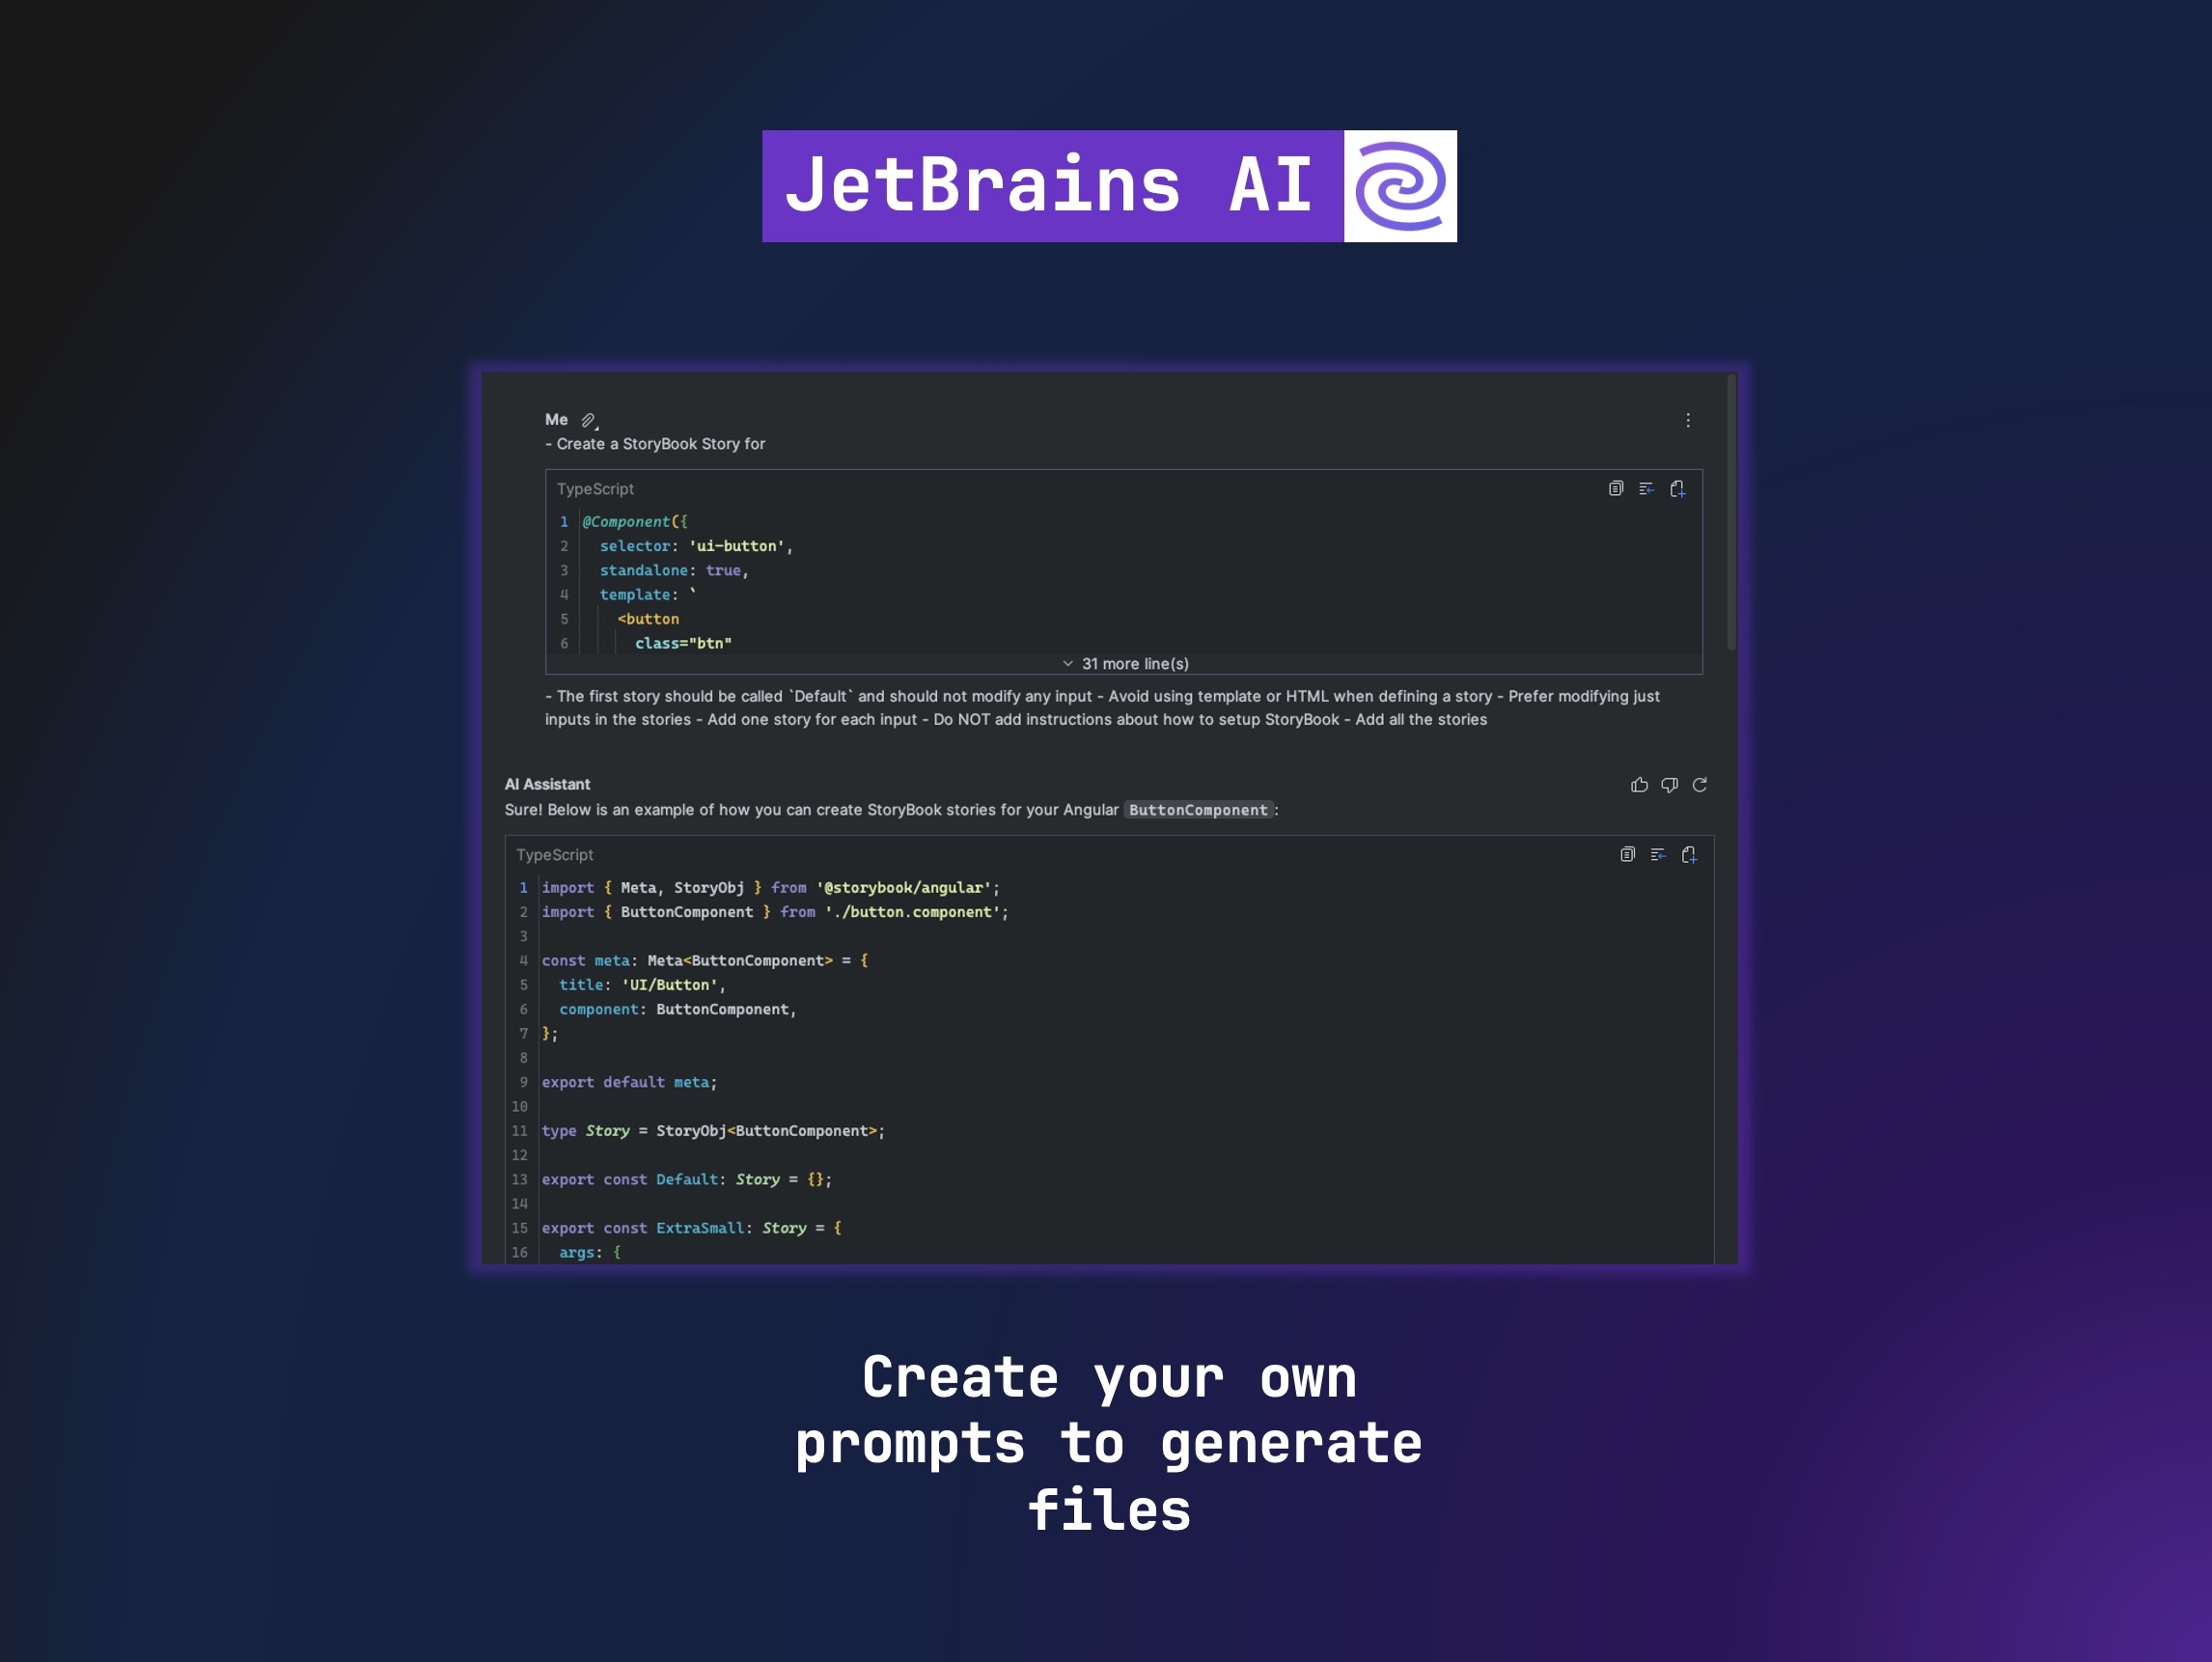
Once again, having a prompt library is a huge win since you can evolve it and generate the perfect results for your needs.
Wishlist
I enjoyed working with JetBrains AI and I am excited to see how it improves with future releases. Here are some things on my wishlist for JetBrains AI:
Specify File Name: I would like to specify the file name whenever the prompt generates a file. For example, when I generated unit tests, it used the prefix "tests.ts." It would be great to specify "specs.ts" or any other preferred name.
Create Files: Having a prompt library is fantastic, but it would be even better if the prompt could generate a new file with a specified name format by default. This would be very helpful for generating unit tests, mock data files, stories, component tests, etc.
Better Code Replacement: I would like it to be smarter about where to replace code. Sometimes, when you ask for something, it requires changes in multiple places. For example, it might need to add a new property in an interface, modify a method, and update the test. In these cases, it would be great to define which files to modify and which ones need more refinement.
Conclusion
Both JetBrains AI Assistant and GitHub Copilot are designed to make coding easier with AI, but they each bring something unique to the table.
JetBrains AI Assistant is tightly woven into JetBrains' suite of IDEs. It offers a smooth and powerful experience with features like smart code completion, automatic documentation, AI-driven chat support, code refactoring, and error detection. This deep integration means it’s more context-aware and customizable, giving developers a tailored development environment.
GitHub Copilot, on the other hand, shines when it comes to code completion and suggestions, especially in Visual Studio Code. It pulls from a vast library of public code repositories to help generate code snippets and complete lines of code. However, it doesn’t offer the same level of IDE-specific features that JetBrains AI Assistant does, like automatic documentation and advanced refactoring tools. Also, in my opinion, Copilot creates better code and understands the context really well.
In short, JetBrains AI Assistant offers a more comprehensive toolkit for developers working in JetBrains IDEs. It's a powerful companion, particularly for those who appreciate a highly customizable and context-sensitive coding assistant.
Subscribe to my newsletter
Read articles from Alfredo Perez directly inside your inbox. Subscribe to the newsletter, and don't miss out.
Written by
