Implementing Istio for Microservices Management: A How-To Guide
 Ankan Banerjee
Why Microservices for Your Application? 🤔
Let’s start with why you might even want microservices. Have you ever had to deploy a small change in a large monolith only to realize it breaks another feature completely unrelated to your change? Yeah, that’s frustrating. Moving to microservices helps in a bunch of ways:
Scaling: Need more resources for just one part of your app? Microservices let you scale only what’s necessary.
Faster Deployment Cycles: Different teams can work on separate microservices independently.
Fault Isolation: One microservice failing doesn't mean your entire application is down.
Tech Flexibility: You can mix and match different technologies based on what’s best for each service.
But with these perks come new challenges. Managing the communication between services, keeping them secure, and gaining insights into how they're working—this can get messy. That's where a service mesh such as Istio steps in!
Things to Consider!
Here are a few important things to keep in mind before jumping into the pool, which I think are important:
Overhead
Each microservice will have an Envoy proxy sidecar attached to it, which increases resource usage (CPU and memory). If you're running in a resource-constrained environment, like a small Kubernetes cluster or a development environment, this can lead to performance issues. Be sure to monitor and scale your resources accordingly.
Complexity
Although Istio simplifies a lot of operational challenges, the initial learning curve can be steep. Setting up, managing, and troubleshooting Istio requires a solid understanding of Kubernetes, networking, and security concepts. If you're just starting out with Kubernetes, Istio might feel overwhelming, so take it step by step.
Network Latency
Since Istio intercepts all communication between your services, there can be a slight increase in network latency. While this is typically minimal and not noticeable in most environments, it’s something to consider for high-performance applications.
Do You Really Need It?
Istio is an extremely powerful tool, but it might be overkill if you're only running a handful of microservices. If your system is small or doesn't require the advanced features like traffic routing, security, and observability that Istio offers, you might want to start with a simpler solution and grow into Istio later.
If we are good then let's delve deeper! 😁
What is Istio❓
Istio is like a traffic cop for your microservices. It manages how data flows between them, makes sure they're secure, and provides observability so you know exactly what’s going on inside your system.
When I first started using Istio, I was amazed by how it simplified the complexity of managing microservices. Suddenly, things like routing traffic, managing load balancing, and enforcing security policies became a lot easier. How, you may ask?
You write code for security, observability, and traffic management just once, and Istio applies it to the necessary microservices. This way a developer can focus on writing good code while Istio handles the rest.
Prerequisites
💡 Before we jump into installing Istio, make sure you have the following:
A Kubernetes cluster (can be minikube/k3s, or a cloud provider's managed Kubernetes service).
kubectlinstalled and configured to manage your cluster.
Once you're set with these, let’s roll! 💪
Installation 🔧
Install the Istio CLI
Start by installing the Istio CLI. It’ll make life much easier when managing Istio.
 curl -L https://istio.io/downloadIstio | sh -
 cd istio-<version>/
 export PATH=$PWD/bin:$PATH  #Add this line to your .bashrc file
Install Istio in Your Cluster
Istio provides seven different configuration profiles to be used during installation.
We will be using the
defaultprofile which is the cleanest and the recommended profile for production.Istio also recommends using the
demoprofile for testing Istio in the cluster. There is a sample BookInfo application included when we downloaded Istio. I suggest testing Istio with the sample app by following the documentation before moving on to production use cases.Run the following command to install Istio using the default configuration profile.
istioctl install --set profile=default -yNote: The default profile comes installed with
istiod(the core component of Istio) andistio-ingressgateway(controlls ingress traffic to the mesh). I recommend also installing theistio-egressgateway(controls egress traffic), which otherwise can cause issues with the application not properly communicating with external services like databases. There are also other benefits such as controlled external access, better visibilty and security. Use the following command during installation:istioctl install --set profile=default \ --set components.egressGateways[0].enabled=true \ --set components.egressGateways[0].name=istio-egressgatewayEnable Sidecar Injection
A sidecar is like having a trusty sidekick for your microservices like Batman with Robin 😎. In the world of microservices, a sidecar is a helper container that tags along with the main container in the same pod. This sidekick handles all the nitty-gritty tasks like logging, monitoring, networking, and security, so that the main service can focus on its duties. In Istio, the sidecar is usually an Envoy proxy that swoops in to manage all network traffic, ensuring everything runs like a well-oiled machine. 🦸♂️🦸♀️
To enable automatic sidecar proxy injection (Envoy) into the pods, label your namespace like this:
kubectl label namespace <your-namespace> istio-injection=enabledIf there are running apps already in the namespace, you need to restart the pods/deployment for Istio to inject the sidecar containers because Istio doesn't immediately inject sidecars into existing pods. You can use the
kubectl rollout restart deployment <your-deployment-name> -n <your-namespace>command to perform a rolling restart to ensure minimal downtime.The other way to enable side car injection is to use the label
sidecar.istio.io/inject: 'true'under the metadata.labels section in the pod definition template in the application deployment yaml definition.
An typical deployment file with the label may look like this:apiVersion: apps/v1 kind: Deployment metadata: name: my-app labels: app: my-app spec: replicas: 3 selector: matchLabels: app: my-app template: metadata: labels: app: my-app sidecar.istio.io/inject: "true" spec: containers: - name: my-app-container image: my-app-image ports: - containerPort: 8080To check if our sidecar containers are running, use
kubectl get pods -n <namespace>command. There should be 2/2 containers for each pod running for the deployment app.
Install Kiali dashboard
As a last step, we will be installing the Kiali dashboard to visualize our mesh and all the applications running inside it. Kiali is an observability console for Istio with service mesh configuration capabilities. To install Kiali use the following commands:
 cd istio-<version>/
 kubectl apply -f samples/addons/kiali.yaml
Phew! We've just installed and setup Istio on the Kubernetes cluster. Give yourself a pat!🎉
Using Istio 🤖
Now that we have installed Istio, it is time to use it!
We can directly apply our manifests like we usually do using kubectl apply command to the sidecar injected namespace. Once deployed, we can visualise the traffic we send to our application in the Kiali dashboard. To open Kiali, use the command:
istioctl dashboard kiali
You can now access the dashboard at localhost:20001. If you are like me and running your workload in a virtual machine in a public cloud and accessing via ssh, use the command with the flag --address=0.0.0.0 to access it via the public IP of the VM. You will see something like:

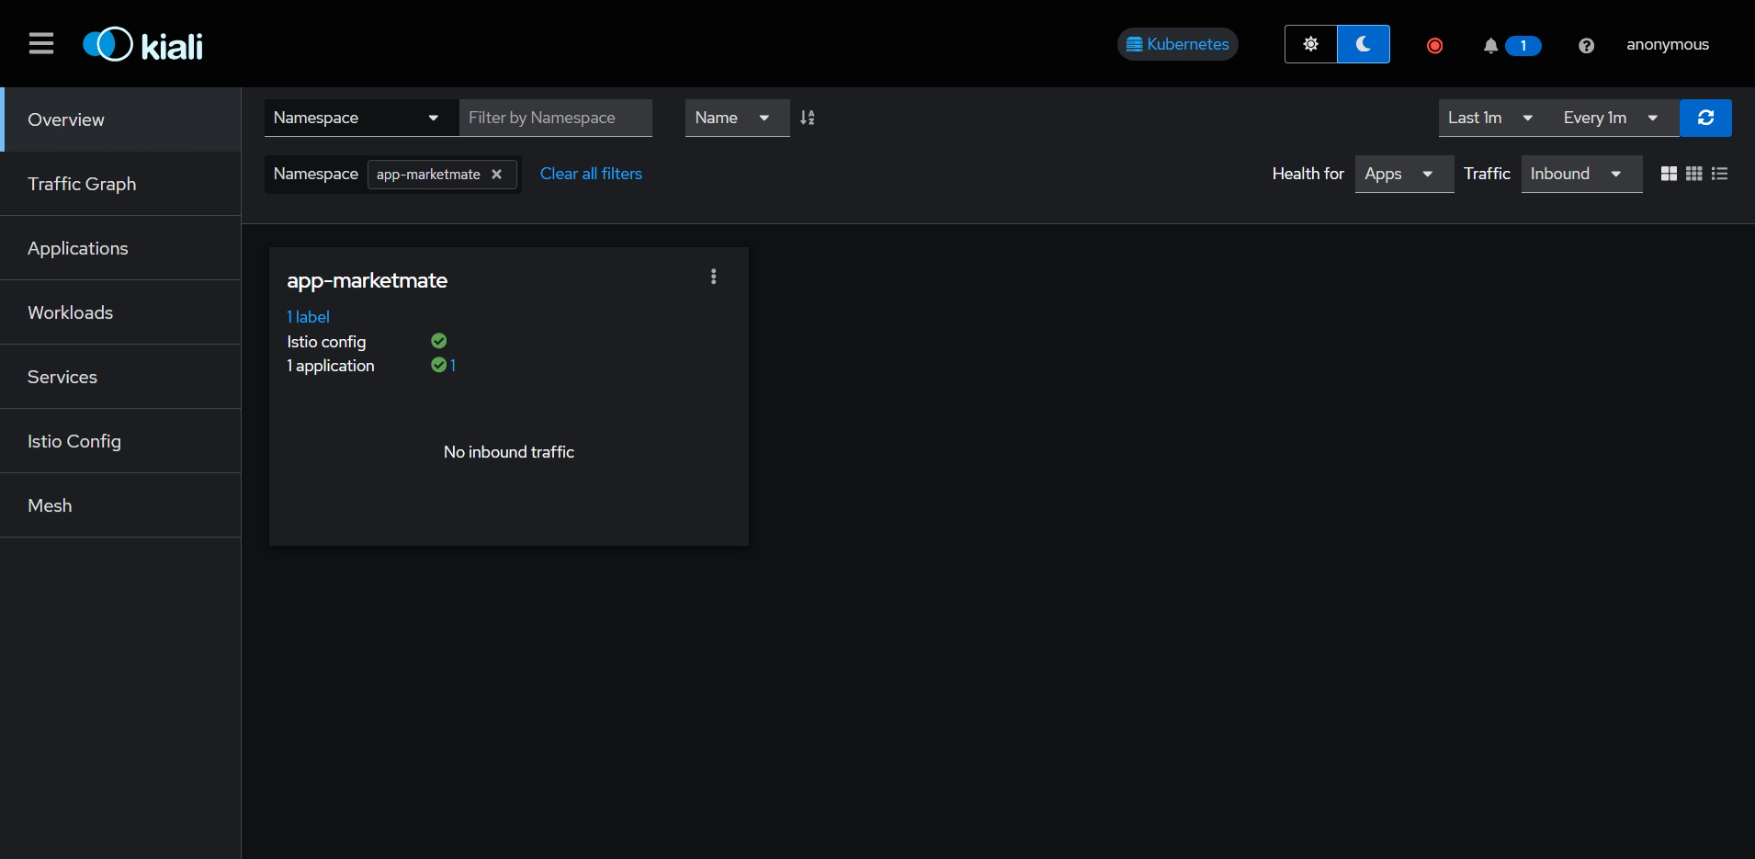
Upon opening your browser, you will be able to view something like this. Select the namespace where you deployed your microservice applications.

On the left pane, select Traffic Graph to visualize and analyze the traffic flow into your application. You will probably see it as empty because we haven't sent any traffic to the application yet. Let's do that.
Configuring Ingress⚙
To give external access to our application, we need to configure ingress to route traffic and define appropriate routing rules.
The ingressgateway is essentially also an Envoy proxy similar to the sidecar but specialised. We will be using Istio's ingressgateway resource to configure our ingress. Why? Here are two major factors in my experience. Compared to a traditional Kubernetes ingress, Istio's IngressGateway does the following:
Request Routing: Route traffic to different versions of your application (e.g., blue/green or canary deployments).
Fault Injection: Test the resiliency of your services by simulating failures, delays, and other real-world issues.
Now, we will create a Gateway resource. A gateway resource allows us to define how external traffic will enter our application service mesh. It is backed by a LoadBalancer service. Unlike Kubernetes ingress, Istio's gateway does not include routing rules.
apiVersion: networking.istio.io/v1alpha3
kind: Gateway
metadata:
  name: myapp-gateway
spec:
  selector:
    istio: ingressgateway # Use Istio's built-in ingress gateway
  servers:
  - port:
      number: 80
      name: http
      protocol: HTTP
    hosts:
    - "myapp.example.com"
    tls:
      httpsRedirect: true
  - port:
      number: 443
      name: https
      protocol: HTTPS
    tls:
      mode: SIMPLE
      credentialName: "my-credential" # Refers to a Kubernetes secret
    hosts:
    - "myapp.example.com"
❗ Under tls, the credentialName should have the credential secret containing the tls certificate and private key for your application domain name. Make sure to create the secret in the istio-system namespace otherwise Istio will be unable to locate the secret. You can use the following command:
kubectl create -n istio-system secret tls my-credential \
  --key=privKey.pem \
  --cert=fullchain.pem
Now that we have ensured our secret is in its right place, use kubectl apply -f gateway.yaml to apply the gateway configuration.
Next, we will be defining a VirtualService resource. This is where we will be defining our routing rules for our internal microservices.
apiVersion: networking.istio.io/v1alpha3
kind: VirtualService
metadata:
  name: myapp
spec:
  hosts:
  - "myapp.example.com"
  gateways:
  - myapp-gateway
  http:
  - match:
    - uri:
        prefix: /v1
    - uri:
        prefix: /v2
    route:
    - destination:
        host: myapp1-service  #this is the internal service for the particular microservice you want to route
        port:
          number: 8000
   - match:
    - uri:
        prefix: /v3
    route:
    - destination:
        host: myapp2-service
        port:
          number: 8000
The http field contains routing rules. Each rule matches a specific URI prefix and routes the traffic to the corresponding service version.
Apply the configuration by using kubectl apply -f virtualservice.yaml
We are done! 🎉
Accessing the application
Access the application at https://myapp.example.com or the domain name you provided. We can also use curl to send traffic to our application. Make sure the istio-ingressgatway has an external IP associated with it. Use the command:
kubectl get svc -n istio-system istio-ingressgateway

In my case I am using k3s which uses ServiceLB/klipper as its default load balancer.
Now that we have sent traffic to our application, we can visualize it in the Kiali dashboard. Open Kiali in your browser. In the traffic graph section, you will see an overview of the traffic flow between the microservices and the relationships between the services in the application. There are also various filters you can explore.
The official Istio documentation is greatly detailed and I would highly recommend going throigh the docs for more advanced configuration: Istio-docs
Conclusion
There are so many other exciting aspects, like configuring security and observability, that are too extensive to cover in just one blog post. However, this gives us a fantastic start to managing our microservice application for production! While Istio might add some overhead and complexity, its powerful features make it an incredibly valuable tool for managing modern microservices architectures with confidence and ease. 🚀
"With great microservices comes great responsibility." 🦸♂️🦸♀️
Feel free to reach out to me if you have any questions, need help, or just want to chat!
Subscribe to my newsletter
Read articles from Ankan Banerjee directly inside your inbox. Subscribe to the newsletter, and don't miss out.
Written by

![Image courtesy: [Istio docs]](https://istio.io/latest/docs/setup/getting-started/kiali-example2.png)