Deploying a Node.js App Seamlessly with Azure Container Instances
 Bhabuk Kunwar
Azure Container Instances is a Platform as a Service (PaaS) offering from Azure that allows you to run and deploy containers without the need of managing the underlying infrastructure.
Azure Container Registry, on the other hand, provides a secure, private registry for managing container images within the Azure ecosystem.
In this post, we will first learn how to containerize a Node.js application using Docker, and then deploy it to the cloud using Azure services such as Azure Container Instances (ACI) and Azure Container Registry (ACR).
Before we begin, make sure you have the following prerequisites installed on your machine:
Step 1 : Containerizing a Node.js app using Docker
Let's start by cloning the following GitHub repository into your local machine.
https://github.com/bhabukkunwar/AzureWeatherApp
It's a simple weather app written in Node.js. You'll find a Dockerfile in the root directory which will be used for building our Docker image. Here's the snippet of the docker file.
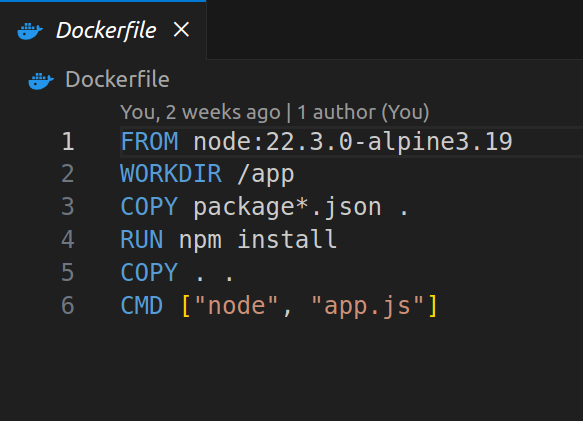
In your root directory create an .env file. Here app_id is an API key provided by Open Weather Map API. Go ahead an create an account to generate a free API key and use it in the .env file as below.

Now to Dockerize the application execute the following steps inside project's root directory.
i. Build the Docker image using the following command.
docker build -t azure-weather-app:latest .
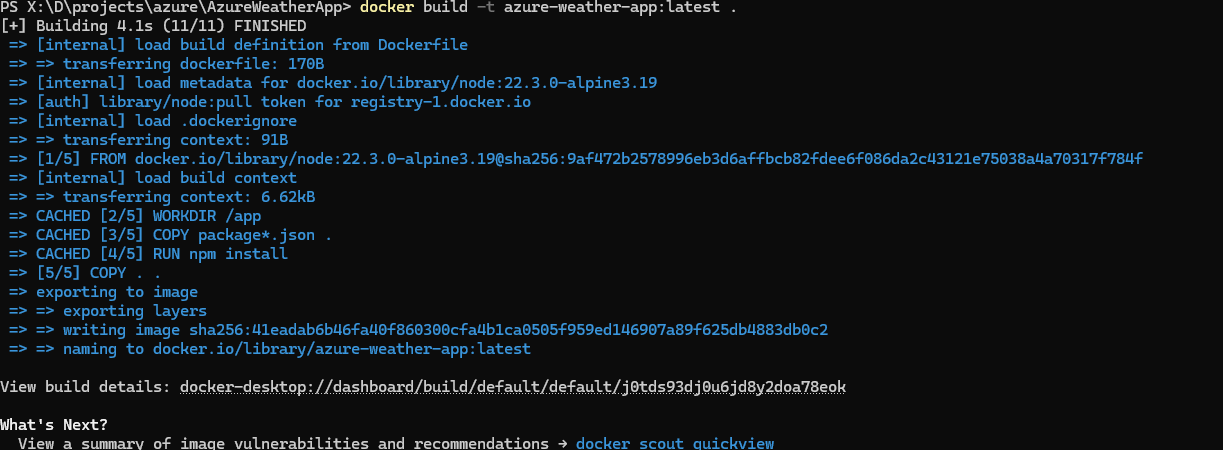
The -t flag allows us to tag our Docker images. The tag should come after the colon : in the format image-name:tag. Tagging is essential when pushing images to registries as it helps manage multiple versions of the same image. By default Docker tags all images as latest unless specified otherwise.
ii. Check whether the image was built correctly with the latest tag using Docker images command.

iii. You can also test by running the container image locally with the following command:
docker run -p 80:80 azure-weather-app
The above command will deploy the app locally which can be accessed through http://localhost url in your browser.
Step 2: Creating Azure Container Registry and pushing our Docker image
i. Inside your preferred terminal first login to your azure account using az cli.
az login
ii. Next, create a resource group. We will use this resource group to deploy our ACR and ACI.
az group create --name rg-az-weather-app --location eastus
iii. Create Azure Container Registry in the above resource group.
az acr create --resource-group rg-az-weather-app --name azureweatherappregistry --sku Basic
iv. Now login should be possible to the newly created ACR using the following command.
az acr login --name azureweatherappregistry
v. In this section, we will create a service principal in Azure with the sole purpose of authenticating Azure Container Registry (ACR) with Docker and pushing our Docker image. It is strongly recommended to use a service principal for authenticating with ACR instead of using personal Azure account credentials.
What is a Service Principal and why should you use it?
A Service Principal (SP) in Azure acts as an identity used by applications or automated processes to access specific Azure resources. Instead of using your personal credentials (which could expose unnecessary access), the SP provides a way to control permissions more securely and granularly. In this guide, we’re using the SP to authenticate our Docker commands with Azure Container Registry (ACR), allowing us to push our container image securely.
Now that we've learned the importance of a Service Principal. Let's go ahead and create one.
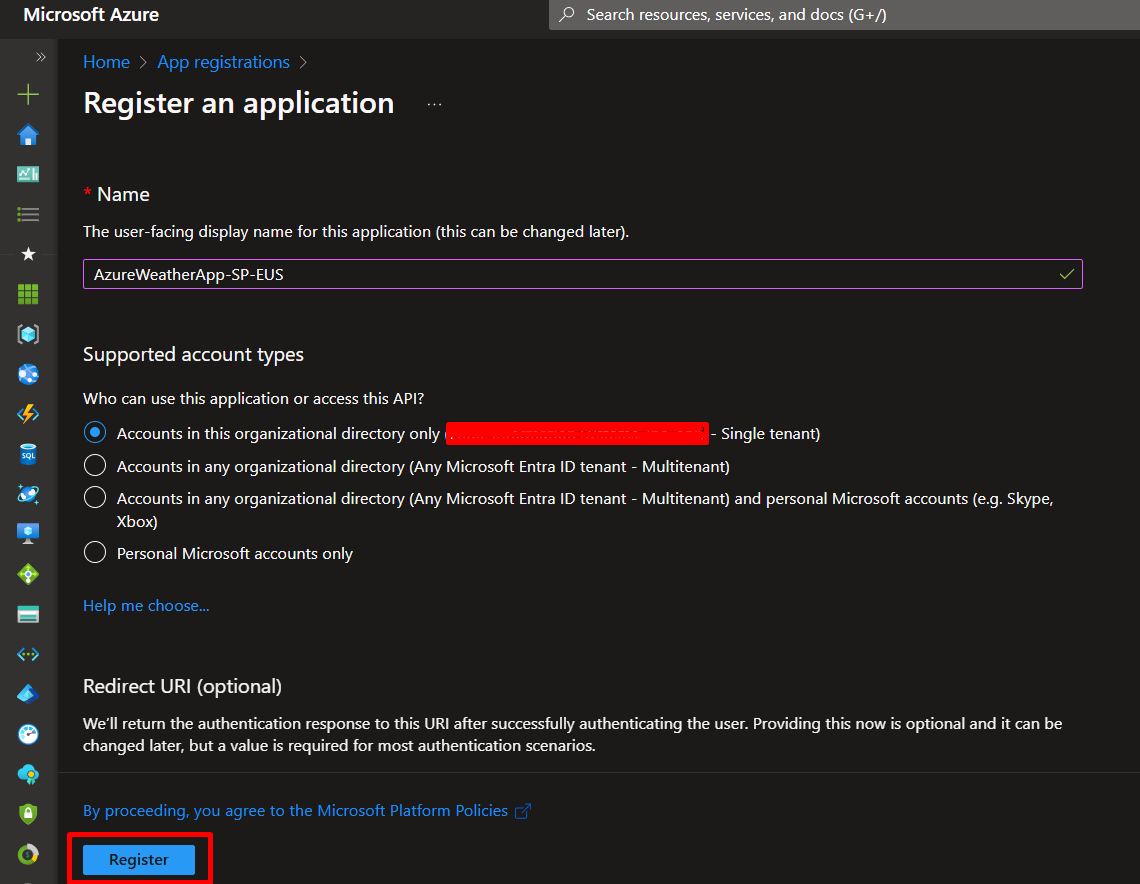
In your Azure Portal, go into App registrations and click on 'New registration'.

Provide a user-facing name for our Service Principal(SP).
Next, we need a client secret. Click on 'Certificates & secrets' and 'New client secret'.
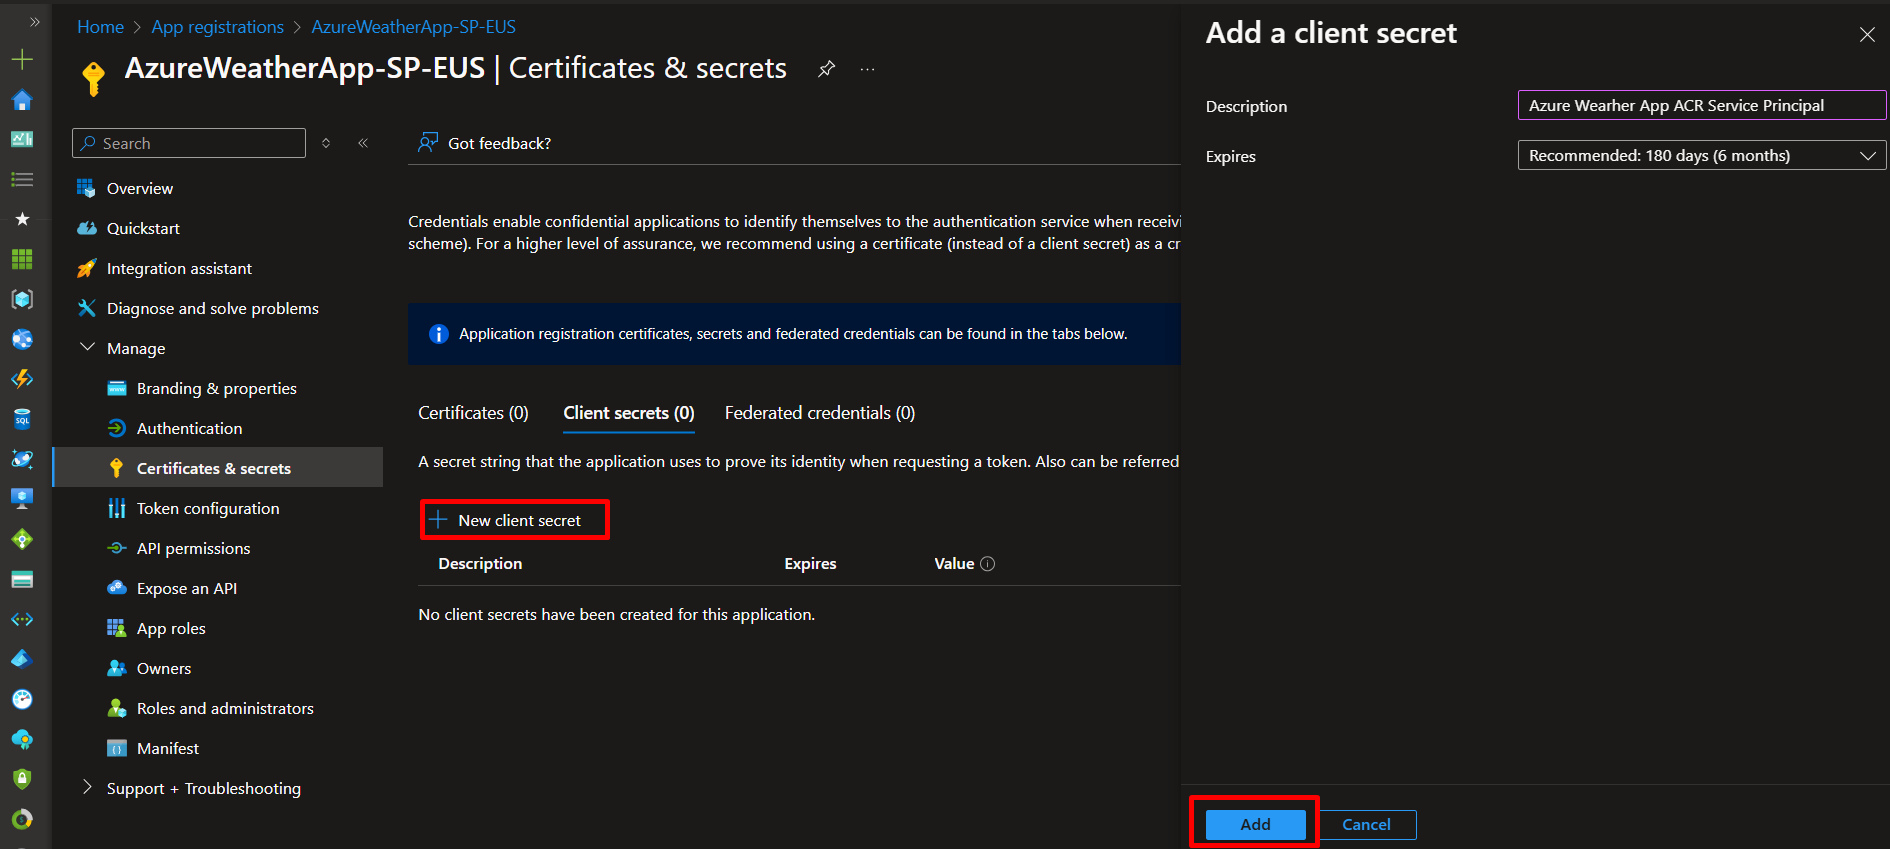
Set description and expiry date and click on 'Add'.
A client secret will be created. Make sure to copy the value, as it is only available once. We will use this secret later.

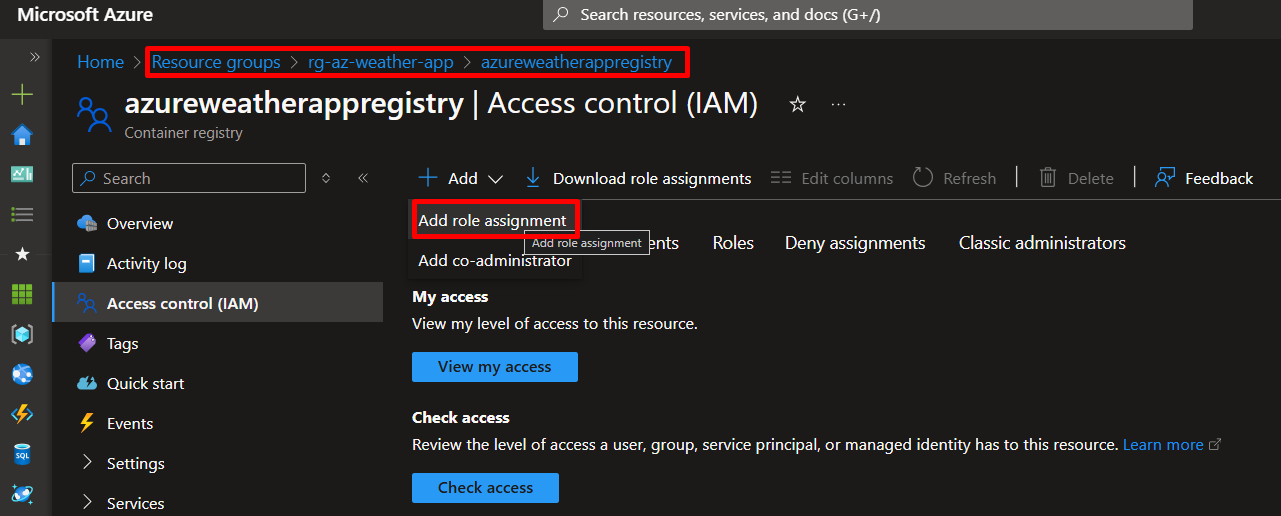
Now, in the Access Control (IAM) for ACR, assign the 'AcrPush' role to our service principal following the steps below.
Inside 'azureweatherappregistry', click on Access control (IAM) and then 'Add role assignment'.
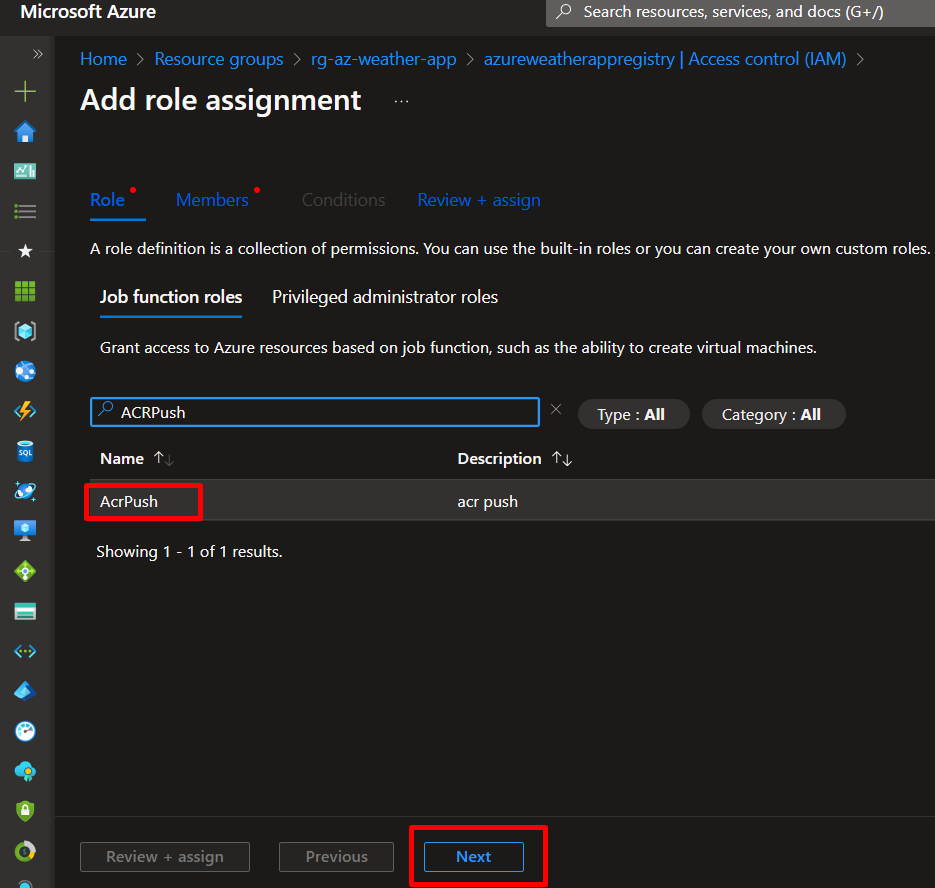
Search for 'AcrPush' and select it.
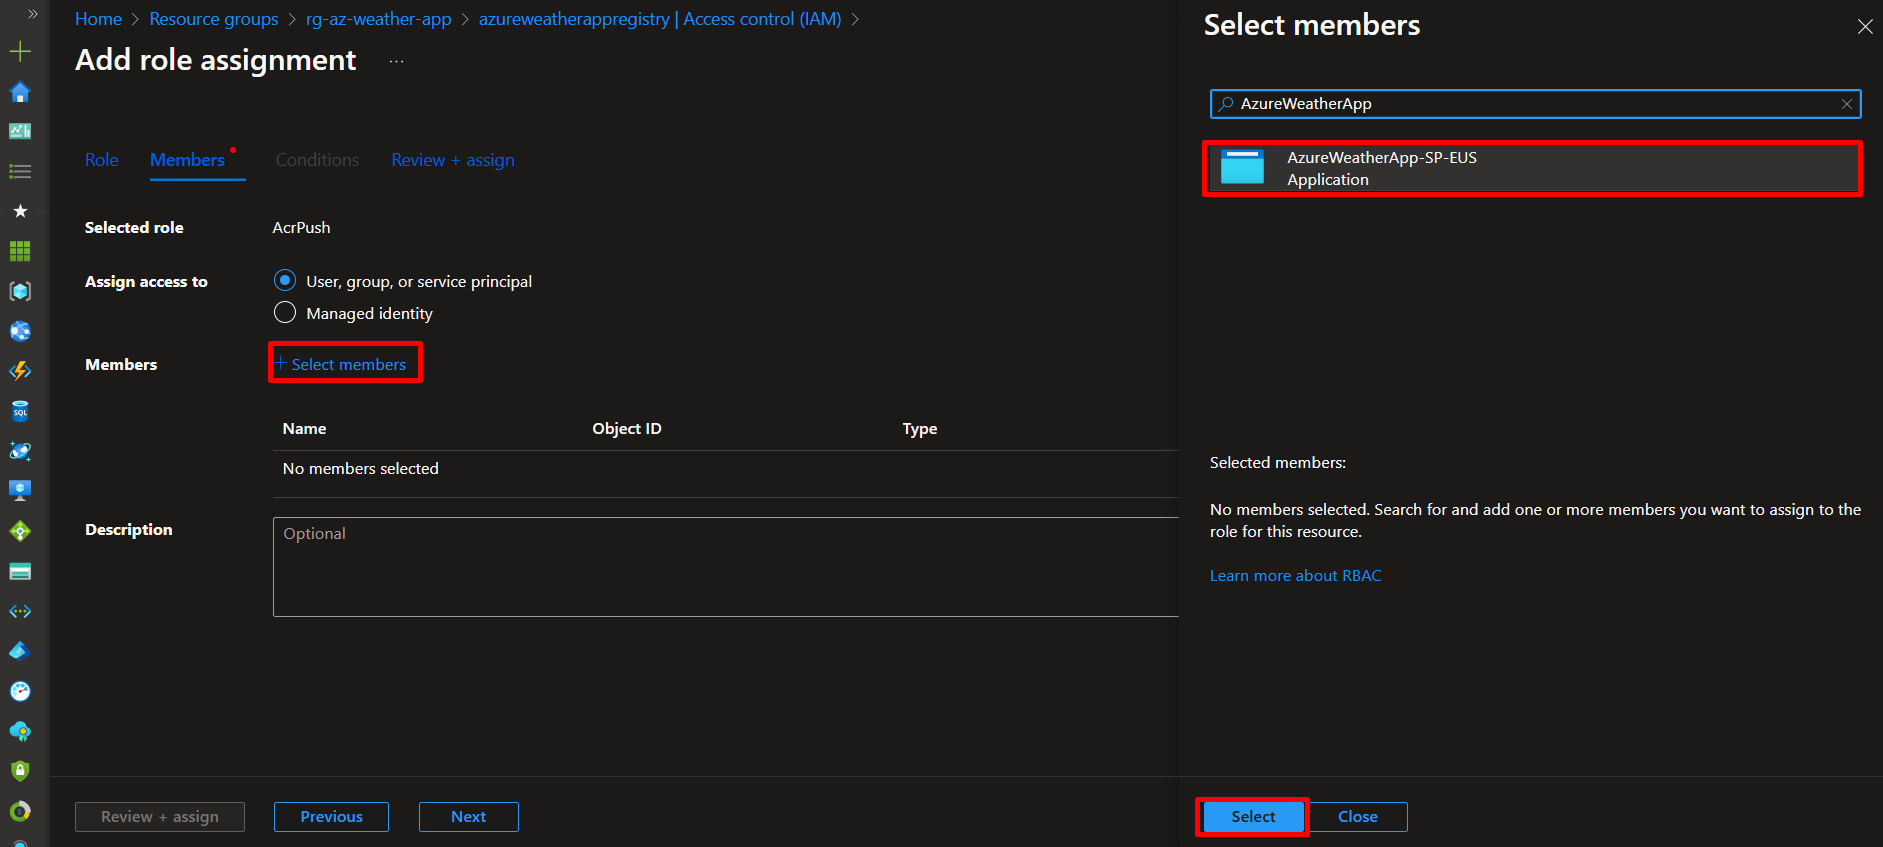
In Members tab, make sure 'User, group or service principal' option is selected and click on 'Select members', search and select the SP 'AzureWeatherApp-SP-EUS' we created in the above steps.
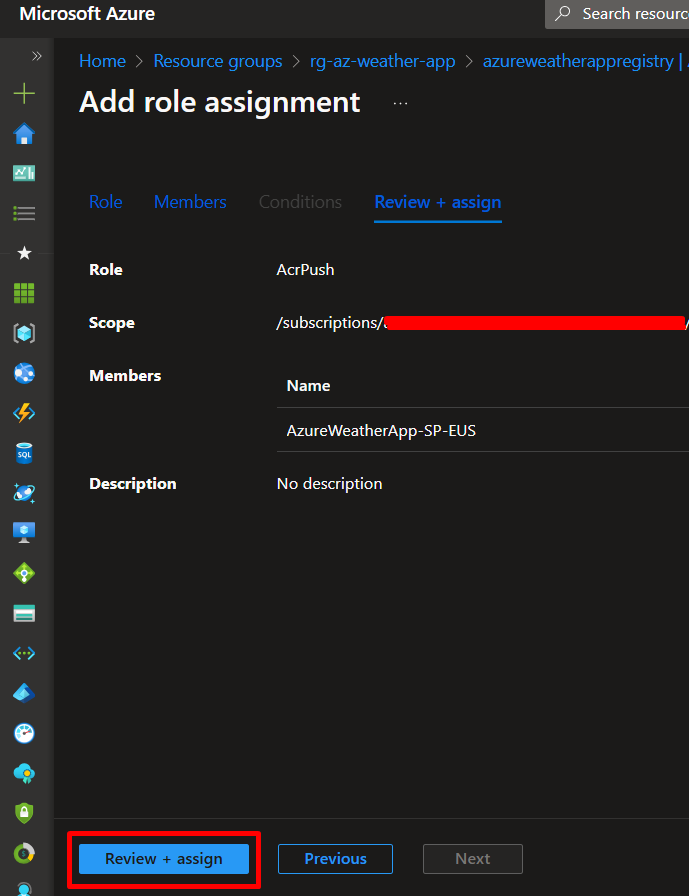
Click on 'Review + assign'.
Phew, that was a lot! But don't worry we are almost done
vi. Remember the client secret we created for our SP in step v? Let's make use of that now to log in to our ACR with Docker. You'll also need client ID which can be copied from the overview page of the 'AzureWeatherApp-SP-EUS' app registration.

vii. Execute the following command to login to ACR using Docker.
Note: Replace <sp-secret-value> and <sp-client-id> with the actual values of our service principal client id and client secret values.
docker login azureweatherappregistry.azurecr.io --username <sp-client-id> --password <sp-secret-value>

viii. Tag the Docker image created in Step 1 with the fully qualified path to your ACR.
docker tag azure-weather-app azureweatherappregistry.azurecr.io/azure-weather-app:latest
Here, azureweatherappregistry.azurecr.io is the FQDN provided by Azure which follows the following convention <your-acr-name>.azurecr.io
We follow it by a slash and appending our previously created docker image name with the assigned tag <your-acr-name>.azurecr.io/<your-docker-image-name>:<tag>
We can also get our ACR login server domain using the command below:
az acr show --name azureweatherappregistry --query loginServer

ix. Next, use the Docker command below to push the Docker image we created during Step 1.
docker push azureweatherappregistry.azurecr.io/azure-weather-app:latest

Step 3: Deploying application to Azure Container Instances
i. Run a command like the one below to start a container instance. Choose a --dns-name-label value that is unique within the Azure region where you're creating the instance. If you encounter a "DNS name label not available" error, try using a different DNS name label.
We opted for a public IP here to allow external access to the application, but you could also configure a private IP for internal usage scenarios.
The image is set to the one we previously pushed to our ACR, and the port is configured to 80, where the Node.js application is running.
az container create --resource-group rg-az-weather-app --name aci-weather-app --image azureweatherappregistry.azurecr.io/azure-weather-app:latest --cpu 1 --memory 1 --registry-login-server azureweatherappregistry.azurecr.io --registry-username <sp-client-id> --registry-password <sp-secret-value> --ip-address Public --dns-name-label azurewebappcontainer --ports 80
Note: Replace <sp-secret-value> and <sp-client-id> with the actual values of our service principal client id and client secret values.
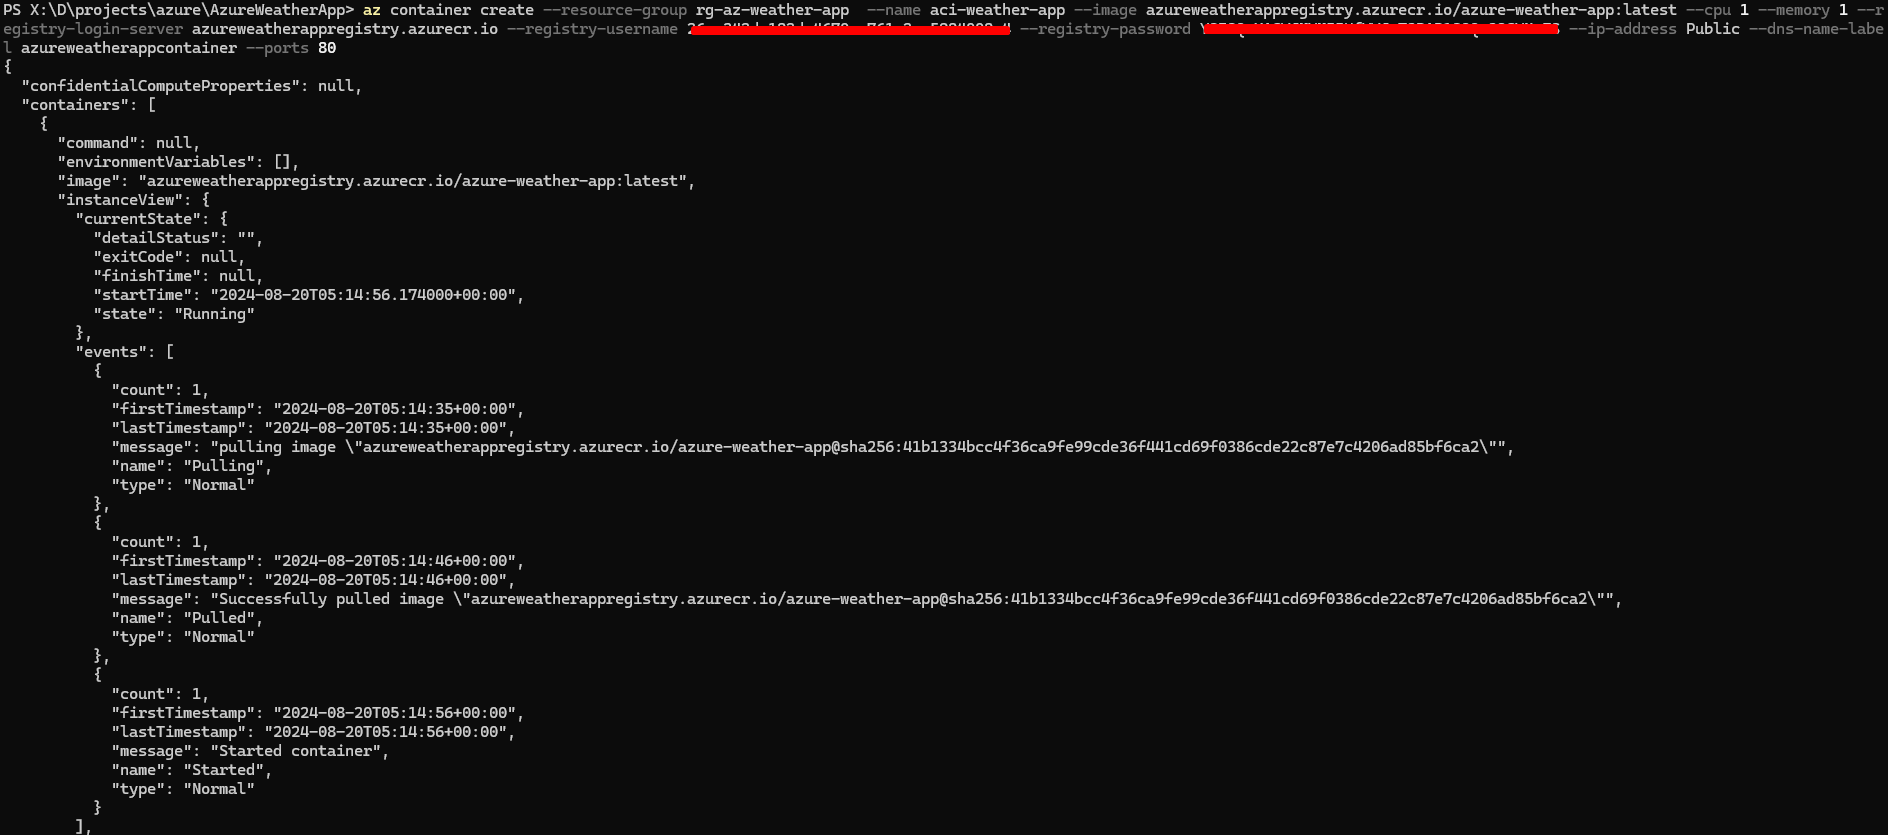
ii. To get the FQDN or the URL of our deployed container instance. Execute the following command.
az container show --resource-group rg-az-weather-app --name aci-weather-app --query ipAddress.fqdn

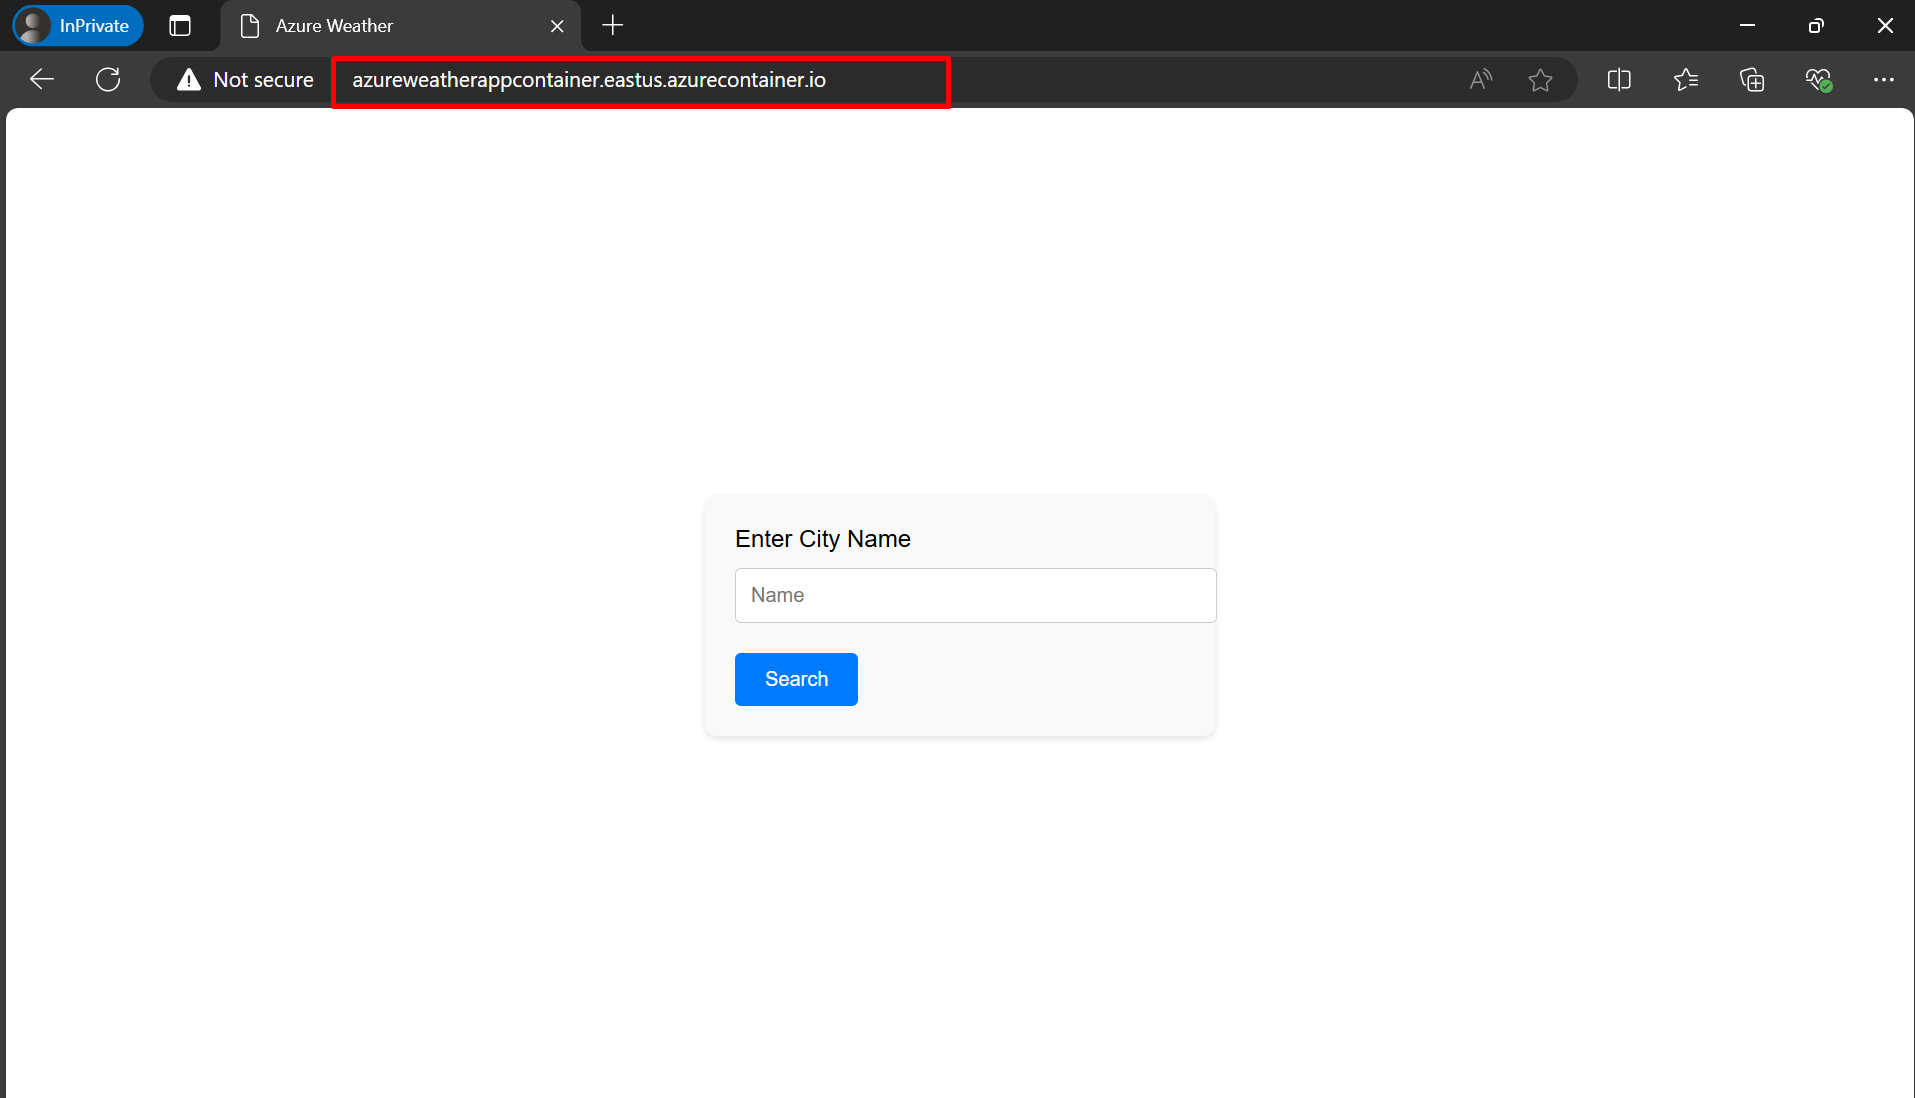
iii. Follow the URL in your browser, you'll see a screen like below.
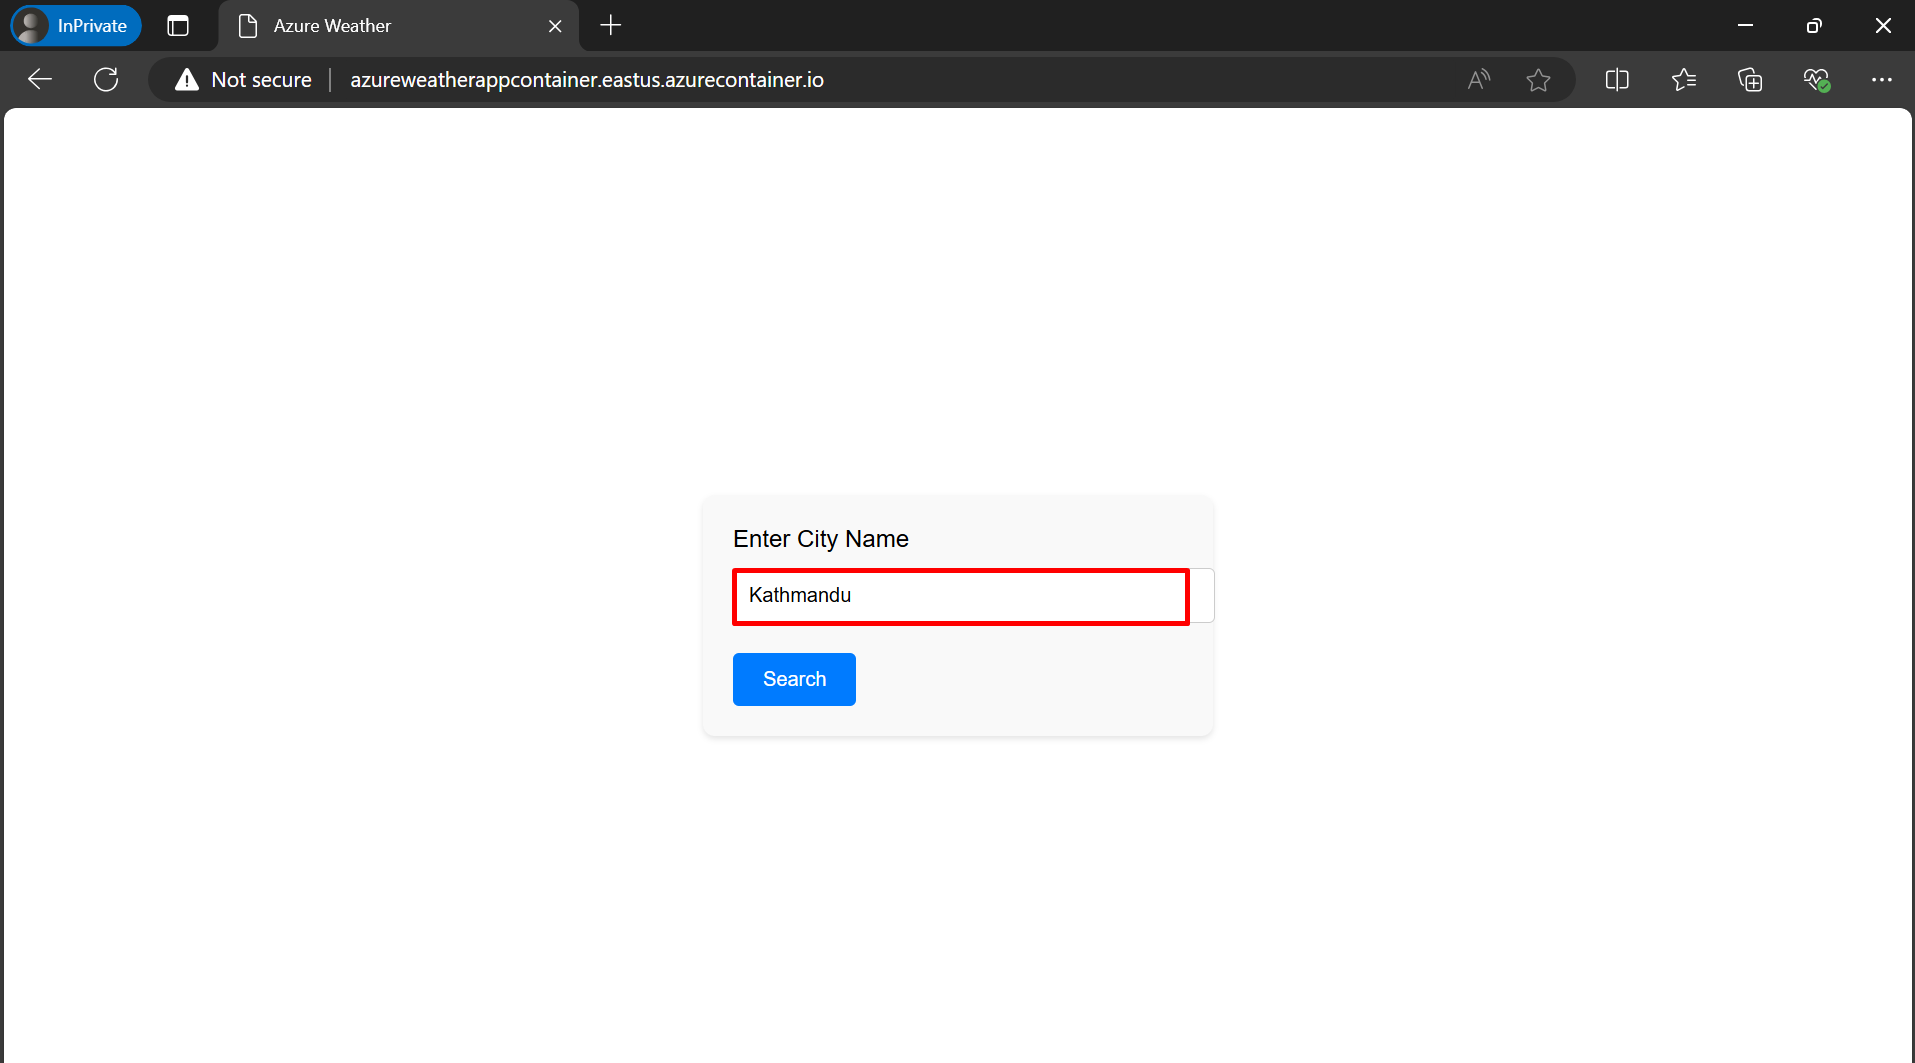
iv. Since this is a weather app, enter the name of the city for which you'd like to view the weather forecast. For example, I'm using Kathmandu, the capital city of Nepal.
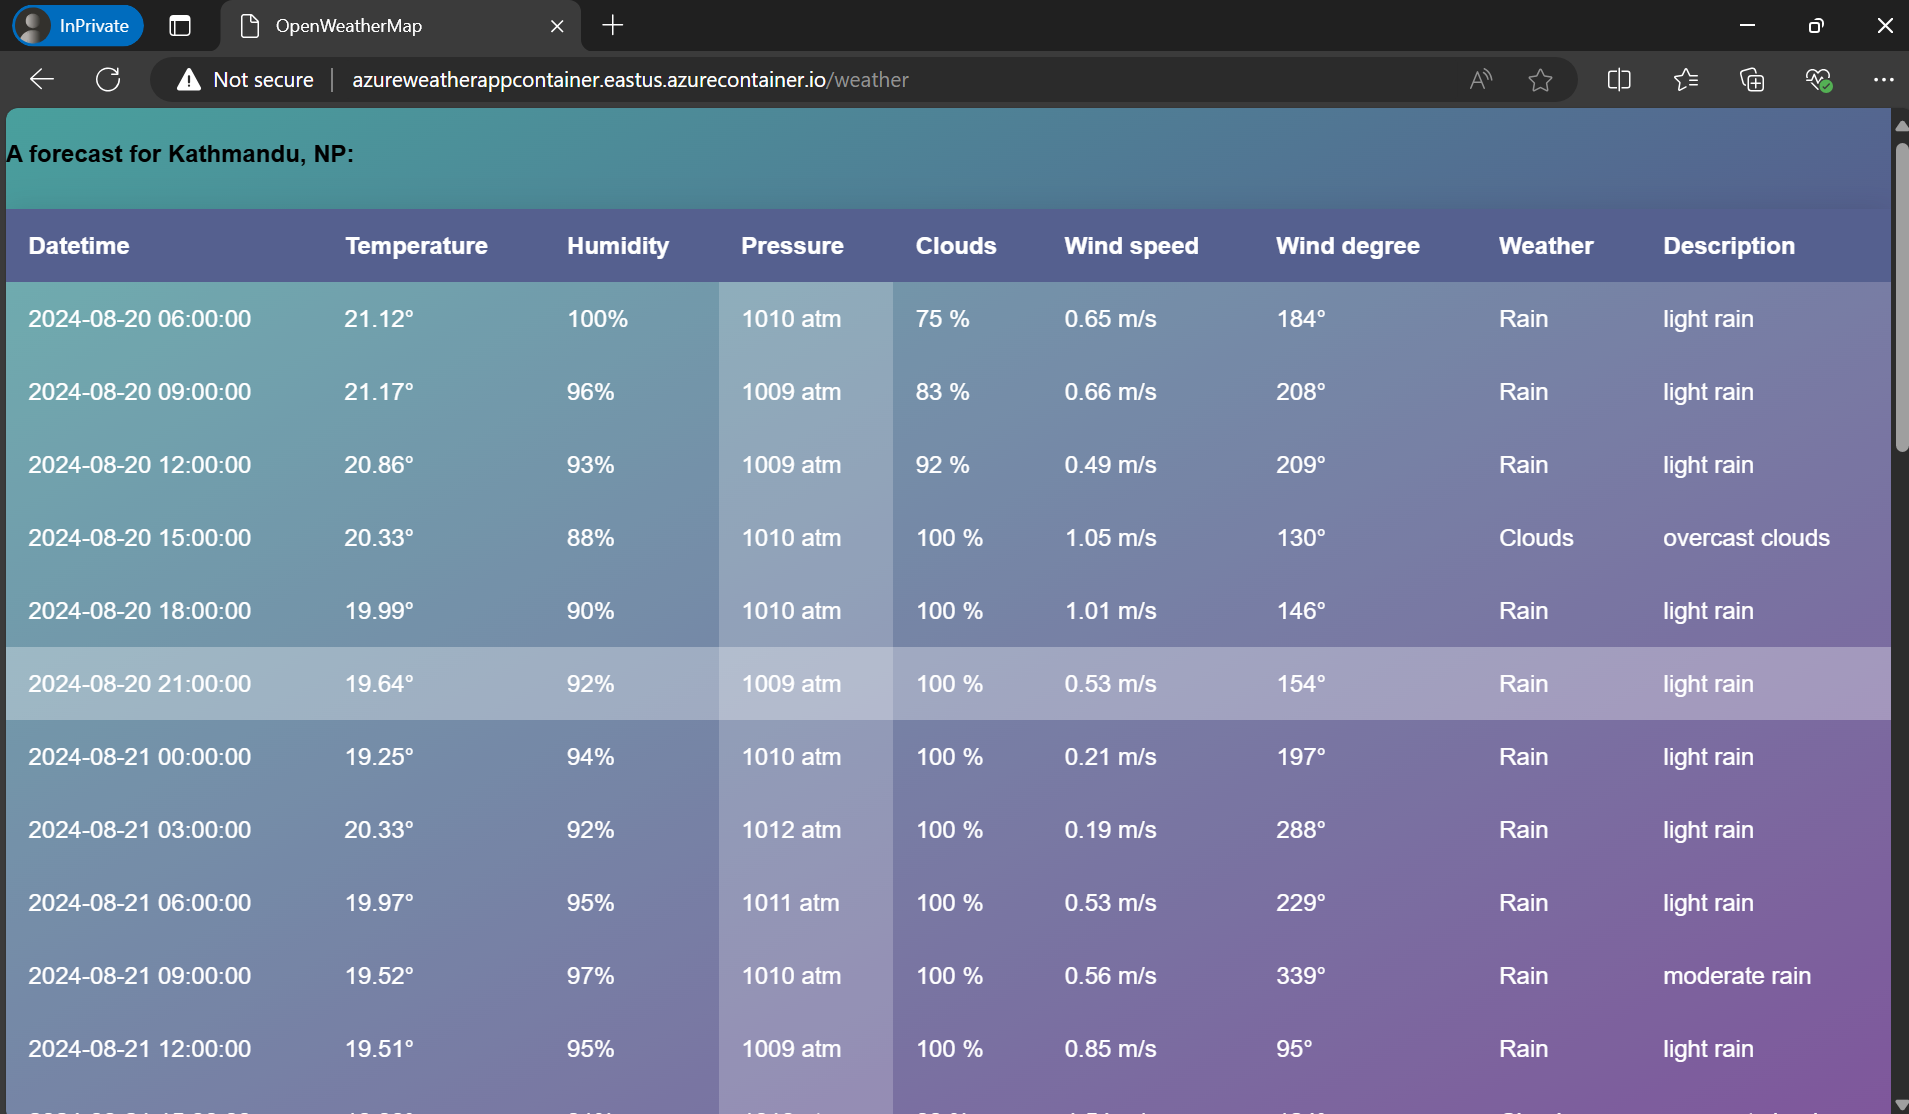
v. Voilà! we have successfully deployed the application and it's running on the cloud believe it or not.
In this tutorial, we learned how to containerize and deploy a Node.js application to Azure using Azure Container Instances and Azure Container Registry. By leveraging the power of Azure services, we simplified the entire deployment process, focusing on code and functionality rather than managing infrastructure. You can replicate this process with any Dockerized application to quickly deploy and test in the cloud.
Subscribe to my newsletter
Read articles from Bhabuk Kunwar directly inside your inbox. Subscribe to the newsletter, and don't miss out.
Written by
