Let's talk about namespaces in K8s
 Syed Mahmood Ali
What exactly is a namespace in K8s?
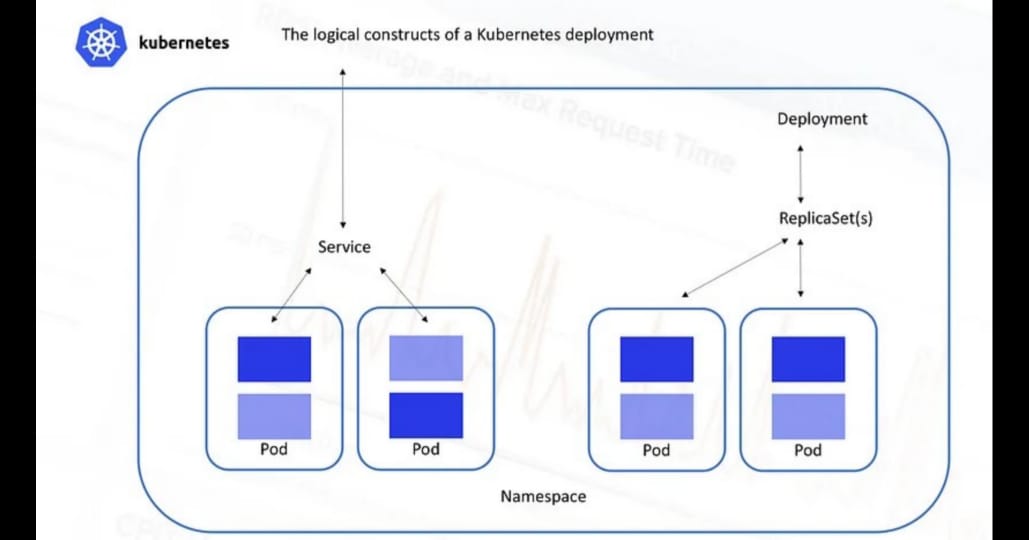
A namespace is a logical separation of resources that enables multiple virtual clusters to be created on the same physical cluster. Namespaces help in organizing and segregating resources within a cluster. Namespaces in Kubernetes are a powerful feature for organizing and managing Kubernetes resources within a cluster, providing logical separation, resource management capabilities, and access control mechanisms.
Why Use Namespaces?
Namespaces are beneficial in several scenarios:
Resource Isolation: Separate resources for different teams or environments like development, testing, and production.
Name Collision Avoidance: Prevent naming conflicts since resources within different namespaces can have the same name.
Resource Quota Management: Limit resource usage (e.g., CPU, memory) per namespace to ensure fair usage.
Security and Access Control: Apply RBAC (Role-Based Access Control) to namespaces for controlling who can access what resources.
Simplifying Cluster Management: Allows admins to manage resources for multiple projects in a large cluster.
Default namespaces
Kubernetes starts with three initial namespaces:
default: Objects with no namespace are added to default.
kube-system: The namespace for objects created by the Kubernetes system.
kube-public: The namespace is created automatically and readable by all users (including those not authenticated). This namespace is mostly reserved for cluster usage, in case that some resources should be visible and readable publicly throughout the whole cluster. The public aspect of this namespace is only a convention, not a requirement.
Creating namespace using declarative way:
ns.yml

apiVersion: v1
kind: Namespace
 metadata:
   name: demo
kubectl create -f ns.yml
Creating namespace using imperative way:
kubectl create namespace <namespace-name>
Working with Resources in a Namespace:
1. Specifying Namespace for Resources
When creating resources, you can explicitly specify the namespace in the resource manifest under metadata.
Example YAML (pod in the dev namespace):
apiVersion: v1
kind: Pod
metadata:
  name: pod
  namespace: dev
spec:
  containers:
  - name: nginx-cnt
    image: nginx
2. Creating Resources in a Specific Namespace
You can also create resources in a specific namespace directly using kubectl by adding the -n flag.
Example:
kubectl run nginx --image=nginx -n dev
3. Switching Between Namespaces
To work in a particular namespace without specifying it each time, set the default namespace for your session:
kubectl config set-context --current -n <namespace-name>
Check which namespace your context is currently set to:
kubectl config view --minify | grep namespace:
4. Viewing Resources in a Namespace
To list resources within a specific namespace:
kubectl get pods -n <namespace-name>
Deleting Namespaces
To delete a namespace (and all its associated resources):
kubectl delete ns <namespace-name>
Example:
kubectl delete ns dev
How to make pods communicate with each other in different namespaces?
The pods in different namespaces can't just communicate using hostname. Instead, how we can make them communicate is using IP and Domain mapping. There's a file named as resolv.config inside of the container in /etc. This file does the job, it maps IP and Domain.
So, how do we actually do it?
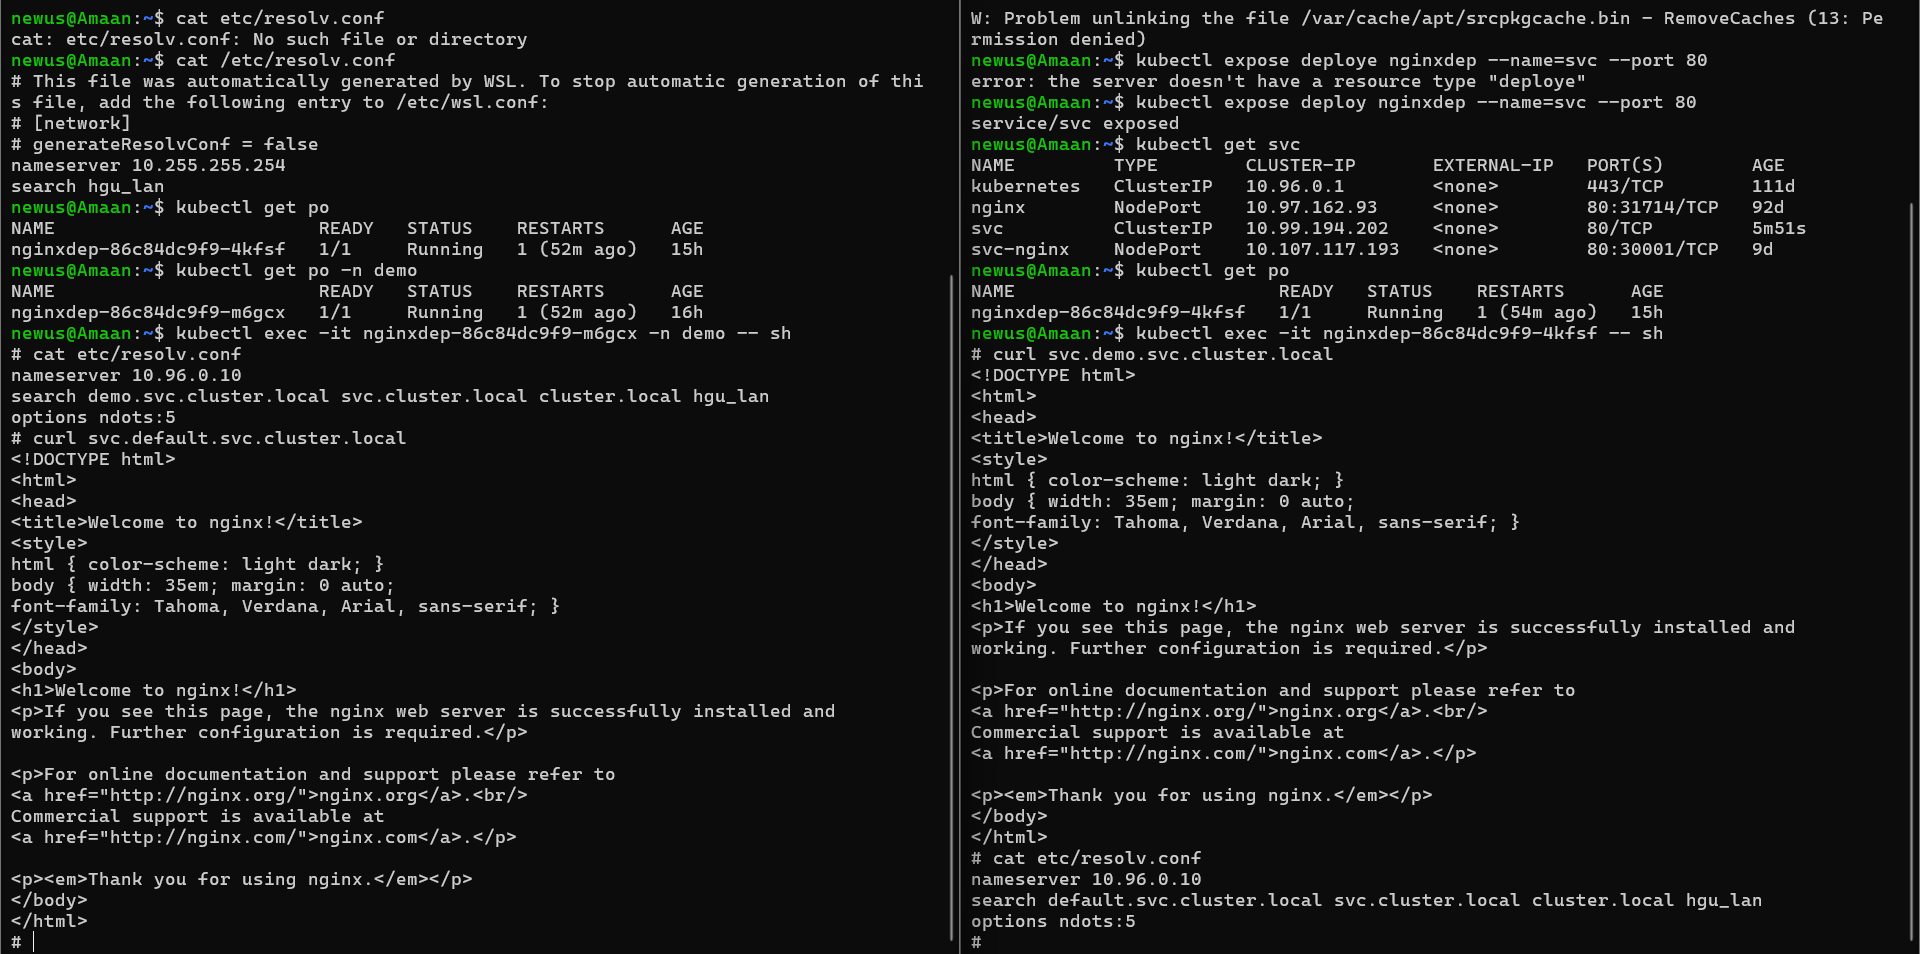
Let's say we have 2 namespaces, demo and default. we'll make the pod in demo namespace to communicate with default.
Go inside the pod in default namespace
  kubectl exec -it <pod-name> -- sh
  #going in the pod
Open
resolv.configfilecat etc/resolv.conf #opening resolv.conf fileYou'll find the domain name that can be used to
curlorpingnameserver 10.96.0.10 search default.svc.cluster.local svc.cluster.local cluster.local options ndots:5default.svc.cluster.localdefault.svc.cluster.localin the 2nd line is the domain that can be used to access the pod in default namespace
Now, what we have to do is go to the pod in the other namespace that is demo
kubectl exec -it <pod-name> -c <container-name> -n demo -- shNow, you can
curlor alsopingto that domain name that we have got from default namespace's podcurl svc.default.svc.cluster.local #the extra 'svc' in the beginning of the domain is the name of the service that is definedor
ping svc.default.svc.cluster.local
#the extra 'svc' in the beginning of the domain is the name of the service that is defined
Congratulations.
You just accessed the pods in different namespaces. Done, it's that easy.
You should be getting the result something like this:

Subscribe to my newsletter
Read articles from Syed Mahmood Ali directly inside your inbox. Subscribe to the newsletter, and don't miss out.
Written by
