Understanding Virtualization, VM Types, and Creating VM Instances on Azure
 Alla Yasheela
What is Virtualization?
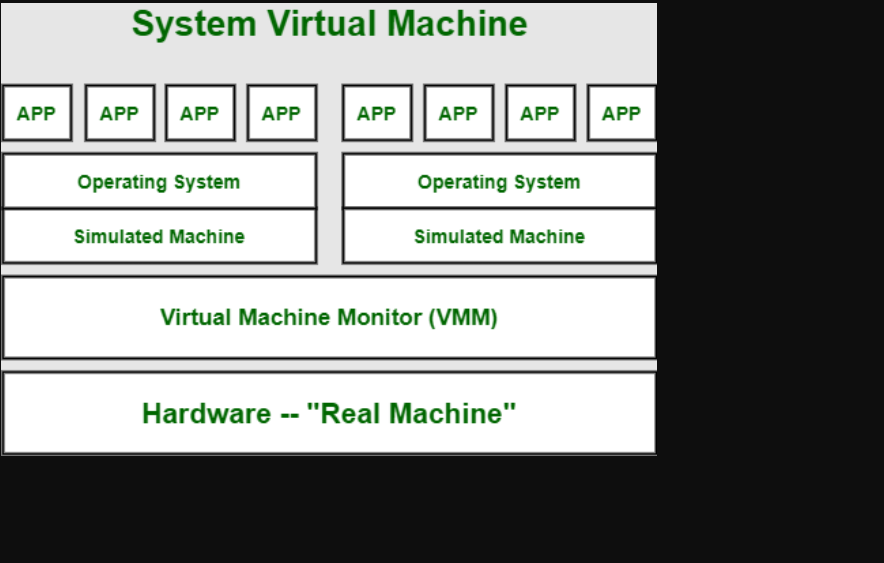
Virtualization is a technology that allows you to create and run virtual versions of physical resources, such as servers or operating systems. This means you can have multiple "virtual" computers running on a single physical machine. The key component in virtualization is the hypervisor.
1. Hypervisor
What It Is: A hypervisor is software that manages and allocates resources to virtual machines (VMs). It sits between the hardware and the VMs, creating and running these virtual environments. There are two main types of hypervisors:
Type 1 Hypervisor (Bare-Metal): Runs directly on the hardware. It’s more efficient and has better performance because it doesn’t need a host operating system. Examples include VMware ESXi and Microsoft Hyper-V.
Type 2 Hypervisor (Hosted): Runs on top of an existing operating system. It’s easier to set up but can be less efficient because it relies on the host OS. Examples include VMware Workstation and Oracle VirtualBox.
Example: If the physical server is like a big, powerful machine, the hypervisor is like a smart manager that allocates space and resources to different virtual machines as needed.
2. VM Types
General-Purpose VMs: These are versatile and can handle a variety of workloads. They are good for testing and development, small databases, and low to moderate traffic websites.
Compute-Optimized VMs: Designed for applications that require high processing power, like complex calculations or simulations.
Memory-Optimized VMs: Ideal for applications that need large amounts of memory, such as big databases or data analytics.
Storage-Optimized VMs: Best for applications that require high disk throughput, like large data processing or high-performance databases.
GPU VMs: Equipped with graphics processing units (GPUs) for tasks like machine learning, 3D rendering, or other GPU-intensive operations.
3. How to Create a VM Instance on Azure
Creating a virtual machine (VM) on Azure involves a few simple steps:
Log In to Azure Portal: Go to the Azure Portal and sign in with your account.
Create a New VM:
Click on "Create a resource" and then select "Virtual Machine."
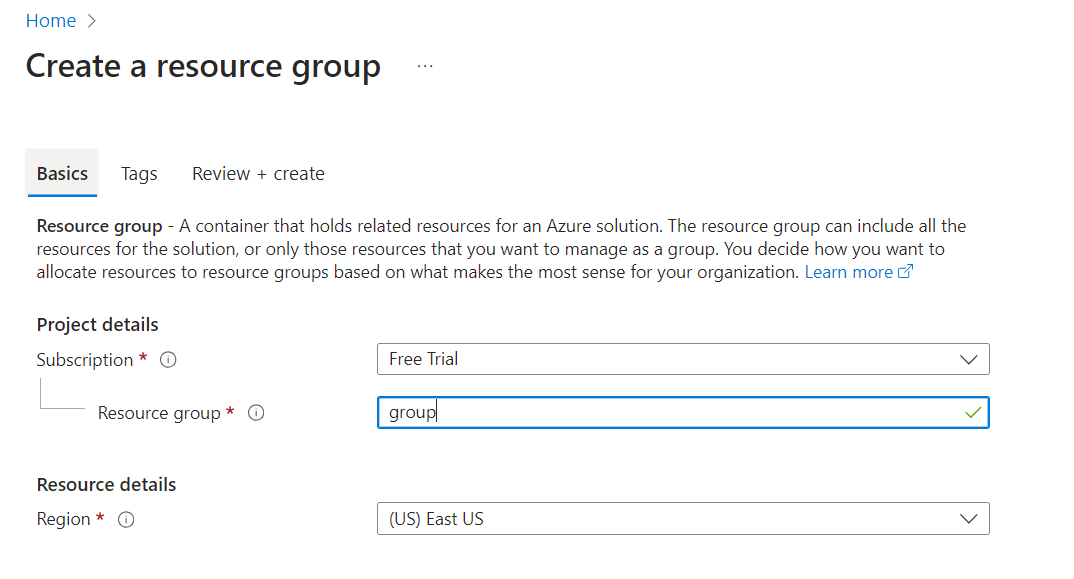
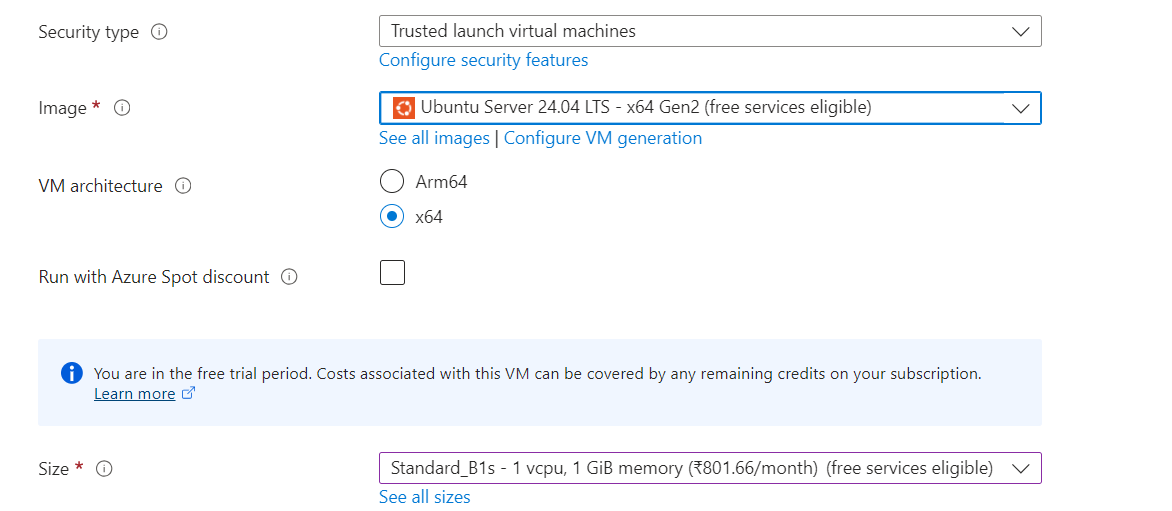
Configure settings like the VM name, region, and network options.
Set up authentication (username and password or SSH key - recommended).
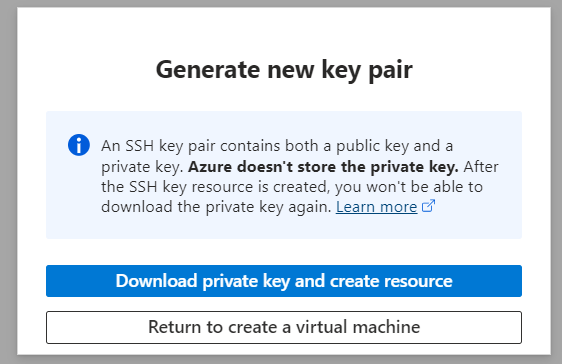
Review and create the VM ( generate the SSH key and don't forget to download pem file)
Access Your VM:
Once the VM is created, you can access it via Remote Desktop.
steps:
1) Install Git (for windows) - https://git-scm.com/downloads
2) Open the terminal and use the following commands:
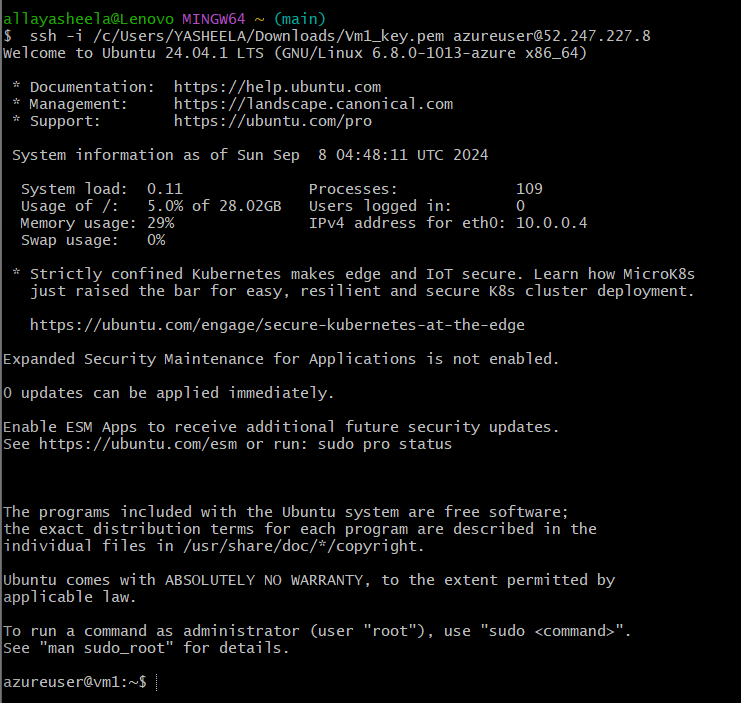
ssh -i <address of you pem file> azureuser@<public ip address>when you enter the command, it shows error (public key not accessible, because to access the pem file, you must be authorized, for that follow the below command
chmod 600 <address>again
ssh -i <address of you pem file> azureuser@<public ip address>now you will be connected to your VM through SSH (like the image shown below)
4. Deploy Jenkins on Azure
Jenkins is a popular tool for automating software development processes. Here’s how to deploy Jenkins on an Azure VM:
Install Java: Jenkins requires Java to run. Install Java on your VM:
in gitbash:
  sudo apt update
  sudo apt install openjdk-17-jdk
or you can directly download from the official website.
Install Jenkins:
  wget -q -O - https://pkg.jenkins.io/debian/jenkins.io.key | sudo apt-key add -
  sudo sh -c 'echo deb http://pkg.jenkins.io/debian-stable binary > /etc/apt/sources.list.d/jenkins.list'
  sudo apt update
  sudo apt install jenkins
or directly download the Jenkins installer from the Jenkins website and run it.
you can check the current version using command
java -versionorjenkins -versionSteps to deploy jenkins to your machine:
follow the below code:
ps -ef | grep jenkinsyou will see the running port as 8080, which is the jenkins application port
when you try to access the website, it shows error
reason: In azure (or any other cloud provider) Ports are blocked by default (for security reasons), to overcome this, we need to manually change network settings for VM
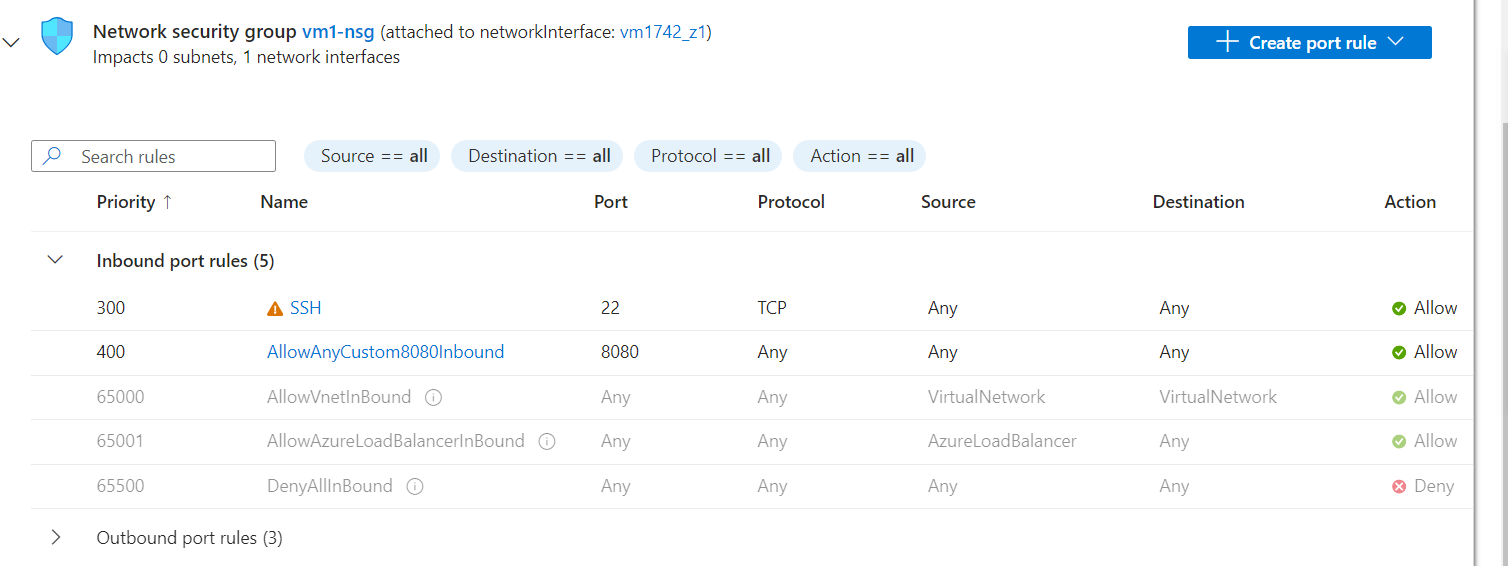
now when you go back to your
http://<ipaddress>:8080/, you will be directed to this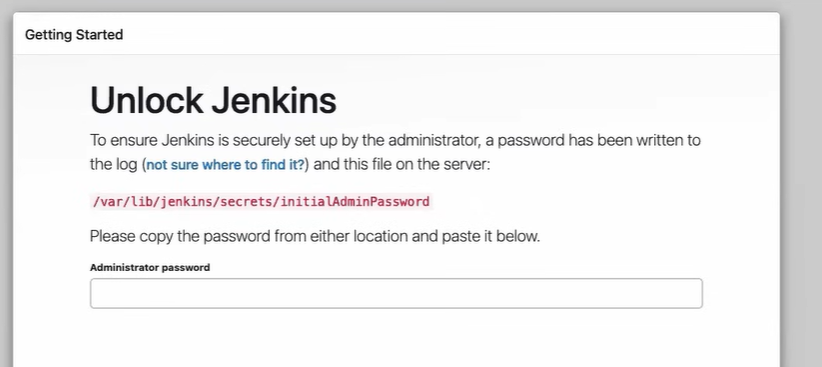
That is it!!! you have deployed Jenkins on Azure :)
Summary
Virtualization: Allows running multiple virtual machines on a single physical machine.
Hypervisor: Manages virtual machines, with Type 1 running directly on hardware and Type 2 on top of an existing OS.
VM Types: Include general-purpose, compute-optimized, memory-optimized, storage-optimized, and GPU VMs, each suited for different tasks.
Creating a VM Instance: Involves setting up a VM through the Azure Portal, configuring settings, and accessing it remotely.
Deploying Jenkins: Requires setting up a VM, installing Java, installing Jenkins, and configuring it through a web interface.
This should provide a clear and practical guide to understanding virtualization, VM types, and deploying Jenkins on Azure!
Happy Learning :)
Subscribe to my newsletter
Read articles from Alla Yasheela directly inside your inbox. Subscribe to the newsletter, and don't miss out.
Written by

Alla Yasheela
Alla Yasheela
I'm Yasheela, an undergraduate with a deep interest in DevOps, and cloud technologies. Currently working on exciting projects on all things DevOps. I’m passionate about simplifying complex concepts and sharing practical insights. Through my Hashnode blog, I document my learning journey, from building scalable applications to mastering cloud services, with the goal of empowering others to grow their tech skills. Let's Learn Together !!