Configuring Active Directory on Windows Server
 Dinesh Kumar K
Active Directory is a directory service developed by Microsoft for Windows domain networks. It provides a centralized system for managing authentication and authorization of users and computers. Key components include:
Domain Controllers: Servers that manage the AD database and authenticate users.
Organizational Units (OUs): Containers that help organize objects within a domain.
User Accounts and Groups: Used to manage access to resources and permissions.
What is Active Directory?
Active Directory is a directory service developed by Microsoft for Windows domain networks. It stores information about users, devices, and network resources, making it possible to centrally manage and control access. With AD, network administrators can set group policies, manage authentication, and monitor user activity within the domain.
Prerequisites
Before you start configuring Active Directory on Windows Server, ensure you have:
A Windows Server installation (Windows Server 2012, 2016, or later).
A static IP address configured on your server.
Administrator privileges on the server.
Installing Active Directory Domain Services
Step 1: Install AD DS Role
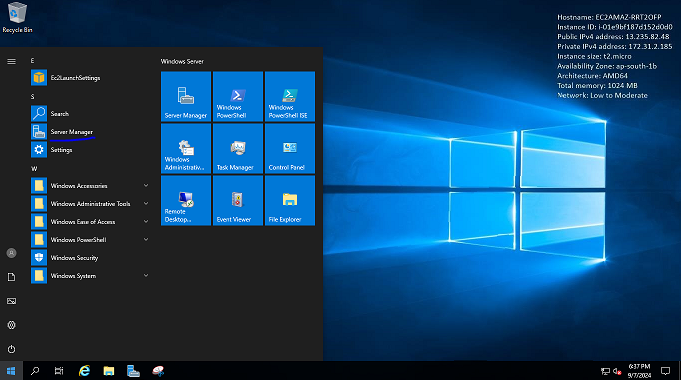
Open Server Manager: Launch Server Manager from the Start menu.
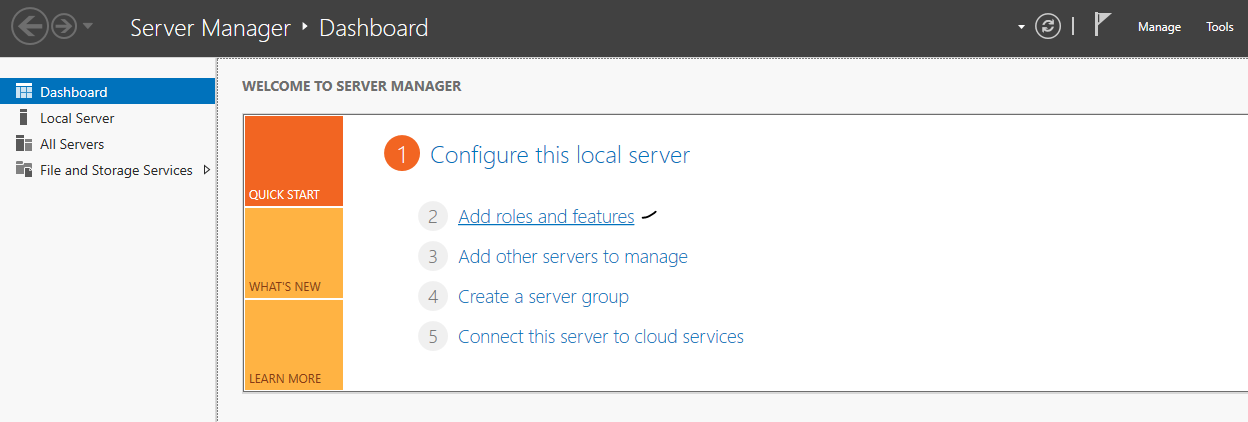
Add Roles and Features: Click on Add roles and features.
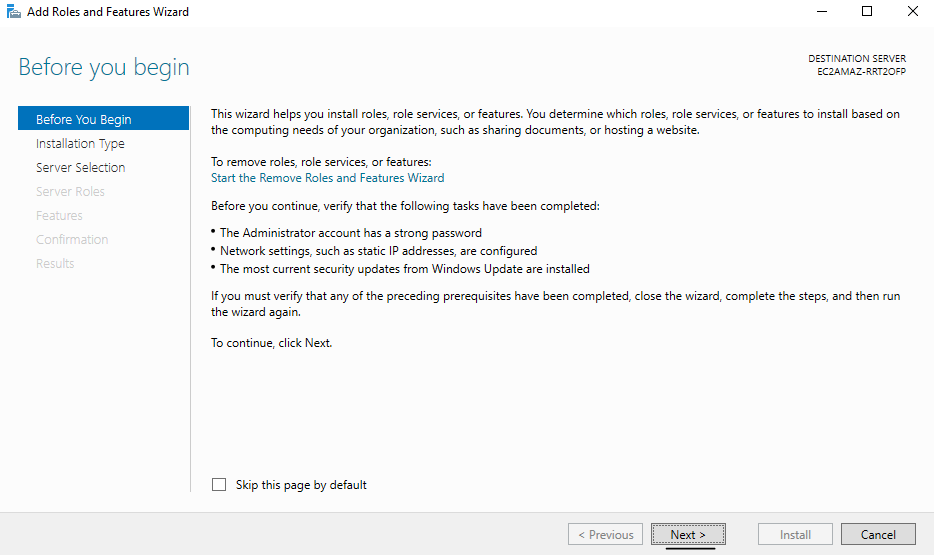
Server Selection: Click Next until you reach the Server Roles page.
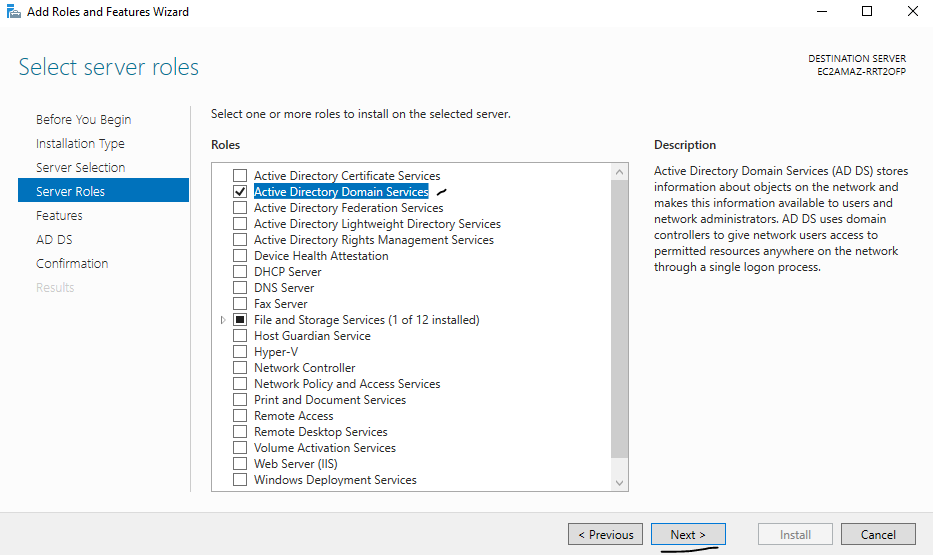
Select Active Directory Domain Services: Check the Active Directory Domain Services checkbox.
Complete the Wizard: Click Next through the remaining screens and then Install.
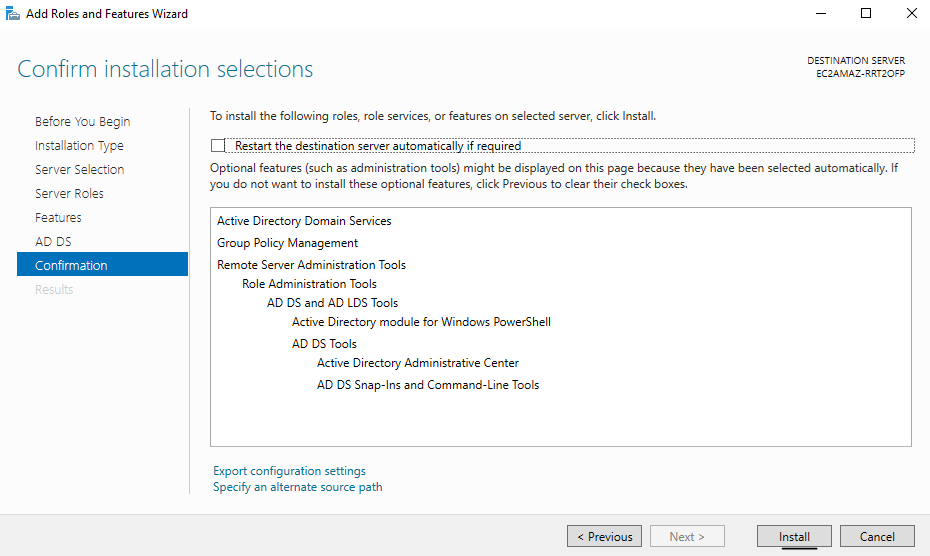
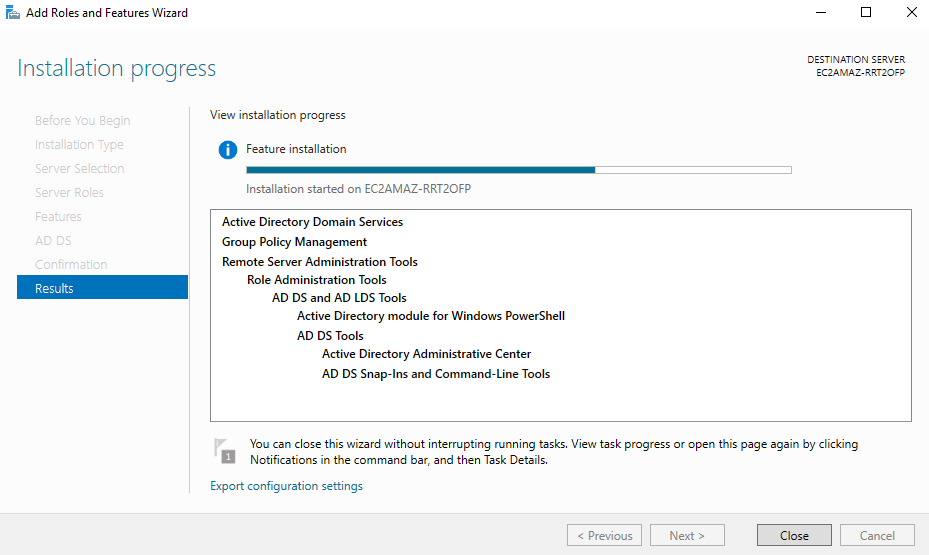
Step 2: Promote the Server to a Domain Controller
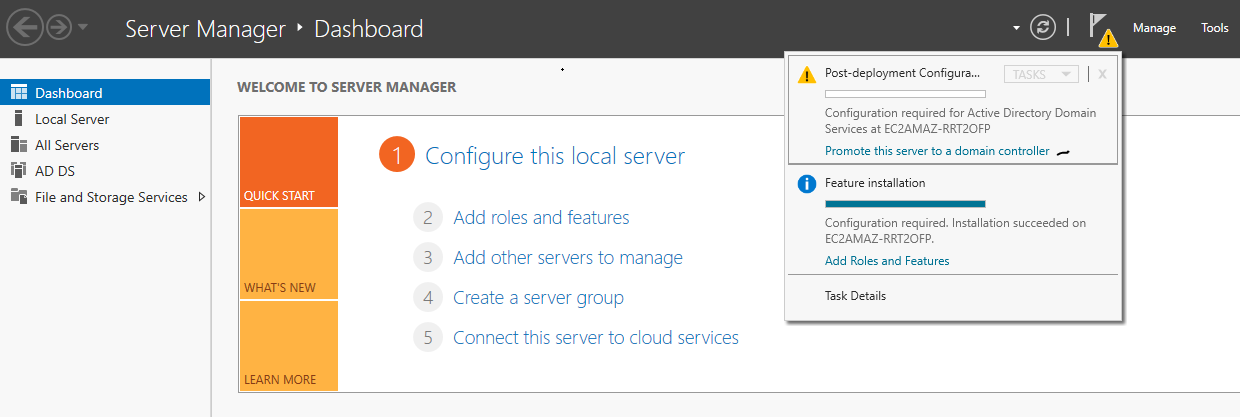
Open AD DS Configuration Wizard: Once the installation is complete, click on the notification flag in Server Manager and select Promote this server to a domain controller.
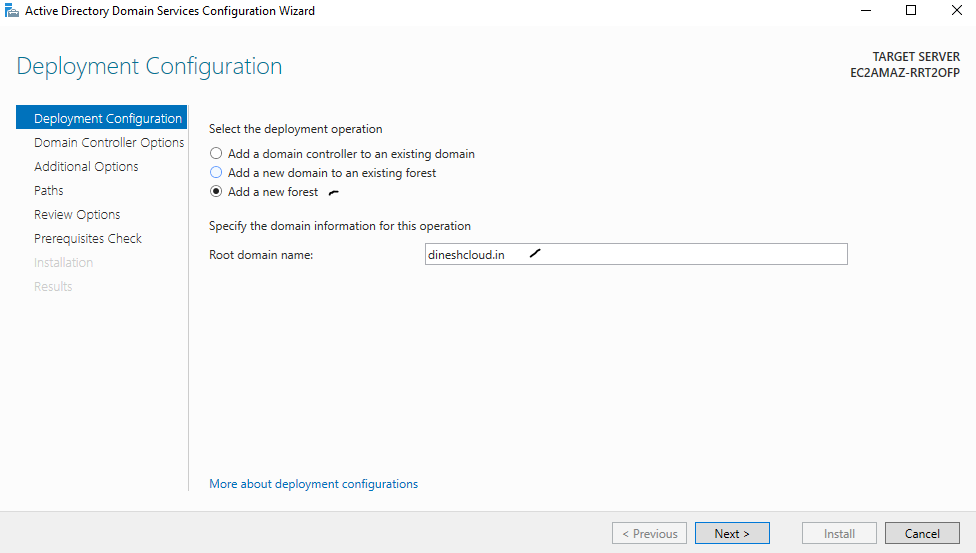
Deployment Configuration:
Choose Add a new forest if this is the first domain controller. > Enter a Root domain name (e.g., example.local).
Domain Controller Options:
Choose a Forest functional level and Domain functional level.
Enter a Directory Services Restore Mode (DSRM) password.
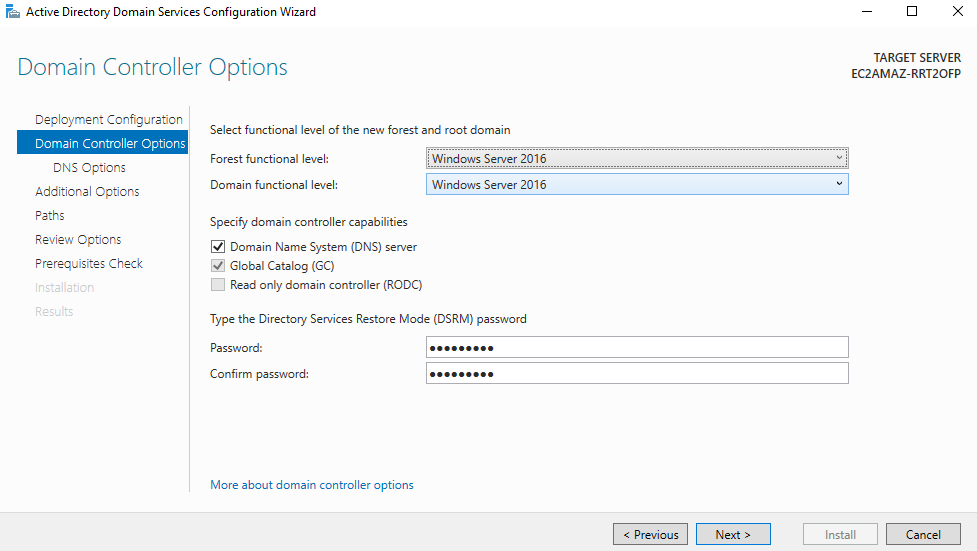
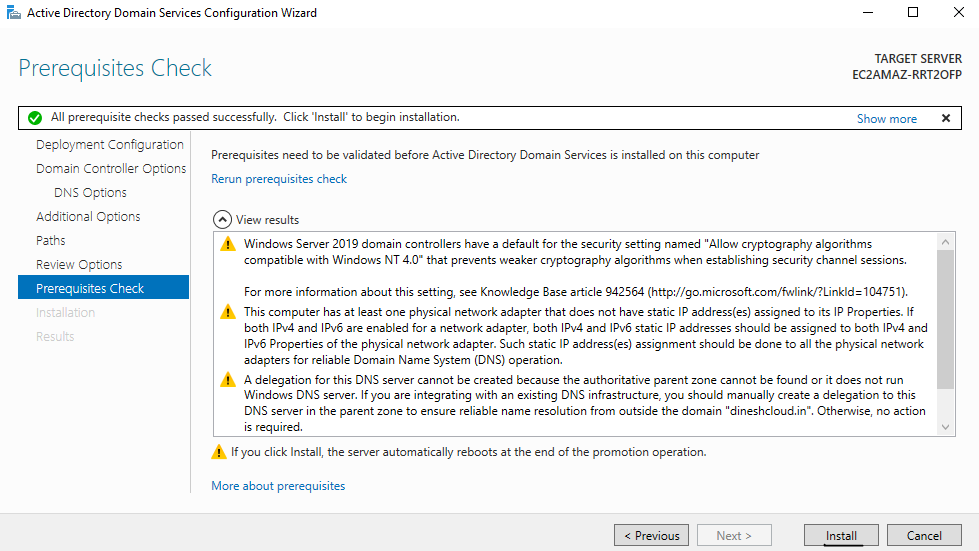
Review Options and Install: Review your selections and click Install. The server will be restarted after installation.
Creating Organizational Unit
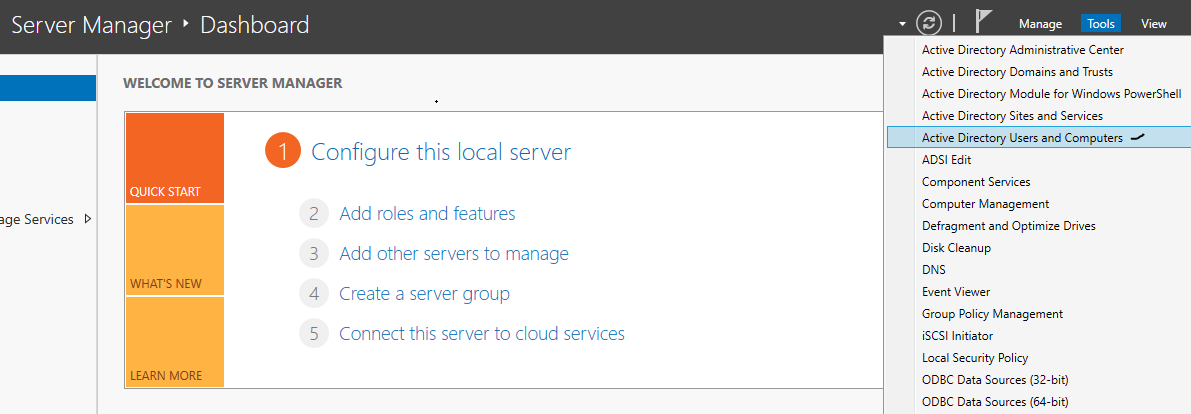
Launch Active Directory Users and Computers: From Server Manager, go to Tools > Active Directory Users and Computers.
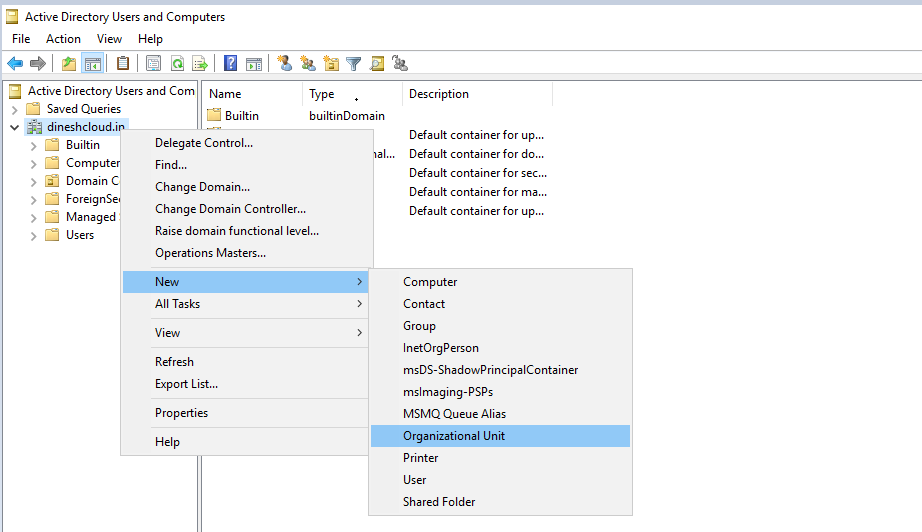
Right-click on the Domain Name or any existing Organizational Unit (OU) where you want to create the new OU.
- From the context menu, hover over New and then click Organizational Unit.
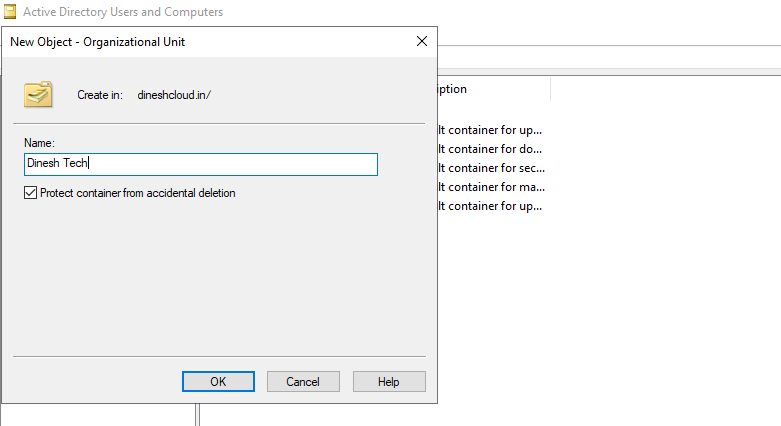
In the New Object - Organizational Unit window:
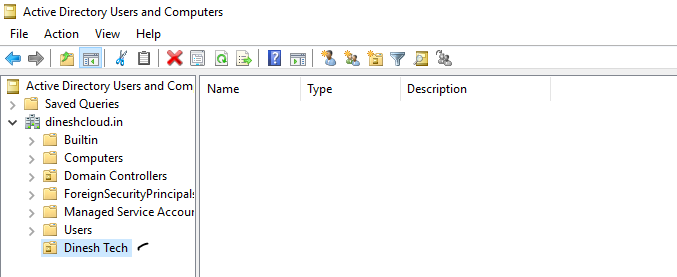
Name: Enter the name for your new OU (e.g., "HR", "IT Dept"). > Click OK to create the OU.
Creating User Accounts
Step 1: Open Active Directory Users and Computers
Launch Active Directory Users and Computers: From Server Manager, go to Tools > Active Directory Users and Computers.

Step 2: Create a New User
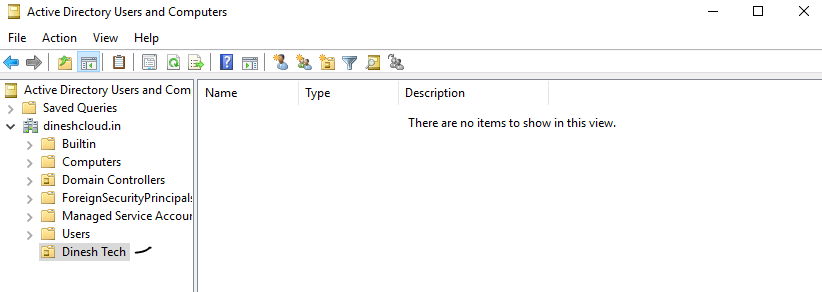
Navigate to the Desired OU: In the Active Directory Users and Computers console, expand your domain and select the Organizational Unit (OU) where you want to create the user.
Create User:
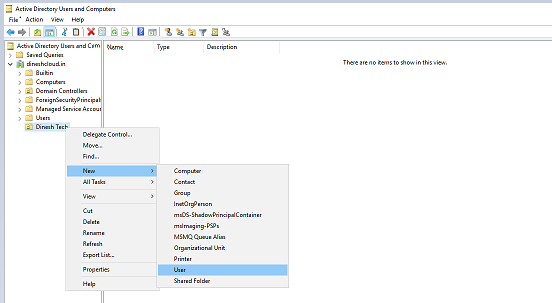
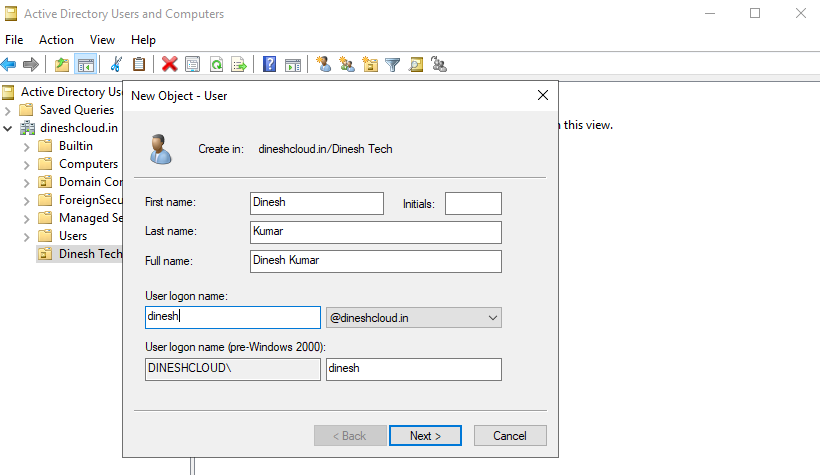
- Right-click the OU, select New > User.
Enter the First name, Last name, and User logon name. > Click Next
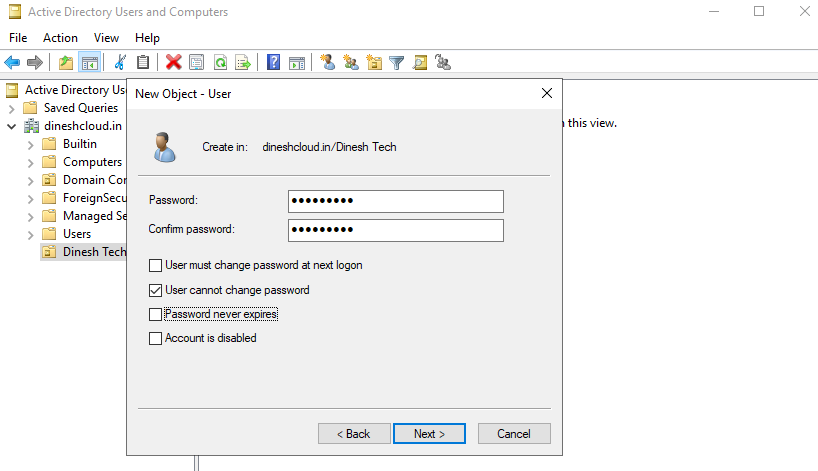
Set a Password for the user.
- Choose options for Password must change at next logon or User cannot change password as needed. > Click Next
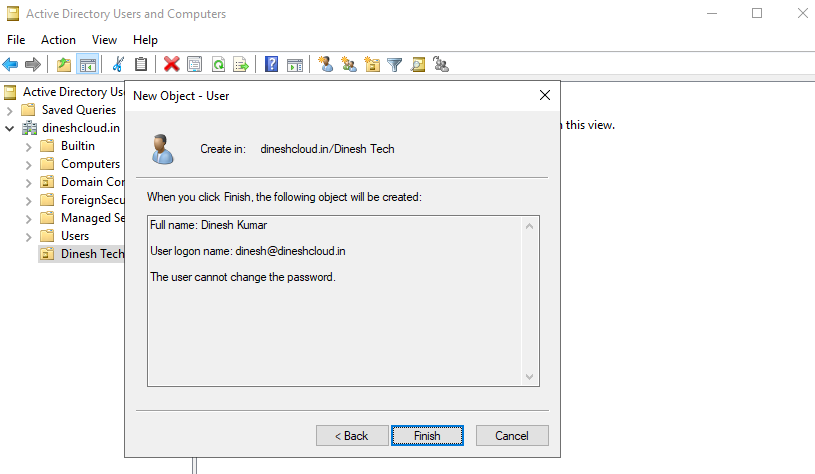
- Click Finish to create the user.
Step 3: Manage User Properties
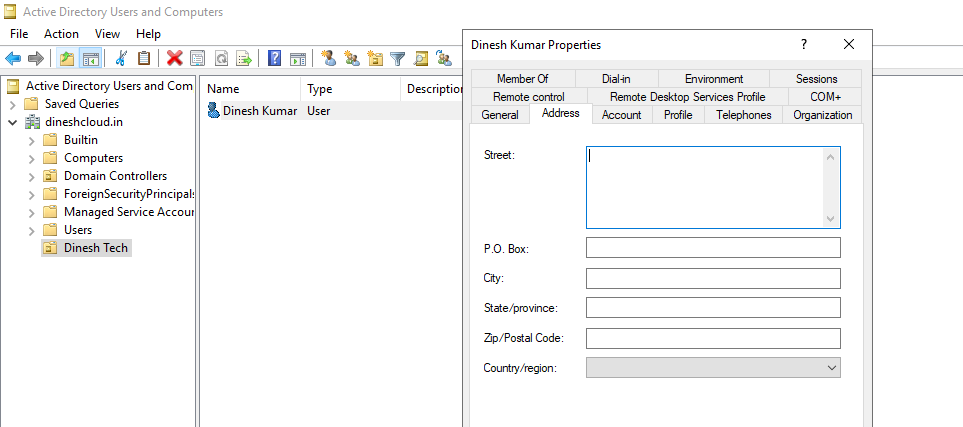
Edit User Details: Right-click on the user account and select Properties.
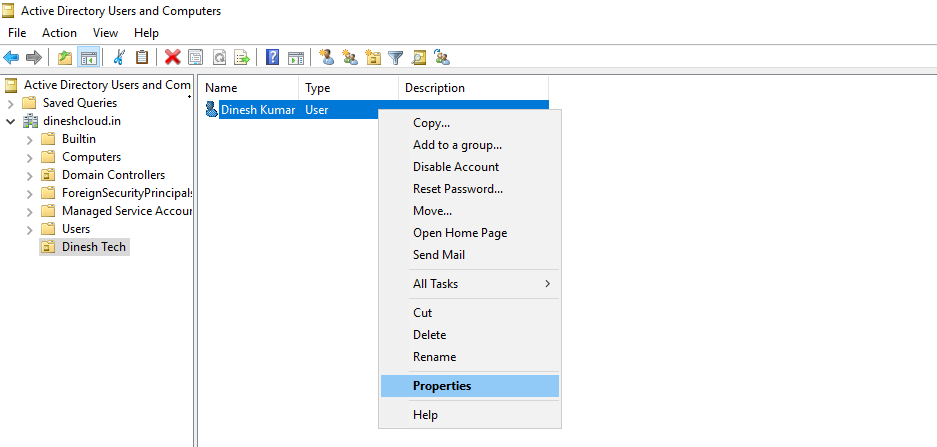
Modify Attributes: You can edit details such as Contact Information, Member Of (for group membership), and Profile settings.
Creating Groups
Step 1: Create a New Group
Open Active Directory Users and Computers
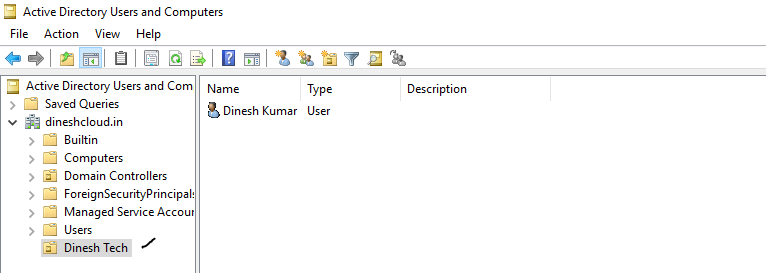
Navigate to the Desired OU: Select the OU where you want to create the group.
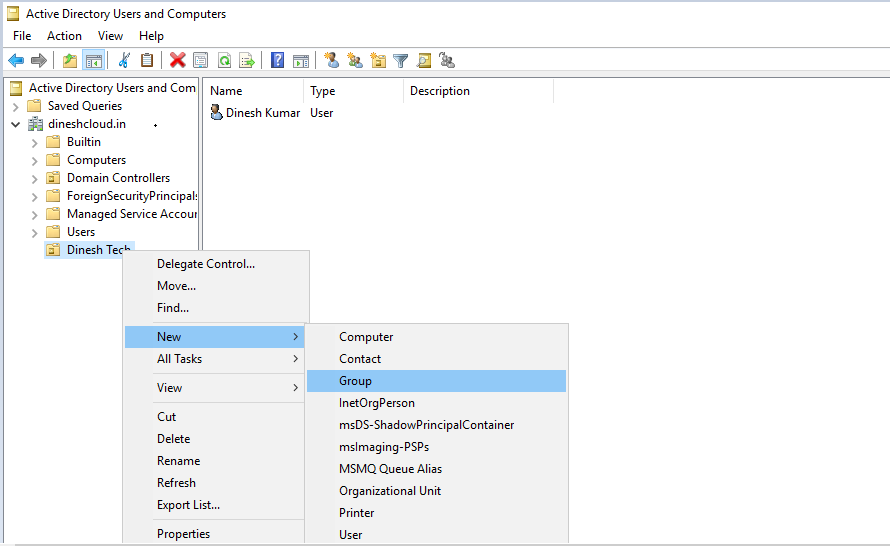
Create Group:
- Right-click the OU, select New > Group.
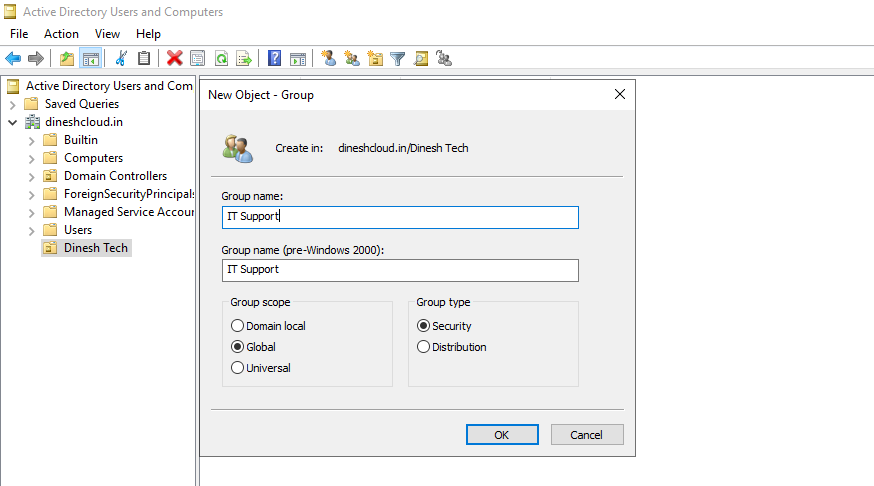
Enter a Group name and select the Group scope (Global, Domain Local, or Universal) and Group type (Security or Distribution).
- Click OK to create the group.
Step 2: Add Members to the Group
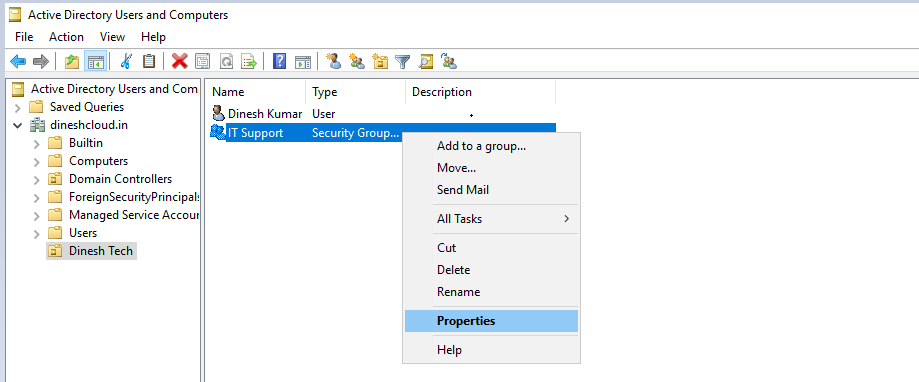
Edit Group Membership:
- Right-click on the group and select Properties.
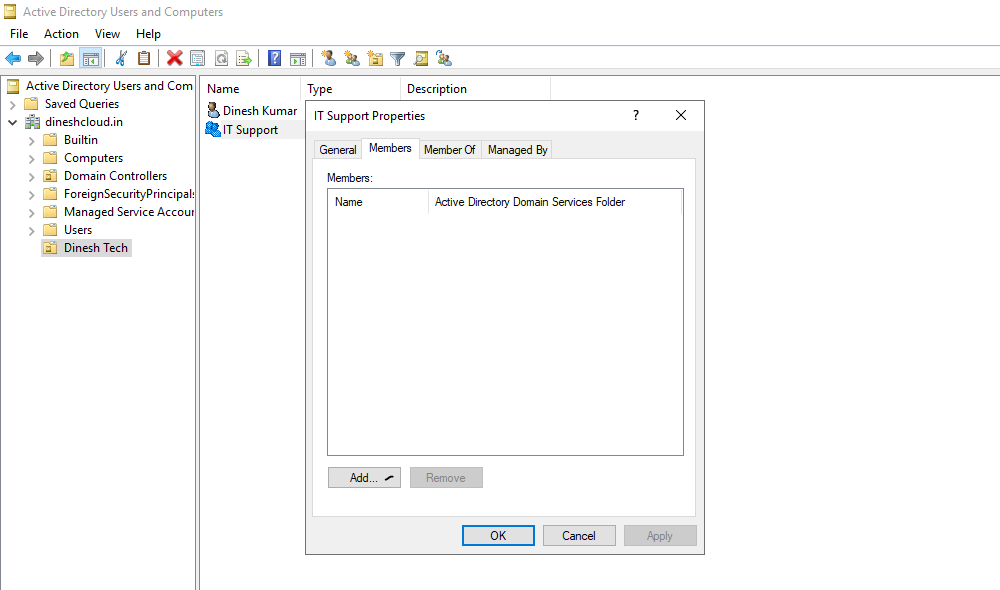
Go to the Members tab and click Add.
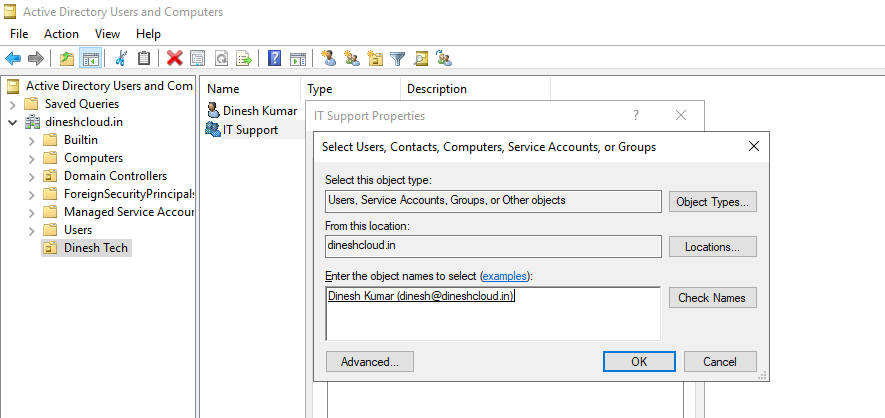
Enter the names of users or other groups to add as members. > Click OK to update the group membership.
Conclusion
Configuring Active Directory is a fundamental task for managing a Windows Server environment. By setting up user accounts and groups, you can control access to resources and enforce security policies effectively. Regularly review and maintain your AD configuration to ensure it meets the needs of your organization and supports your IT infrastructure.
Subscribe to my newsletter
Read articles from Dinesh Kumar K directly inside your inbox. Subscribe to the newsletter, and don't miss out.
Written by

Dinesh Kumar K
Dinesh Kumar K
Hi there! I'm Dinesh, a passionate Cloud and DevOps enthusiast. I love to dive into the latest new technologies and sharing my journey through blog.