How to Create a Virtual Network and Deploy an NGINX Web Server on Azure
 Alla Yasheela
Table of contents
- 1. Create a Virtual Network (VNet)
- 2. How to Add a DNAT Rule for Your Azure Firewall
- 3. Configure DNAT Rule
- 4. Create a Virtual Machine (VM) with NGINX
- 5. Connect to Your VM Using Azure Bastion
- 6. Install and Configure Nginx on Ubuntu
- Step 1: Update Package Lists
- Step 2: Install Nginx
- Step 3: Start Nginx Service
- Step 4: Create HTML File
- Restart Nginx
- Conclusion
In this blog post, we'll walk through the steps to create a Virtual Network (VNet), deploy a Virtual Machine (VM) with NGINX, and connect it securely using Azure Bastion. This guide is designed for beginners, so we'll keep things straightforward and easy to follow.
1. Create a Virtual Network (VNet)
A Virtual Network (VNet) in Azure allows your resources, like virtual machines, to communicate with each other securely.
Steps to Create a VNet:
Log in to Azure Portal:
- Go to portal.azure.com and log in with your Azure account.
Navigate to Virtual Networks:
In the left-hand menu, click on "Create a resource," then search for "Virtual Network" and select it.
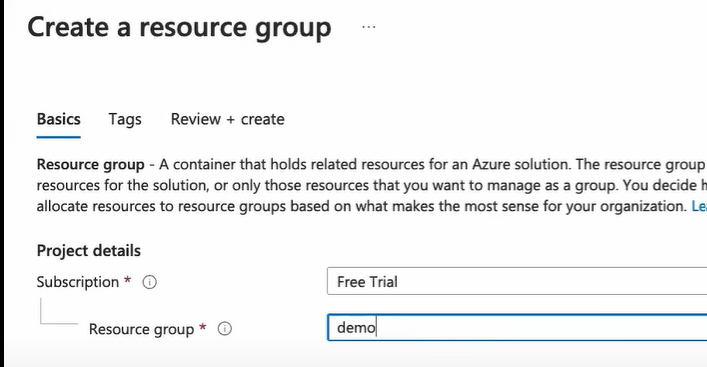
must*
Create the VNet:
Click "Create" and fill in the details:
Name: Give your VNet a name (e.g.,
MyVNet).Region: Choose the region closest to you.
Address Space: Set the IP range (e.g.,
10.0.0.0/16).Subnets: Define a subnet (e.g.,
10.0.1.0/24for your first subnet).
Click "Review + create," then "Create."
Your VNet is now ready!

don't forget to add this.
2. How to Add a DNAT Rule for Your Azure Firewall
In this section, we'll extend our setup by adding a DNAT (Destination Network Address Translation) rule to our Azure Firewall. This rule will allow external users to access your NGINX web server securely by forwarding traffic from a public IP to the private IP of your VM.
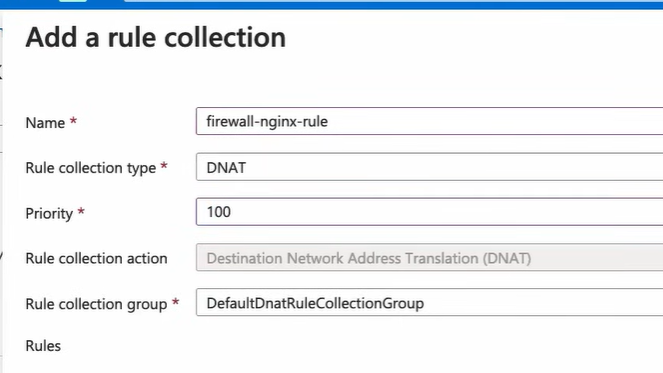
1. Set Up Azure Firewall
Before adding a DNAT rule, ensure that your Azure Firewall is deployed within your Virtual Network (VNet). If you haven't set it up yet, follow these steps:
Deploy Azure Firewall:
Go to the Azure Portal, click on "Create a resource," and search for "Firewall."
Click "Create" and fill in the required details:
Name: Give your firewall a name (e.g.,
MyAzureFirewall).Region: Choose the same region as your VNet.
Virtual Network: Select the VNet where your NGINX server is hosted.
Public IP: Create or use an existing public IP address.
Create the Firewall:
- Click "Review + create" and then "Create." Wait for the deployment to complete.
3. Configure DNAT Rule
Now that the firewall is set up, you can create a DNAT rule to forward traffic from the firewall's public IP to your NGINX VM.
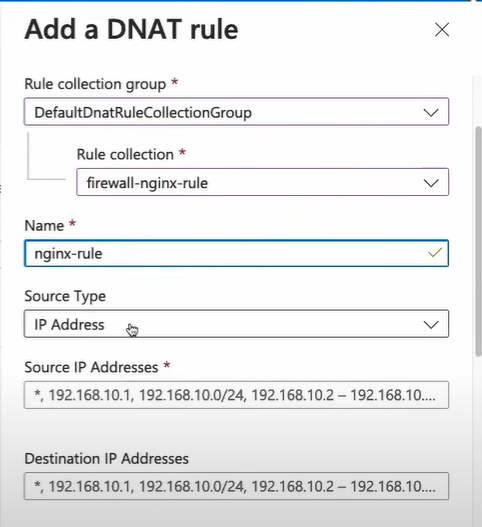
add your Source IP address and destination (vm) address
Steps to Create a DNAT Rule:
Navigate to the Firewall:
- Go to the Azure Portal and select "Firewall" from the menu, then click on your deployed firewall.
Add a DNAT Rule:
- In the firewall's overview page, click on "Rules" under the "Settings" section, then select "DNAT."
Configure the DNAT Rule:
Click "Add a DNAT rule collection" and fill in the details:
Name: Give the rule collection a name (e.g.,
NginxDNATRuleCollection).Priority: Set the priority (lower numbers have higher priority).
Rule Name: Name the rule (e.g.,
NginxDNATRule).Source Address: Set to
*to allow traffic from any external IP or specify a particular IP range.Destination Address: Enter the public IP of the Azure Firewall.
Destination Ports: Set to
80(HTTP) or443(HTTPS) depending on your configuration.Translated Address: Enter the private IP address of your NGINX VM (you can find this in the VM's network settings).
Translated Port: Set this to
80(for HTTP) or443(for HTTPS).Protocol: Choose "TCP."
Save the Rule:
- Click "Save" to apply the DNAT rule.
4. Create a Virtual Machine (VM) with NGINX
Now, let's create a VM that will host your NGINX web server.
Steps to Create a VM:
Navigate to Virtual Machines:
- In the Azure Portal, click on "Virtual Machines" and then "Create."
Configure the VM:
Basics Tab:
Name: Give your VM a name (e.g.,
NginxWebServer).Region: Choose the same region as your VNet.
Image: Select
Ubuntu Server 24.04 LTS(a popular Linux distribution).Size: Choose an appropriate size (e.g.,
B1sfor a small, cost-effective VM).Authentication: Select "SSH public key."
Username: Choose a username (e.g.,
azureuser).SSH Key: Generate a new key pair and download the private key (.pem file).
Networking Tab:
Virtual Network: Select the VNet you created earlier.
Subnet: Choose the default subnet.
Public IP: Ensure it is set to "Enabled" (this gives your VM a public IP address).
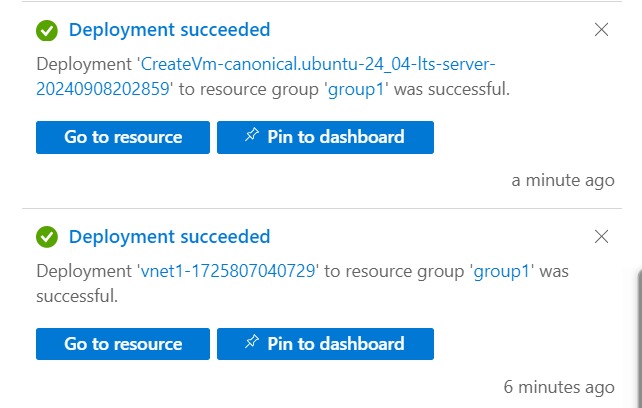
Review + Create: Review your settings and click "Create."
Wait for Deployment:
Azure will now create your VM, which may take a few minutes.
5. Connect to Your VM Using Azure Bastion
Azure Bastion allows you to securely connect to your VM without exposing it directly to the internet.
Steps to Connect Using Bastion:
Navigate to Bastion:
- Go to your VM's overview page, and in the "Connect" section, select "Bastion."
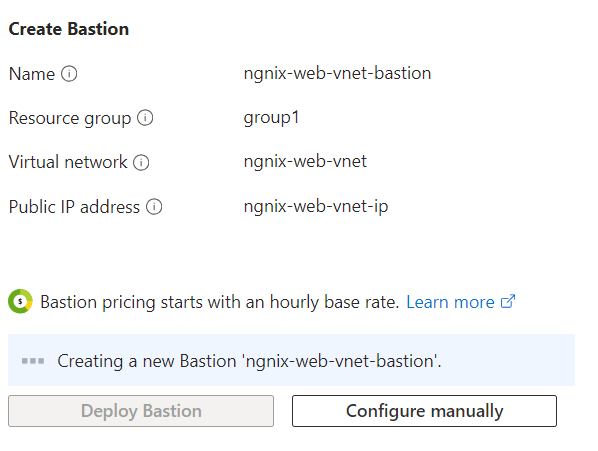
Set Up Bastion:
If Bastion is not set up yet, click "Create Bastion" and fill in the required details:
- Subnet: Ensure a subnet named
AzureBastionSubnetexists (Azure will prompt you to create one if needed).
- Subnet: Ensure a subnet named
Click "Create."
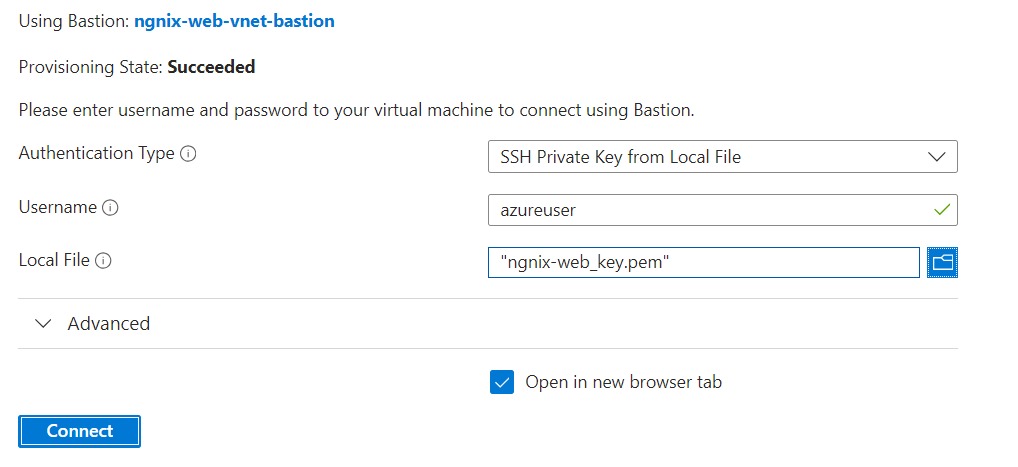
Connect to VM:
Once Bastion is set up, enter the username (
azureuser) and use your SSH key to connect.Click "Connect," and a browser-based terminal will open.
6. Install and Configure Nginx on Ubuntu
Step 1: Update Package Lists
Before installing any new software, it's a good practice to update the package lists to ensure you get the latest version.
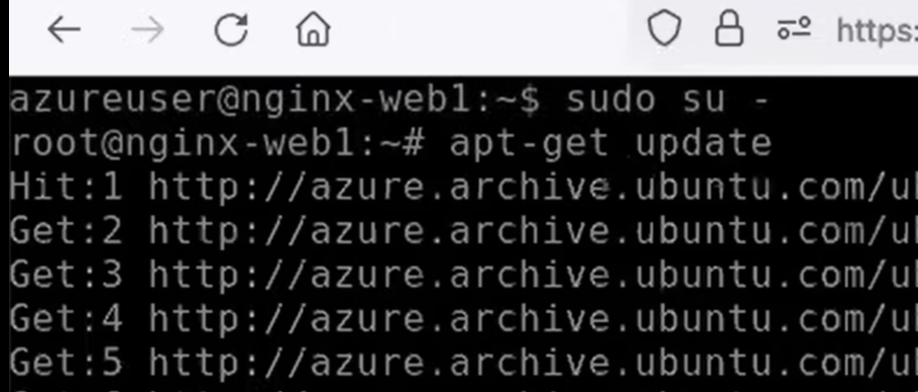
it should look like this
sudo apt update
sudo apt upgrade
Step 2: Install Nginx
Install Nginx using the following command:
sudo apt install nginx
Step 3: Start Nginx Service
sudo systemctl start nginx
Step 4: Create HTML File
sudo vim /var/www/html/index.html
Add the HTML content, for example.
<!DOCTYPE html>
<html lang="en">
<head>
    <meta charset="UTF-8">
    <meta name="viewport" content="width=device-width, initial-scale=1.0">
    <title>Demo Page</title>
</head>
<body>
    <h1> I Learnt how networking works in Azure today</h1>
</body>
</html>
Save the file.
Restart Nginx
sudo systemctl restart nginx
Conclusion
Congratulations! You’ve successfully created a Virtual Network, deployed a Virtual Machine with NGINX, and connected to it securely using Azure Bastion. These steps form the foundation of setting up a web server in Azure, and you can build on this by exploring more advanced configurations and services.
Feel free to share your experience or ask questions in the comments!
Happy learning :)
Subscribe to my newsletter
Read articles from Alla Yasheela directly inside your inbox. Subscribe to the newsletter, and don't miss out.
Written by

Alla Yasheela
Alla Yasheela
I'm Yasheela, an undergraduate with a deep interest in DevOps, and cloud technologies. Currently working on exciting projects on all things DevOps. I’m passionate about simplifying complex concepts and sharing practical insights. Through my Hashnode blog, I document my learning journey, from building scalable applications to mastering cloud services, with the goal of empowering others to grow their tech skills. Let's Learn Together !!