Enhance Active Directory: Adding an Additional Domain Controller in Windows Server
 Dinesh Kumar K
Table of contents
In any growing IT infrastructure, adding an additional domain controller (ADC) enhances redundancy and load balancing for Active Directory (AD). This blog walks you through the step-by-step process of configuring an additional domain controller on Windows Server.
Why Add an Additional Domain Controller?
Redundancy: Having more than one domain controller ensures continued authentication and access if one goes offline.
Load Balancing: Distributes authentication requests across multiple domain controllers.
Improved Security: Ensures AD services are always available, enhancing overall security.
Prerequisites
Before starting, ensure the following:
A Windows Server is installed and properly configured with the latest updates.
You have access to an existing domain and a Domain Admin account.
The new server is joined to the domain.
Network connectivity between the servers.
Static IP address configured for the new domain controller.
Steps to Configure an Additional Domain Controller
Step 1: Prepare the Server for the Additional Domain Controller
To begin, install Windows Server on the new server and ensure it’s connected to the same network as the existing domain controller.
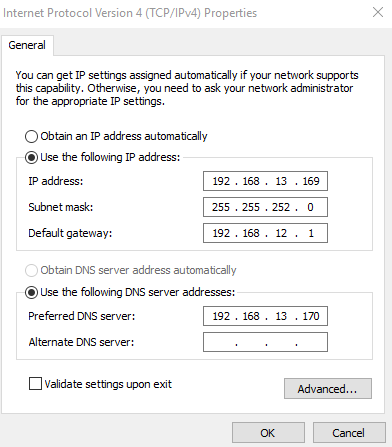
Open network adapter and select Properties.

Select Internet Protocol Version 4 (TCP/IPv4), click Properties, and configure a static IP address. > Set the Preferred DNS server to the IP address of your existing domain controller.
Step 2: Install the Active Directory Domain Services (AD DS) Role
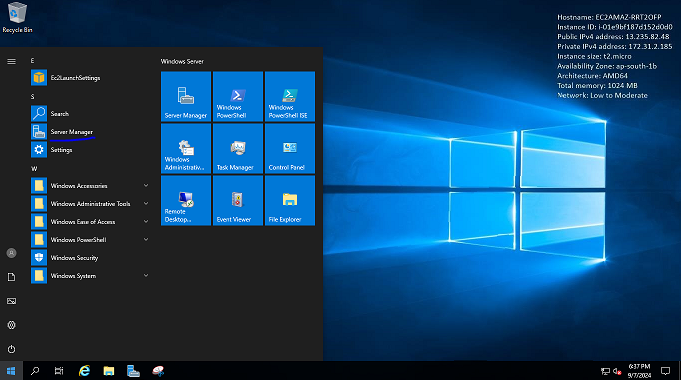
Open Server Manager
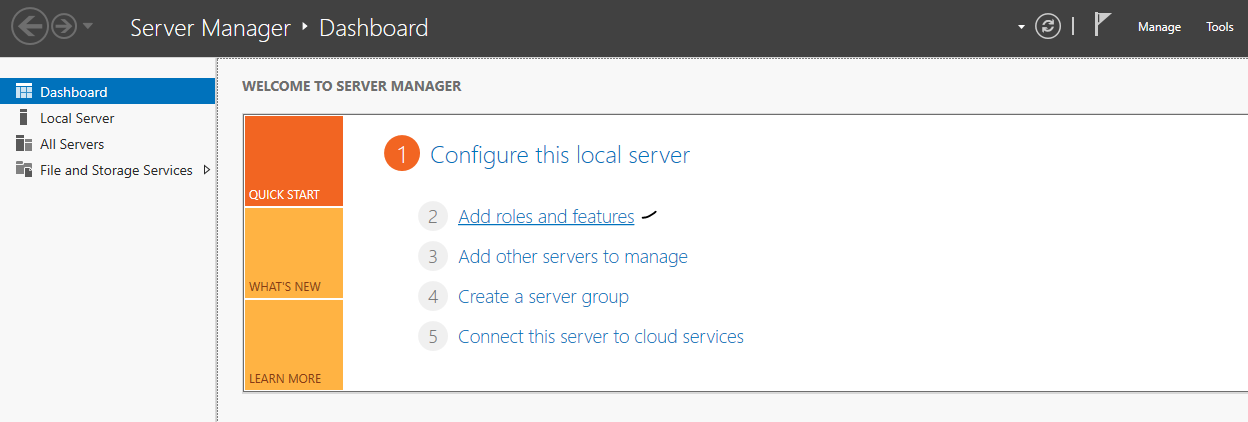
Click on Add roles and features.
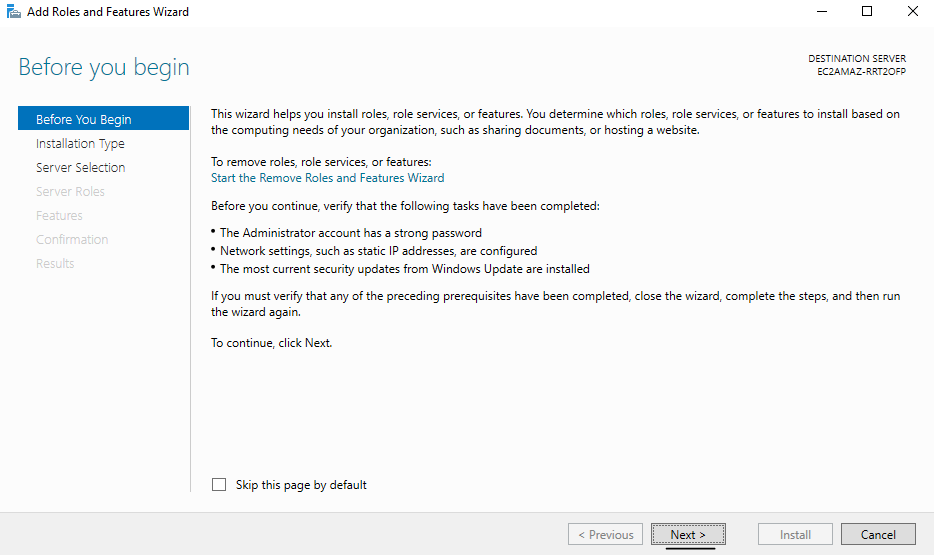
Click Next until you reach the Server Roles page.
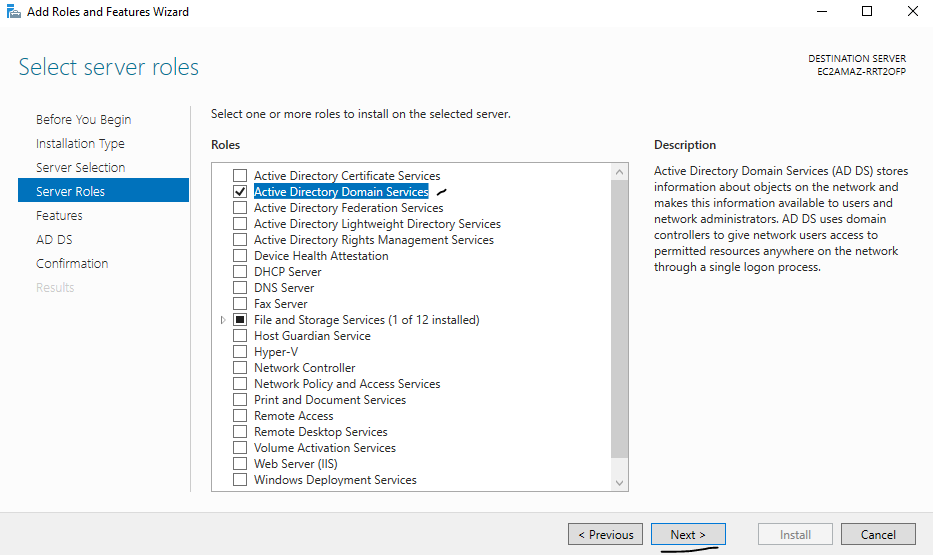
In the Server Roles window, check the box for Active Directory Domain Services (AD DS).
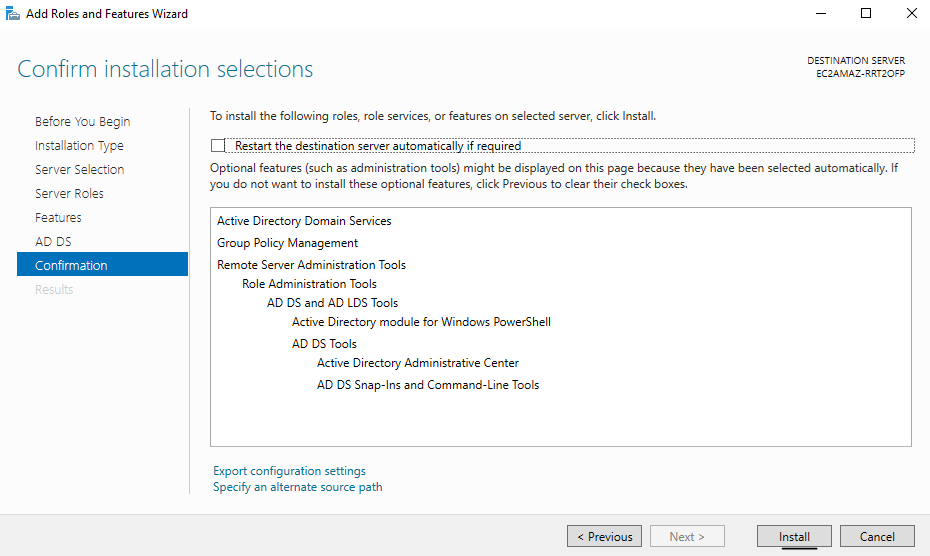
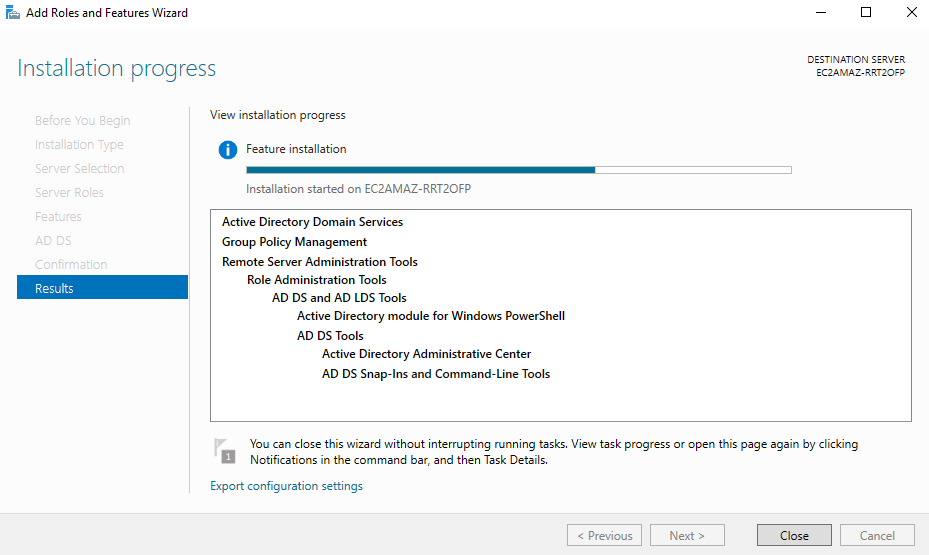
Complete the Wizard: Click Next through the remaining screens and then Install.
Step 3: Promote the Server to a Domain Controller
Once the role is installed, the server must be promoted to a domain controller.
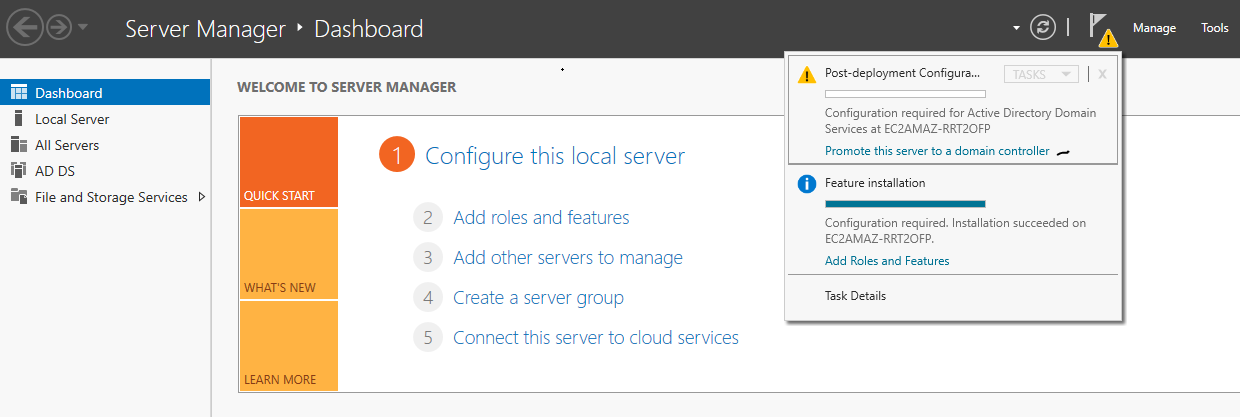
In Server Manager, click on the flag icon in the top right and choose Promote this server to a domain controller.
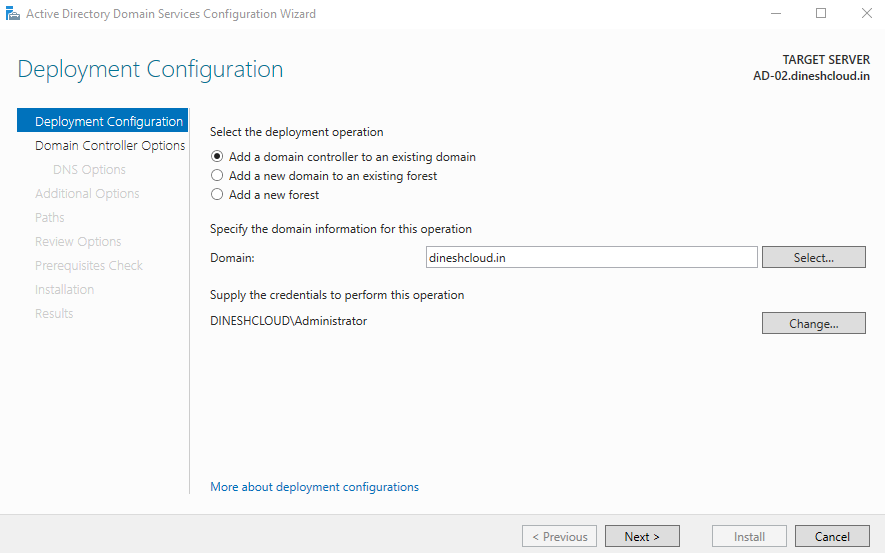
In the Deployment Configuration window, select Add a domain controller to an existing domain.
Enter the domain name (e.g., dineshcloud.in) and click Select. Provide domain admin credentials to continue.
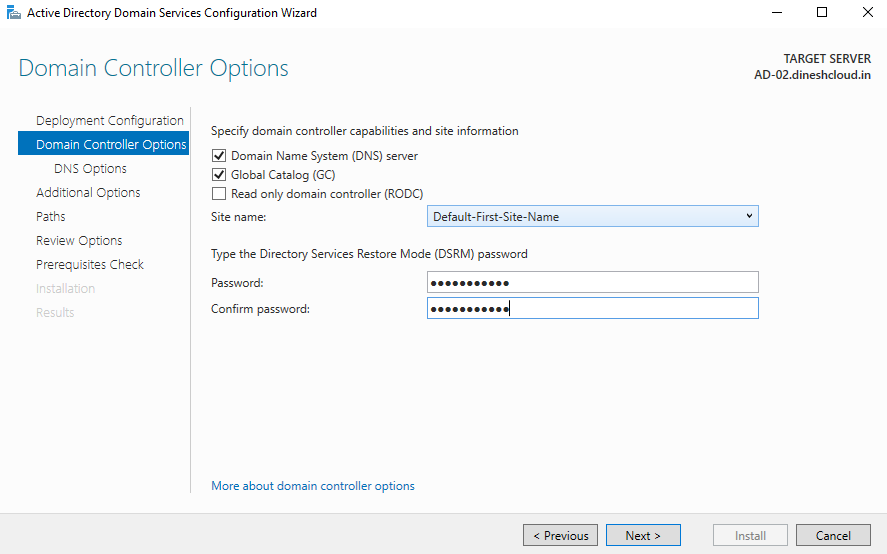
In the Domain Controller Options window:
DNS: Check if you want this server to act as a DNS server.
Global Catalog (GC): Ensure this box is checked.
Read-only domain controller (RODC): Leave unchecked for a writable domain controller.
Set the Directory Services Restore Mode (DSRM) password.
Click Next
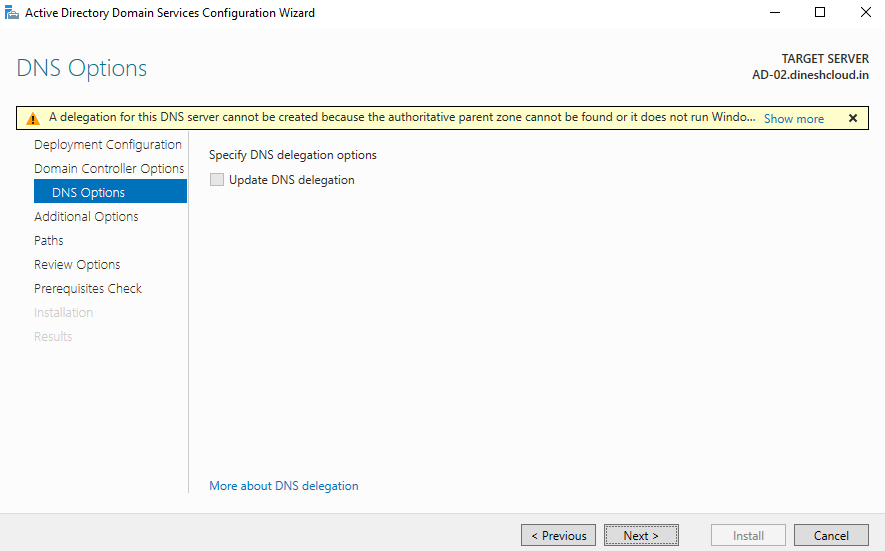
Click Next to proceed through the DNS delegation warning (if applicable).
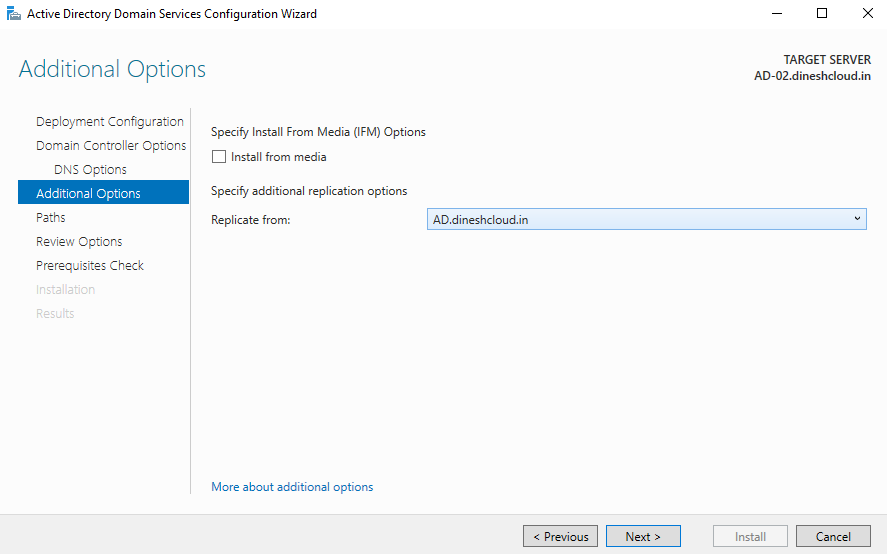
In the Additional Options window, select the replication domain controller or leave it as default.
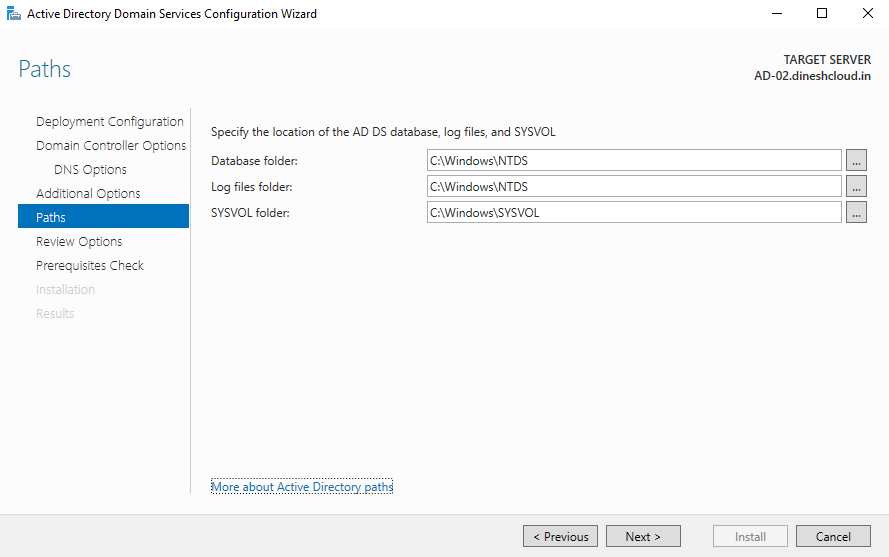
Choose the default file paths for AD database, log files, and SYSVOL unless you need to change them.
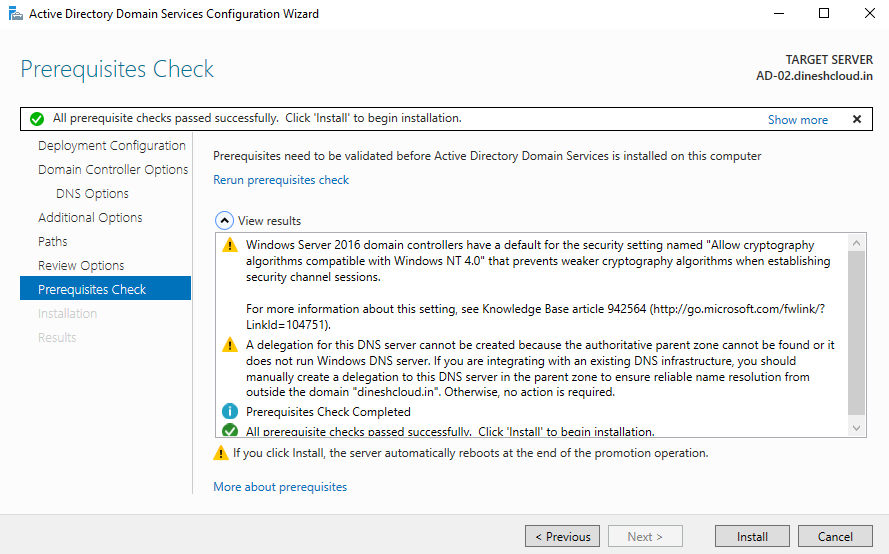
Complete the wizard and click Install after the Prerequisites Check is successful.
Step 4: Verify and Reboot
The server will automatically reboot after the installation completes.
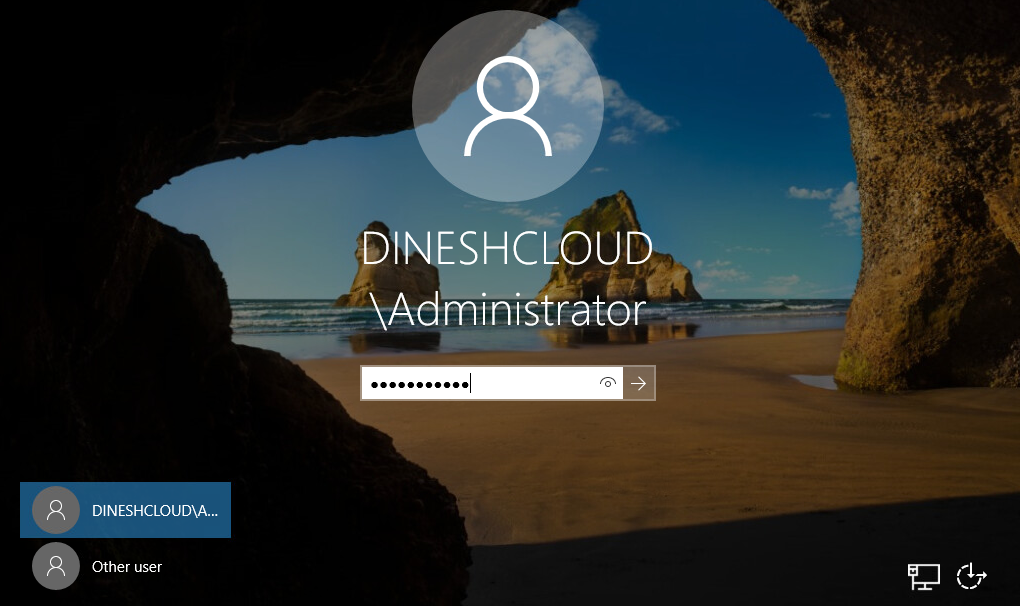
Log in to the server using domain credentials after the reboot.
Step 5: Validate Domain Controller Installation
Once the server is up, it's essential to verify that it has been properly added as a domain controller.
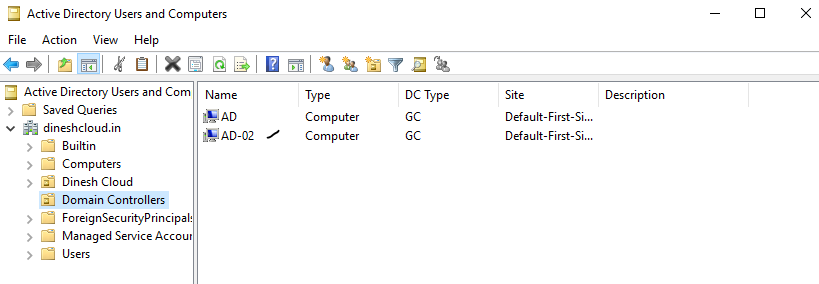
Open Active Directory Users and Computers (ADUC) on the new server.

Ensure that the new server appears under Domain Controllers in the AD structure.
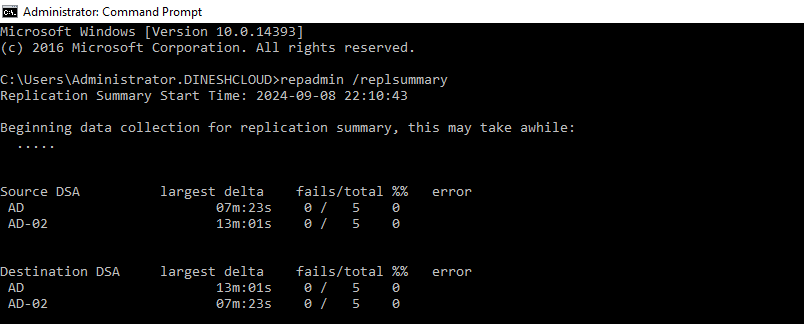
Replication Check:
Open Command Prompt as an administrator > Run the following command to check AD replication
repadmin /replsummary
Conclusion
Adding an additional domain controller to your Windows Server 2016 environment is a crucial step in ensuring high availability, fault tolerance, and load balancing for your Active Directory infrastructure. By following these steps, you can effectively enhance your network's security and performance.
Subscribe to my newsletter
Read articles from Dinesh Kumar K directly inside your inbox. Subscribe to the newsletter, and don't miss out.
Written by

Dinesh Kumar K
Dinesh Kumar K
Hi there! I'm Dinesh, a passionate Cloud and DevOps enthusiast. I love to dive into the latest new technologies and sharing my journey through blog.