Compose Multiplatform Navigation Solutions - Voyager
 Michał Konkel
In the upcoming posts, I will thoroughly explore several popular navigation libraries used in Compose Multiplatform projects. Today's post is about the Voyager library. Choosing a navigation library for your Compose Multiplatform project can be a challenging task due to the variety of options available, each with its own unique features and benefits.
Selecting the right navigation library is crucial as it impacts the structure and flow of your application. An ideal navigation library should offer flexibility, ease of use, and robust performance to handle complex navigation scenarios. In this series, I aim to dive deep into the functionalities and advantages of different libraries to help you make an informed decision.
Showcase application assumptions:
Application should allow us to navigate from one screen to another.
Application should allow to pass some parameters from first to second screen.
Application should handle the screen rotation without loosing data.
Application should handle the Tab Navigation.
Application should handle the async operations with coroutines.
The project is available in the GitHub repository.
Dependencies
Base project setup as always is made with Kotlin Multiplatform Wizard, we also need to add some Voyager as it is the core thing that we would like to examine.
[versions]
voyager = "1.1.0-alpha04"

[libraries]
voyager - navigator = { module = "cafe.adriel.voyager:voyager-navigator", version.ref = "voyager" }
voyager - screenmodel = { module = "cafe.adriel.voyager:voyager-screenmodel", version.ref = "voyager" }
voyager - transitions = { module = "cafe.adriel.voyager:voyager-transitions", version.ref = "voyager" }
commonMain.dependencies {
    ...
    implementation(libs.voyager.navigator)
    implementation(libs.voyager.screenmodel)
    implementation(libs.voyager.transitions)
}
Voyager Introduction
A multiplatform navigation library built specifically for, and seamlessly integrated with, Jetpack Compose. Voyager provides a robust and flexible solution for managing navigation in your applications. It supports various navigation patterns, including stack-based navigation, tab navigation, and more.
Screens
The basic structure for Voyager is the Screen interface. Every screen in our application is essentially a class that includes a @Composable function responsible for providing the content to be displayed. Each screen-related class must implement this interface. Upon closer examination, we can see that the Screen interface is a straightforward contract with only one method to implement, which makes it easy to understand and use.
For screens that do not require any input parameters, we can use either an object or a class. This allows us to define simple, reusable screens without the need for additional setup. On the other hand, if a screen needs to accept some parameters, we can use a data class. This approach is particularly useful when we need to pass data between different screens, ensuring that each screen can be customized based on the provided parameters.
Let's add the screens with basic UI to the project
class FirstScreen : Screen {

    @Composable
    override fun Content() {
        Column(
            modifier = Modifier.fillMaxSize(),
            horizontalAlignment = Alignment.CenterHorizontally,
            verticalArrangement = Arrangement.Center
        ) {
            Text("First screen")
            Button(onClick = { /*TODO*/ }) {
                Text("Second Screen")
            }
        }
    }
}
data class SecondScreen(val greetings: String) : Screen {

    @Composable
    override fun Content() {
        Column(
            modifier = Modifier.fillMaxSize(),
            horizontalAlignment = Alignment.CenterHorizontally,
            verticalArrangement = Arrangement.Center
        ) {
            Text("First screen")
            Spacer(modifier = Modifier.height(16.dp))
            Text("Greetings: $greetings}")
            Button(onClick = { /*TODO*/ }) {
                Text("Go Back")
            }
        }
    }
}
Linear Navigation
The second most important component in Voyager is the Navigator, which is a Compose function built upon the internals of the Compose framework. The Navigator plays a crucial role in managing various aspects of the application. It handles the lifecycle, backPress, StateRestoration and the navigation.
To obtain the navigator in any Screen, we need to use the LocalNavigator within the local composition. This is similar to how we use other elements in the CompositionLocal. The LocalNavigator must be provided at the root of the composition, typically within the App() function. By doing this, we ensure that the navigator is accessible throughout the entire composition tree, allowing for seamless navigation between different screens. This setup is essential for maintaining a consistent and manageable navigation structure in our application.
Let's obtain the navigator and push the SecondScreen from the FirstScreen. To achieve this, we need to instantiate the second screen within the function call. This process involves creating an instance of the SecondScreen class and then using the push method to navigate to it.
One interesting aspect to note is that push is an infix function. In Kotlin, infix functions allow us to call functions in a more natural and readable way, without the need for dots and parentheses. This makes the code cleaner and easier to understand. For example, instead of writing navigator.push(SecondScreen()), we can simply write navigator push SecondScreen().
This infix notation enhances the readability of the code, making the navigation flow more intuitive and straightforward. By leveraging this feature, we can create a more elegant and maintainable navigation structure within our Compose application.
@Composable
private fun FirstScreenButton() {
    val navigator = LocalNavigator.currentOrThrow

    Button(
        onClick = {
            navigator.push(SecondScreen("Hello from First Screen"))
            // infix call:
            // navigator push SecondScreen("Hello from First Screen")
        }
    ) {
        Text("Second Screen")
    }
}
We can achieve the same functionality with the SecondScreen to navigate back to the FirstScreen using the pop function. This involves calling the pop method on the navigator instance, which effectively removes the current screen from the stack and returns to the previous one.
@Composable
private fun SecondScreenButton() {
    val navigator = LocalNavigator.currentOrThrow

    Button(
        onClick = {
            navigator.pop()
        }
    ) {
        Text("Go Back")
    }
}
The last crucial step is to ensure the proper creation of the navigator to prevent any null-pointer exceptions within the composition. The flexible approach provided by Voyager allows us to select from a variety of default screen transitions. For the purpose of this post, we will utilize the SlideTransition(), which offers a smooth and visually appealing way to switch between screens.
@Composable
fun App() {
    MaterialTheme {
        Navigator(FirstScreen()) { navigator ->
            SlideTransition(navigator)
        }
    }
}
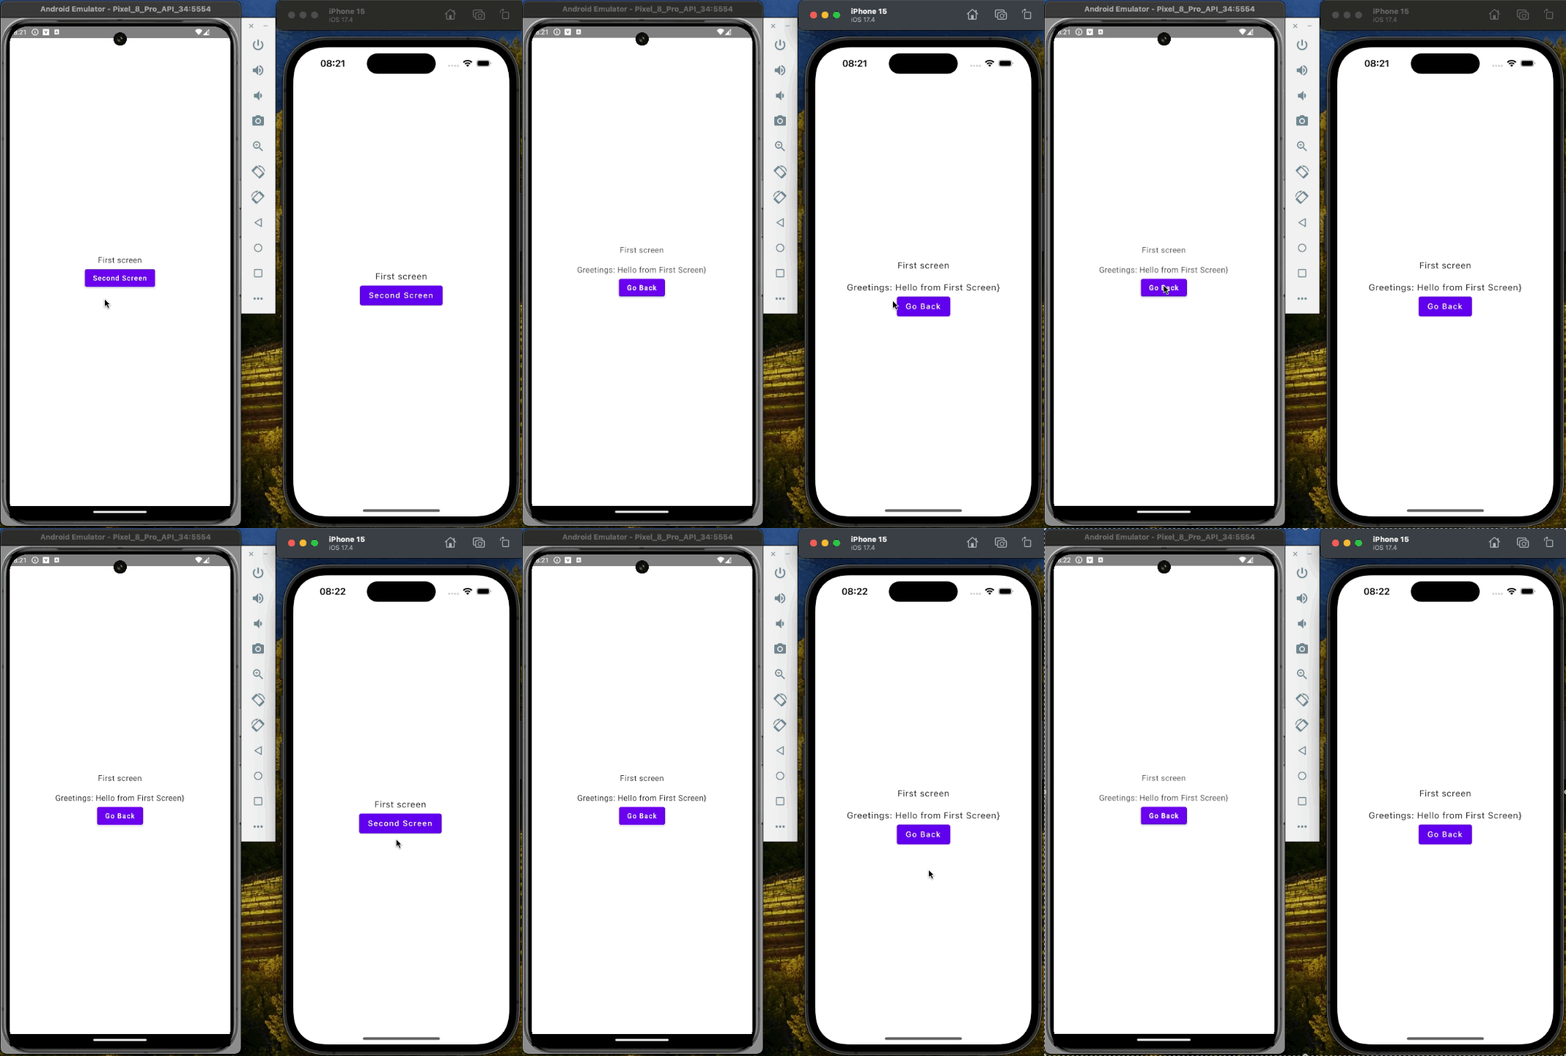
The initial configuration is up and running, we can navigate between the screens and the data is preserved during the screen rotation. Let's run the project on both Android and iOS to see the results.

Screen Model
It is worth mentioning that compared to the Decompose library, Voyager also has its own ViewModel equivalent, called the ScreenModel. This is an important feature to highlight because it provides a similar functionality to what many developers are already familiar with in other frameworks. However, with some recent changes in compose multiplatform, the ViewModels were moved to the common code. This means that you now have more flexibility in your approach and can choose the one that best fits your needs and project requirements.
For the sake of this post, I will use ScreenModel from the Voyager library. The ScreenModel is designed to store and manage UI-related data with lifecycle awareness, ensuring that your data survives configuration changes such as screen rotations. This is crucial for maintaining a consistent user experience across different device states.
Unlike the ViewModel, the ScreenModel is just an interface. This means that it provides a more lightweight and flexible way to manage your UI-related data. You can create a ScreenModel only from the Screen component, which integrates seamlessly with the rest of the Voyager library. This integration allows you to take full advantage of Voyager's navigation and state management capabilities, making it easier to build robust and maintainable applications.
class FirstScreenModel : ScreenModel {
    val screenTitle = "First screen"
    val buttonText = "Second Screen"
    val greetings = "Hello from First Screen"
}
class FirstScreen : Screen {

    @Composable
    override fun Content() {
        val screenModel = rememberScreenModel { FirstScreenModel() }
        ...
        Text(screenModel.screenTitle)
    }
}
Now, if we have a text input and want to store the value, we should use state inside the ScreenModel. This way, it can be retained after screen rotation.
Tab Navigation
To use the Tab navigation we need to add another library to our project voyager-tab-navigator.
[libraries]
voyager - tabs = { module = "cafe.adriel.voyager:voyager-tab-navigator", version.ref = "voyager" }
commonMain.dependencies {
    ...
    implementation(libs.voyager.tabs)
}
When we want to create Tab we need to usr thr Tab interface instead of previously seen Screen interface. The idea behind tabs is the same. Nevertheless, TabNavigator don't support the backPress and Stack API. With the Tab interface we need to implement 2 methods:
Content()- the composable content of the taboptions()- the informations about current tab icon, title and index
Let's create the FirstTab and implement all the methods, with some default values.
object FirstTab : Tab {
    @Composable
    override fun Content() {
        Column {
            Text("First Tab")
        }
    }

    override val options: TabOptions
        @Composable
        get() {
            val title = remember { "First" }
            val icon = rememberVectorPainter(Icons.Default.Home)

            return remember {
                TabOptions(
                    index = 0u,
                    title = title,
                    icon = icon
                )
            }
        }
}
The SecondTab should look exactly the same but with different content.
object SecondTab : Tab {
    @Composable
    override fun Content() {
        Column {
            Text("Second Tab")
        }
    }

    override val options: TabOptions
        @Composable
        get() {
            val title = remember { "Second" }
            val icon = rememberVectorPainter(Icons.Default.AccountBox)

            return remember {
                TabOptions(
                    index = 1u,
                    title = title,
                    icon = icon
                )
            }
        }
}
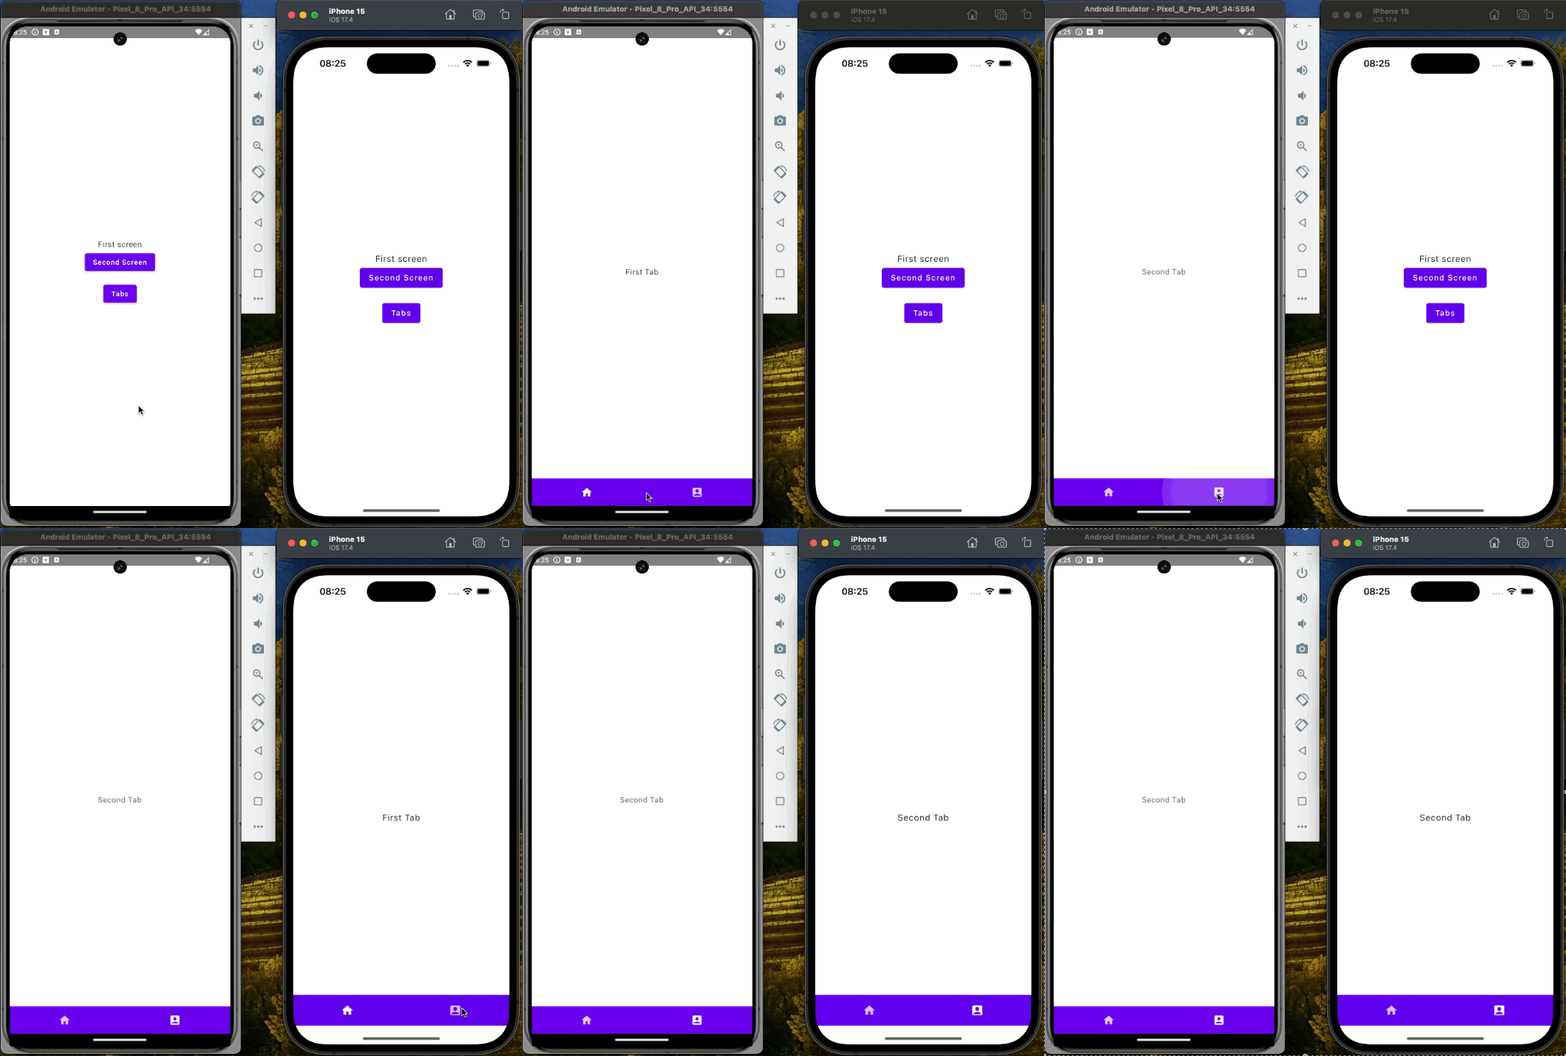
The final step involves creating a container for the tabs. To achieve this, we can follow the steps outlined at the beginning of this post and create a TabScreen. Within this screen, we will utilize the Scaffold function, which provides a basic layout structure. The bottomBar parameter of the Scaffold will be assigned a component called BottomNavigation from the Material library. This component is essential as it provides the navigation bar at the bottom of the screen, allowing users to switch between different tabs easily.
To ensure proper navigation and state management, the entire content should be enclosed within the TabNavigator function. This function is responsible for handling the navigation logic between the tabs, ensuring that the correct tab content is displayed when a user interacts with the BottomNavigation bar.
By following these steps, we can create a robust and user-friendly tabbed interface that leverages the power of Jetpack Compose and Material Design components. This setup not only provides a clean and organized layout but also ensures that the application remains responsive and intuitive for users.
class TabScreen : Screen {
    @Composable
    override fun Content() {
        TabNavigator(FirstTab) {
            Scaffold(
                bottomBar = {
                    BottomNavigation {
                       // items
                    }
                }
            ) {
              //Content
            }
        }
    }
}
We can create the helper function TabNavigationItem() that will be using the LocalTabNavigator to navigate between the tabs and BottomNavigationItem for creating the items.
@Composable
private fun RowScope.TabNavigationItem(tab: Tab) {
    val tabNavigator = LocalTabNavigator.current

    BottomNavigationItem(
        selected = tabNavigator.current == tab,
        onClick = { tabNavigator.current = tab },
        icon = {
            tab.options.icon?.let {
                Icon(painter = it, contentDescription = tab.options.title)
            }
        }
    )
}
Now we can use the helper function.
BottomNavigation {
    TabNavigationItem(FirstTab)
    TabNavigationItem(SecondTab)
}
The content of our Scaffold function should display the current tab. To achieve this, we need to use Voyager's function CurrentTab(), which will dynamically render the content associated with the currently selected tab. This function ensures that the user interface updates seamlessly as users navigate between different tabs.
@Composable
override fun Content() {
    Scaffold(
        bottomBar = {
            ...
        }
    ) {
        CurrentTab()
    }
}
For the convenience we should add the entrypoint to any existing screen.
@Composable
private fun TabScreenButton() {
    val navigator = LocalNavigator.currentOrThrow

    Button(onClick = { navigator.push(TabScreen()) }) {
        Text("Tabs")
    }
}

Coroutines
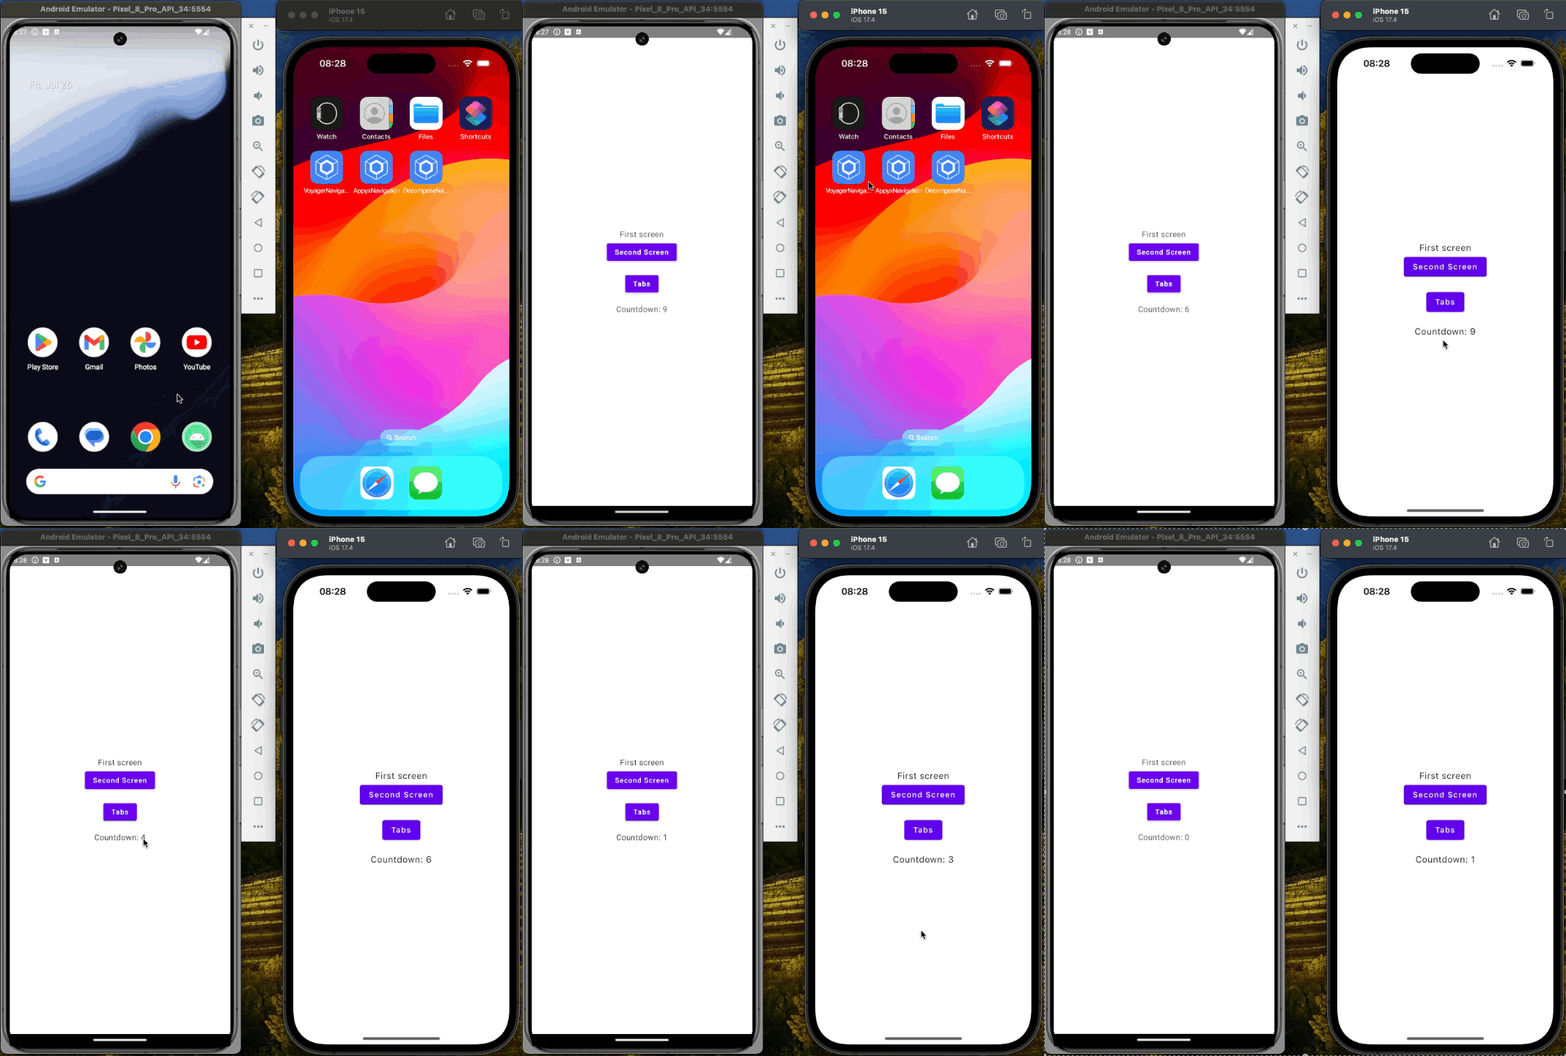
The ScreenModel offers an efficient and straightforward method to manage asynchronous operations using coroutines. By following the detailed documentation, we can implement a countdown timer to see how this integration works in practice. The Screen class provides a screenModelScope, which is a coroutine scope that is automatically cancelled when the screen is disposed of. This ensures that any ongoing operations are properly cleaned up, preventing memory leaks and other potential issues.
To illustrate, let's create a simple countdown timer within the ScreenModel. First, we define a coroutine that will handle the countdown logic. This coroutine will decrement a timer value every second and update the UI accordingly
class FirstScreenModel : ScreenModel {
    ...
    val countDownText = mutableStateOf<String>("0")

    init {
        screenModelScope.launch {
            for (i in 10 downTo 0) {
                countDownText.value = i.toString()
                delay(1000)
            }
        }
    }
}

Summary
The Voyager is a great library for navigation in Compose Multiplatform projects. It is easy to use and provides various ways to navigate between screens. The library is tightly coupled with Jetpack Compose and can use ScreenModel or a ViewModel for handling the business logic. This is really flexible and can speed up the process if you have used such an approach in the past.
If you are looking for a navigation library for your Compose Multiplatform project, you definitely should give it a try!
In this series, I'll explore popular navigation libraries for Compose Multiplatform projects, starting with Voyager. Voyager offers a robust, flexible solution for managing navigation, supporting various patterns like stack-based and tab navigation. This article covers setting up Voyager, creating screens, handling navigation transitions, screen rotations, and tab navigation, and utilizing ScreenModel for state management and async operations using coroutines. By the end, you'll understand how to effectively use Voyager to navigate.
Subscribe to my newsletter
Read articles from Michał Konkel directly inside your inbox. Subscribe to the newsletter, and don't miss out.
Written by
