Create a Real-Time Face Emotion Detector with Python and Deep Learning
 ByteScrum Technologies
In the modern era, Artificial Intelligence (AI) is becoming deeply integrated into everyday applications. One of the most fascinating applications of AI is Facial Emotion Recognition, where a computer system can identify emotions on human faces in real-time. This blog will guide you step by step on how to build a Python-based real-time facial emotion recognition application using Deep Learning and OpenCV.
By the end of this blog, you'll have a functional application that captures a live webcam feed, detects faces, and predicts the emotions using a pre-trained deep learning model. This system can recognize emotions like happiness, sadness, anger, and more. Whether you're a data scientist or an AI enthusiast, this project will be a fun and insightful way to explore deep learning.
1. Prerequisites
Before jumping into the coding part, let's make sure we have all the necessary tools and libraries installed. Here are the main libraries we will use:
TensorFlow: A popular deep learning library.
Keras: Simplifies deep learning model building.
OpenCV: Used for real-time image processing.
NumPy: Handles matrix operations.
dlib: Provides algorithms for detecting and analyzing human faces.
Run the following command in your terminal to install these dependencies:
pip install tensorflow keras opencv-python numpy dlib
# for mac users
brew install cmake
2. Understanding Facial Emotion Recognition
Facial Emotion Recognition involves detecting facial expressions and interpreting the emotion being conveyed. It's a crucial element in many applications such as:
Customer feedback analysis for user engagement.
Surveillance systems for detecting suspicious activities.
Interactive gaming and entertainment to enhance user experiences.
The primary goal of this project is to detect seven basic emotions:
Angry
Disgust
Fear
Happy
Sad
Surprise
Neutral
We will train a Convolutional Neural Network (CNN) to classify these emotions.
3. Dataset: FER-2013
To build any deep learning model, we need data to train the model. For this project, we'll use the FER-2013 dataset, which contains over 35,000 labeled grayscale images of human faces, each with a resolution of 48x48 pixels. Each image is labeled with one of the seven emotions.
You can download the dataset from Kaggle.
Once you've downloaded the dataset, place it in a folder where you can access it through your Python script.
4. Building the CNN Model for Emotion Detection
Now, let's start building the Convolutional Neural Network (CNN) to classify the emotions.
CNN is a type of deep learning model that is particularly good at handling image data. It extracts features from the images using layers of filters, and by doing so, it learns patterns that help classify the images.
Below is the architecture of the CNN model:
import tensorflow as tf
from tensorflow.keras.models import Sequential
from tensorflow.keras.layers import Conv2D, MaxPooling2D, Flatten, Dense, Dropout

def create_model():
    model = Sequential()

    # Convolutional layers to extract features
    model.add(Conv2D(64, (3, 3), activation='relu', input_shape=(48, 48, 1)))
    model.add(MaxPooling2D(pool_size=(2, 2)))

    model.add(Conv2D(128, (3, 3), activation='relu'))
    model.add(MaxPooling2D(pool_size=(2, 2)))

    model.add(Conv2D(256, (3, 3), activation='relu'))
    model.add(MaxPooling2D(pool_size=(2, 2)))

    # Flatten the 3D features to 1D
    model.add(Flatten())

    # Fully connected layers
    model.add(Dense(512, activation='relu'))
    model.add(Dropout(0.5))
    model.add(Dense(7, activation='softmax'))  # 7 classes for emotions

    model.compile(optimizer='adam', loss='categorical_crossentropy', metrics=['accuracy'])
    return model
This CNN consists of:
Three convolutional layers to extract features from the images.
Max-pooling layers to downsample the feature maps.
A fully connected layer to perform classification.
A final layer with 7 outputs (for each emotion) and a softmax activation function.
5. Training the Model on the FER-2013 Dataset
We will now load the FER-2013 dataset, preprocess the data, and train our CNN model. Here's the full process:
5.1. Data Preprocessing
The data from FER-2013 comes in a CSV format. We need to split it into training and testing sets, normalize the pixel values, and one-hot encode the labels.
import numpy as np
import pandas as pd
from tensorflow.keras.utils import to_categorical
from sklearn.model_selection import train_test_split

# Load the dataset
data = pd.read_csv('fer2013.csv')

# Preprocess the data
X = []
y = []
for index, row in data.iterrows():
    X.append(np.array(row['pixels'].split(), dtype='float32').reshape(48, 48, 1))
    y.append(row['emotion'])

X = np.array(X) / 255.0  # Normalize pixel values
y = to_categorical(np.array(y), num_classes=7)

# Split the data into training and testing sets
X_train, X_test, y_train, y_test = train_test_split(X, y, test_size=0.2, random_state=42)
5.2. Training the Model
Now that the data is preprocessed, we can train the model using our training data.
model = create_model()
model.fit(X_train, y_train, validation_data=(X_test, y_test), epochs=30, batch_size=64)

# Save the model
model.save('emotion_detection_model.h5')
6. Integrating Real-Time Emotion Detection Using OpenCV
Now that the model is trained, we can integrate it with a live webcam feed to perform real-time emotion recognition. We'll use OpenCV for video capture and face detection.
6.1. Loading the Trained Model
First, we need to load the trained model:
from tensorflow.keras.models import load_model
model = load_model('emotion_detection_model.h5')
6.2. Real-Time Video Processing
We'll now capture the video from the webcam, detect faces using OpenCV's Haar cascades, and predict the emotion for each detected face using our trained model.
import cv2
import numpy as np
from tensorflow.keras.preprocessing.image import img_to_array

# Load face detector
face_classifier = cv2.CascadeClassifier(cv2.data.haarcascades + 'haarcascade_frontalface_default.xml')

# Define emotion labels
emotion_labels = ['Angry', 'Disgust', 'Fear', 'Happy', 'Sad', 'Surprise', 'Neutral']

# Initialize video capture
cap = cv2.VideoCapture(0)

while True:
    ret, frame = cap.read()
    gray = cv2.cvtColor(frame, cv2.COLOR_BGR2GRAY)
    faces = face_classifier.detectMultiScale(gray, 1.3, 5)

    for (x, y, w, h) in faces:
        cv2.rectangle(frame, (x, y), (x+w, y+h), (255, 0, 0), 2)

        roi_gray = gray[y:y+h, x:x+w]
        roi_gray = cv2.resize(roi_gray, (48, 48), interpolation=cv2.INTER_AREA)

        if np.sum([roi_gray]) != 0:
            roi = roi_gray.astype('float') / 255.0
            roi = img_to_array(roi)
            roi = np.expand_dims(roi, axis=0)

            # Predict the emotion
            prediction = model.predict(roi)[0]
            label = emotion_labels[prediction.argmax()]

            # Display label and bounding box on the face
            cv2.putText(frame, label, (x, y - 10), cv2.FONT_HERSHEY_SIMPLEX, 1, (0, 255, 0), 2)

    # Display the frame
    cv2.imshow('Emotion Recognition', frame)

    # Press 'q' to exit
    if cv2.waitKey(1) & 0xFF == ord('q'):
        break

cap.release()
cv2.destroyAllWindows()


6.3. Running the Application
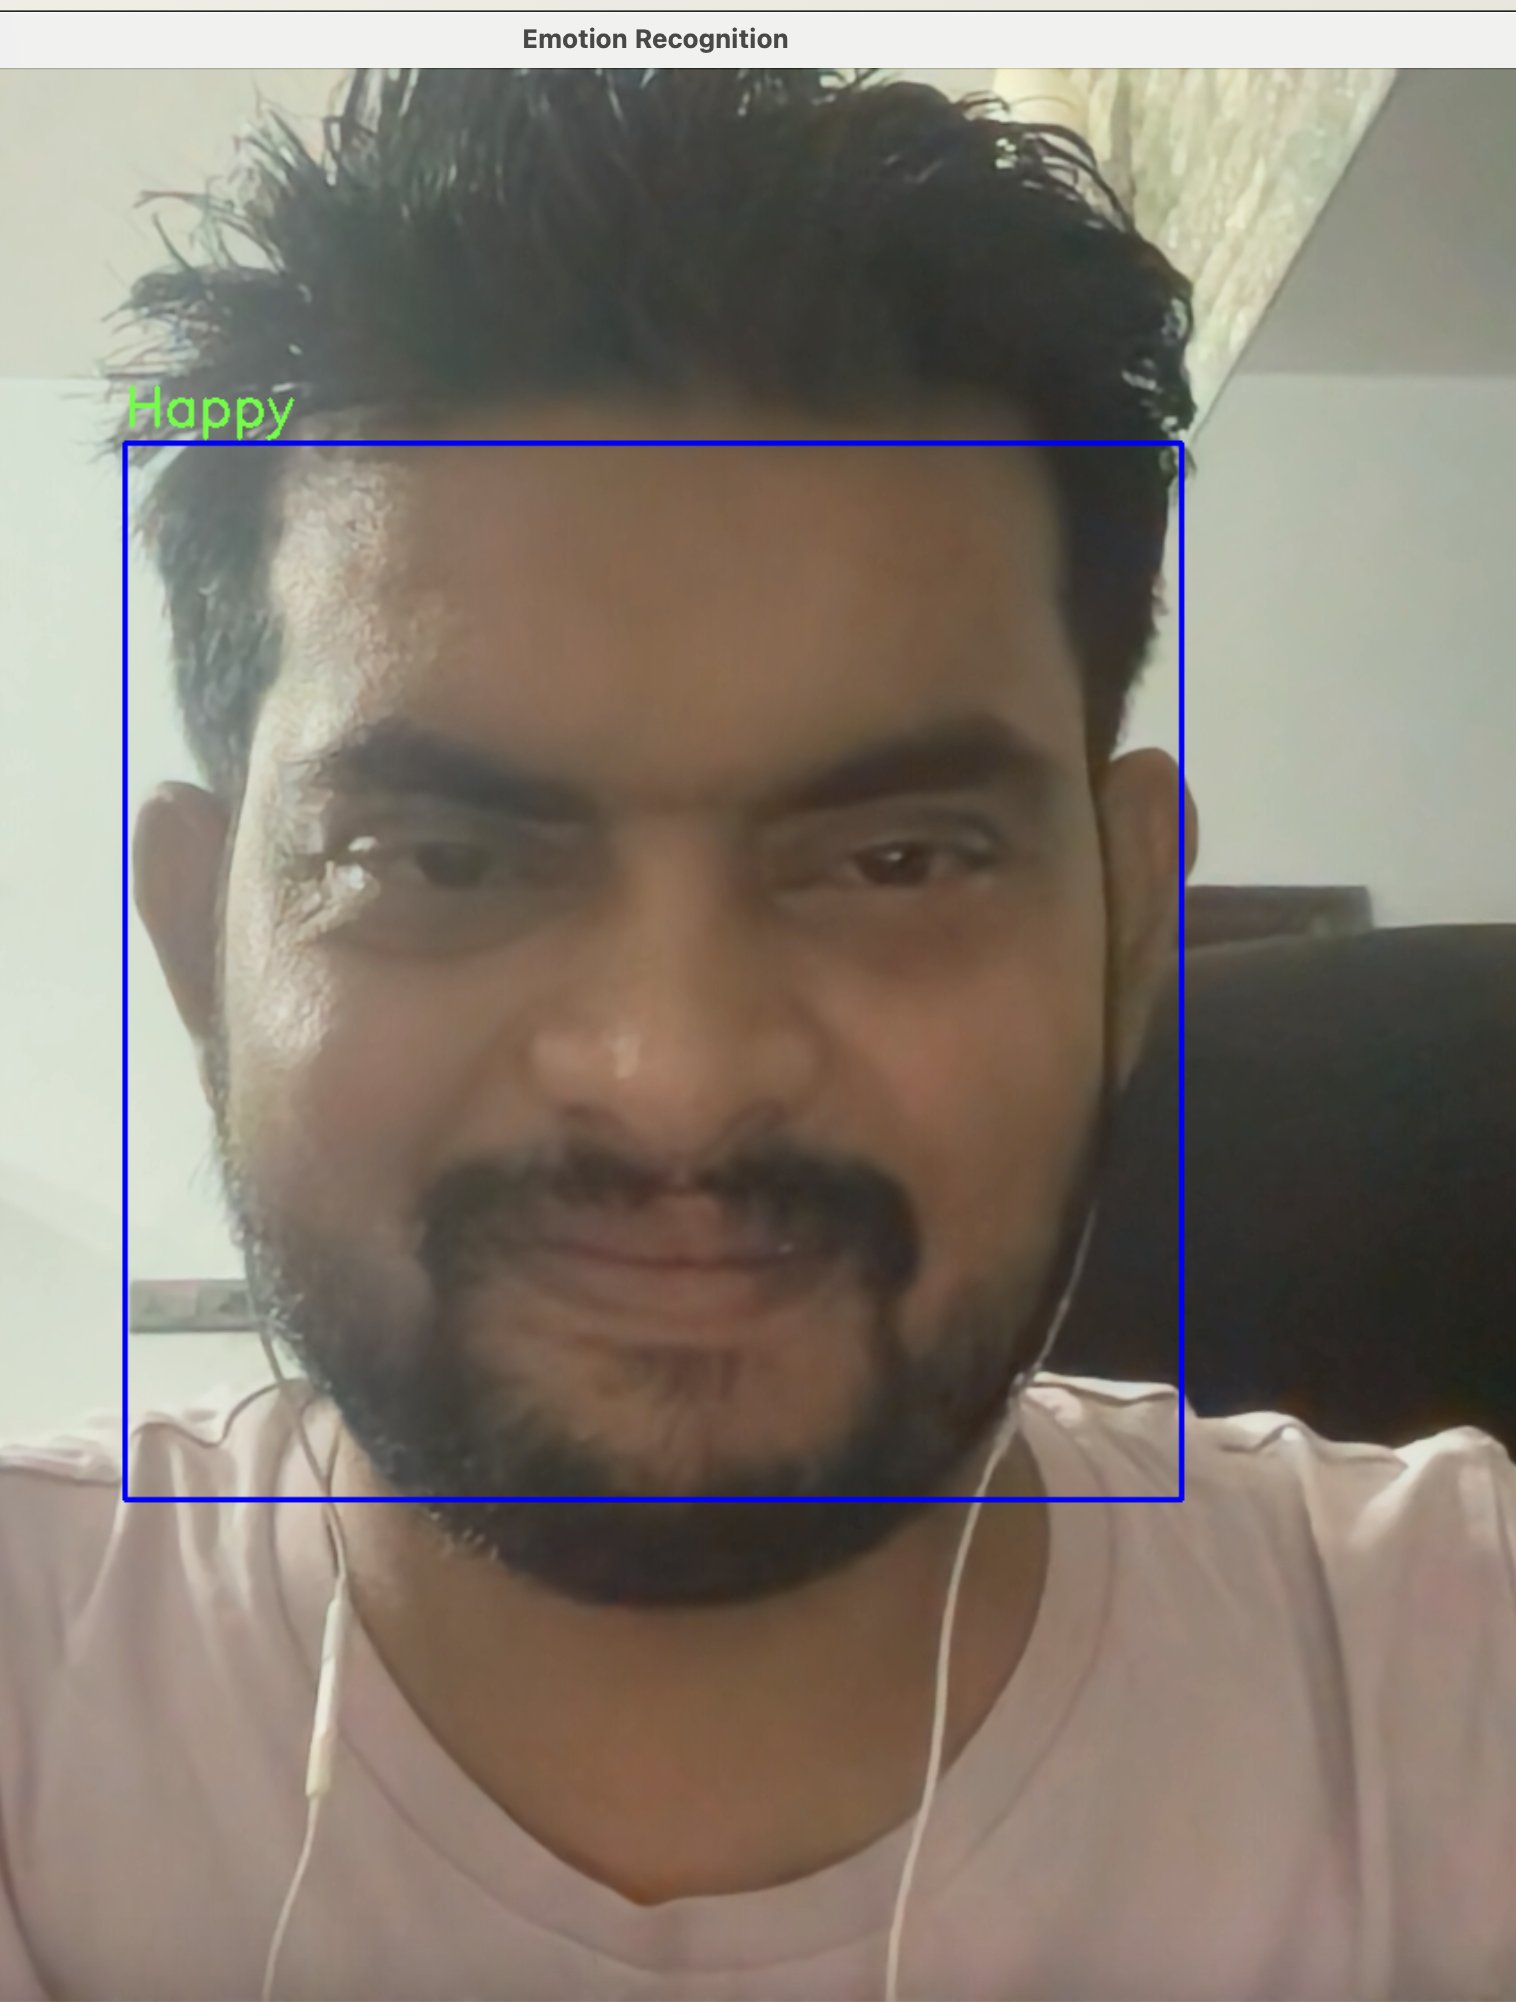
Run the Python script, and it will launch your webcam. The system will detect faces in real-time and classify the emotions based on the model's predictions. A bounding box will appear around the face, along with the predicted emotion.
Conclusion
Deploying it to a web or mobile platform.
Adding more emotions or customizing the CNN for specific facial expressions.
Using this model in surveillance, entertainment, or interactive systems.
Deep learning has endless possibilities, and facial emotion recognition is just one of the many exciting projects you can build with it. Stay curious, and keep exploring!
Subscribe to my newsletter
Read articles from ByteScrum Technologies directly inside your inbox. Subscribe to the newsletter, and don't miss out.
Written by

ByteScrum Technologies
ByteScrum Technologies
Our company comprises seasoned professionals, each an expert in their field. Customer satisfaction is our top priority, exceeding clients' needs. We ensure competitive pricing and quality in web and mobile development without compromise.