Day 5: ReactJS - Basics of Routing in ReactJS
 Saket Khopkar

Routing is important !! Especially when you are navigating
Hello and Welcome to Day 5 of Learning ReactJS. Finally we are learning something different other than Hooks today. We will be exploring the concept of Routing in ReactJS.
Routing is the process of navigating from one page to another in a web application. In a traditional website, each page load involves a full request to the server. However, in a React app, we often build single-page applications (SPAs), where the app loads a single HTML file, and navigation is handled on the client side without full page reloads. React Router is the tool that makes this possible.
When building React applications, you often need to create multi-page applications. React Router is the standard library for routing in React, enabling you to manage multiple views in a single-page application (SPA).
Now the question arises that Routing is also available in Angular, how does it stand different?
In React, routing is handled using an external library called React Router, which lets you define and manage routes using JSX components. Routes are specified in your component tree and are dynamically rendered based on the URL. React Router is highly flexible and integrates seamlessly with React's component-based architecture.
In Angular, routing is a core feature of the framework and is built-in. Routes are defined in a separate module, usually called the routing module, using a declarative syntax. Angular’s routing system is integrated with the framework's dependency injection and provides additional features like lazy loading and route guards out of the box.
To proceed learning React Routers, you will be needing this in your project:
npm install react-router-dom
Routing in short means "showing the way". You will need to command your application to navigate to correct path on certain stages. Now as this direction should be on-point, same should be the Syntax; where you wrap your entire application in a <Router> component. The most commonly used router is BrowserRouter, which uses the browser's history API to keep your UI in sync with the URL.
import { BrowserRouter as Router, Route, Routes } from 'react-router-dom';

function App() {
  return (
    <Router>
      <Routes>
        {/* Define your routes here */}
      </Routes>
    </Router>
  );
}
Let us start with basic examples, shall we? We will have to modify our index.html a bit because this is where we are going to inject our components.
<!DOCTYPE html>
<html lang="en">
<head>
    <meta charset="UTF-8">
    <meta name="viewport" content="width=device-width, initial-scale=1.0">
    <title>React Router Example</title>
</head>
<body>
    <div id="root"></div> <!-- This is where your React app will be injected -->
</body>
</html>
It is time to render the app. Place this code in App.js:
import React from 'react';
import ReactDOM from 'react-dom';
import App from './App';

// Render the App component into the root element
ReactDOM.render(<App />, document.getElementById('root'));
Understanding ReactDOM
Now that we have used ReactDOM to render our app component, let understand why is it needed in first place. What is its goal and so on.
ReactDOM is a separate library from React that provides methods for rendering React components to the DOM. While React is responsible for creating and managing the component's state and behavior, ReactDOM is responsible for interacting with the browser's DOM and rendering those components into actual HTML elements on the page.
In a React application, the root component (often named App) and all other components it contains are written in JSX (JavaScript XML). JSX is not valid HTML, so it needs to be converted into real HTML elements that the browser can understand. This is where ReactDOM comes in.
import ReactDOM from 'react-dom' imports the ReactDOM library, which provides methods to render React components into the DOM.
ReactDOM.render(, document.getElementById('root')); Here, ReactDOM.render() is used to take the App component and insert it into the HTML element with the ID of root. This element is usually found in the index.html file, as <div id="root"></div>.
The <App /> component is a JSX element that needs to be rendered to the browser. ReactDOM.render() converts this JSX into actual HTML and inserts it into the specified DOM element.
Now, let's dive into the App.js file where we will set up routing. First, we need to import the necessary modules from react-router-dom.
Below are the modules which you will be requiring:
Router: TheRoutercomponent wraps around our entire app, enabling routing functionality.Routes: Inside theRouter, we useRoutesto define different paths (or routes) and what component should be displayed when the route is accessed.Route: EachRoutecomponent defines a path and the component that should be rendered for that path.Link: TheLinkcomponent allows us to create navigation links that users can click on to navigate to different routes.
import React from 'react';
import { BrowserRouter as Router, Routes, Route, Link } from 'react-router-dom';
Okay so now our initial setup is done. Let create different components. Based on the route selected, we will navigate to specified component.
Suppose you are creating a website for some IT Company. This routing will be mostly used when clicking various options on the navbar. Possible components of the navbar would be Home Page, About Page, Service Page and Contact Page. In case of wrong URL, we will need an 404 not found page.
// Home component
function Home() {
  return <h2>Home Page</h2>;
}

// About component
function About() {
  return <h2>About Page</h2>;
}

// Services component
function Services() {
  return (
    <div>
      <h2>Our Services</h2>
      <ul>
        <li>Web Development</li>
        <li>Mobile App Development</li>
        <li>SEO Optimization</li>
      </ul>
    </div>
  );
}

// Contact component
function Contact() {
  return (
    <div>
      <h2>Contact Us</h2>
      <form>
        <label>
          Name:
          <input type="text" name="name" />
        </label>
        <br />
        <label>
          Email:
          <input type="email" name="email" />
        </label>
        <br />
        <label>
          Message:
          <textarea name="message" />
        </label>
        <br />
        <button type="submit">Send</button>
      </form>
    </div>
  );
}

// 404 Not Found component
function NotFound() {
  return <h2>404 - Page Not Found</h2>;
}
Here is what our components would look like (or will be). Each component here is a simple function returning JSX, which represents the UI for that component. We have also added few list like options for Service page and a Contact form along with input fields for Conatct Page.
Time for a final nail in the coffin. Let's setup our App by wrapping all inside Router component and defining the route path. The process is almost identical to what we did in Angular.
function App() {
  return (
    <Router>
      <div>
        {/* Navigation menu */}
        <nav>
          <ul>
            <li>
              <Link to="/">Home</Link>
            </li>
            <li>
              <Link to="/about">About</Link>
            </li>
            <li>
              <Link to="/services">Services</Link>
            </li>
            <li>
              <Link to="/contact">Contact</Link>
            </li>
          </ul>
        </nav>

        {/* Routes configuration */}
        <Routes>
          <Route path="/" element={<Home />} />
          <Route path="/about" element={<About />} />
          <Route path="/services" element={<Services />} />
          <Route path="/contact" element={<Contact />} />
          <Route path="*" element={<NotFound />} />
        </Routes>
      </div>
    </Router>
  );
}
Here, we use Link components to create navigation links that point to different routes. When a user clicks on these links, the browser's URL changes, and the corresponding component is rendered. The Routes component defines the different paths and the components that should be displayed for each path.
To sum up things with routers, here is the breakdown:
The
path="/"route displays theHomecomponent.The
path="/about"route displays theAboutcomponent.The
path="/services"route displays theServicescomponent.The
path="/contact"route displays theContactcomponent.The
path="*"route is a catch-all route that displays theNotFoundcomponent for any undefined paths. (Can also be called as WildCard Routing).
So in the end, lets see how our application behaves:
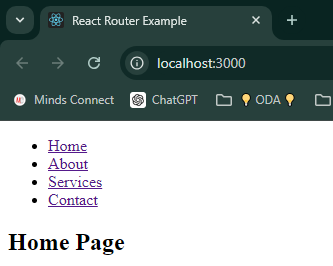
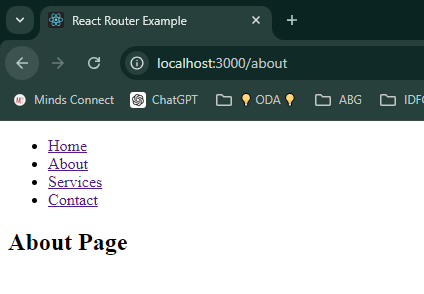
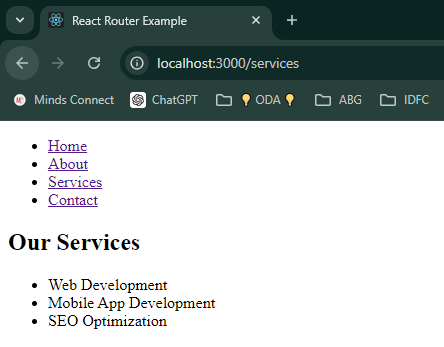
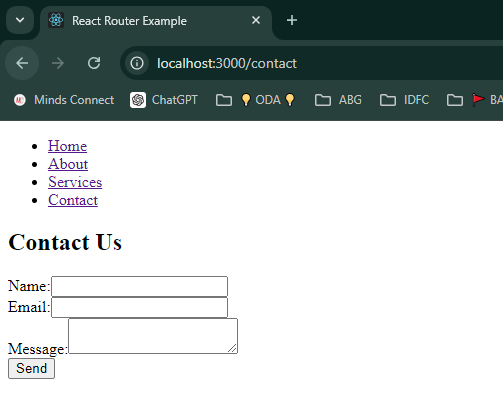
Too lazy to apply CSS. Apologies
So, our application is behaving as expected. It will render the specific components based on what user clicks on. In case of any unspecifed URL, we can customise your 404 Not Found page (You guys apply CSS for good creativity).
Well, that's all, folks for the Day 5! If you've made it this far, congratulations—you now know more about React than my Wi-Fi knows about staying connected. Now go forth, build something amazing, and remember, when in doubt, blame the cache! I will be back in later parts with more explorations with detailed concepts.
Until then Ciao
Subscribe to my newsletter
Read articles from Saket Khopkar directly inside your inbox. Subscribe to the newsletter, and don't miss out.
Written by

Saket Khopkar
Saket Khopkar
Developer based in India. Passionate learner and blogger. All blogs are basically Notes of Tech Learning Journey.