AWS Cloud Series III: Cloud security and permission management with AWS IAM
 Theodore Gerrad
What is AWS IAM ?
AWS Identity and Access management (IAM) is a AWS service that allows you to securely control access to AWS resources. This is useful because it enhances security by restricting access to critical resources based on the principle of "least privilege". The IAM service allows you to manage access to your AWS account, the resources they can use as well as the actions they can perform on those resources.
We can demonstrate this by creating a policy that would restrict the access of an IAM user based on their role in an organization. Since it is expected that you still have a free-tier AWS account, we'll be needing the following resources;
i) Amazon Elastic Compute Cloud (EC2); which is a web service provided by Amazon Web Services that allows users to rent virtual servers, known as instances, to run applications in the cloud. EC2 provides scalable computing capacity, meaning you can increase or decrease the number of instances based on your application's needs. This is where our "service" will be hosted. This service has a variety of instances with different combinations of CPU, memory and storage to suit your workload.
Step 1: Create/Launch your EC2 instance
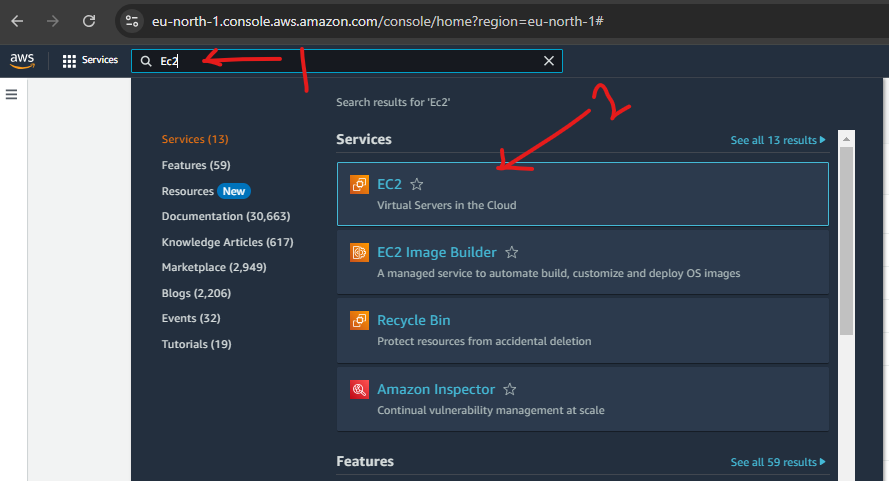
While logged into the AWS console, type EC2 into the search bar and select "EC2" from the search result.
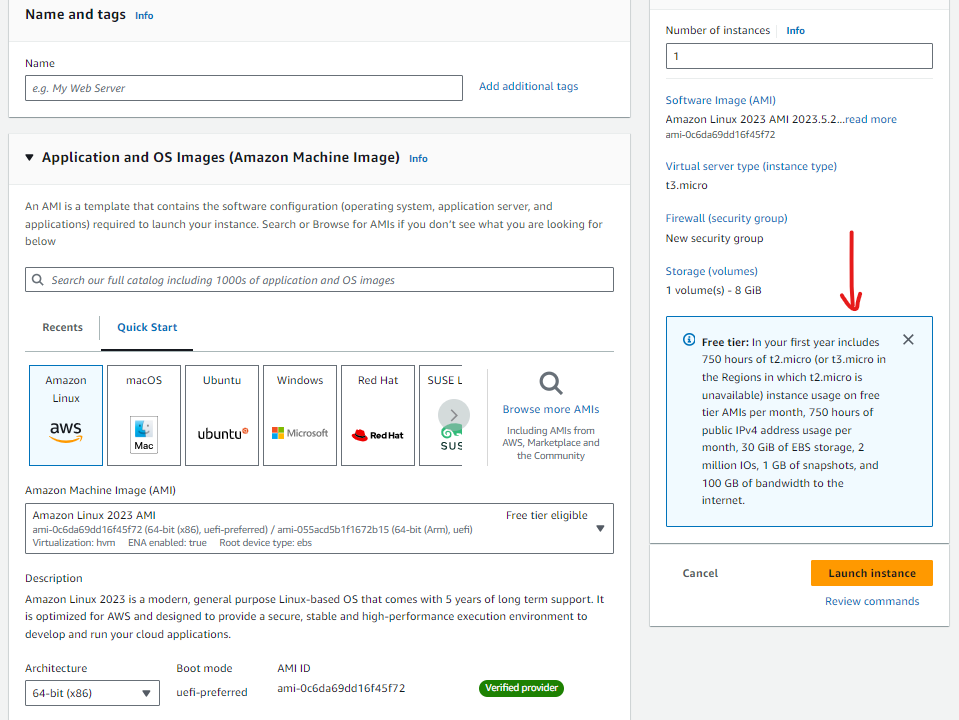
Your free-tier AWS account allows you about 750 hours of t2.micro instance usage per-month which is partly why we are going to use this instance. Depending on the AWS region on your free-tier account you have the option of either the "t2.micro" or "t3.micro" instances. If like me, you happen to be in a region where "t2.micro" instances are unavailable, "t3 micro" instances work fine for this project.
For this project, we will be creating two EC2 instances to demonstrate how AWS IAM policies will be used to define the various levels of access an IAM user will have on resources depending on the environment they are operating in. One of these environments will be our "development" environment (where developers push their code for testing before it goes to the end user) and the other will be our "production" environment (where our live application sits and where our end users interact with the application/service).
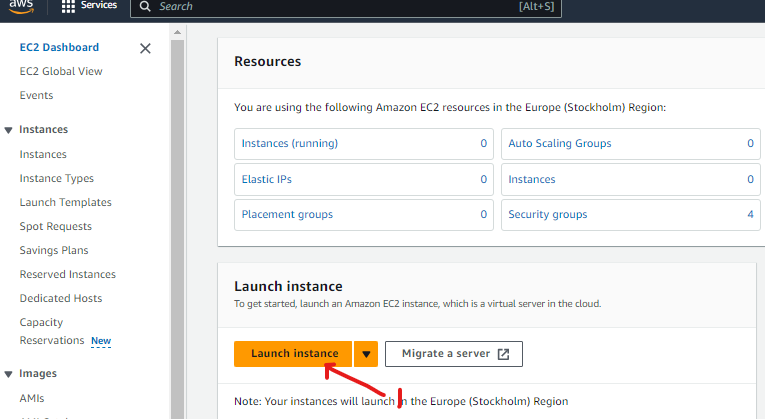
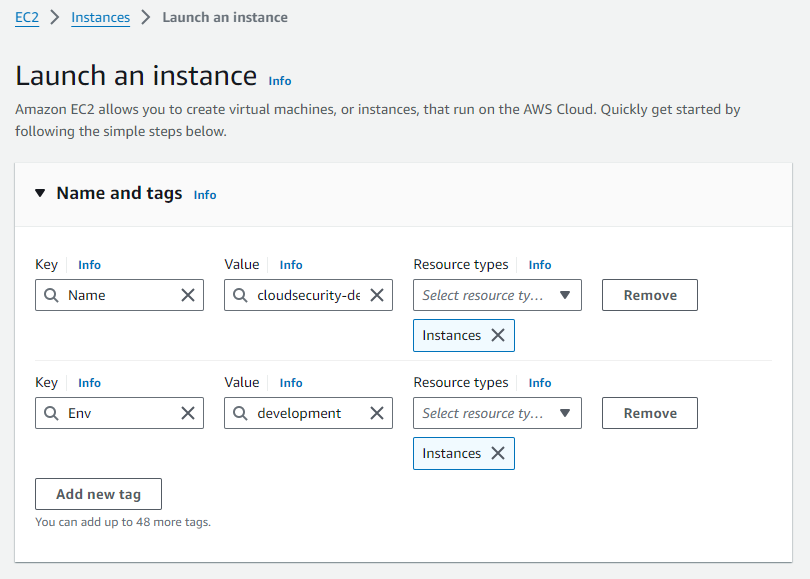
Clicking on the "Launch instance" button, you are navigated to the "Launch an instance" screen. You can create additional tags to allow us to identify resources related to the AWS assets (in this case our EC2 instance). This is beneficial because it allows us to identify resources based on a criteria in instances where we need to apply policies for example.
For this EC2 instance, we have used the "Env" tag and it's value is "development" (for reasons we clarified earlier).

Repeat this entire process again to create an EC2 instance for our "production" environment.
ii) Step 2: Create IAM Policy
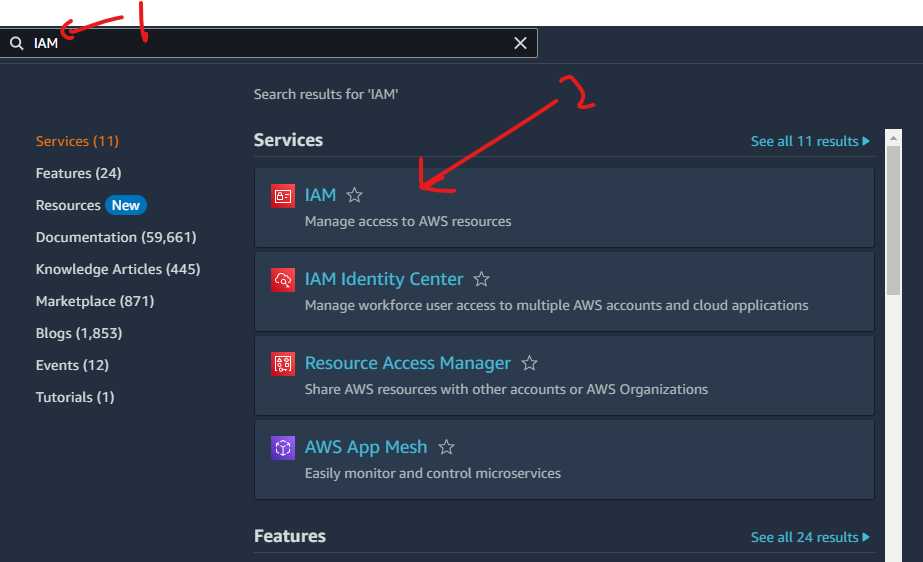
IAM Policies are rules that define what an IAM user or group can or can ’t do on certain AWS resources. For this project, I’ve set up a policy using JSON policy editor and you can do this as well by navigating to the search bar on the AWS console, entering and clicking "IAM".

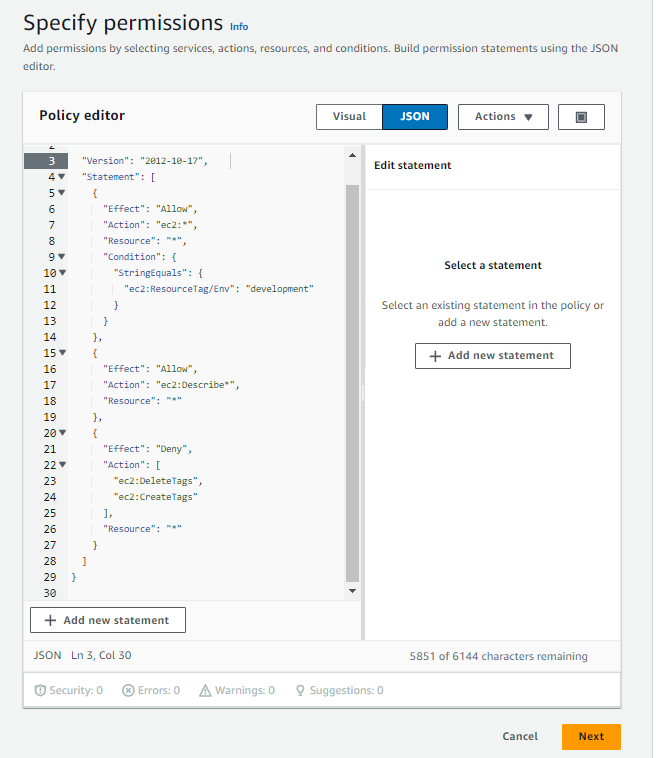
For our project, we will be setting up a policy using a JSON policy editor. This policy will allow all actions on EC2 instances with the resource tag/Env of "development" but denies the creation and deletion of tags on all EC2 instances. When writing JSON Policy statements, you have to specify the: Effect*:* it either denies or allows an action.
Action: whatever a policy allows or denies.
Resource: an entity that a policy applies to.
iii) Step 3: Create an IAM user and User Groups
An IAM User is an individual who has access who has access to AWS resources. A User Group as the name implies is typically a collection of users that have the same level access to AWS resources.
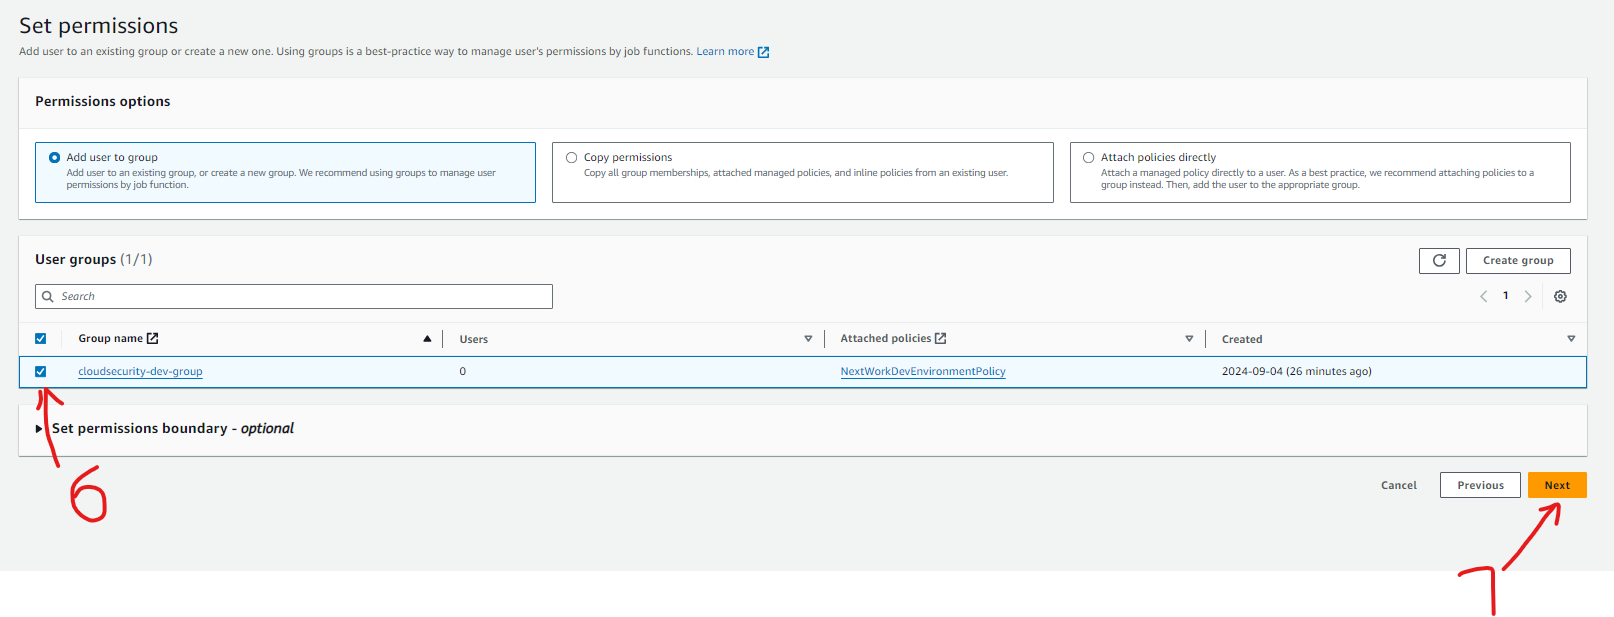
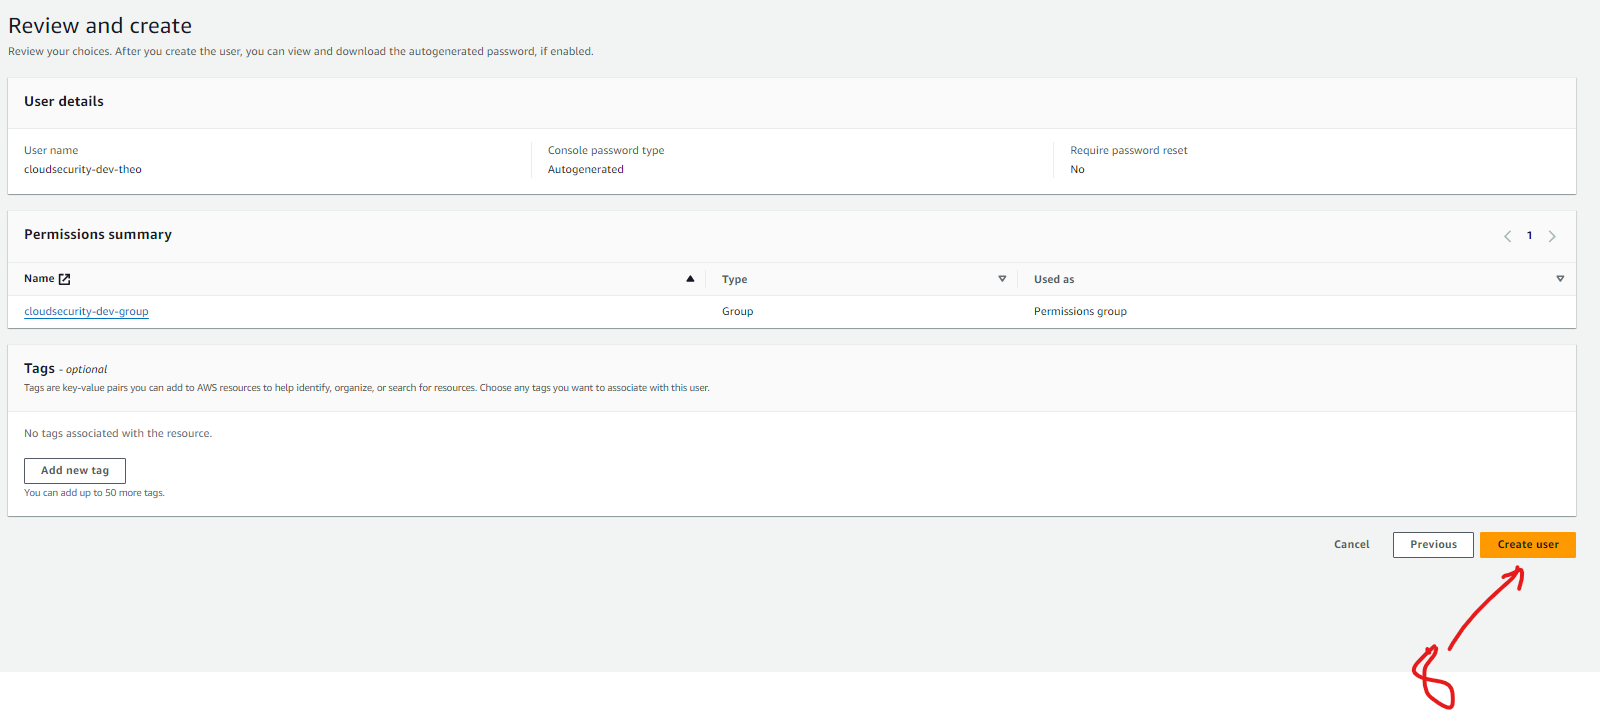
The User-group for this project is is called "cloudsecurity-dev-group" as illustrated by the screenshot below. The policy we created from earlier is attached to this user group and this means it will apply to all IAM Users in this group.

When I created a new User, I had to tick a checkbox that provides the user access via the AWS Management console because we did not set up a key pair that would allow other login methods.

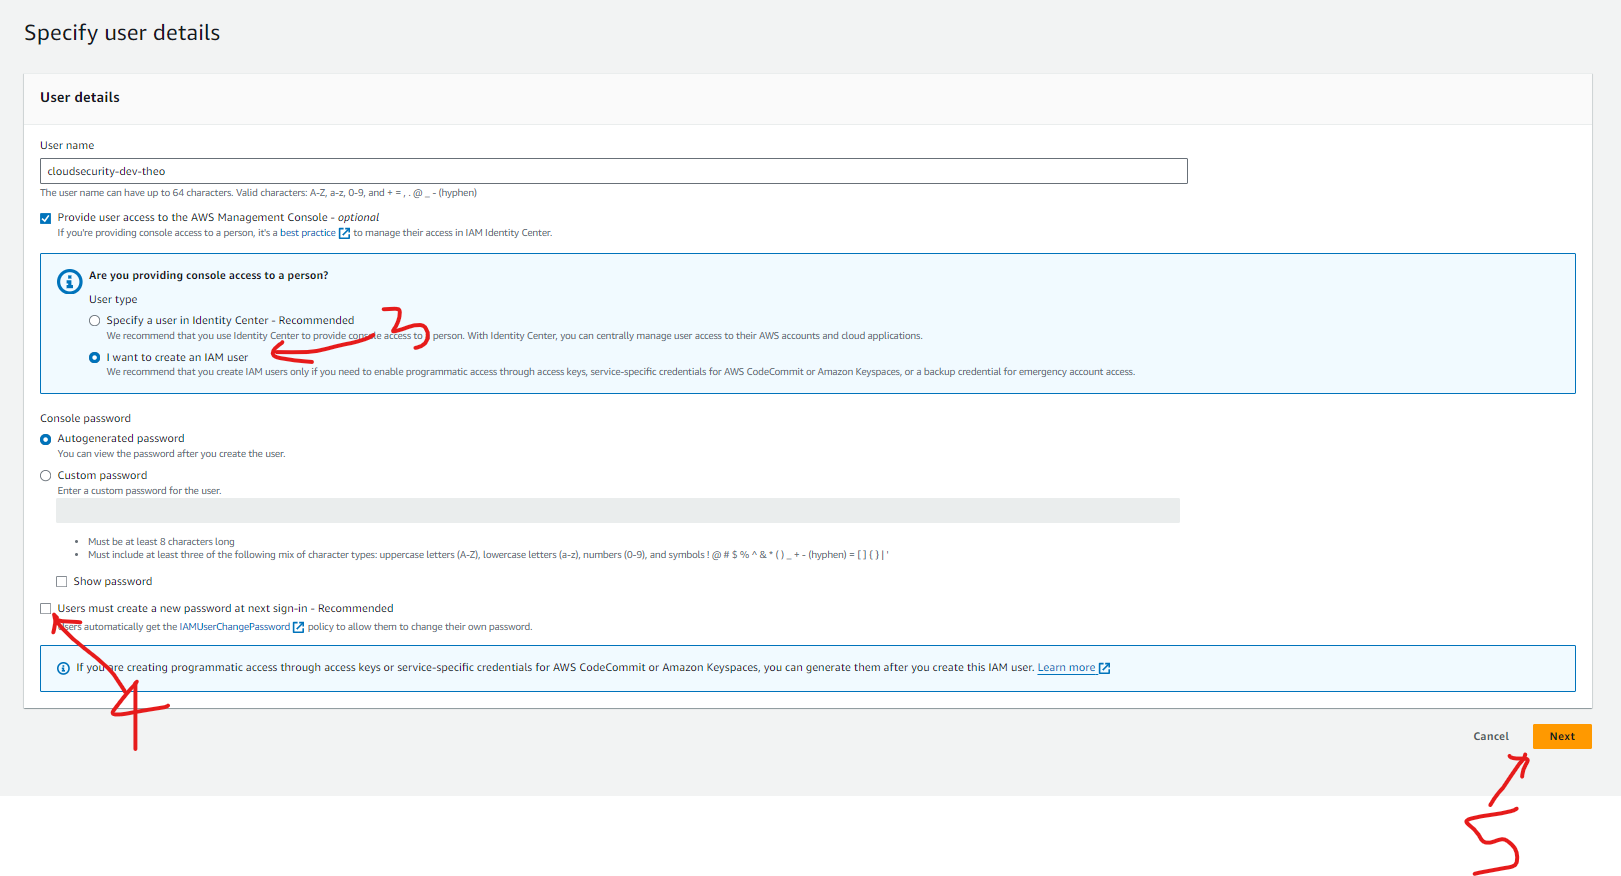
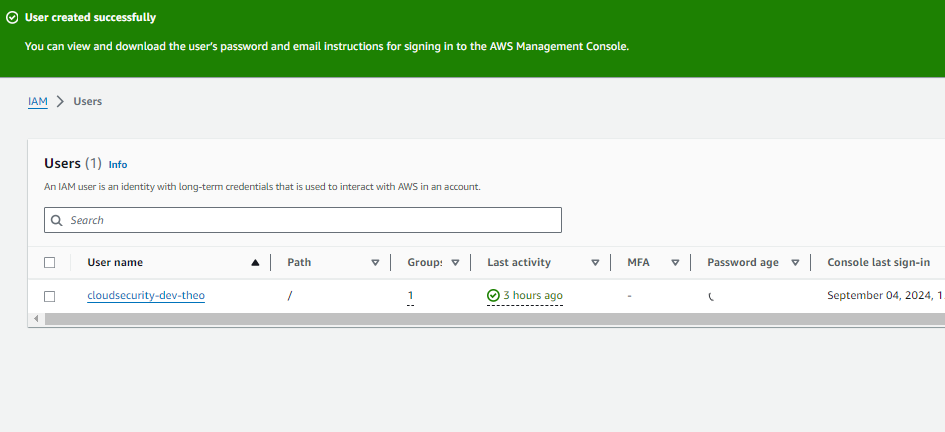
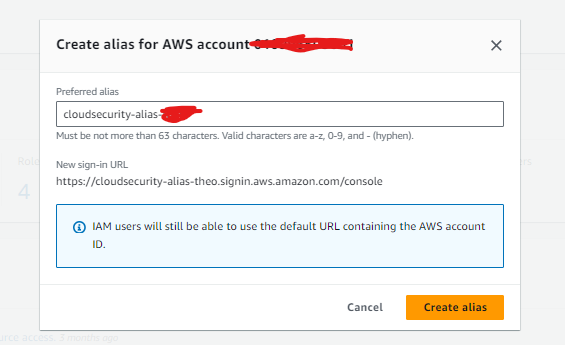
Once my new user was created, there was a unique sign-in URL that allows the user to sign in. This is because of the AWS account alias which is an easy to remember name for an AWS account and saves you from having to remember the default AWS account ID. When a new user gets onboarded on an AWS account, they get access by signing into URL created for the account.

iv) Step 4: IAM USER IN ACTION
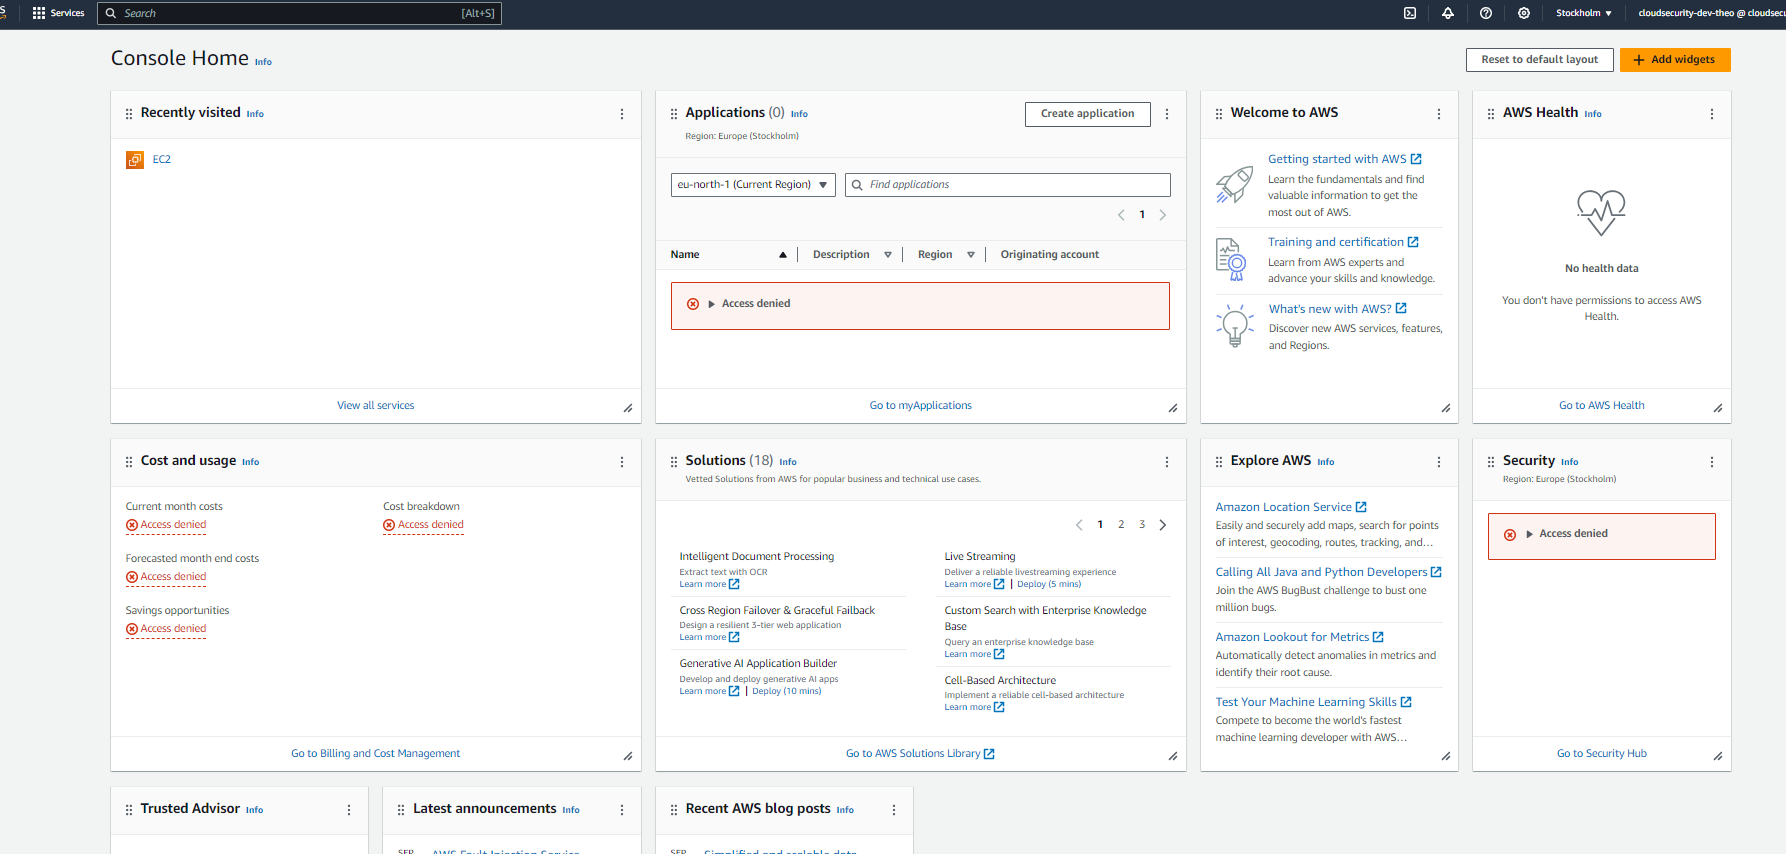
With the IAM Policy, IAM User Group and IAM User all set up, we can tie it all together by logging into my AWS account as the new user (this is not to be confused with our "root user"). After successful login, we can see that the dashboard is considerably different from that of our root user with so many denied permissions and warnings being displayed on the dashboard as illustrated in the image below.
Step 5: IAM USER IN ACTION
We can now test the JSON IAM policy that was set up by earlier by trying to stop the instances i.e. both the development and production. When I tried to stop the production instance, I received an error message that I was not authorized to perform that action on the resource.
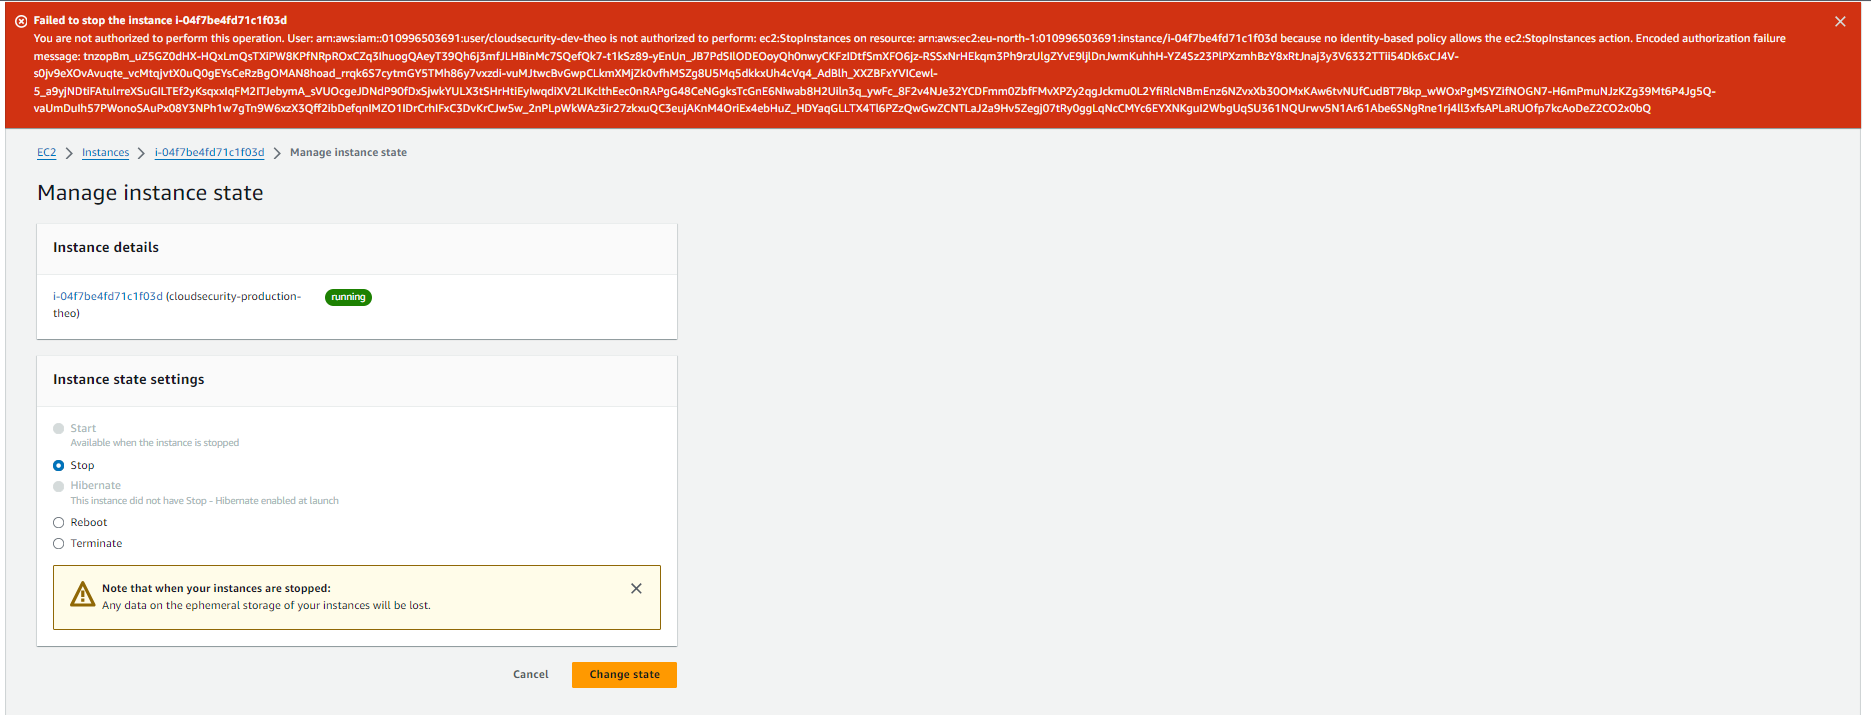
Next, when I tried to stop the development instance, it was terminated without any issues. This was because our policy allows for the IAM user to stop/terminate the EC2 instance on the development environment.

Step 6: Delete resources
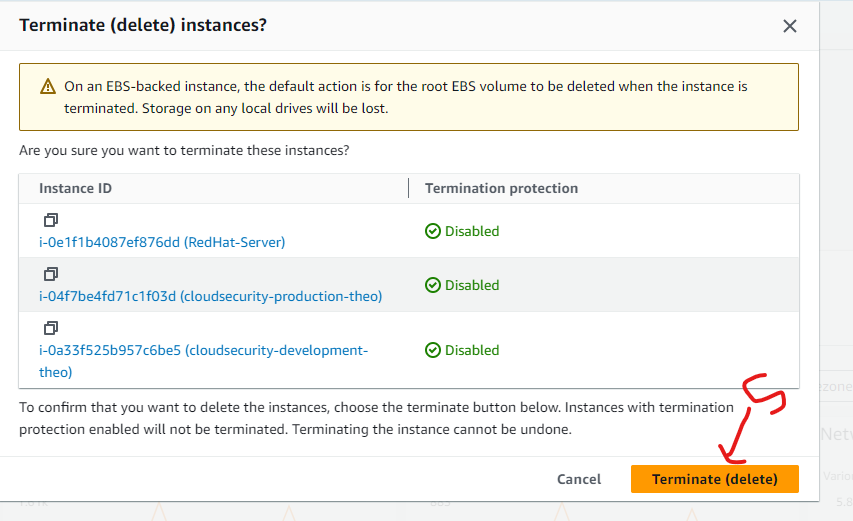
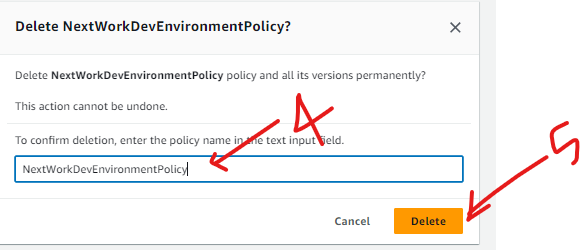
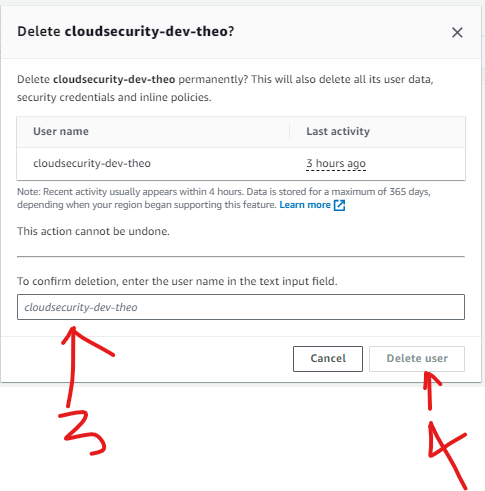
As per usual, we are now going to delete all of our AWS resources; this includes both EC2 instances for the dev and production environments, the user groups, our policy, and our user.
Delete EC2 instances

Delete Policy

Delete User

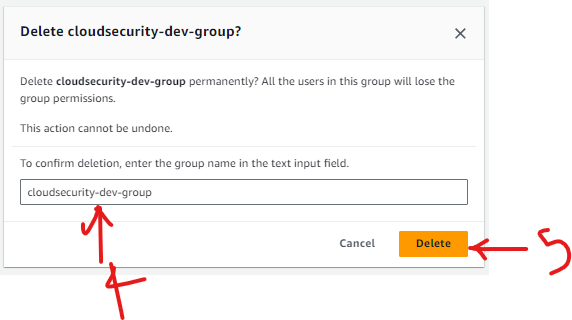
Delete User Group

In summary, we created:
An IAM User Group called "cloudsecurity-dev-group" with defined permissions using an IAM Policy.
An IAM User called cloudsecurity-dev-theo that is added to the user group.
An EC2 instance with the Env tag "production" and Name "cloudsecurity-production-theo".
An EC2 instance with the Env tag "development" and Name "cloudsecurity-development-theo".
Key Takeaways
IAM Policies are rules that define what an IAM user or group can or can ’t do on certain AWS resources. An account alias is a friendly / easy to remember name for an AWS account.
IAM users are individuals that will have access to AWS resources they are created in order to allow/deny certain actions based on the principle of least privilege.
IAM User Groups are a collection of IAM Users they are created to easily manage IAM Users by applying policies to a group of Users rather than individual users.
An account alias is a friendly / easy to remember name for an AWS account.
Subscribe to my newsletter
Read articles from Theodore Gerrad directly inside your inbox. Subscribe to the newsletter, and don't miss out.
Written by
