Building a QR Code Generator with React
 Abhishek Gurjar
Introduction
In this tutorial, we'll create a QR Code Generator web application using React. This project is ideal for those looking to learn about integrating APIs, managing state, and generating dynamic content.
Project Overview
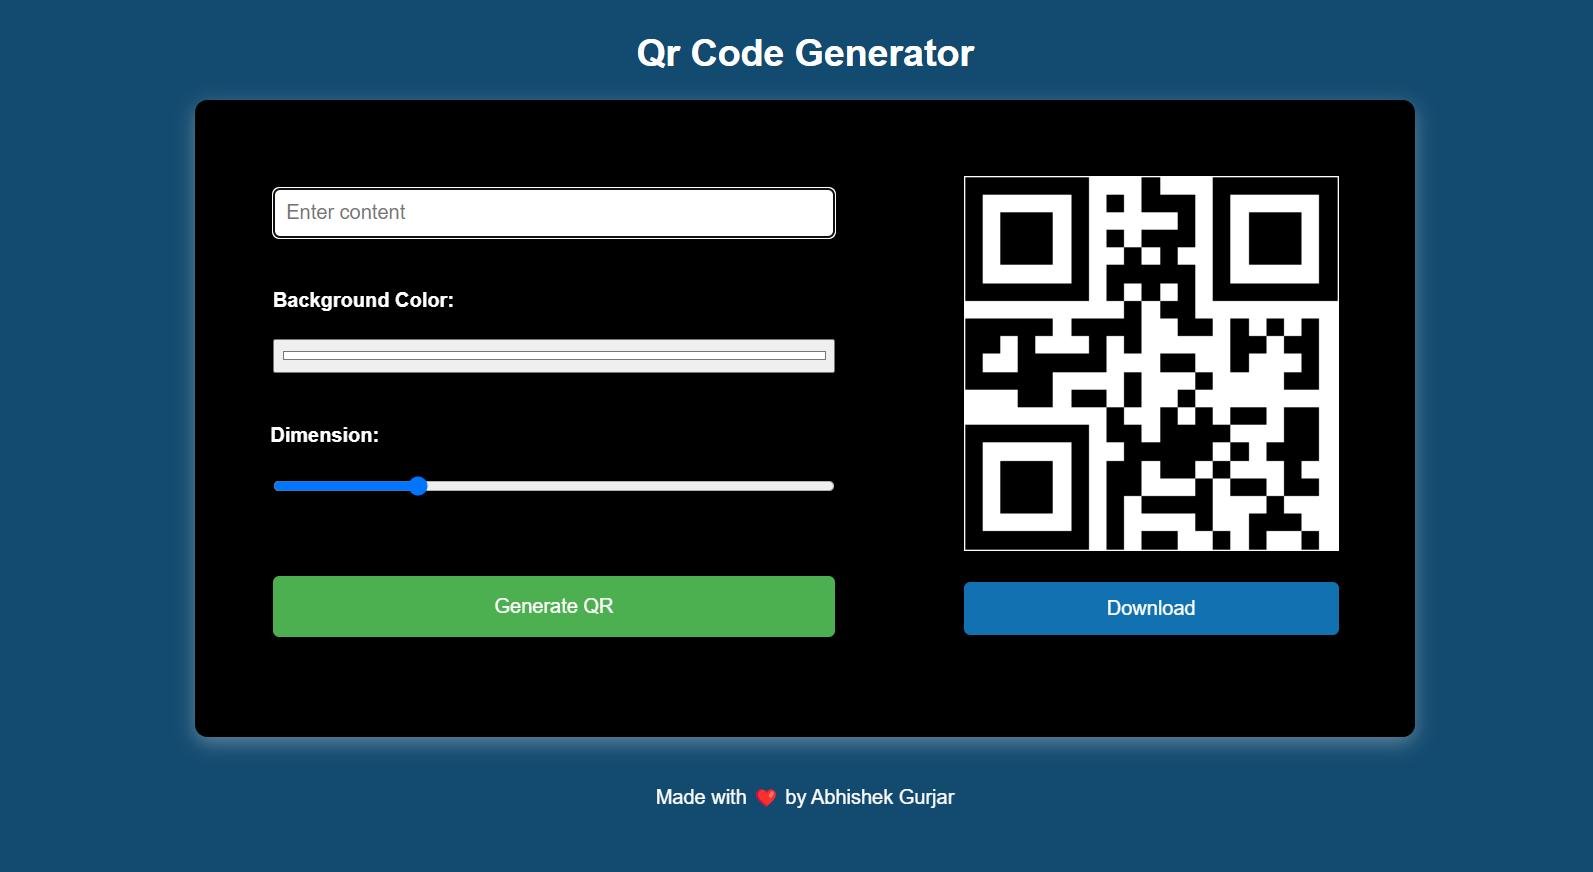
The QR Code Generator allows users to create QR codes by entering content, adjusting the size, and selecting a background color. It utilizes a public API to generate the QR codes and displays them on the screen. Users can generate, view, and download QR codes for various purposes.
Features
Content Input: Users can input the content they want to encode into a QR code.
Dynamic Size: Adjust the size of the QR code dynamically.
Background Color Customization: Choose a background color for the QR code.
API Integration: Fetches QR codes from a public QR code generation API.
Download Option: Allows users to download the generated QR code.
Technologies Used
React: For building the user interface and managing component states.
CSS: For styling the application.
JavaScript: For handling API requests and app logic.
Project Structure
The project is organized as follows:
├── public
├── src
│   ├── components
│   │   ├── QrCode.jsx
│   ├── App.jsx
│   ├── App.css
│   ├── index.js
│   └── index.css
├── package.json
└── README.md
Key Components
QrCode.jsx: Manages the QR code generation and display.
App.jsx: Renders the main layout and the
QrCodecomponent.
Code Explanation
QrCode Component
The QrCode component handles the QR code generation logic and manages the display of the generated QR code.
import { useState } from "react";
import axios from "axios";

const QrCode = () => {
  const [content, setContent] = useState("");
  const [size, setSize] = useState(300);
  const [bgColor, setBgColor] = useState("ffffff");
  const [qrCode, setQrCode] = useState(
    "https://api.qrserver.com/v1/create-qr-code/?data=QR%20Code%20Generator&size=300x300&bgcolor=ffffff"
  );

  const GenerateQR = () => {
    axios
      .get(
        `https://api.qrserver.com/v1/create-qr-code/?data=${content}&size=${size}x${size}&bgcolor=${bgColor}`
      )
      .then((res) => {
        setQrCode(res.config.url);
      });
  };

  return (
    <div className="qr-code">
      <div className="input-box">
        <div className="input-container">
          <input
            type="text"
            value={content}
            onChange={(e) => setContent(e.target.value)}
            placeholder="Enter content"
          />
        </div>

        <div className="input-color">
          <h4>Background Color:</h4>
          <input
            type="color"
            value={`#${bgColor}`}
            onChange={(e) => setBgColor(e.target.value.substring(1))}
          />
        </div>
        <div className="input-dimension">
          <h4>Dimension:</h4>
          <input
            type="range"
            min="200"
            max="600"
            value={size}
            onChange={(e) => setSize(e.target.value)}
          />
        </div>
        <button className="generate-btn" onClick={GenerateQR}>
          Generate QR
        </button>
      </div>
      <div className="output-box">
        <div className="qr-image">
          {qrCode && <img src={qrCode} alt="Generated QR Code" />}
        </div>
        {qrCode && (
          <div className="download-btn">
            <a href={qrCode} download="QRCode.png">
              <button type="button">Download</button>
            </a>
          </div>
        )}
      </div>
    </div>
  );
};

export default QrCode;
This component manages the state for QR code content, size, background color, and the generated QR code URL. It fetches QR codes from the API and displays them.
App Component
The App component renders the QrCode component and provides a header and footer for the layout.
import QrCode from './components/QrCode'
import "./App.css"

const App = () => {
  return (
    <div className='app'>
      <div className="header">
        <h1>QR Code Generator</h1>
      </div>
      <QrCode />
      <div className="footer">
        <p>Made with ❤️ by Abhishek Gurjar</p>
      </div>
    </div>
  );
}

export default App;
This component sets up the overall layout and includes the QR code generator.
CSS Styling
The CSS styles the application to ensure a clean and user-friendly interface.
* {
  box-sizing: border-box;
}

body {
  margin: 0;
  padding: 0;
  font-family: Arial, sans-serif;
}

.app {
  display: flex;
  flex-direction: column;
  align-items: center;
  min-height: 100vh;
  padding: 20px;
  background-color: #134b70;
  color: white;
}

.header {
  width: 100%;
  text-align: center;
}

.header h1 {
  font-size: 30px;
}

.qr-code {
  background-color: #000000;
  display: flex;
  align-items: flex-start;
  padding: 60px;
  gap: 100px;
  border-radius: 10px;
  font-family: Arial, sans-serif;
  box-shadow: rgba(231, 231, 231, 0.35) 0px 5px 15px;
}

.input-box {
  display: flex;
  flex-direction: column;
  align-items: center;
  margin-bottom: 20px;
}

.input-container,
.input-color,
.input-dimension {
  margin: 10px 0;
  gap: 40px;
}

input[type="text"] {
  padding: 10px;
  font-size: 16px;
  width: 450px;
  border: 1px solid #ccc;
  border-radius: 5px;
}

input[type="color"] {
  padding: 5px;
  width: 450px;
}

input[type="range"] {
  width: 450px;
}

.generate-btn {
  padding: 15px 40px;
  width: 450px;
  font-size: 16px;
  background-color: #4caf50;
  color: white;
  border: none;
  border-radius: 5px;
  cursor: pointer;
  margin-top: 50px;
}

.generate-btn:hover {
  background-color: #45a049;
}

.output-box {
  display: flex;
  flex-direction: column;
  align-items: center;
}

.qr-image img {
  border: 1px solid #000000;
}

.download-btn {
  margin-top: 20px;
}

.download-btn button {
  width: 300px;
  padding: 12px 40px;
  font-size: 16px;
  background-color: #1171b1;
  color: white;
  border: none;
  border-radius: 5px;
  cursor: pointer;
}

.download-btn button:hover {
  background-color: #134b70;
}

.footer {
  width: 100%;
  padding: 20px;
  text-align: center;
}
The styling ensures a clean layout with user-friendly visuals and responsive design.
Installation and Usage
To get started with this project, clone the repository and install the dependencies:
git clone https://github.com/abhishekgurjar-in/qr_code_generator.git
cd qr-code-generator
npm install
npm start
This will start the development server, and the application will be running at http://localhost:3000.
Live Demo
Check out the live demo of the QR Code Generator here.
Conclusion
The QR Code Generator project is a practical example of how to integrate APIs and manage dynamic content in React. It provides a simple yet effective tool for generating QR codes with a user-friendly interface.
Credits
- Inspiration: The project is inspired by the need for easy QR code generation for various applications.
Author
Abhishek Gurjar is a web developer passionate about creating interactive and useful web applications. You can follow his work on GitHub.
Subscribe to my newsletter
Read articles from Abhishek Gurjar directly inside your inbox. Subscribe to the newsletter, and don't miss out.
Written by

Abhishek Gurjar
Abhishek Gurjar
I’m Abhishek Gurjar, a Full Stack MERN developer specializing in MongoDB, Express.js, React, and Node.js. I love creating dynamic web apps and sharing insights on web development.