Configuring DNS on Windows Server
 Dinesh Kumar K
DNS (Domain Name System) is a critical service that translates human-friendly domain names into IP addresses that computers use to identify each other on the network. Configuring DNS on Windows Server ensures that your network’s domain name resolution is handled efficiently and securely. This guide will walk you through the process of setting up and configuring DNS on Windows Server.
DNS is essential for:
Resolving domain names to IP addresses: Enables users to access resources using domain names instead of IP addresses.
Managing DNS records: Includes various types of records like A, AAAA, MX, CNAME, and more.
Steps to Configure DNS on Windows Server
Create a forward lookup zone: This is used to resolve domain names to IP addresses.
Create a reverse lookup zone: This resolves IP addresses to domain names (optional but recommended).
Step 1: Configure Forward Lookup Zone
Launch DNS Manager: From Server Manager, go to Tools > DNS.
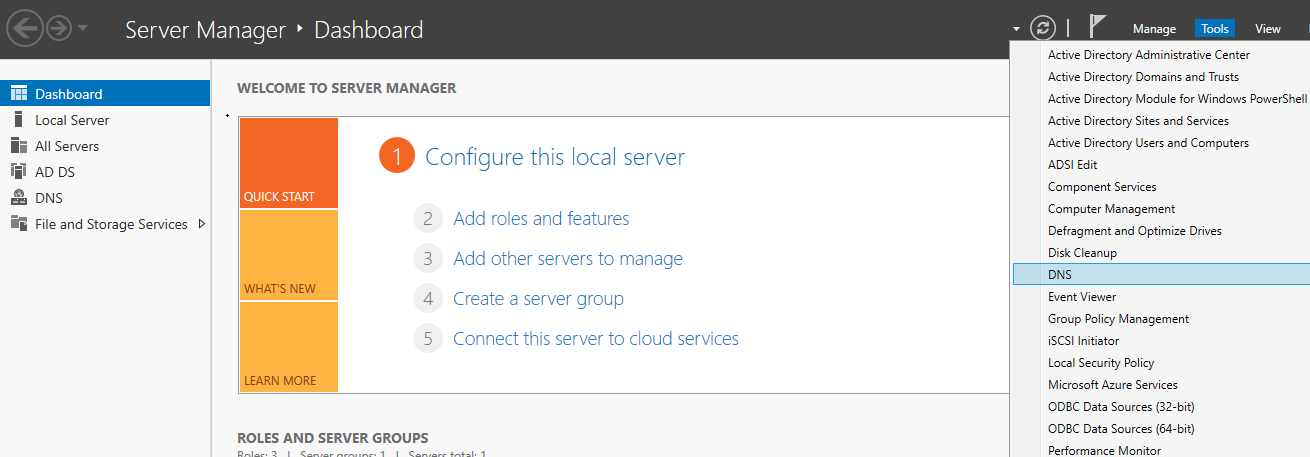
In DNS Manager, expand your server's name in the left-hand pane.

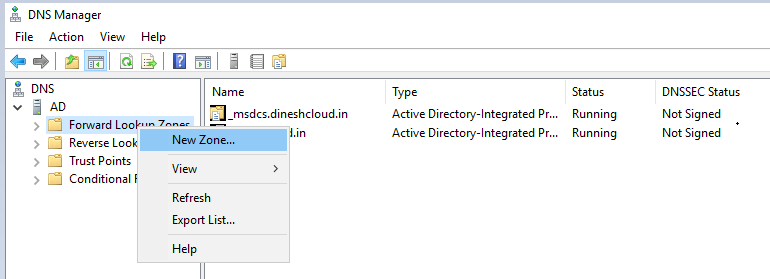
Right-click on Forward Lookup Zones and select New Zone.
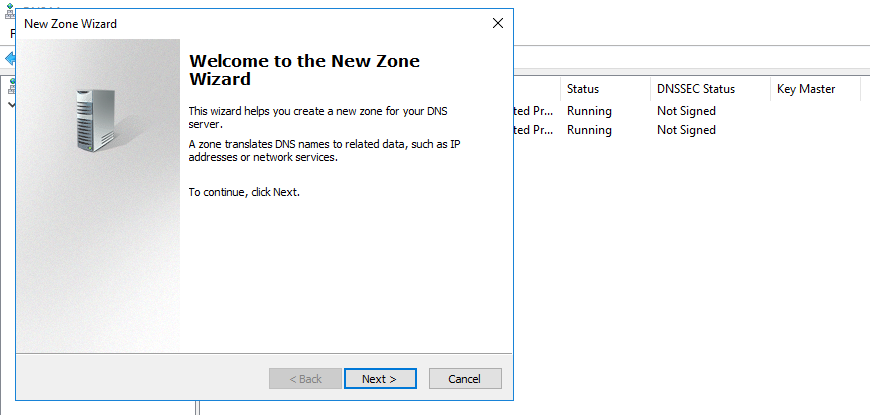
Click Next on the Welcome screen.
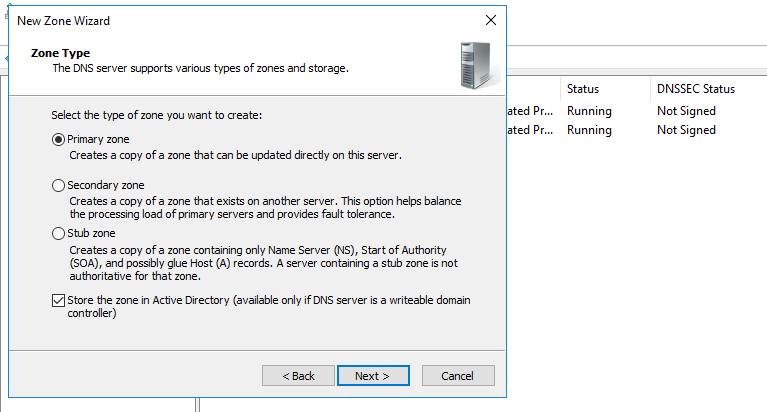
Select Primary Zone (or Secondary/Stub if applicable), then click Next.
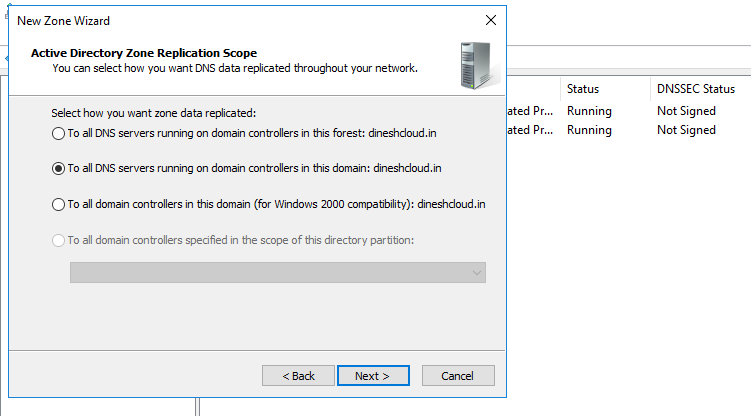
Choose where to store the zone data:
- To all DNS servers running on domain controllers in this domain (for Active Directory-integrated zones). > Click Next.
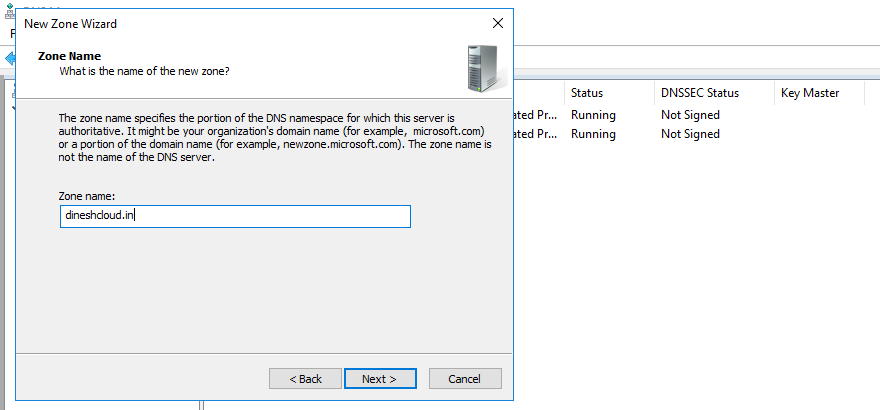
Enter the domain name for your DNS zone (e.g., dineshcloud.in), and click Next.
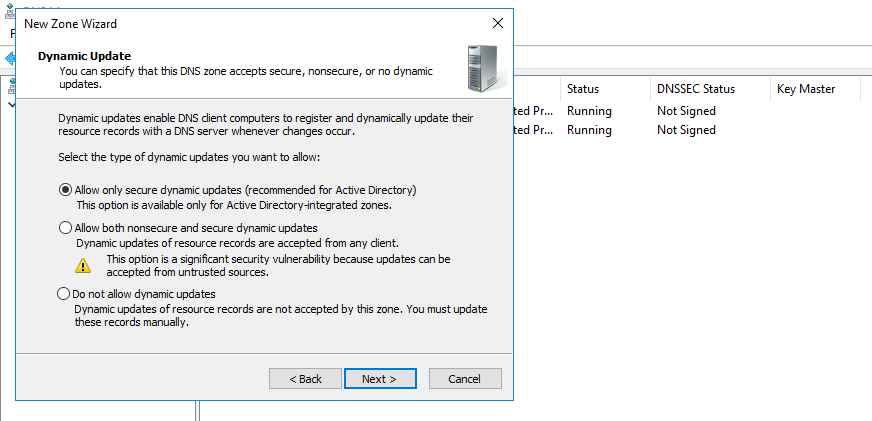
Choose one of the following options:
Allow only secure dynamic updates (for AD environments).
Allow both nonsecure and secure dynamic updates.
Do not allow dynamic updates (if manually managing records).
Click Next.
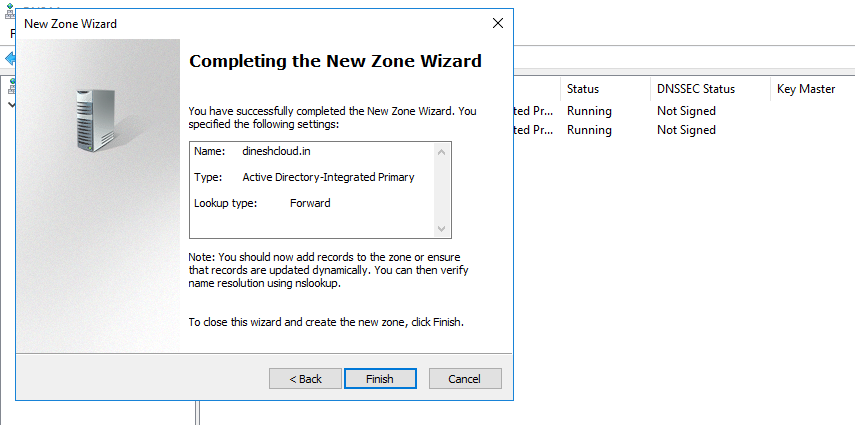
Click Finish to complete the zone creation.
Step 2: Create a Host (A) Record
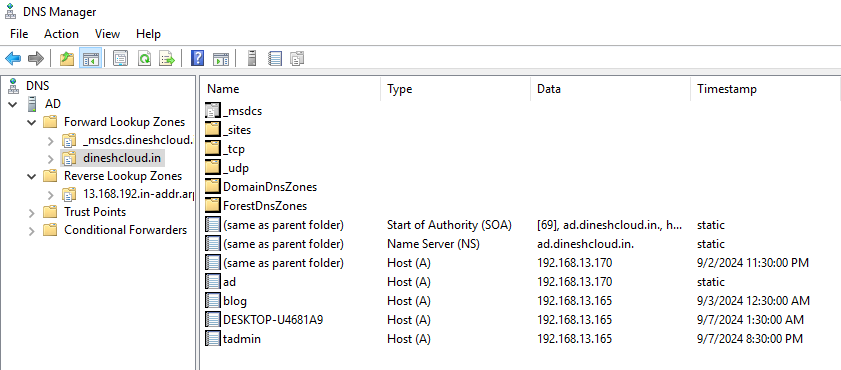
In the Forward Lookup Zones, expand your newly created zone (e.g., dineshcloud.in).
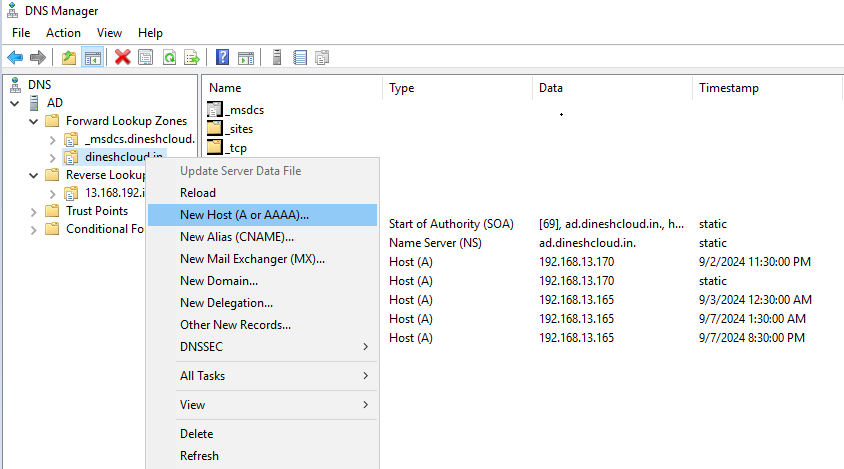
Right-click the zone and select New Host (A or AAAA).
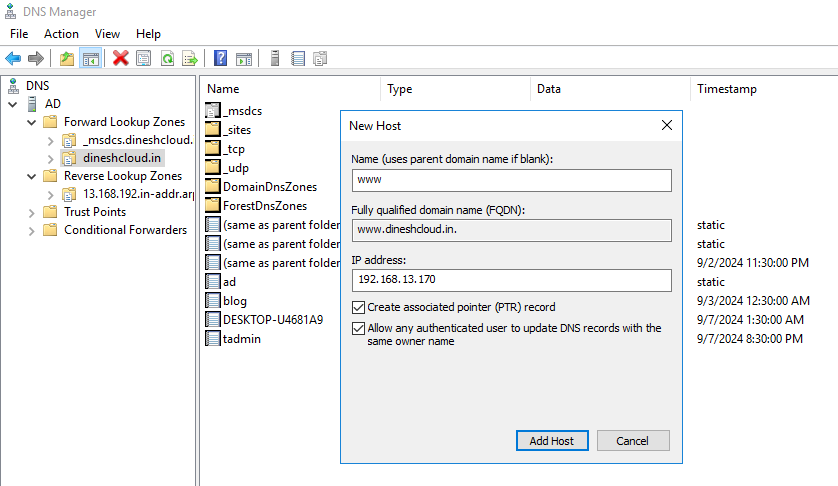
In the Name field, enter the host name (e.g., www for www.dineshcloud.in).
In the IP address field, enter the IP address of the host.
Check Create associated pointer (PTR) record if you want reverse DNS for this entry.
Click Add Host and then OK.
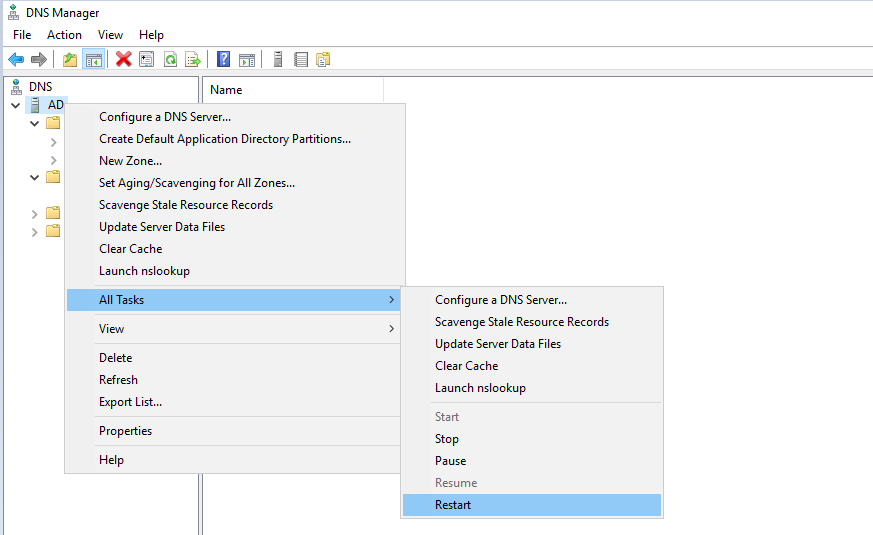
Restart the domain
Step 3: Configure Reverse Lookup Zone
Reverse Lookup Zones map IP addresses back to domain names.
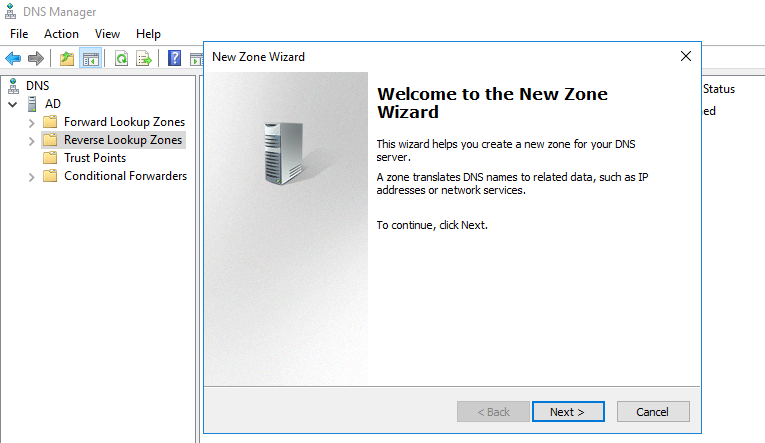
In DNS Manager, right-click on Reverse Lookup Zones and select New Zone.
Follow the New Zone Wizard steps as with the forward lookup zone.
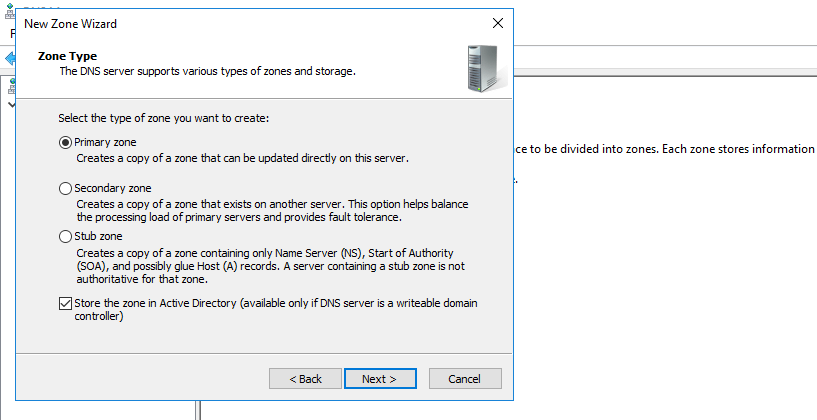
- Choose Primary zone and click Next.
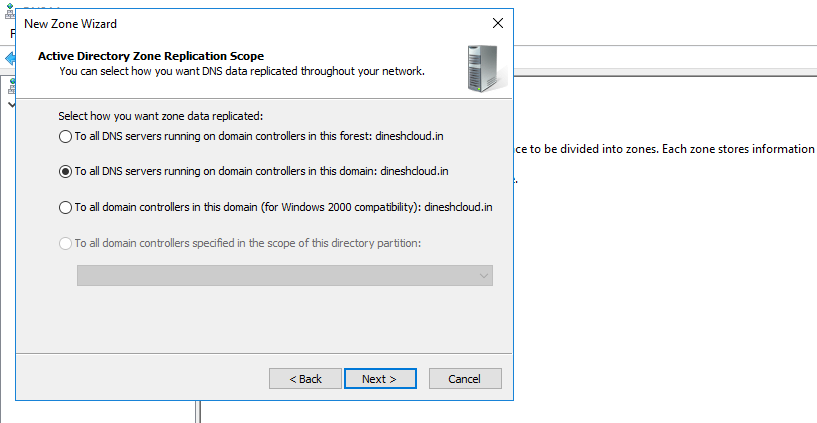
Choose where to store the zone data:
- To all DNS servers running on domain controllers in this domain (for Active Directory-integrated zones). > Click Next.
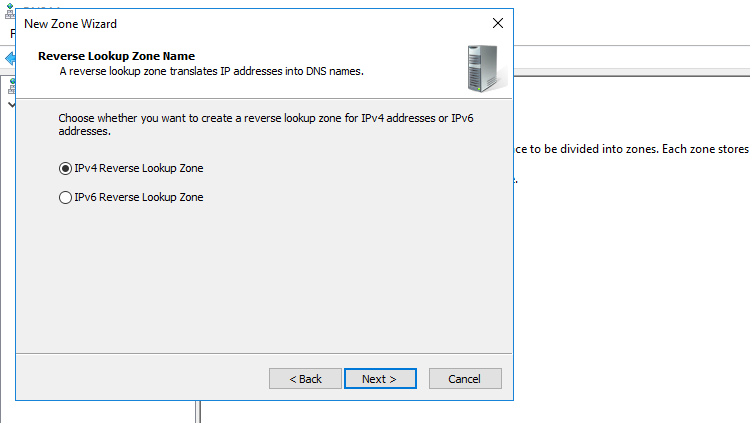
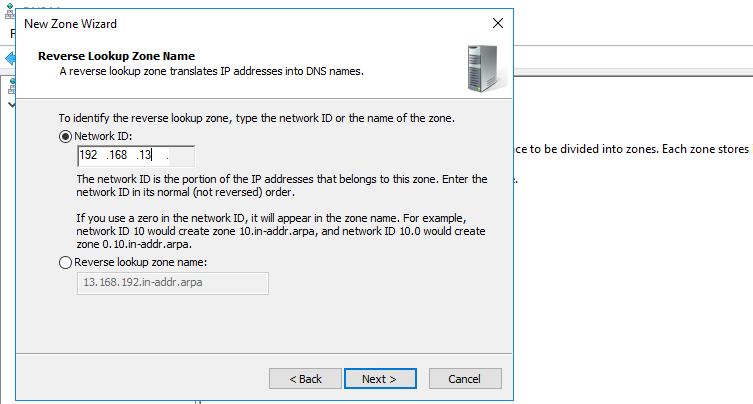
Select the IPV4 Reverse Lookup Zone > Click Next
Select the Network ID that matches your IP address range (e.g., 192.168.1 for a 192.168.1.0/24 network). > Click Next.
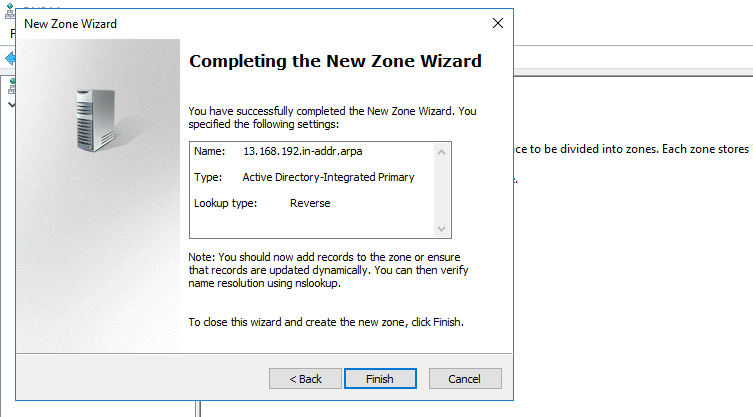
Click Finish.
Step 4: Create a PTR Record
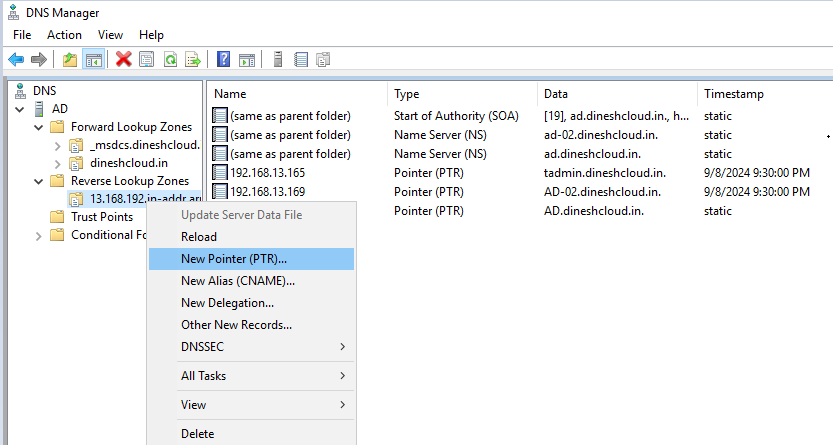
In the Reverse Lookup Zone, right-click and select New Pointer (PTR).
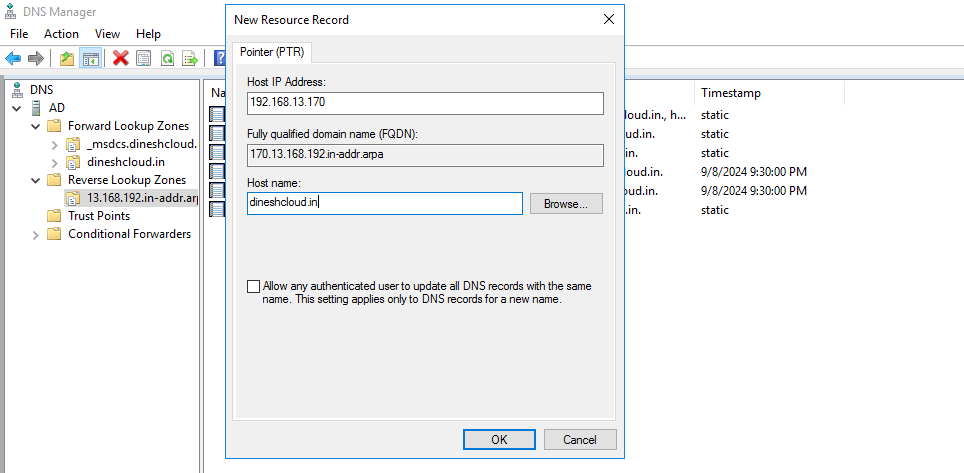
Enter the IP Address and corresponding Host Name. > Click OK to create the PTR record.
Step 5: Testing DNS Configuration
To ensure your DNS configuration is working, you can use the nslookup command on the server or a client machine.

Open Command Prompt > Type nslookup dineshcloud.in and press Enter. > Verify that it returns the correct IP address.

If the reverse lookup zone is configured, try querying the IP address:

Check DNS Resolution:
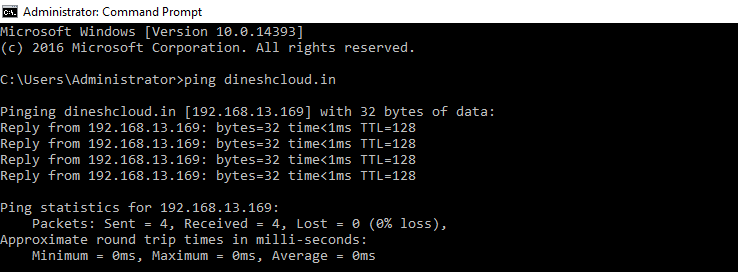
Ping Domain Names: Try pinging domain names from client computers to ensure they resolve correctly (e.g., ping dineshcloud.in).
Conclusion
Configuring DNS on Windows Server is a critical task for managing domain name resolution within your network. By following these steps, you can set up and manage DNS zones and records effectively, ensuring that users and applications can resolve domain names to IP addresses smoothly.
Subscribe to my newsletter
Read articles from Dinesh Kumar K directly inside your inbox. Subscribe to the newsletter, and don't miss out.
Written by

Dinesh Kumar K
Dinesh Kumar K
Hi there! I'm Dinesh, a passionate Cloud and DevOps enthusiast. I love to dive into the latest new technologies and sharing my journey through blog.