Mastering GitLab for DevOps: A Comprehensive Guide
 Anas
AnasWhat is GitLab?
GitLab is an open-source DevOps platform that provides a comprehensive suite of tools for version control, CI/CD, project management, and security. It enables teams to collaborate on code, manage projects, and deploy applications seamlessly, all within a single interface.
Key Features of GitLab
Repository Management: Git-based version control for tracking code changes.
Continuous Integration/Continuous Deployment (CI/CD): Automate testing, building, and deploying applications.
Issue Tracking: Manage and track bugs, features, and other project tasks.
Project Management: Use boards, milestones, and roadmaps to organize and plan work.
Security and Compliance: Integrated tools for code quality, dependency scanning, and container security.
Example CI/CD Pipeline using artifacts
stages:
  - build
  - deploy

build_job:
  stage: build
  script:
    - echo "Building the project..."
    - ./build.sh
  artifacts:
    paths:
      - build/

deploy_job:
  stage: deploy
  script:
    - echo "Deploying the project..."
    - ./deploy.sh
  dependencies:
    - build_job
  artifacts:
    when: on_success
    paths:
      - build/
- Artifacts: Store build outputs and use them in later stages of the pipeline.
How to use Gitlab
Sign Up/Install: Create an account on GitLab.com or install GitLab on your server using the GitLab installation guide.
Create a New Project: Navigate to "New Project" and create a repository, initializing it with a README file to get started.
Navigating the GitLab Interface
Dashboard: Overview of your projects, issues, and activities.
Project Overview: Detailed view of project files, issues, and CI/CD pipelines.
Settings: Configure project settings, including integrations, access controls, and CI/CD settings.
First Project
- Create your first project, initialize it with a README, and explore the project dashboard. Familiarize yourself with the layout, menus, and key features available.
In terminal type ssh-keygen > copy public id > paste in ssh keys in gitlab user setting
now i can add files in my project let's see
Project has been created successfully, Let’s Create a .gitlab-ci.yml file to run a pipeline.
Here is the pipeline configuration
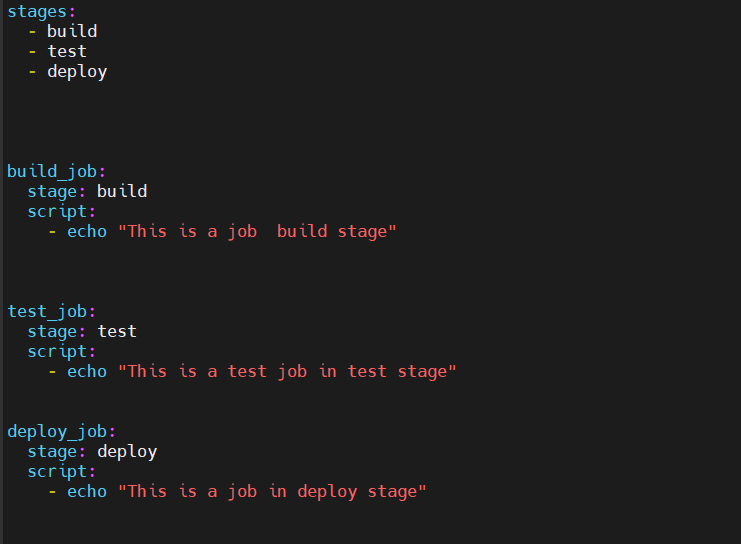
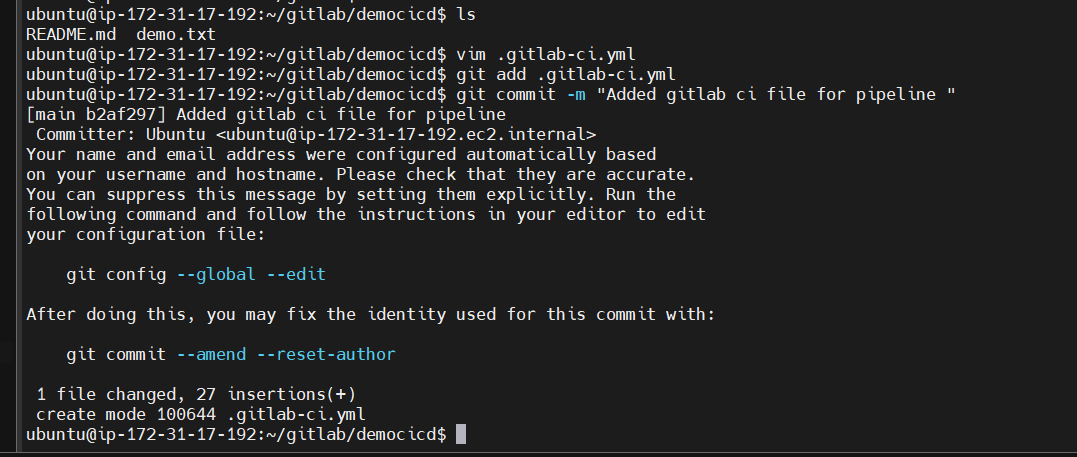
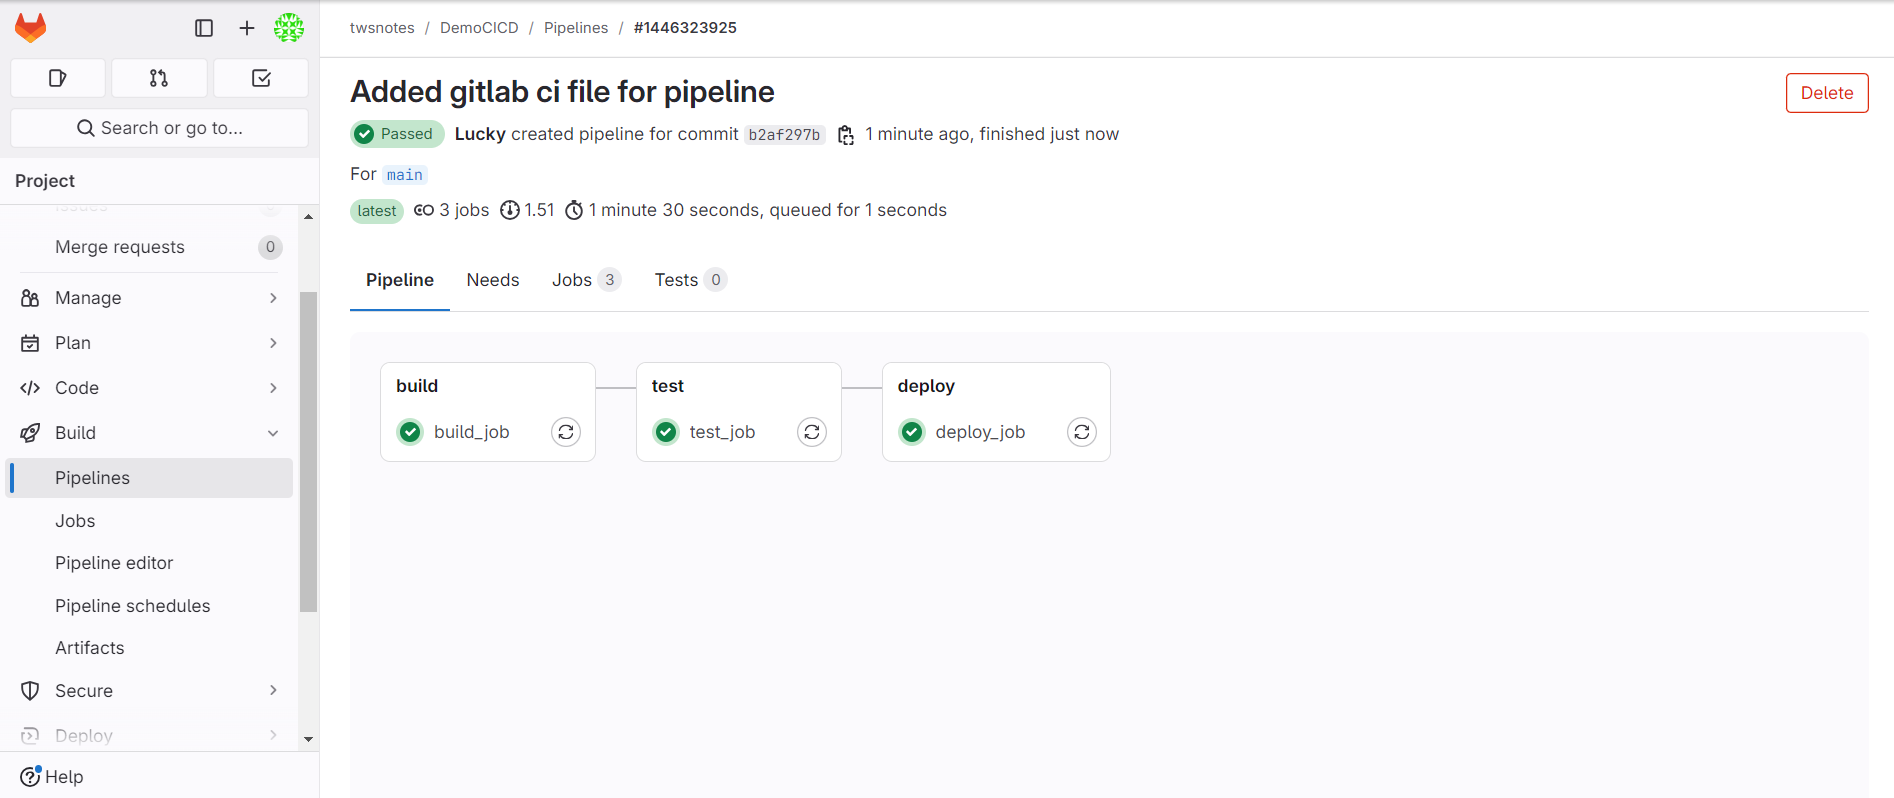
Pipeline has been triggered & Completed successfully.
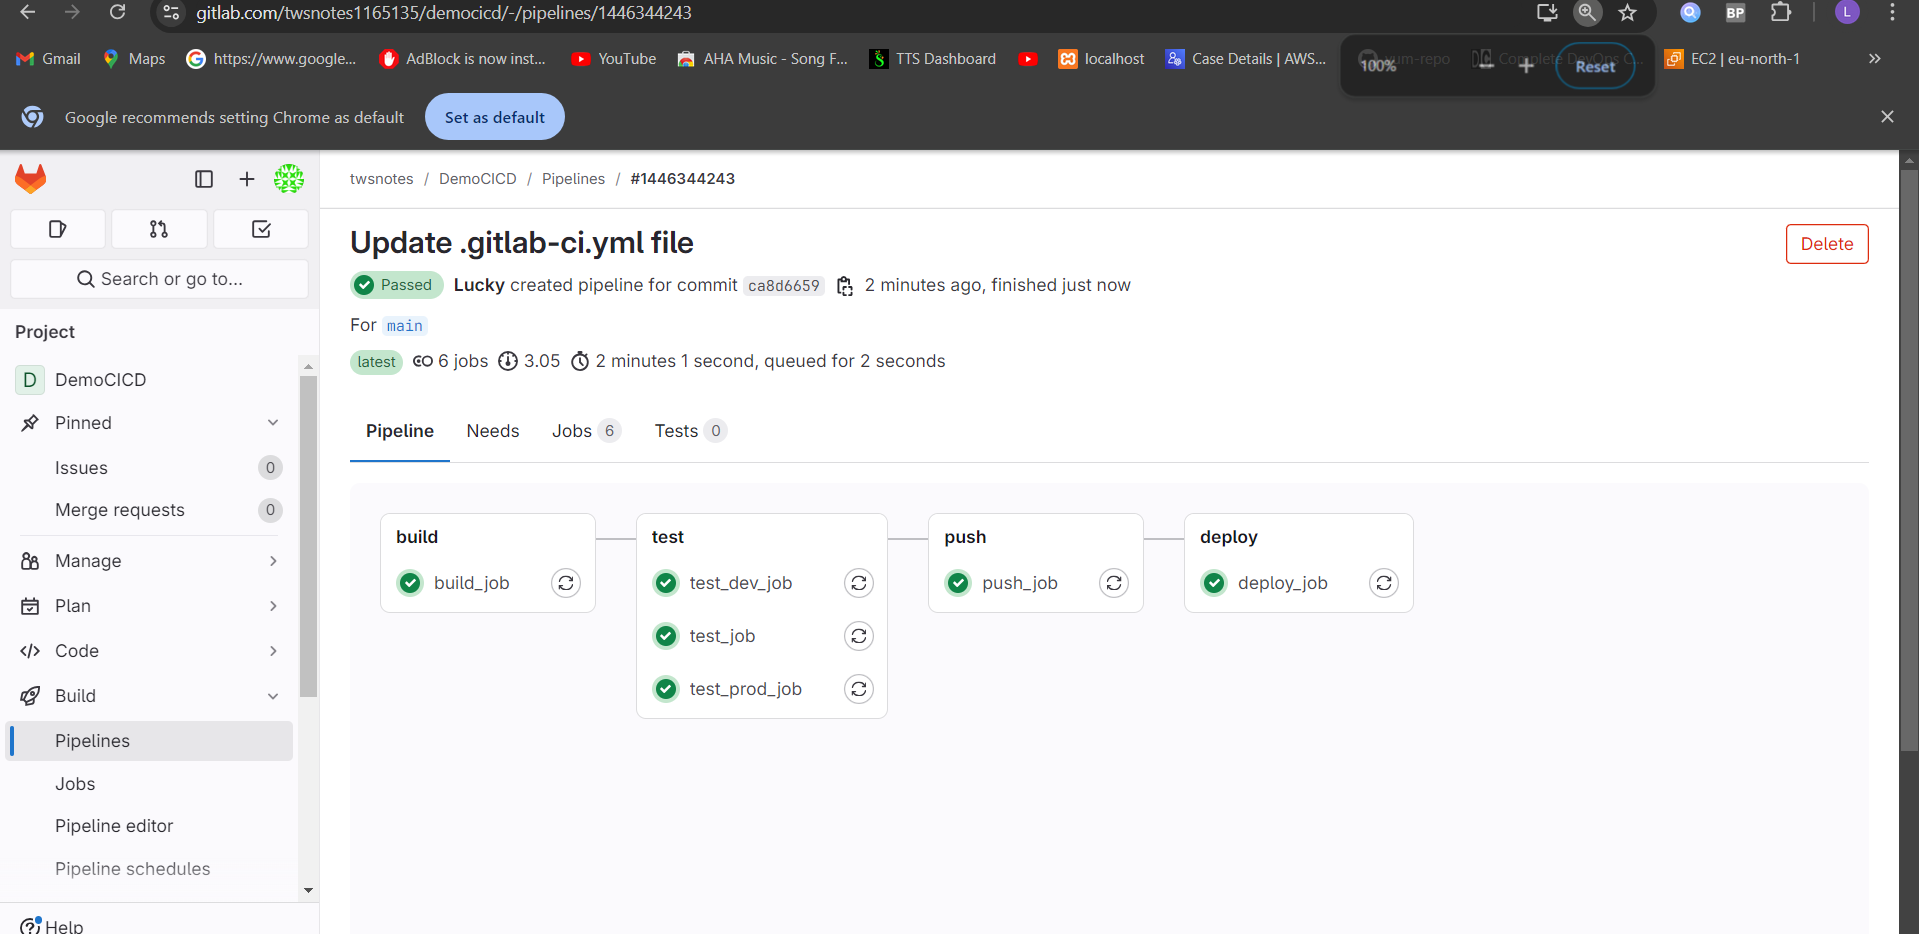
Parallel Jobs


Variables Types :
Predefined variables
User Defined or custom Variables(used for secret)
Environment
Predefined variables
Predefined variables Predefined variables become available at two different phases of pipeline execution. Some variables are available when GitLab creates the pipeline, and can be used to configure the pipeline or in job scripts. The other variables become available when a runner runs the job, and can only be used in job scripts. These are defined by Gitlab, Let’s add the Predefined Variables into our Pipeline. Added the Predefined Variables into the Pipelines.
Added the Predefined Variables into Pipelines
stages:
  - build
  - test
  - push
  - deploy


build_job:
  stage: build
  script:
    - echo "This is a job  build stage for $CI_PROJECT_NAME"


test_job:
  stage: test
  script:
    - echo "This is a test job in test stage for pipeline $CI_PIPELINE_NAME"

push_job:
  stage: push
  script:
    - echo "This is push job in push stage  "
deploy_job:
  stage: deploy
  script:
    - echo "This is a job in deploy stage"


test_dev_job:
  stage: test
  script:
    - echo "This is a job for dev in test stage"


test_prod_job:
  stage: test
  script:
    - echo "This is a job for prod in test stage "
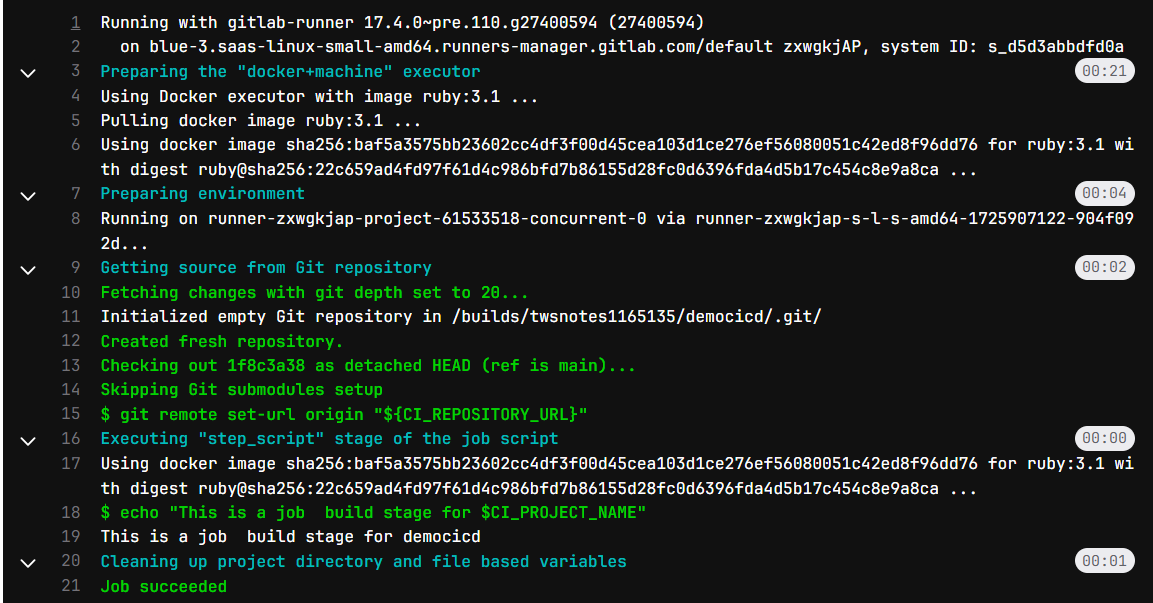
Let’s check the Output, Build Output has Predefined Variable & we can see the Project Name showing in the Next Line.
This way we can use the Predefined Variable to your pipelines.
environment variable
variables:
   DATE: "2024-09-09"
  MY_VAR: "Hello, World!"


stages:
  - test
  - build

test:
  stage: test
  script:

    - echo "The date is $DATE"
    - echo "My variable is $MY_VAR"
User Defined Variables OR SECRET:
Under Project—-> Setting —-> CI/CD —> Variables —> Expand
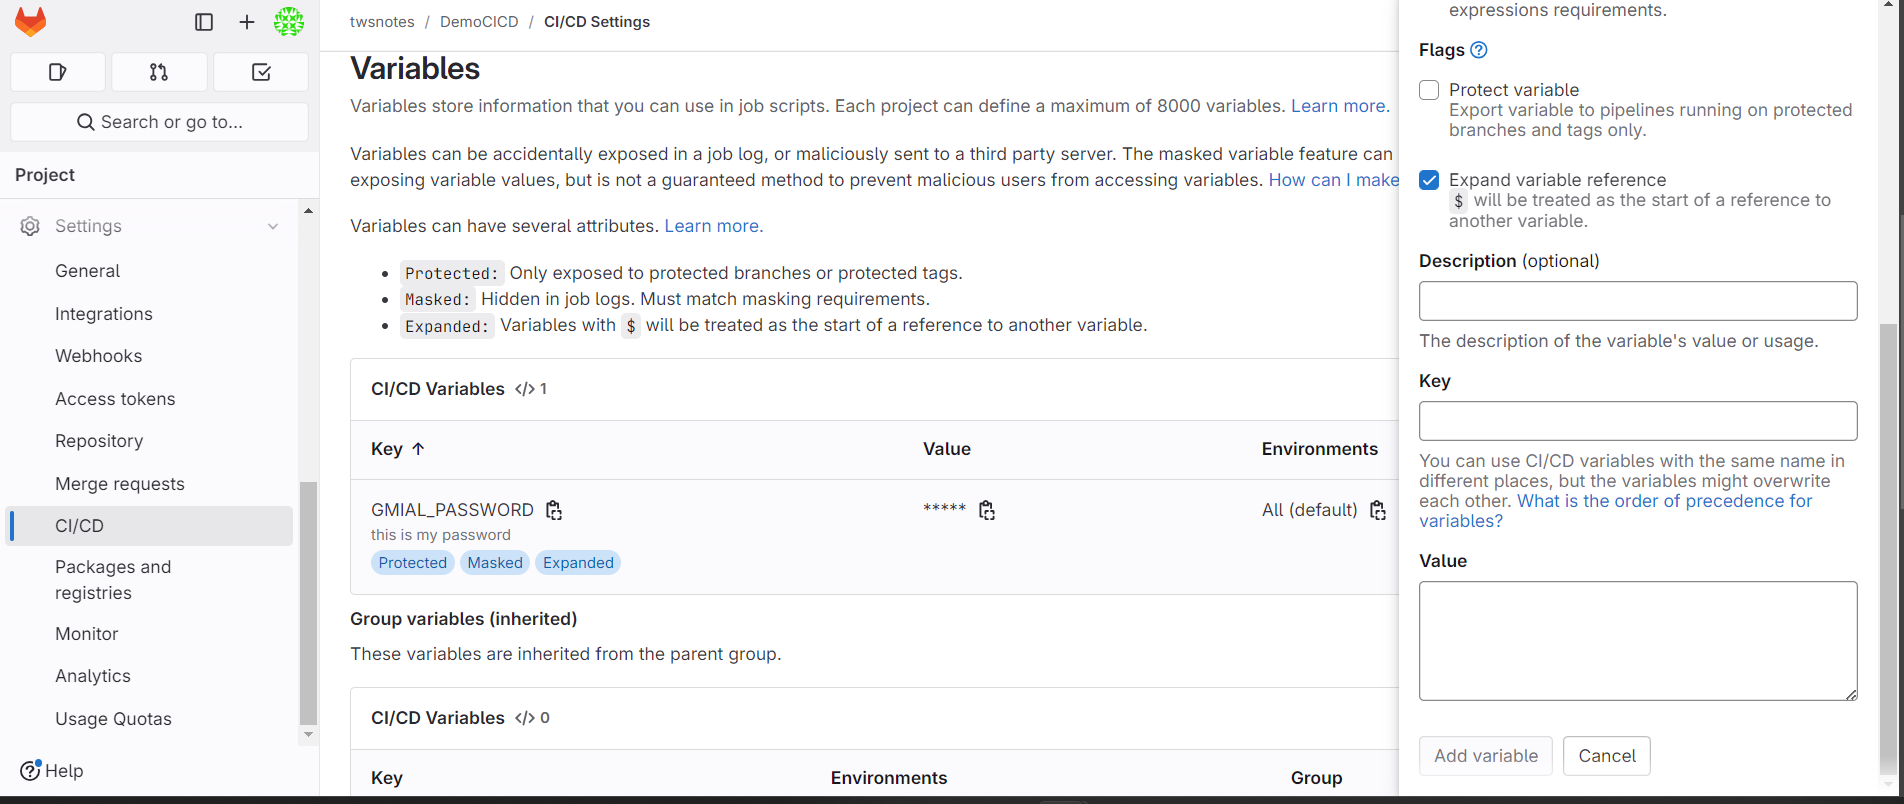
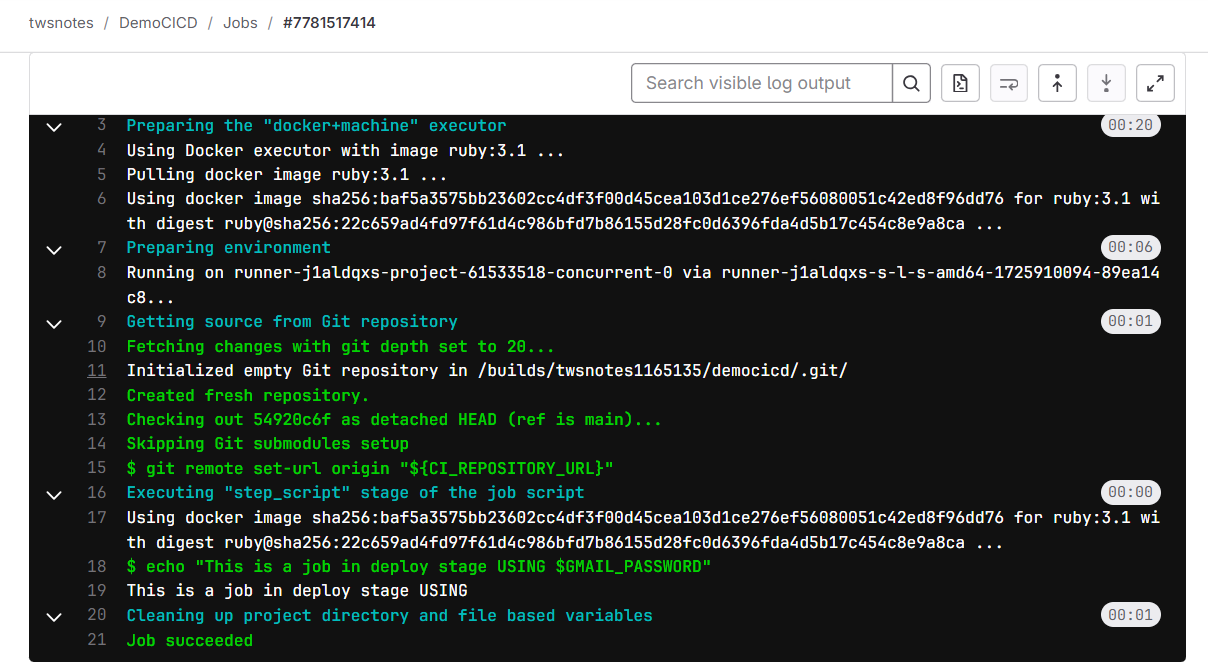
(a) Project Level Variable Define
(b) Group Level Variable Define
# Creating the Variables, follow the same process as shown on Project Level.
# Once you add the Variables on Group Level, it will be assigned to all your Projects.
Artifacts
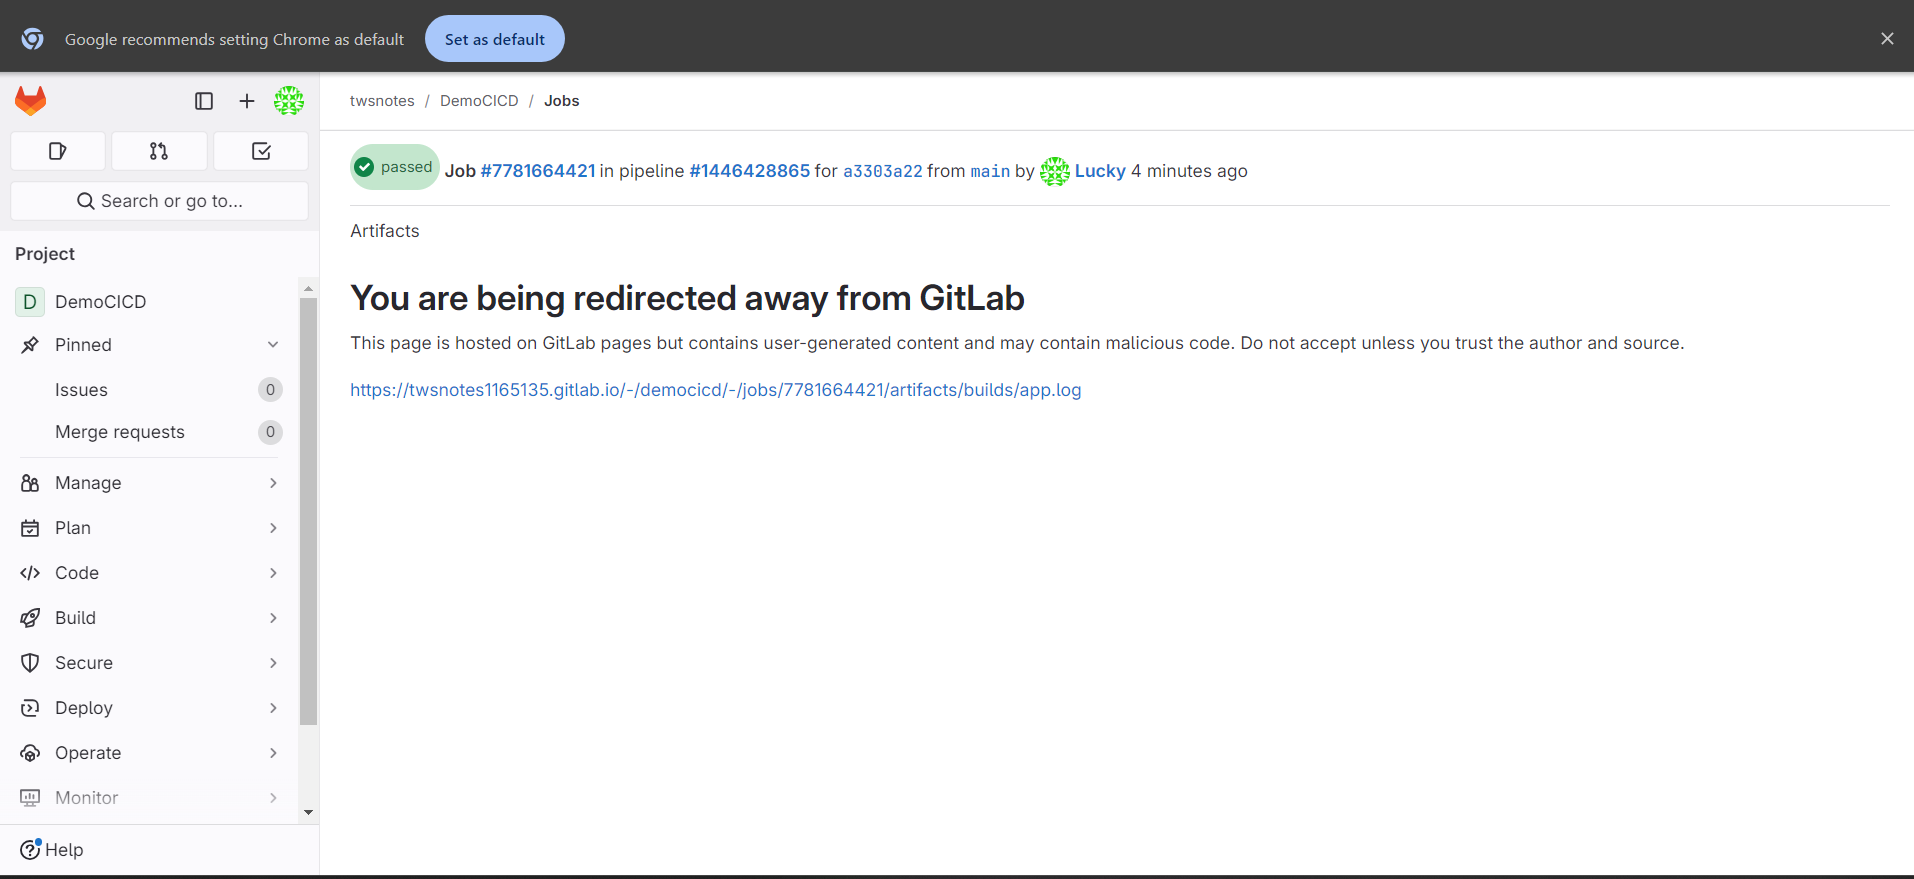
Artifacts are files that are generated by a job and can be used by other jobs in the same pipeline or even in different pipelines.
Artifacts can be used to pass data between jobs, store build outputs, or share files between pipelines .
stages:
  - build
  - test
  - push
  - deploy


build_job:
  stage: build
  script:
    - echo "This is a job  build stage for $CI_PROJECT_NAME"
    - mkdir -p builds
    - echo "this is a log file data" > builds/app.log
    - echo "more logs" >> builds/app.log

  artifacts:
    paths:
      - builds/
    expire_in: 1 week


test_job:
  stage: test
  script:
    - echo "This is a test job in test stage for pipeline $CI_PIPELINE_NAME" >> builds/app.log

  artifacts:
    paths:
      - builds/
    expire_in: 1 week

push_job:
  stage: push
  script:
    - echo "This is push job in push stage  "
deploy_job:
  stage: deploy
  script:
    - echo "This is a job in deploy stage USING $GMAIL_PASSWORD"


test_dev_job:
  stage: test
  script:
    - echo "This is a job for dev in test stage"


test_prod_job:
  stage: test
  script:
    - echo "This is a job for prod in test stage "
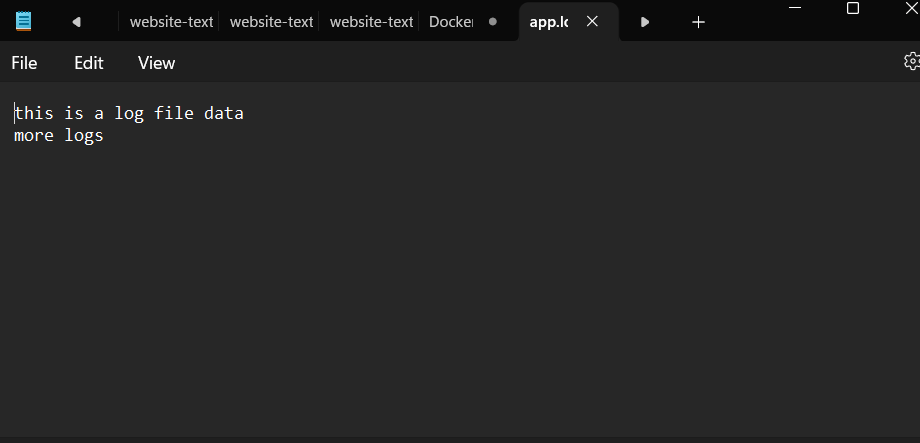
mkdir -p builds: This command creates a directory namedbuildsif it doesn't already exist. The-pflag ensures that the command doesn't fail if the directory already exists.echo "this is a log file data" > builds/app.log: This command creates a file namedapp.login thebuildsdirectory and writes the string "this is a log file data" to it.echo "more logs" >> builds/app.log: This command appends the string "more logs" to the existingapp.logfile.paths:specifies that thebuilds/directory should be saved as an artifact.expire_in: 1 weekspecifies that the artifact should be kept for 1 week before it's automatically deleted.
Gitlab Runners
runner : a runner is a server where your ci jobs are picked and process and whatever the data or output was processed it returns back to gitlab.com or in your instance
Self-Hosted Runners:
Self-hosted runners, are runners that you host and manage yourself. You can install and configure them on your own infrastructure, and you have full control over the environment and the runner.
SaaS runners are hosted and managed by GitLab, while instance runners are hosted and managed by you. They are not the same, but instance runners are a type of self-hosted runner.
Click on Setting—> CICD —> Runners —> Click on Expand
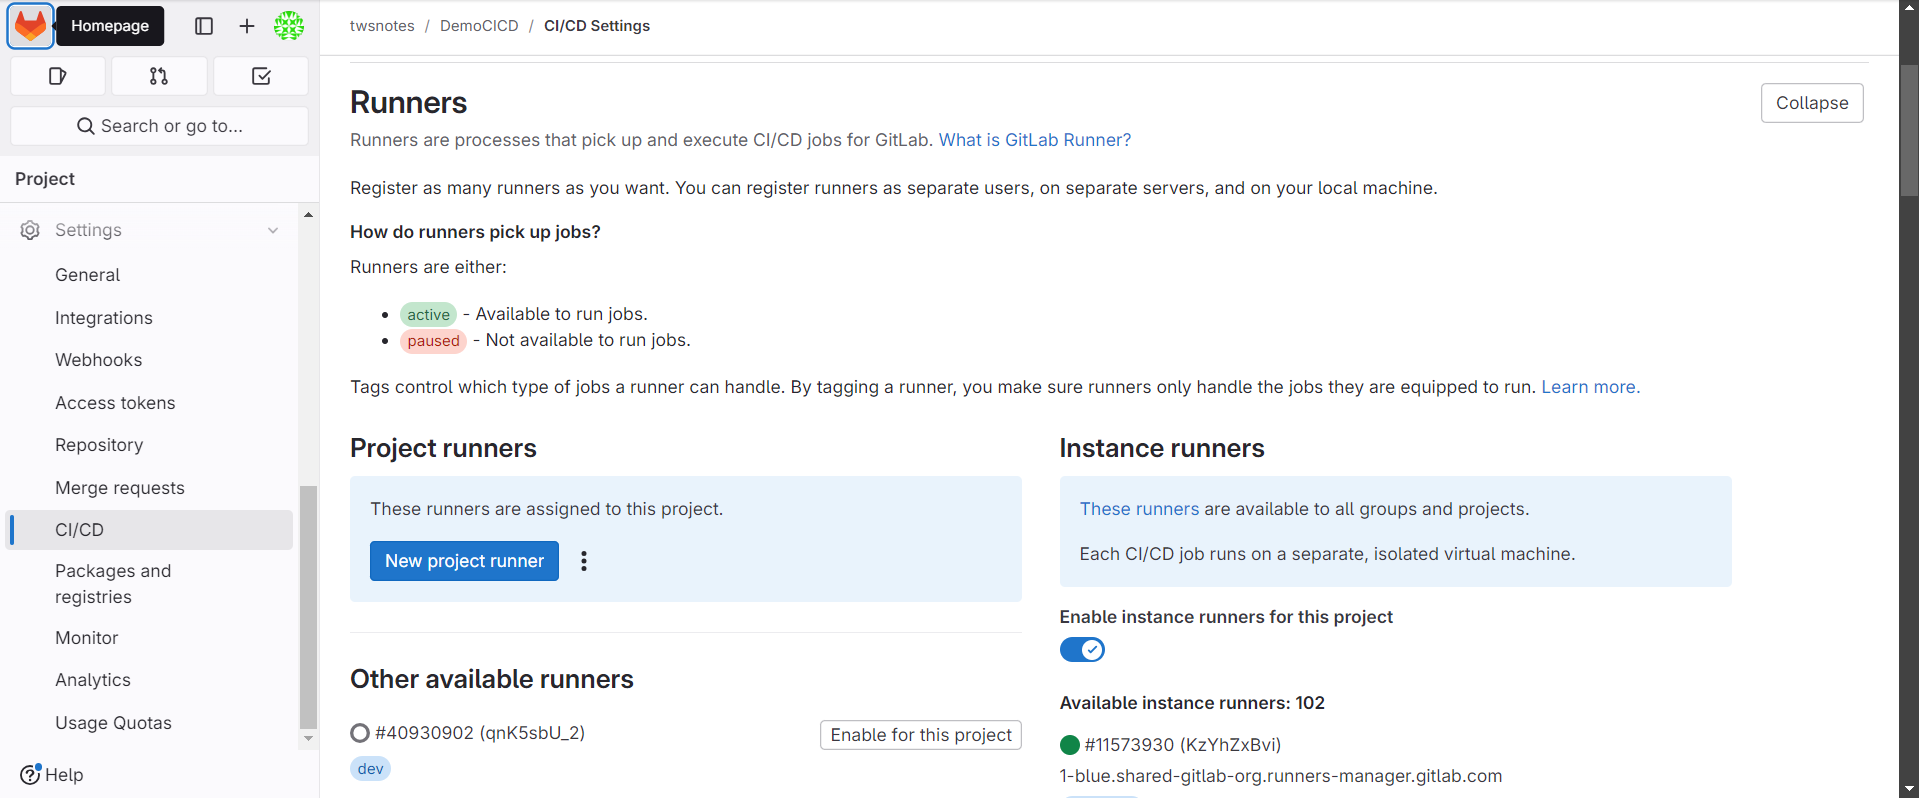
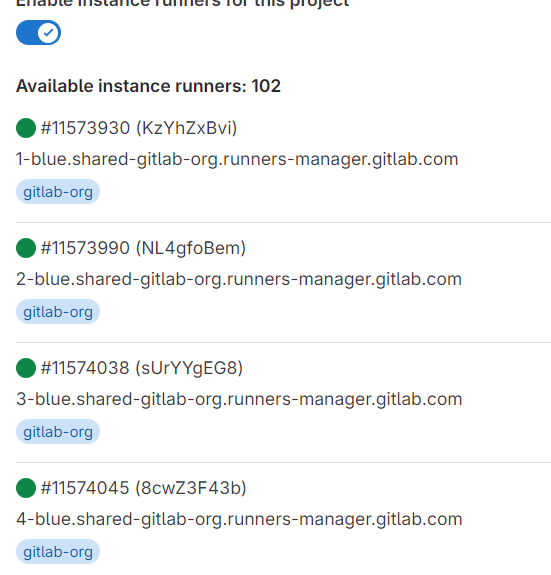
You can Create your Own runner or you can use “Instance Runners” provided by Gitlab for free.
These are the instance runners
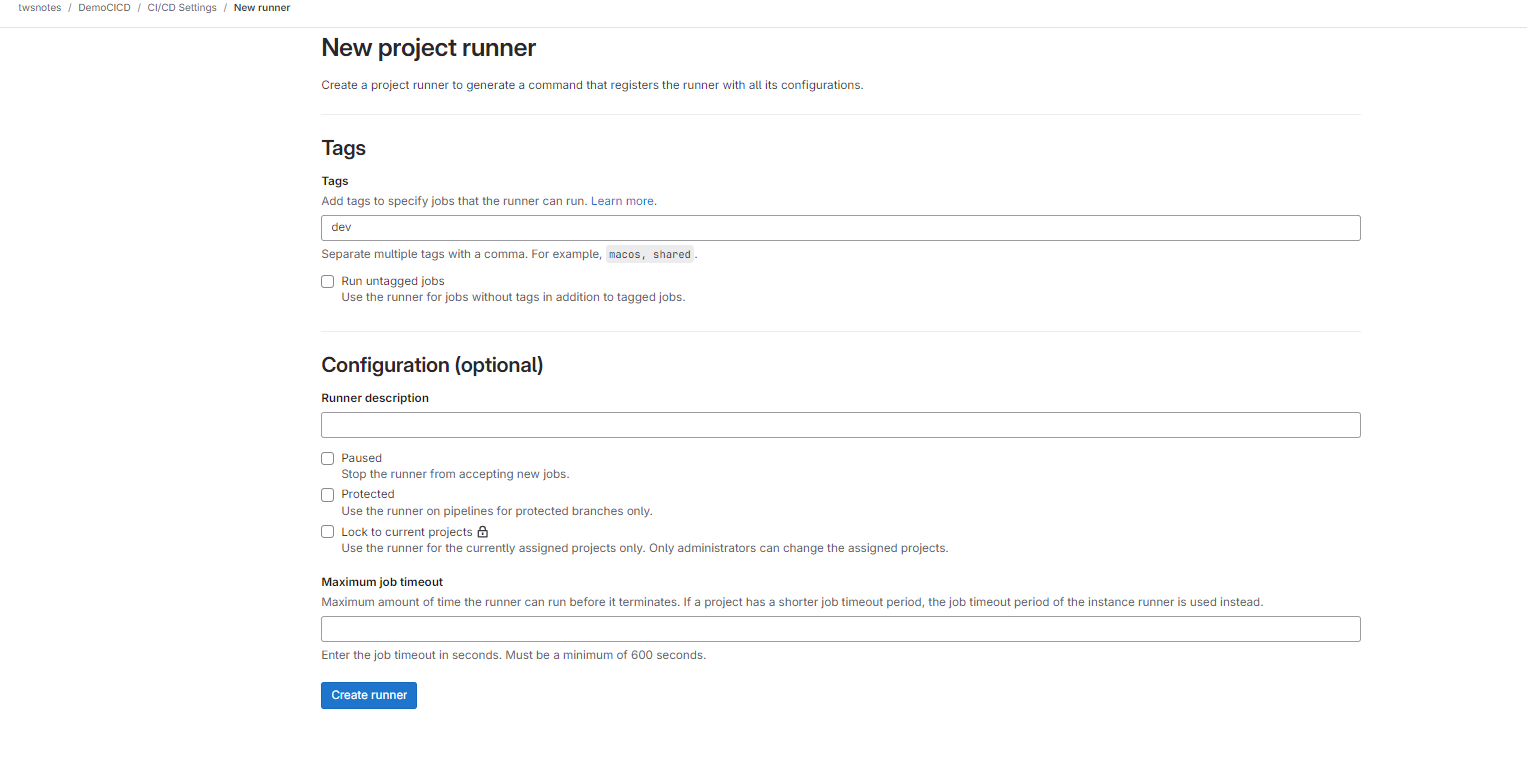
Let’s add the “New Project Runner”

# Tag : Value which we will define in the Pipeline to instruct which runner to use
Note : We can use different platforms to run runners, but I will be using Linux Platform.
# Execute the below steps on Linux EC2 Instance to register your Gitlab Runner. Click on “How do i install Gitlab runner”
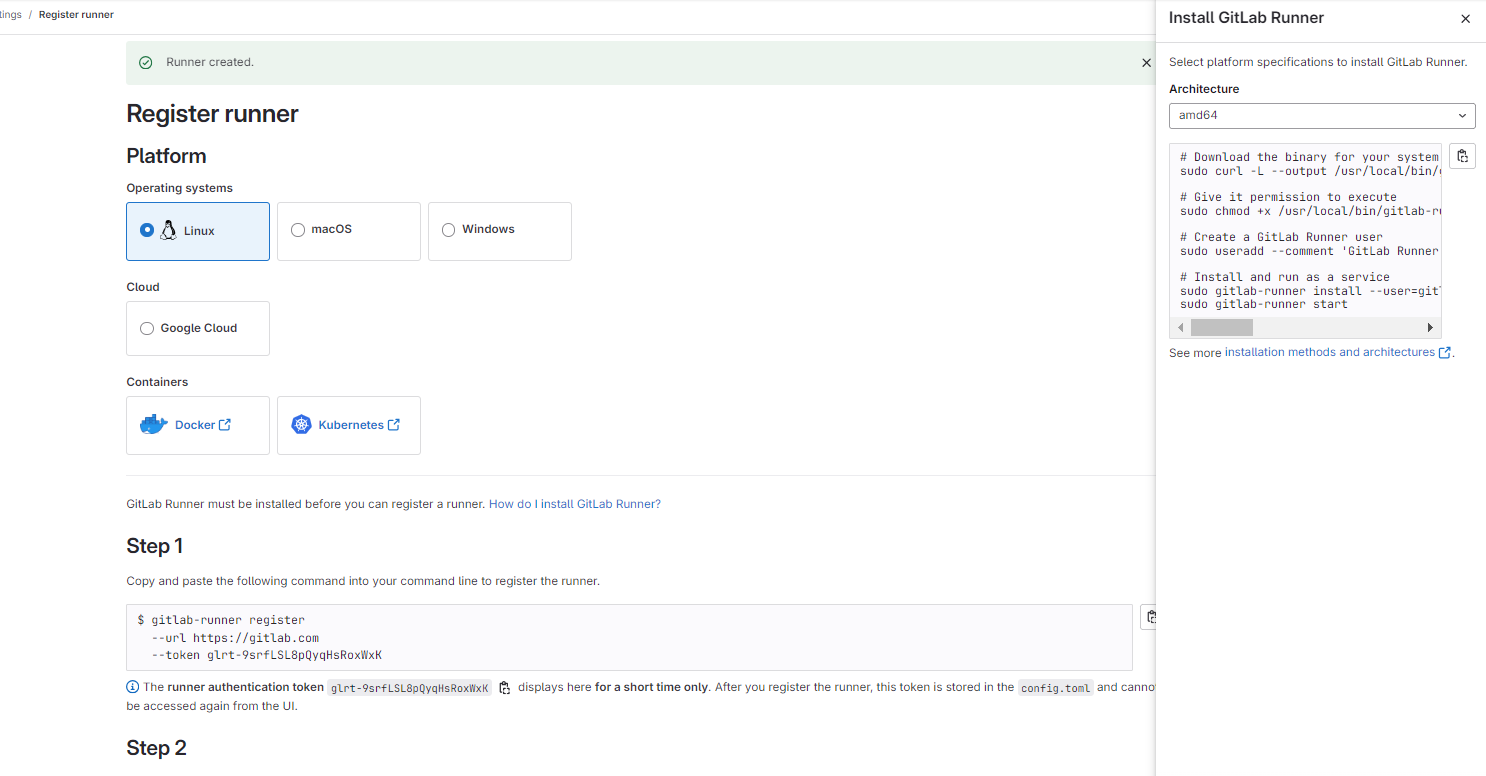
Install the Gitlab Runner
# Run the below command on an EC2 Linux instance to install the Gitlab Runner.
# Download the binary for your system
sudo curl -L --output /usr/local/bin/gitlab-runner https://gitlab-runner -downloads.s3.amazonaws.com/latest/binaries/gitlab-runner-linux-amd64
# Give it permission to execute
sudo chmod +x /usr/local/bin/gitlab-runner
# Create a GitLab Runner
user sudo useradd --comment 'GitLab Runner' --create-home gitlab-runner --shell /bin/bash
# Install and run as a service
sudo gitlab-runner install --user=gitlab-runner --working-directory=/home/gitlab-runner sudo gitlab-runner start
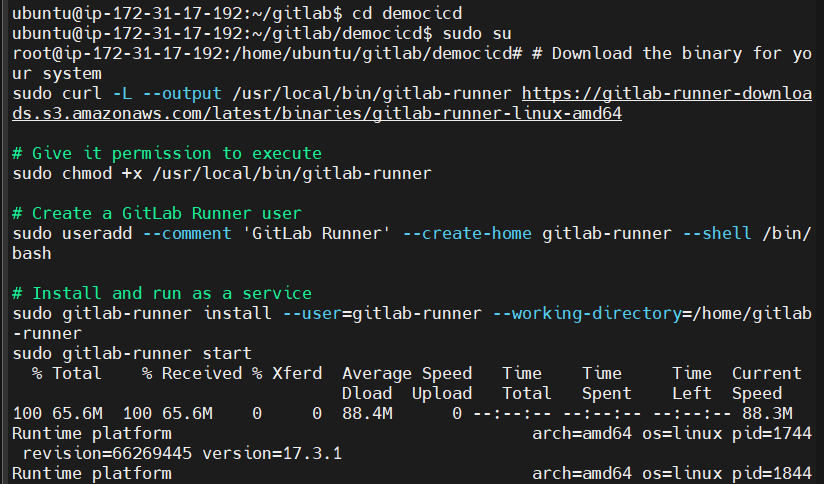
Gitlab runner status
To Check the gitlab runner status, you have to be a root user else it will give you a below warning
fatal: the --user is not supported for non-root users

Register the Gitlab Runner
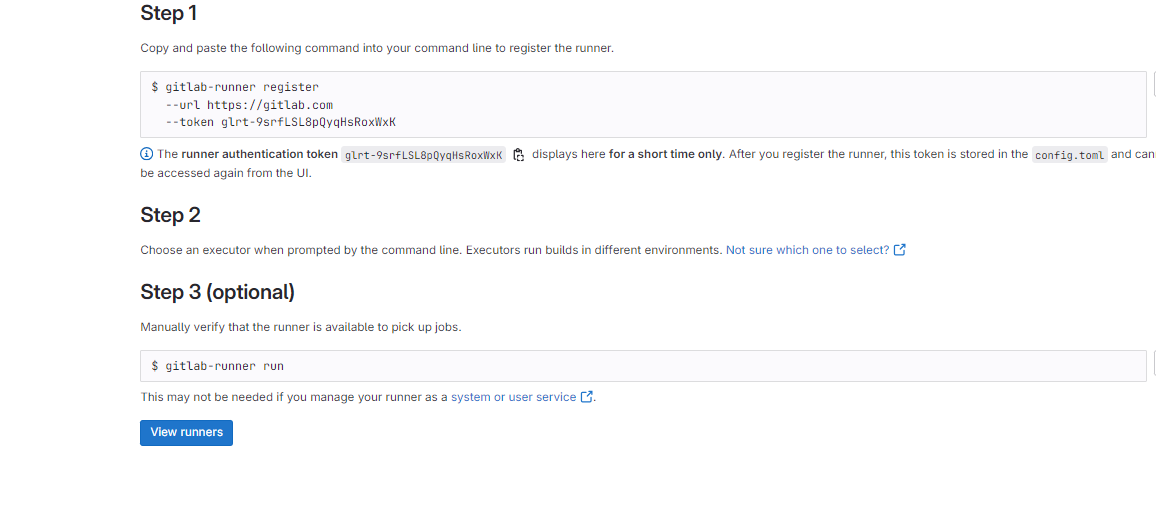
# Run Step-1 Command to register the runner with your Project.
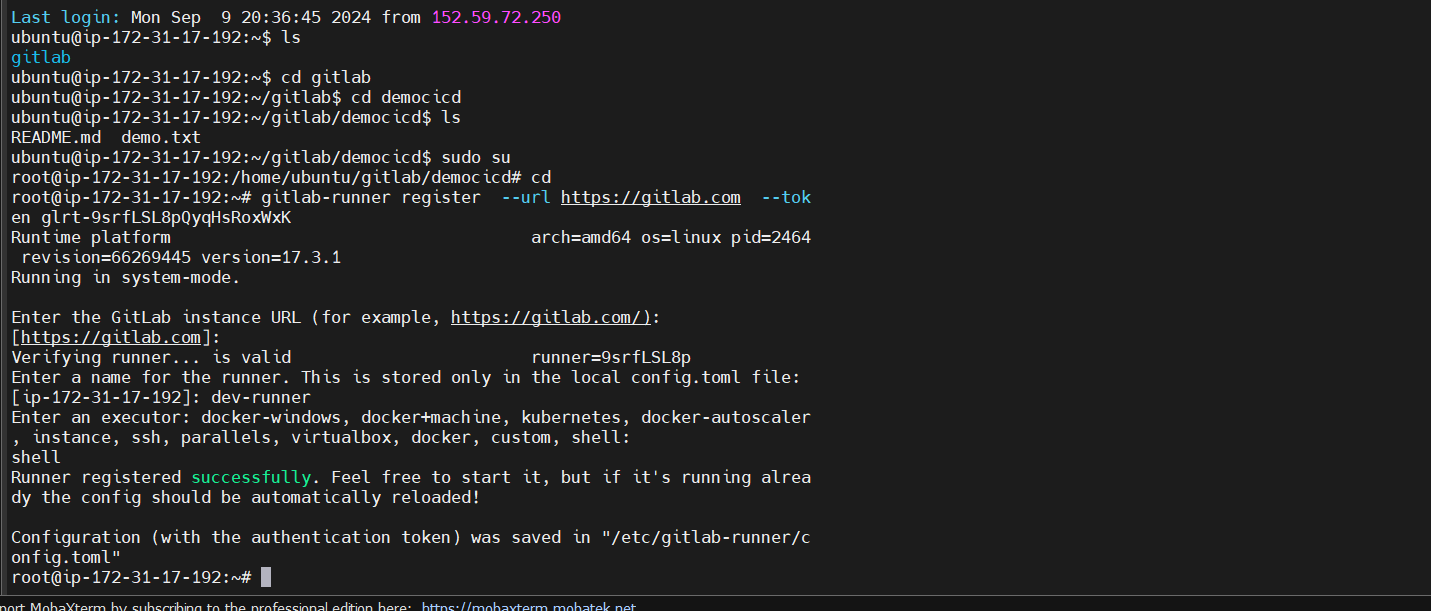
# After Step-1 Command, runner registered with the Project.
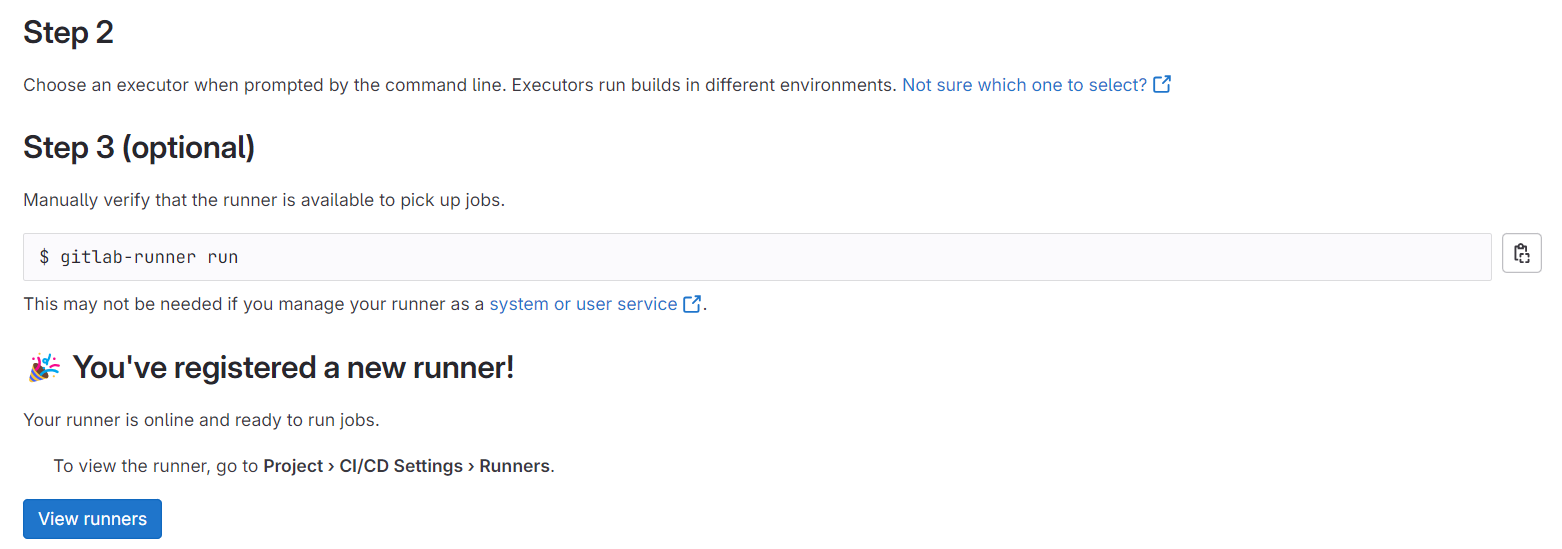
Click on View Runner, here you can see newly created runner with Tag Name : Dev
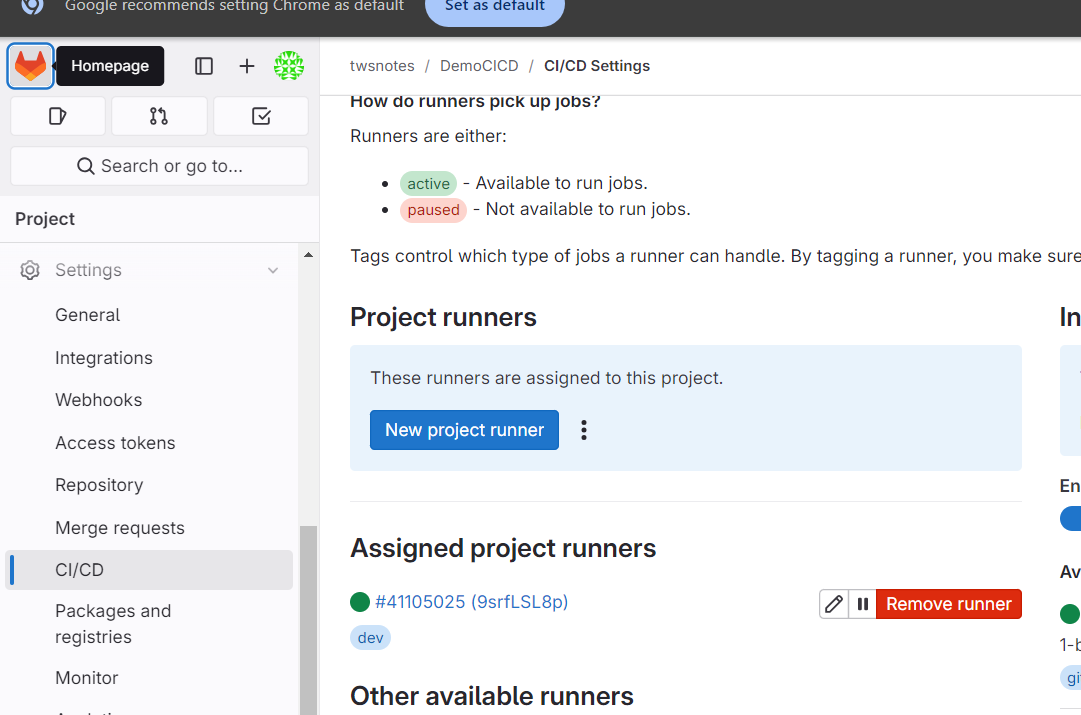
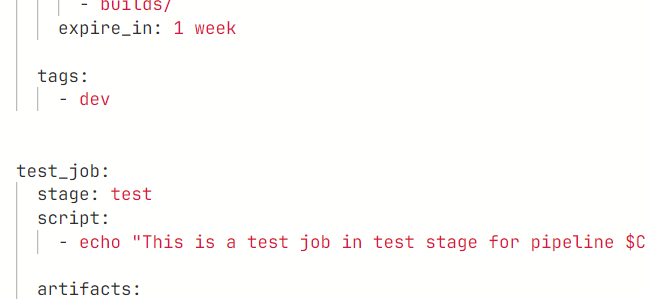
using tag this particular will run on the executor with the label dev
let's say i have another executor or another runner with the label production so that time you can add that this will run on production
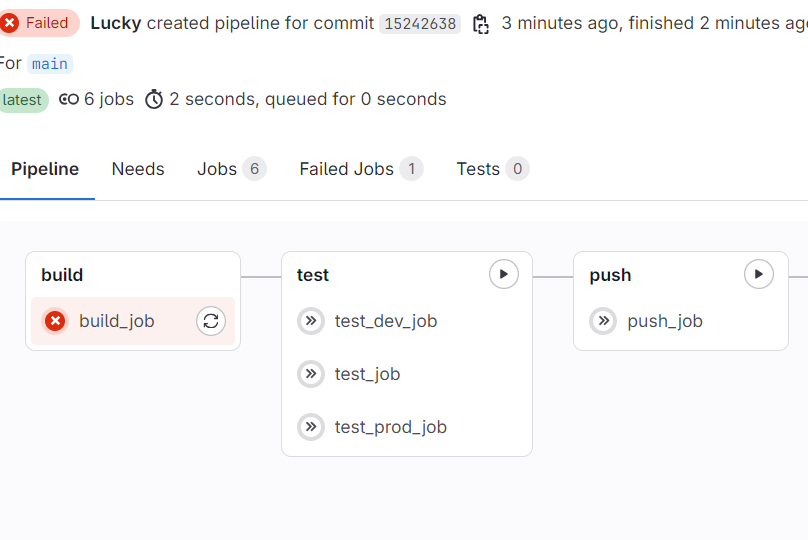
pipeline failed
in your linux instance there is a particular file which is known as .bash_logout
what does .bash_logout do , generally logs out your runner and thats file need to be commented out
sudo su
cd /home/gitlab-runner/
ls -a
output : .  ..  .bash_logout  .bashrc  .profile
this is the file which causes of trouble
so comment this


gitlab-runner status
Runtime platform                                    arch=amd64 os=linux pid=2681 revision=66269445 version=17.3.1
gitlab-runner: Service is running
now pipeline is success
guess, where are these jobs running because the instance runner or the saas runners we turned it off right but where are these running
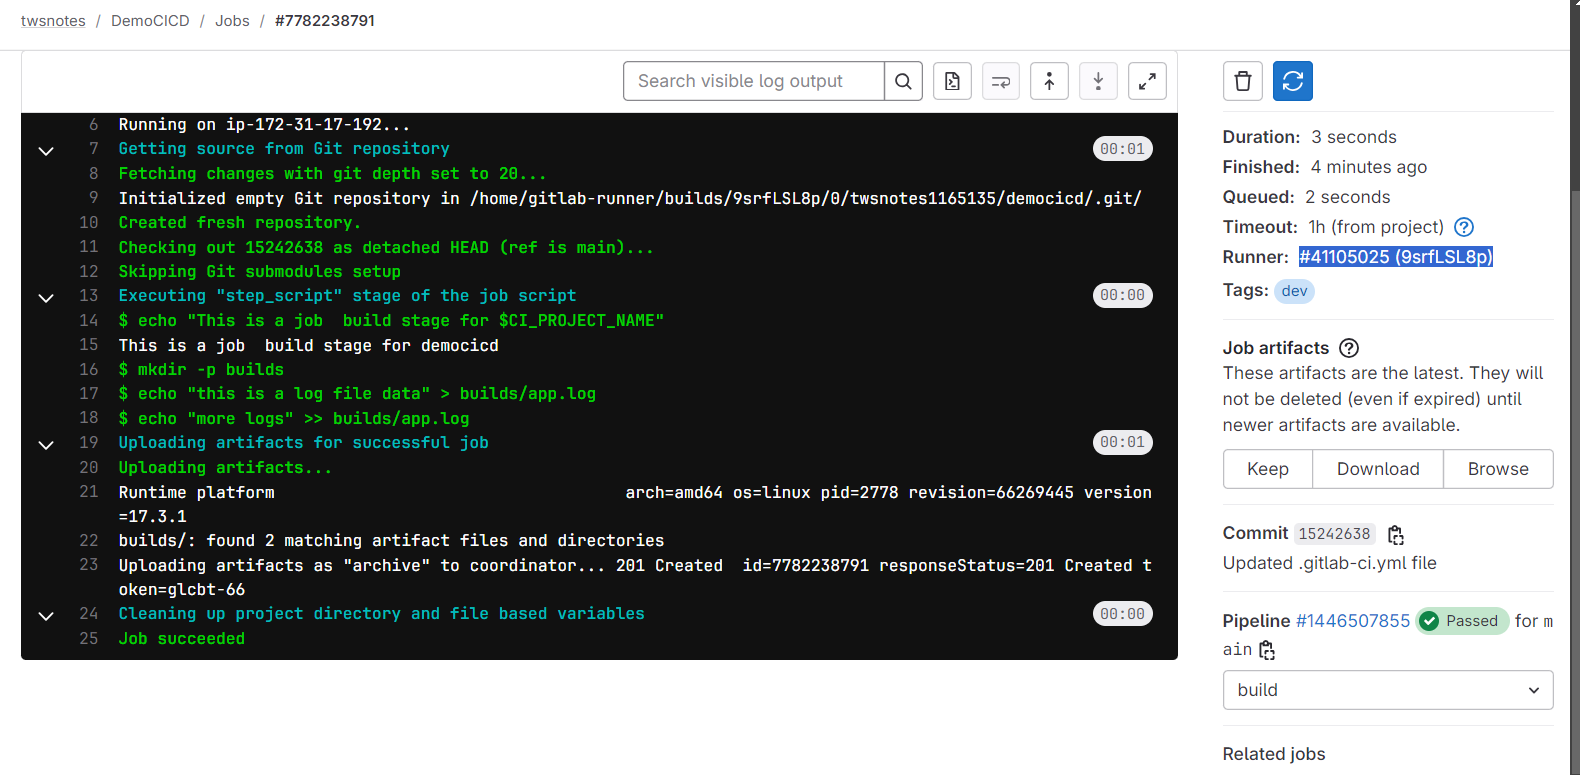
here you will see #41105025 (9srfLSL8p) - this is the runner id
Django Notes App
Project Import from Here are the Options to import your projects into Gitlab.

We will be using Repository by URL Option which is imported from GitHub. Mirror Repository : Check this box hence no need for Manual Update, it will be Mirroring the changes from Source “GitHub”
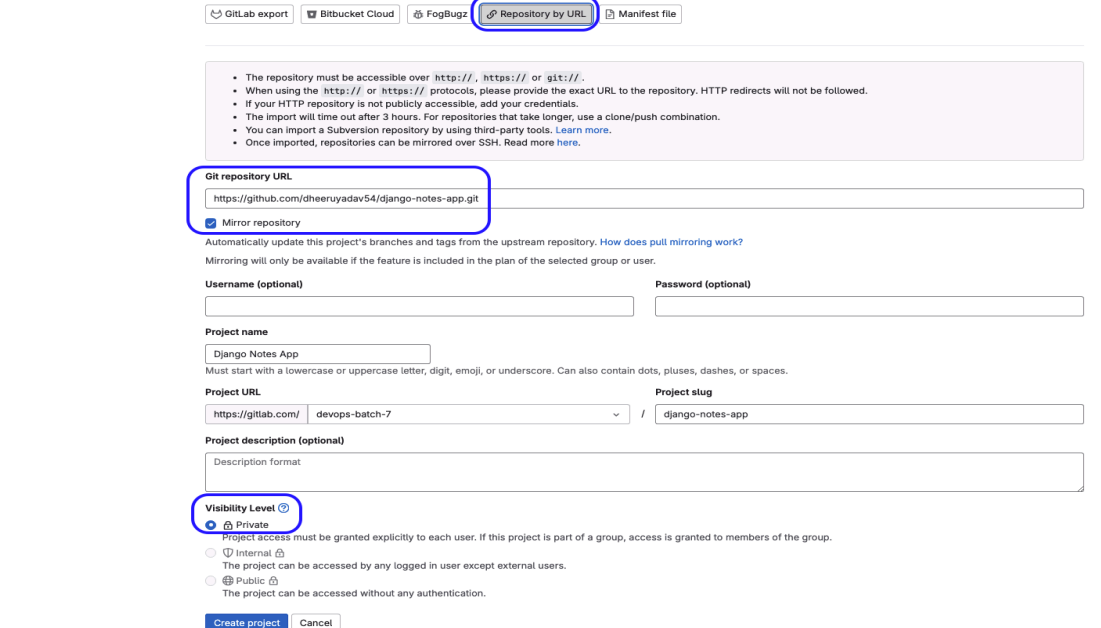
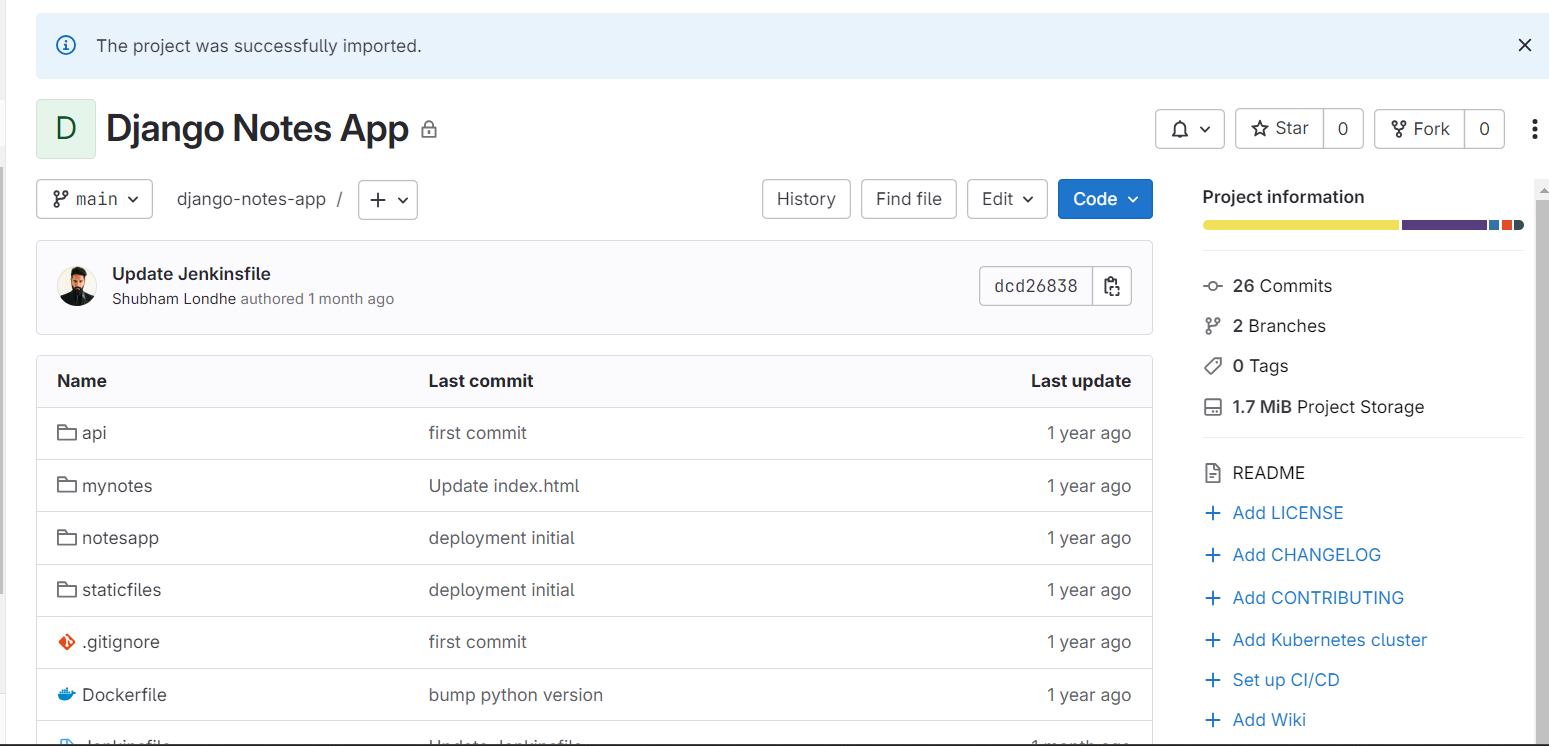
SSH Key-Gen on EC2 Machine $ ssh-keygen : Use this command to generate the Private & Public Key Pair on EC2 Instance.
# Copy the Public key from EC2 Instance to gitlab Account cat /home/ubuntu/.ssh/id_ed25519.pub
Add the Public Key to Gitlab Account Click on your profile icon —-> Edit Profile —-> SSH Keys —-> Add new key
Paste the Copied Public key here & hit add key.
$ git clone git@gitlab.com:devops-batch-7/django-notes-app.git : Use SSH URL
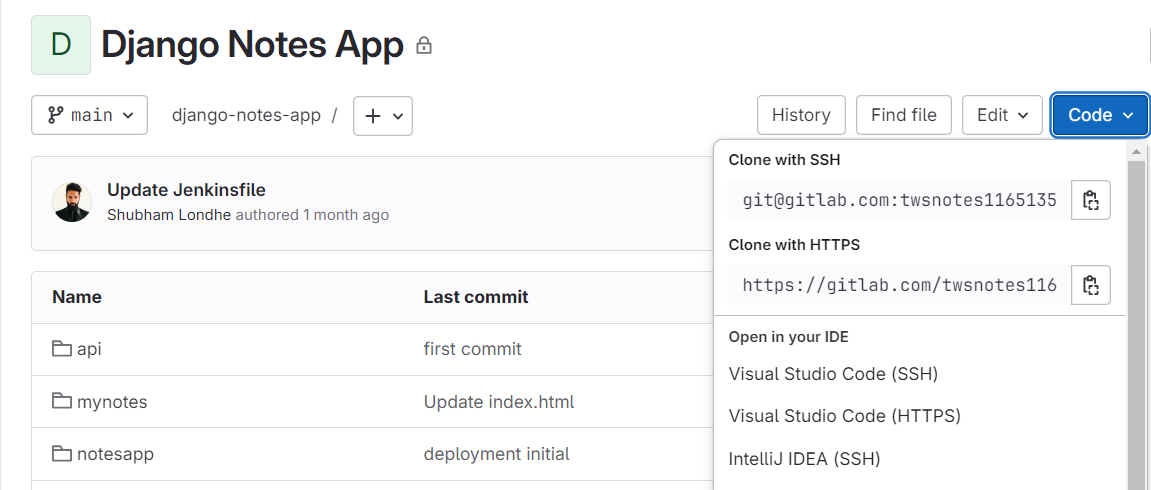
# After adding the Public key into gitlab, we can clone our project locally on EC2 instance

# Added a .gitlab-ci.yml file with the four stages with runner tag: Dev
and enable this dev runner tag
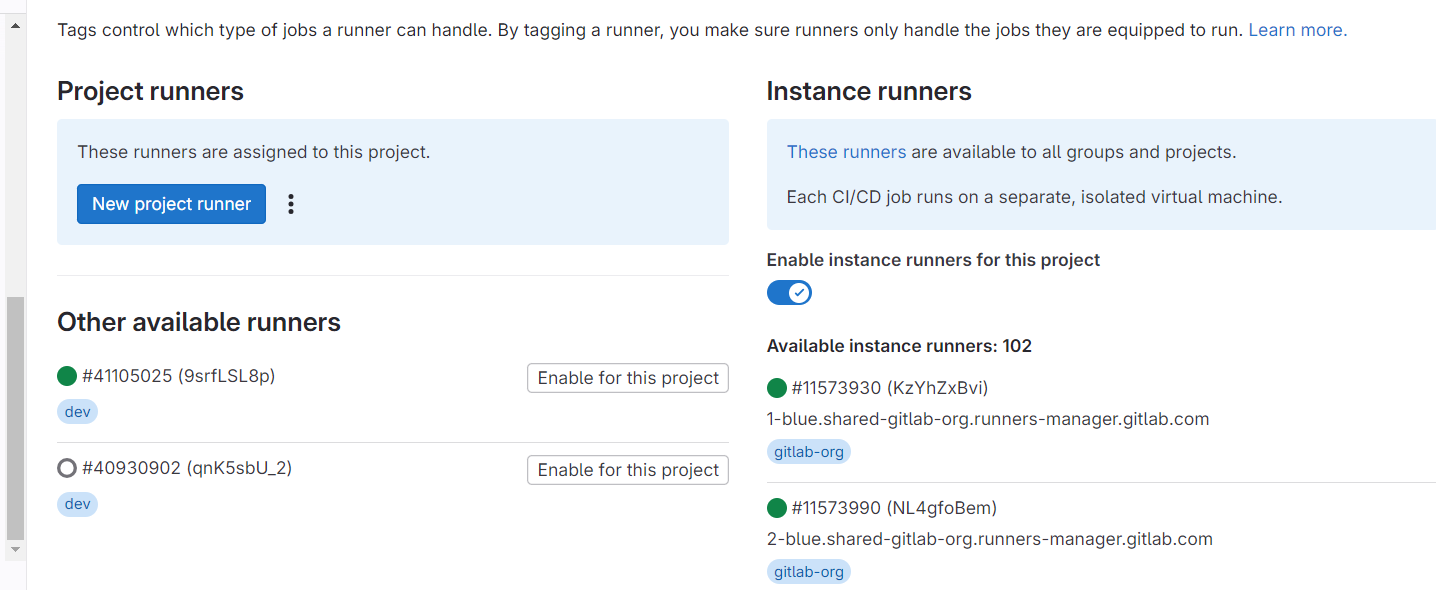
# Added a .gitlab-ci.yml file with the four stages with runner tag: Dev
Prerequisites - docker & compose command should have installed
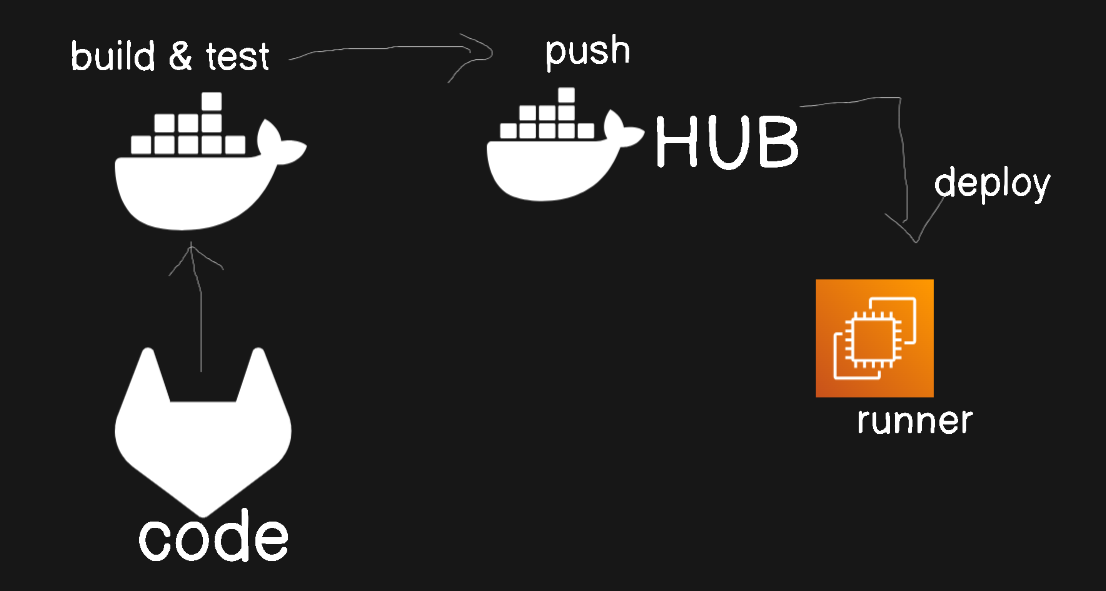
Run the Pipeline
stages:
    - build_and_test
    - push_to_dockerhub
    - deploy


build_job:
    stage: build_and_test
    script:
        - docker build -t notes-app:latest .
    tags:
        - dev

    artifacts:
        paths:
            - builds/
        expire_in: 1 day

push_job:
    stage: push_to_dockerhub
    script:
        - docker login -u $DOCKERHUB_USER -p $DOCKERHUB_PAT
        - docker image tag notes-app:latest $DOCKERHUB_USER/notes-app:latest
        - docker push  $DOCKERHUB_USER/notes-app:latest
    tags:
        - dev

    artifacts:
        paths:
            - builds/
        expire_in: 1 day


deploy_job:
    stage: deploy
    script:
        - docker compose up -d
    tags:
        - dev

    artifacts:
        paths:
            - builds/
        expire_in: 1 day
Successful Pipeline:
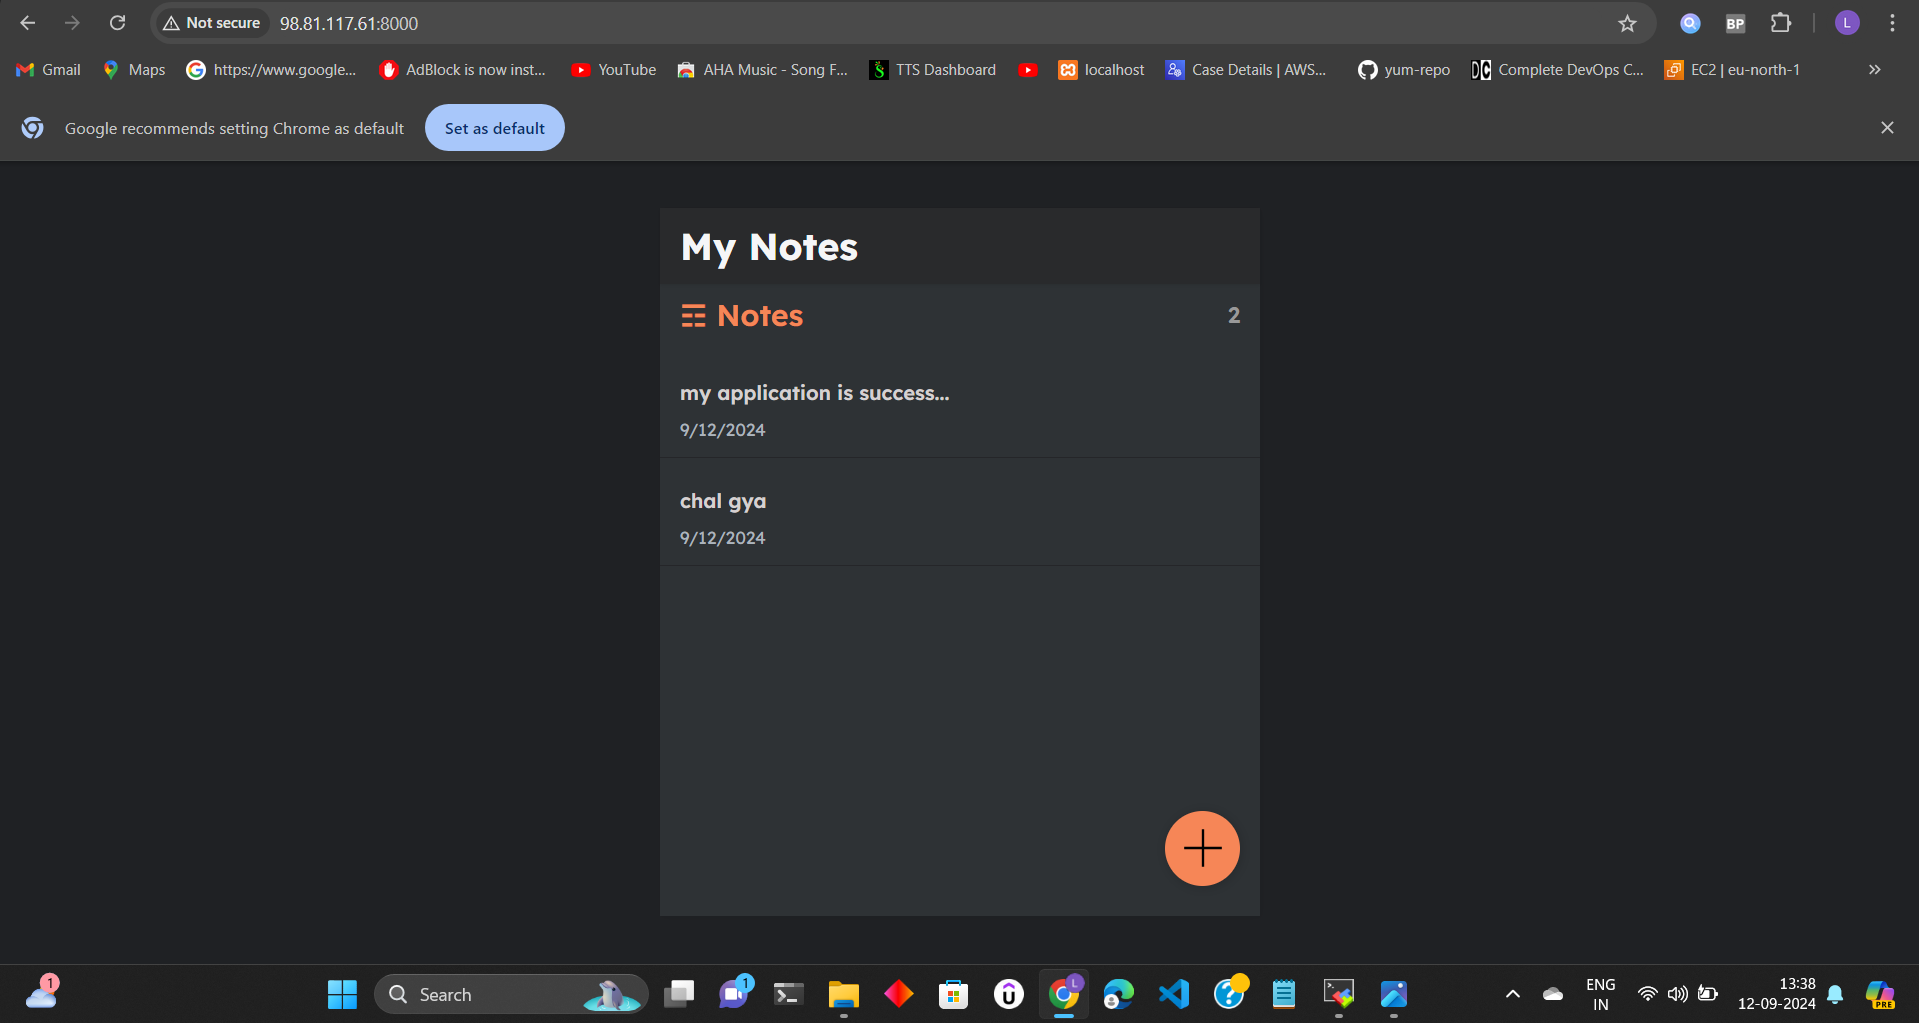
we have successfully uploaded the Docker image to DockerHub & deployed it
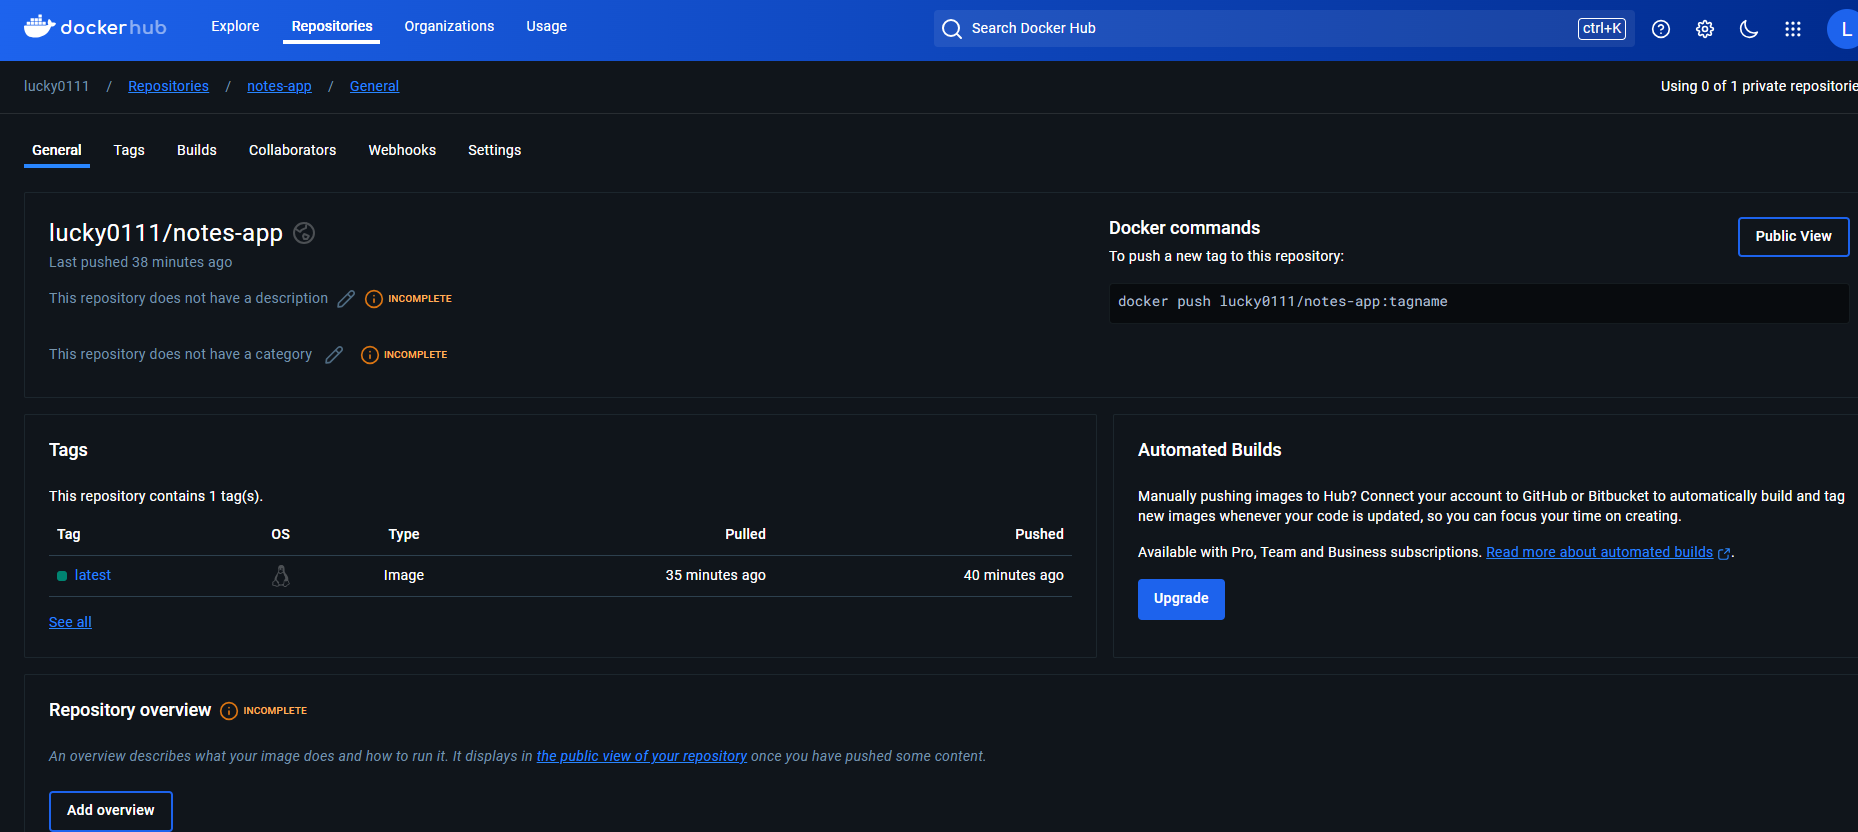
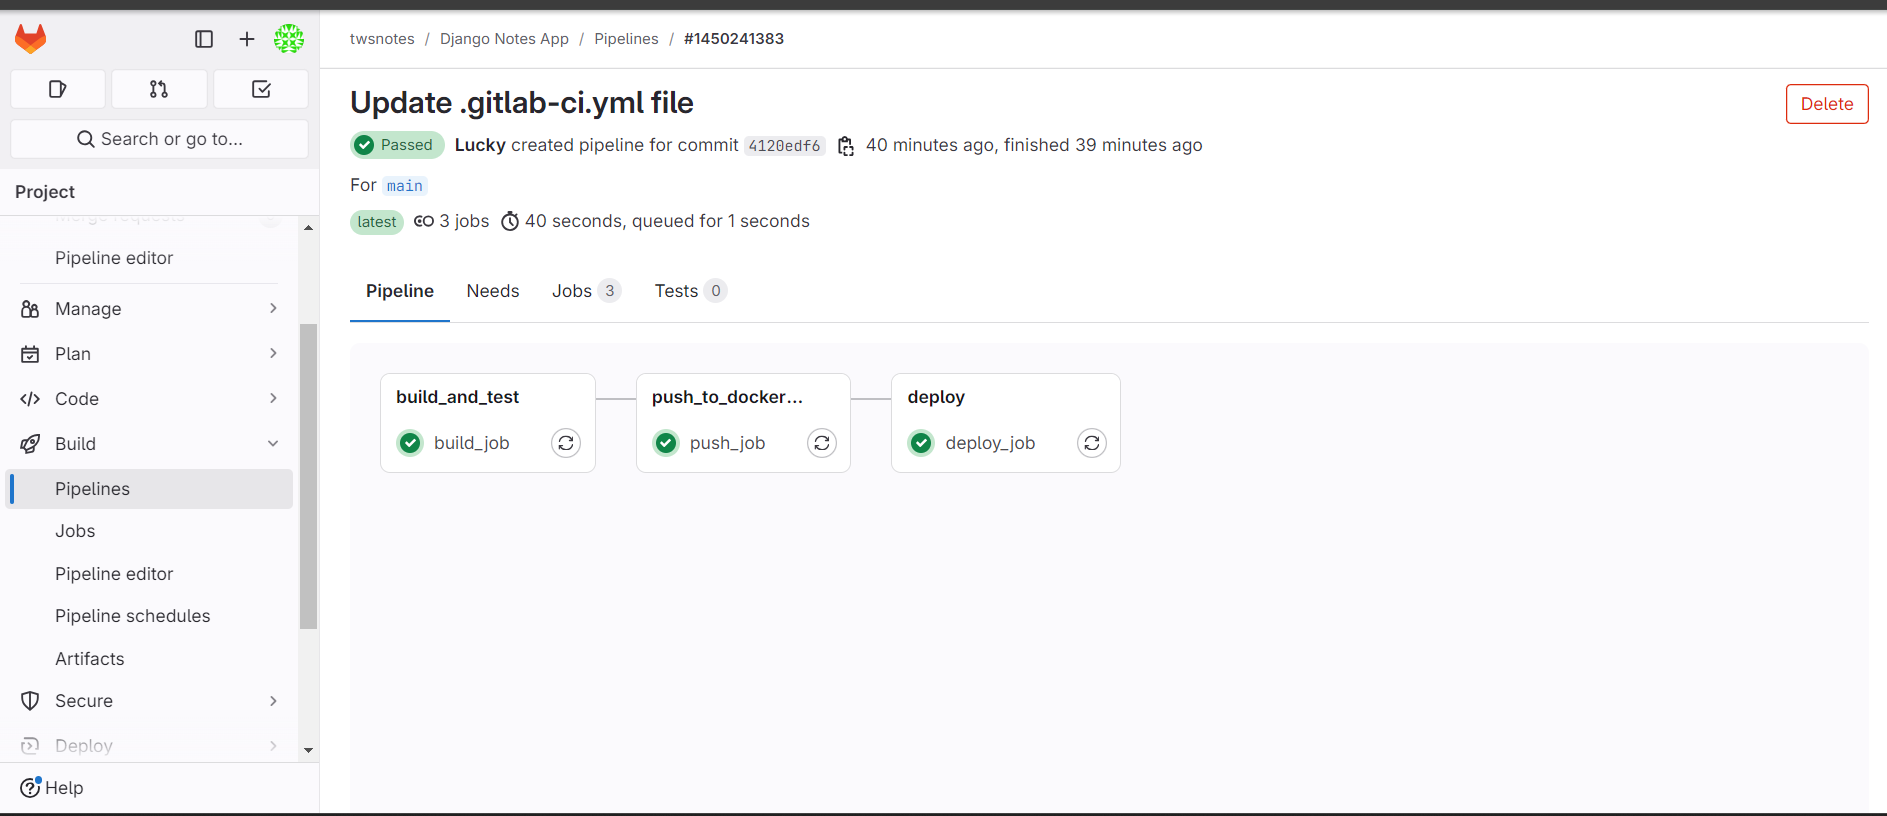
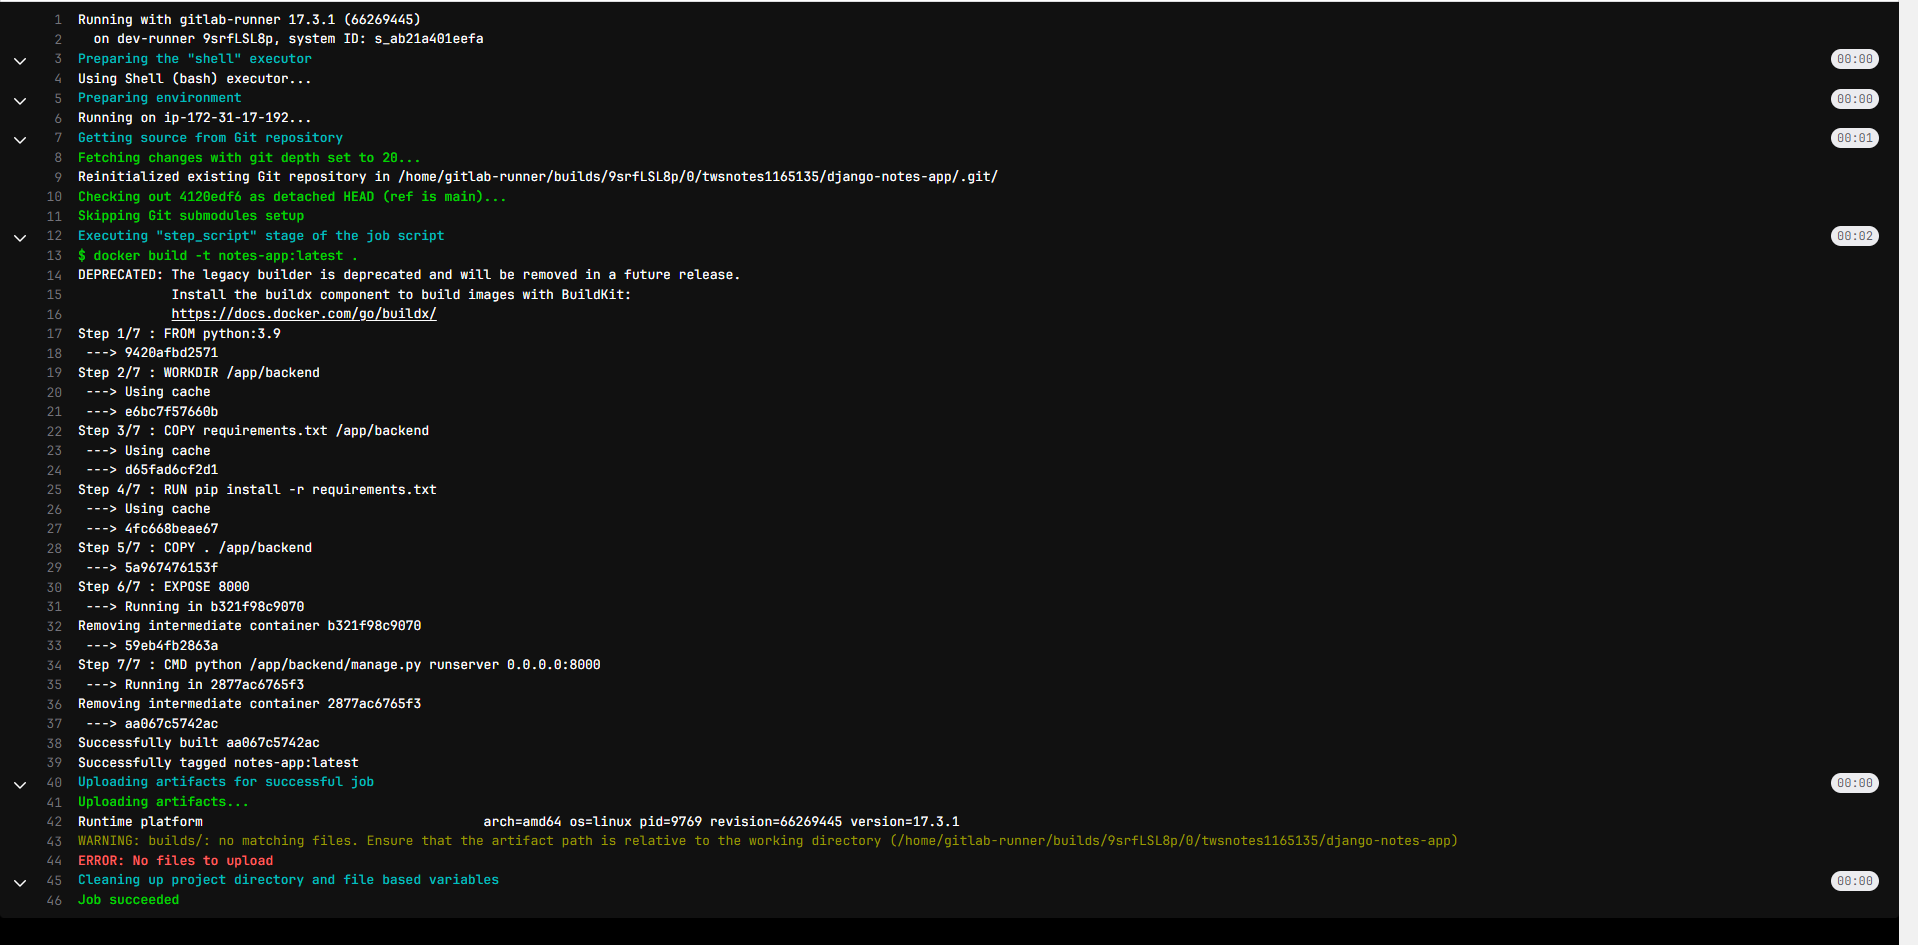
Build Job:
$ docker build -t node-app:latest . : Run this Docker command to build the docker image.
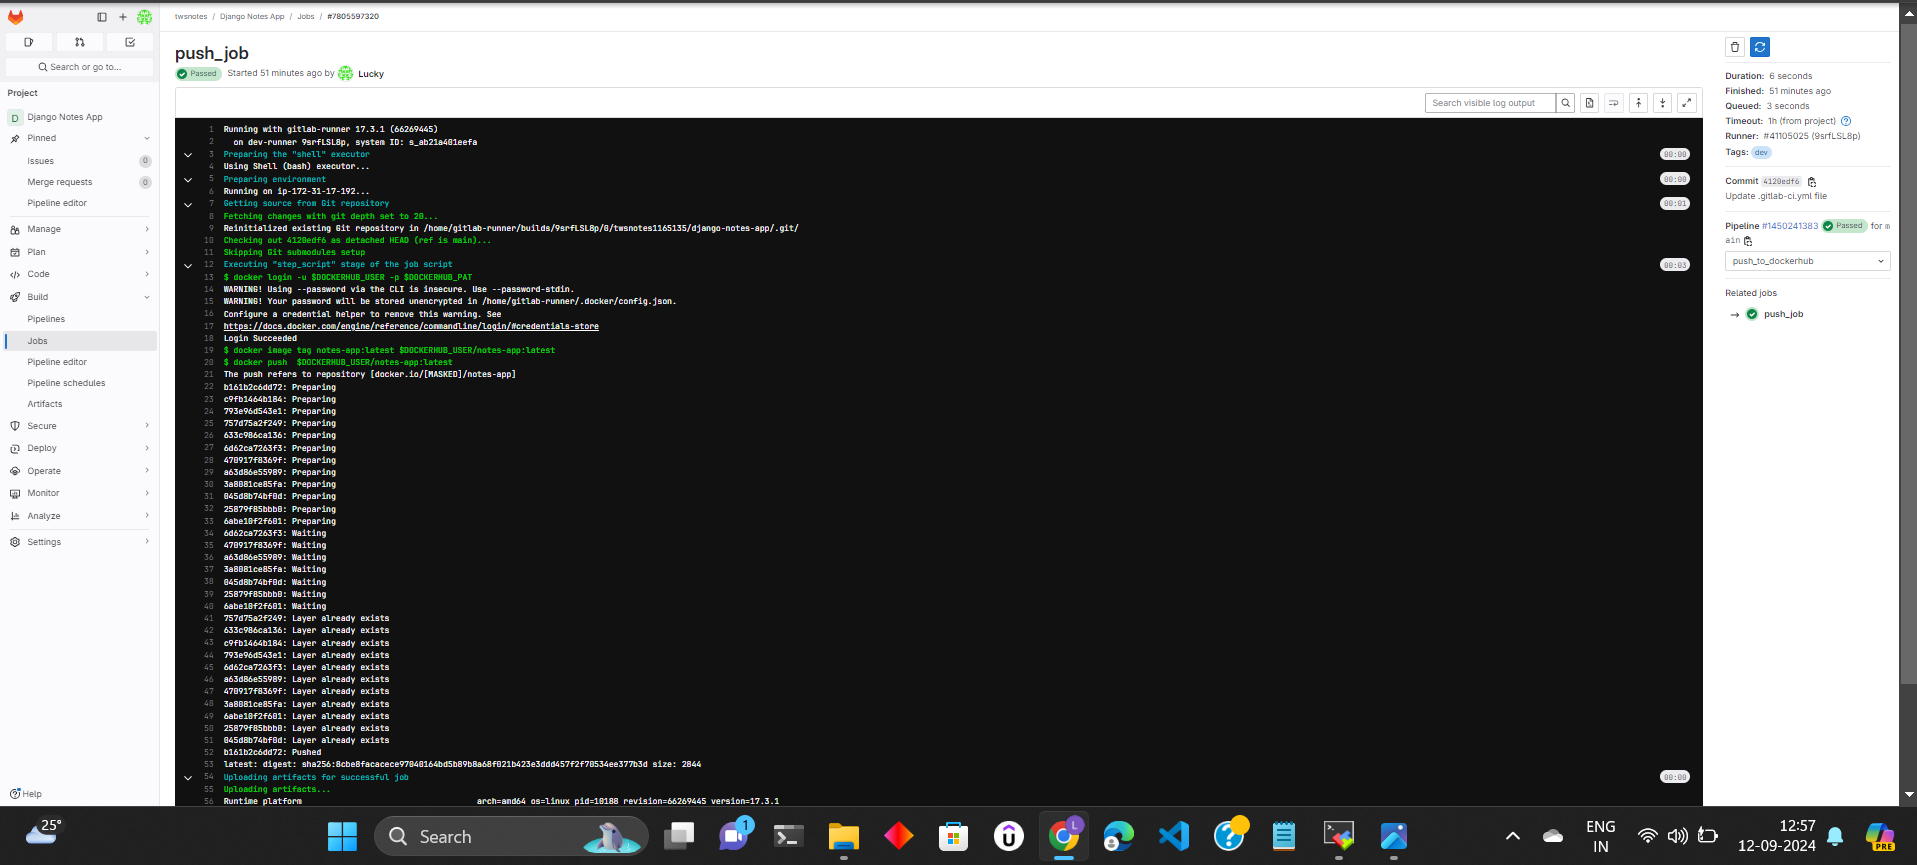
Push Job:
# Pushed the build image to DockerHub by using the User Defined Variables in the gitlab.
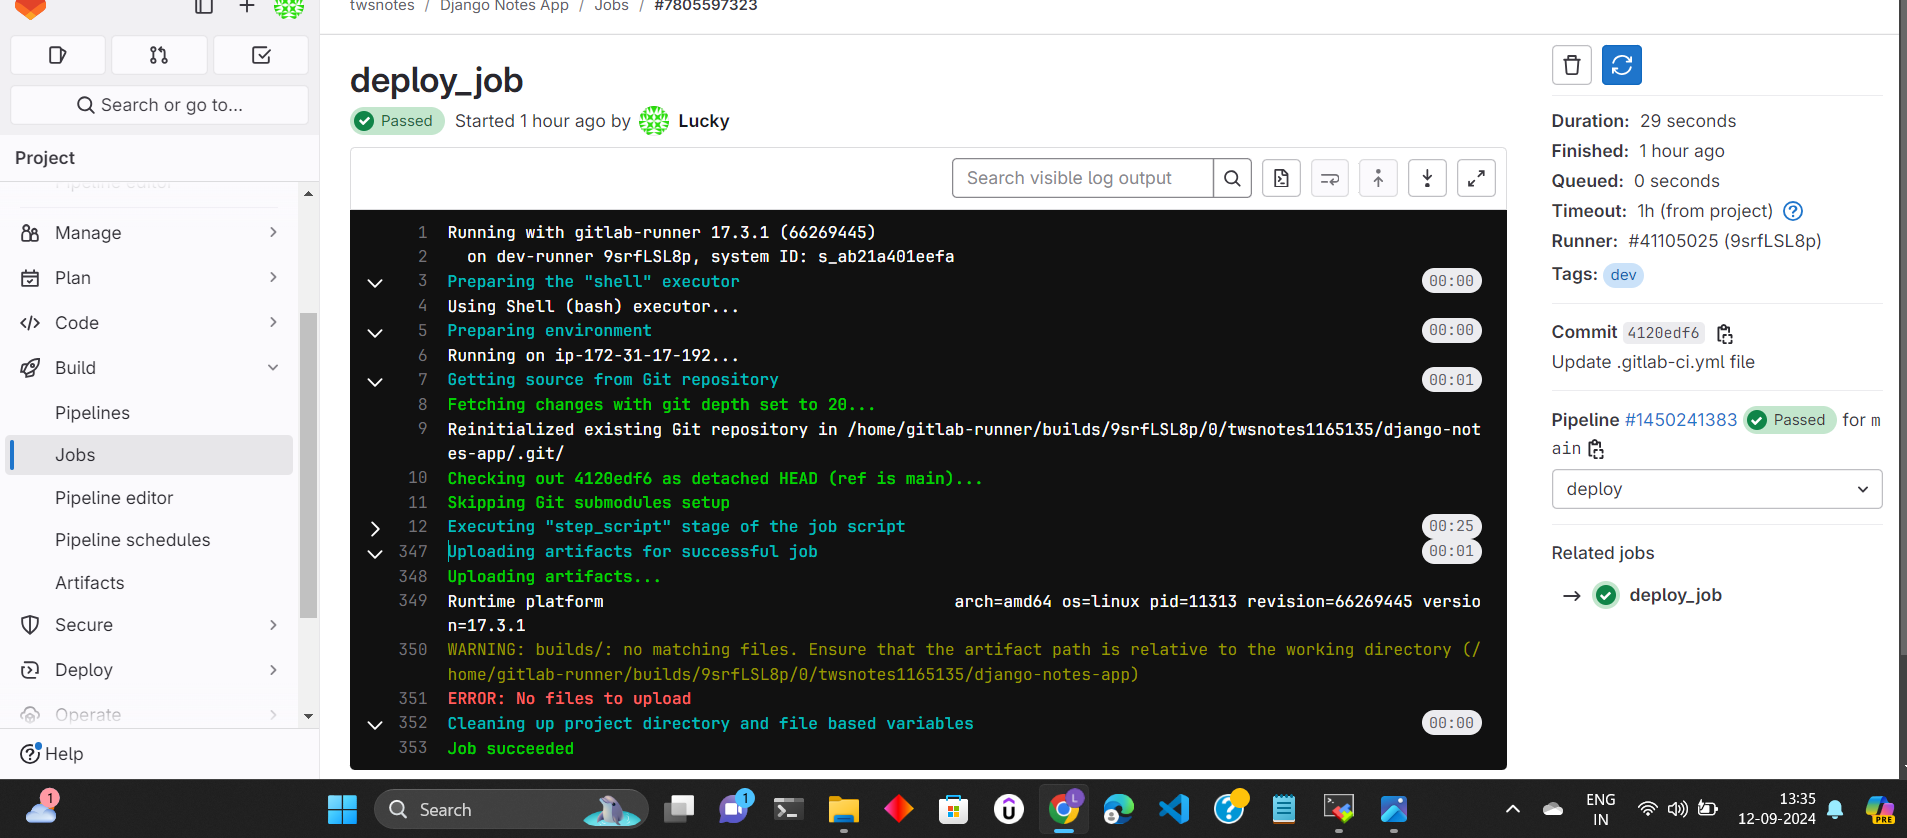
Deploy Job:
# Pushed the image to DockerHub.
Subscribe to my newsletter
Read articles from Anas directly inside your inbox. Subscribe to the newsletter, and don't miss out.
Written by
