💸 Unlocking Revenue : Efficiently Monetize Your API with Cloud APIM Serverless
 Thomas Delafaye

APIs are not just tools for integration but also valuable products that can generate significant revenue.
Cloud APIM Serverless helps you to monetize your APIs, allowing you to focus on innovation while maximizing profitability.
In this blog post, we’ll guide you through the process of setting up easy monetization for your API using Cloud APIM Serverless.
💡 Why Monetizing Your API ?
Generate Revenue : Turn your API into a revenue stream by offering paid access.
Promote Innovation : Encourage developers to build on your platform by providing high-quality, premium features.
Control Usage : Implement usage tiers and rate limits to ensure fair and optimal resource utilization.
🚀 Getting Started with API Monetization
Sign Up on Cloud APIM Serverless:
Before setting up monetization, ensure you have created a project on Cloud APIM Serverless.
If you haven't created one yet, follow these steps:
Log in to your Cloud APIM Serverless dashboard.
Click on "New project" and fill in your project name.
Set Up your Billing Plans:
Navigate to the Developer portal section in your API settings.
Click on Dev portal Plans and configure your plans.
For this example let's create 3 plans :
Silver Tier: Offer basic access with limited usage.
Gold Tier: Provide additional features and higher usage limits for a fee.
Diamond Tier : Get all features included in Silver & Gold and much more.
Configure Stripe Integration :
Create an account on Stripe (https://stripe.com/)
Go to your Dashboard and create your products (Silver, Gold and Diamond) as we took for our example.
Create a Pricing table and add your 3 products into the table.
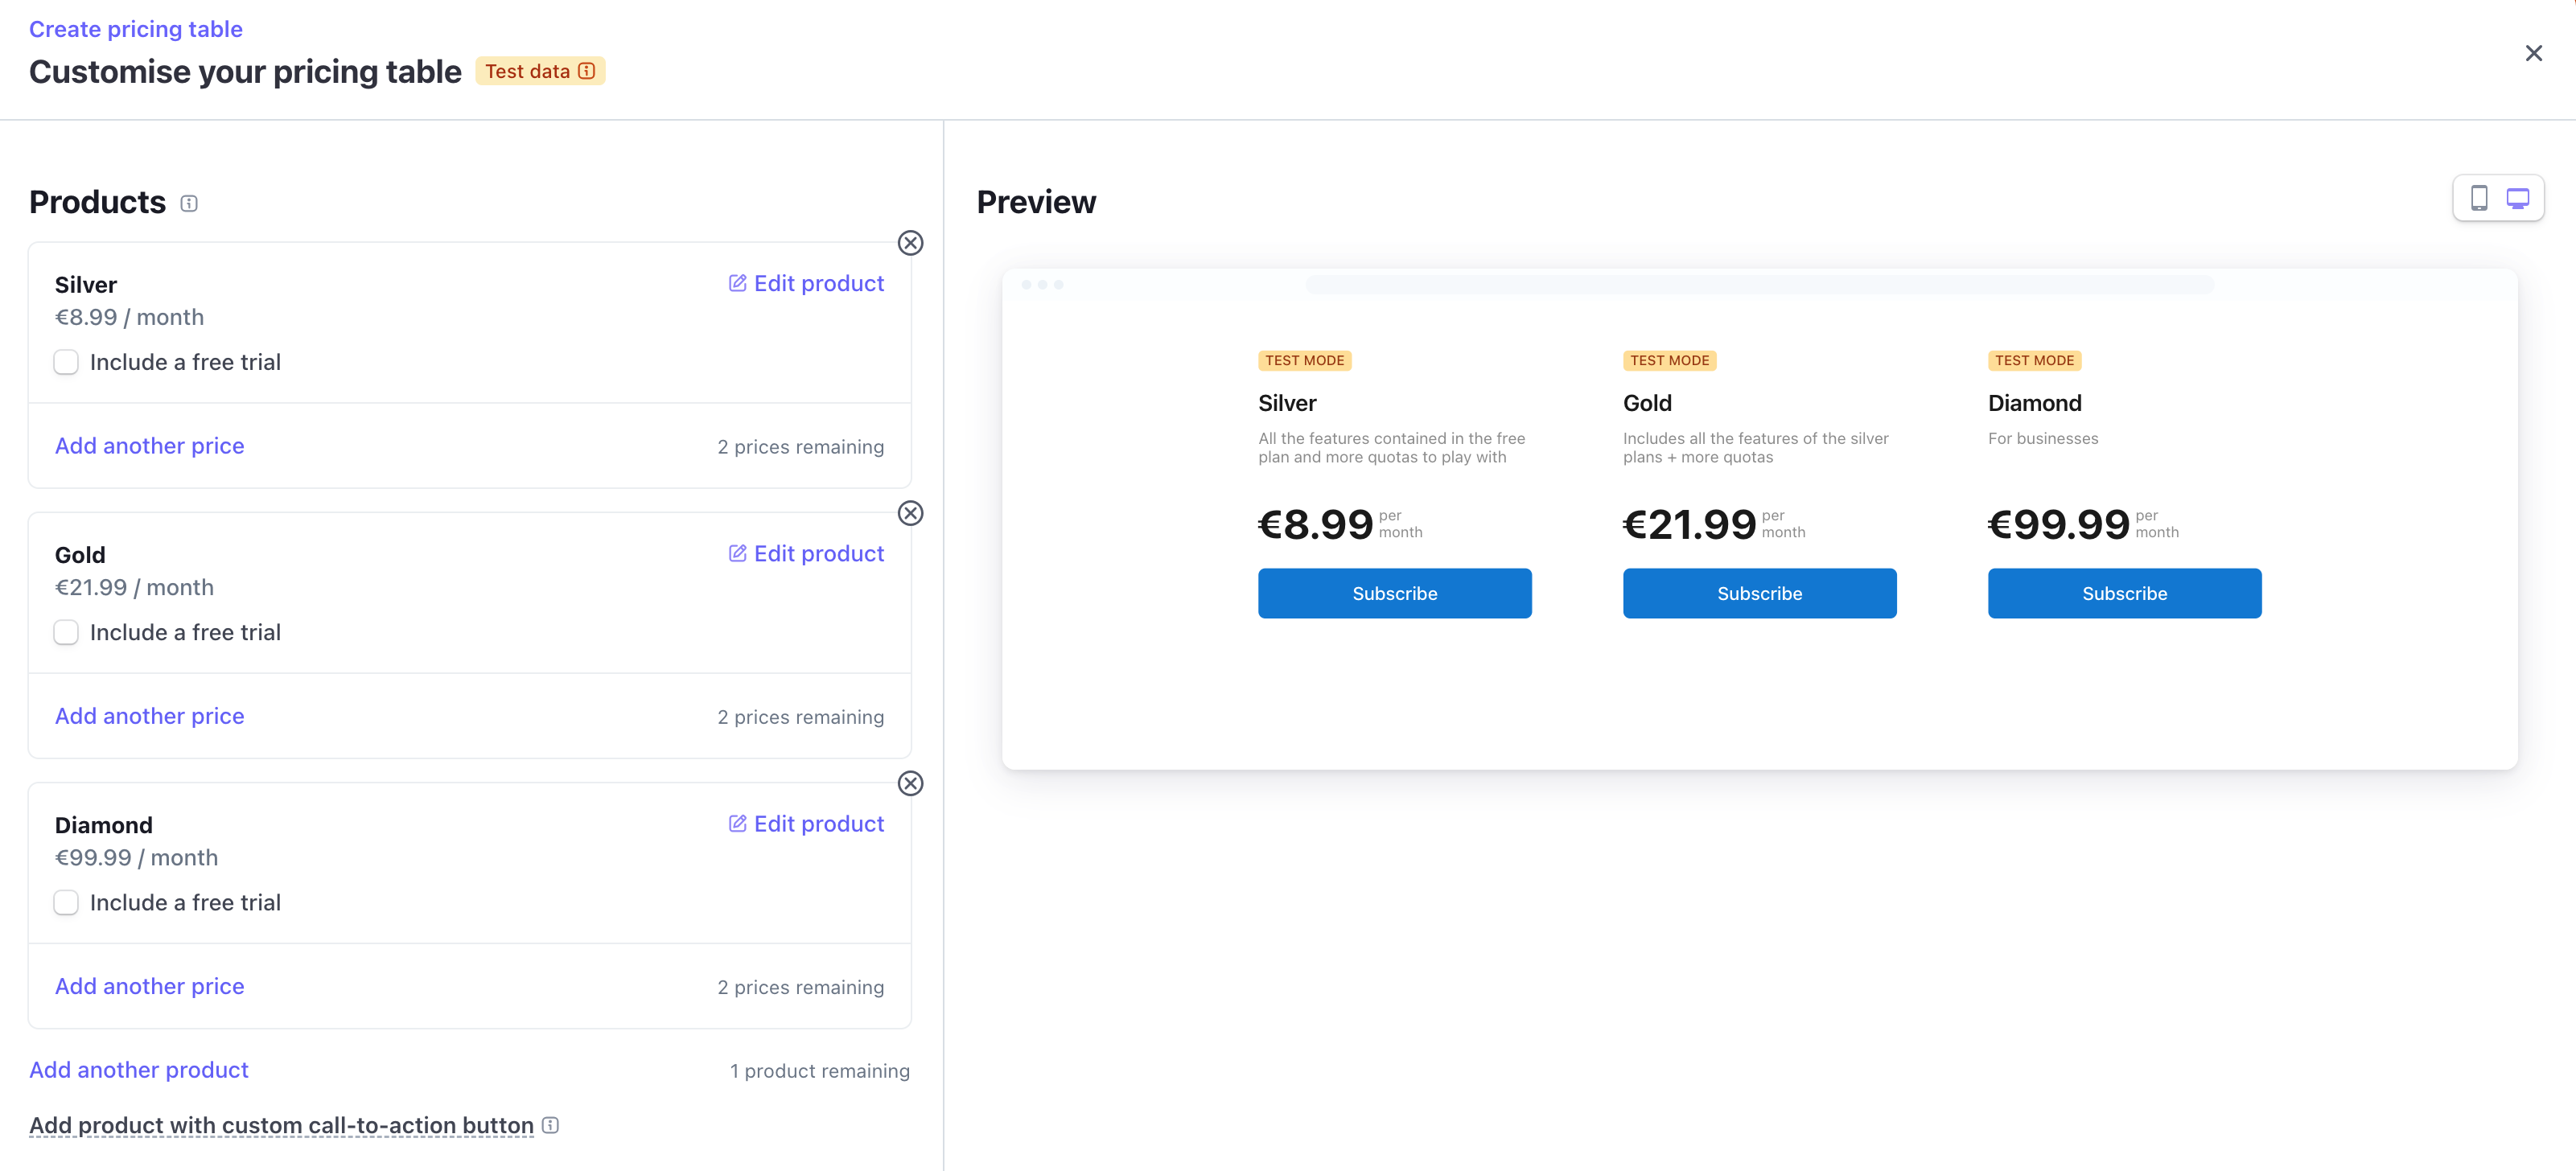
Then, click on Continue and go to Payment Page step
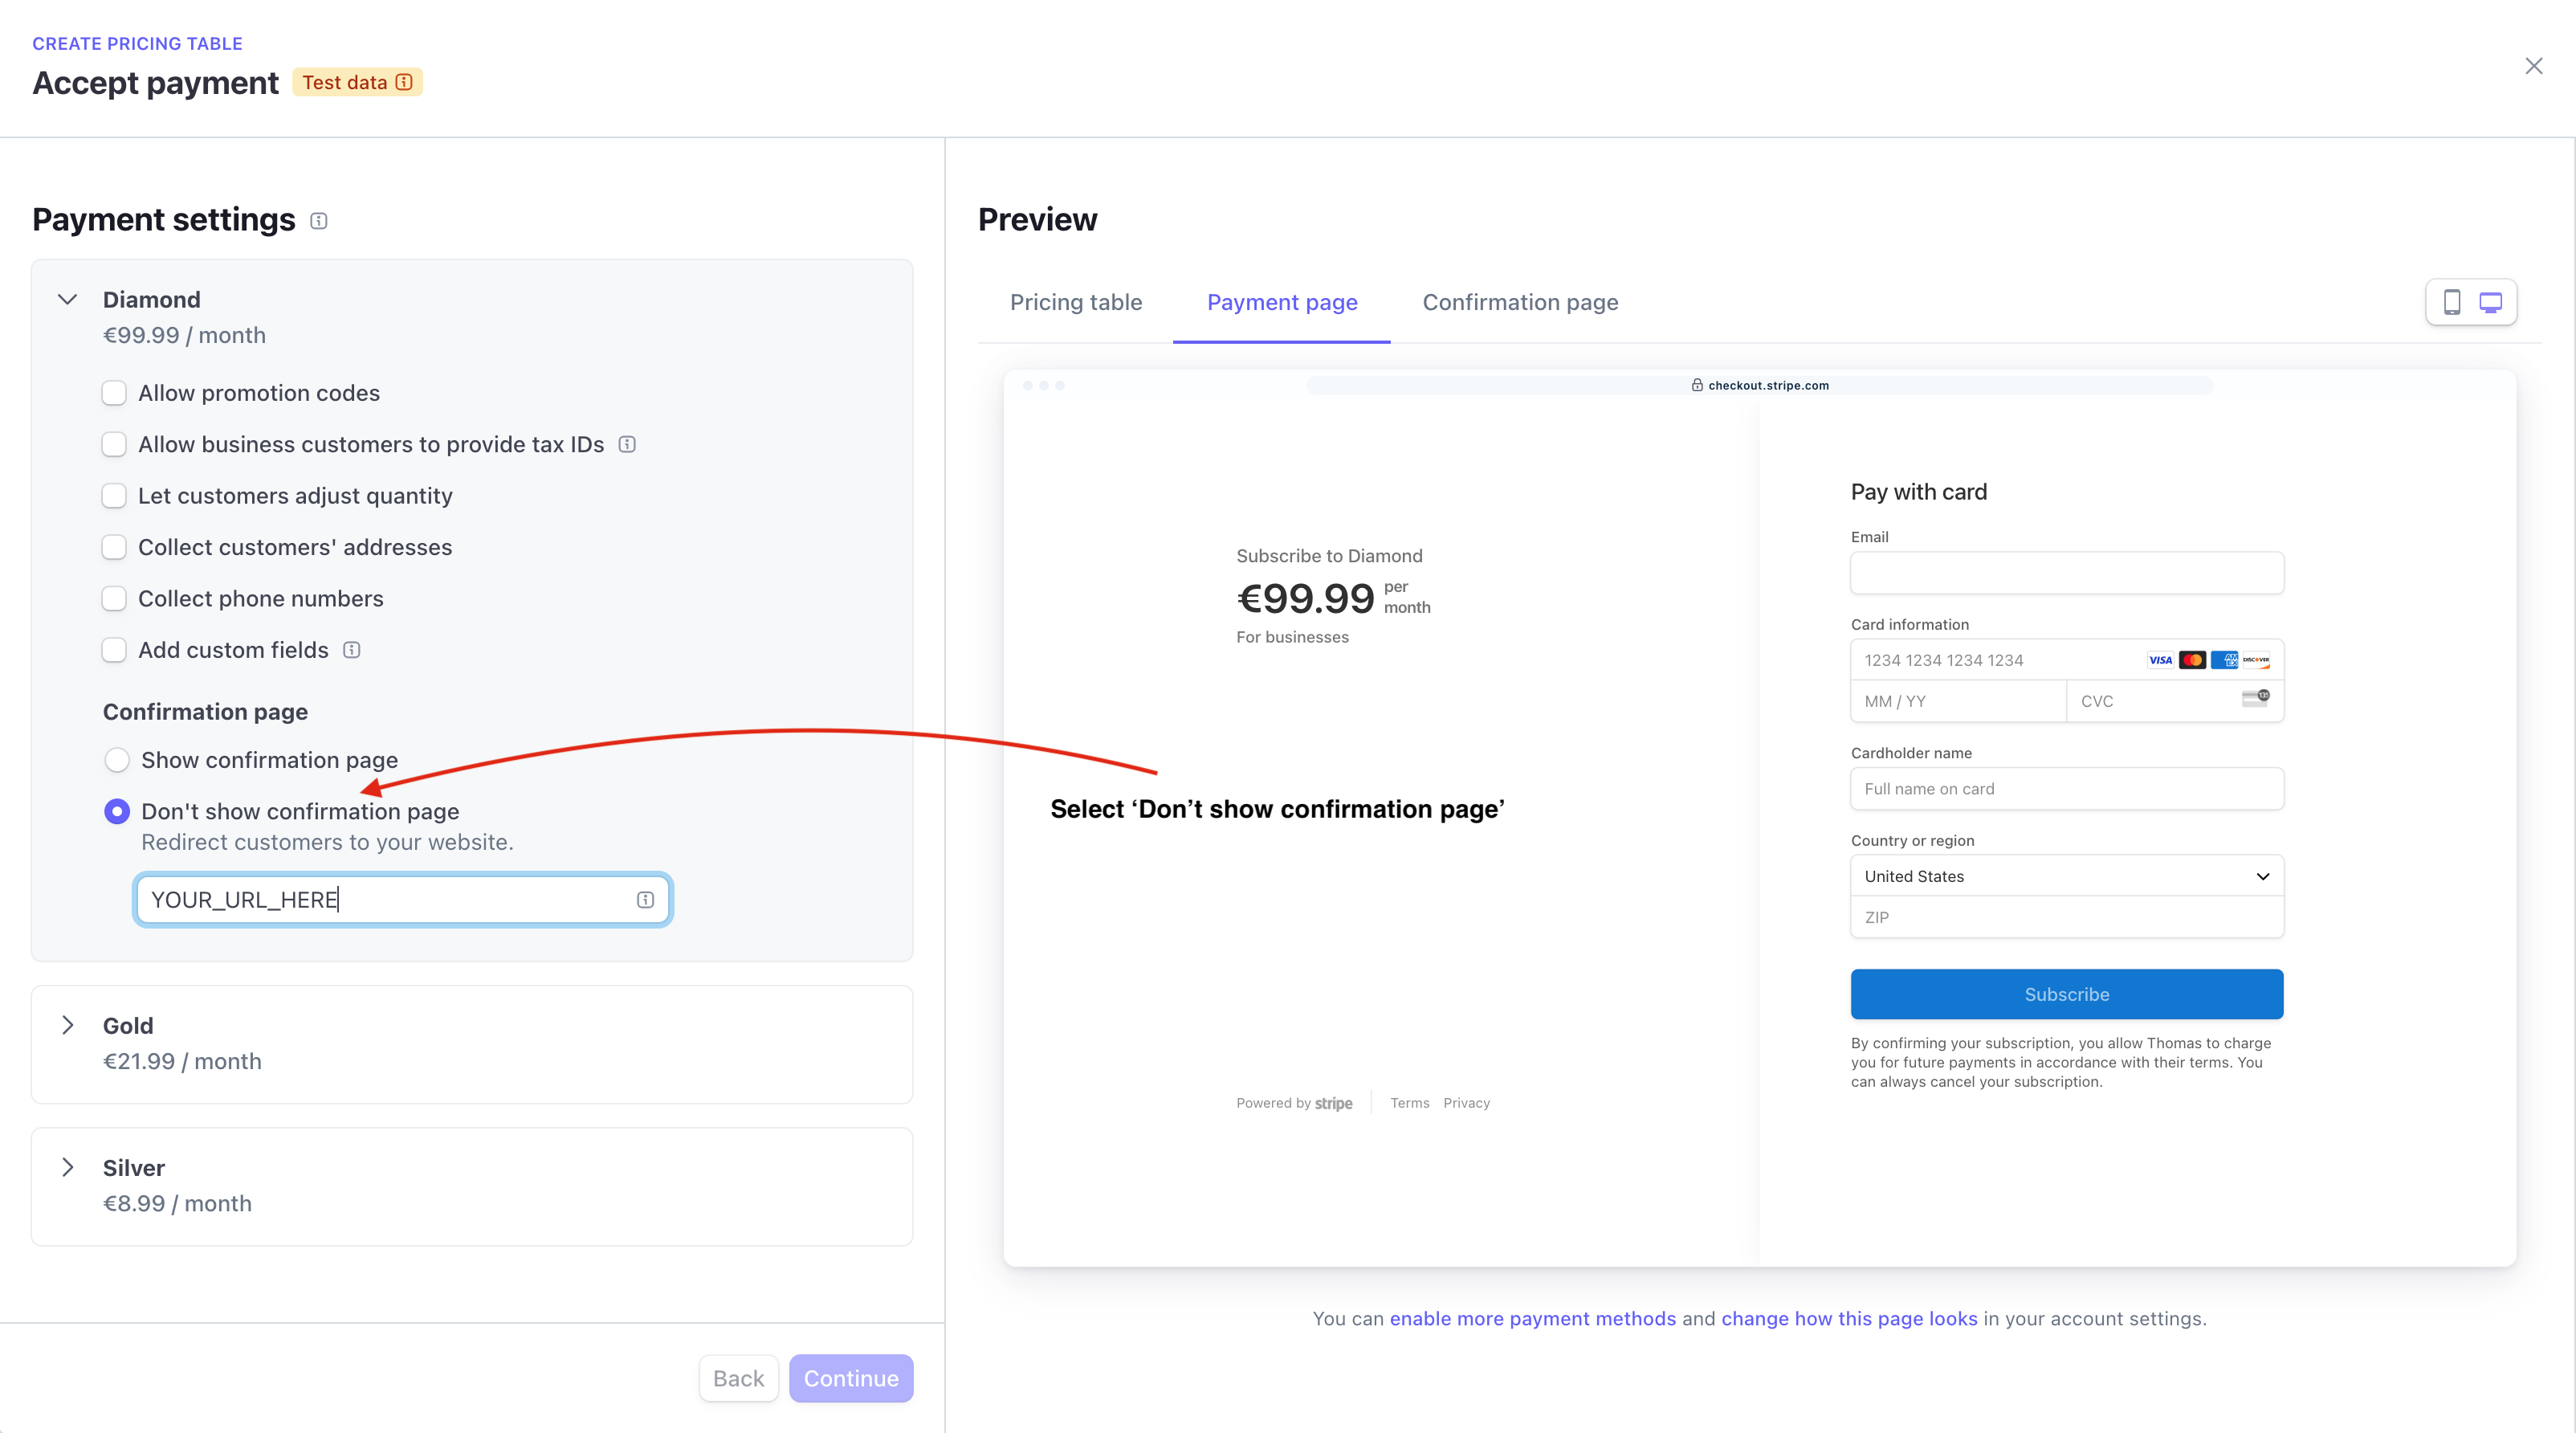
For each product choose Don't show Confirmation page and put your link such as https://my-project-domain.cloud-apim.dev/docs/subloading?session_id={CHECKOUT_SESSION_ID}
Replace the domain name by your Serverless project domain
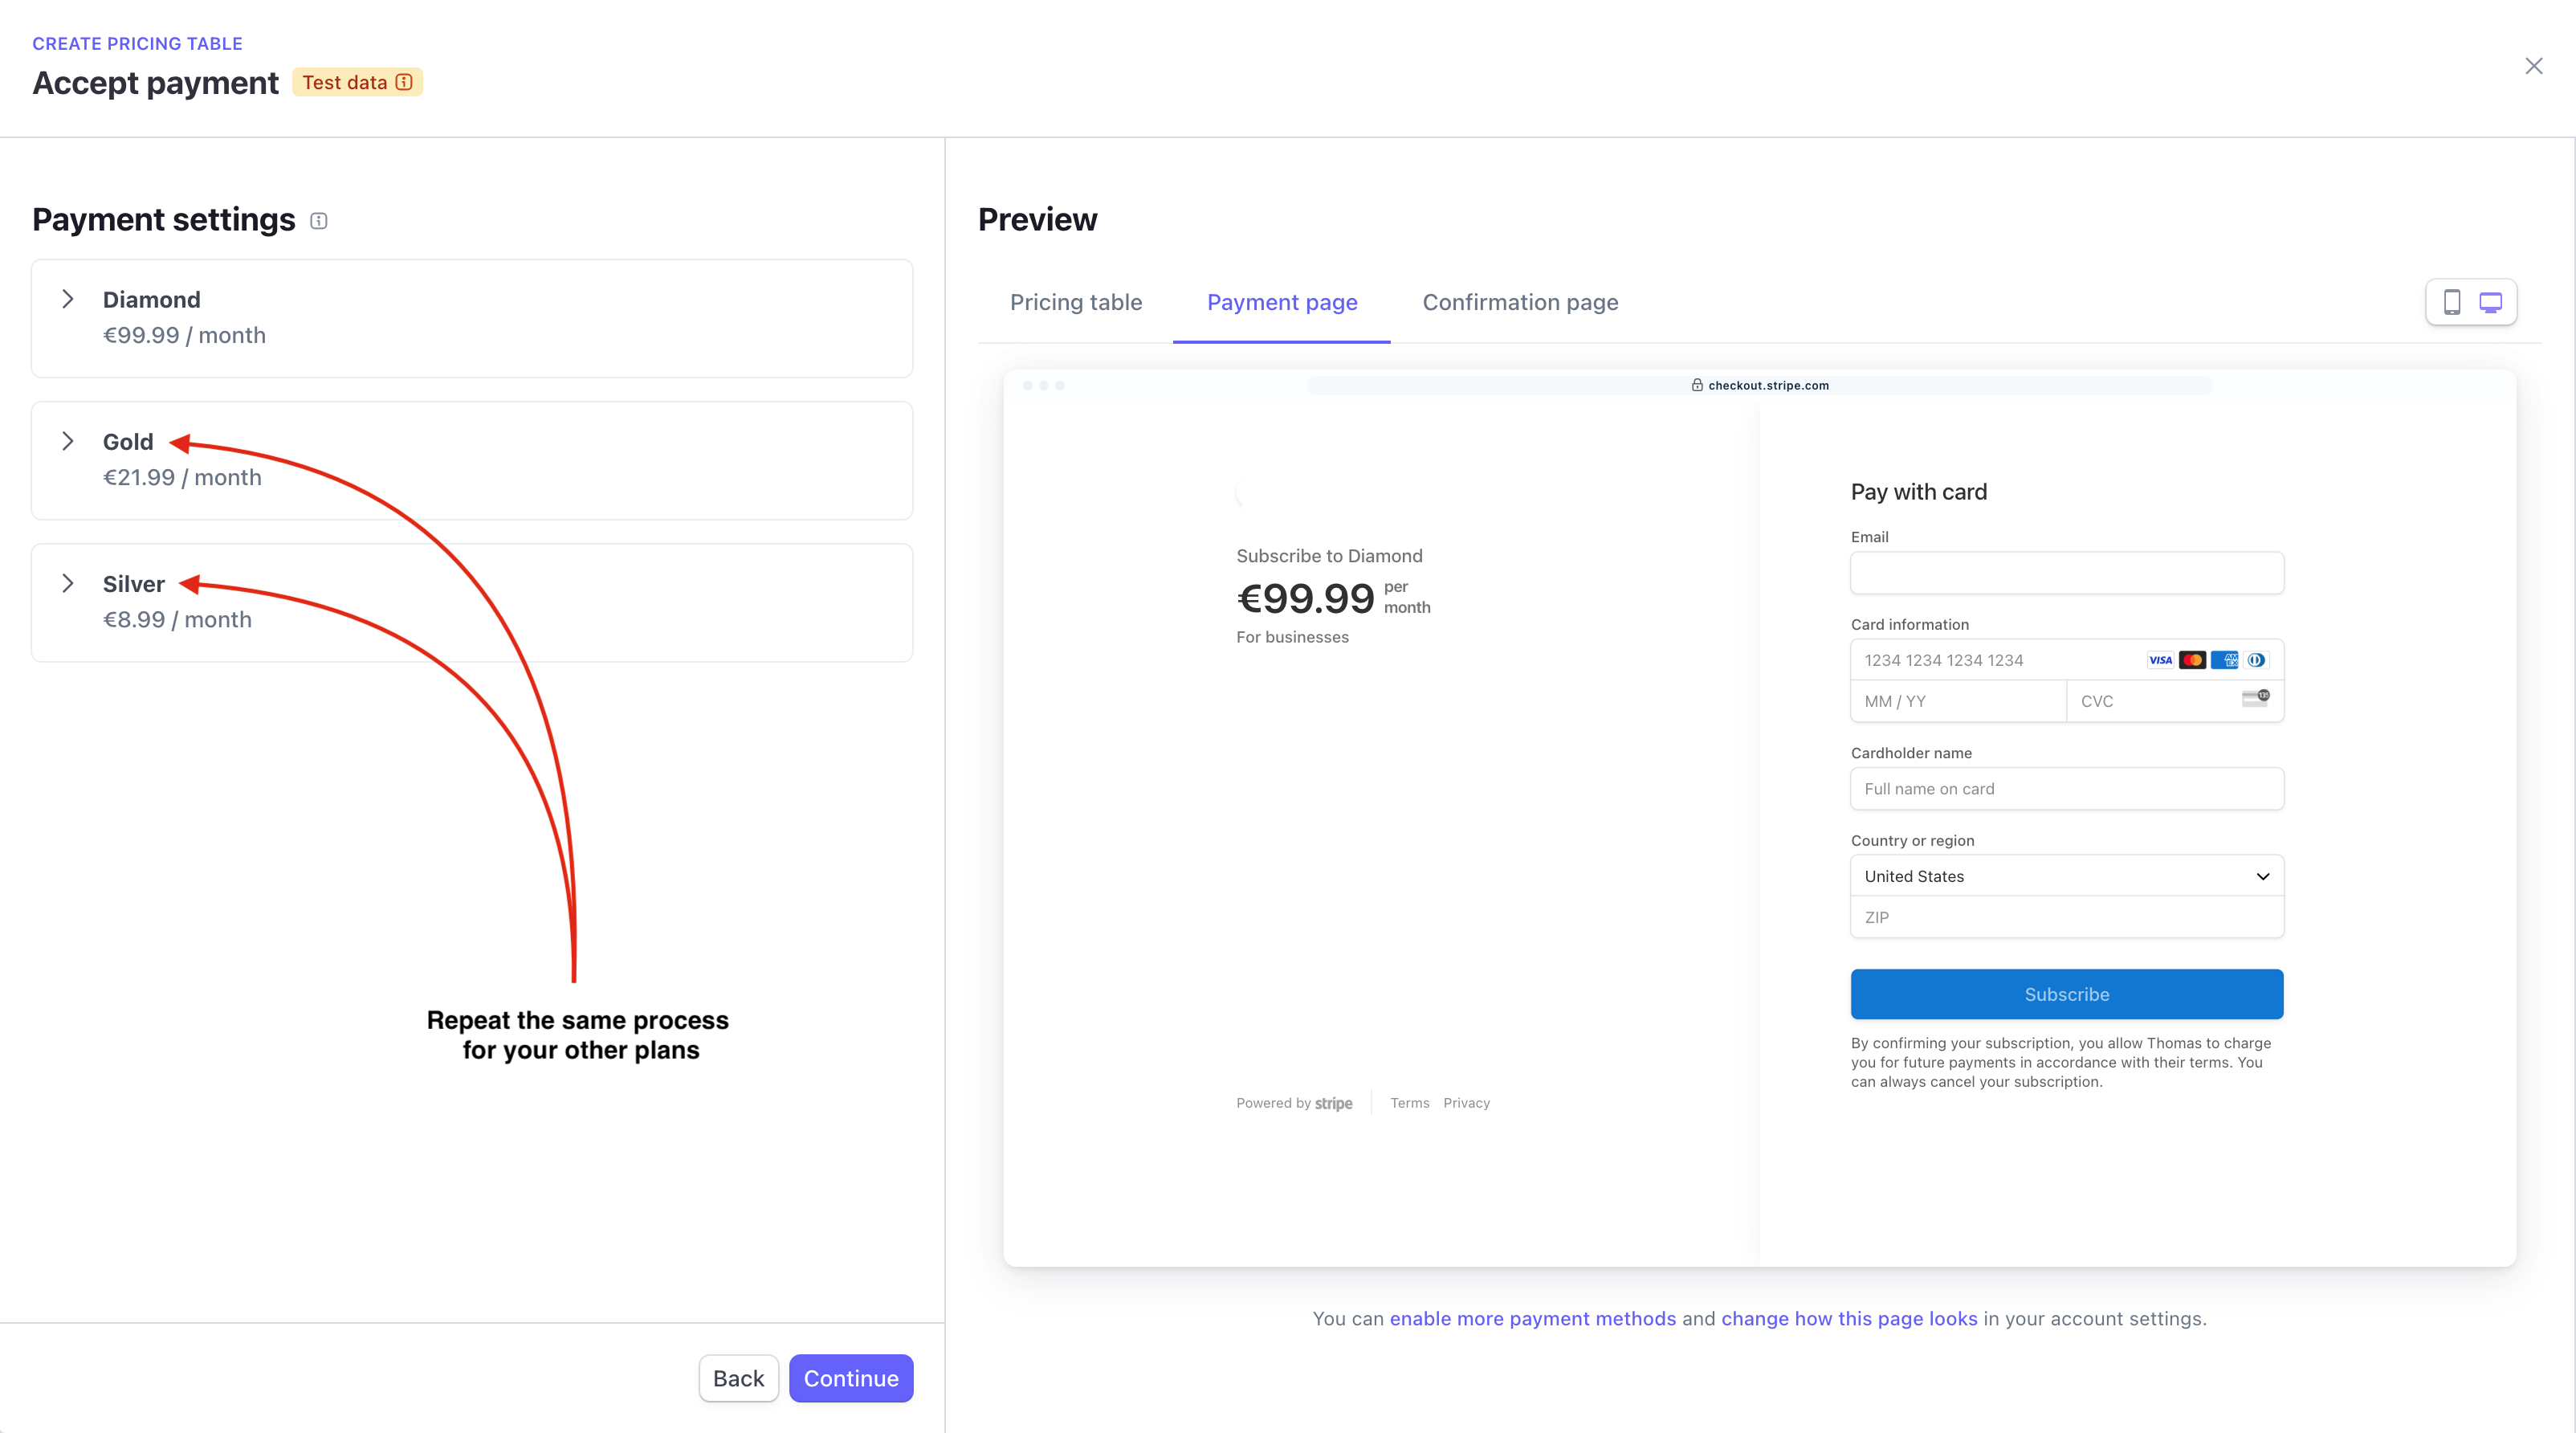
Once you've configured all your plans into your pricing table you can click on Finish
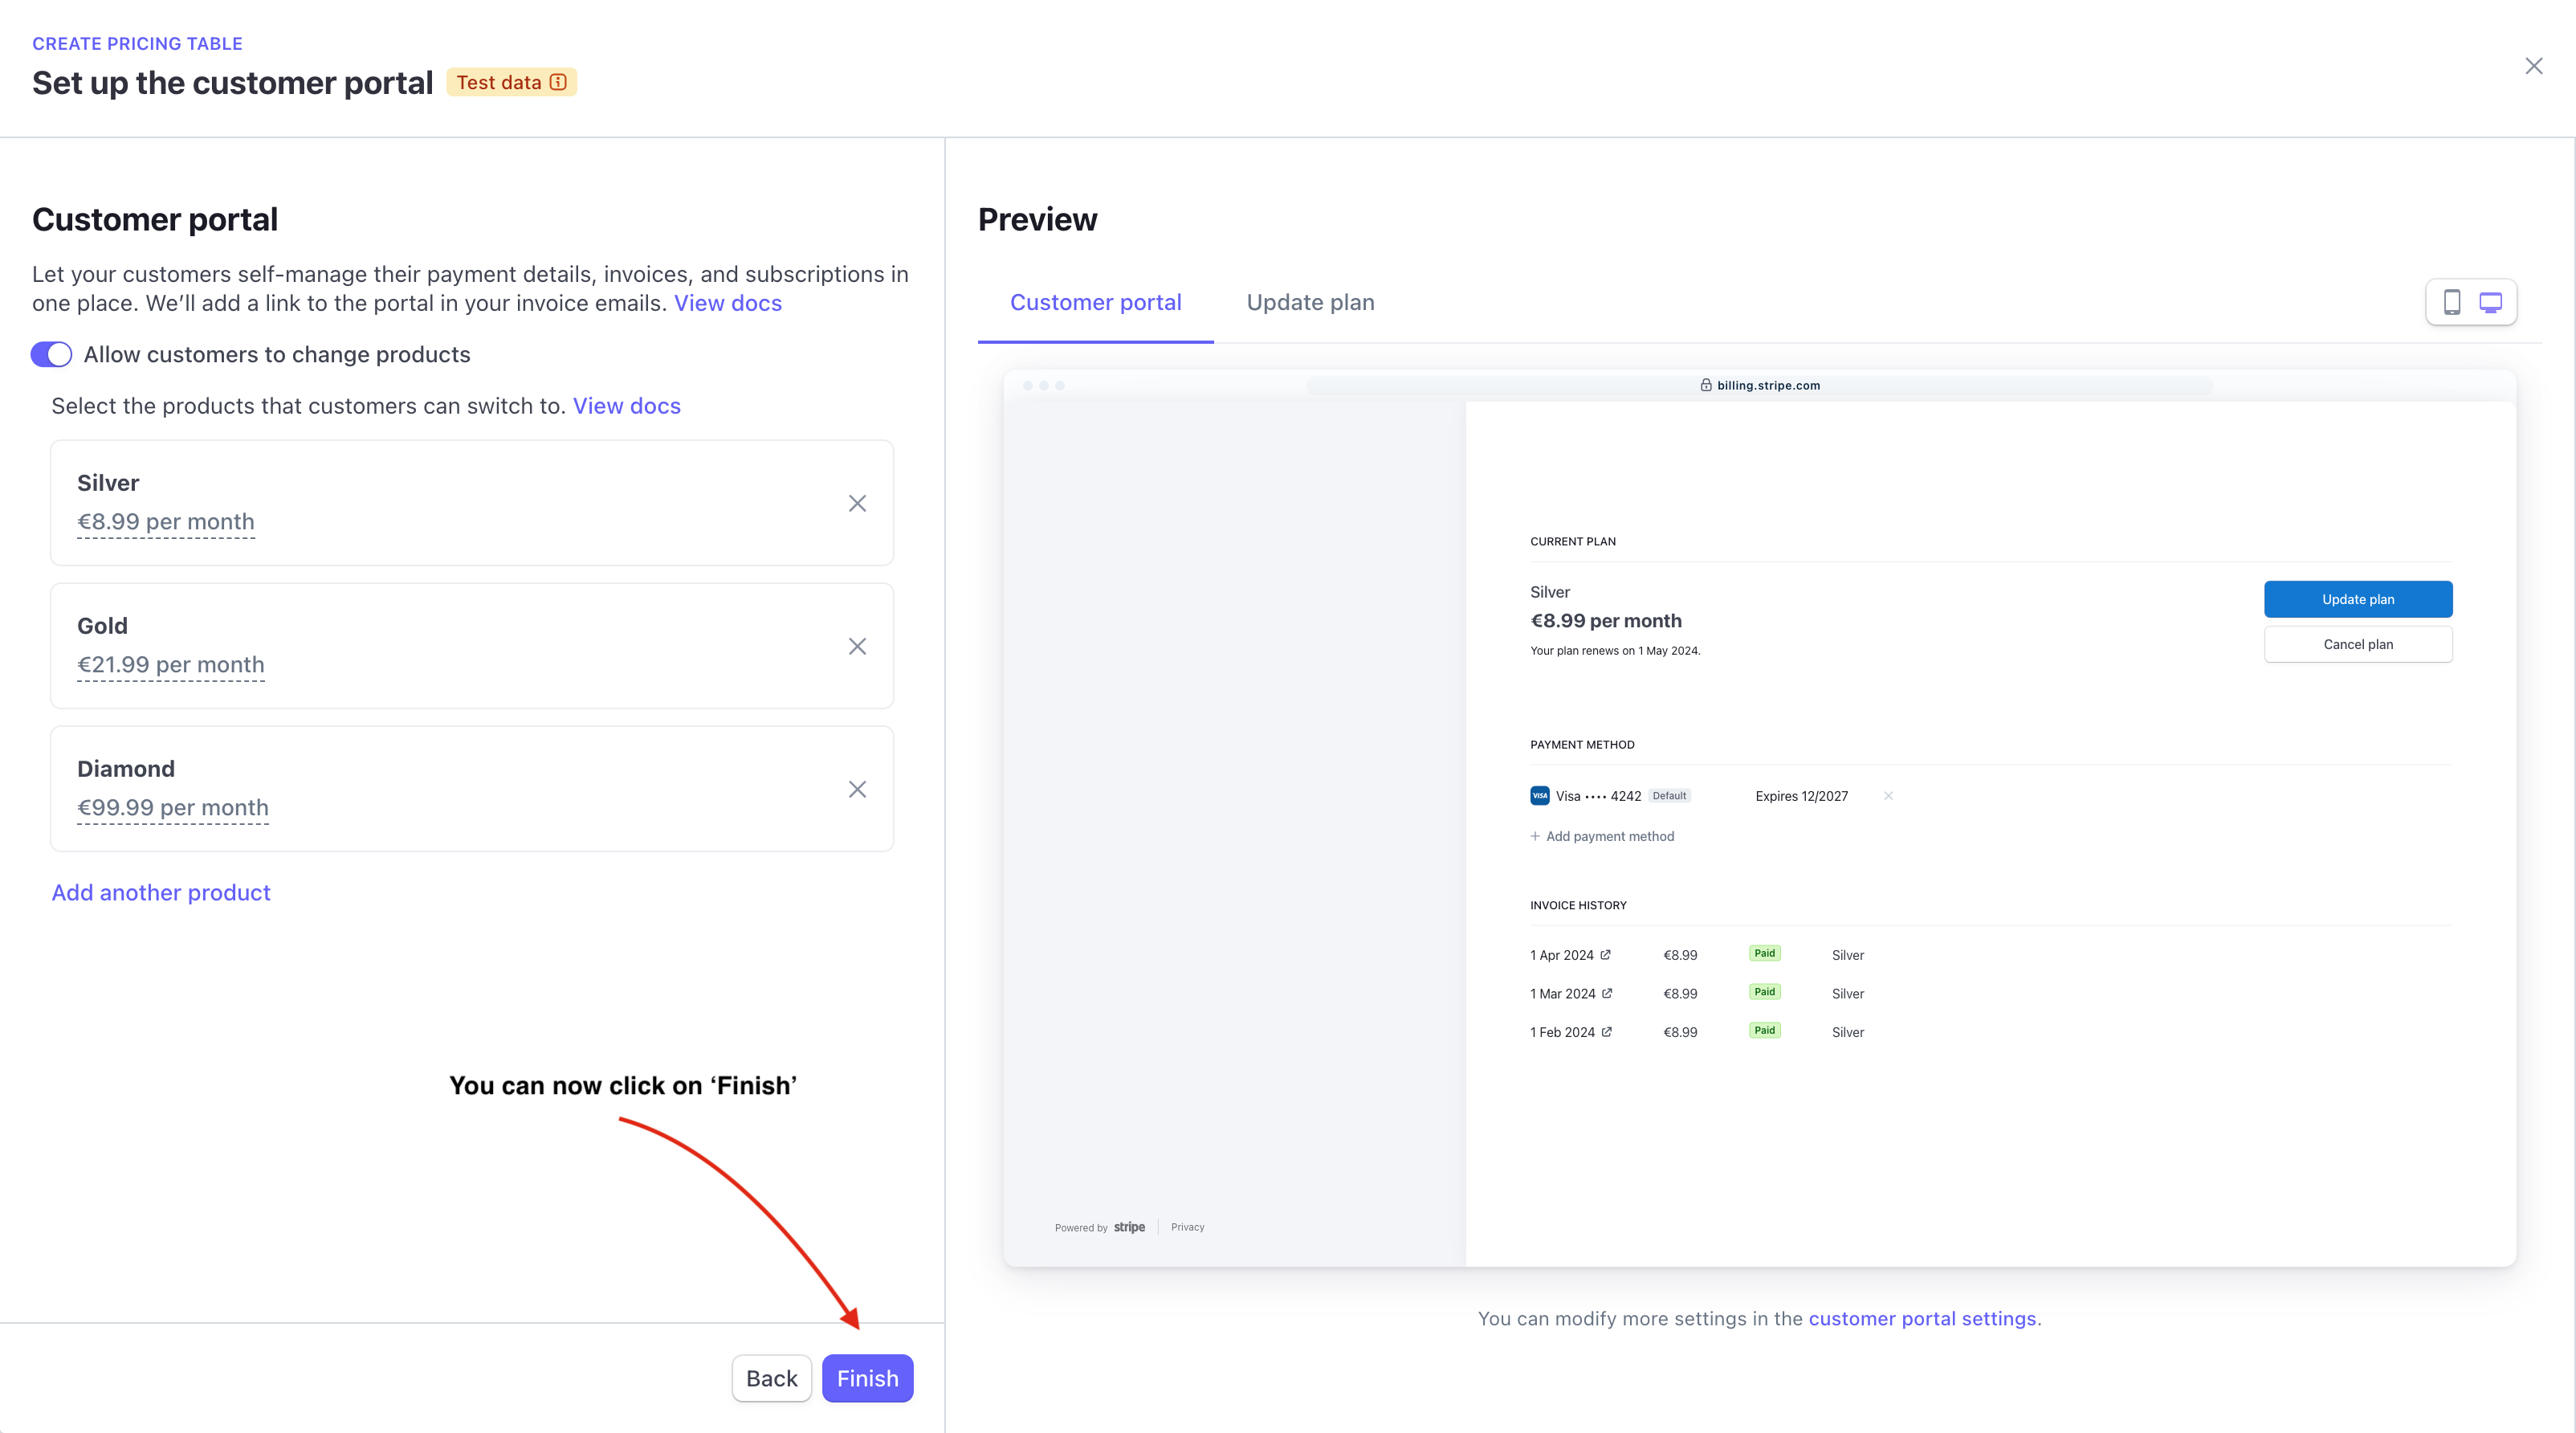
Now, copy your STRIPE_PRICING_TABLE_ID you'll set it up into your environment variables right after.
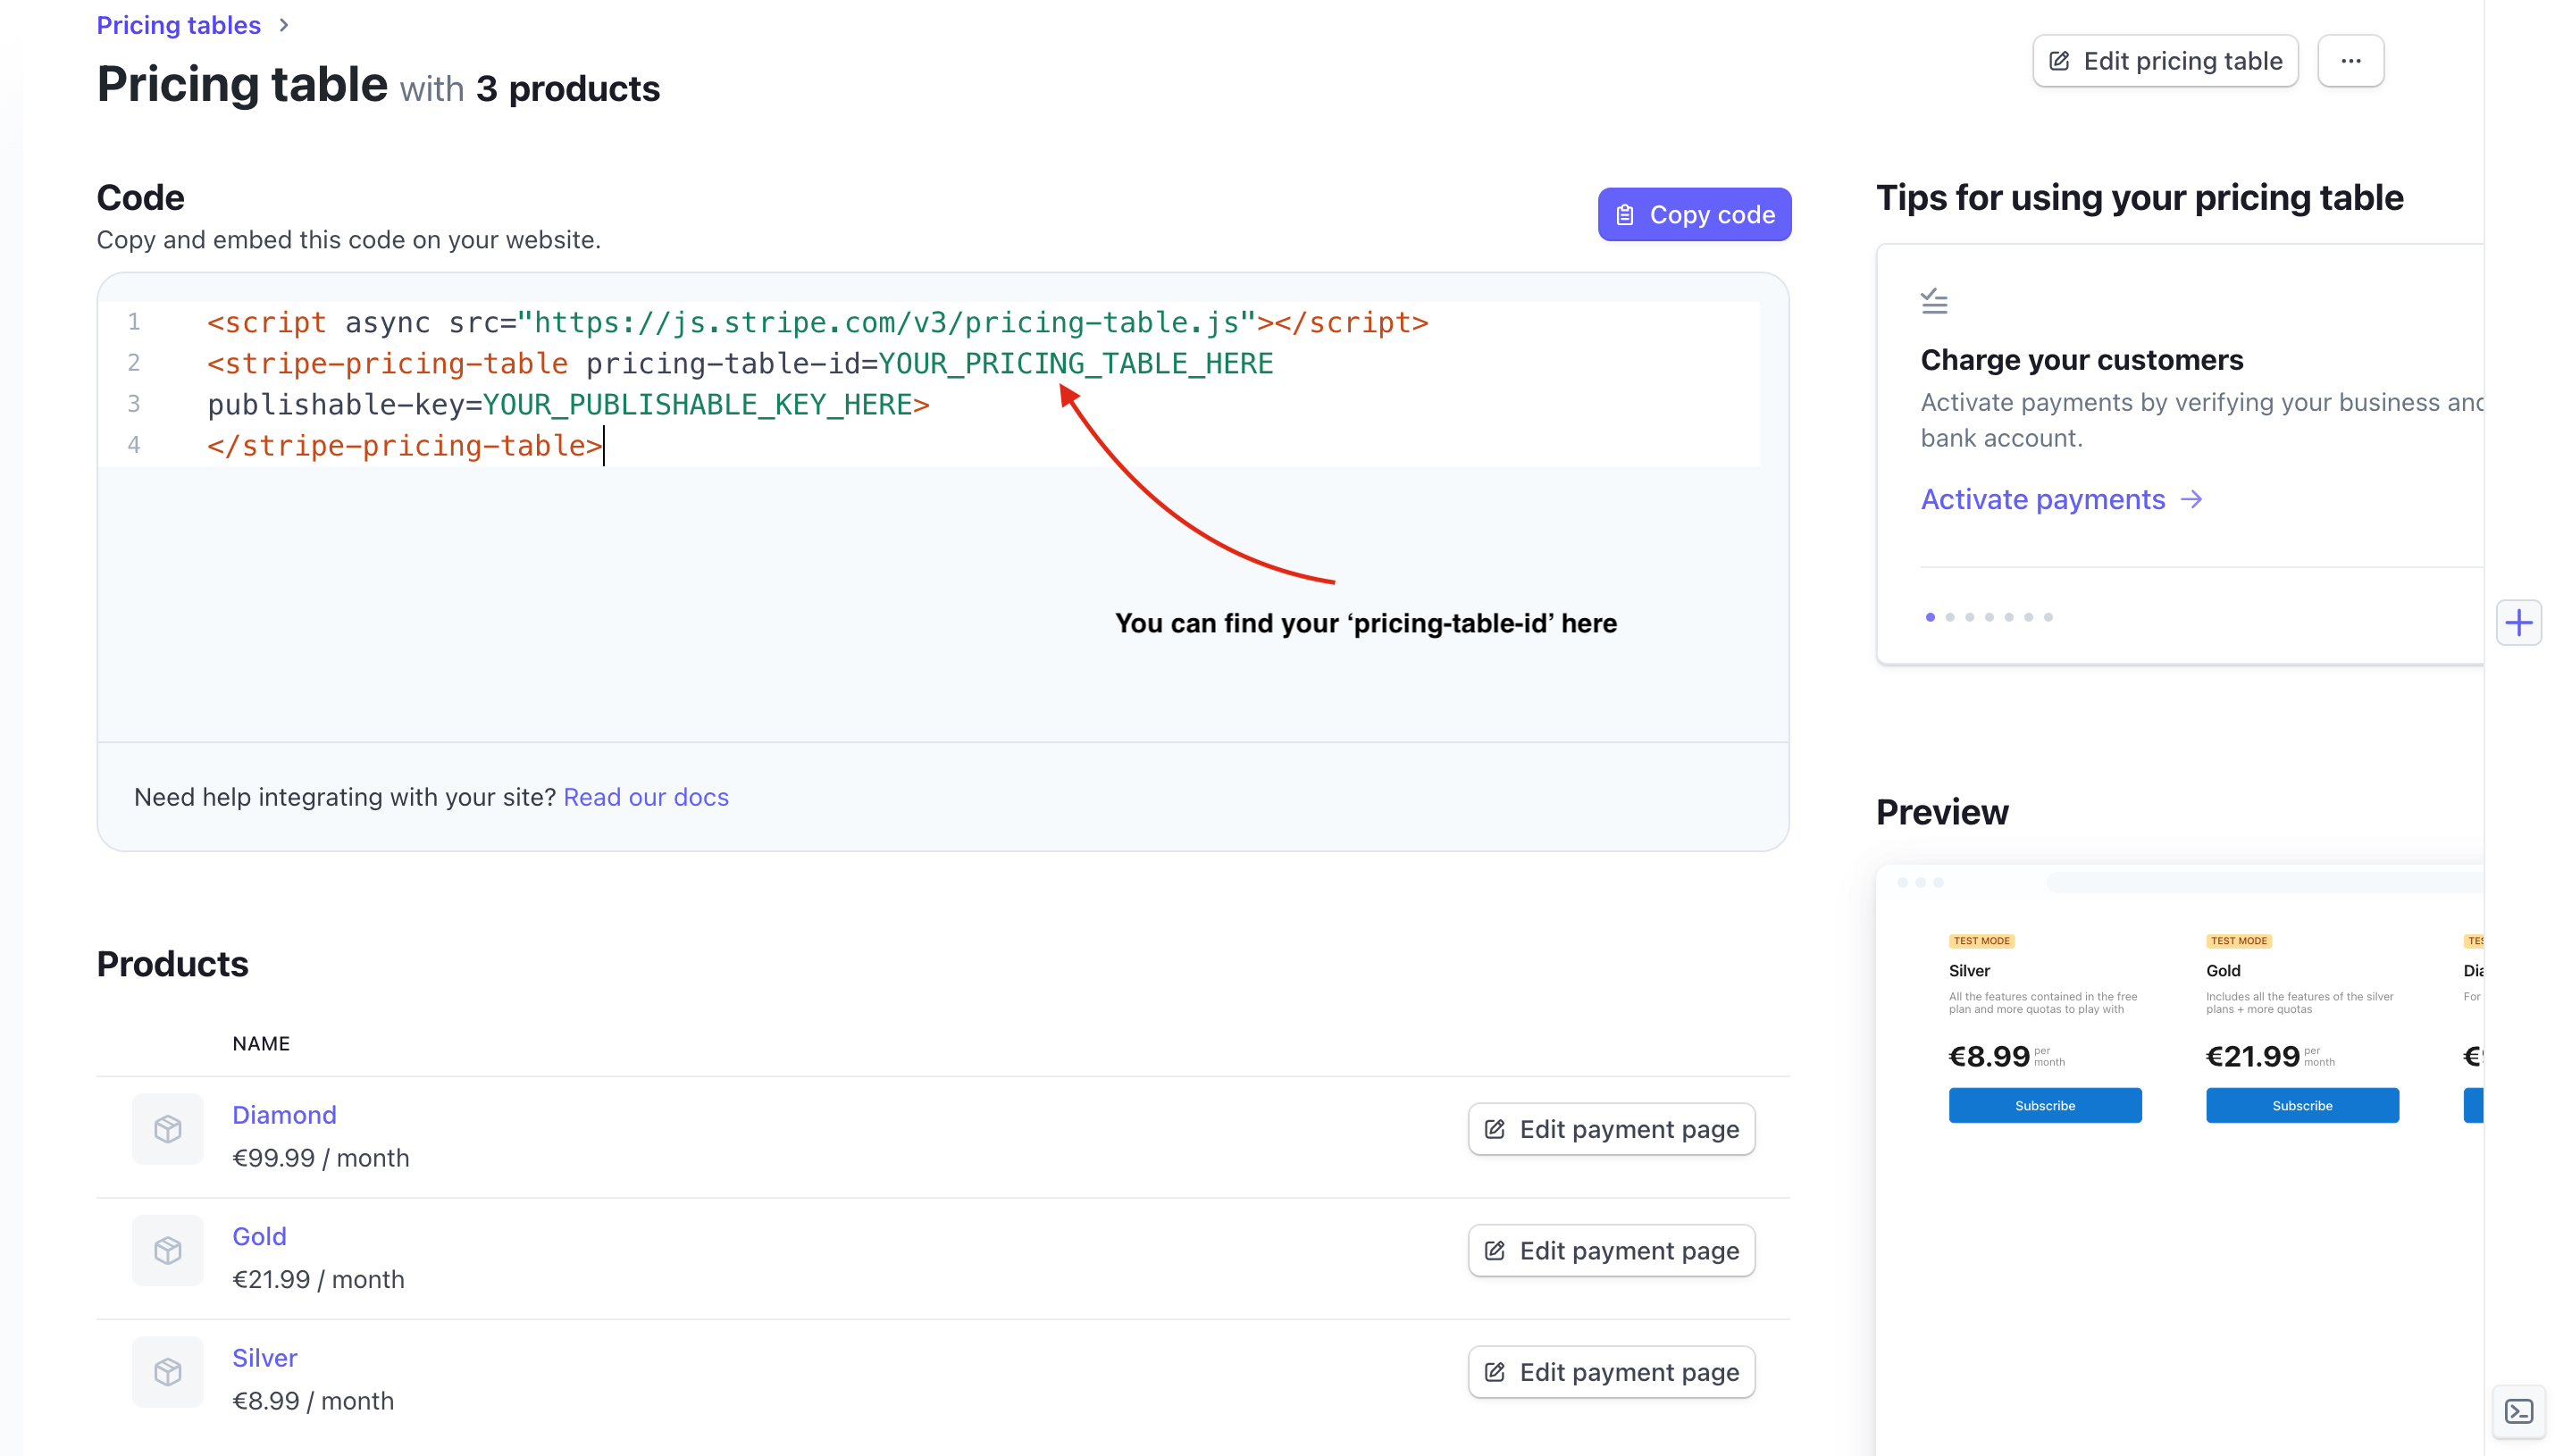
Configure Stripe Webhooks
Go to your Stripe Dashboard Developers and select Webhooks tab.
Click on + add enpoint and fill in the form as shown below :
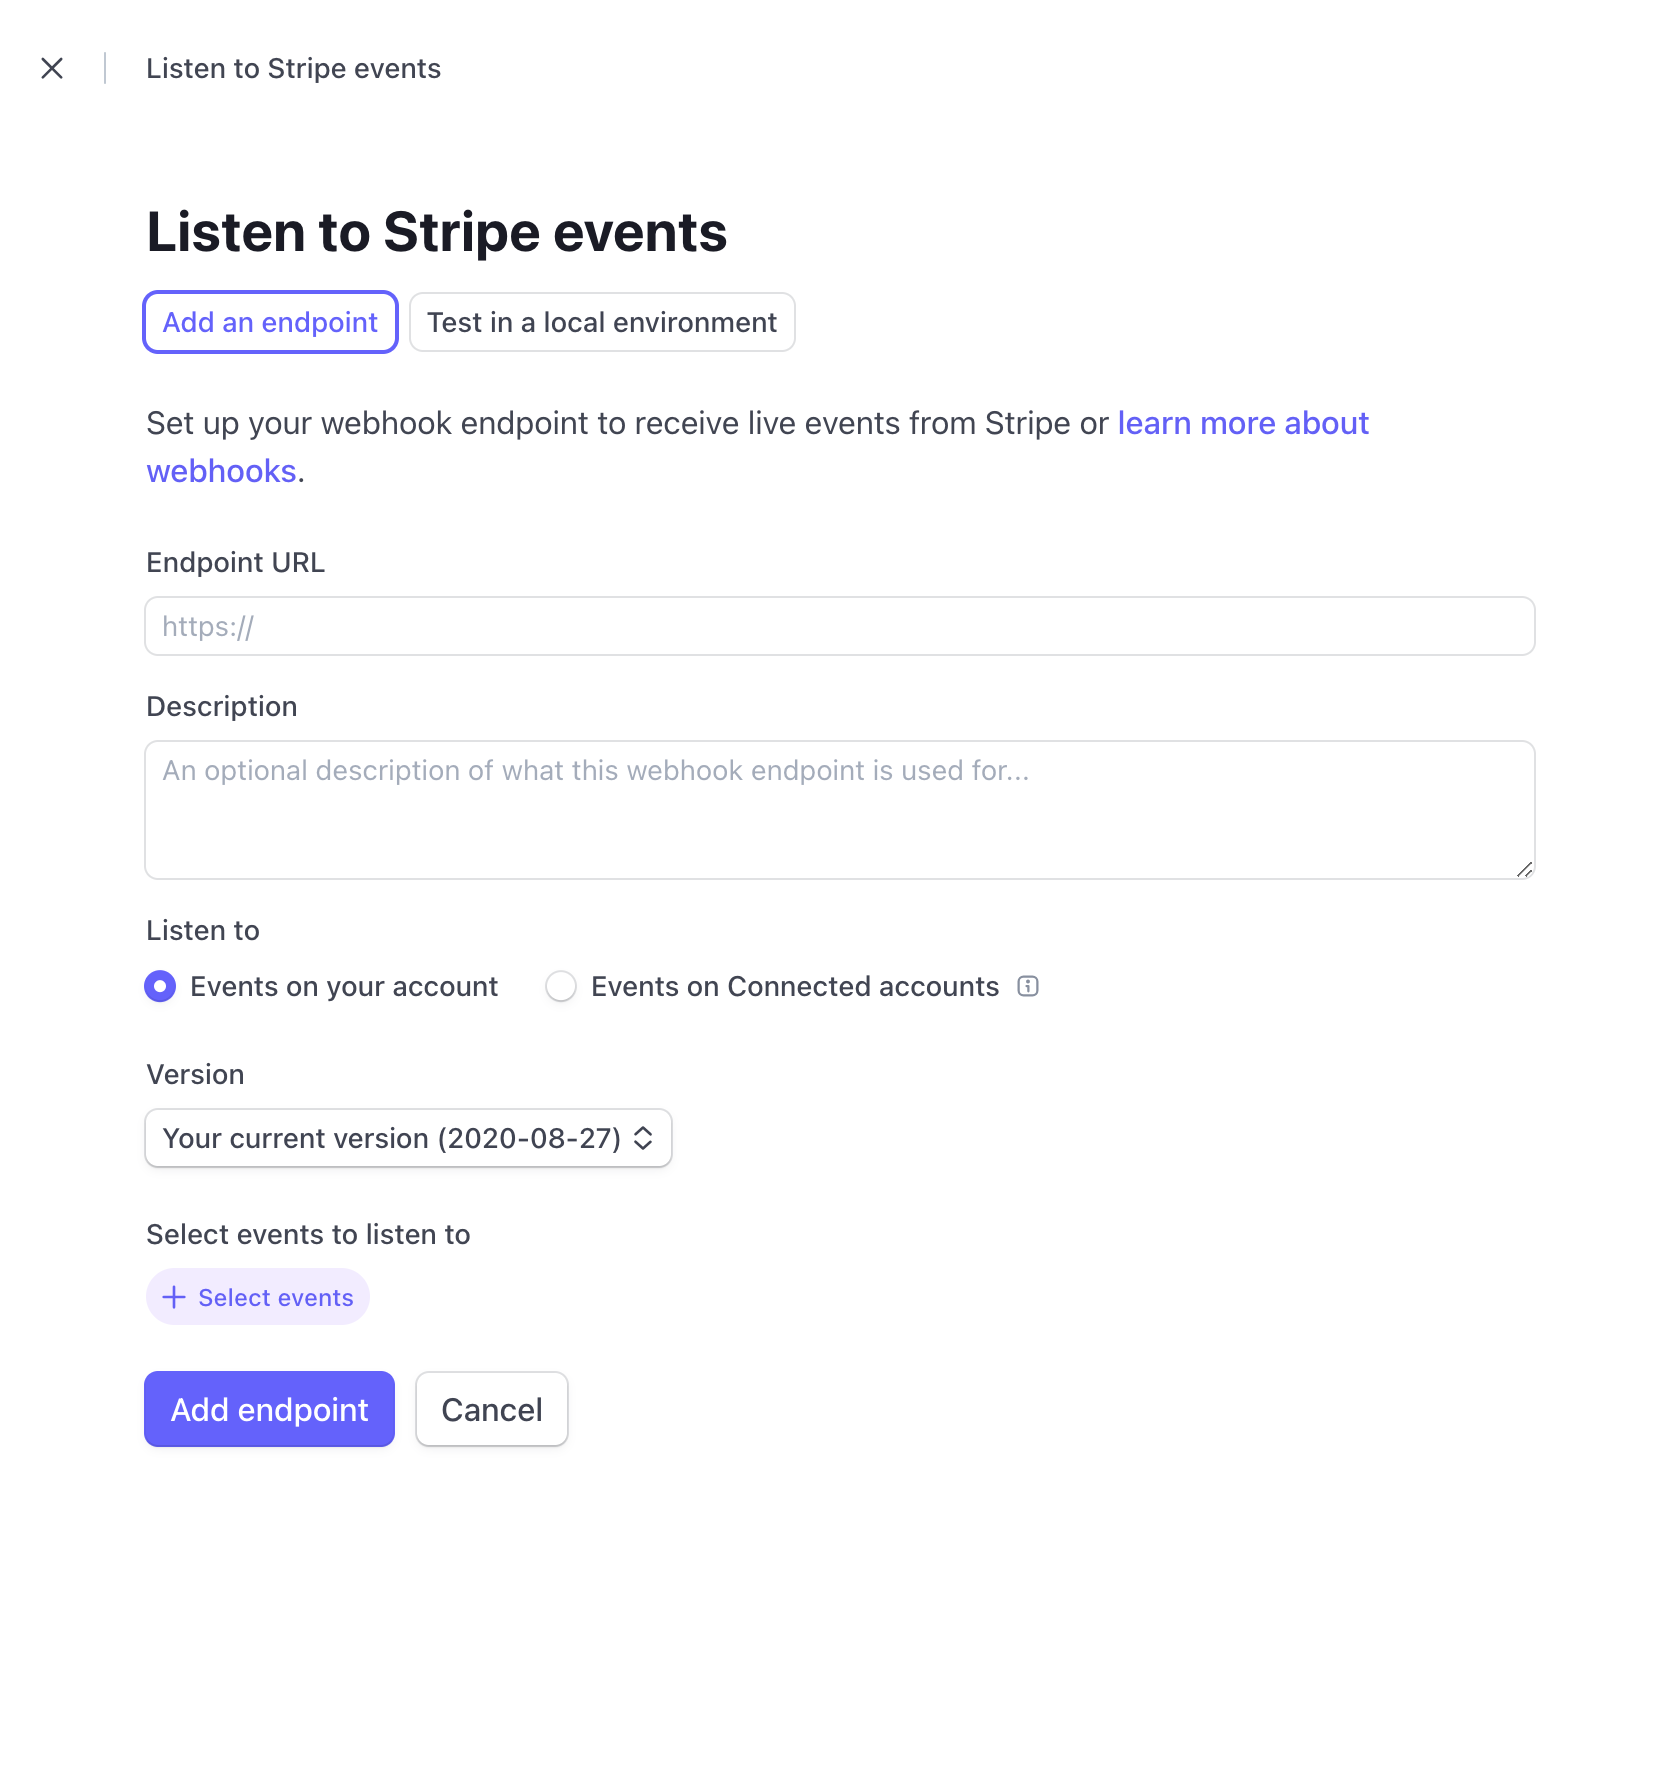
Put https://hooks.cloud-apim.com/serverless/stripe as endpoint url
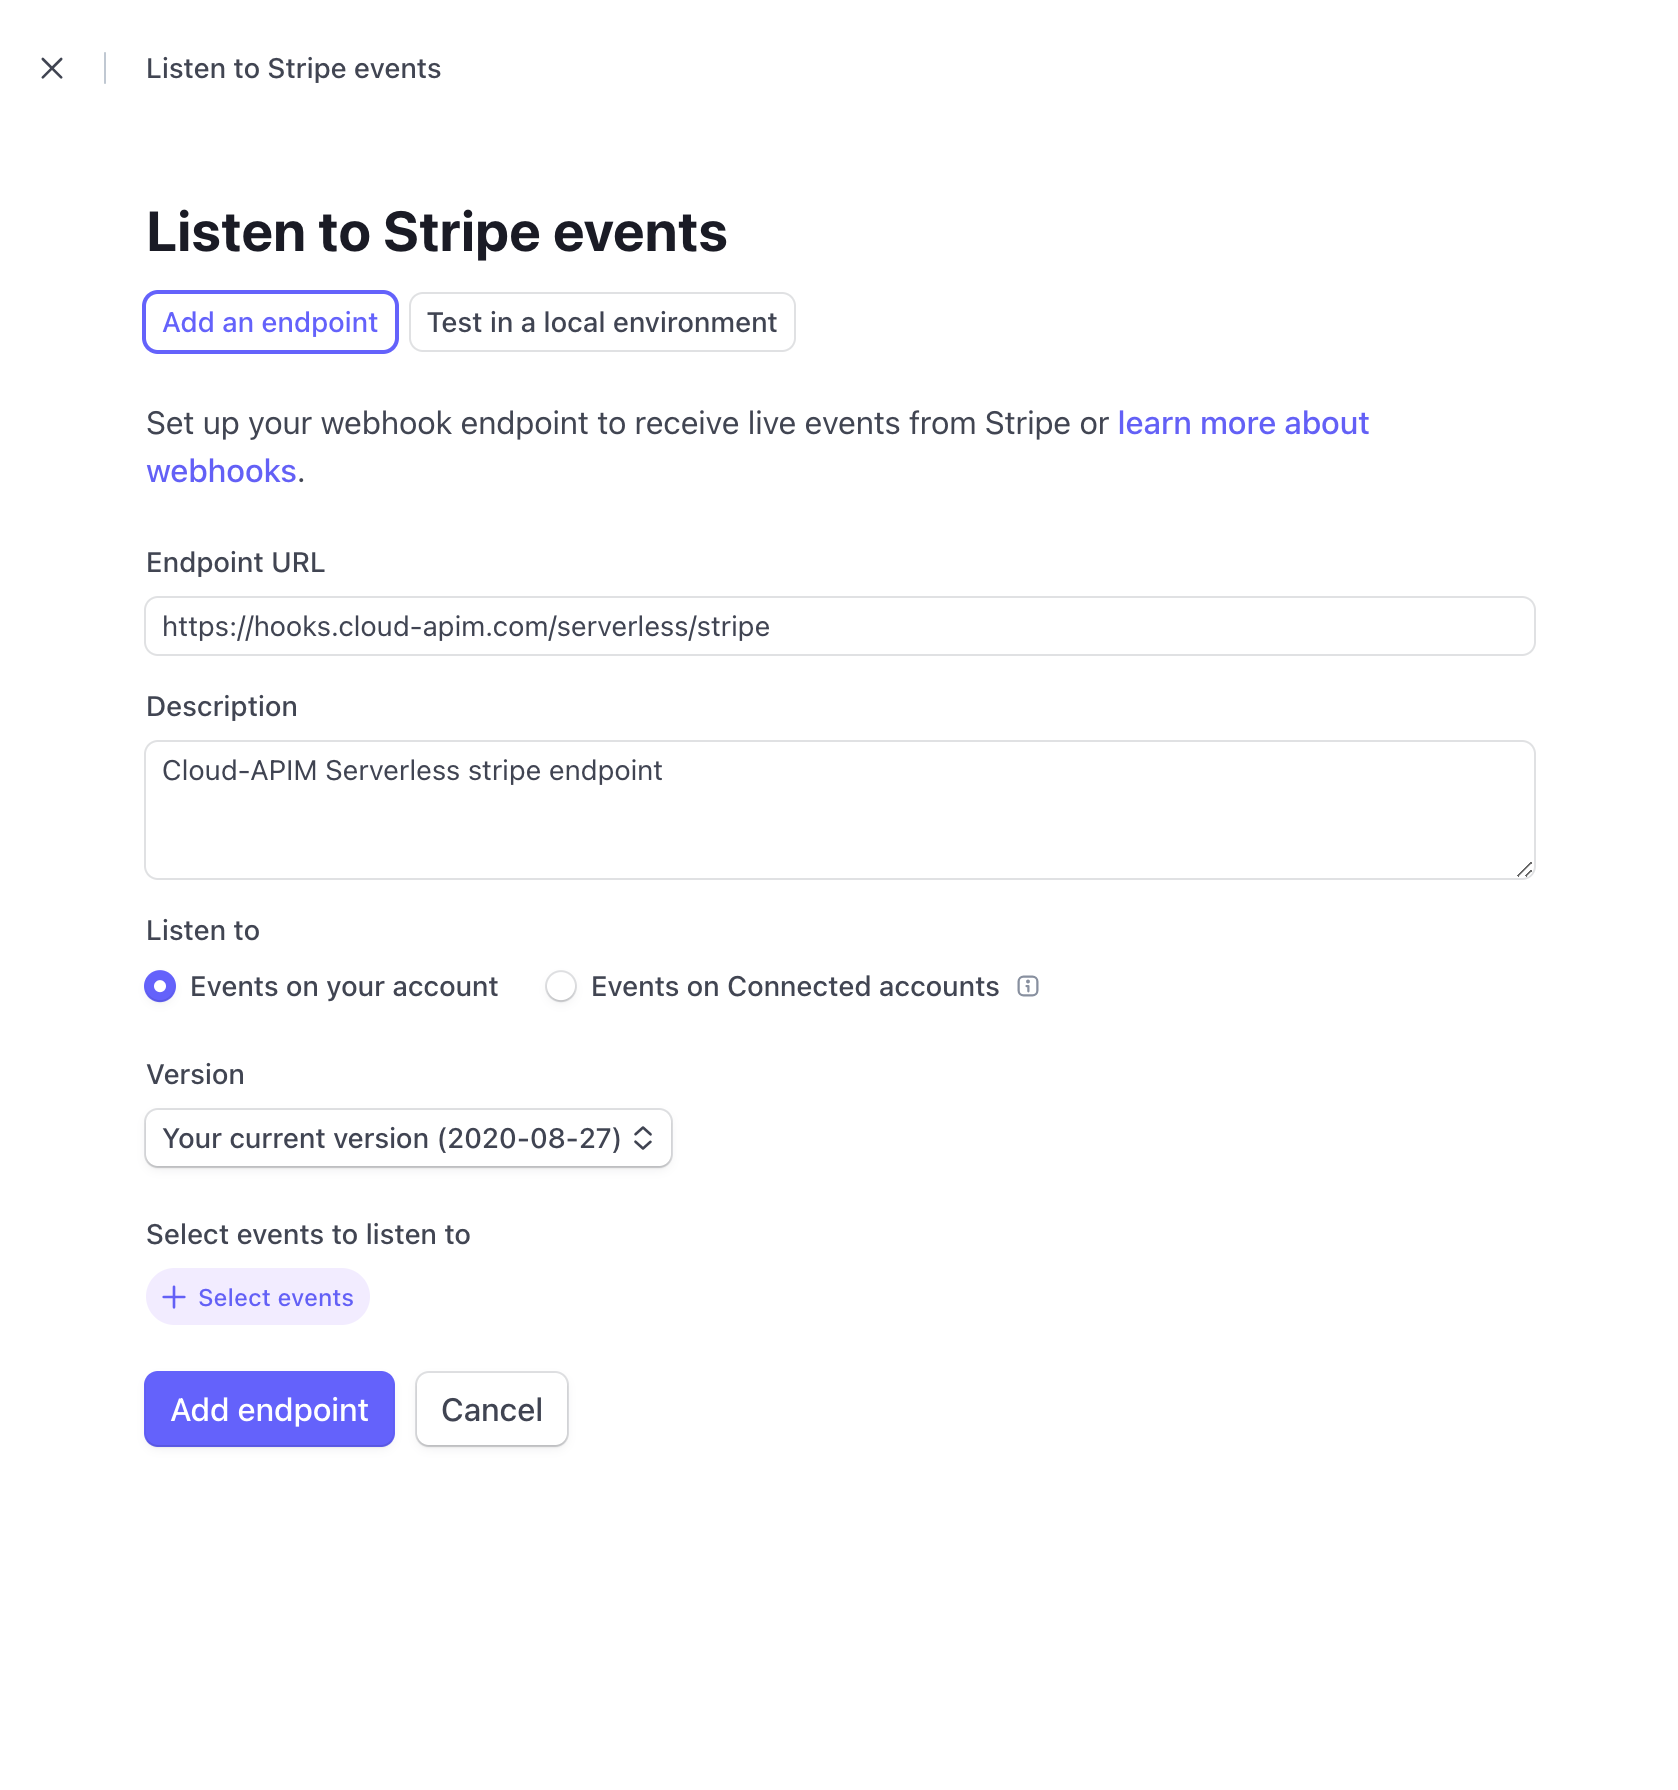
At the bottom of the form in the section Select events to listen to please select those events :
customer.subscription.deleted, customer.subscription.updated and checkout.session.completed
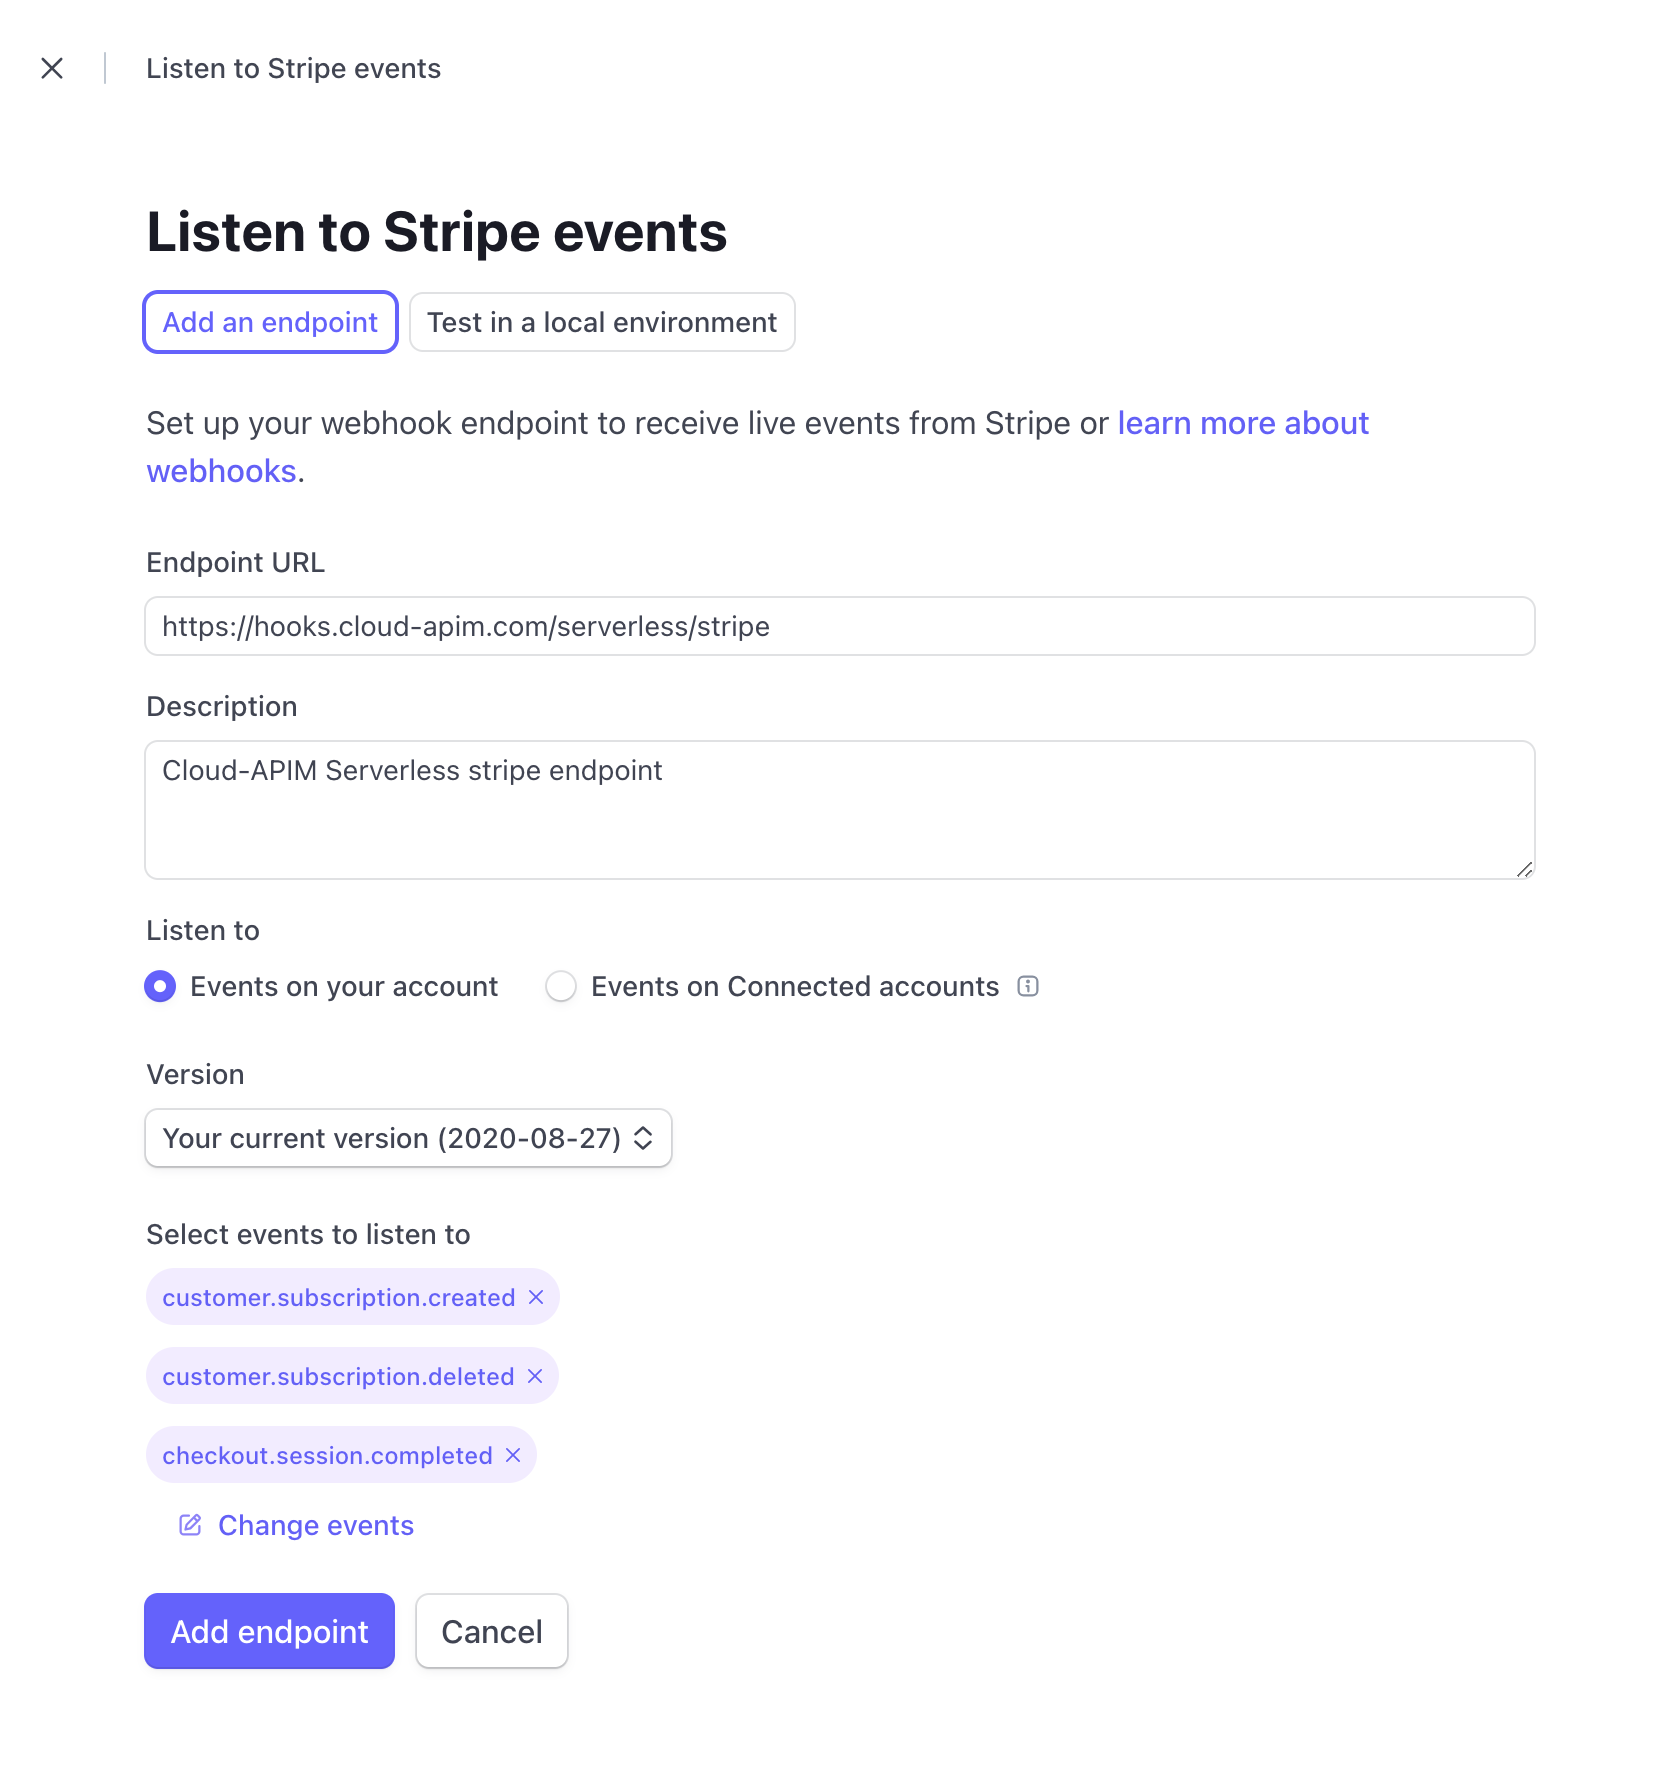
You have now configured with success your project. Click on Add endpoint to save your changes.
Manage your environment variables
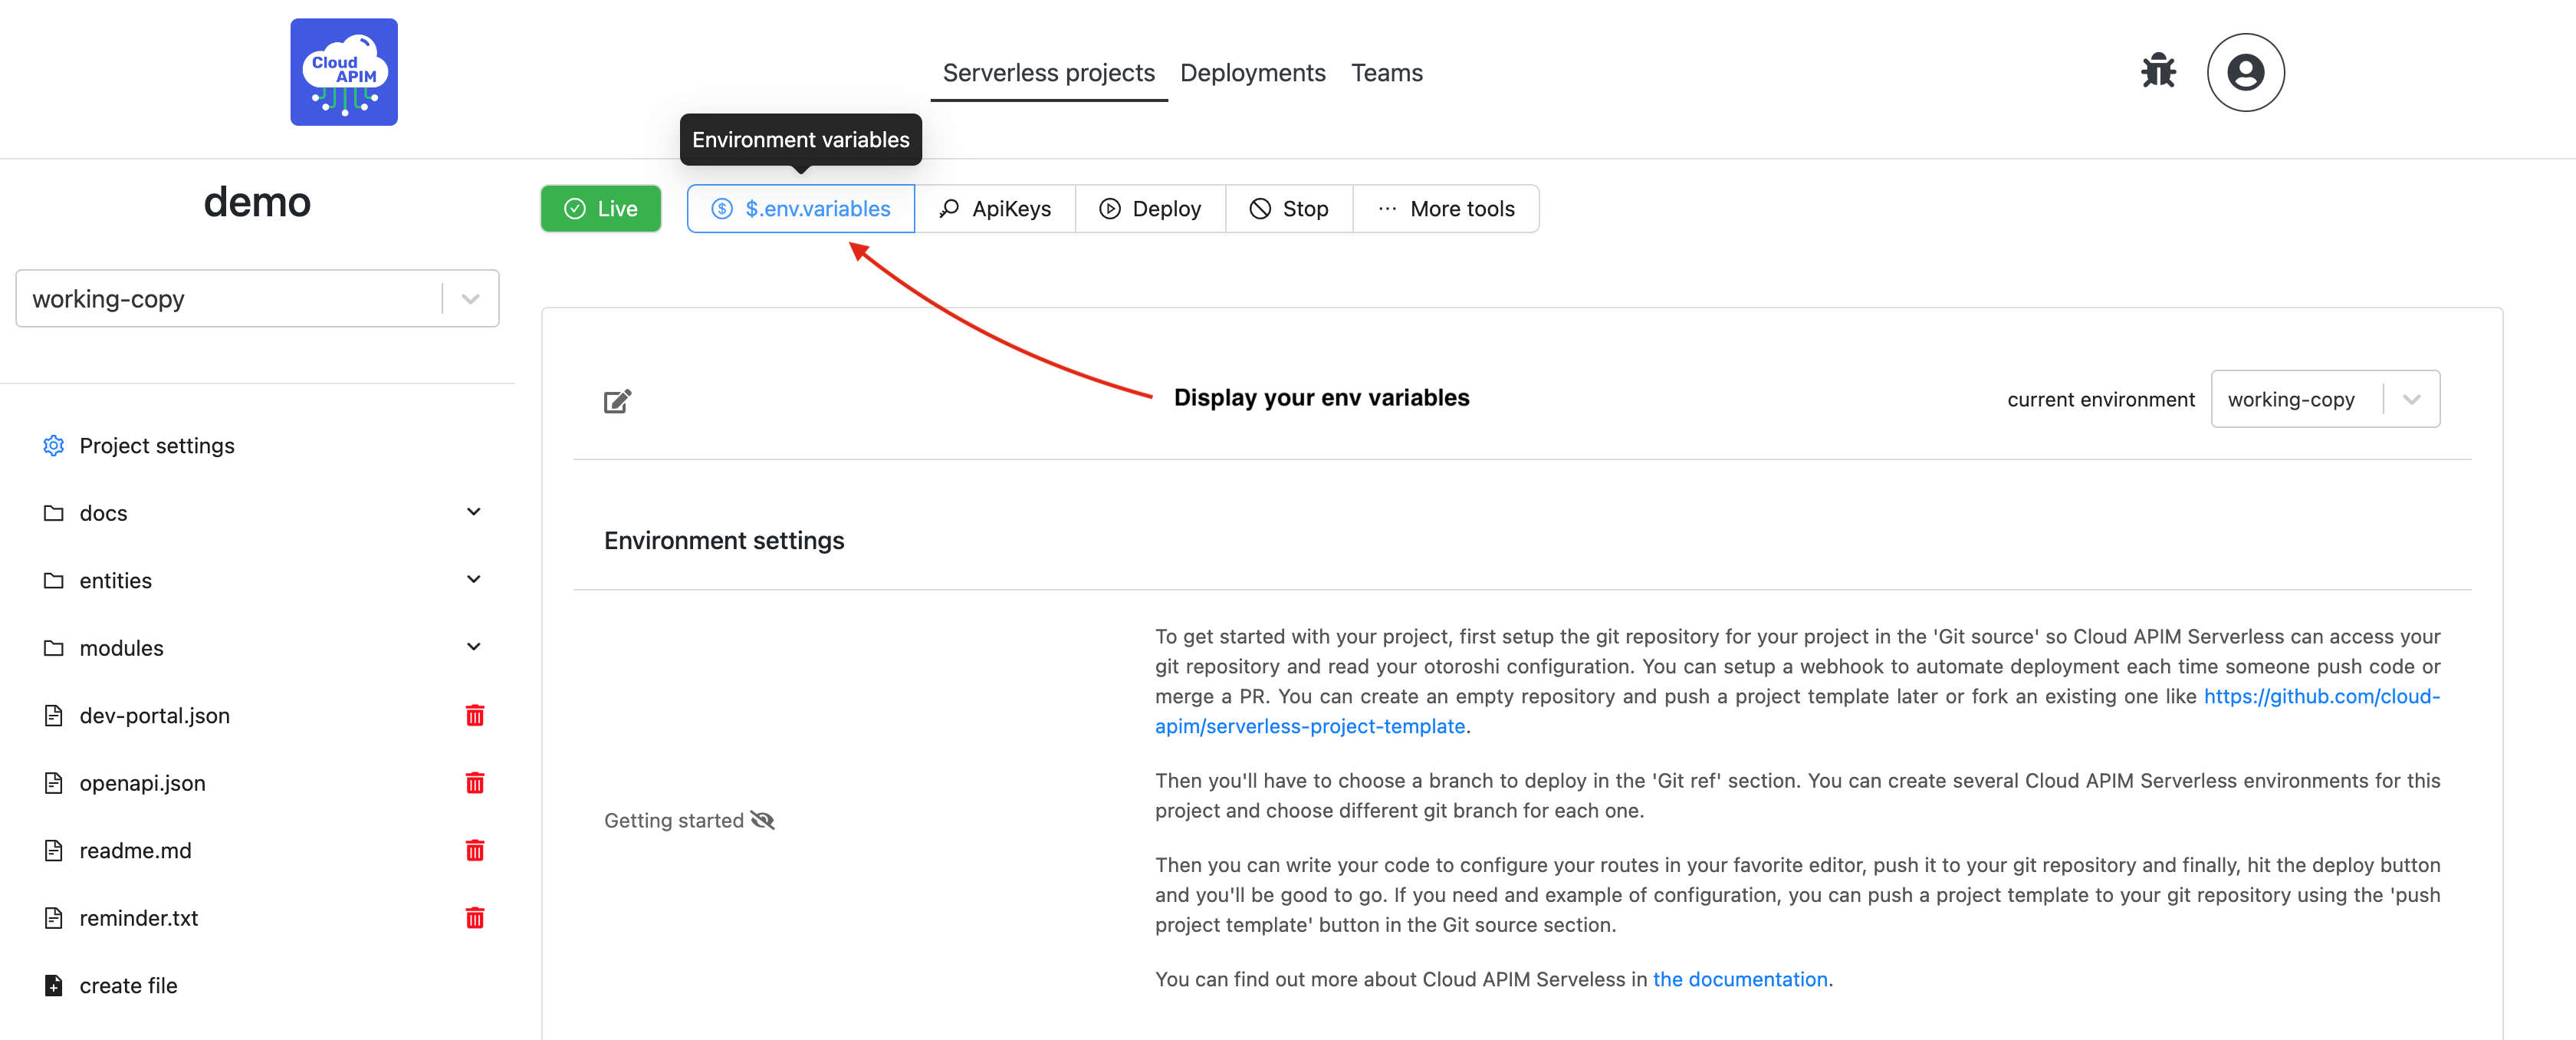
Go back to your Cloud APIM Serverless project and set up the 3 required $.env.variables for your project.
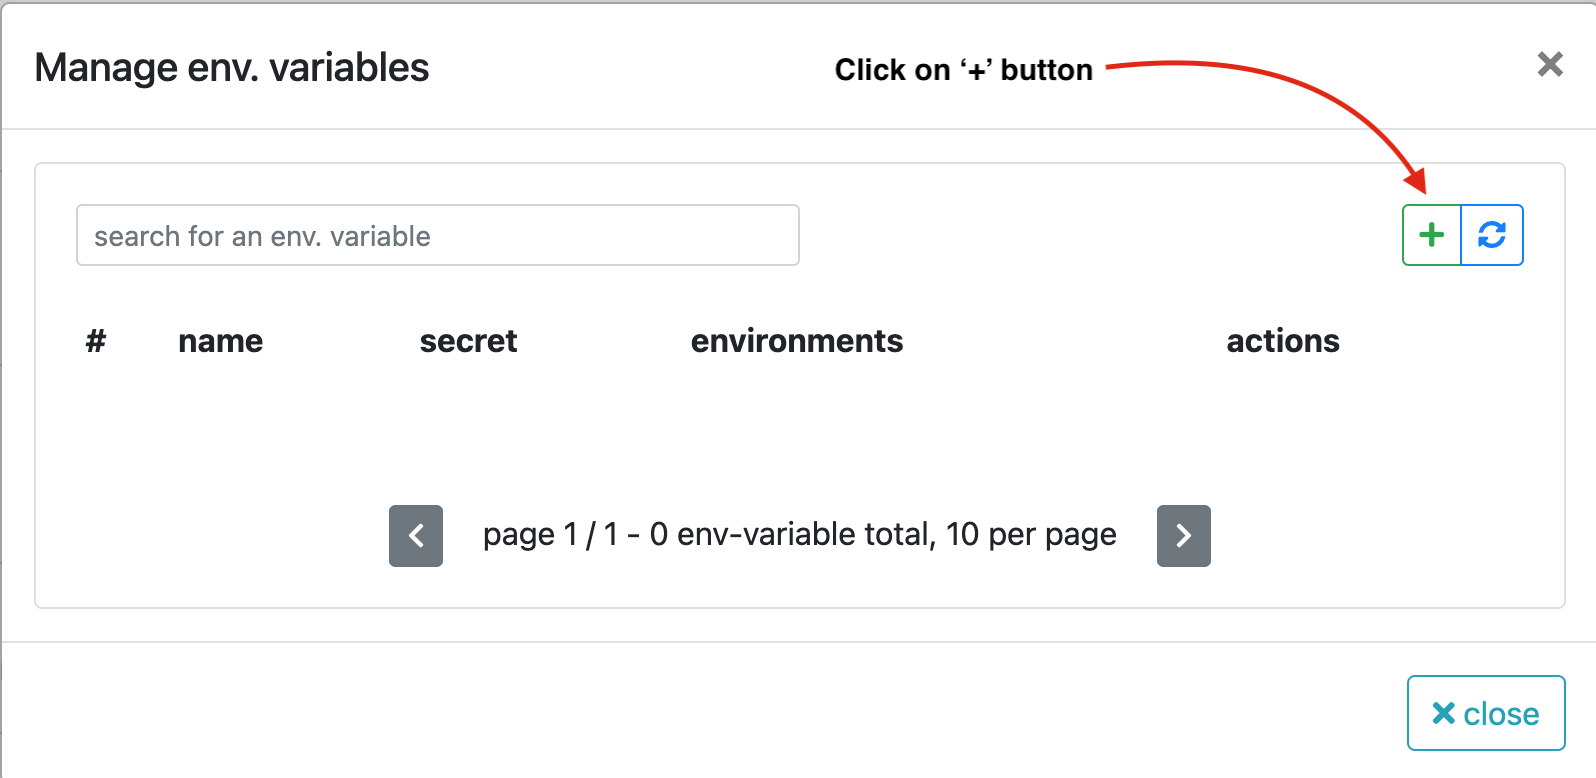
You need to set up 3 environment variables STRIPE_PRICING_TABLE_ID, STRIPE_PUB_KEY and STRIPE_SECRET_KEY.
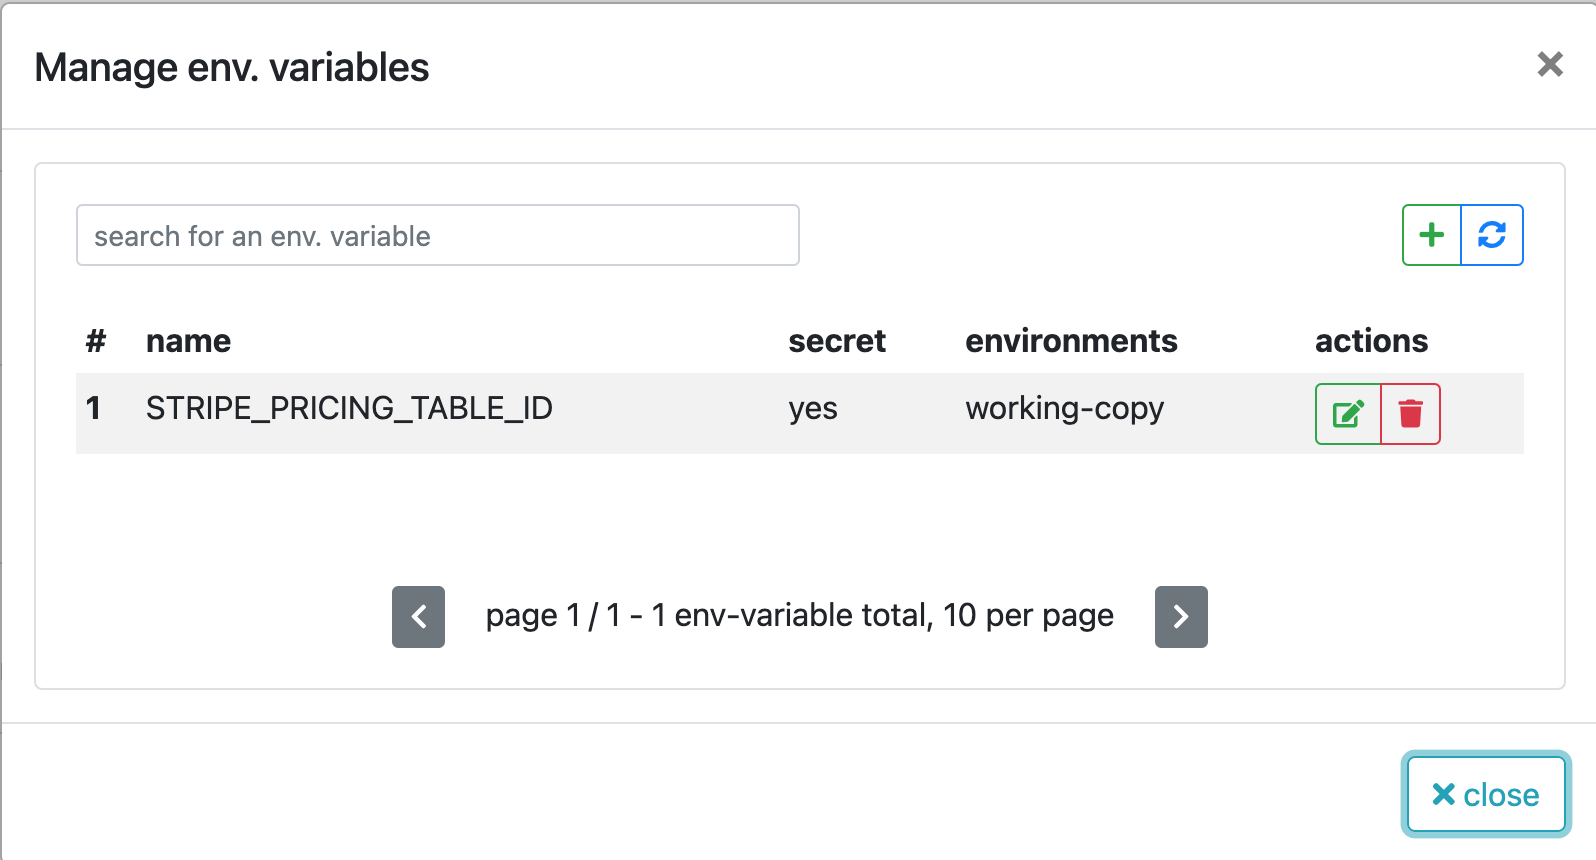
To do it, follow the screenshots below
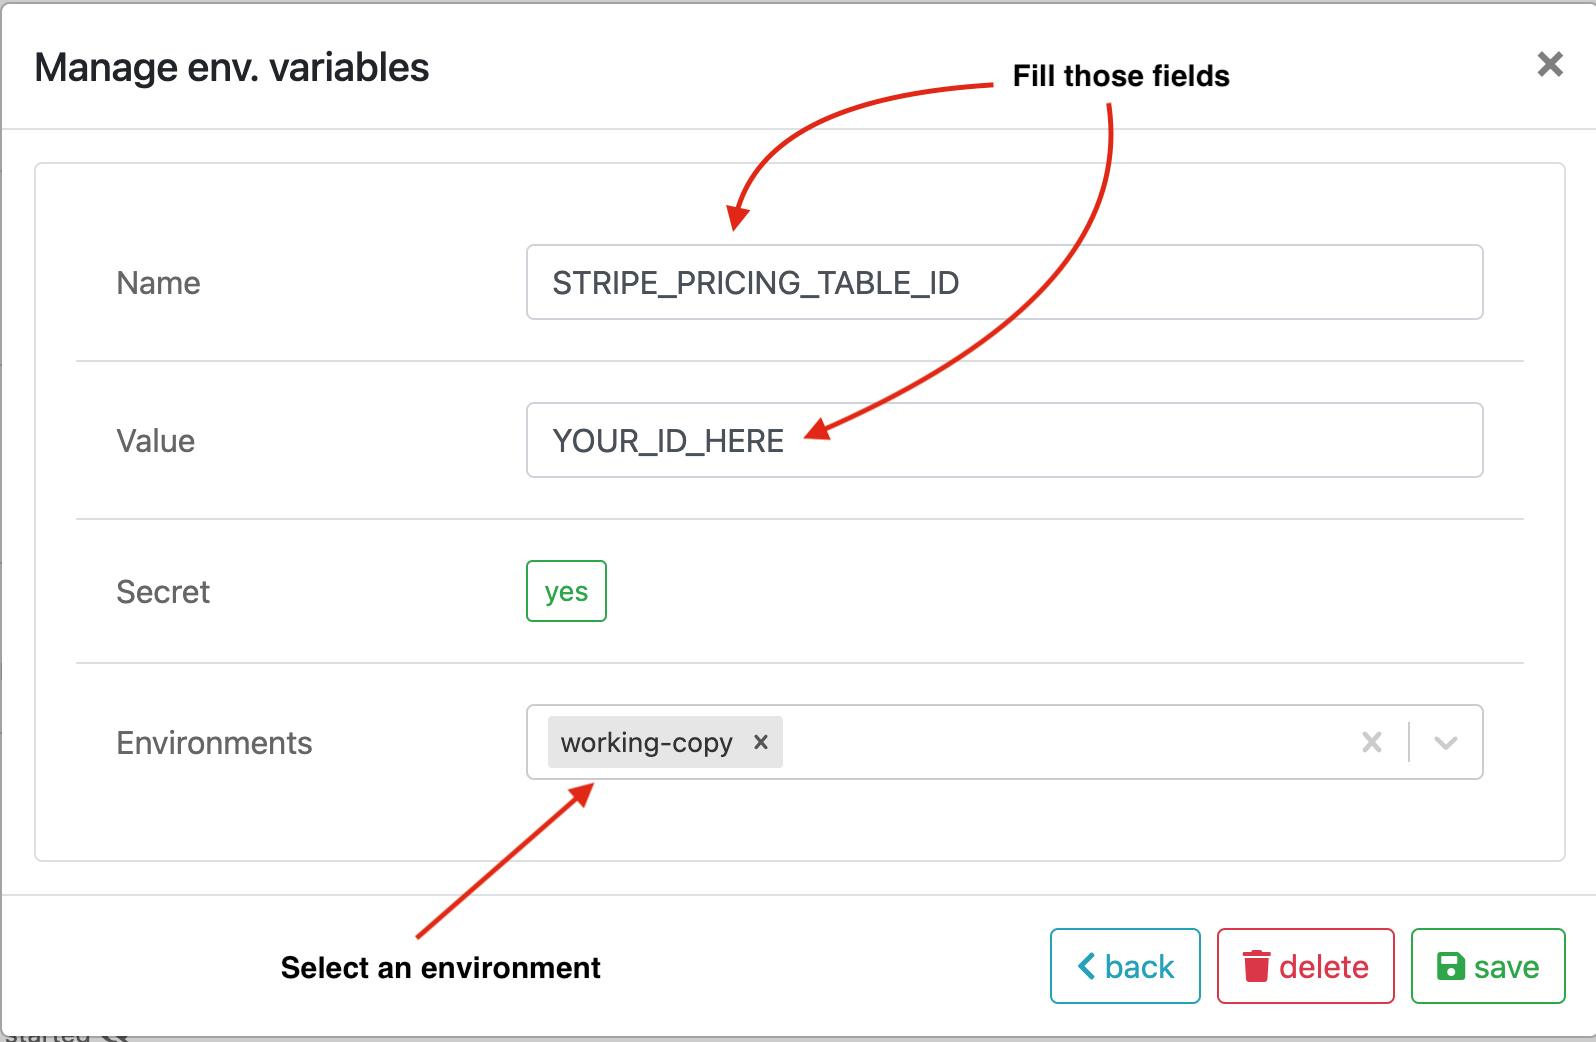
Now, save your new variable and repeat the process for the other variables.
Configure your developer portal
Well, we are close to the end of our configuration !
You just need to configure your portal by enabling the monetization and setting up your different plans.
In the developer portal editor just paste the following code :
"monetisation": {
    "enabled": true,
    "provider": "stripe",
    "config" : {
      "pricing_table_id" : "${environment.STRIPE_PRICING_TABLE_ID}",
      "pub_key" : "${environment.STRIPE_PUB_KEY}",
      "secret_key" : "${environment.STRIPE_SECRET_KEY}"
    }
 }
Follow the procedure : https://www.cloud-apim.com/serverless/documentation/docs/Monetisation/portal-conf
🌟 Benefits of Monetizing with Cloud APIM Serverless
Streamlined Setup: Easily configure billing plans and payment integration without extensive coding.
Scalable Solutions: Scale your API monetization strategy as your user base grows.
Comprehensive Analytics: Gain insights into API usage and revenue through detailed analytics and reporting.
Secure Transactions: Ensure secure payment processing with trusted payment gateways.
Enhanced Developer Experience: Provide a user-friendly developer portal that simplifies subscription management and API access.
Documentation
For more help let's check out our documentation about monetization https://www.cloud-apim.com/serverless/documentation/docs/category/add-monetisation
🎉 Conclusion
Monetizing your API with Cloud APIM Serverless is a straightforward and effective way to unlock new revenue streams while providing value to your users.
By leveraging the platform’s robust monetization features, you can set up billing plans, manage subscriptions, and handle payments with ease.
Start monetizing your API today and turn your innovation into income with Cloud APIM Serverless !
🚀 Get Started Now
Ready to get started with Cloud APIM Serverless ?
Sign up now and take the first step towards secure and efficient API management !
📡 Stay Connected
Follow our blog for the latest updates, tips, and best practices for Cloud APIM Serverless and API management.
🏢 About Cloud APIM
Cloud APIM provides cutting-edge, managed solutions for API management, enabling businesses to leverage the full power of their APIs with ease and efficiency. Our commitment to innovation and excellence drives us to offer the most advanced tools and services to our customers, empowering them to achieve their digital transformation goals.
Subscribe to my newsletter
Read articles from Thomas Delafaye directly inside your inbox. Subscribe to the newsletter, and don't miss out.
Written by
