Network Security : Setting Up a Honeypot on Kali Linux with Pentbox to Detect Intrusion
 Esther Adwets
Honeypots are network resources designed to look like real services but are deliberately set up to attract hackers.
So, instead of serving legitimate users, these services lure attackers and allow security teams and professionals to observe their Tactics, Techniques and Procedures(TTPs) in a controlled environment.
Pentbox is a versatile tool, often configured as a honeypot. Additionaly, penetration testers like it due to its wide range of tools that support various testing scenarios. It is written in Ruby, and can be installed on multiple operating systems, including Windows, macOS, and Linux, making it accessible across platforms for testing and cybersecurity purposes.
In this guide, I will show you how to install pentbox, configure a honeypot, then try to access it to determine whether it is operates as per our configurations.
What we will use: VirtualBox, Kali Linux, Windows 10 Pentbox Tool.
Disclaimer: This write-up is for educational use only. I am not responsible for any damage or legal issues arising from its use. Unauthorized attacks on individuals or organizations are illegal. Always follow local, state, and federal laws. I accept no liability for misuse or damage.
Step 1: Download and Install Pentbox on Kali Linux
To download Pentbox from Github to our machine, we will use the following command
git clone https://github.com/technicaldada/pentbox
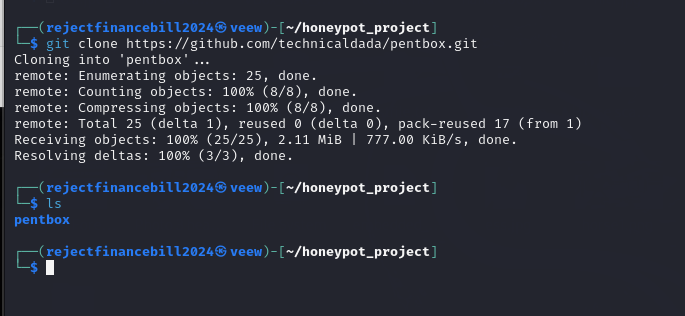
Once it is downloded to our directory of choice, we will then cd to pentbox (Where we will get to unzip and install it from)
Once in the pentbox directory , unzip the tool using the command tar -zxvf pentbox.tar.gz
Here is a breakdown of the command and options that we will use.
-z: Tellstarto decompress the archive using gzip (since the file has a.gzextension).-x: Extracts the files from the archive.-v: Enables verbose mode, which displays the names of the files being extracted.-f: Specifies the filename of the archive to work with (pentbox.tar.gz).
So, tar -zxvf pentbox.tar.gz will decompress and extract the contents of pentbox.tar.gz while listing the files as they are extracted. (As shown below.)
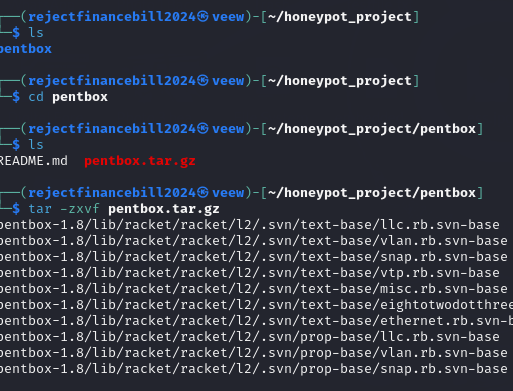
When all the files have been extracted, we will proceed to the directory we just unzipped, using the command: cd pentbox-1.8
Step 2 : Set Up the Honeypot using Fast Auto Configuration
We will then list all the files to find a Pentbox script that we can run to launch Pentbox.
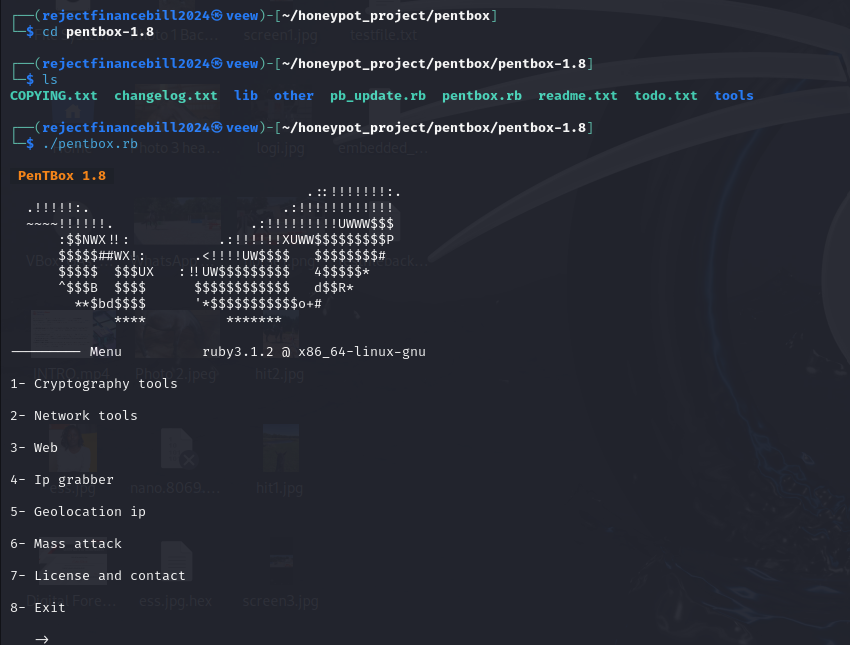
The command ./pentbox.rb is used to execute a Ruby script named pentbox.rb located our current working directory.
./: Specifies the path to the script, indicating it is in the current directory.pentbox.rb: The name of the Ruby script we want to run.
Of note: Should you encounter issues on this step, please make sure that the script has executable permissions. You can set these permissions using the command chmod +x pentbox.rb
Back to Pentbox!
Like I mentioned in the beginning, Pentbox is used to perform several other actions that will be listed there. However, we are interested in setting up a honeypot, so out interest will be Network tools, which is option 2. So, press 2.
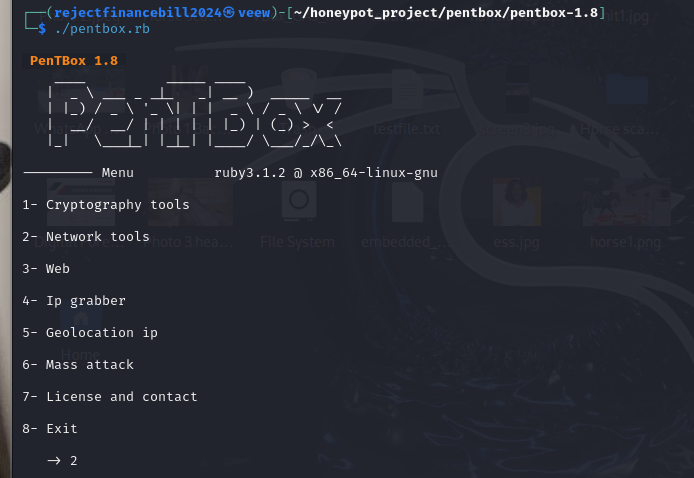
We will then see another set of options under Network tools, and since we are only interested in a Honeypot, please select option 3.
Also, since we are learning, feel free to test all the other options that come with Pentbox and have some fun!
After we have selected Honeypot, we will see two configuration options. We will go for Fast Auto Configuration, so press 1.
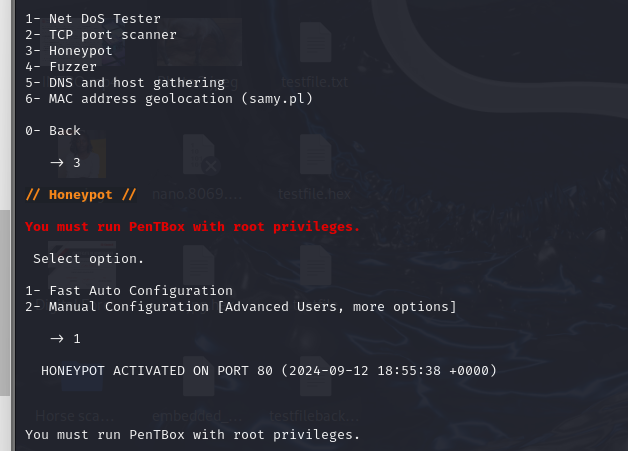
Congratulations! You just created your honeypot. Do you see the notification that a honeypot has been activated on pot 80?
Open a new tab on your terminal, DON’T CLOSE THE CURRENT!
Step 3: Test the Honeypot on Windows
We are going to check on the IP address of the machine the honeypot is running on. To do that, we use the command ifconfig
IP Address of Pentbox Honeypot host (Kali):192.168.100.104
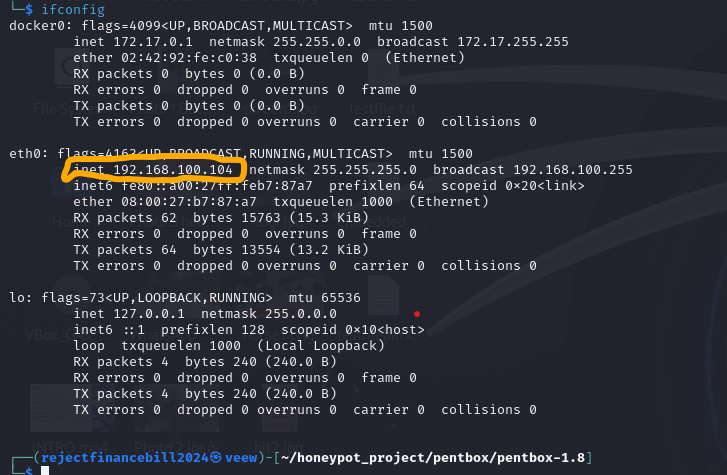
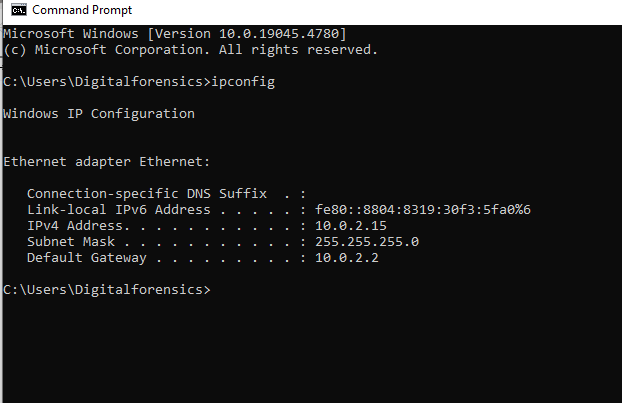
Next, we will move to our Windows Machine and try to get into our honeypot. But first, let’s check the IP address of the attacking machine. (Windows machine)
IP Address of Windows 10 machine: 10.0.2.15
Open Microsoft Edge on your Windows machine, click on the address bar, and type in:
192.168.100.1
Press ENTER.
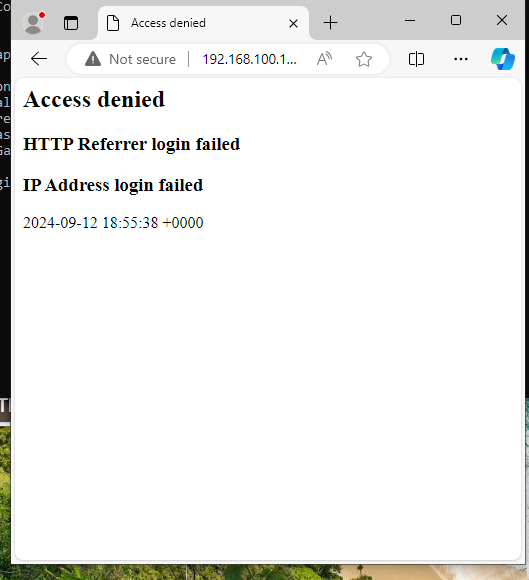
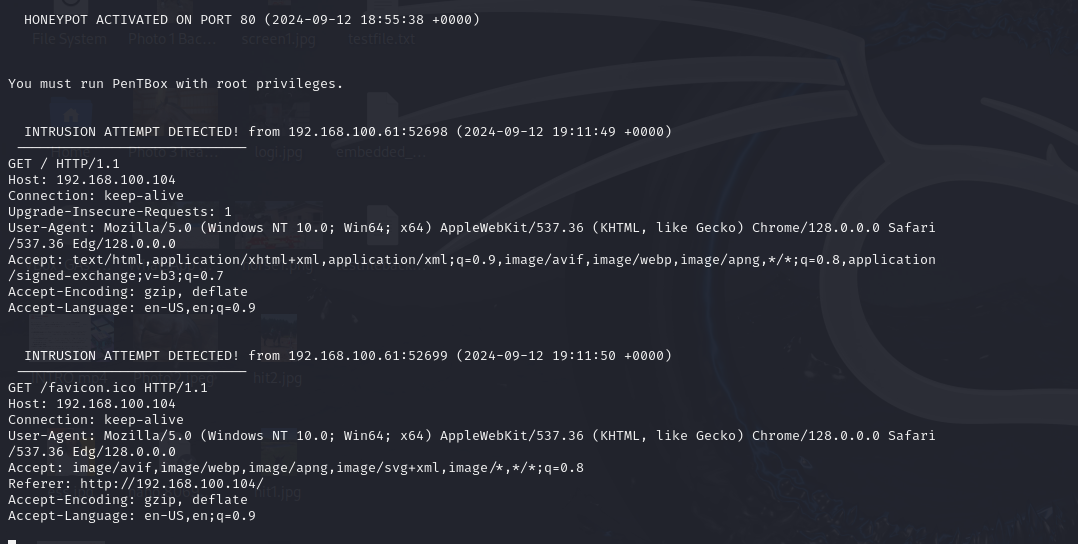
Check for any alerts on the Kali Linux machine hosting our honeypot.
The Kali terminal shows a message: "INTRUSION ATTEMPT DETECTED" from 192.168.100.61:52698.
Keep in mind that port numbers might differ.
See you in the next article where we will get to test the Manual Configuration option.
Subscribe to my newsletter
Read articles from Esther Adwets directly inside your inbox. Subscribe to the newsletter, and don't miss out.
Written by
