Creating an Azure Storage
 Onoja Bishop
What is Azure Storage
Azure Storage is Microsoft’s cloud storage solution designed for modern data storage needs. It offers a variety of services that are highly available, massively scalable, durable, and secure. Below are some key features of azure storage:
Durability and High Availability: Azure Storage ensures your data is safe even in the event of hardware failures. You can also replicate data across different regions for added protection.
Security: All data stored in Azure is encrypted, and you have fine-grained control over who can access your data.
Scalability: It can scale to meet the data storage and performance needs of today’s applications.
Accessibility: Data can be accessed from anywhere in the world over HTTP or HTTPS.
Azure Storage includes several services:
Azure Blobs: For storing large amounts of unstructured data such as text or binary data.
Azure Files: Enables you to set up highly available network file shares that can be accessed by using the industry standard Server Message Block (SMB) protocol, Network File System (NFS) protocol, and Azure Files REST API.
Azure Queues: Service is used to store and retrieve messages. Queue messages can be up to 64 KB in size, and a queue can contain millions of messages.
Azure Tables: A NoSQL store for structured data.
Azure Disks: Is a virtual hard disk (VHD). You can think of it like a physical disk in an on-premises server but, virtualized.
Step 1: Create a resource group and a storage account.
Create and deploy a resource group to hold all your project resources.
- In the Azure portal, search for and select
Resource groups.
- In the Azure portal, search for and select
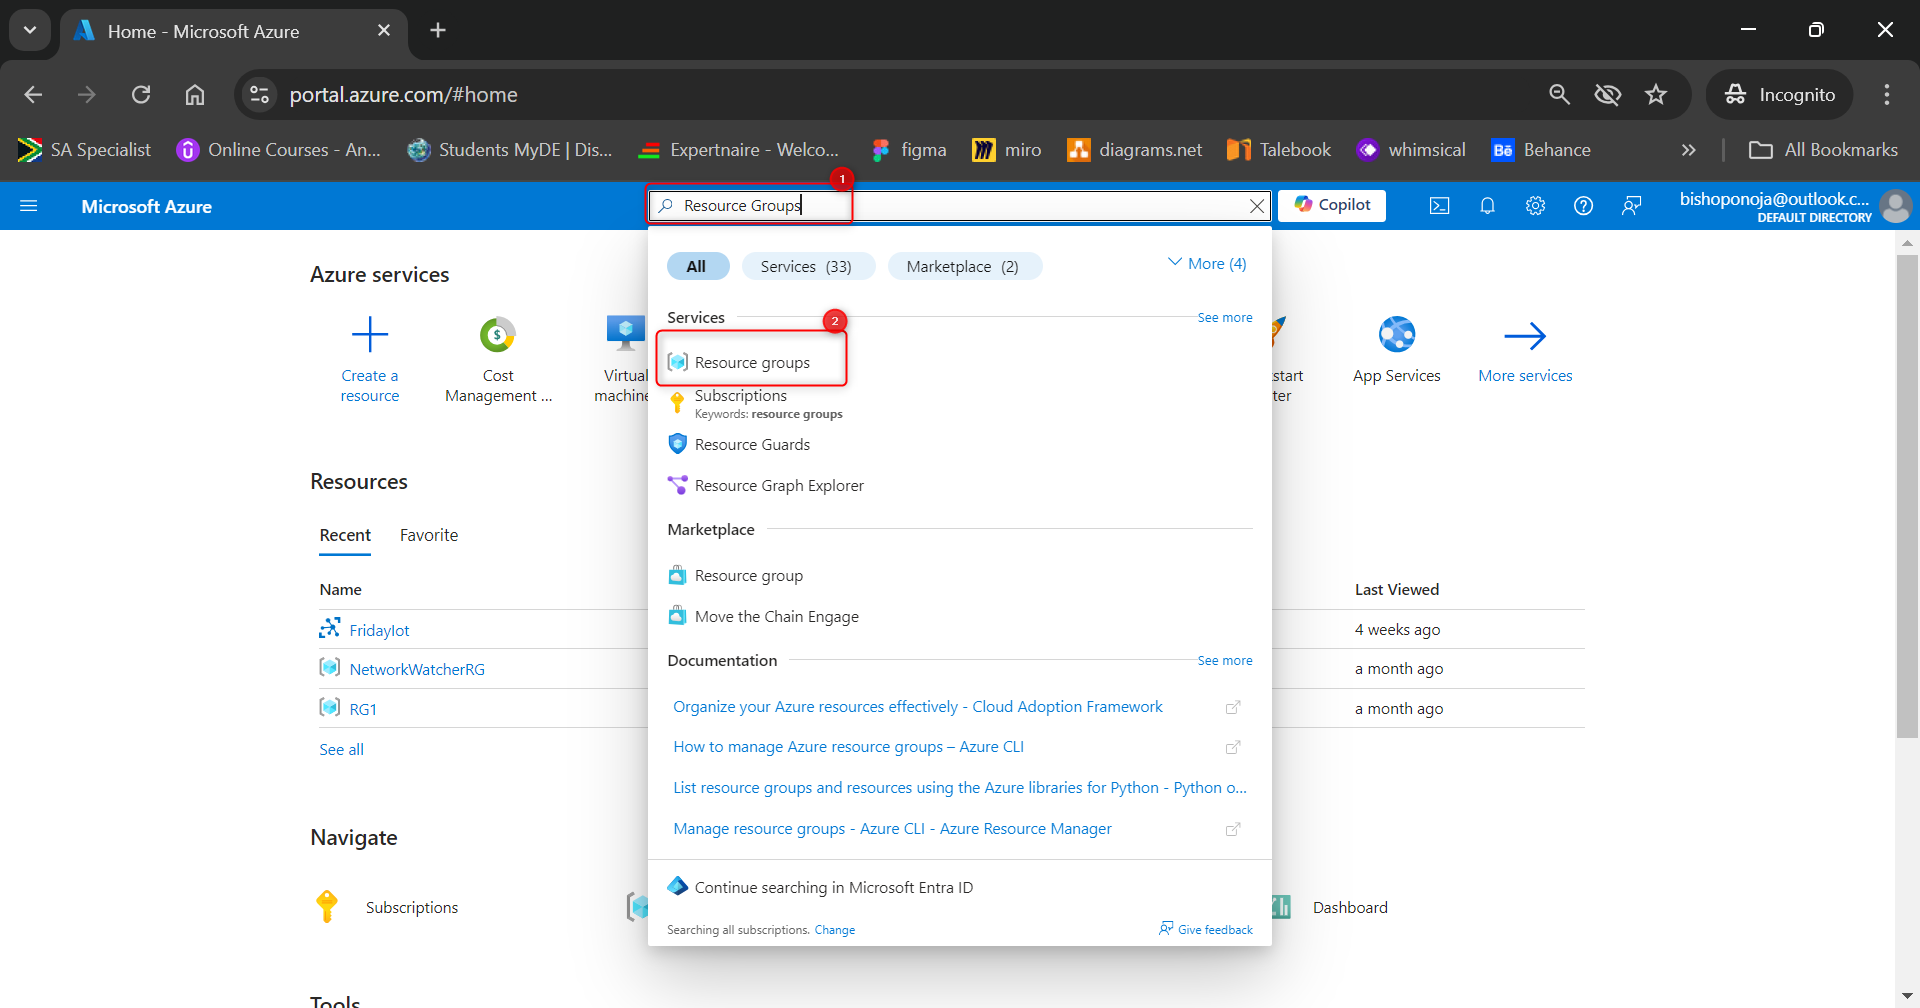
- Select + Create.
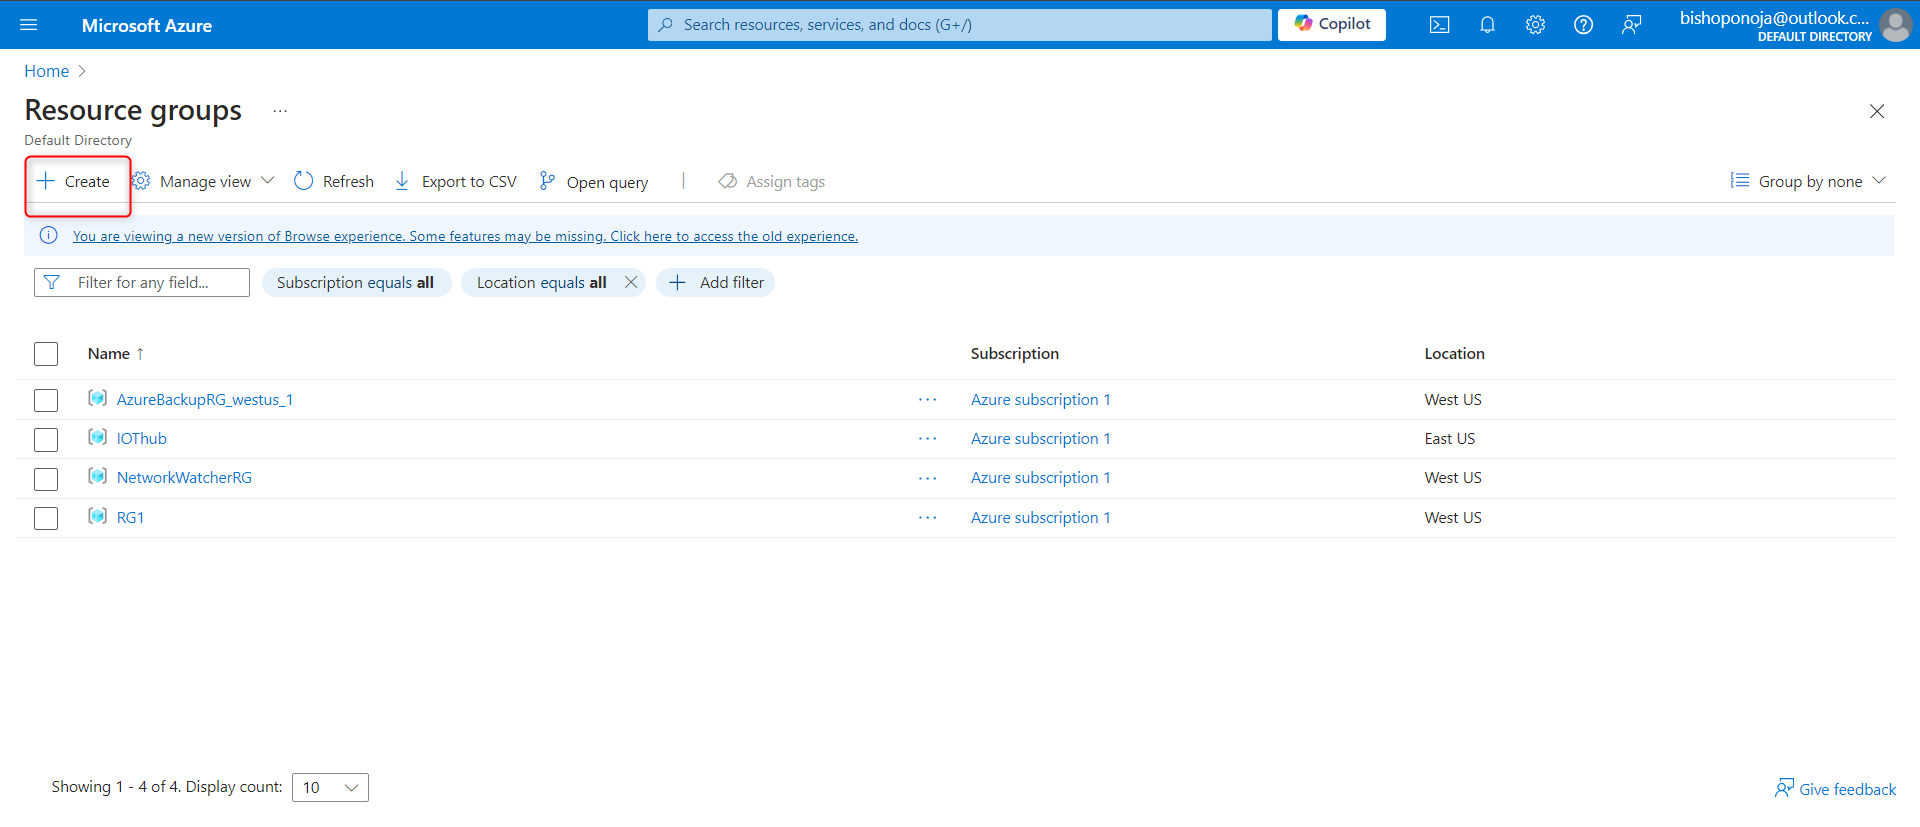
Give your resource group a name. For example,
storagerg.Select a region. Use this region throughout the project.
Select Review and create to validate the resource group.
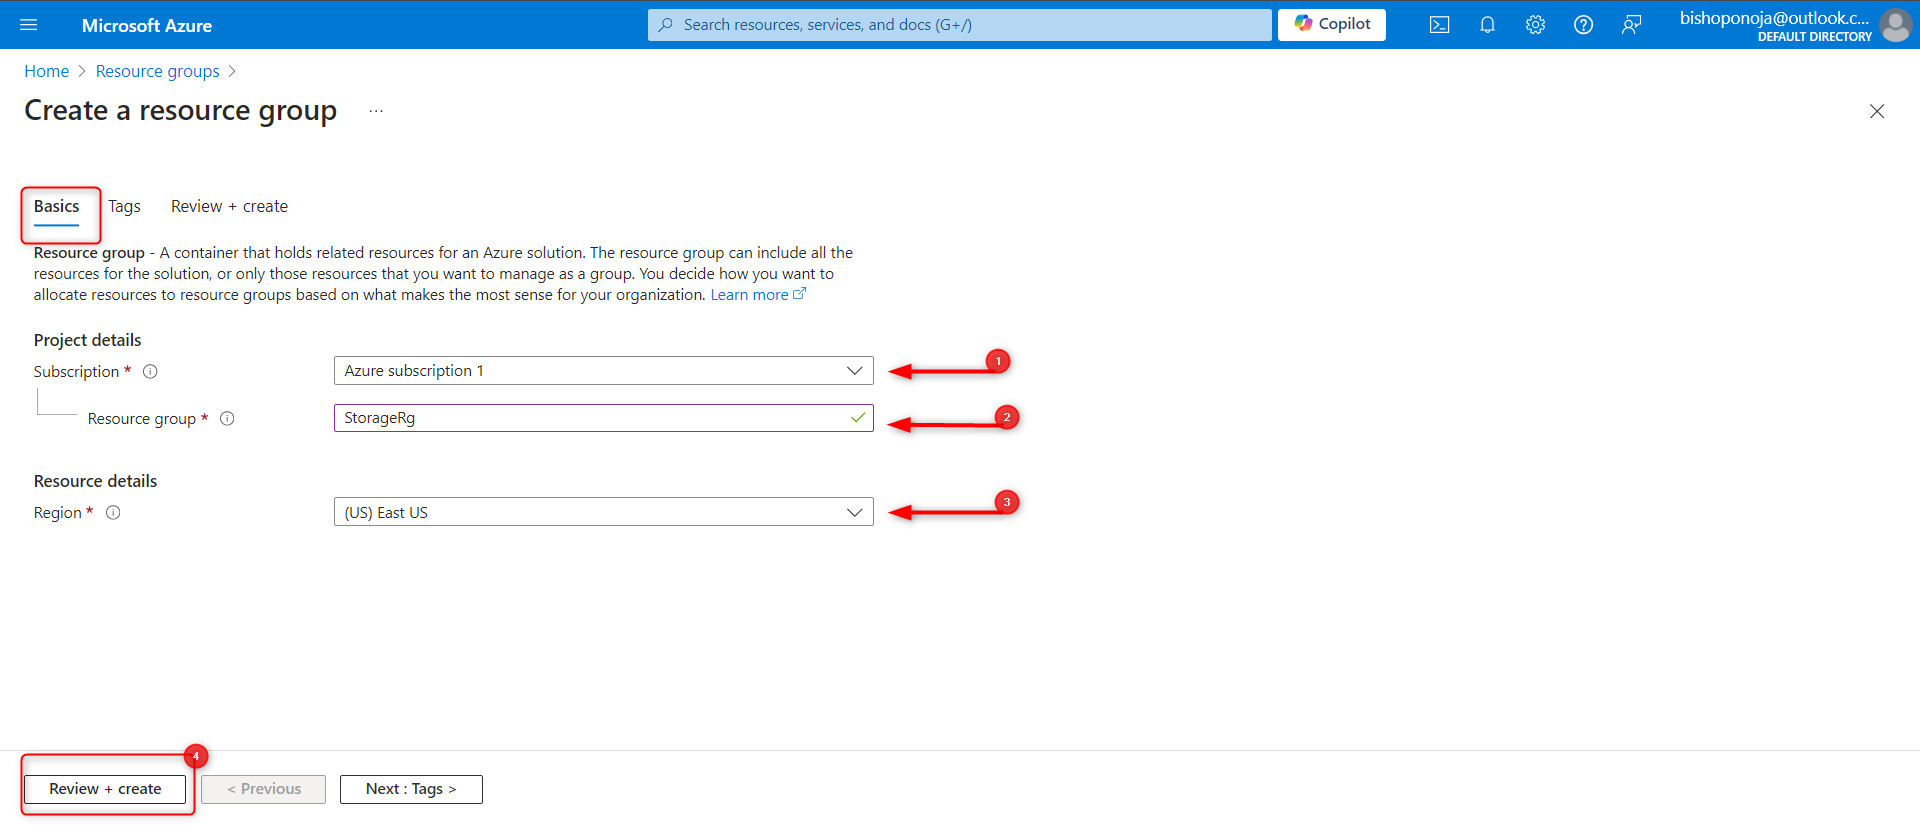
Select Create to deploy the resource group.
Create and deploy a storage account to support testing and training.
- In the Azure portal, search for and select
Storage accounts.
- In the Azure portal, search for and select
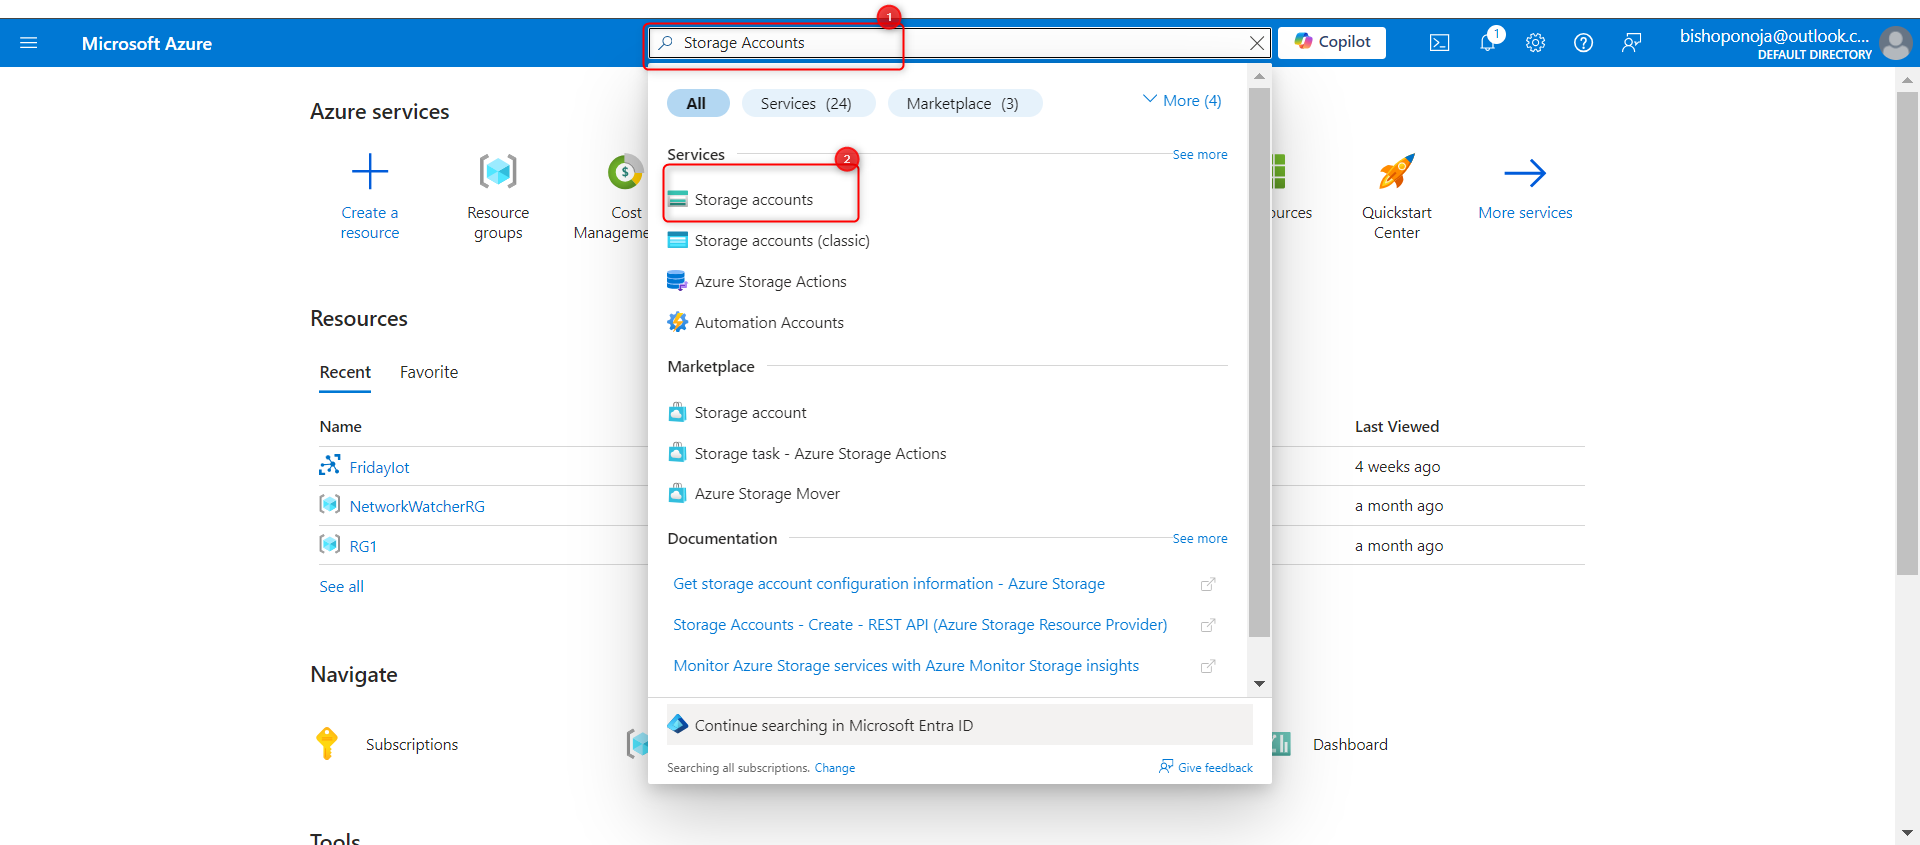
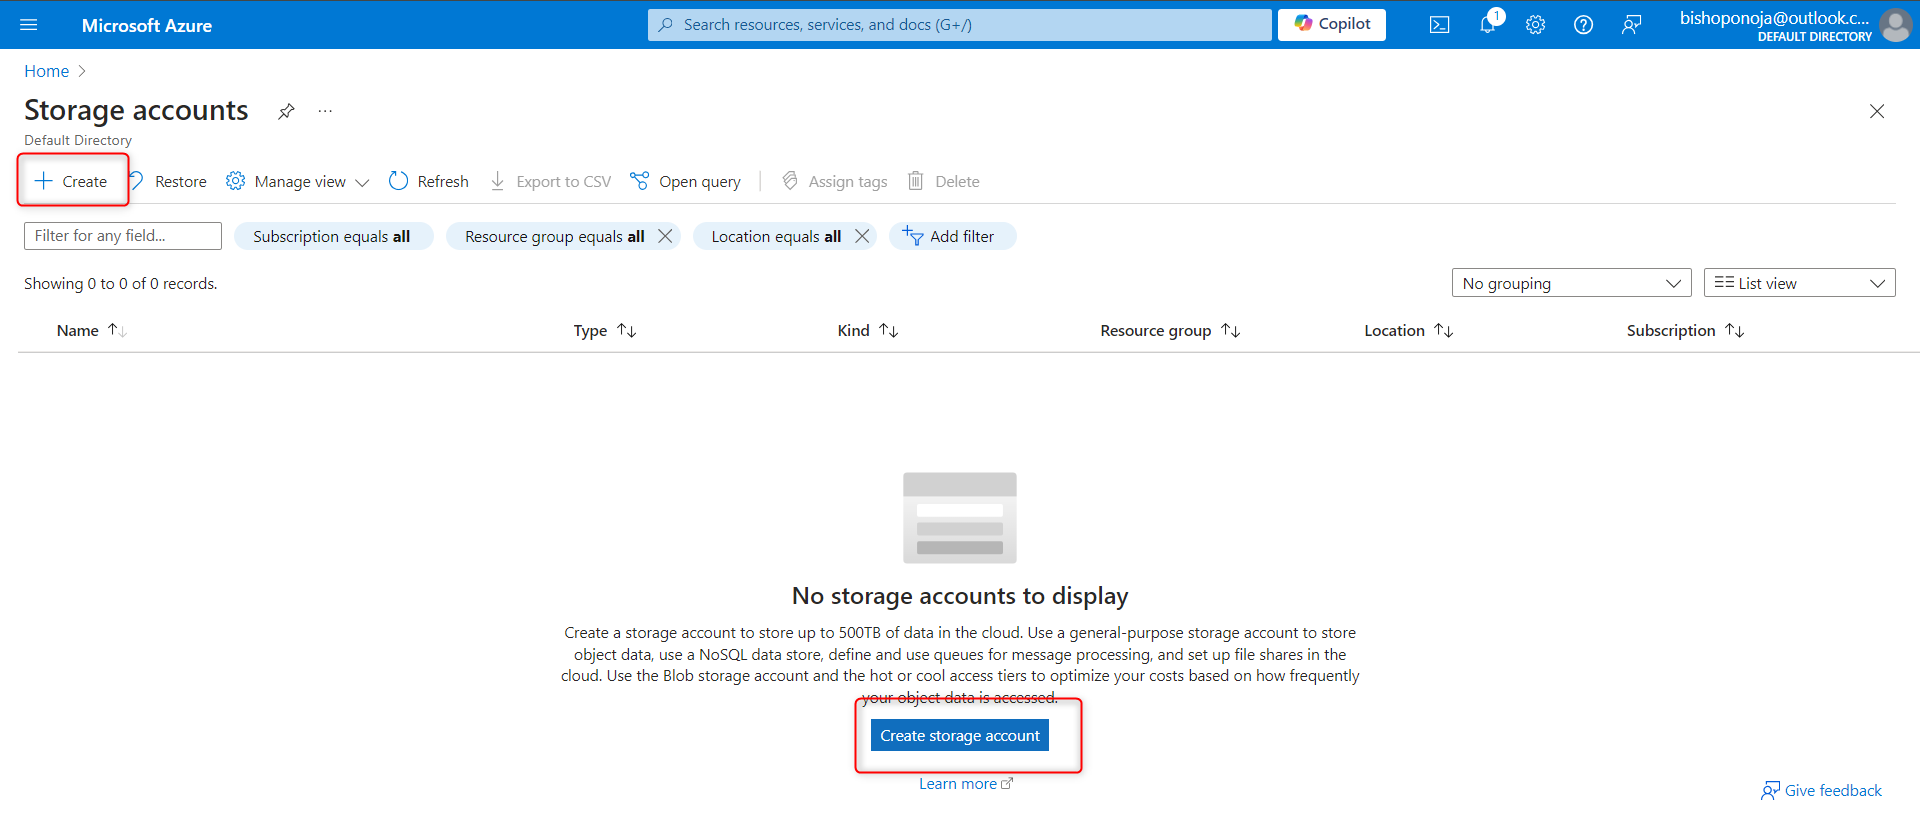
- Select + Create.
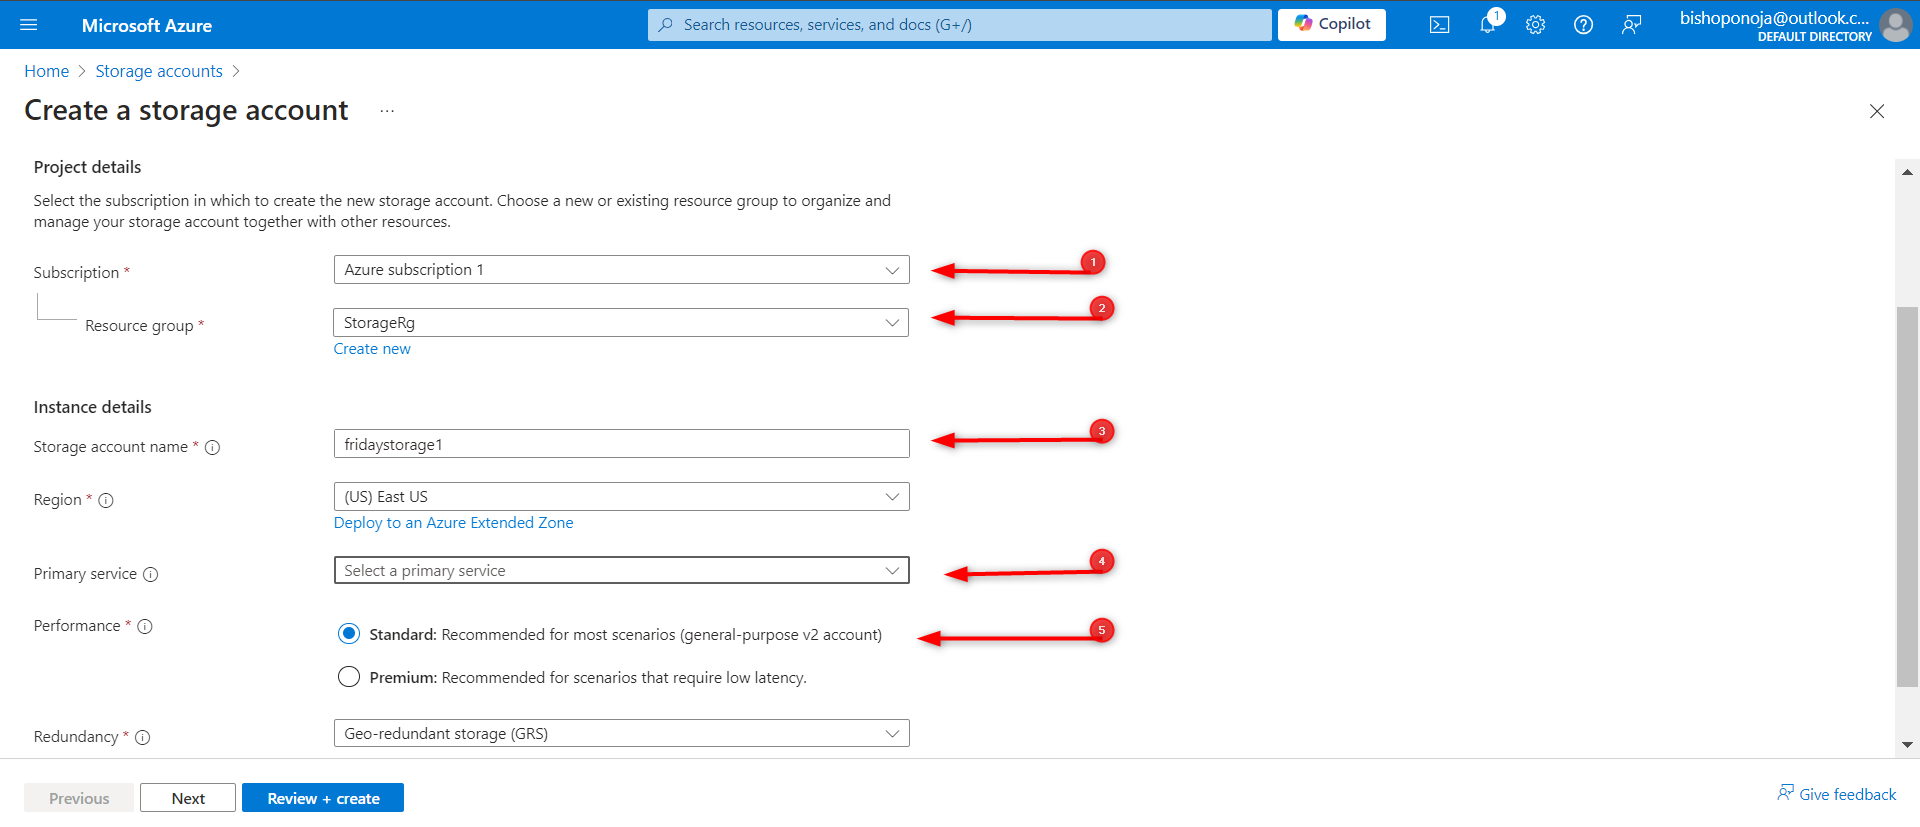
On the Basics tab, select your Resource group.
Provide a Storage account name. The storage account name must be unique in Azure.
Set the Performance to Standard.
Select Review, and then Create.
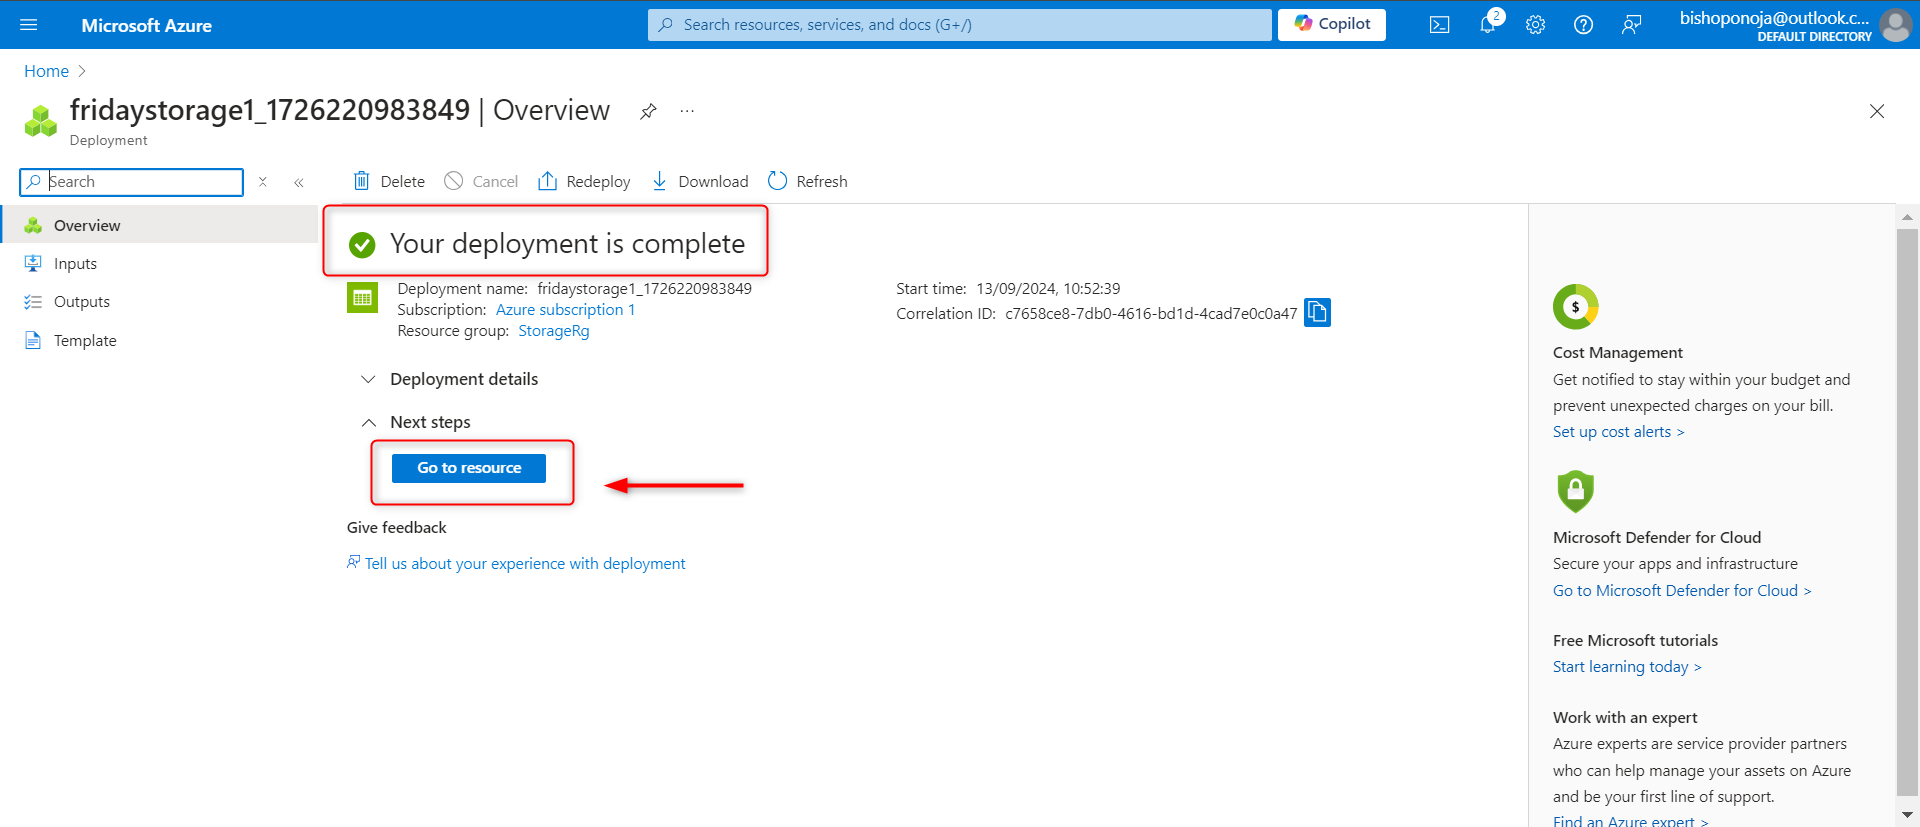
- Wait for the storage account to deploy and then Go to resource.
Step 2: Configure simple settings in the storage account.
The data in this storage account doesn’t require high availability or durability. A lowest cost storage solution is desired.
In your storage account, in the Data management section, select the Redundancy blade.
Select Locally-redundant storage (LRS) in the Redundancy drop-down.
Be sure to Save your changes.
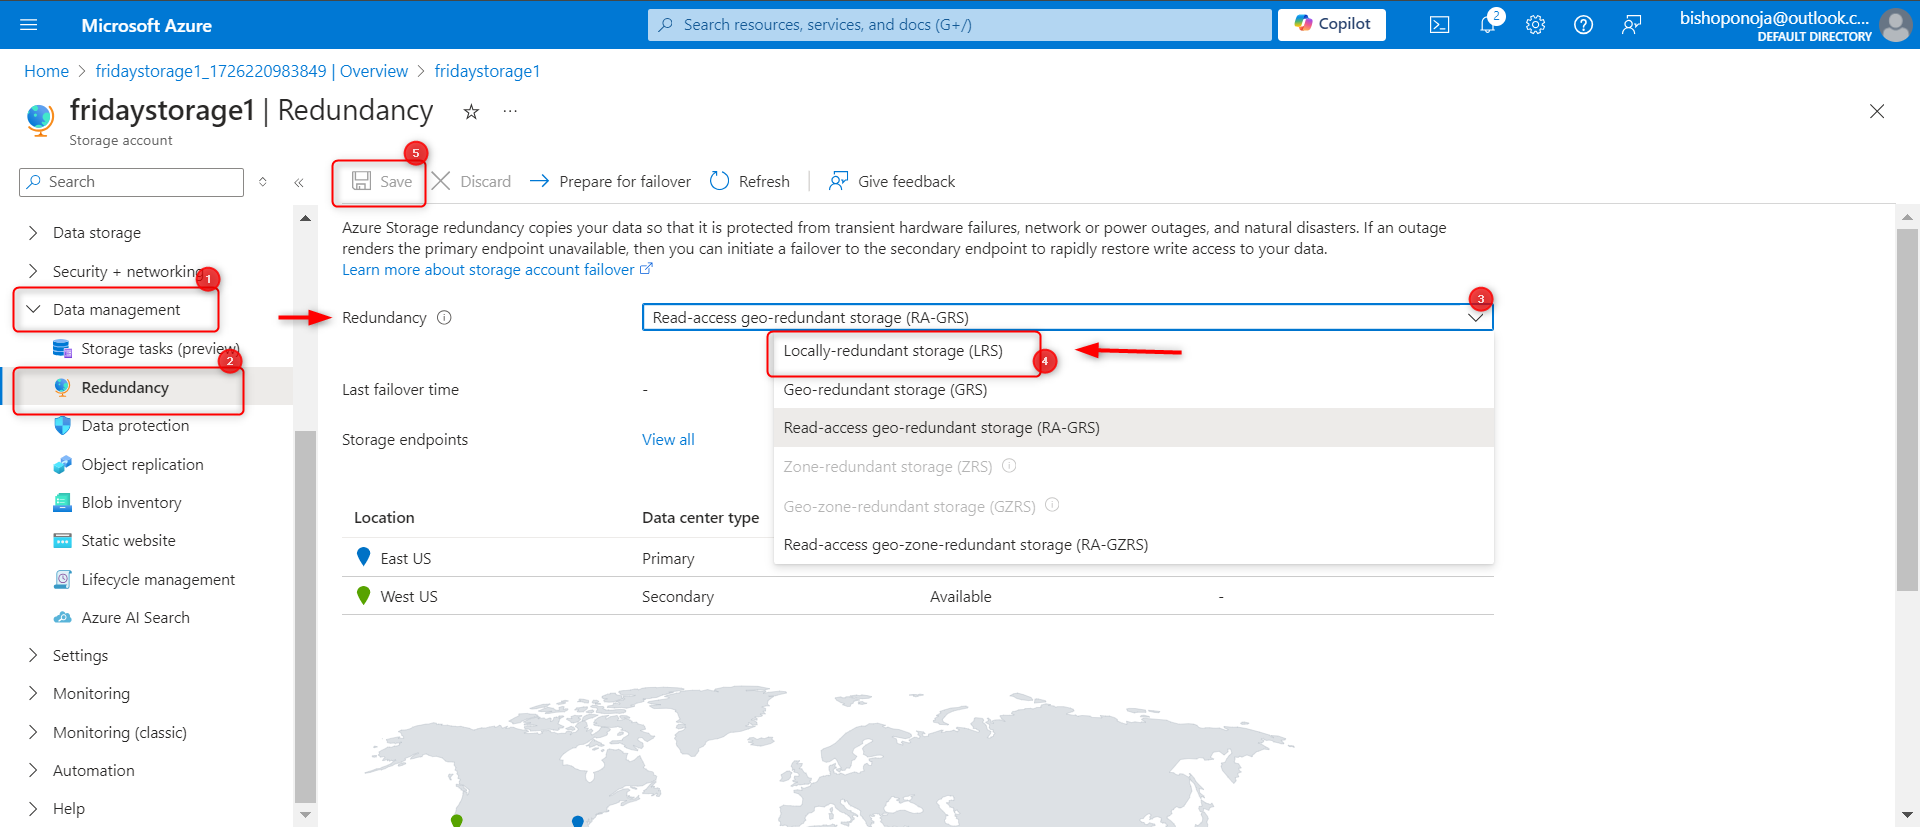
- Refresh the page and notice the content only exists in the primary location.
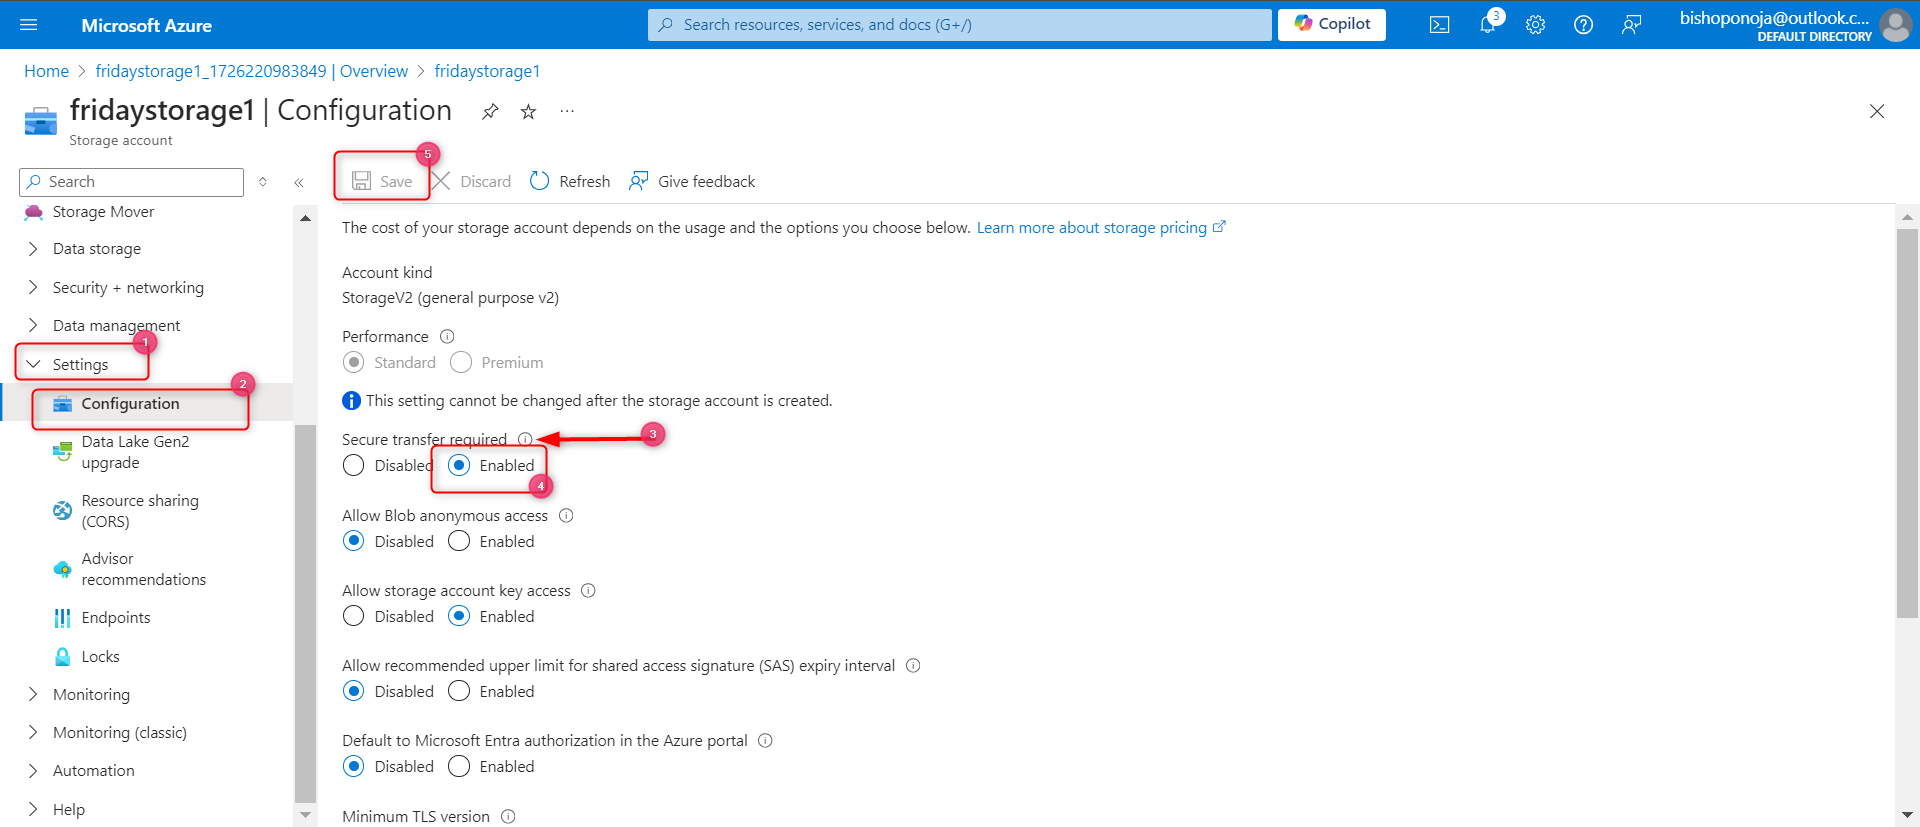
The storage account should only accept requests from secure connections.
In the Settings section, select the Configuration blade.
Ensure Secure transfer required is Enabled.
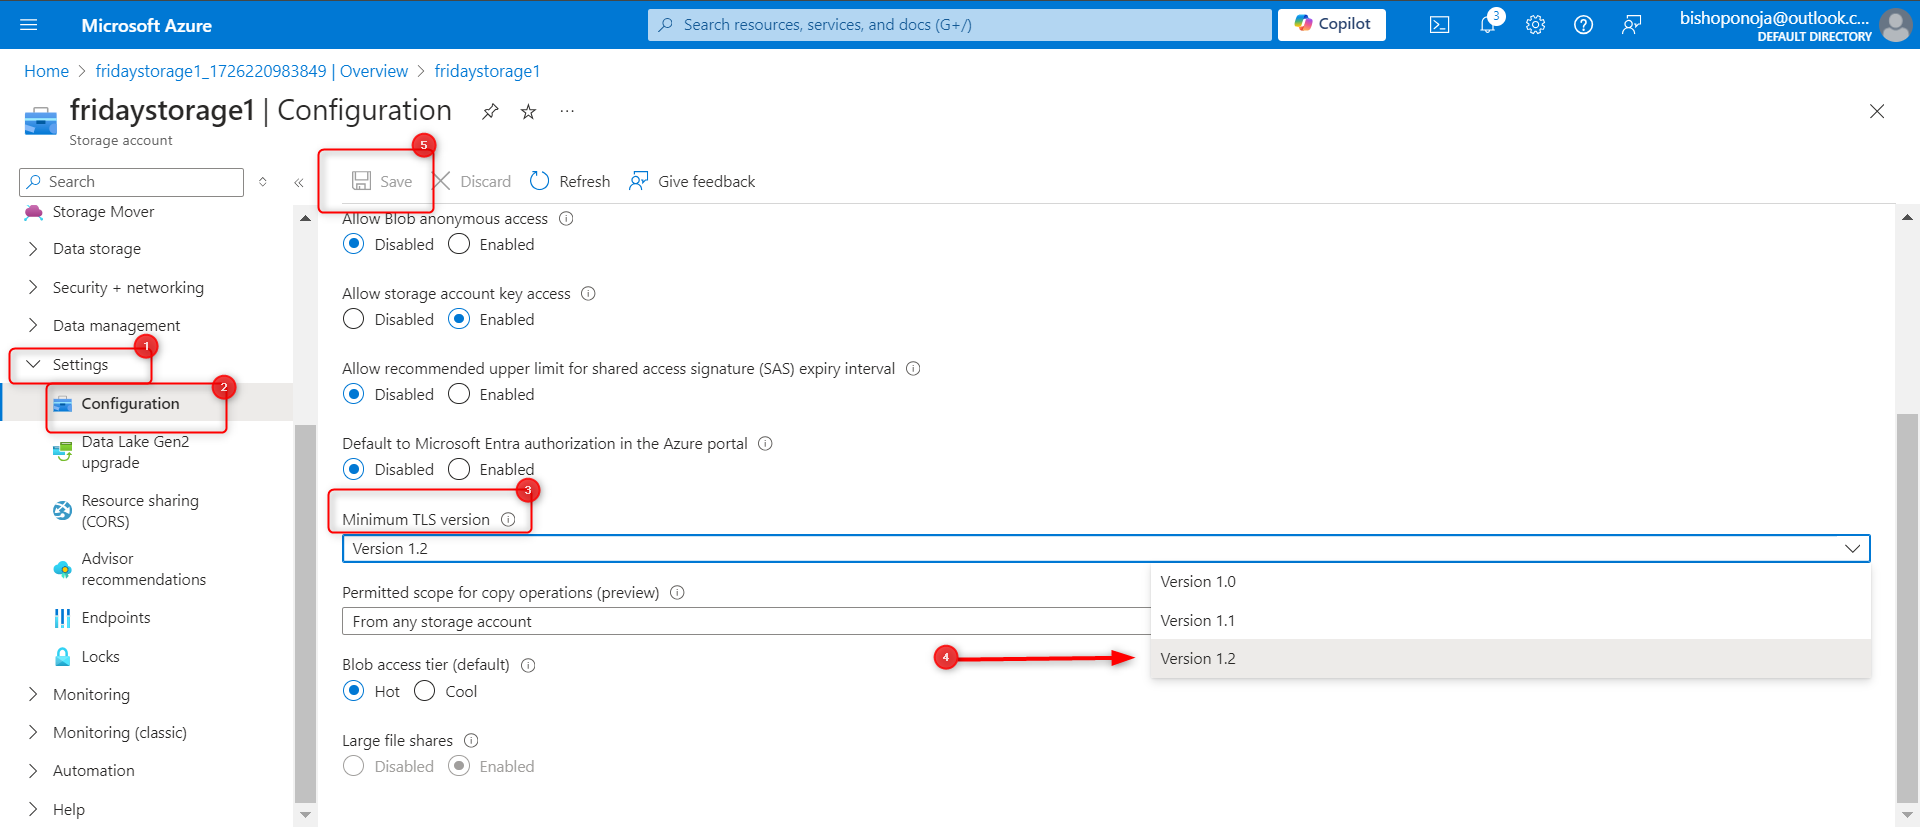
Developers would like the storage account to use at least TLS version 1.2.
In the Settings section, select the Configuration blade.
Ensure the Minimal TLS version is set to Version 1.2.
Until the storage is needed again, disable requests to the storage account.
In the Settings section, select the Configuration blade.
Ensure Allow storage account key access is Disabled.
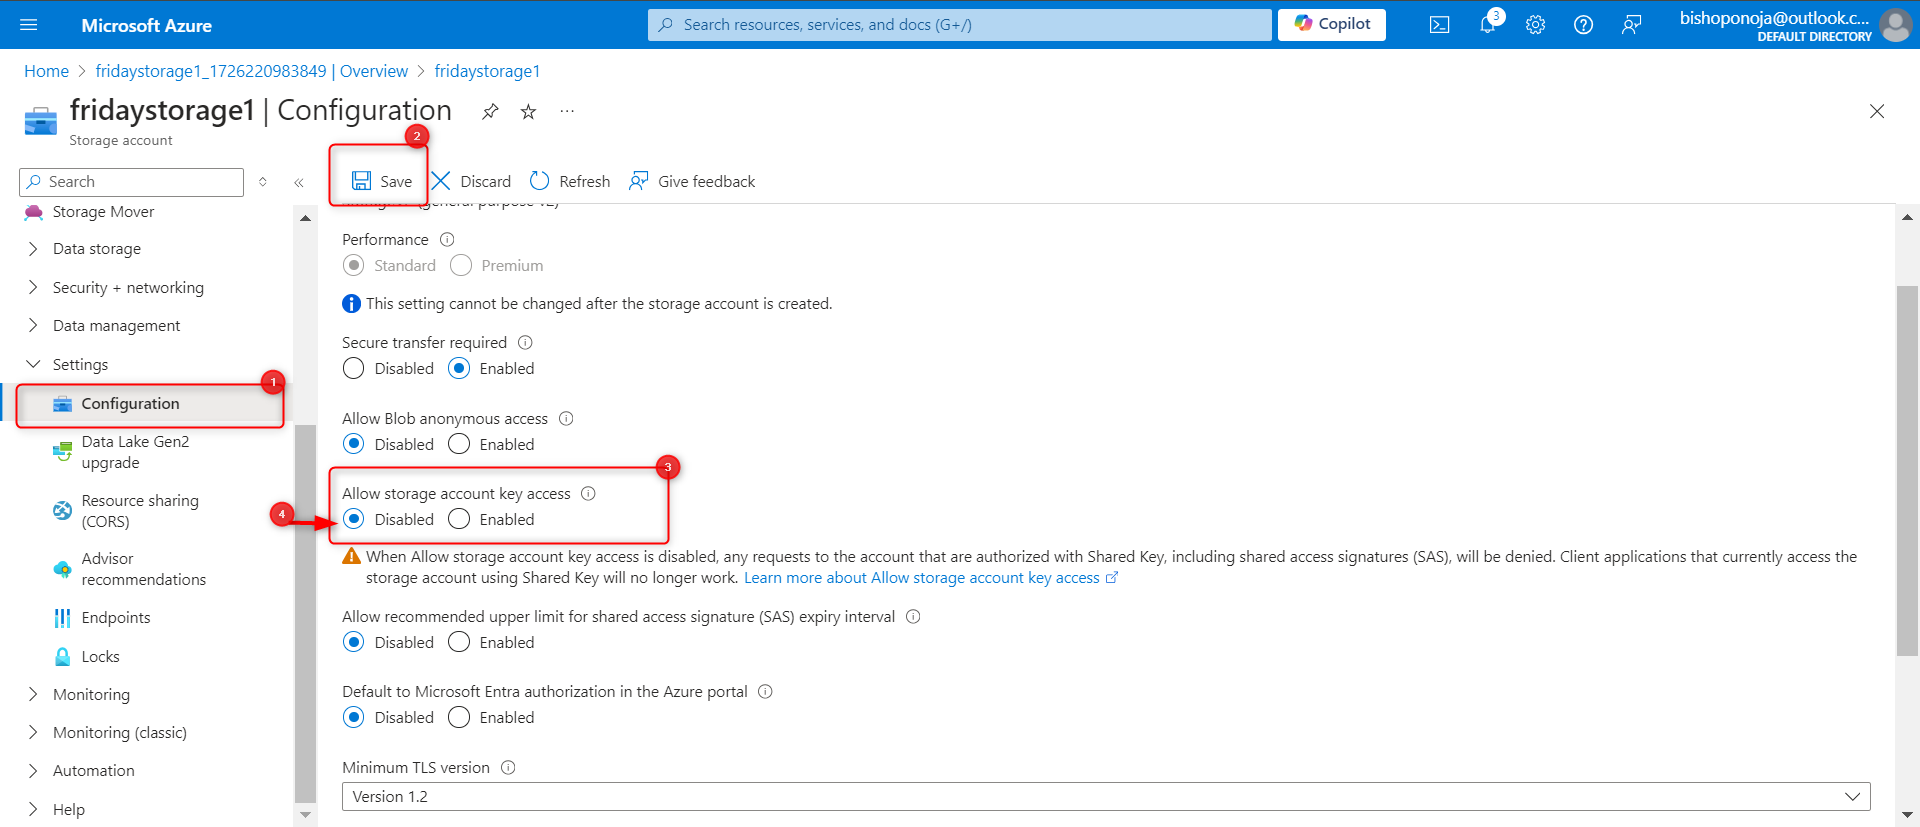
Be sure to Save your changes.
Ensure the storage account allows public access from all networks.
In the Security + networking section, select the Networking blade.
Ensure Public network access is set to Enabled from all networks.
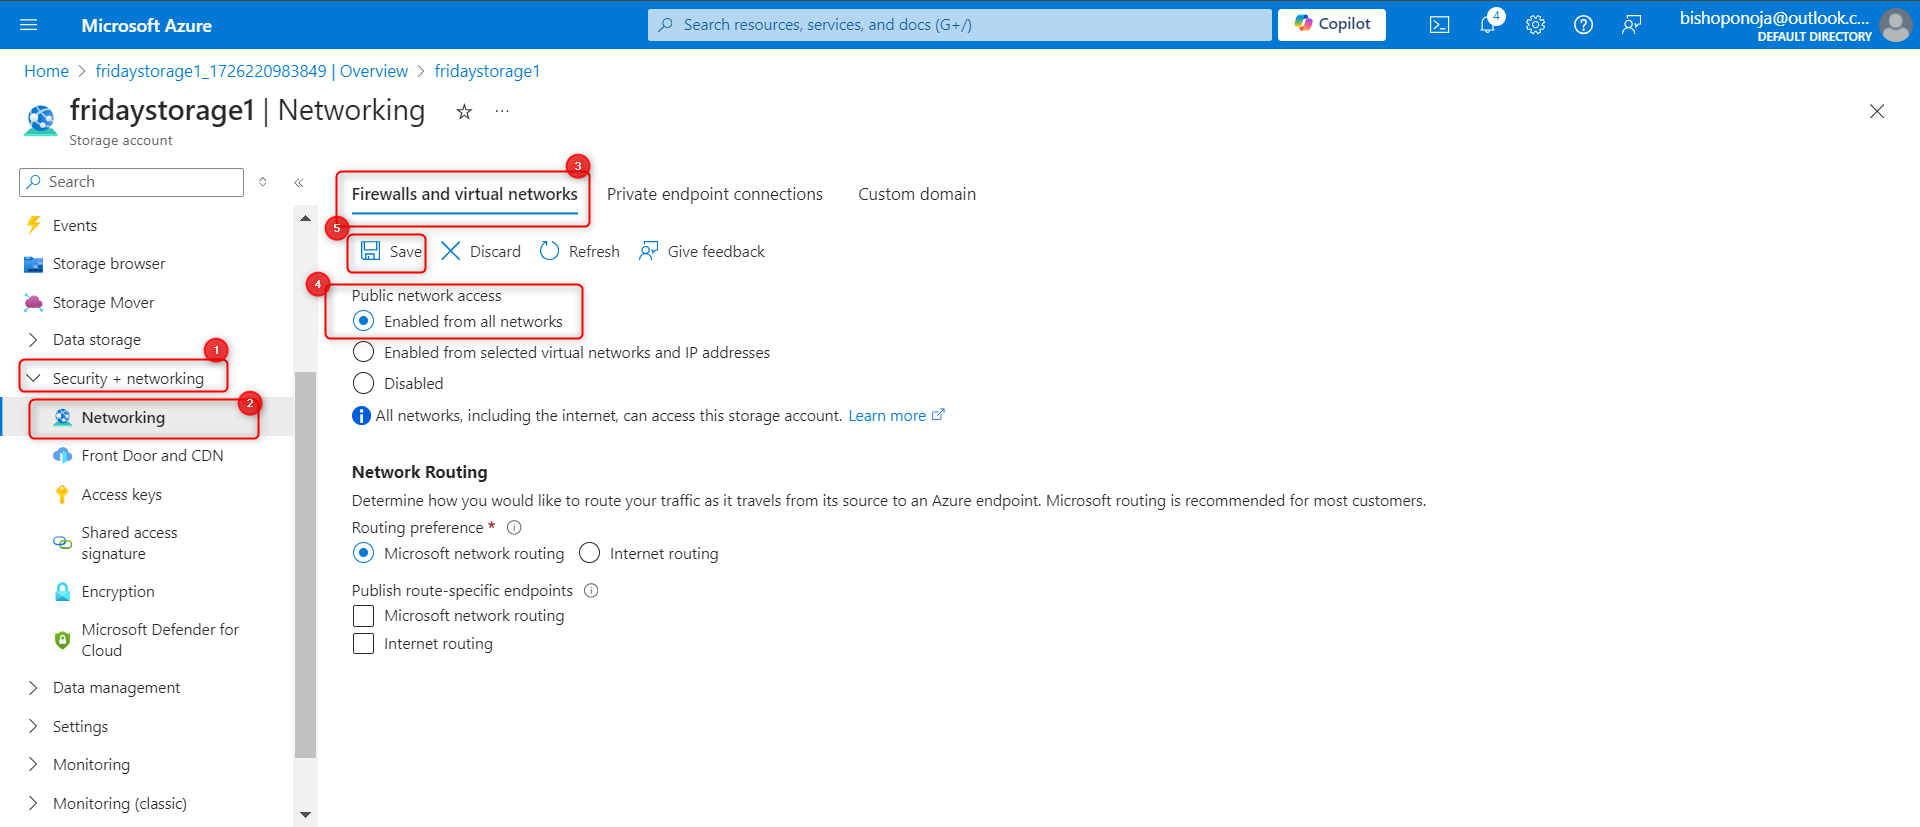
Be sure to Save your changes.
Subscribe to my newsletter
Read articles from Onoja Bishop directly inside your inbox. Subscribe to the newsletter, and don't miss out.
Written by
