Provisioning Scalable and Secure Multi-Environment Kubernetes Clusters on AWS Using Terraform and Terragrunt (Keep Your Terraform Code DRY)
 Mwanthi Daniel
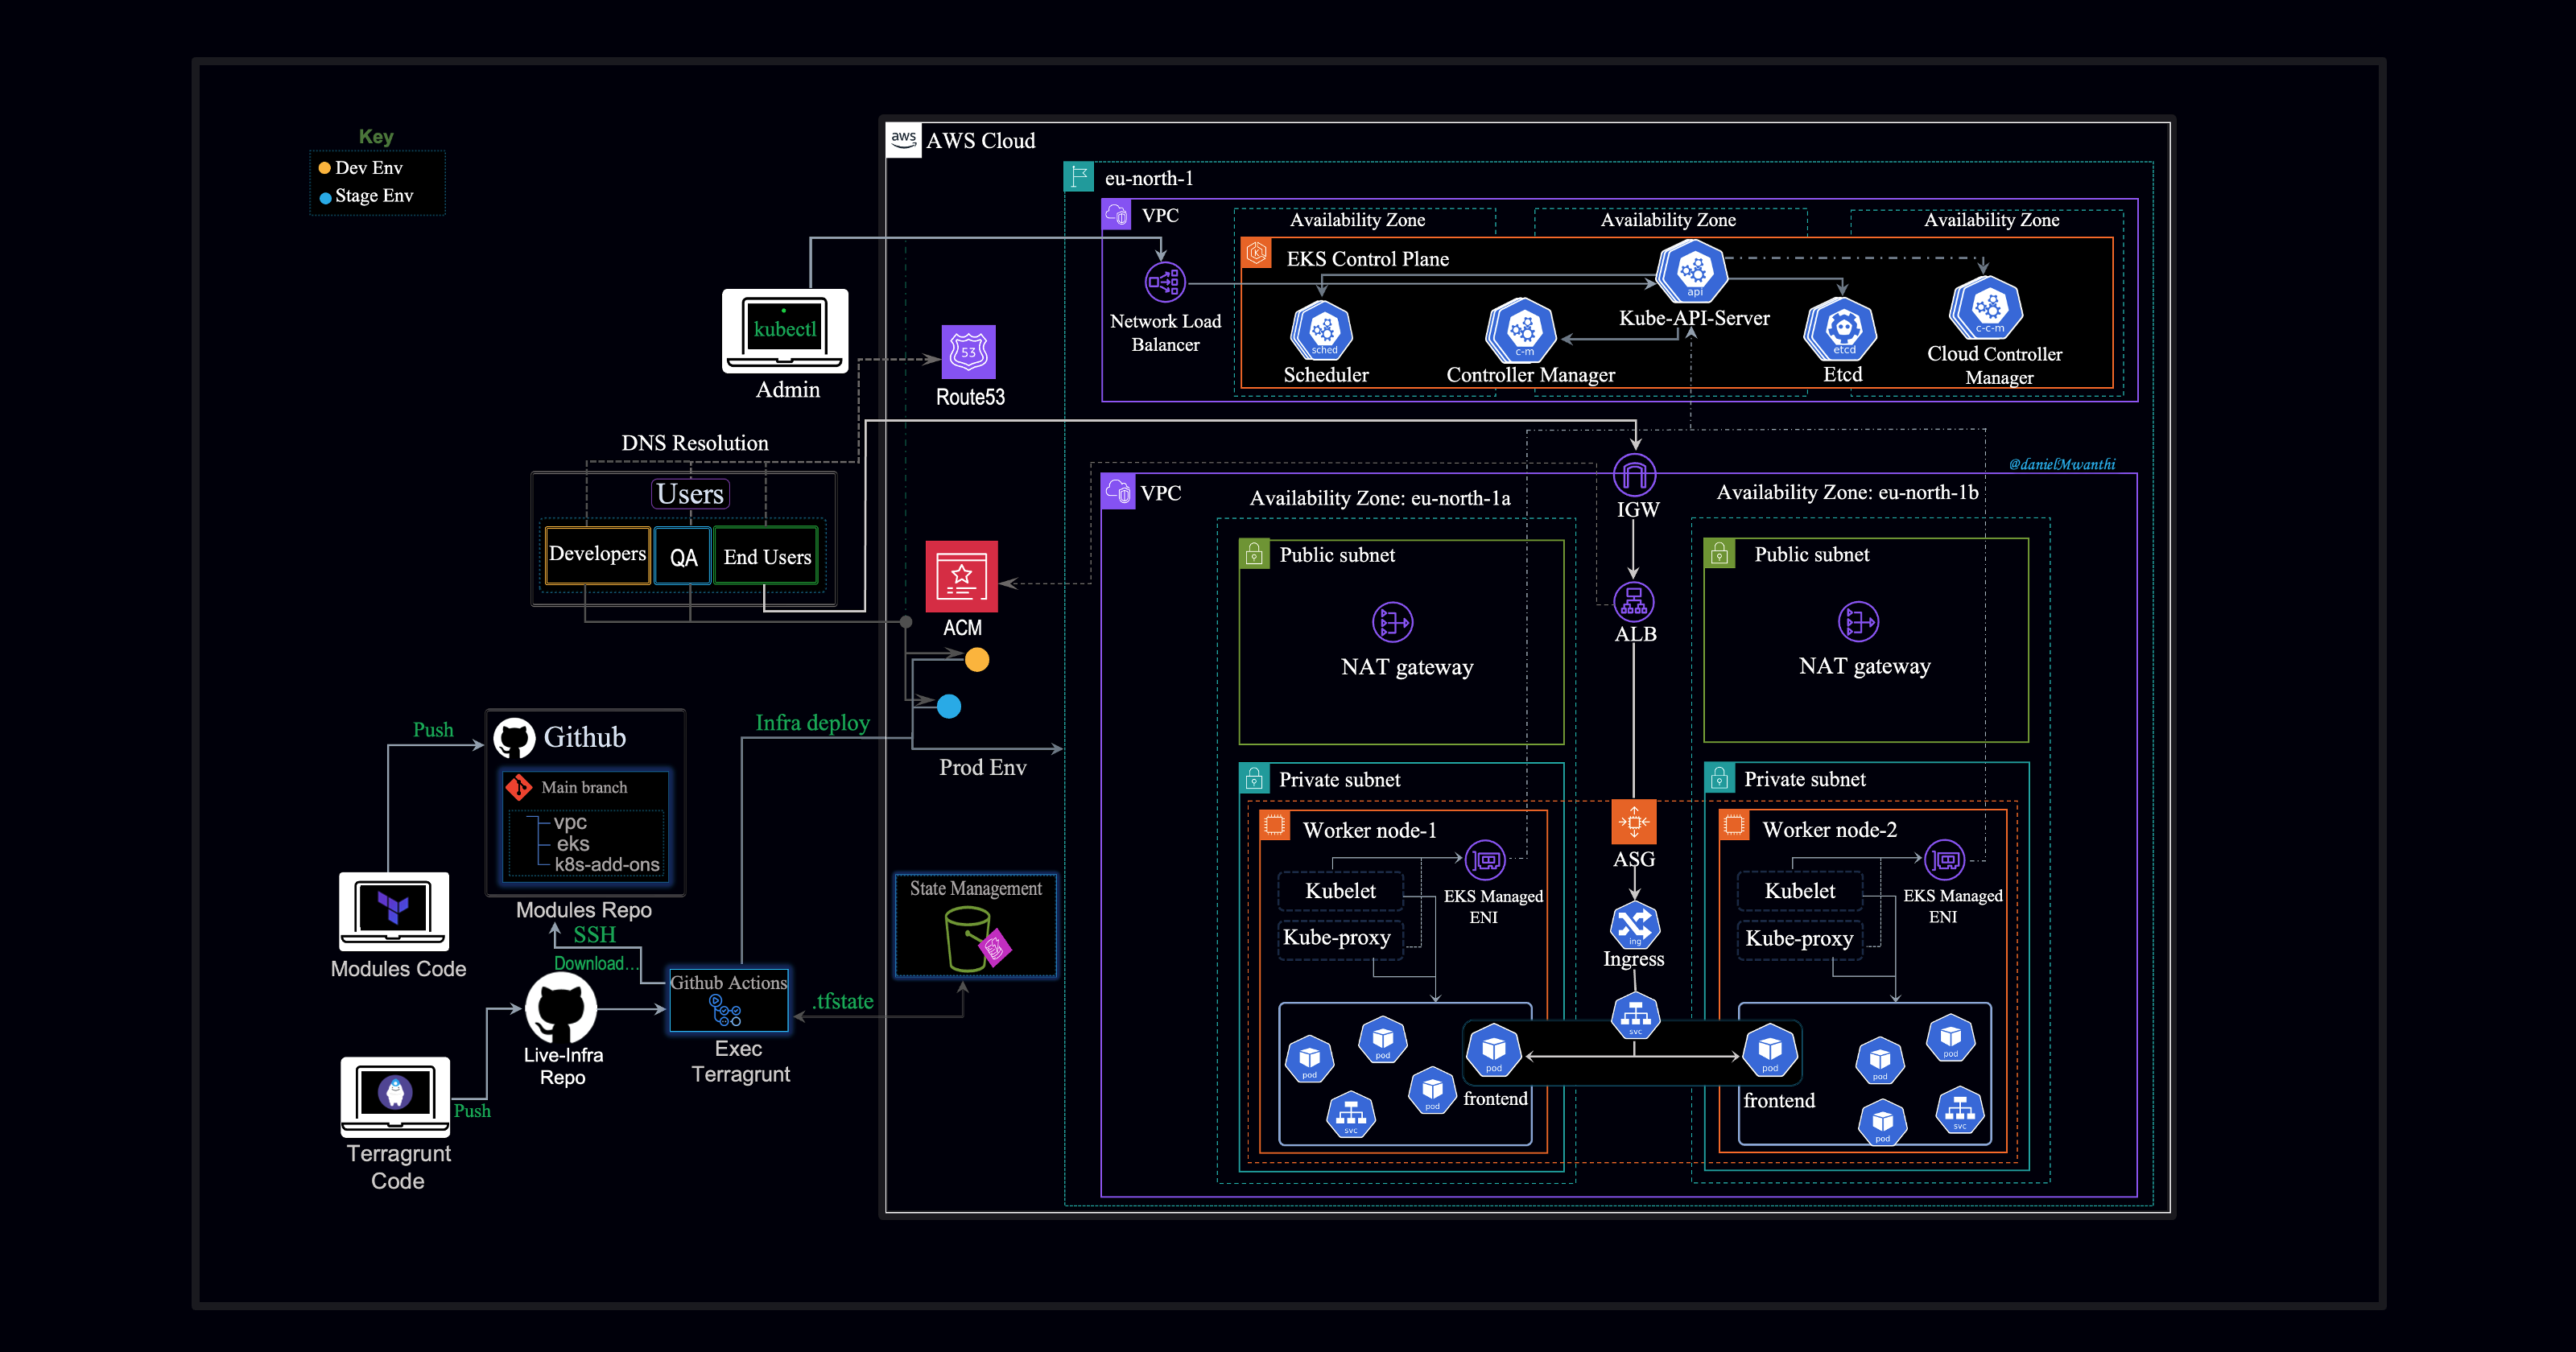
This project demonstrates the provisioning of multiple Kubernetes environments—Development, Staging, and Production—each with distinct resource capacities, leveraging Amazon Elastic Kubernetes Service (EKS) on AWS. The infrastructure will be efficiently managed using Terraform and Terragrunt. To ensure scalability, the Cluster Autoscaler will be employed, particularly for the production environment, allowing it to adjust automatically to varying workloads.
For testing, a custom application will be deployed and exposed through an Ingress resource, which will automatically provision an AWS Application Load Balancer (ALB) and secure it using Amazon Certificate Manager (ACM). A DNS record will then be configured in Route 53 to map the domain to the load balancer's address, ensuring seamless access to the application via a user-friendly URL.
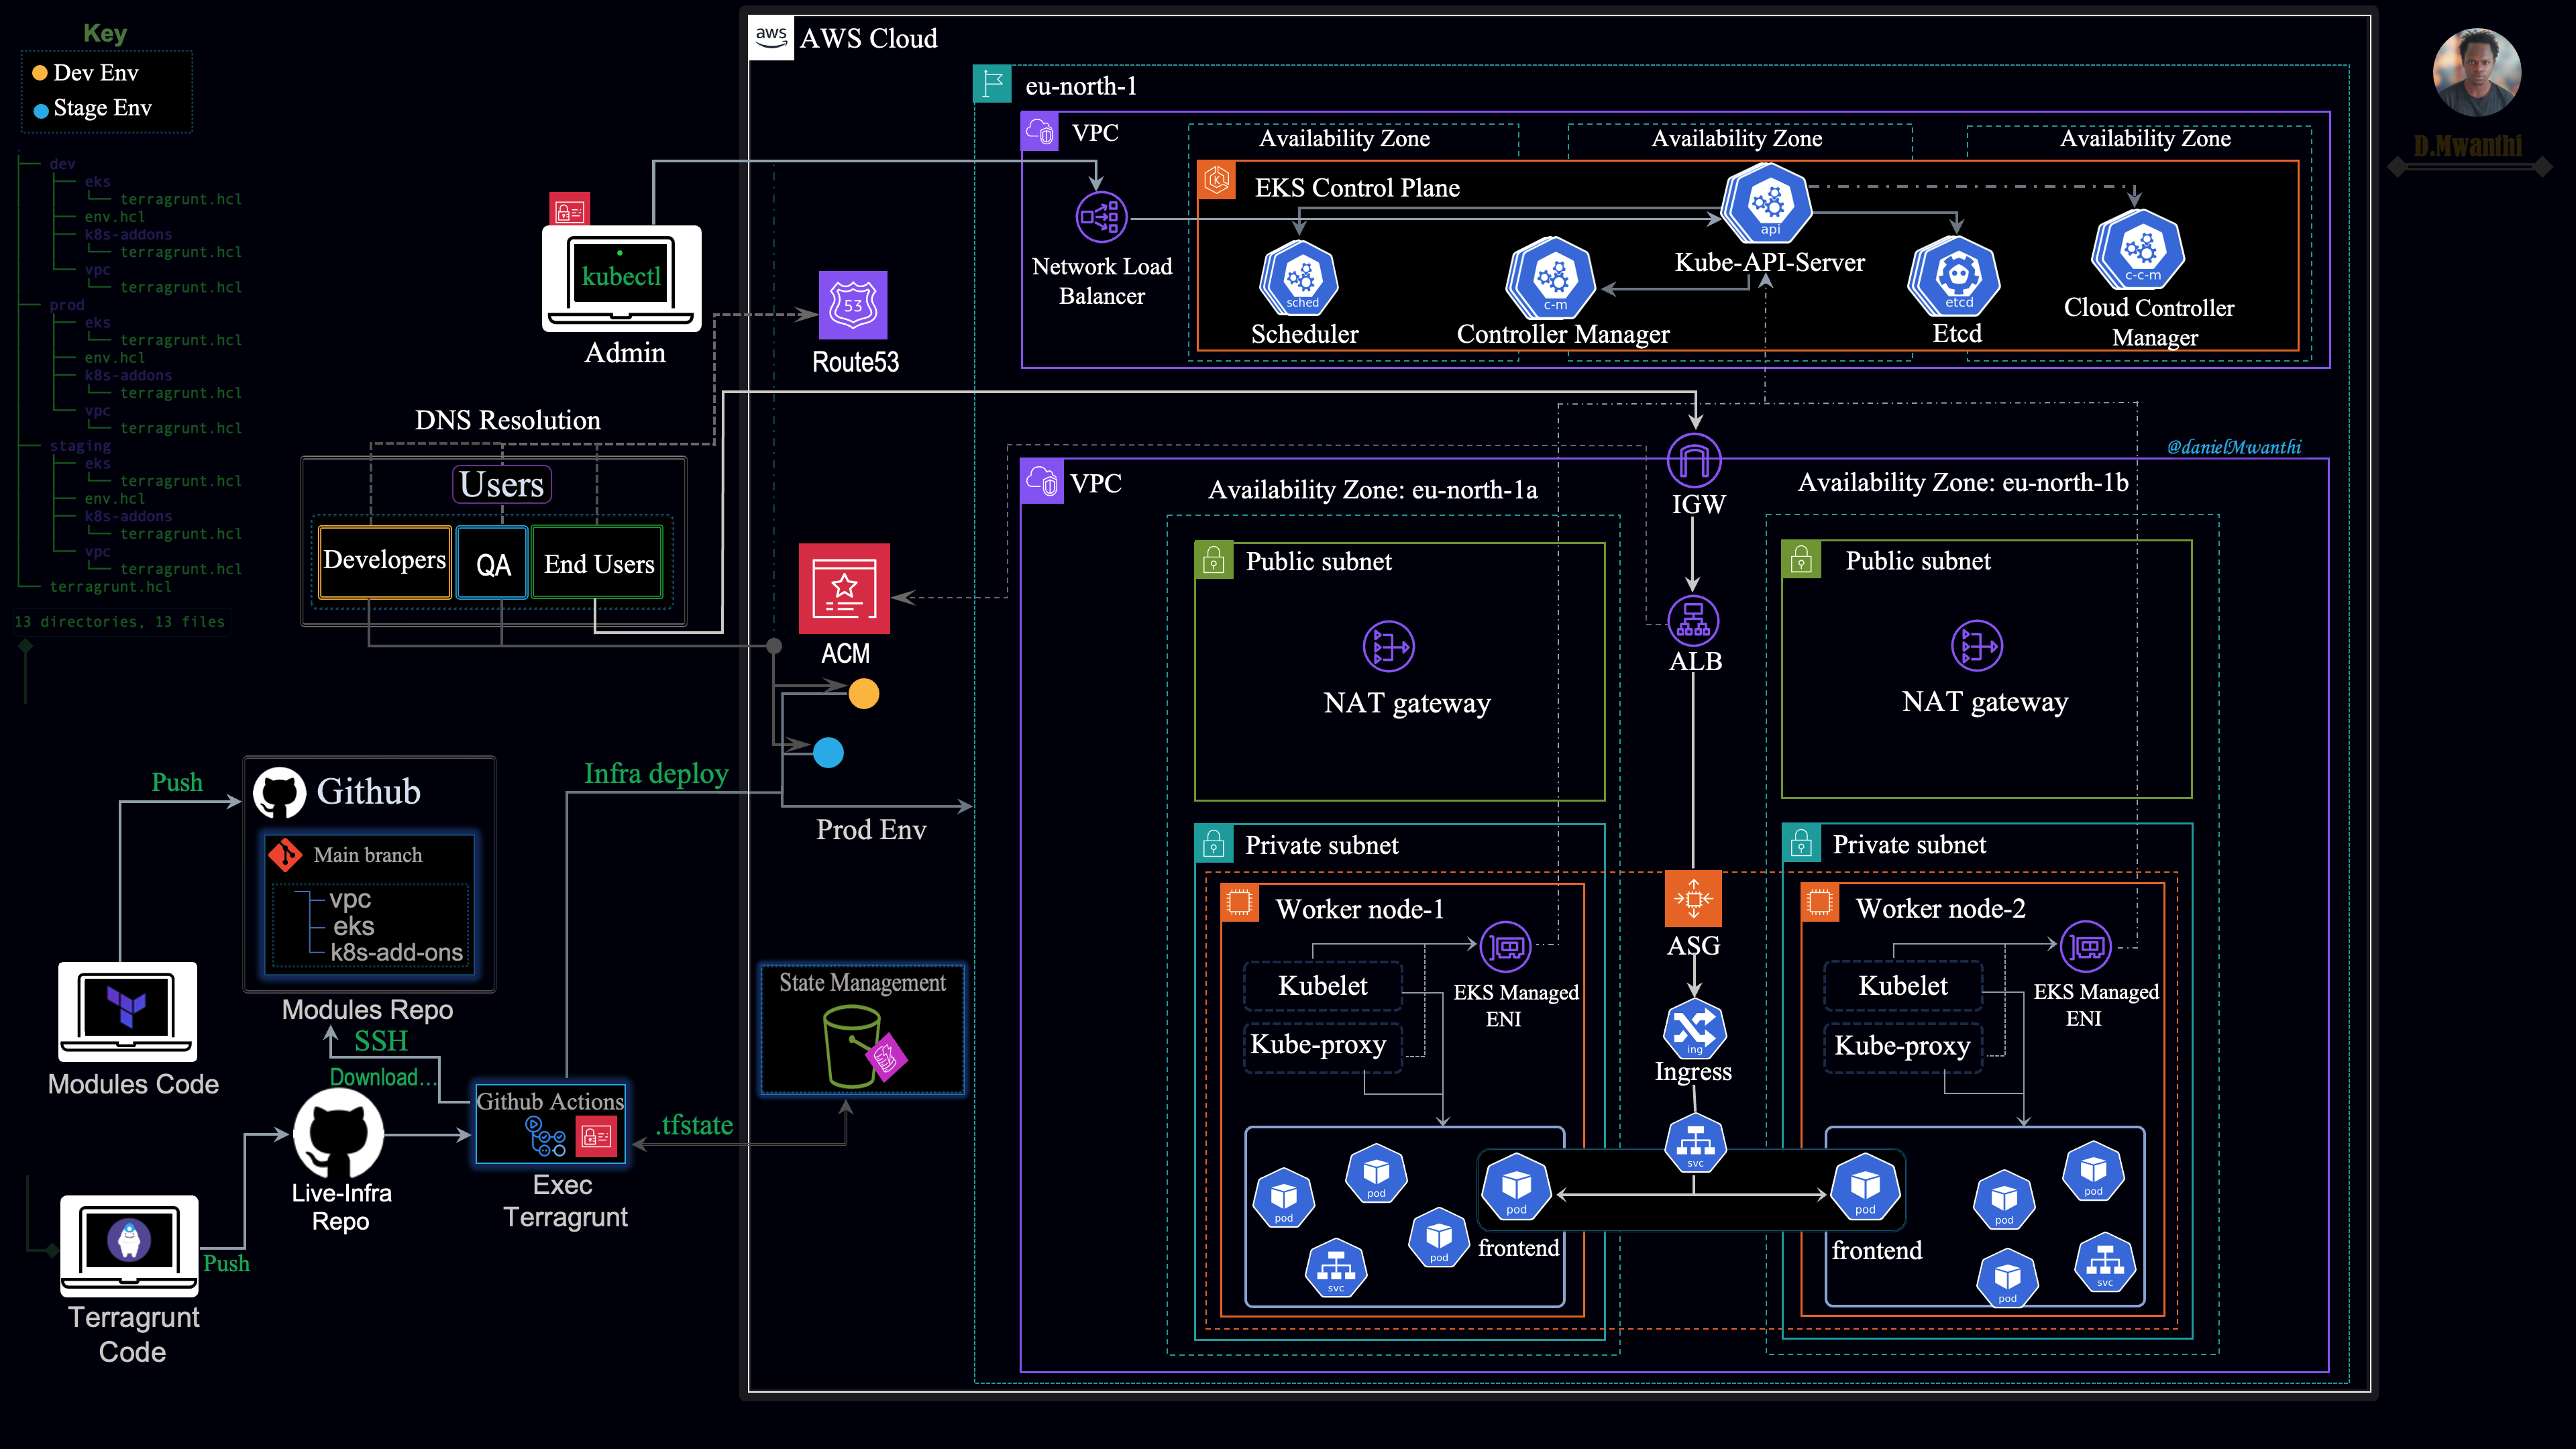
Outlined below is the architecture we will implement:
Prerequisite and Initial Set ups
To follow along effectively, ensure you have a solid understanding of Terraform as a tool and are able to provision a single EKS cluster manually on Amazon Web Services (AWS). Additionally, a good grasp of Kubernetes architecture is essential. Make sure you have the AWS CLI installed and configured on your local system, as we will use it to create some of the prerequisite resources in the cloud, as outlined below:
- Create S3 Bucket and DynamoDB Table for Terraform State Management: Create an S3 bucket with versioning enabled to store the Terraform state, and set up a DynamoDB table for state locking:
# Create s3 bucket
aws s3api create-bucket --bucket infra-bucket-by-daniel --region eu-north-1 --create-bucket-configuration LocationConstraint=eu-north-1
# Enable bucket versioning
aws s3api put-bucket-versioning --bucket infra-bucket-by-daniel --versioning-configuration Status=Enabled

# Create a Dynamodb table for state locking
aws dynamodb create-table \
 --table-name infra-terra-lock \
    --attribute-definitions \
 AttributeName=LockID,AttributeType=S \
    --key-schema \
 AttributeName=LockID,KeyType=HASH \
    --billing-mode PAY_PER_REQUEST \
 --region eu-north-1
Create an EC2 instance to set up our working environment:
Let's start by creating a key pair on AWS, which will allow us to SSH into the EC2 instance using the corresponding private key from our local system.
Creating a Key Pair
Ensure it is created in the same region where you will launch your EC2 instance.
aws ec2 create-key-pair --key-name my-aws-key --region eu-north-1 --query 'KeyMaterial' --output text > private-key.pem
For local testing, Terraform will use the EC2 instance's credentials to authenticate with AWS. Since the instance is hosted on AWS, we will create and attach an IAM instance profile to enable it to interact with other cloud services.
- Create an IAM Role, Security Group and Instance Profile:
First, create the trust policy document that grants the EC2 service permission to assume the IAM role:
cat <<EOF > trust-policy.json
{
  "Version": "2012-10-17",
  "Statement": [
    {
      "Effect": "Allow",
      "Principal": {
        "Service": "ec2.amazonaws.com"
      },
      "Action": "sts:AssumeRole"
    }
  ]
}
EOF
Later, we will modify this policy to allow GitHub Actions to authenticate with AWS and provision resources.
- Create IAM role with necessary permissions.
# Create IAM Role
aws iam create-role --role-name terra-ec2-Role --assume-role-policy-document file://trust-policy.json

# Attach AdministratorAccess Policy to the Role
aws iam attach-role-policy --role-name terra-ec2-Role --policy-arn arn:aws:iam::aws:policy/AdministratorAccess

# Create Instance Profile
aws iam create-instance-profile --instance-profile-name terra-ec2-InstanceProfile

# Add Role to Instance Profile
aws iam add-role-to-instance-profile --instance-profile-name terra-ec2-InstanceProfile --role-name terra-ec2-Role
- Create a security group to restrict and allow traffic to the instance.
# Create security
aws ec2 create-security-group --group-name dev-security-group --description "Security group for SSH access"
Upon successful creation, AWS will return the Security group id:
{
    "GroupId": "sg-0d3e2ccde8bdd7a82"
}
- Allow inbound SSH traffic on port 22. This is necessary for accessing the EC2 instance via SSH.
# Replace `sg-0d3e2ccde8bdd7a82` with the group id return on your terminal
aws ec2 authorize-security-group-ingress --group-id sg-0d3e2ccde8bdd7a82 --protocol tcp --port 22 --cidr 0.0.0.0/0
Upon successful creation, AWS will return output similar to one below:
{
    "Return": true,
    "SecurityGroupRules": [
        {
            "SecurityGroupRuleId": "sgr-052c5658e5cfa754c",
            "GroupId": "sg-0d3e2ccde8bdd7a82",
            "GroupOwnerId": "848055118036",
            "IsEgress": false,
            "IpProtocol": "tcp",
            "FromPort": 22,
            "ToPort": 22,
            "CidrIpv4": "0.0.0.0/0"
        }
    ]
}
Create an EC2 instance
Create an instance on the default VPC and attach the key and instance profile created above. Note that my instance will be created in
eu-north-1region.
# Ensure the image id and instance type exists in the region you create the instance
# Also use the sg id returned in your terminal: `sg-0d3e2ccde8bdd7a82`
aws ec2 run-instances \
  --image-id ami-04cdc91e49cb06165 \
  --count 1 \
  --instance-type t3.xlarge \
  --key-name my-aws-key \
  --iam-instance-profile Name=terra-ec2-InstanceProfile \
  --security-group-ids sg-0d3e2ccde8bdd7a82 \
  --tag-specifications 'ResourceType=instance,Tags=[{Key=Name,Value=Admin-Server}]' \
  --block-device-mappings '[{"DeviceName":"/dev/sda1","Ebs":{"VolumeSize": 30}}]' \
  --region eu-north-1
This command will modify the root block device to have 30 GB at instance launch. If we do not make this adjustment, the instance will be created with only 8 GiB of disk space, which may be insufficient to accommodate all the installations required for local testing.
Let's get the public ip of our instance:
# Replace instance id with the one return in you case above
aws ec2 describe-instances \
  --instance-ids i-085d29d6ffd7bd0db \
  --query 'Reservations[].Instances[].PublicIpAddress' \
  --output text
Copy the Ip address return above and use it to SSH into your instance:
# Ensure the private key file allows only user read permissions (`-r-------`).
chmod 400 private-key.pem
# Replace `16.170.238.41` with your ip address
ssh -i private-key.pem ubuntu@16.170.238.41
Once connected, first update and upgrade the system packages:
sudo apt update -y && sudo apt upgrade -y
- Also, rename the hostname so it aligns with the purpose of our instance.
sudo hostnamectl set-hostname dev-enviroment && bash
Install AWS CLI
We will use AWS CLI to copy Kubernetes authentication configurations from the EKS clusters once created, thus we need it installed. For more details on installation checkout the instructions outlined here. Execute the following command to get it done in a single step.
# Download and install AWS CLI
sudo curl "https://awscli.amazonaws.com/awscli-exe-linux-x86_64.zip" -o "awscliv2.zip"
sudo apt install unzip -y
sudo unzip awscliv2.zip
sudo ./aws/install
sudo rm awscliv2.zip
sudo rm -rf ./aws
Now that the cli is installed, let’s confirm our instance profile is working as expected. List the bucket in our account:
$ aws s3 ls

2024-07-17 16:25:56 infra-bucket-by-daniel
I can successfully list my S3 buckets. Currently, I have only one bucket (the backend bucket) in AWS. Since I'm able to list the S3 buckets, this confirms that the IAM instance profile is properly set, allowing us to authenticate with AWS APIs from within our working environment (EC2 instance).
Install Terraform
Check out the Terraform installation instructions on this page. Below are commands for installing it on a Linux distribution (Ubuntu).
# update the system and  install the gnupg, software-properties-common, and curl packages
sudo apt-get update && sudo apt-get install -y gnupg software-properties-common

# Install the HashiCorp GPG key.
wget -O- https://apt.releases.hashicorp.com/gpg | \
gpg --dearmor | \
sudo tee /usr/share/keyrings/hashicorp-archive-keyring.gpg > /dev/null

# Verify the key's fingerprint
gpg --no-default-keyring \
--keyring /usr/share/keyrings/hashicorp-archive-keyring.gpg \
--fingerprint

# Add the official HashiCorp repository to your system
echo "deb [signed-by=/usr/share/keyrings/hashicorp-archive-keyring.gpg] \
https://apt.releases.hashicorp.com $(lsb_release -cs) main" | \
sudo tee /etc/apt/sources.list.d/hashicorp.list

# Download the package information from HashiCorp.
sudo apt update -y

# Install Terraform from the new repository.
sudo apt-get install terraform
Confirm Terraform is successfully installed by running the following command:
$ terraform --version

Terraform v1.9.5
on linux_amd64
Install Terragrunt
Terragrunt is a thin wrapper for Terraform that enables us keep our Terraform configurations DRY when working with multiple Terraform modules across multiple environments, and managing remote state. With this tool we are able to execute Terraform to create various environments each environment having independent configurations from other environments without copy/pasting common configurations from environment to environment. Let's install this tool:
# Downloading the binary for
curl -L https://github.com/gruntwork-io/terragrunt/releases/download/v0.62.3/terragrunt_linux_amd64 -o terragrunt
# Add execute permissions to the binary.
chmod u+x terragrunt
# Put the binary somewhere on your PATH
sudo mv terragrunt /usr/local/bin/terragrunt
Execute the following command to confirm Terragrunt was successfully installed:
$ terragrunt --version

terragrunt version v0.62.3
Install kubectl (an utility for interacting with the kubernetes cluster)
We'll use
kubectlto interact with our clusters from our local system(EC2 instance), therefore we need it installed. Since we will be provisioning EKS clusters which is AWS managed, let's install this utility from AWS documentation. Also make sure it is of the same version as the version of Kubernetes cluster you intent provision. In my case I'll be deploying the latest version of Kubernetes currently available in Amazon EKS, that's 1.3.0. Thus my kubectl version will either be 1.30 or 1.29.
# Download the binary
curl -O https://s3.us-west-2.amazonaws.com/amazon-eks/1.30.0/2024-05-12/bin/linux/amd64/kubectl
# Apply execute permissions to the binary.
chmod +x ./kubectl

# Copy the binary to a folder in your PATH
mkdir -p $HOME/bin && cp ./kubectl $HOME/bin/kubectl && export PATH=$HOME/bin:$PATH
rm kubectl
Confirm the kubectl was successfully installed:
$ kubectl version --client --output=yaml
clientVersion:
  buildDate: "2024-04-30T23:56:29Z"
  compiler: gc
  gitCommit: 59ddf7809432afedd41a880c1dfa8cedb39e5a1c
  gitTreeState: clean
  gitVersion: v1.30.0-eks-036c24b
  goVersion: go1.22.2
  major: "1"
  minor: 30+
  platform: linux/amd64
kustomizeVersion: v5.0.4-0.20230601165947-6ce0bf390ce3
Connect to the EC2 Instance Using a Text Editor
Let's connect to our EC2 instance using a text editor and start developing our Terraform modules for infrastructure provisioning. I’m using VS Code, but if you prefer PyCharm, you can connect it to your remote server as well.
First, let's configure an SSH alias in ~/.ssh/config to streamline the connection process and bypass the need to manually confirm the host's authenticity.
# This command is executed from you local enviroment and not from the instance
cat <<EOF >> ~/.ssh/config
Host dev-enviroment
    Hostname 16.170.238.41
    User ubuntu
    IdentityFile /Users/Dan/project-dir/private-key.pem
    StrictHostKeyChecking no
EOF
Replace Hostname with the public IP of your instance and specify the path to your SSH private key in IdentityFile.
To verify that the content has been successfully saved in the ~/.ssh/config file, you can display it by running the following command:
cat ~/.ssh/config
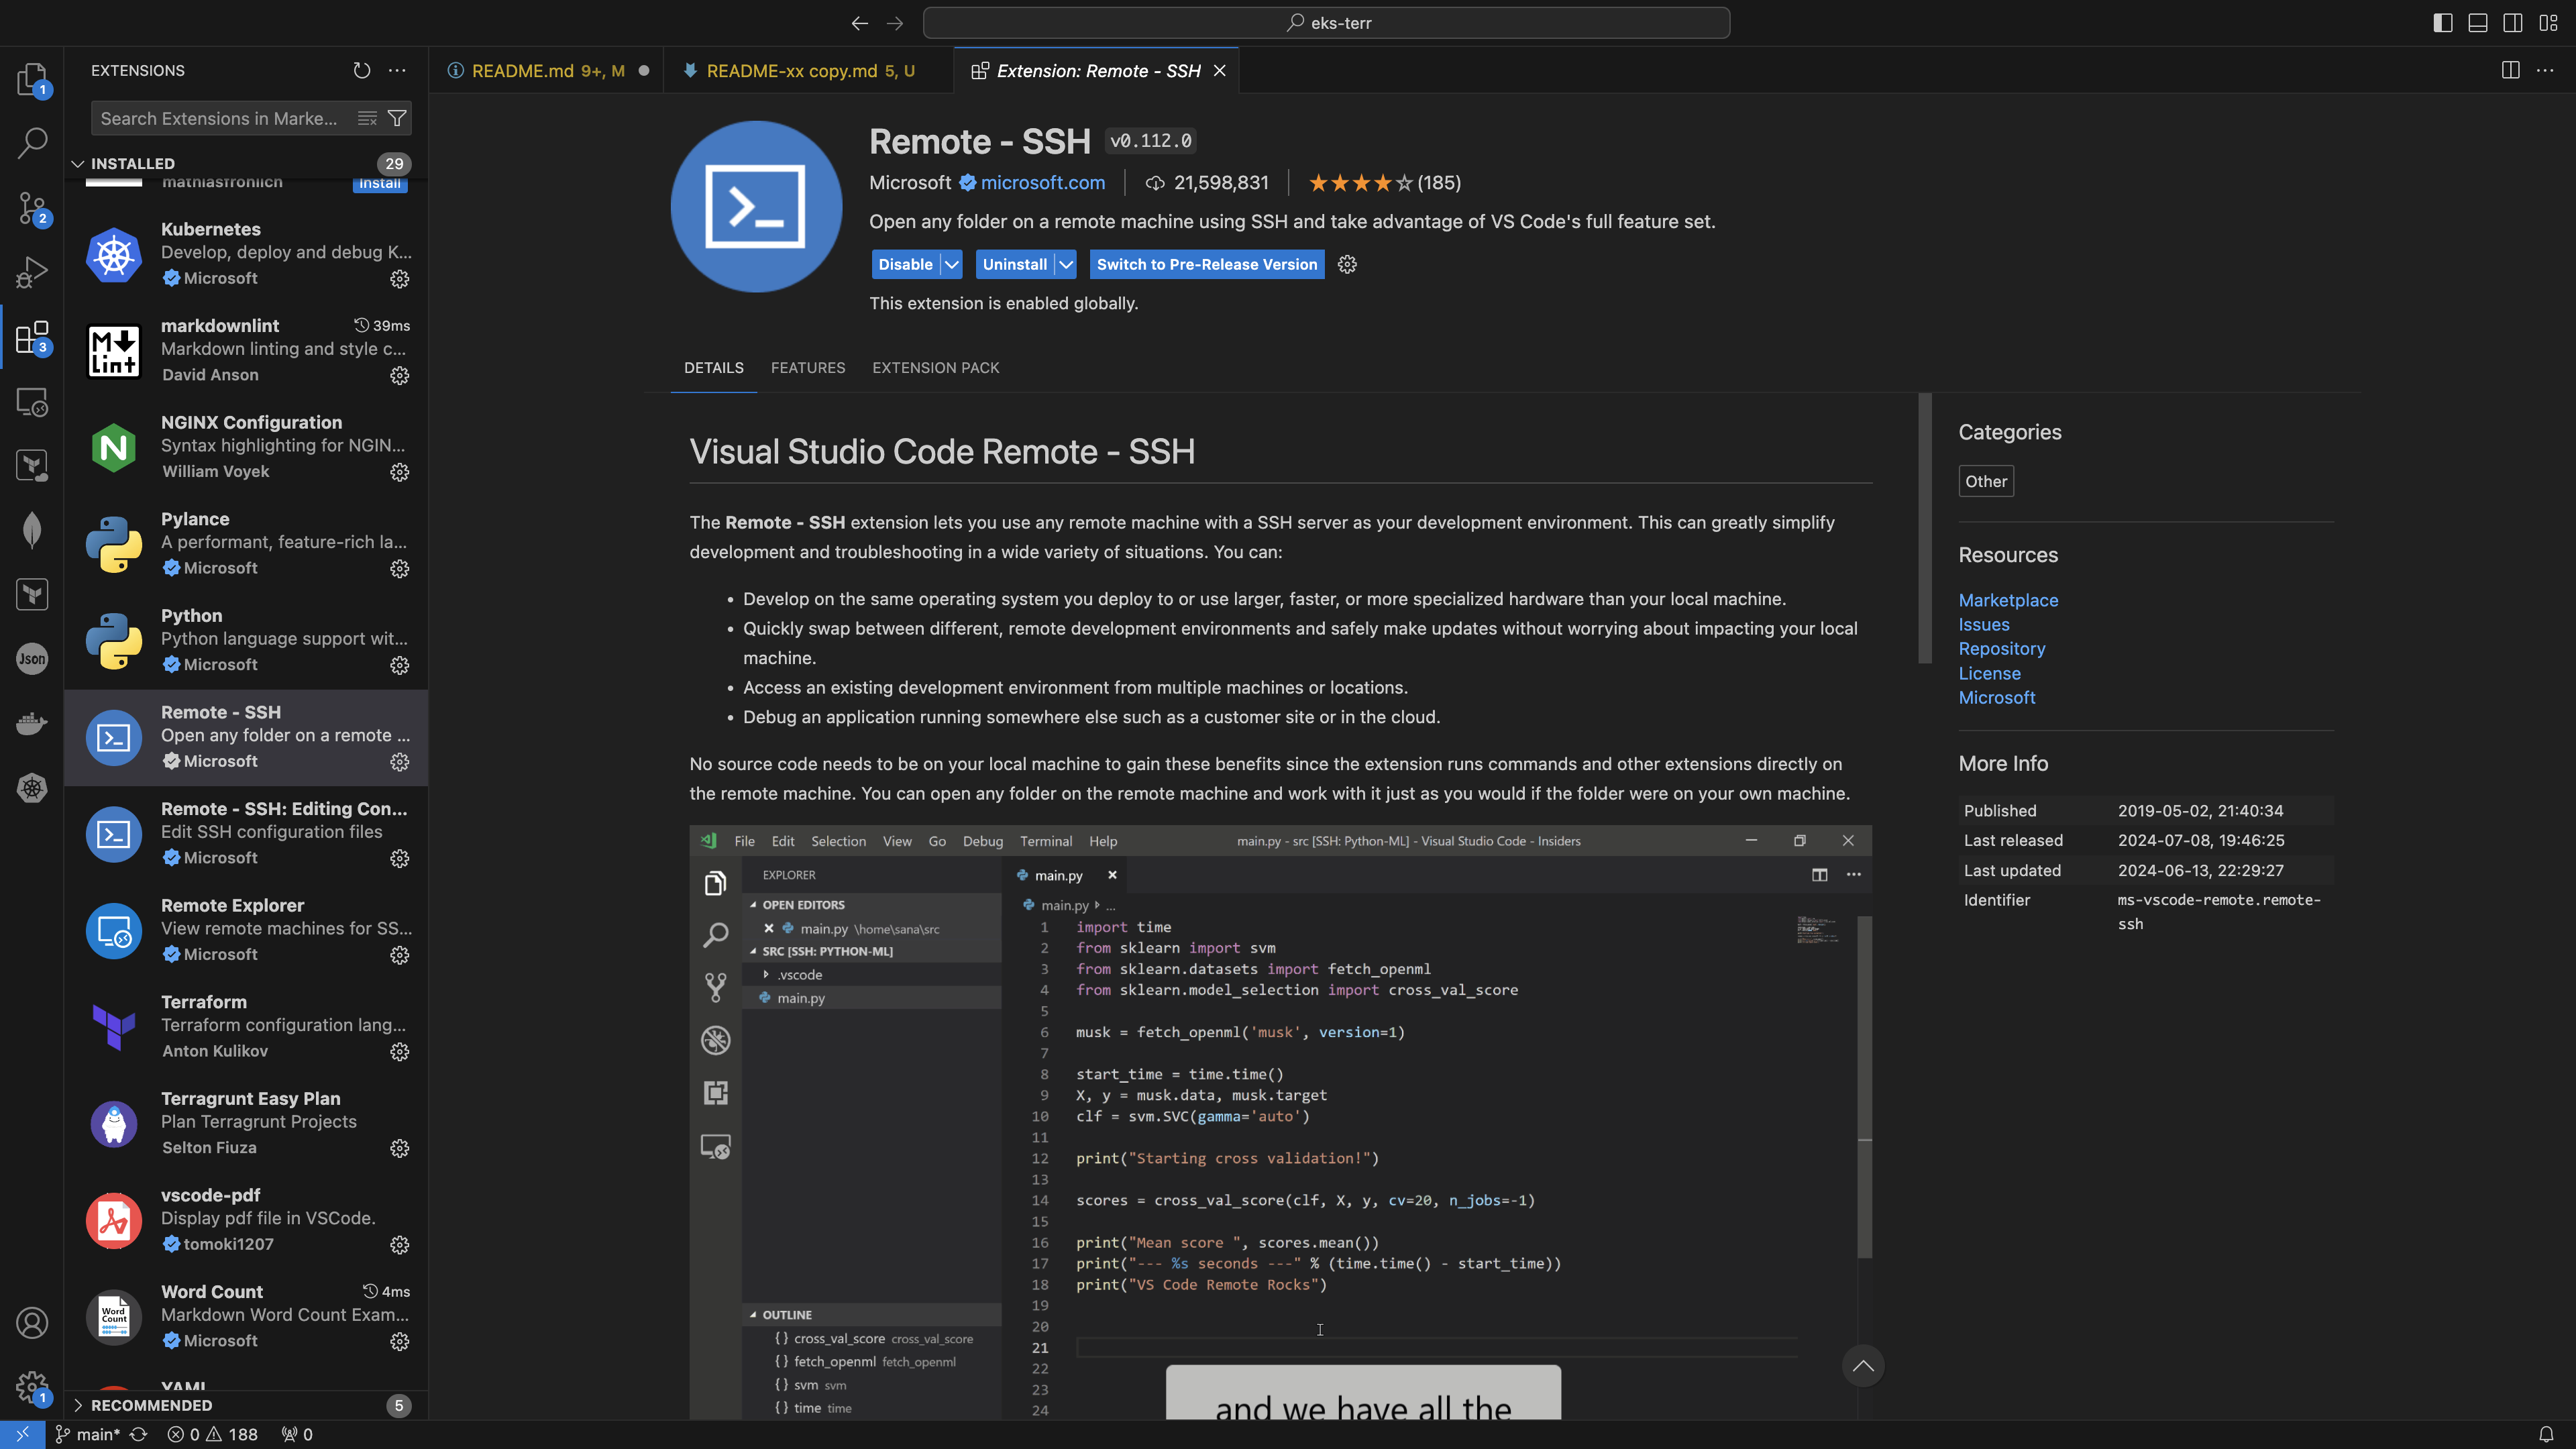
Open VS Code on your local system and make sure the Remote-SSH extension is installed.
Click on the >< symbol at the bottom left corner of VS Code, then select Connect to Host... under the Remote-SSH option. Choose the dev-environment option if that's how you named your host in the ~/.ssh/config file. Consider opening the image below in an isolated table to see the steps clearly:
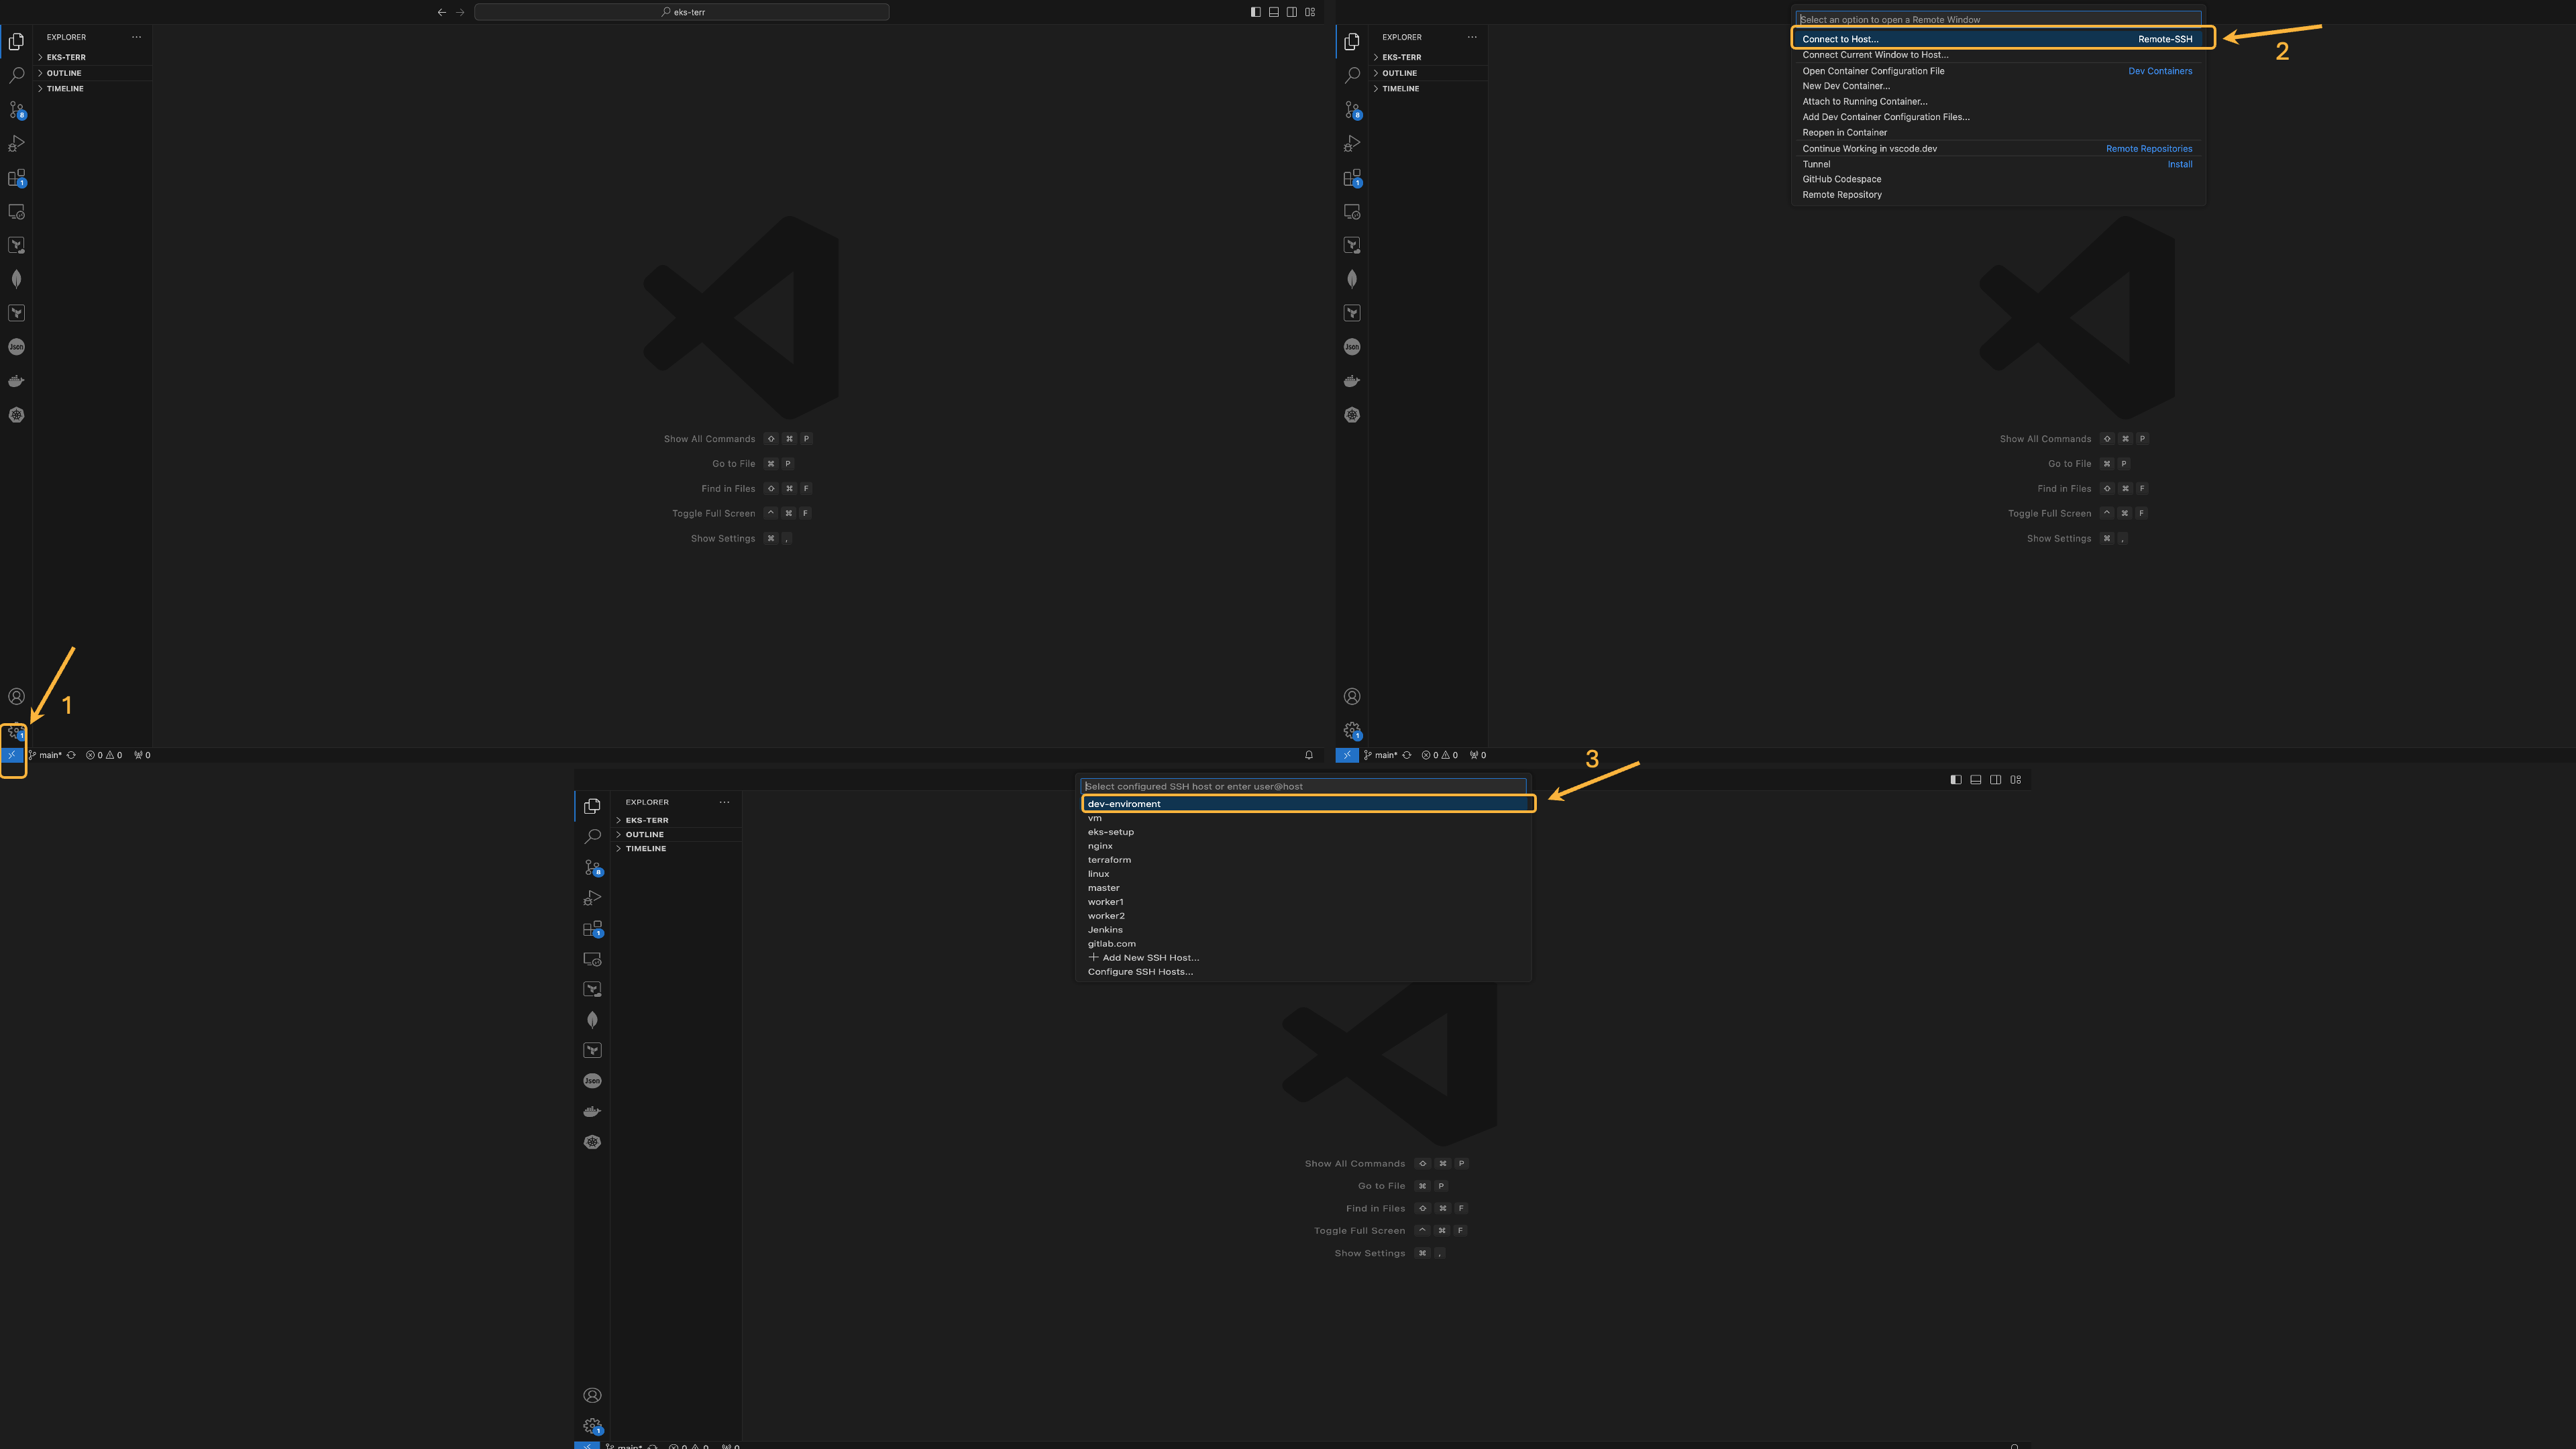
Within 5-10 seconds, VS Code should connect to the instance. Once connected, press “Control + ` (backtick)” to open VS Code's terminal, which will now operate within the EC2 instance.
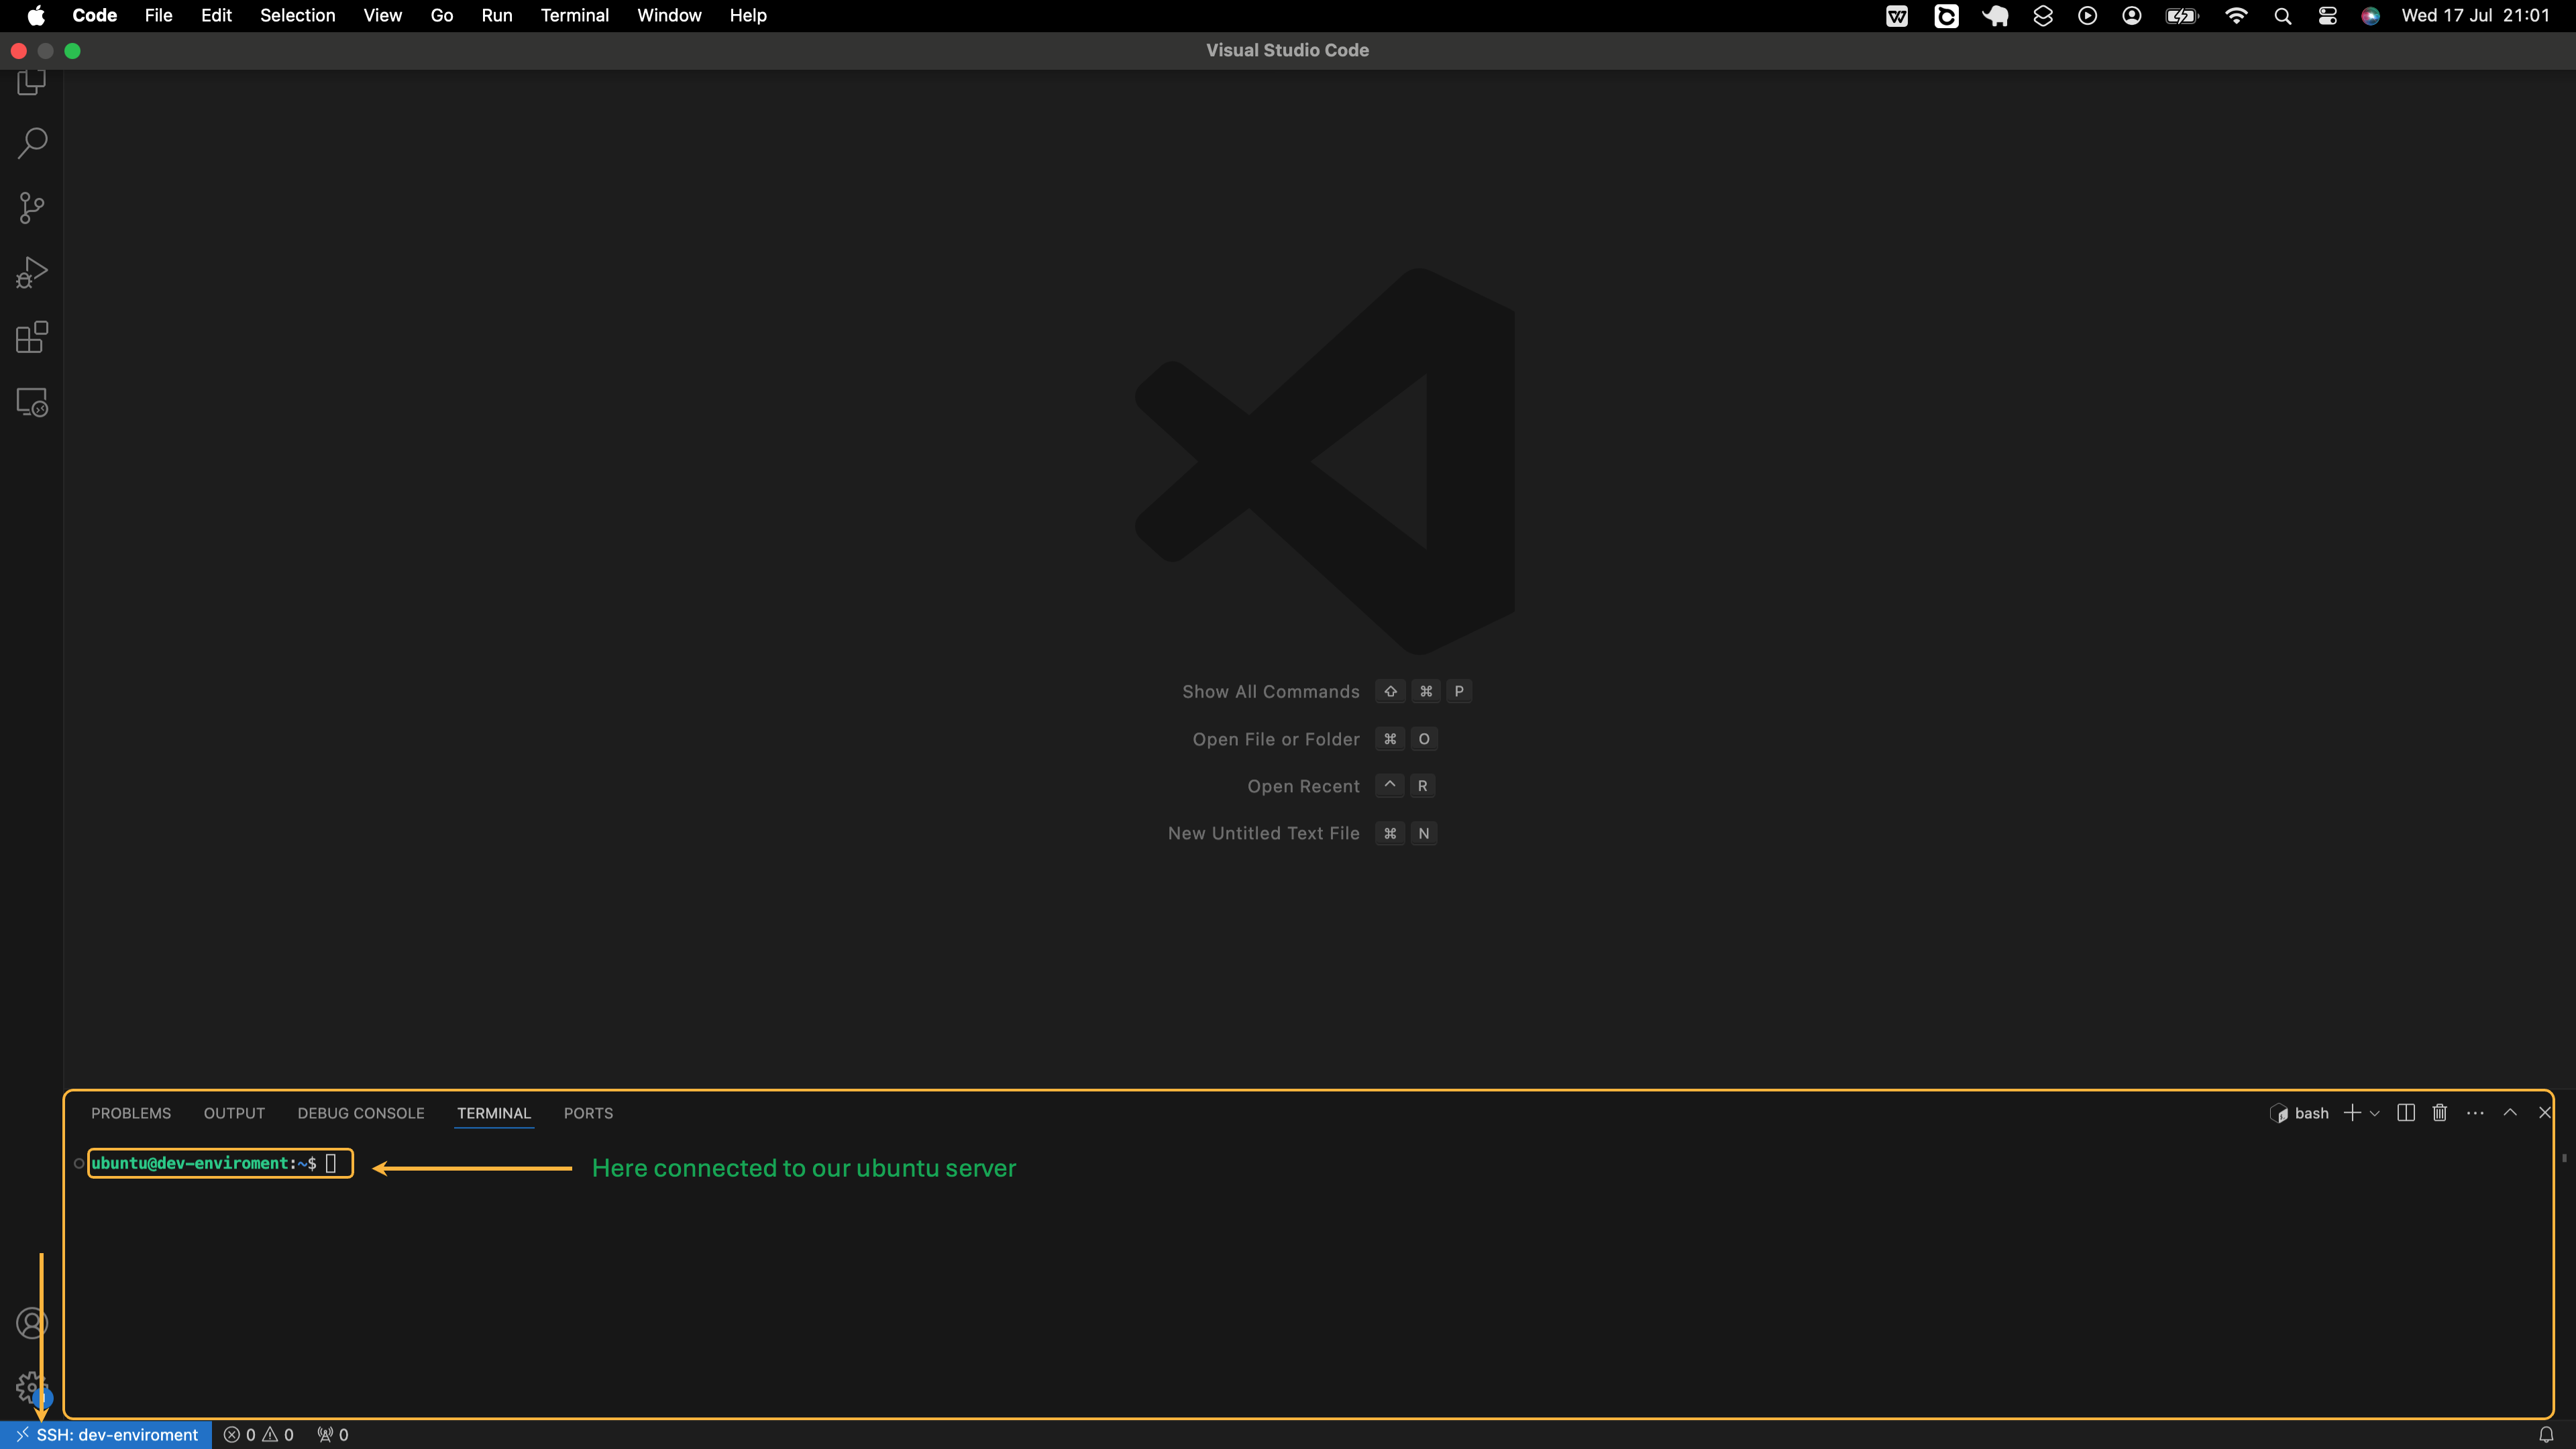
Create a directory named infrastructure-modules to store your Terraform modules, and then navigate to it by executing the following commands in the terminal:
mkdir -p ~/infrastructure-modules
cd ~/infrastructure-modules
Execute the command below to launch a new instance of the VS Code from within the infrastructure-modules directory:
code .
You will be prompted to confirm you trust the ubuntu author. Check the box and click Yes, I trust the authors.
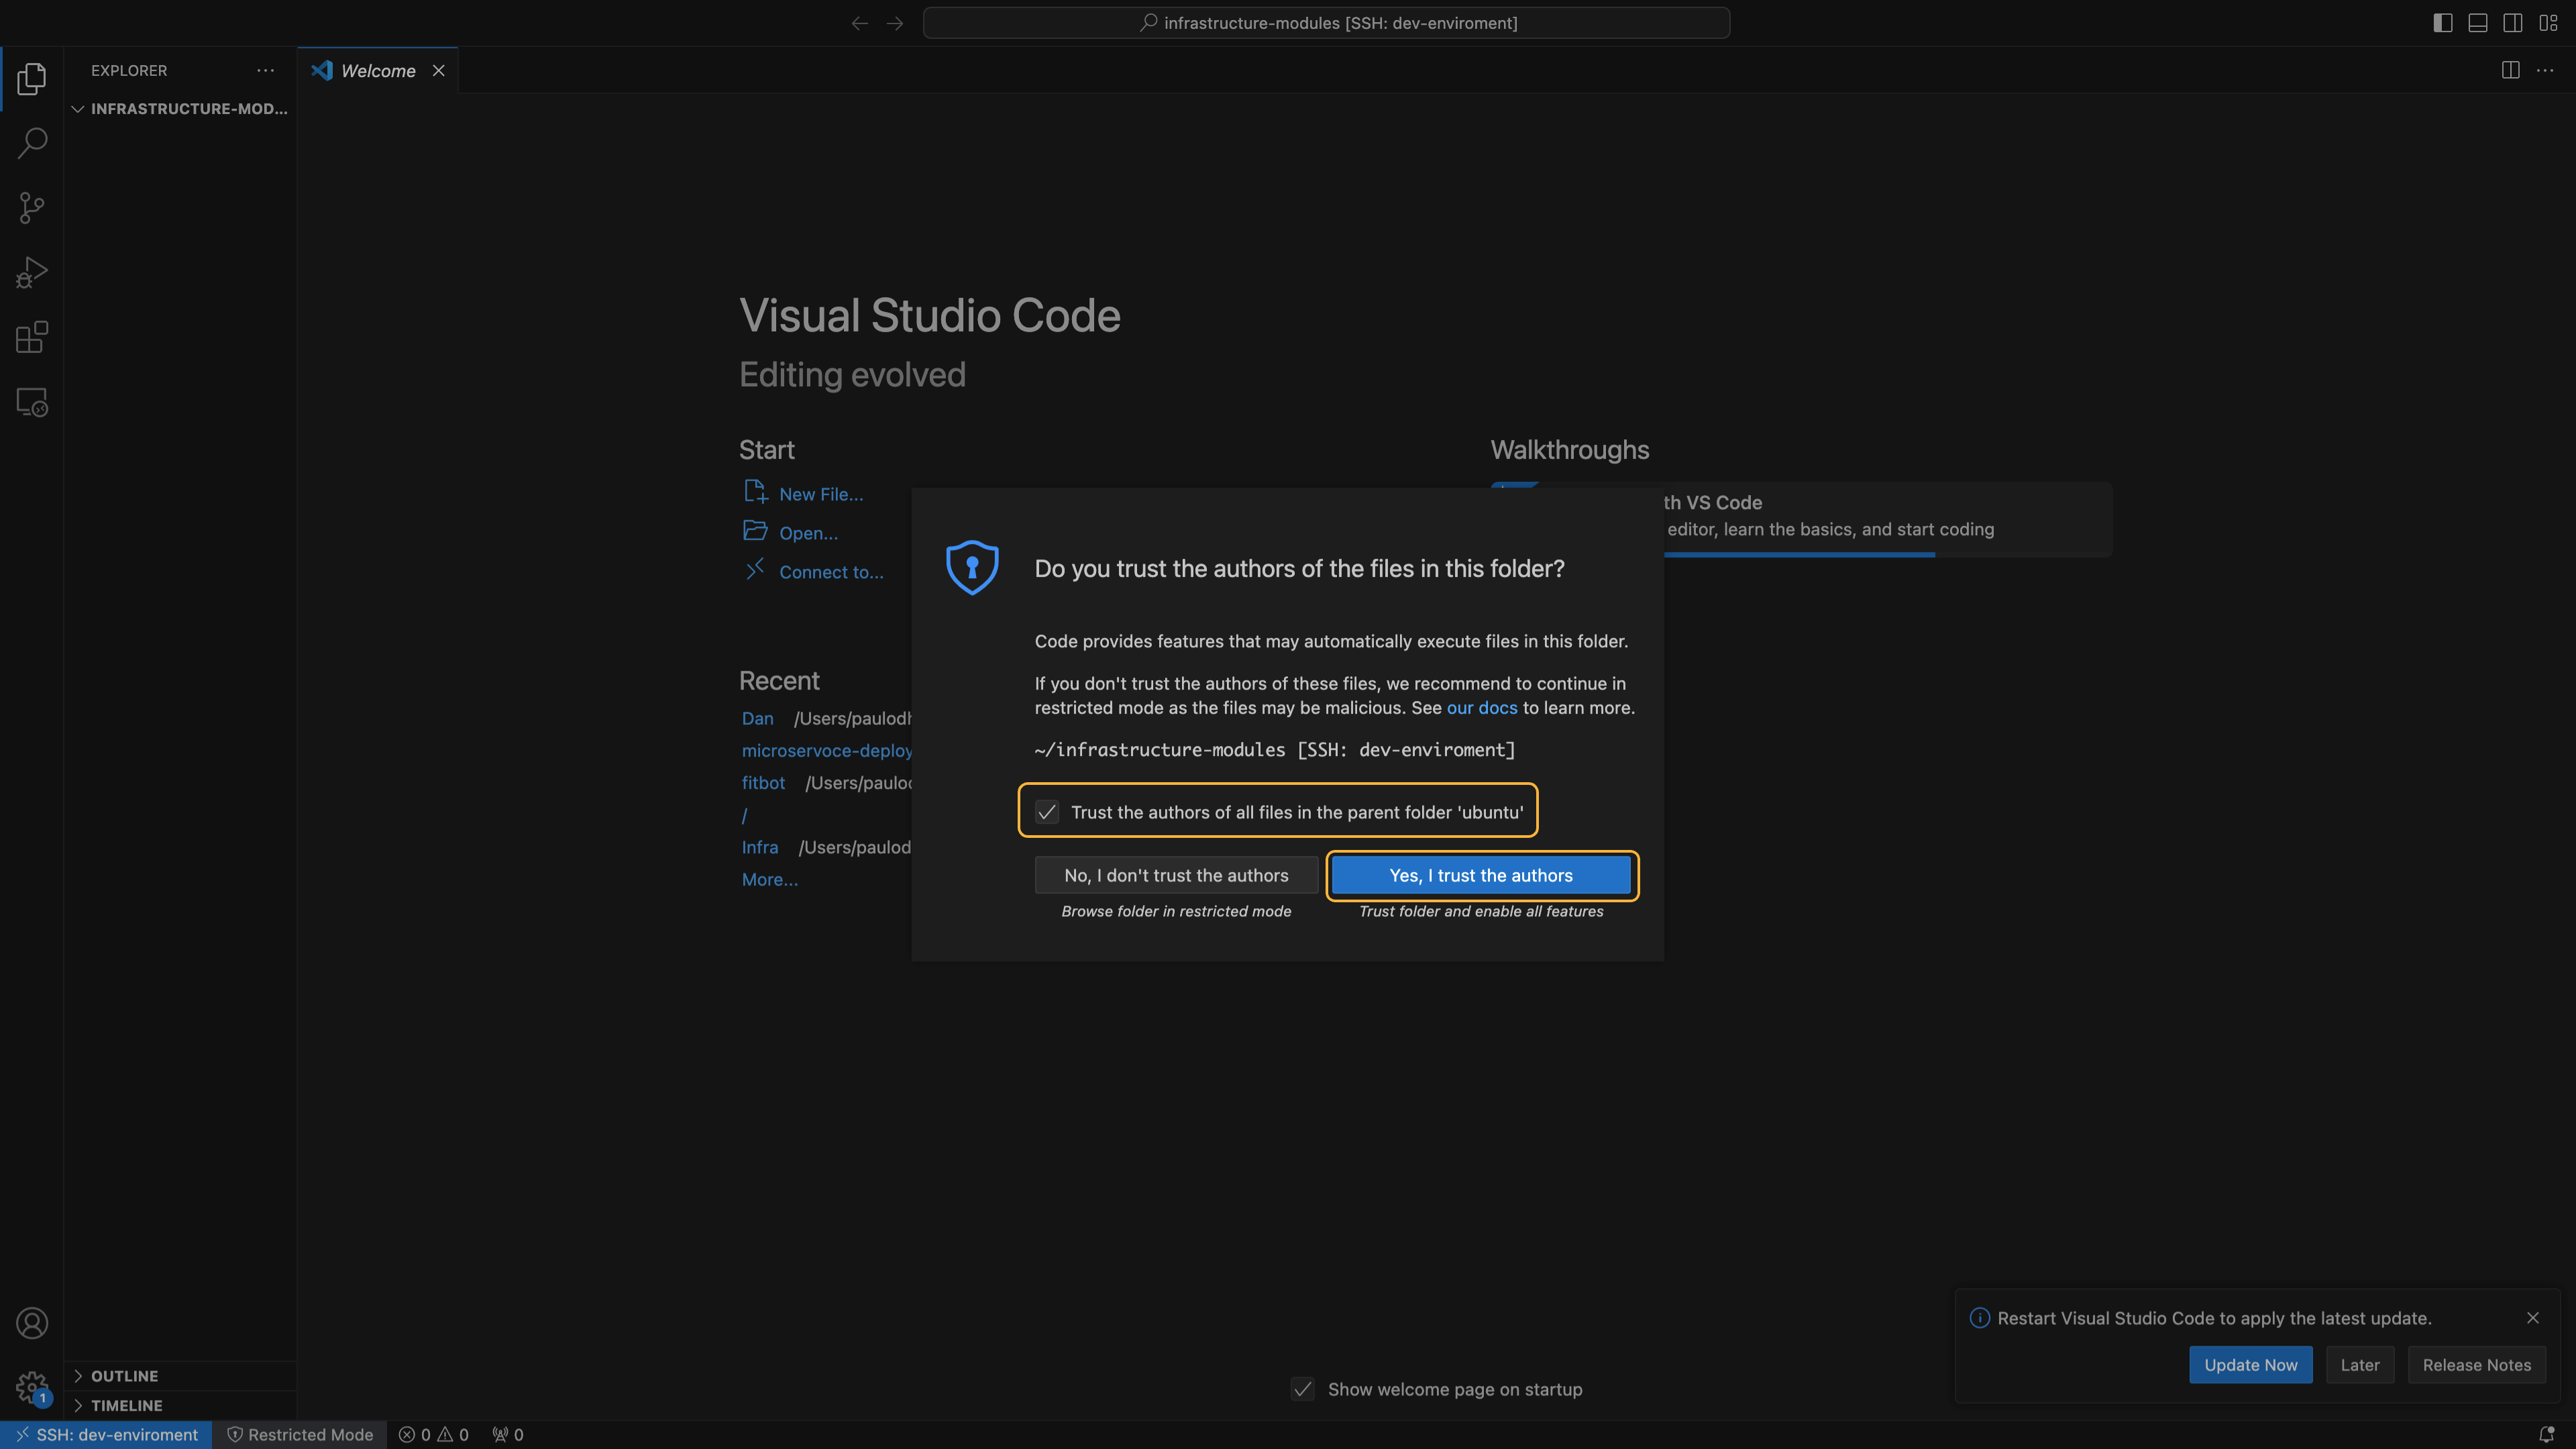
Our working environment (EC2 instance) is fully set up. Now, let's proceed with developing the infrastructure provisioning modules.
Developing Custom Terraform Modules for Infrastructure Provisioning
We intend to provision three Kubernetes clusters (dev, stage, prod) using Amazon EKS. Each environment will consist of two core infrastructures: a VPC, which provides the foundational network infrastructure for our Kubernetes worker nodes, and an EKS cluster, which provides Kubernetes functionalities for the environment. The control plane is managed by AWS and is not deployed in the VPC we provide. The worker nodes run in our VPC, while the control plane resides in AWS's infrastructure and communicates with the worker nodes over the network. That's why our architecture diagram shows two VPCs.
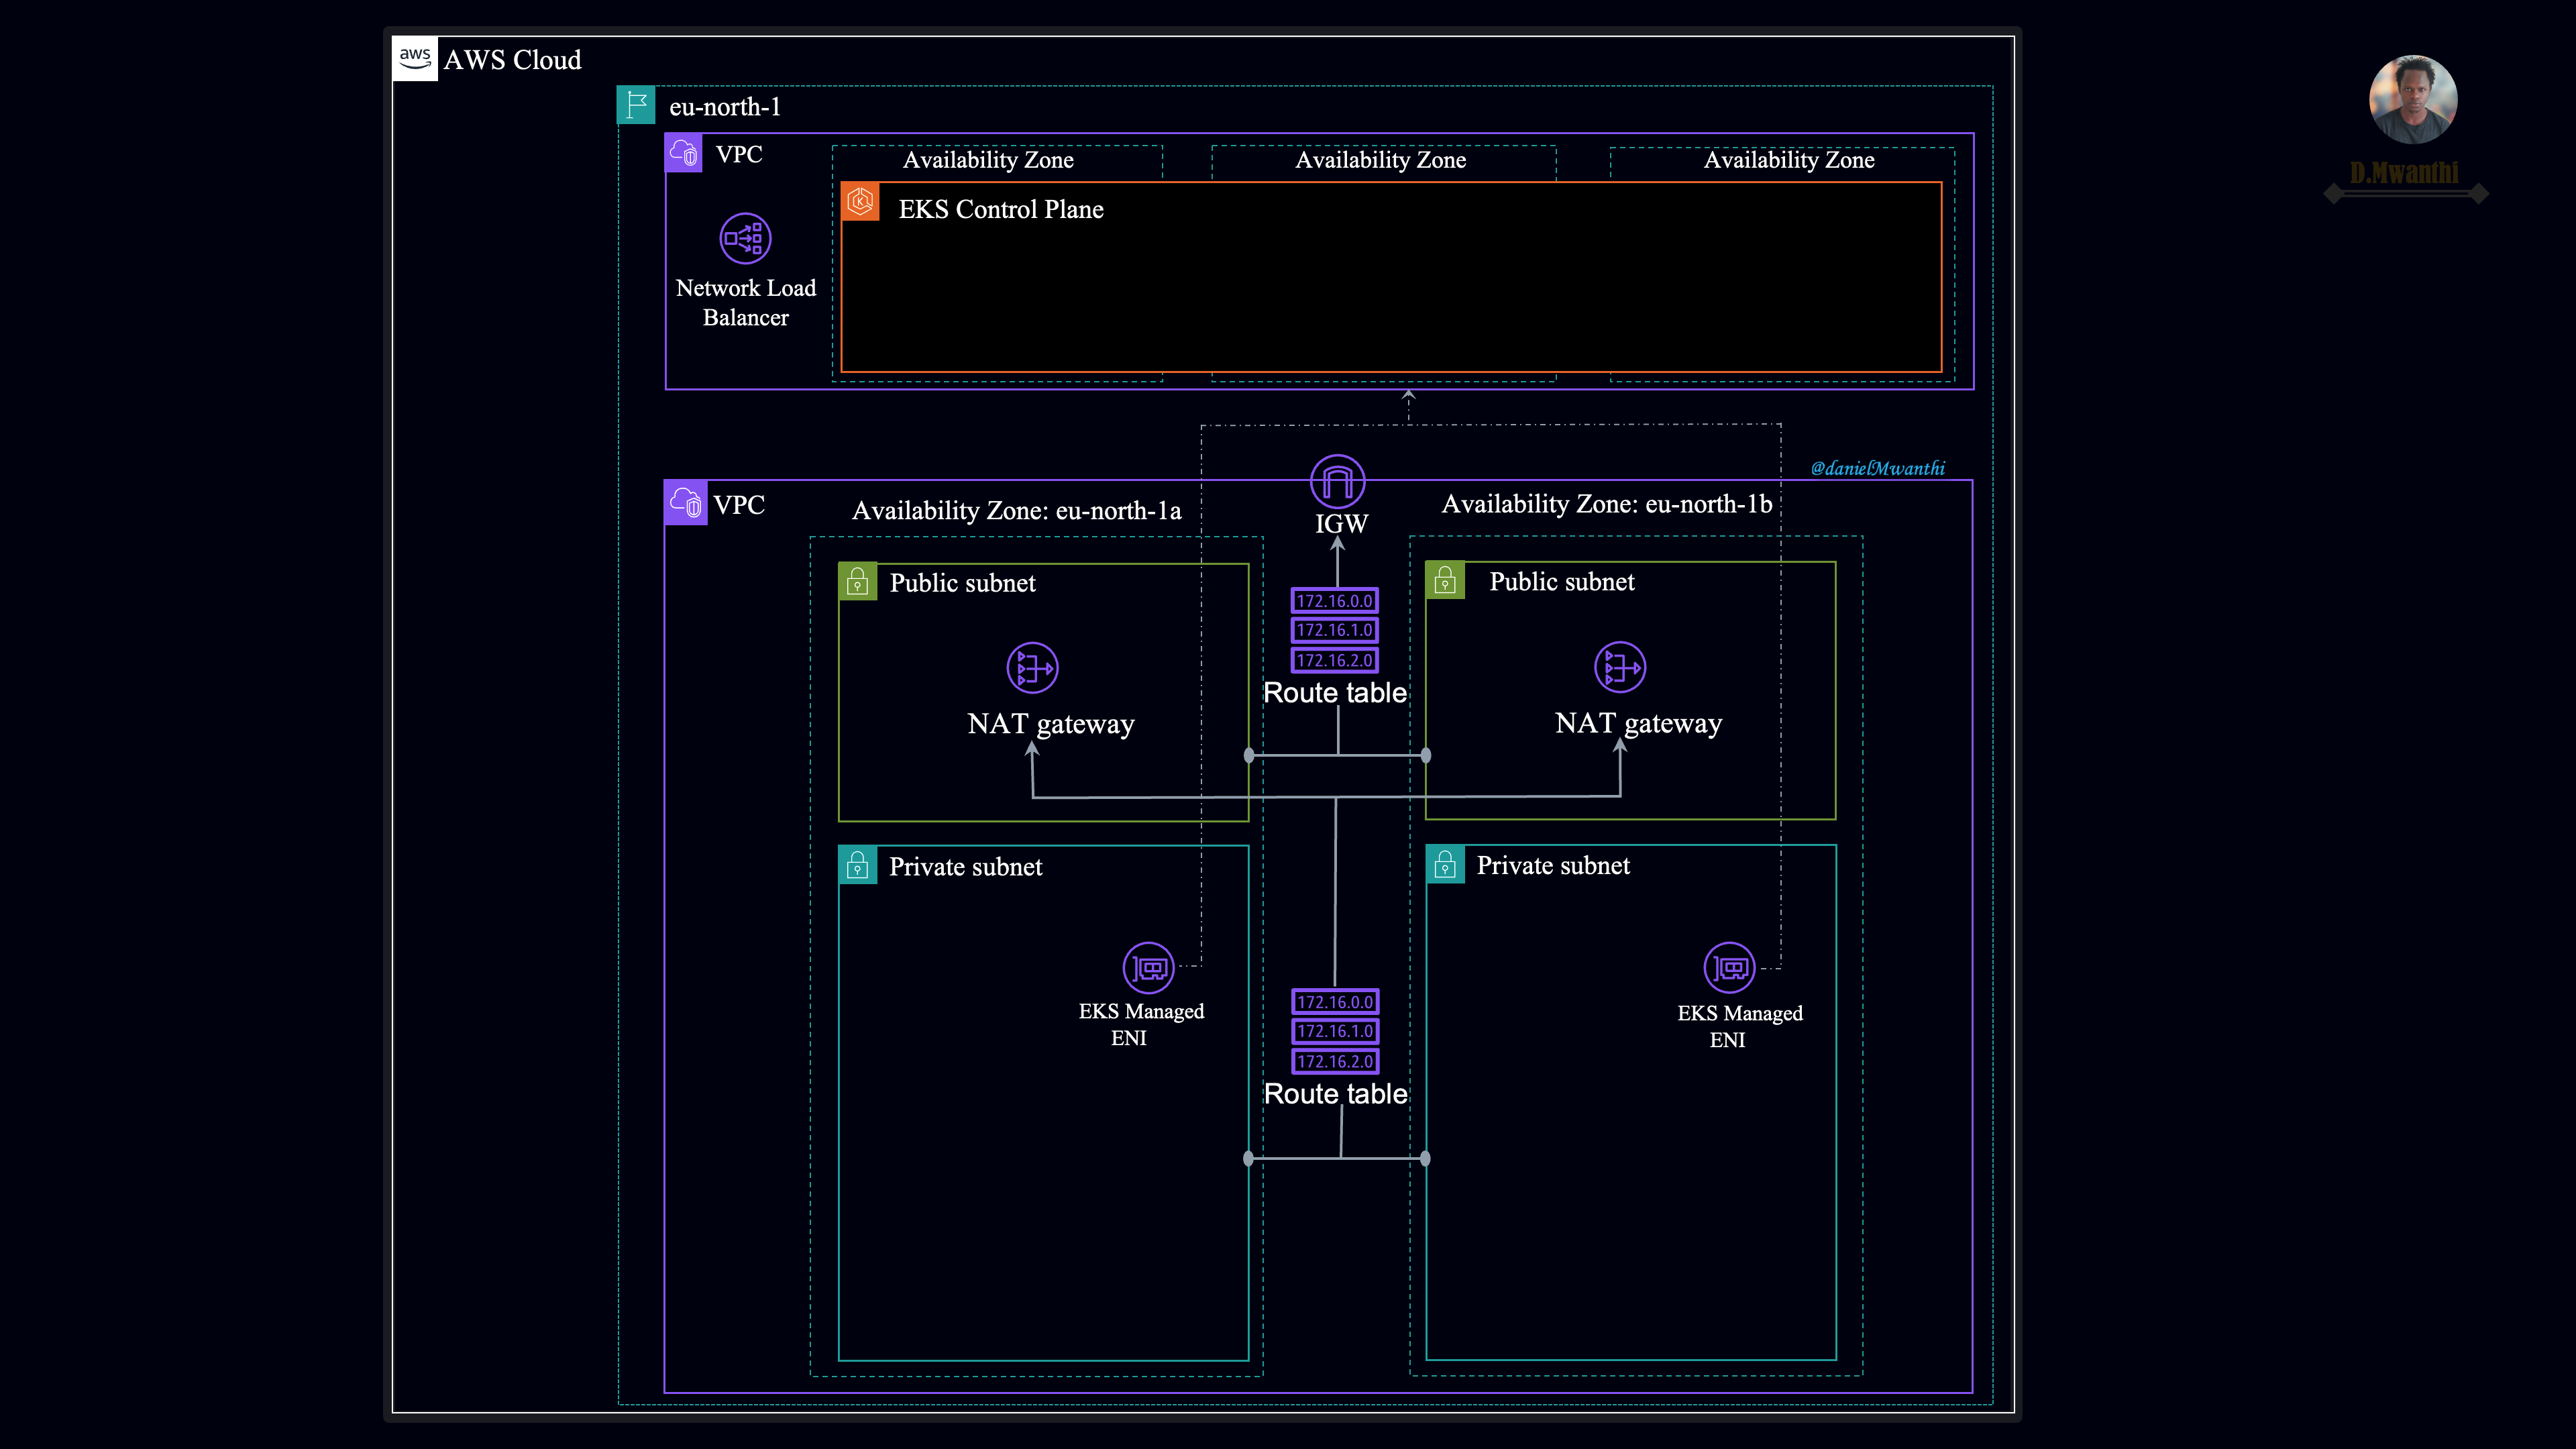
Once the clusters are provisioned, we'll use Helm with Terraform to install Kubernetes add-ons that extend its functionalities.
Since we'll be provisioning the same infrastructures across various environments, we will create reusable Terraform code (modules) that is configurable based on the environment-specific requirements. Terraform modules promote code reusability across different environments by exposing variables that may differ between environments as input variables, allowing customization based on users' specific needs. Beyond the code reusability, we also need to ensure the modules are effective. They should be lightweight, easy to review, update, test, and secure. To achieve this, we need to ensure our modules are compact and well-structured.
We are provisioning two types of infrastructure (VPC and EKS cluster) in each environment. Defining all configurations in a single module could make it too complex and violate the best practices. To avoid this, we will split the infrastructure into multiple modules. Specifically, we will create separate modules for each AWS service (such as VPCs and EKS clusters) and a distinct module for managing Kubernetes add-ons. In total, we will develop three modules (VPC, EKS, and K8S-addons) that will be used to provision the desired infrastructure across all three environments on AWS.
Let's create three subdirectories inside the infrastructure-modules directory, one for each custom Terraform module.
# Excuted from our instance
mkdir -p ~/infrastructure-modules/{vpc,eks,k8s-addons}
Confirm that your infrastructure-modules directory structure matches the one below:
# Install and execute tree
sudo apt install tree -y && tree .

.
├── eks
├── k8s-addons
└── vpc

4 directories, 0 files
VPC module
In this module, we will define Terraform configurations for provisioning the networking infrastructure required for the project. When configured and applied, this module should create an Amazon VPC, Subnets with required tags for EKS auto-discovery, internet gateways, NAT gateways, and route tables. EKS required at least two subnets in different availability zones. In our case, we will create four subnets: two public subnets and two private subnets. EKS will use public subnets to create an Application Load balancer for exposing applications deployed on the worker nodes which are launched in the private subnets, to the internet.
Create the following three files inside the vpc folder:
# Execute to create files
touch ~/infrastructure-modules/vpc/{main.tf,variables.tf,output.tf}
In the main.tf file, define all configurations needed to set up the networking infrastructure. Run the following script to create the VPC configuration file (main.tf) in the ~/infrastructure-modules/vpc/ directory.
cat <<EOF > ~/infrastructure-modules/vpc/main.tf
# create VPC
resource "aws_vpc" "this" {
  cidr_block = var.vpc_cidr_block

  instance_tenancy = "default"
  enable_dns_support = true
  enable_dns_hostnames = true

  tags = {
    Name = "\${var.env}-vpc"
  }
}

# create internet gateway
resource "aws_internet_gateway" "this" {
    vpc_id = aws_vpc.this.id

    tags = {
        Name = "\${var.env}-igw"
    }
}

# Public subnets
resource "aws_subnet" "public" {
  count = length(var.public_subnets)

  vpc_id = aws_vpc.this.id
  cidr_block = var.public_subnets[count.index]
  availability_zone = var.azs[count.index]

    # A map of tags to assign to the resources
    tags = merge({
      Name = "\${var.env}-public-\${var.azs[count.index]}"},
      var.public_subnets_tags
      )
}

# Private subnets
resource "aws_subnet" "private" {
  count = length(var.private_subnets)

  vpc_id = aws_vpc.this.id
  cidr_block = var.private_subnets[count.index]
  availability_zone = var.azs[count.index]

    # A map of tags to assign to the resources
    tags = merge({
      Name = "\${var.env}-private-\${var.azs[count.index]}"},
      var.private_subnets_tags
      )
}

#### NAT gateway ####
# locate public ip first
resource "aws_eip" "this" {
  domain = "vpc"

  tags = {
    Name = "\${var.env}-nat"
  }
}

resource "aws_nat_gateway" "this" {
  allocation_id = aws_eip.this.id
  subnet_id     = aws_subnet.public[0].id

  tags = {
    Name = "\${var.env}-nat"
  }

  depends_on = [aws_internet_gateway.this]
}

# public route table
resource "aws_route_table" "public" {
  vpc_id = aws_vpc.this.id

  route {
      cidr_block     = "0.0.0.0/0"
      gateway_id = aws_internet_gateway.this.id
      }

  tags = {
    Name = "\${var.env}-public"
  }
}

# private route table
resource "aws_route_table" "private" {
  vpc_id = aws_vpc.this.id

  route {
      cidr_block     = "0.0.0.0/0"
      nat_gateway_id = aws_nat_gateway.this.id
    }

  tags = {
    Name = "\${var.env}-private"
  }
}

# Associate route tables with the subnets
# public
resource "aws_route_table_association" "public" {
  count = length(var.public_subnets)
  subnet_id      = aws_subnet.public[count.index].id
  route_table_id = aws_route_table.public.id
}

# Private
resource "aws_route_table_association" "private" {
  count = length(var.private_subnets)
  subnet_id      = aws_subnet.private[count.index].id
  route_table_id = aws_route_table.private.id
}
EOF
In this module, all the configurations that may vary from an environment to environment are set as input variables. Let's go through it to understand more how it is works.
First, a resource is defined to provision an AWS VPC with a CIDR block provided via an input variable. In this VPC, DNS support and DNS hostname are enabled, allowing DNS resolution within the VPC and assigning the DNS hostnames to the instance. The instance tenacy is set to default, ensuring shared hardware. The VPC will be tagged using environment name as a prefix followed by the vpc string as a suffix. This naming convention is suitable in our case since we will be provisioning three VPCs—one for each Kubernetes environments—making it easy to differentiate which VPC belongs to which environment.
Next, a resource is defined for creating an Internet Gateway and attaching it to the VPC (aws_internet_gateway.this). The Internet Gateway is essential for routing all traffic destined for addresses outside the VPC CIDR range to the Internet.
Following this is the aws_subnet.public resource, which is responsible for creating multiple public subnets within the VPC. It dynamically configures CIDR blocks and availability zones based on values provided via input variables. The subnets are tagged with a name that includes the environment name as a prefix and the availability zone as a suffix.
Additional tags are also added through the input variable. These tags are intended to enable the EKS cluster to automatically discover the subnets, as we will see later.
Next, the aws_subnet.private resource is used to create private subnets where EKS will launch worker nodes. These subnets will be tagged similarly to the public subnets, but with specific tags for private subnets. The key difference is that Kubernetes is directed to create internal load balancers in these subnets, if needed, using the "kubernetes.io/role/internal-elb" = "1" tag that will be passed as an input variable. This setup allows services that need to be accessed from within the VPC to use internal load balancers, rather than exposing them directly via service addresses. For example, this might be useful for accessing Grafana from within the VPC.
The aws_eip.this resource allocates a static IP address, which is then associated with the NAT gateway created by the aws_nat_gateway.this resource in the first public subnet. A NAT gateway is required to enable instances running in the private subnets (worker nodes) to access the Internet securely. The creation of this NAT gateway is conditioned on the existence of the internet gateway, using the depends_on attribute.
Even though we have created public subnets, if Kubernetes launches an internet-facing Application load balancer to expose application running in the pods to the Internet, we will no be able to access the application despite having a public load balancer. This is because there are no routes for forwarding traffic destined for IP addresses outside our VPC's CIDR block range to the internet gateway. To resolve this, we create a route table using the aws_route_table.public resource. This route table is configured to direct all internet-bound traffic (0.0.0.0/0) to the internet gateway, which manages routing traffic to external IP addresses. The table is tagged with the environment name as the prefix and will be used to route traffic from all the public subnets in our architecture.
We have also created a private route table (aws_route_table.private) to handle traffic from the private subnets. Unlike the public route table, this table forwards internet-bound traffic from the private subnets to the NAT gateway, which then sends the traffic to the internet gateway for routing to the internet.
To bring these route tables into effect, we associate them with their respective subnets. The aws_route_table_association.public resource links the public route table to all the public subnets in the infrastructure, while the aws_route_table_association.private resource connects the private route table to all the private subnets.
Most fields in this module are configured using input variables. We need to declare these variables so that module users can set values according to their specific requirements. Enter the following content in the variables.tf file to declare all the variables required by this module:
# Go through the the description to understand expected values of of each variable
cat <<EOF > ~/infrastructure-modules/vpc/variables.tf
variable "env" {
    description = "Enviroment name."
    type = string
}

variable "vpc_cidr_block" {
    description = "Classless Inter-Domain Rounting (CIDR)."
    type = string
    default = "10.0.0.0/16"
}

variable "azs" {
    description = "Availability zones for subnets"
    type = list(string)
}

variable "private_subnets" {
    description = "CIDR ranges for private subnets."
    type = list(string)
}

variable "public_subnets" {
    description = "CIDR ranges for private subnets."
    type = list(string)
}

variable "private_subnets_tags" {
    description = "Private subnet tags."
    type = map(any)
}

variable "public_subnets_tags" {
  description = "Private subnet tags."
  type        = map(any)
}

EOF
The EKS module will need information about the VPC to locate it and launch the cluster computing resources within it. For an EKS module to access this information, we must expose it from the VPC module. For example, we need details such as the VPC ID and the subnets where to launch our worker nodes. To achieve this, define output variables for these fields in the output.tf file by executing the following script:
# output variables
cat <<EOF > ~/infrastructure-modules/vpc/output.tf
output "vpc_id" {
    value = aws_vpc.this.id
}

output "private_subnets" {
    value = aws_subnet.private[*].id
}

output "public_subnets" {
    value = aws_subnet.public[*].id
}
EOF
The VPC module is complete.
EKS module
In this module, we'll define all Terraform configurations needed to provision an EKS cluster on AWS with managed worker nodes. Let's start by creating the necessary files to structure these configurations:
# Execute from the infrastructure-modules directory
touch ~/infrastructure-modules/eks/{main.tf,variables.tf,output.tf}
Next, declare all resource provisioning configurations in the main.tf file. While it's possible to split the configurations into multiple files to improve readability, for now, we'll keep everything in one file. Execute the following script from the command line to create this file.
cat <<EOF > ~/infrastructure-modules/eks/main.tf
resource "aws_iam_role" "eks" {
  name = "\${var.env}-env-eks-cluster-role"

  assume_role_policy = <<POLICY
{
    "Version": "2012-10-17",
    "Statement": [
        {
            "Effect": "Allow",
            "Principal": {
                "Service": "eks.amazonaws.com"
            },
            "Action": "sts:AssumeRole"
        }
    ]
}
POLICY
}

# Attach iam policy to the iam role
resource "aws_iam_role_policy_attachment" "eks" {
  role       = aws_iam_role.eks.name
  policy_arn = "arn:aws:iam::aws:policy/AmazonEKSClusterPolicy"
}

# Create eks cluster
resource "aws_eks_cluster" "this" {
  name     = "\${var.env}-\${var.eks_name}"
  version = var.eks_version
  role_arn = aws_iam_role.eks.arn

  vpc_config {
    endpoint_private_access = false
    endpoint_public_access = true
    subnet_ids =var.subnet_ids
  }
  depends_on = [aws_iam_role_policy_attachment.eks]
}

### Create iam role for nodes
resource "aws_iam_role" "nodes" {
  name = "\${var.env}-\${var.eks_name}-eks-nodes"

  assume_role_policy = jsonencode({
    Statement = [{
      Action = "sts:AssumeRole"
      Effect = "Allow"
      Principal = {
        Service = "ec2.amazonaws.com"
      }
    }]
    Version = "2012-10-17"
  })
}

# Attach policy to the nodes iam role
resource "aws_iam_role_policy_attachment" "nodes" {
    for_each = var.node_iam_policies

    policy_arn = each.value
    role = aws_iam_role.nodes.name
}

# Create eks node groups
resource "aws_eks_node_group" "this" {
  for_each = var.node_groups

  # connect node  groups to the cluster
  cluster_name = aws_eks_cluster.this.name
  node_group_name = each.key
  node_role_arn = aws_iam_role.nodes.arn

  subnet_ids = var.subnet_ids

  capacity_type = each.value.capacity_type
  instance_types = each.value.instance_types

  scaling_config {
    desired_size = each.value.scaling_config.desired_size
    max_size = each.value.scaling_config.max_size
    min_size = each.value.scaling_config.min_size
  }

  update_config {
    max_unavailable = 1
  }

  labels = {
    role = each.key
  }

  depends_on = [ aws_iam_role_policy_attachment.nodes ]
}
EOF
This configuration file defines an IAM role resource (aws_iam_role.eks) with a trust policy that allows the EKS service to assume it. The role name is prefixed with the environment name specified by an input variable.
The next resource, aws_iam_role_policy_attachment.eks, attaches the AmazonEKSClusterPolicy to the IAM role created earlier, granting permissions for EKS to manage and interact with other AWS services.
Now that we have an IAM role with the necessary permissions, next we define a resource (aws_eks_cluster.this) to create an EKS cluster. The cluster is named using the environment and cluster name, with the Kubernetes version all specified through input variables. It uses the IAM role created earlier and configures VPC access with public endpoints enabled and private endpoints disabled. The cluster creation is dependent on the IAM role policy attachment being completed first.
The next resource aws_iam_role.nodes creates the iam role that the worker nodes will be assume. Following this, the aws_iam_role_policy_attachment.nodes resource attaches multiple policies to the role. These policies are specified in a list provided throught an input variable.
Next, we define the resource for creating EKS node groups (aws_eks_node_group.this), one for each entry in the node_groups variable. Each node group is connected to the previously created EKS cluster (aws_eks_cluster.this.name) and uses the IAM role for nodes (aws_iam_role.nodes.arn). Nodes in each group are configured with capacity type and instance types specified through input variables. Each node group is set to run a specific number of nodes (desired_size) and can scale within a user-defined range, from a minimum (min_size) to a maximum (max_size), as specified through input variables. Note that this scaling configuration only sets bounds for the number of nodes and does not enable automatic scaling based on resource demands. To enable automatic scaling, we will deploy a cluster autoscaler as an add-on to dynamically adjust the number of nodes based on the cluster's needs. During node group updates, the maximum number of unavailable nodes is set to 1, ensuring only one node is taken offline at a time. Finally, the depends_on directive is set to ensures that the node groups are created only after the IAM policies have been attached to the IAM role.
This module is heavily configured using input variables. All expected input variables are declared in the variables.tf file. Review this file to understand the variables and their expected values:
cat <<EOF > ~/infrastructure-modules/eks/variables.tf
variable "env" {
  description = "Enviroment name."
  type = string
}

variable "eks_version" {
  description = "Desired Kubernetes master version"
  type = string
}

variable "eks_name" {
  description = "Name of the cluster"
  type = string
}

variable "subnet_ids" {
  description = "List of subnet IDs. Must be in at least two different availability zones"
  type = list(string)
}

variable "node_iam_policies" {
  description = "List of IAM Policies to attach to EKS-managed nodes"
  type = map(any)
  default = {
    1 = "arn:aws:iam::aws:policy/AmazonEKSWorkerNodePolicy"
    2 = "arn:aws:iam::aws:policy/AmazonEKS_CNI_Policy"
    3 = "arn:aws:iam::aws:policy/AmazonEC2ContainerRegistryReadOnly"
    4 = "arn:aws:iam::aws:policy/AmazonSSMManagedInstanceCore"
  }
}

variable "node_groups" {
  description = "EKS nade groups"
  type = map(any)
}
EOF
From these variables, the IAM policies for the node groups are specified by default in the node_iam_policies and include:
AmazonEKSWorkerNodePolicy: Grants permissions for EKS worker nodes to join the cluster and communicate with the EKS control plane.
AmazonEKS_CNI_Policy: Allows worker nodes to manage network interfaces and assign IP addresses for pods in the EKS cluster.
AmazonEC2ContainerRegistryReadOnly: Provides read-only access to Amazon ECR, enabling nodes to pull container images. Note: This is only necessary if any ECR-hosted images are used.
AmazonSSMManagedInstanceCore: Enables the use of AWS Systems Manager for managing and configuring nodes remotely, particularly since the worker nodes are in private subnets without SSH access.
The rest of variables we will explain as we provide values when calling the module.
Once the cluster is created, we need to output its name for use in the add-ons module. To achieve this, declare output variables in the output.tf file:
cat <<EOF > ~/infrastructure-modules/eks/output.tf
output "eks_name" {
  value = aws_eks_cluster.this.name
}
EOF
Kubernetes Addons
In this module we define Terrafrom configuration for installing the Cluster Autoscaler as an add-on on the EKS cluster. The Cluster Autoscaler is an external components that need to be installed on the cluster to automatically scale up or down the cluster work nodes. When installed, it monitors unscheduled pods, specifically the pending pods that can not be scheduled on any of the existing nodes due to insufficient resources (CPU, memory, etc.). When it detects such a situation, it interacts with the cloud provider's API (in the case of AWS, the EC2 Auto Scaling API) to adjust (increase) the desired size property of the underlined Auto Scaling group (node group). The desired size is a parameter that defines how many EC2 instances (nodes) the Auto Scaling group should maintain. AWS responds to this change by provisioning additional EC2 instances to match the new desired size of the Auto Scaling group. These instances are launched using a launch template associated with the Auto Scaling group. The launch template specifies an AMI (Amazon Machine Image) pre-configured for EKS. This AMI contains the necessary software, including the kubelet, which is responsible for registering the instance with the EKS cluster. When the instance starts, the kubelet automatically connects to the EKS cluster's API server and registers the instance as a node, adding it to the pool of worker nodes.
Conversely, if the Cluster Autoscaler detects that some nodes are underutilized, it decreases the desired capacity of the Auto Scaling group. AWS will then terminate the excess instances, and Kubernetes will remove the corresponding nodes from the cluster.
The Cluster Autoscaler needs permission to interact with the cloud provider and adjust the desired size property of the Auto Scaling group (node group). To authorize it, we could create an IAM OIDC provider, but this approach requires several components and can be complex. Instead, we will use EKS Pod Identities, which simplifies the process of authenticating processes running in your EKS cluster with the AWS API. EKS Pod Identities, a feature developed by the Amazon EKS team, allows us to associate IAM roles with pods and workloads in our EKS cluster, enabling them to access authorized cloud resources similarly to how an EC2 instance would be authorized using an IAM role.
To deploy the EKS Pod Identity we need to:
Create an IAM role with
pods.eks.amazonaws.comas the trust.Assign the necessary policies to the IAM role, providing the required permissions for your workloads.
Link the IAM role to a service account in your EKS cluster. This service account will be assumed by pods to gain the permissions defined by the IAM role, allowing them to interact with AWS resources securely.
Finally, deploy the pod identity agent on the cluster. This agent ensures that any request a pod, such as an autoscaler pod, sends to the cloud API is made using the correct identity, as defined by the service account the pod assumes. The cloud service then checks these requests against the permissions associated with that service account.
To set this up, first execute the command below to create all necessary module files inside the k8s-addons directory:
touch ~/infrastructure-modules/k8s-addons/{pod-identity.tf,autoscaler.tf,metrics-server.tf,variables.tf}
In the pod-identity.tf file, define the configurations needed to deploy the EKS Pod Identity agent as a pod in the cluster using the EKS add-on.
cat <<EOF > ~/infrastructure-modules/k8s-addons/pod-identity.tf
# Deploy pod identity on cluster using eks addon
resource "aws_eks_addon" "pod_identity" {
  cluster_name = var.eks_name
  addon_name = "eks-pod-identity-agent"
  addon_version = "v1.3.2-eksbuild.2"
}
EOF
In this configuration, we are deploying version v1.3.2-eksbuild.2 of the Pod Identity. To find the available eks-pod-identity-agent add-on versions, you can run the following command:
aws eks describe-addon-versions \
--region eu-north-1 \
--addon-name eks-pod-identity-agent
If a new version is available, just update the Terraform code to use it.
In the autoscaler.tf file, define the Terraform configuration to deploy the Cluster Autoscaler using a Helm chart. This should include creating an IAM role for the service account and associating it with the service account.
# move policy to policy file
cat <<EOF > ~/infrastructure-modules/k8s-addons/autoscaler.tf
resource "aws_iam_role" "cluster_autoscaler" {
  name = "\${var.env}-\${var.eks_name}-cluster-autoscaler"

  assume_role_policy = jsonencode ({
    Version = "2012-10-17"
    Statement = [
      {
        Effect = "Allow"
        Action = [
          "sts:AssumeRole",
          "sts:TagSession"
        ]
        Principal = {
          Service = "pods.eks.amazonaws.com"
        }
      }
    ]
  })
}

# Create a policy allowing access to ec2 autoscaling api
resource "aws_iam_policy" "cluster_autoscaler" {
  name = "\${var.env}-cluster-autoscaler"

  policy = jsonencode({
    Version = "2012-10-17"
    Statement = [
      {
        Effect = "Allow"
        Action = [
          "autoscaling:DescribeAutoScalingGroups",
          "autoscaling:DescribeAutoScalingInstances",
          "autoscaling:DescribeLaunchConfigurations",
          "autoscaling:DescribeScalingActivities",
          "autoscaling:DescribeTags",
          "ec2:DescribeImages",
          "ec2:DescribeInstanceTypes",
          "ec2:DescribeLaunchTemplateVersions",
          "ec2:GetInstanceTypesFromInstanceRequirements",
          "eks:DescribeNodegroup"
        ]
        Resource = "*"
      },
      {
        Effect = "Allow"
        Action = [
          "autoscaling:SetDesiredCapacity",
          "autoscaling:TerminateInstanceInAutoScalingGroup"
        ]
        Resource = "*"
      },
    ]
  })
}

# attach the policy to aim role for the autoscaler
resource "aws_iam_role_policy_attachment" "cluster_autoscaler" {
  policy_arn = aws_iam_policy.cluster_autoscaler.arn
  role       = aws_iam_role.cluster_autoscaler.name
}

# Associate IAM role the with kubernetes service account
# we are providing the namespace where the autoscaler will be running and the kubernetes service account name.
resource "aws_eks_pod_identity_association" "cluster_autoscaler" {
  cluster_name    = var.eks_name
  namespace       = "kube-system"
  service_account = "cluster-autoscaler"
  role_arn        = aws_iam_role.cluster_autoscaler.arn
}

# Deploy the autoscaler the the eks cluster
resource "helm_release" "cluster_autoscaler" {
  name = "autoscaler"

  repository = "https://kubernetes.github.io/autoscaler"
  chart      = "cluster-autoscaler"
  namespace  = "kube-system"
  version    = "9.37.0"

  set {
    name  = "rbac.serviceAccount.name"
    value = "cluster-autoscaler"
  }

  set {
    name  = "autoDiscovery.clusterName"
    value = var.eks_name
  }

  # updated the region to match eks region
  set {
    name  = "awsRegion"
    value = "eu-north-1"
  }

  depends_on = [helm_release.metrics_server]
}
EOF
In this file, we first create an IAM role for the autoscaler using aws_iam_role.cluster_autoscaler resource. We then create a policy allowing access to the EC2 Autoscaling group and attach it to the role. Since this IAM role will be assumed by the cluster autoscaler running in the EKS, we associate it with a Kubernetes service account (cluster-autoscaler) in the kube-system namespace. Note that, to bid the IAM role with the service account, we don’t use annotation as is the case of the OIDC provider. We directly use the ARN of the IAM role.
Next we define the Terraform configurations for deploying the cluster autoscaler to the EKS using Helm chart (helm_release.cluster_autoscaler). You can upgrade the chart version to meet your requirements and also set the region value in the set block to match your cluster's region.
Finally, we set the Metrics Server (metrics_server) as a module dependency, as it provides essential resource usage data that the Cluster Autoscaler uses to make scaling decisions.
In the variables.tf file, declare all variable needed to configure this module.
cat <<EOF > ~/infrastructure-modules/k8s-addons/variables.tf
variable "env" {
  description = "Environment name."
  type        = string
}

variable "eks_name" {
  description = "Name of the cluster."
  type        = string
}
EOF
The cluster Autoscaler modules above depend on the metric sever. Define a resource in the metrics-server.tf file to deploy the Metrics Server on the cluster.
cat <<EOF > ~/infrastructure-modules/k8s-addons/metrics-server.tf
resource "helm_release" "metrics_server" {
  name       = "metrics-server"
  repository = "https://kubernetes-sigs.github.io/metrics-server/"
  chart      = "metrics-server"
  namespace  = "kube-system"
  version    = "3.12.1"

  values = [
    yamlencode({
      defaultArgs = [
        "--cert-dir=/tmp",
        "--kubelet-preferred-address-types=InternalIP,ExternalIP,Hostname",
        "--kubelet-use-node-status-port",
        "--metric-resolution=15s",
        "--secure-port=10250"
      ]
    })
  ]
}
EOF
We are using Helm to deploys the Metrics Server on a Kubernetes cluster the configuration is applied. The configuration specifies the Helm chart repository, chart name, version, and deployment namespace. It also provides configuration values to the Helm chart, including settings such as certificate directory, kubelet address types, metric resolution, and secure port.
At this point, your modules folder should have a structure similar to the one below:
$ tree
.
├── eks
│   ├── main.tf
│   ├── output.tf
│   └── variables.tf
├── k8s-addons
│   ├── autoscaler.tf
│   ├── metrics-server.tf
│   ├── pod-identity.tf
│   └── variables.tf
└── vpc
    ├── main.tf
    ├── output.tf
    └── variables.tf

4 directories, 10 files
That's everything for the infrastructure provisioning custom Terraform modules. In the future, we will update the add-ons module to include AWS Load Balancer Controller deployment configurations. Let's go ahead and push them to GitHub.
Hosting Modules on Github
To prevent authentication errors when pushing modules to GitHub from your EC2 instance, follow these steps to set up an SSH key for authentication:
- Generate an SSH Key Pair:
ssh-keygen -t rsa -b 4096
- Add the SSH Key to the SSH Agent:
eval "$(ssh-agent -s)"
ssh-add ~/.ssh/id_rsa
- Copy the SSH public key:
cat ~/.ssh/id_rsa.pub
This will display your public key. Copy the entire key.
Add the SSH Key to Your GitHub Account:
Go to GitHub
→ Settings → SSH and GPG keys → New SSH key. Paste the key and save.Configuring Git with User Credentials:
Configure git in your EC2 instance. Here, set your Git user information globally with the following commands:
# Replace with your GitHub username and email address
git config --global user.name "D-Mwanth"
git config --global user.email "dmwanthi2@gmail.com"
At this point, we should be able to push changes to Github without authentication issues. Next, follow these steps to host your modules on the Github:
Create GitHub Repository:
Create a GitHub repository to store your Terraform code. If you have the
ghCLI installed and configured, use it to create the repository quickly. Otherwise, create it through the GitHub UI the usual way.
# We are creating a private one
gh repo create infrastructure-modules --private
Initialize the Terraform modules directory as a Git repository:
Navigate to the root of your
infrastructure-modulesdirectory (on your EC2 instance) and run:
git init
This initializes Git in the modules directory.
If your initial branch is named master make sure to rename it:
git branch -m main
Add GitHub Repository as Remote Origin:
Run the following command to link your local repository to the previously created GitHub repository:
# Replace D-Mwanth with your Github Username
git remote add origin git@github.com:D-Mwanth/infrastructure-modules.git
Stage and commit changes:
When using a single Git repository for multiple modules, you'll need to create a Git tags for specific modules so that you can reference them as independent versions later. That’s what we are going to do:
From the root of your repository, stage, commit, and tag each module individually. Note that there are no files that need to be ignored in this repository:
# Commit and tag vpc module
git add vpc/
git commit -m "Commit vpc module"
git tag vpc-v0.0.1 -m "Vpc module version 0.0.1"

# Commit and tag eks module
git add eks/
git commit -m "Commit eks module"
git tag eks-v0.0.1 -m "Eks module version 0.0.1"

# Commit and tag k8s-addons module
git add k8s-addons/
git commit -m "Commit k8s-addons module"
git tag k8s-addons-v0.0.1 -m "K8s-addons module version 0.0.1"
Whenever you make changes to any of the three modules, commit the changes for that specific module and update its tag (e.g., from 0.0.1 to 0.0.2). This strategy enables deployment of different module versions across environments. For example, after updating the eks module and tagging it as v0.0.2, you can update the dev environment to use this new version. If it performs well in dev, you then promote the same version to staging, and if successful there, promote it to prod.
Using this approach, issues are isolated to a single environment, and rollbacks are easily achieved by deploying a previous version.
Push changes to Remote repository:
Finally, push your local commits to the remote repository:
# Push modules code alongside their tags to the remote repository
git push origin main --tags
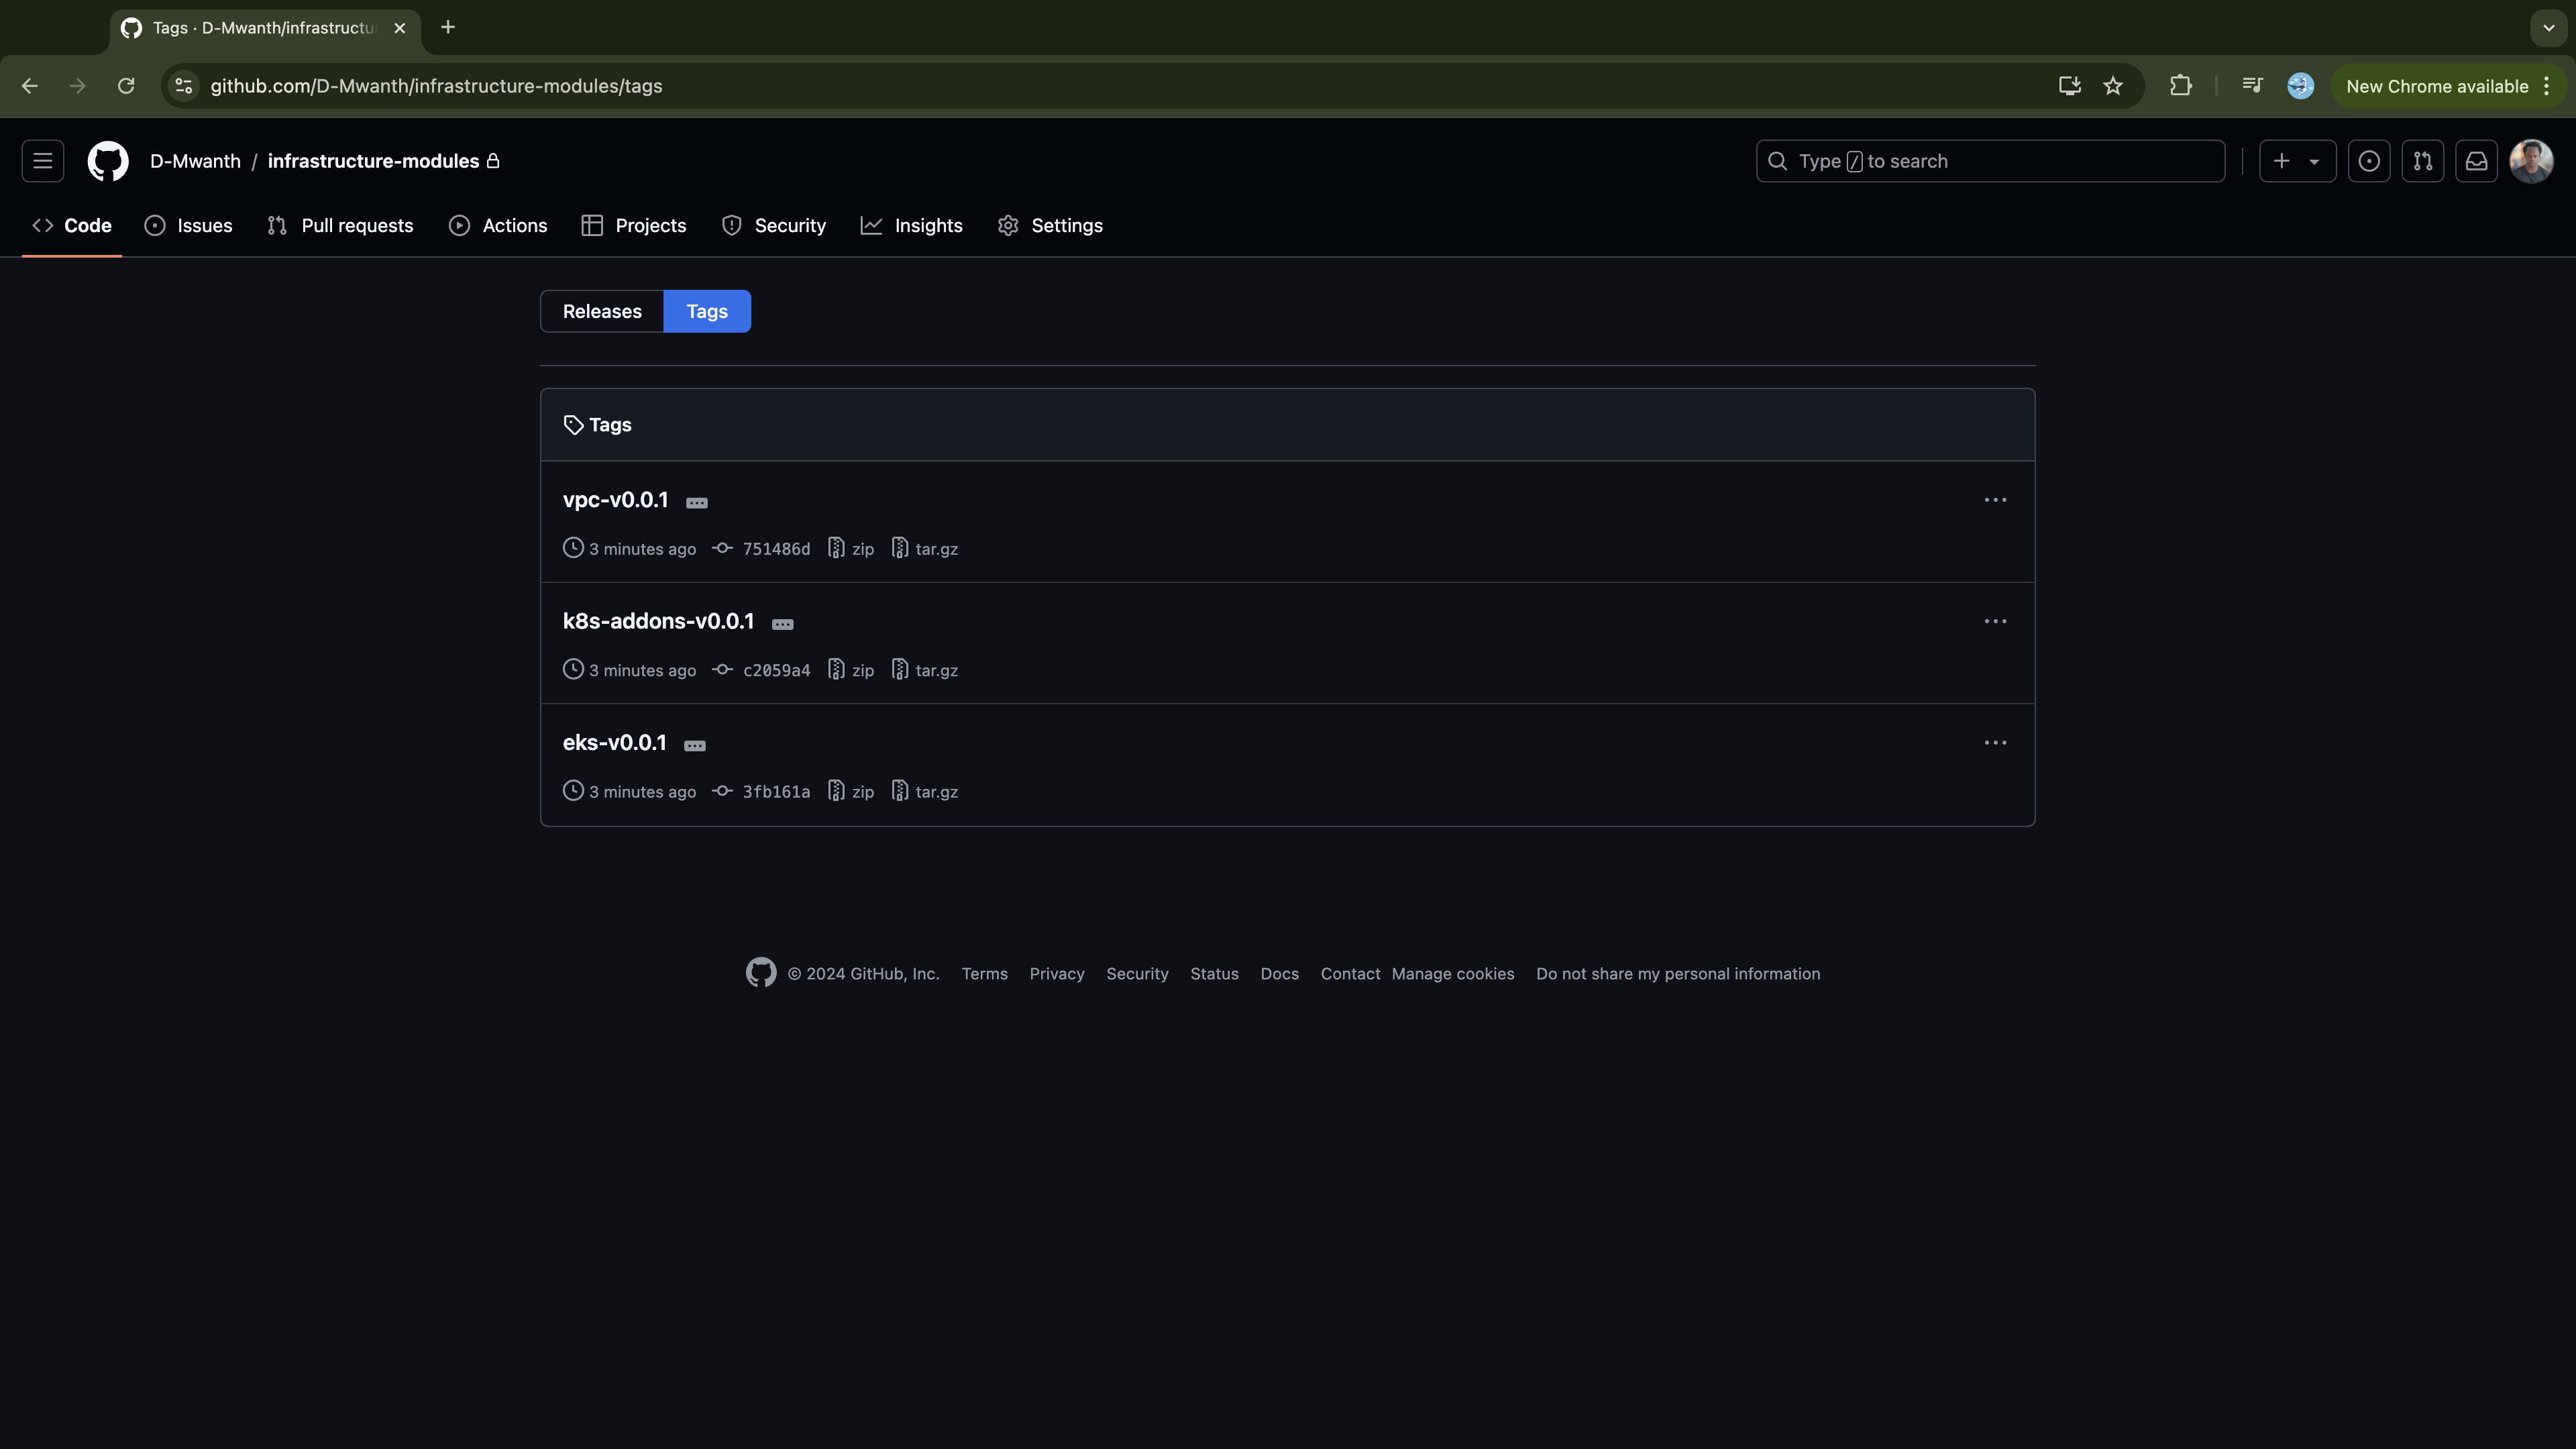
Verify the changes were pushed from Github's website:
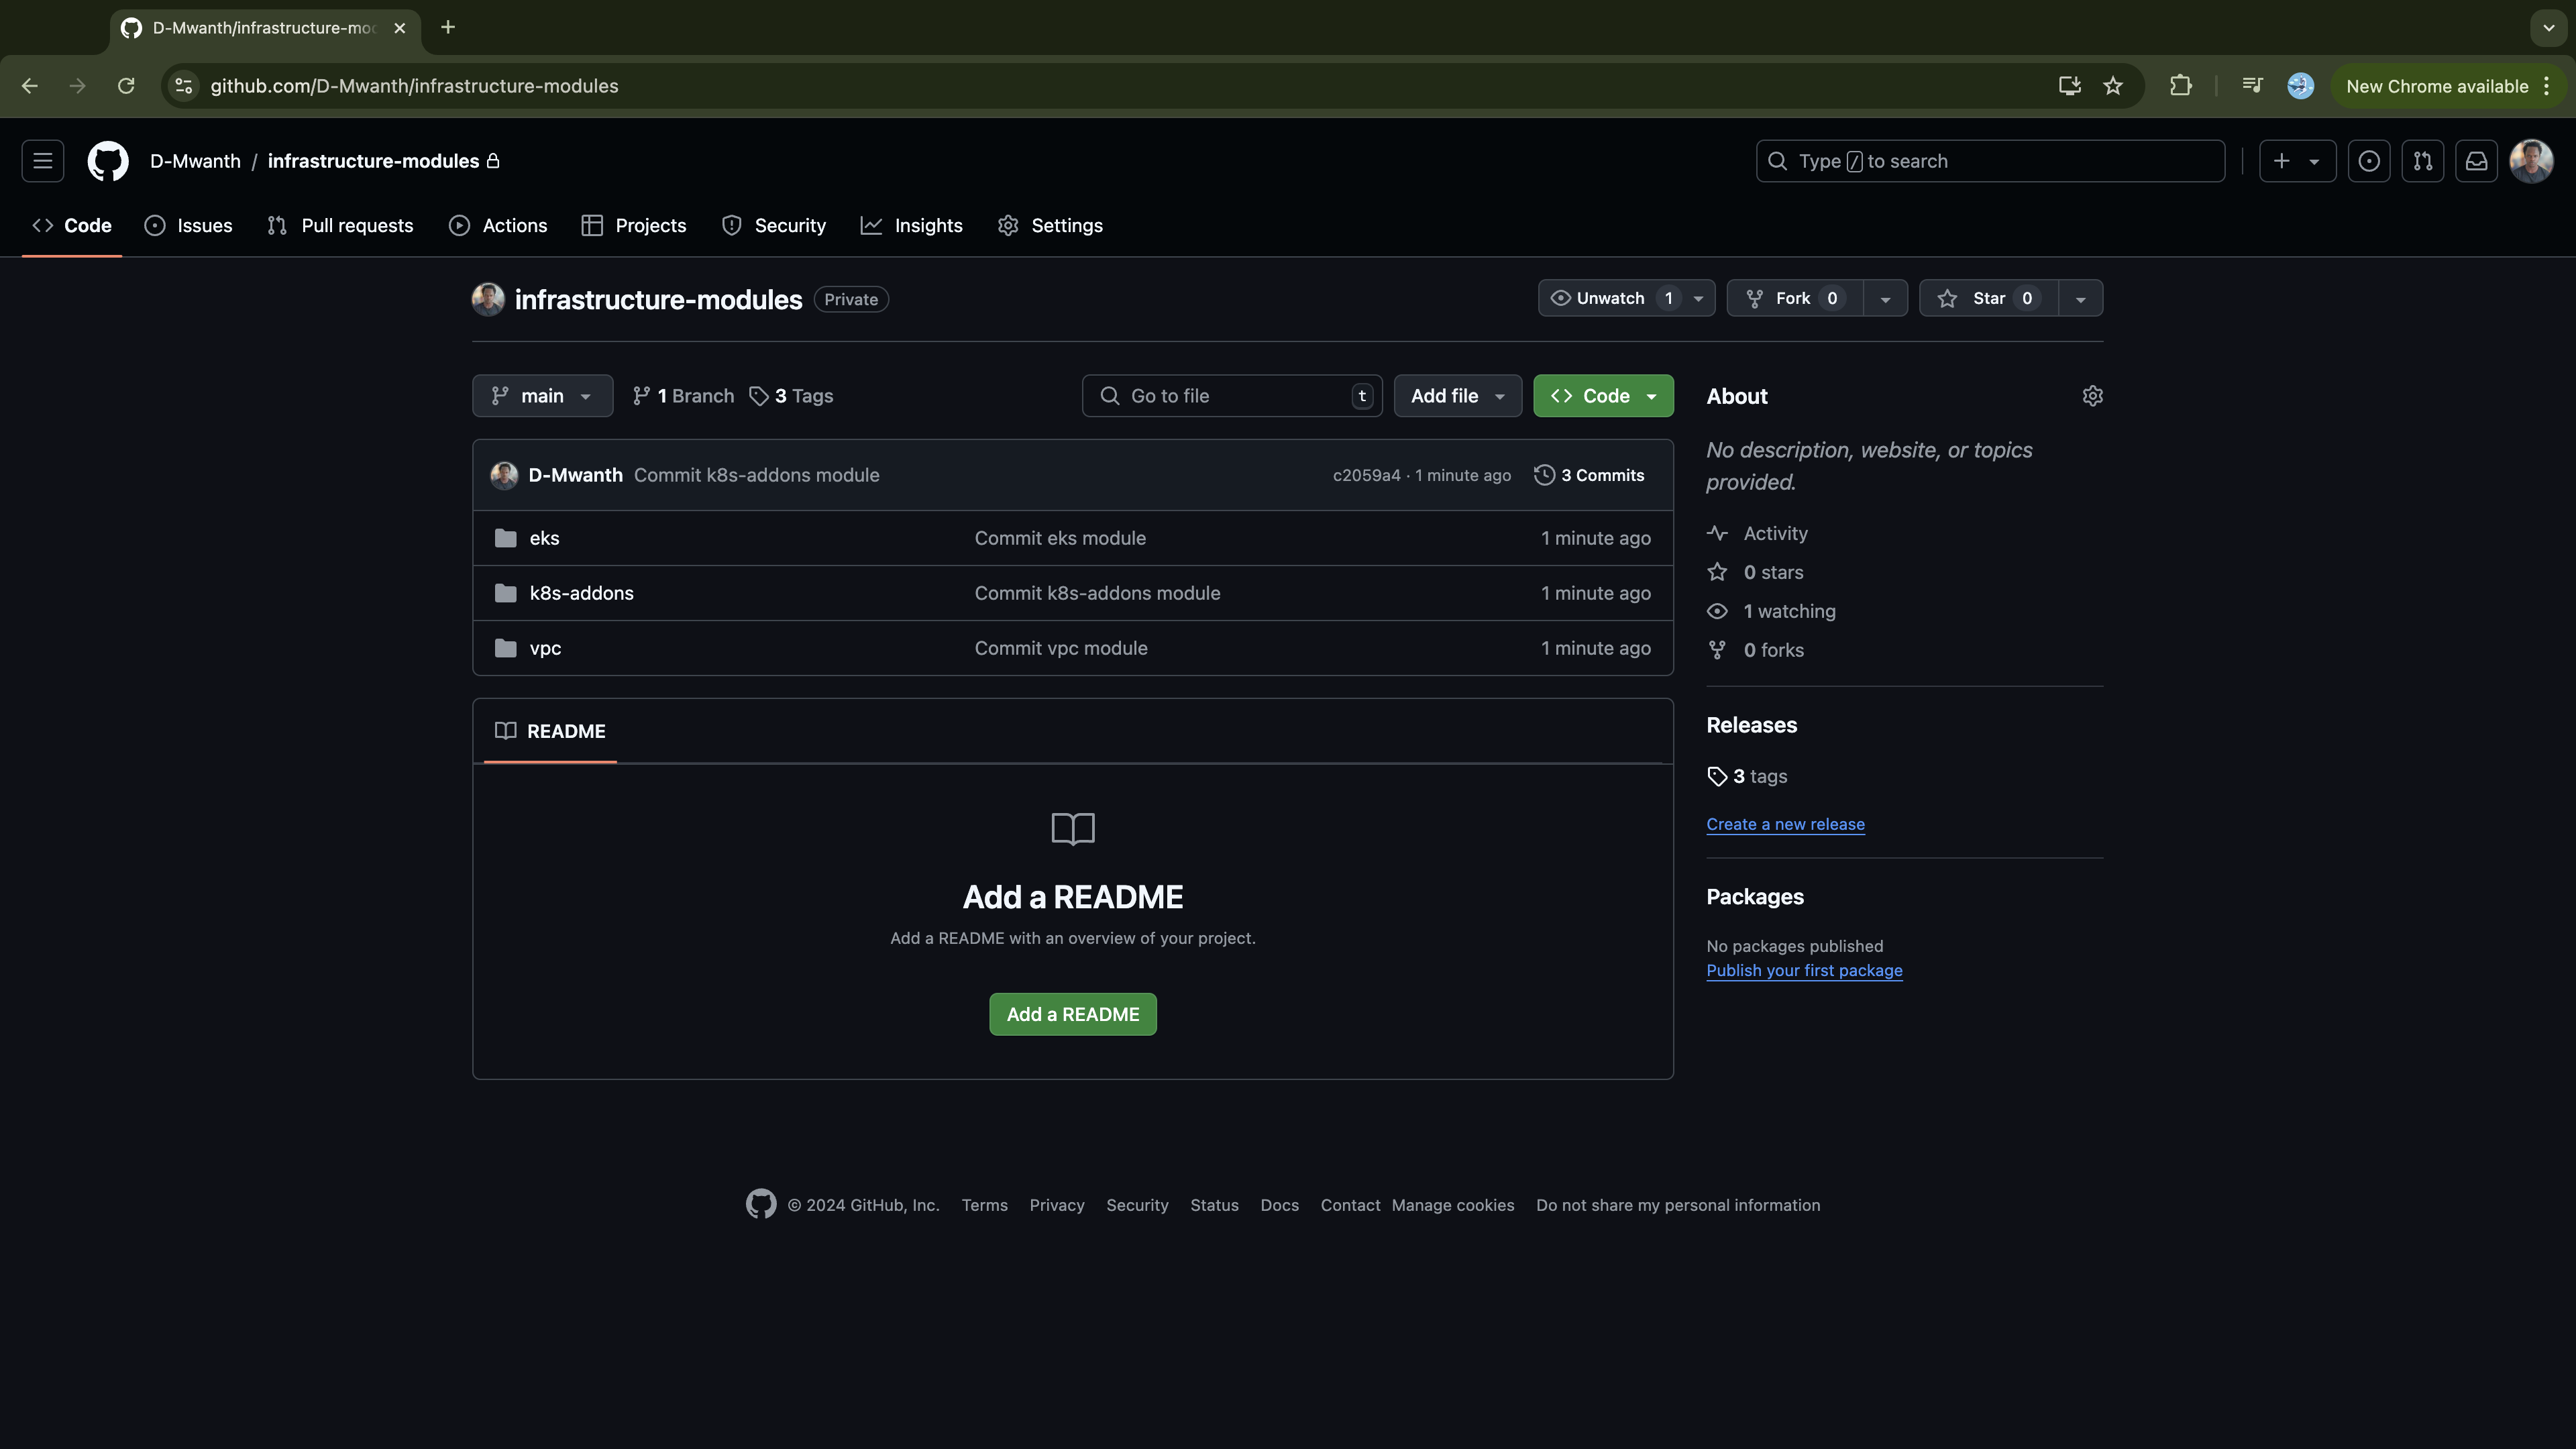
Also, verify that each module is specifically tagged.
Provisioning Multiple Kubernetes Clusters with Tarraform Modules and Terragrunt
In the previous session, we developed reusable Terraform modules for provisioning infrastructure on AWS. To provision multiple environments efficiently while adhering to the DRY (Don't Repeat Yourself) principle, we'll use Terragrunt. Terragrunt enables us to define all shared configurations in a centralized location, which environment-specific modules can access and customize according to their specifications. We’ll provide further details as we proceed.
First, execute the command below to establish your Terragrunt project setup:
mkdir -p ~/live-infrastructure/{dev,staging,prod} && touch ~/live-infrastructure/terragrunt.hcl
Verify that your directory structure matches the layout shown below:
$ cd ~/live-infrastructure && tree

.
├── dev
├── prod
├── staging
└── terragrunt.hcl

4 directories, 1 file
In this structure, live-infrastructure is the project directory. Within it, dev, staging, and prod are subdirectories for environment-specific Terragrunt configurations. The live-infrastructure/terragrunt.hcl file, located at the root level alongside the environment directories, will contain configurations that are shared across all environments, including provider settings, Terraform constraints, and backend configurations. Execute the command below to log these configurations into the file:
# Create the root terragrunt file
cat <<EOF > ~/live-infrastructure/terragrunt.hcl
# terraform state configuration
remote_state {
    backend = "s3"
    generate = {
        path = "backend.tf"
        if_exists = "overwrite_terragrunt"
    }

    config = {
        bucket = "infra-bucket-by-daniel"
        key = "\${path_relative_to_include()}/terraform.tfstate"
        region = "eu-north-1"
        encrypt = true
        dynamodb_table = "infra-terra-lock"
    }
}

generate "provider" {
    path = "provider.tf"
    if_exists = "overwrite_terragrunt"

    contents = <<EOF
    terraform {
      required_providers {
        aws = {
          source  = "hashicorp/aws"
          version = "~> 5.0"
        }
      }
    }

    provider "aws" {
        region = "eu-north-1"
    }
    EOF
}

EOF
In each cluster, we start by provisioning an Amazon VPC along with its components, which provide the foundational network infrastructure. Once the VPC is in place, we then deploy an Amazon EKS cluster within that VPC. After the cluster is successfully deployed, we move on to installing Kubernetes add-ons to extend its functionality. To manage the order of infrastructure deployment we need to pay careful attention to the dependencies. For instance, it is impossible to provision the EKS cluster before the VPC is set up, and likewise, Kubernetes add-ons cannot be deployed until the cluster exists. To manage these dependencies effectively, we need to organize how our Terraform modules are applied within each environment. Instead of using a single Terragrunt file to configure all Terraform modules, we will create individual Terragrunt files for each module and place them in their respective subdirectories within each environment directory. First, let's create these subdirectories across all environments:
# Create the vpc,eks,eks-addons directories in all environment folders
mkdir -p ~/live-infrastructure/{dev,staging,prod}/{vpc,eks,k8s-addons}
Inside these modules' subdirectories, across all three environments, create a terragrunt.hcl file that specifies the source of the corresponding Terraform module, the required input variables, and outlines any dependencies. First, let's define the configurations for instantiating the VPC module. Since the VPC infrastructure will be consistent across all environments, execute the following script to create this file in each environment.
for env in dev staging prod; do
  mkdir -p ~/live-infrastructure/$env/vpc
  cat <<EOF > ~/live-infrastructure/$env/vpc/terragrunt.hcl
terraform {
  source = "git@github.com:D-Mwanth/infrastructure-modules.git//vpc?ref=vpc-v0.0.1"
}

include "root" {
  path = find_in_parent_folders()
}

include "env" {
  path           = find_in_parent_folders("env.hcl")
  expose         = true
  merge_strategy = "no_merge"
}

inputs = {
  env             = include.env.locals.env
  azs             = ["eu-north-1a", "eu-north-1b"]
  private_subnets = ["10.0.0.0/19", "10.0.32.0/19"]
  public_subnets  = ["10.0.64.0/19", "10.0.96.0/19"]

  private_subnets_tags = {
    "kubernetes.io/role/internal-elb" = 1
    "kubernetes.io/cluster/$env-env-cluster"  = "owned"
  }

  public_subnets_tags = {
    "kubernetes.io/role/elb"         = 1
    "kubernetes.io/cluster/$env-env-cluster" = "owned"
  }
}
EOF

done
Note that we are referencing version v0.0.1 of the VPC module. Also, we are running this script directly from anywhere on the command line.
Next, run the following script to create Terragrunt configurations for deploying the EKS module across all three environments:
for env in dev staging prod; do
  if [ "$env" = "dev" ]; then
    instance_types="t3.medium"
    max_size=5
  elif [ "$env" = "staging" ]; then
    instance_types="t3.large"
    max_size=8
  elif [ "$env" = "prod" ]; then
    instance_types="t3.xlarge"
    max_size=10
  fi

  cat <<EOF > ~/live-infrastructure/$env/eks/terragrunt.hcl
terraform {
  source = "git@github.com:D-Mwanth/infrastructure-modules.git//eks?ref=eks-v0.0.1"
}

include "root" {
  path = find_in_parent_folders()
}

include "env" {
  path           = find_in_parent_folders("env.hcl")
  expose         = true
  merge_strategy = "no_merge"
}

inputs = {
  eks_version = "1.30"
  env         = include.env.locals.env
  eks_name    = "env-cluster"
  subnet_ids  = dependency.vpc.outputs.private_subnets

  node_groups = {
    general = {
      capacity_type  = "ON_DEMAND"
      instance_types = ["$instance_types"]
      scaling_config = {
        desired_size = 2
        max_size     = $max_size
        min_size     = 1
      }
    }
  }
}

dependency "vpc" {
  config_path = "../vpc"
  mock_outputs = {
    private_subnets = ["subnet-1234", "subnet-5678"]
  }
}
EOF

done
This script configures instance types and node group maximum sizes capacity with varying values across different environments. We are configuring Terragrunt to download version v0.0.1 of the EKS module across all environments. It's also configured to inherits settings from parent folders (include.root) and environment-specific settings (include.env) without merging them. All required inputs for the Terraform modules are provided within the inputs block. Additionally, the deployment of this module relies on the VPC module, as indicated in the dependency block.
Next, execute the following script to generate Terragrunt configurations for deploying the k8s-addons module across all three environments:
for env in dev staging prod; do
cat <<EOH > ~/live-infrastructure/$env/k8s-addons/terragrunt.hcl
terraform {
  source = "git@github.com:D-Mwanth/infrastructure-modules.git//k8s-addons?ref=k8s-addons-v0.0.1"
}

include "root" {
  path = find_in_parent_folders()
}

include "env" {
  path           = find_in_parent_folders("env.hcl")
  expose         = true
  merge_strategy = "no_merge"
}

inputs = {
  env      = include.env.locals.env
  eks_name = dependency.eks.outputs.eks_name
  vpc_id = dependency.vpc.outputs.vpc_id
  cluster_autoscaler_helm_version = "9.28.0"
}

# Specify dependencies
dependency "eks" {
  config_path = "../eks"
  mock_outputs = {
    eks_name            = "env-cluster"
  }
}

# Input for the Load Balancer module in the next session
dependency "vpc" {
  config_path = "../vpc"
  mock_outputs = {
    vpc_id = "vpc-12345678"
  }
}

# Generate helm provider configurations
generate "helm_provider" {
  path      = "helm-provider.tf"
  if_exists = "overwrite_terragrunt"
  contents  = <<EOF
data "aws_eks_cluster" "eks" {
    name = var.eks_name
}

data "aws_eks_cluster_auth" "eks" {
    name = var.eks_name
}

provider "helm" {
  kubernetes {
    host                   = data.aws_eks_cluster.eks.endpoint
    cluster_ca_certificate = base64decode(data.aws_eks_cluster.eks.certificate_authority[0].data)
    token = data.aws_eks_cluster_auth.eks.token
  }
}
EOF
}
EOH

done
Finally, run the script below to assign the name of each environment as a local variable specific to that environment:
for env in dev staging prod; do
  cat <<EOF > ~/live-infrastructure/$env/env.hcl
locals {
    env = "$env"
}
EOF

done
Terragrunt is fully configured to deploy resources across all three environments. At this stage, your project directory structure should resemble the one shown below:
$ tree
.
├── dev
│   ├── eks
│   │   └── terragrunt.hcl
│   ├── env.hcl
│   ├── k8s-addons
│   │   └── terragrunt.hcl
│   └── vpc
│       └── terragrunt.hcl
├── prod
│   ├── eks
│   │   └── terragrunt.hcl
│   ├── env.hcl
│   ├── k8s-addons
│   │   └── terragrunt.hcl
│   └── vpc
│       └── terragrunt.hcl
├── staging
│   ├── eks
│   │   └── terragrunt.hcl
│   ├── env.hcl
│   ├── k8s-addons
│   │   └── terragrunt.hcl
│   └── vpc
│       └── terragrunt.hcl
└── terragrunt.hcl

13 directories, 13 files
Local infrastructure testing
Now we can run Terragrunt to deploy the infrastructure for each environment, but first let's validate our code is error free across all environments:
# Validate your code
$ cd ~/live-infrastructure/ && terragrunt run-all validate --terragrunt-non-interactive

INFO[0000] The stack at /home/ubuntu/live-infrastructure will be processed in the following order for command validate:
Group 1
- Module /home/ubuntu/live-infrastructure/dev/vpc
- Module /home/ubuntu/live-infrastructure/prod/vpc
- Module /home/ubuntu/live-infrastructure/staging/vpc

Group 2
- Module /home/ubuntu/live-infrastructure/dev/eks
- Module /home/ubuntu/live-infrastructure/prod/eks
- Module /home/ubuntu/live-infrastructure/staging/eks

Group 3
- Module /home/ubuntu/live-infrastructure/dev/k8s-addons
- Module /home/ubuntu/live-infrastructure/prod/k8s-addons
- Module /home/ubuntu/live-infrastructure/staging/k8s-addons

INFO[0000] Downloading Terraform configurations from git::ssh://git@github.com/D-Mwanth/infrastructure-modules.git?ref=vpc-v0.0.1 into /home/ubuntu/live-infrastructure/dev/vpc/.terragrunt-cache/VxJ5XGvwMfvypF9Yw7vAmvC52f4/RPkR83ye5TQq2QmyRR4mBmLw7v8  prefix=[/home/ubuntu/live-infrastructure/dev/vpc]
INFO[0000] Downloading Terraform configurations from git::ssh://git@github.com/D-Mwanth/infrastructure-modules.git?ref=vpc-v0.0.1 into /home/ubuntu/live-infrastructure/prod/vpc/.terragrunt-cache/2NDIsQ0YKy4O5gBRw6Vm6k9KNNI/RPkR83ye5TQq2QmyRR4mBmLw7v8  prefix=[/home/ubuntu/live-infrastructure/prod/vpc]
INFO[0000] Downloading Terraform configurations from git::ssh://git@github.com/D-Mwanth/infrastructure-modules.git?ref=vpc-v0.0.1 into /home/ubuntu/live-infrastructure/staging/vpc/.terragrunt-cache/aO29Fw8eiNvxSDDPJ8ymKqg1wJg/RPkR83ye5TQq2QmyRR4mBmLw7v8  prefix=[/home/ubuntu/live-infrastructure/staging/vpc]
Success! The configuration is valid.

Success! The configuration is valid.

Success! The configuration is valid.

INFO[0020] Downloading Terraform configurations from git::ssh://git@github.com/D-Mwanth/infrastructure-modules.git?ref=eks-v0.0.1 into /home/ubuntu/live-infrastructure/dev/eks/.terragrunt-cache/qq20b5k2Fss2ln2JQ1YtC1bQFlk/RPkR83ye5TQq2QmyRR4mBmLw7v8  prefix=[/home/ubuntu/live-infrastructure/dev/eks]
INFO[0021] Downloading Terraform configurations from git::ssh://git@github.com/D-Mwanth/infrastructure-modules.git?ref=eks-v0.0.1 into /home/ubuntu/live-infrastructure/staging/eks/.terragrunt-cache/OJGkARGLr_F7rATfRgdP74bPKM0/RPkR83ye5TQq2QmyRR4mBmLw7v8  prefix=[/home/ubuntu/live-infrastructure/staging/eks]
INFO[0021] Downloading Terraform configurations from git::ssh://git@github.com/D-Mwanth/infrastructure-modules.git?ref=eks-v0.0.1 into /home/ubuntu/live-infrastructure/prod/eks/.terragrunt-cache/6DMZL1siP5XHVewyxAJ-kfhhcSc/RPkR83ye5TQq2QmyRR4mBmLw7v8  prefix=[/home/ubuntu/live-infrastructure/prod/eks]
Success! The configuration is valid.

Success! The configuration is valid.

Success! The configuration is valid.

INFO[0040] Downloading Terraform configurations from git::ssh://git@github.com/D-Mwanth/infrastructure-modules.git?ref=k8s-addons-v0.0.1 into /home/ubuntu/live-infrastructure/staging/k8s-addons/.terragrunt-cache/XPa7nSkiyixNHBsVrbgmVlHOOAg/RPkR83ye5TQq2QmyRR4mBmLw7v8  prefix=[/home/ubuntu/live-infrastructure/staging/k8s-addons]
INFO[0040] Downloading Terraform configurations from git::ssh://git@github.com/D-Mwanth/infrastructure-modules.git?ref=k8s-addons-v0.0.1 into /home/ubuntu/live-infrastructure/dev/k8s-addons/.terragrunt-cache/RqgoPMA0XRZQ5OXdJhMs5iUOLqo/RPkR83ye5TQq2QmyRR4mBmLw7v8  prefix=[/home/ubuntu/live-infrastructure/dev/k8s-addons]
INFO[0041] Downloading Terraform configurations from git::ssh://git@github.com/D-Mwanth/infrastructure-modules.git?ref=k8s-addons-v0.0.1 into /home/ubuntu/live-infrastructure/prod/k8s-addons/.terragrunt-cache/aEUvp2k_WrWGYfrQeoC-3Nvm6Fw/RPkR83ye5TQq2QmyRR4mBmLw7v8  prefix=[/home/ubuntu/live-infrastructure/prod/k8s-addons]
Success! The configuration is valid.

Success! The configuration is valid.

Success! The configuration is valid.
Now, apply Terragrunt to deploy the infrastructure. We'll start by applying the configurations for the dev environment only, ensuring everything is working properly before automating the release process across all three environments with GitHub Actions.
# If validation exists without an error apply the changes
cd ~/live-infrastructure/dev && terragrunt run-all apply --auto-approve --terragrunt-non-interactive
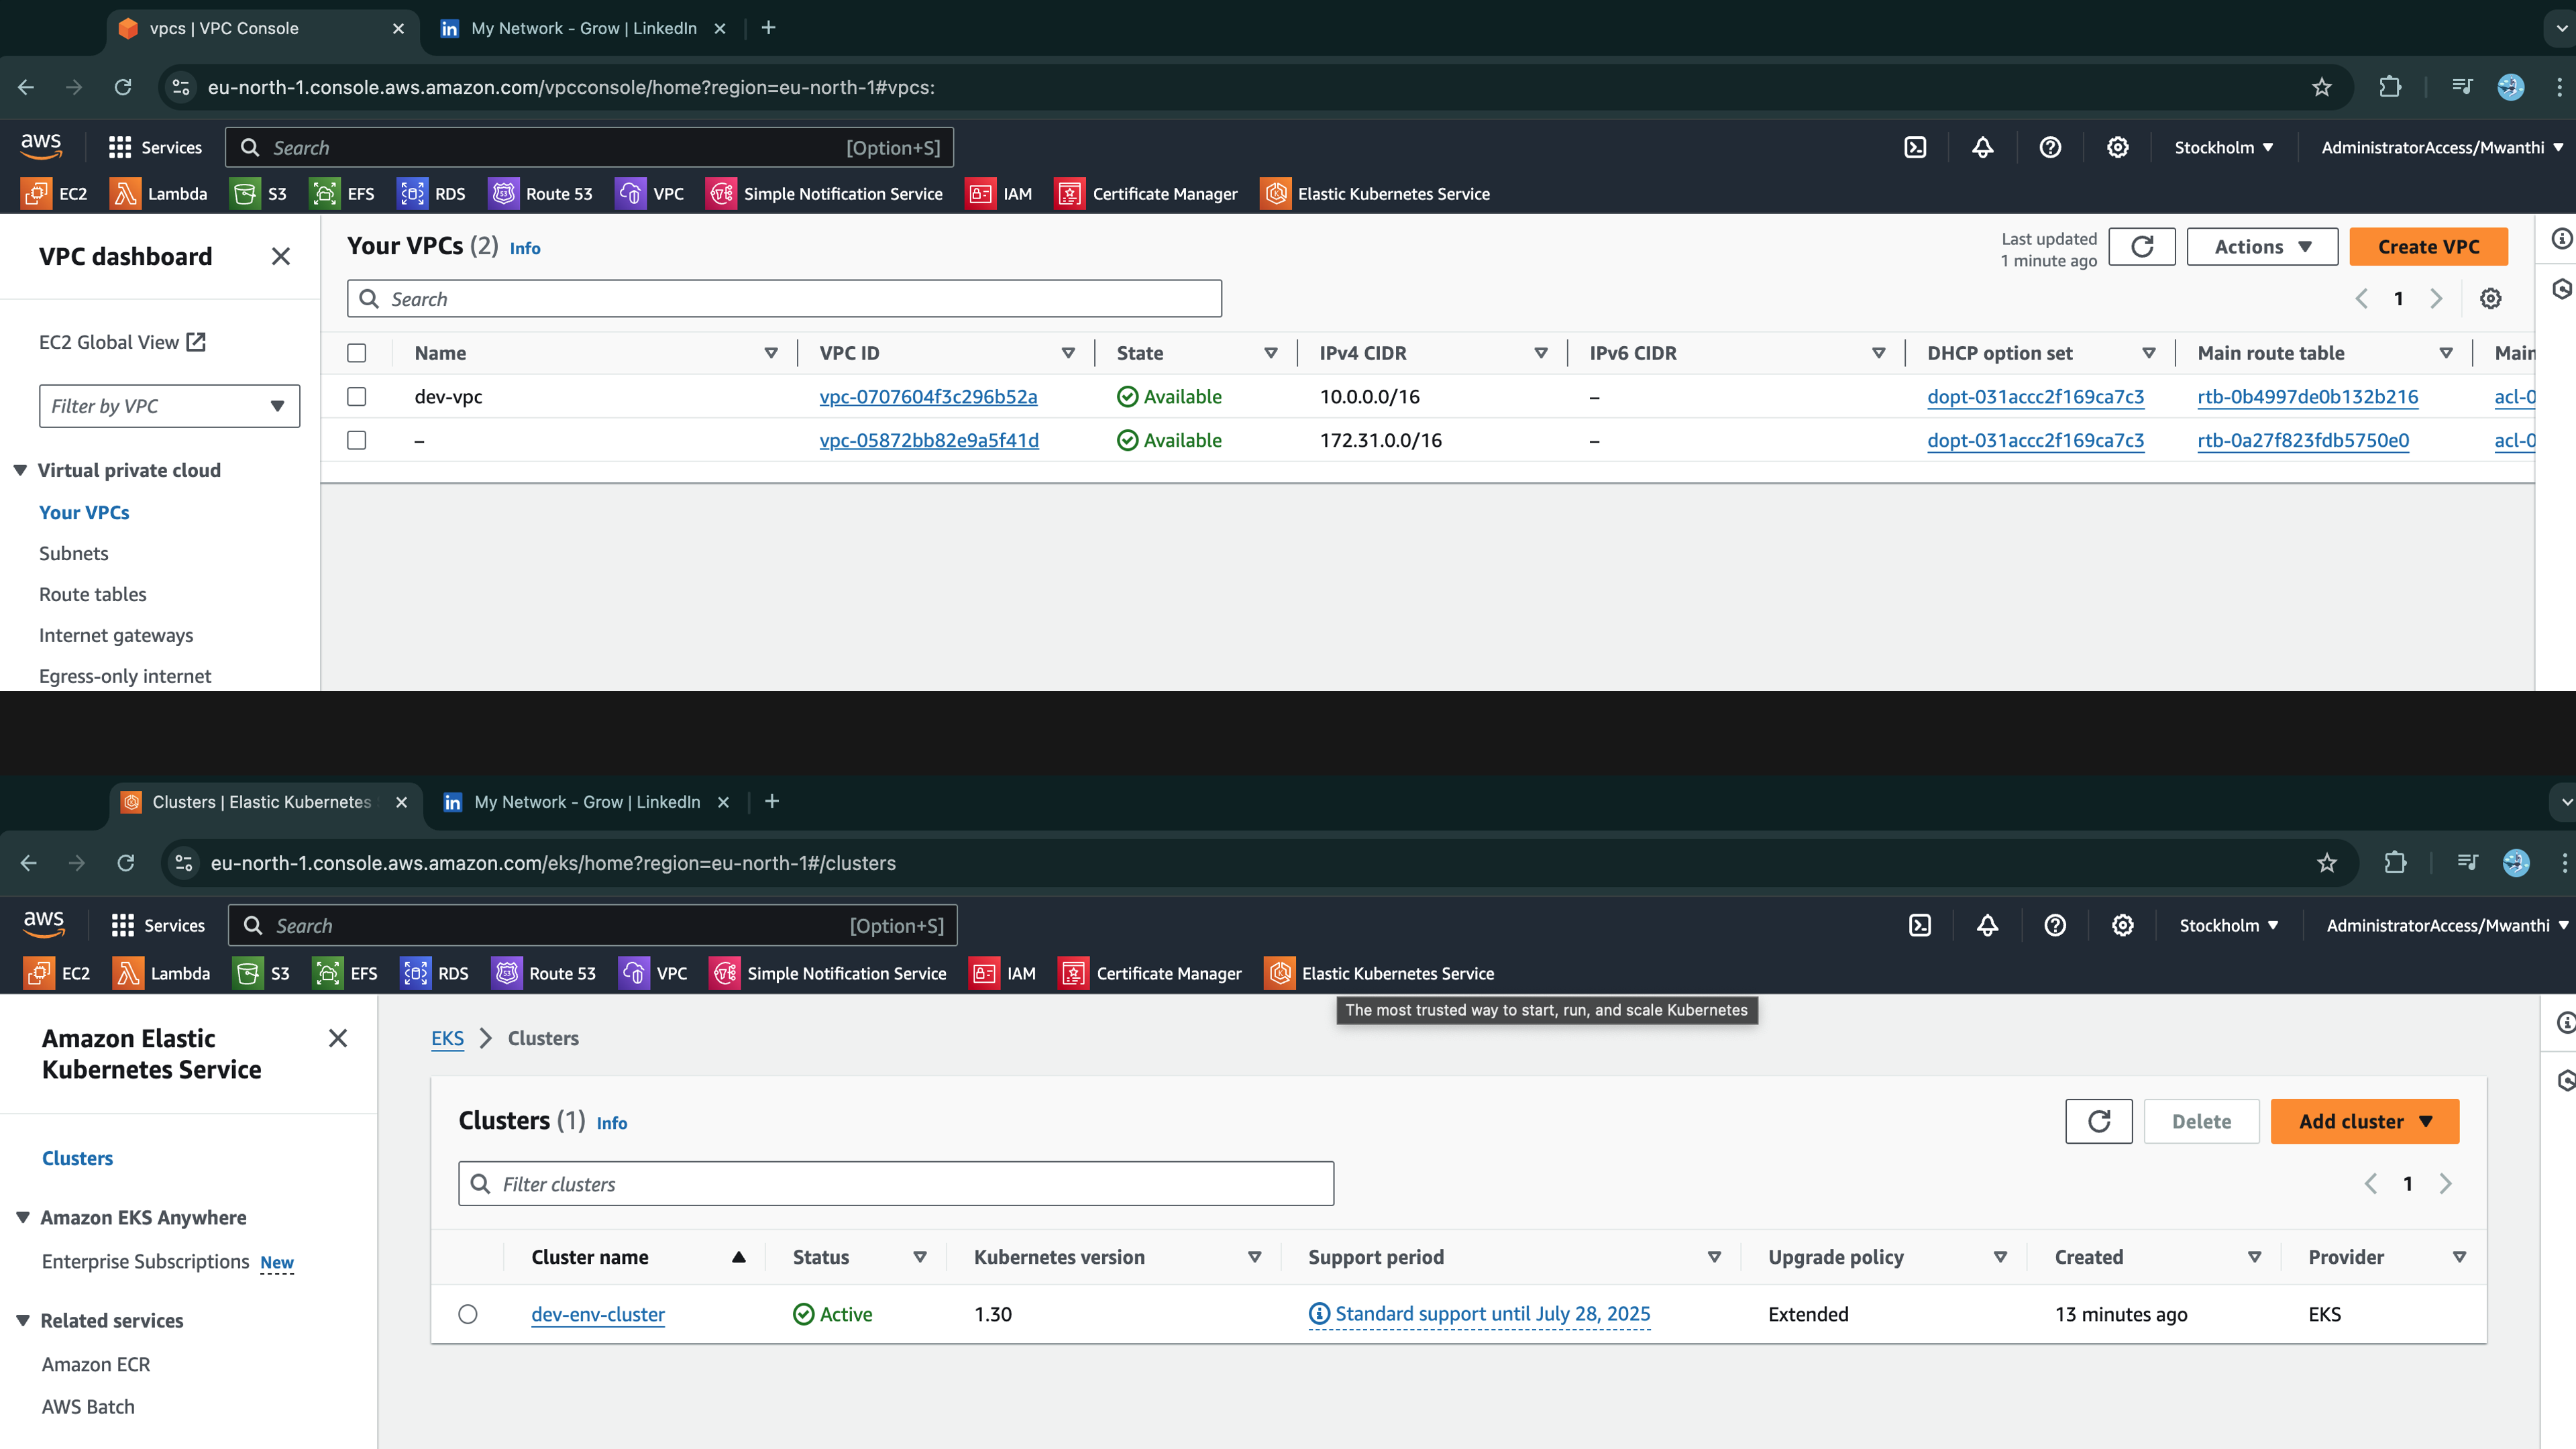
The process will take approximately 10-15 minutes to complete. Once it finishes successfully, go to AWS and verify that a VPC and EKS cluster have been deployed as shown below:
Let's confirm we can access the cluster by checking our authentication with the Kubernetes API:
# Configures kubeconfig with dev-env-cluster credentials
$ aws eks update-kubeconfig --region eu-north-1 --name dev-env-cluster
- Check nodes in our cluster:
$ kubectl get nodes
NAME                                         STATUS   ROLES    AGE     VERSION
ip-10-0-12-128.eu-north-1.compute.internal   Ready    <none>   4m12s   v1.30.2-eks-1552ad0
ip-10-0-46-252.eu-north-1.compute.internal   Ready    <none>   4m13s   v1.30.2-eks-1552ad0
Check the installed add-ons are up and running (cluster autoscaler, pod identity, and metric-server):
$ kubectl get pods -n kube-system
NAME                                                READY   STATUS    RESTARTS   AGE
autoscaler-aws-cluster-autoscaler-ffb695cd5-2sxxk   1/1     Running   0          3m29s
aws-node-944pm                                      2/2     Running   0          4m57s
aws-node-qf72p                                      2/2     Running   0          4m56s
coredns-75b6b75957-77wnm                            1/1     Running   0          6m37s
coredns-75b6b75957-rmdwd                            1/1     Running   0          6m37s
eks-pod-identity-agent-7jrn7                        1/1     Running   0          3m58s
eks-pod-identity-agent-fzgp4                        1/1     Running   0          3m58s
kube-proxy-lp4rk                                    1/1     Running   0          4m56s
kube-proxy-rbkmw                                    1/1     Running   0          4m57s
metrics-server-6b76f9fd75-7ldhl                     1/1     Running   0          4m3s
The cluster was successfully deployed, and we have confirmed that our configurations work as expected. We won’t be testing the cluster’s deployment capabilities and accessibility at this stage; we'll address that in the next session. For now, let's destroy the infrastructure:
terragrunt run-all destroy --auto-approve --terragrunt-non-interactive
Automating infrastructure Deployment with Github Actions
Now, initialize Git in the live-infrastructure project directory and create a remote repository to host your Terragrunt configurations:
cd ~/live-infrastructure
# Initialize Git
git init
If your initial branch is named master make sure to rename it as main:
git branch -m main
Create a repository on Github, call it say, live-infrastracture:
# Running this command from my local system, which has the gh CLI installed and configured.
gh repo create live-infrastructure --private
Add the live-infrastructure as the remote repostory to your local Git repository:
git remote add origin git@github.com:D-Mwanth/live-infrastructure.git
Before committing the changes, create a .gitignore file and specify the configurations to ignore:
# Create the .gitignore file at the root of the project folder
cat <<EOF > ~/live-infrastructure/.gitignore
**/.terragrunt-cache/
**/.terraform.lock.hcl
EOF
Now, stage, commit, and push the changes to the remote repository:
# Stage all changes
git add .

# Commit the changes
git commit -m "Initial commit"

# Push changes to the remote repository
git push -u origin main
Now, instead of executing Terragrunt manually, this time let’s create a GitHub Actions workflow to automate this process. First, create a .github directory at the root of your Terragrunt project, and inside it, create a workflows subdirectory.
mkdir -p ~/live-infrastructure/.github/workflows
Execute the following script from the command line to create the GitHub Actions workflow:
cat << EOF > ~/live-infrastructure/.github/workflows/workflow.yaml
name: Terragrunt CI 🚀

on:
  push:
    branches:
      - main
  workflow_dispatch:
    inputs:
      working-directory:
        description: 'The working directory for Terragrunt'
        required: true
        default: './dev'

jobs:
  terragrunt:
    name: Terragrunt Execution
    runs-on: ubuntu-latest

    permissions:
      id-token: write
      contents: read

    steps:
    - name: Checkout code
      uses: actions/checkout@v3

    - name: Configure AWS credentials
      uses: aws-actions/configure-aws-credentials@v4
      with:
        role-to-assume: \${{ secrets.IAM_ROLE_ARN }}
        aws-region: eu-north-1

    - name: Set up Terraform
      uses: hashicorp/setup-terraform@v3
      with:
        terraform_version: 1.9.4

    # We could use a pre-built action, but Terragrunt is a lightweight package that installs quickly
    - name: Install Terragrunt
      run: |
        curl -LO https://github.com/gruntwork-io/terragrunt/releases/download/v0.62.3/terragrunt_linux_amd64
        chmod u+x terragrunt_linux_amd64
        sudo mv terragrunt_linux_amd64 /usr/local/bin/terragrunt

    - name: Set up SSH key
      run: |
        mkdir -p ~/.ssh
        echo "\${{ secrets.SSH_PRIVATE_KEY }}" > ~/.ssh/id_rsa
        chmod 600 ~/.ssh/id_rsa
        ssh-keyscan github.com >> ~/.ssh/known_hosts

    - name: Determine Work-Directory
      id: set-dir
      run: |
        if [ "\${{ github.event_name }}" == "push" ]; then
          echo "WORKING_DIRECTORY=./" >> \$GITHUB_ENV
        else
          echo "WORKING_DIRECTORY=\${{ github.event.inputs['working-directory'] }}" >> \$GITHUB_ENV
        fi

    - name: Terragrunt Apply
      run: terragrunt run-all apply --auto-approve --terragrunt-non-interactive
      working-directory: \${{ env.WORKING_DIRECTORY }}
EOF
This workflow automatically runs on pushes to the main branch and can also be manually triggered from the Actions UI, which is useful for targeted debugging. When triggered, the workflow checks out the code, configure AWS credentials using IAM role (Recommended approach) whose ARN is provided through repository secret, sets up Terraform, installs Terragrunt, set up Github SSH key on the runner to enable it to download modules through ssh from our modules private repository, and applies the configuration using run-all apply Terragrunt command. The Determine Work-Directory step sets the WORKING_DIRECTORY environment variable to the root of the project folder (./) for push events, or to the user-specified directory for manual triggers via workflow_dispatch, defaulting to dev directory (./dev) if not provided. The working-directory for the Terragrunt Apply step is then set to ${{ env.WORKING_DIRECTORY }}, reflecting the determined directory.
This workflow assumes a role to authenticate with AWS and deploy infrastructure. Using roles is preferred over IAM users because roles provide temporary credentials and can be scoped to specific actions, which enhances security and minimizes the risk of long-term credential exposure. We haven't created the role yet. While we could create a new role for GitHub Actions, doing so might cause access issues for our Admin Server (EC2 instance) since the role attached to the instance differs from the one used to create the cluster, as highlighted below:
$ aws eks update-kubeconfig --region eu-north-1 --name dev-env-cluster

Updated context arn:aws:eks:eu-north-1:848055118036:cluster/dev-env-cluster in /home/ubuntu/.kube/config

ubuntu@dev-enviroment:~$ kubectl get nodes

E0906 10:45:45.798713    1747 memcache.go:265] couldn't get current server API group list: the server has asked for the client to provide credentials
E0906 10:45:46.794482    1747 memcache.go:265] couldn't get current server API group list: the server has asked for the client to provide credentials
E0906 10:45:47.828315    1747 memcache.go:265] couldn't get current server API group list: the server has asked for the client to provide credentials
E0906 10:45:48.799034    1747 memcache.go:265] couldn't get current server API group list: the server has asked for the client to provide credentials
E0906 10:45:50.000532    1747 memcache.go:265] couldn't get current server API group list: the server has asked for the client to provide credentials
error: You must be logged in to the server (the server has asked for the client to provide credentials)
There are several ways to address this, but the most straightforward approach would be to associate the GitHub Actions workflow with the same IAM role that’s assigned to the Admin Server (EC2 instance). Currently, the IAM role assumed by the Admin Server has a trust policy that restricts it to being assumed only by an EC2 instances. To allow GitHub Actions to assume this role, we need to update the trust policy. Let’s modify the role to permit authentication by GitHub Actions using OpenID Connect (OIDC) and enabling secure access to AWS.
Create an OpenID Connect Provider
First we need to create an OIDC provider in IAM.
aws iam create-open-id-connect-provider \
  --url "https://token.actions.githubusercontent.com" \
  --client-id-list "sts.amazonaws.com" \
  --thumbprint-list "6938fd4d98bab03faadb97b34396831e3780aea1"
Upon successful creation, AWS will return the OpenID Connect Provider ARN:
{
    "OpenIDConnectProviderArn": "arn:aws:iam::<account-id>:oidc-provider/token.actions.githubusercontent.com"
}
Update the IAM Role's Trust Relationship
Now we need to update the trust policy associated with our terra-ec2-Role role to allows GitHub Actions to assume the role, along with the associated permissions to deploy AWS resources.
First let's create a trust policy document file with updated trust policy
cat <<EOF > trust-policy.json
{
  "Version": "2012-10-17",
  "Statement": [
    {
      "Effect": "Allow",
      "Principal": {
        "Service": "ec2.amazonaws.com"
      },
      "Action": "sts:AssumeRole"
    },
    {
      "Effect": "Allow",
      "Principal": {
        "Federated": "arn:aws:iam::<account-id>:oidc-provider/token.actions.githubusercontent.com"
      },
      "Action": "sts:AssumeRoleWithWebIdentity",
      "Condition": {
        "StringLike": {
          "token.actions.githubusercontent.com:sub": "repo:D-Mwanth/live-infrastructure:ref:refs/heads/main"
        },
        "StringEquals": {
          "token.actions.githubusercontent.com:aud": "sts.amazonaws.com"
        }
      }
    }
  ]
}
EOF
Replace with your AWS account ID.
Replace
D-Mwanth/live-infrastructurewith your GitHub repository (inowner/repoformat).Replace
mainwith the branch that will assume the role (such asmainordev).
Update the IAM Role
Before updating the IAM role’s trust policy, first retrieve and review the current one:
% aws iam get-role --role-name terra-ec2-Role --query "Role.AssumeRolePolicyDocument" --output json

{
    "Version": "2012-10-17",
    "Statement": [
        {
            "Effect": "Allow",
            "Principal": {
                "Service": "ec2.amazonaws.com"
            },
            "Action": "sts:AssumeRole"
        }
    ]
}
Now run the command below to update it:
aws iam update-assume-role-policy --role-name terra-ec2-Role --policy-document file://trust-policy.json
Now, retrieve and review it again to ensure the trust policy was upadate:
% aws iam get-role --role-name terra-ec2-Role --query "Role.AssumeRolePolicyDocument" --output json
{
    "Version": "2012-10-17",
    "Statement": [
        {
            "Effect": "Allow",
            "Principal": {
                "Service": "ec2.amazonaws.com"
            },
            "Action": "sts:AssumeRole"
        },
        {
            "Effect": "Allow",
            "Principal": {
                "Federated": "arn:aws:iam::848055118036:oidc-provider/token.actions.githubusercontent.com"
            },
            "Action": "sts:AssumeRoleWithWebIdentity",
            "Condition": {
                "StringEquals": {
                    "token.actions.githubusercontent.com:aud": "sts.amazonaws.com"
                },
                "StringLike": {
                    "token.actions.githubusercontent.com:sub": "repo:D-Mwanth/live-infrastructure:ref:refs/heads/main"
                }
            }
        }
    ]
}
Initially, we had granted administrative permissions to our role, so no additional permissions are needed, as the role already has full access to the cloud.
Note: Administrative access provides full permissions to AWS resources, which is useful for testing but not recommended for production. In a production environment, it is advisable to define a more restrictive IAM policy.
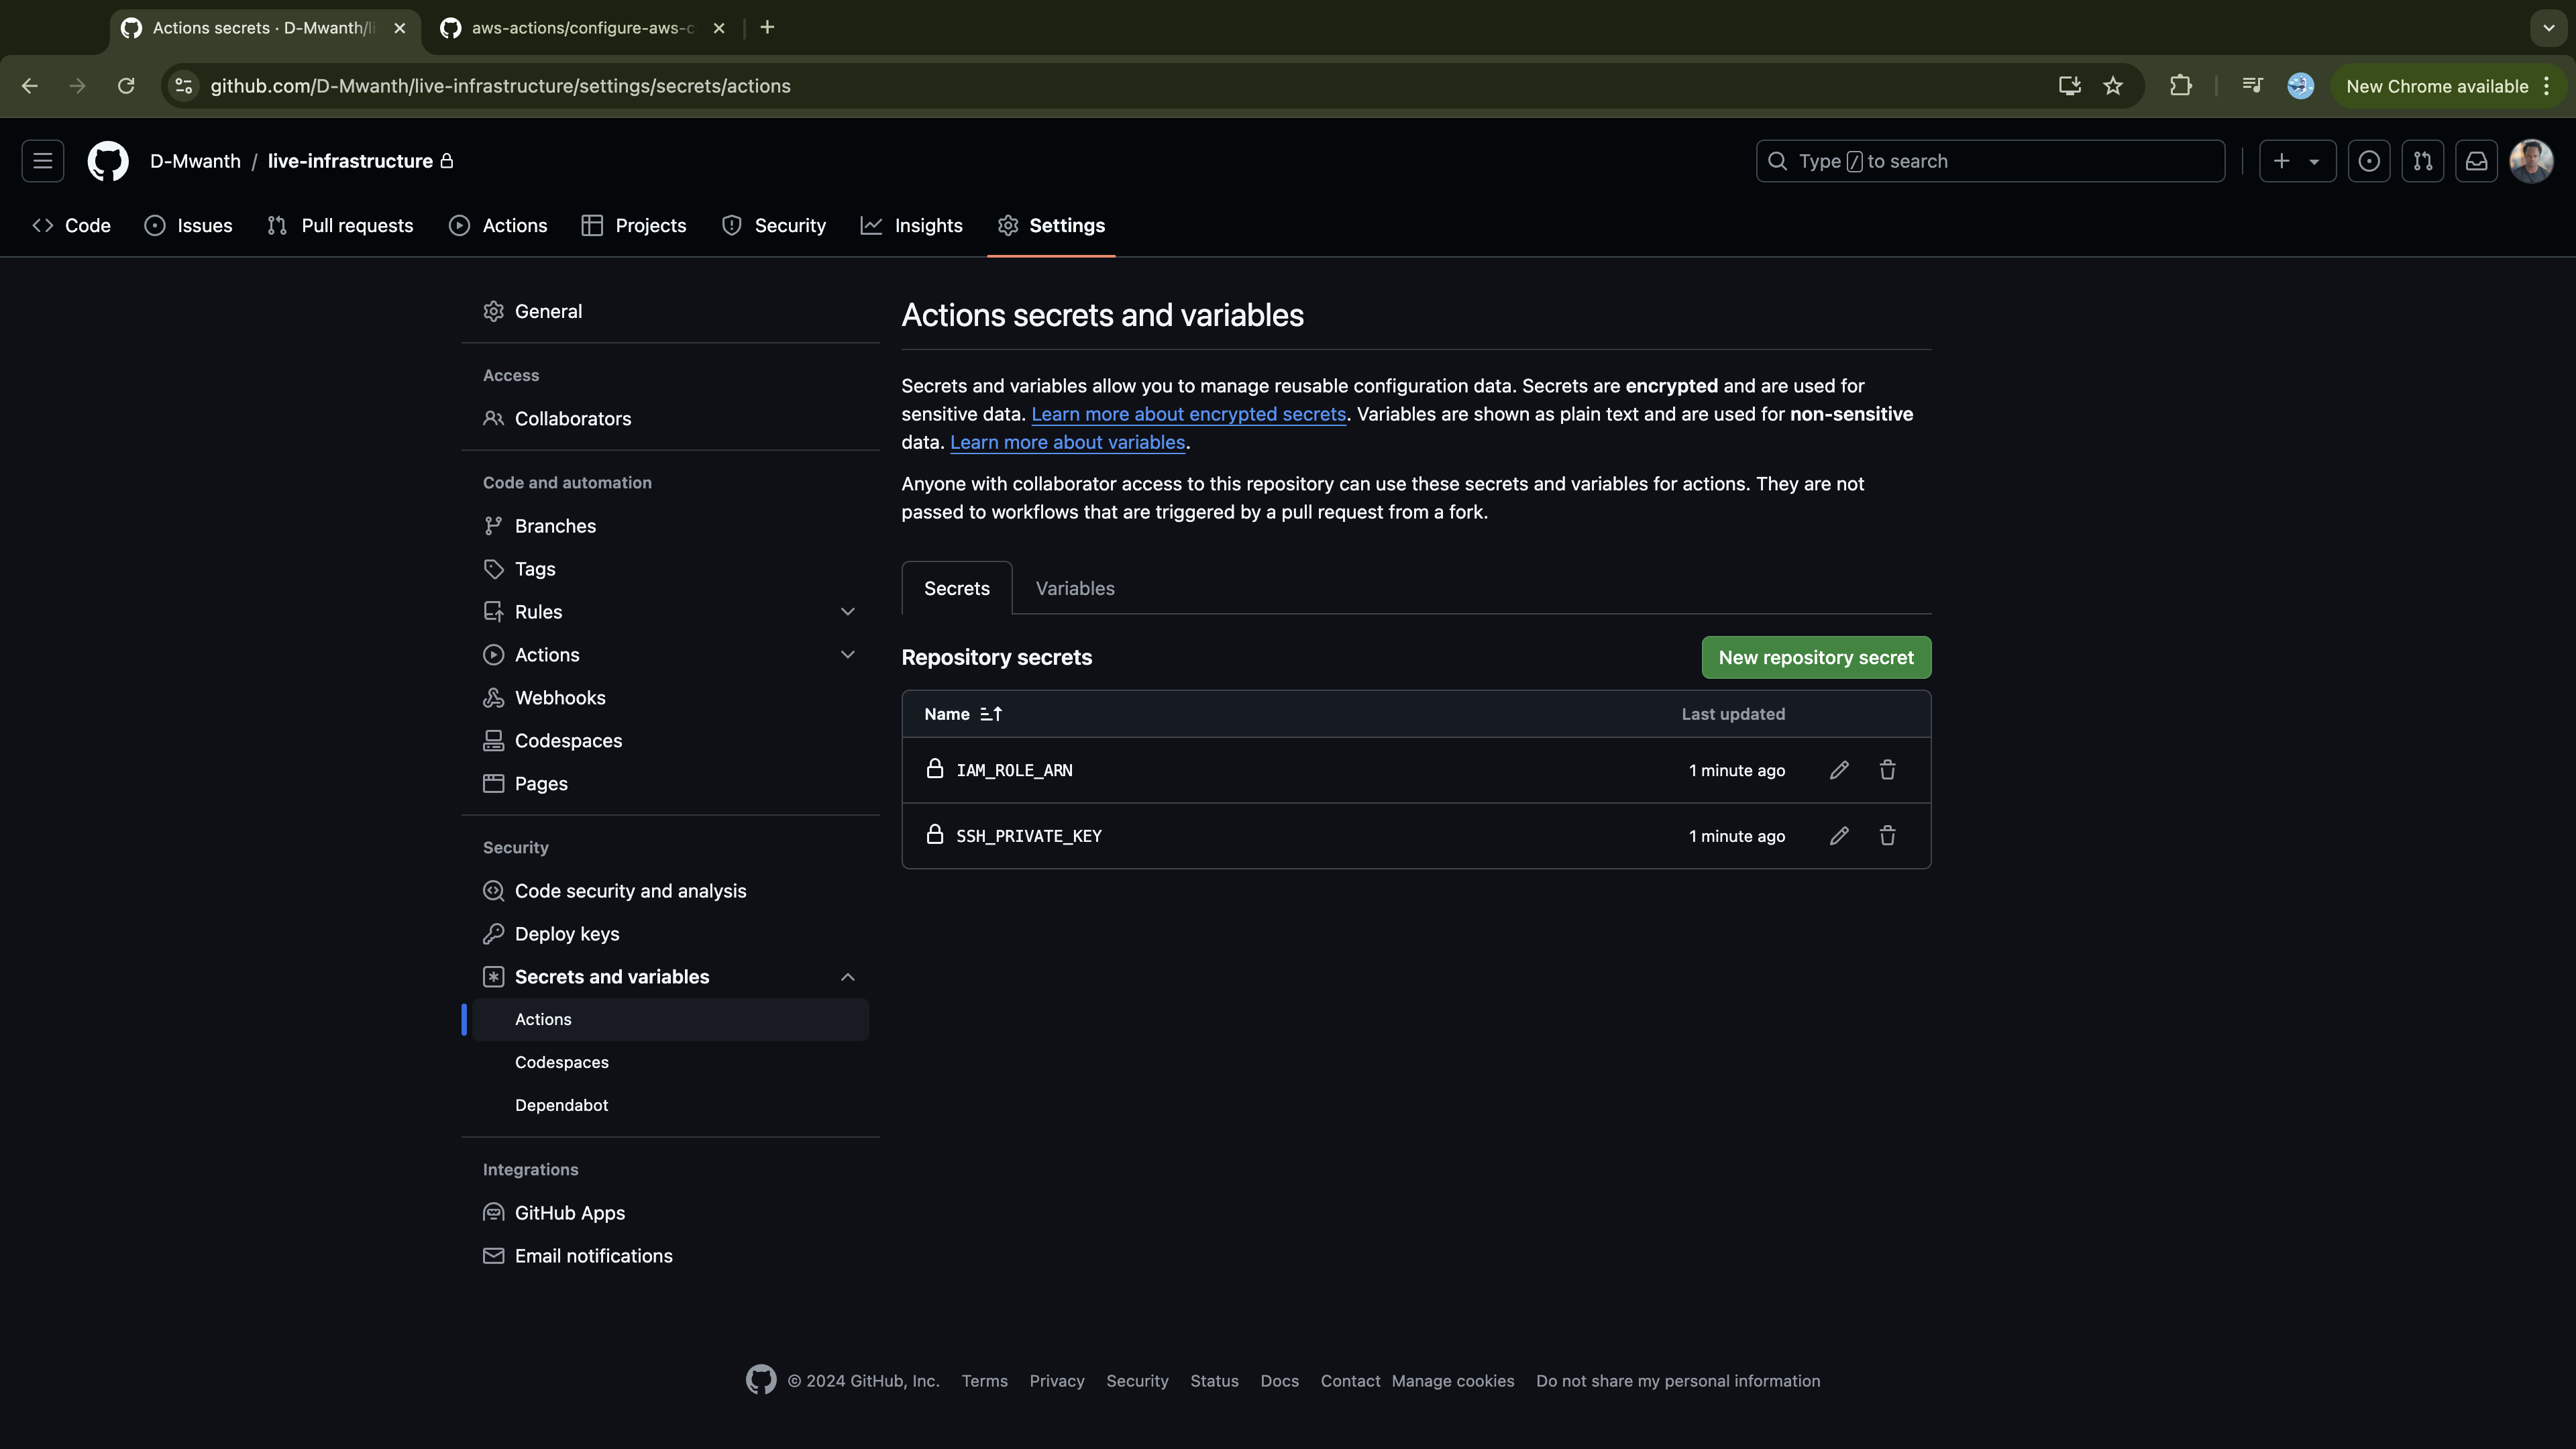
Now we need to set the secrets referenced by our workflow in the repository as repository secrets. This includes an SSH key for GitHub authentication, since GitHub Actions will download Terraform modules from our private modules repository, and the IAM role ARN used to authenticate the GitHub Actions with AWS. Let’s quickly set them up using the gh CLI:
# Set the IAM Role ARN as a repository secret
# Retrieve the IAM role ARN dynamically using AWS CLI
ROLE_ARN=$(aws iam get-role --role-name terra-ec2-Role --query 'Role.Arn' --output text)
gh secret set IAM_ROLE_ARN --repo D-Mwanth/live-infrastructure --body "$ROLE_ARN"

# Add the private SSH key as a repository secret
# The runner will use this key to access GitHub and download Terraform modules
# <Not exposing the key here as it's linked to my GitHub account>
gh secret set SSH_PRIVATE_KEY --repo D-Mwanth/live-infrastructure --body "$(cat ~/.ssh/id_rsa)"
Confirm the secret was added in your repo:
% gh secret list --repo D-Mwanth/live-infrastructure

NAME             UPDATED
IAM_ROLE_ARN     less than a minute ago
SSH_PRIVATE_KEY  less than a minute ago
Similarly, you can do so from the GitHub UI (live-infrastructure -> settings -> secrets -> actions):
Now commit and push the changes to the Github repository:
# Stage all changes
git add .

# Commit the changes
git commit -m "Added Github Actions Workflow"

# Push changes to the remote repository
git push -u origin main
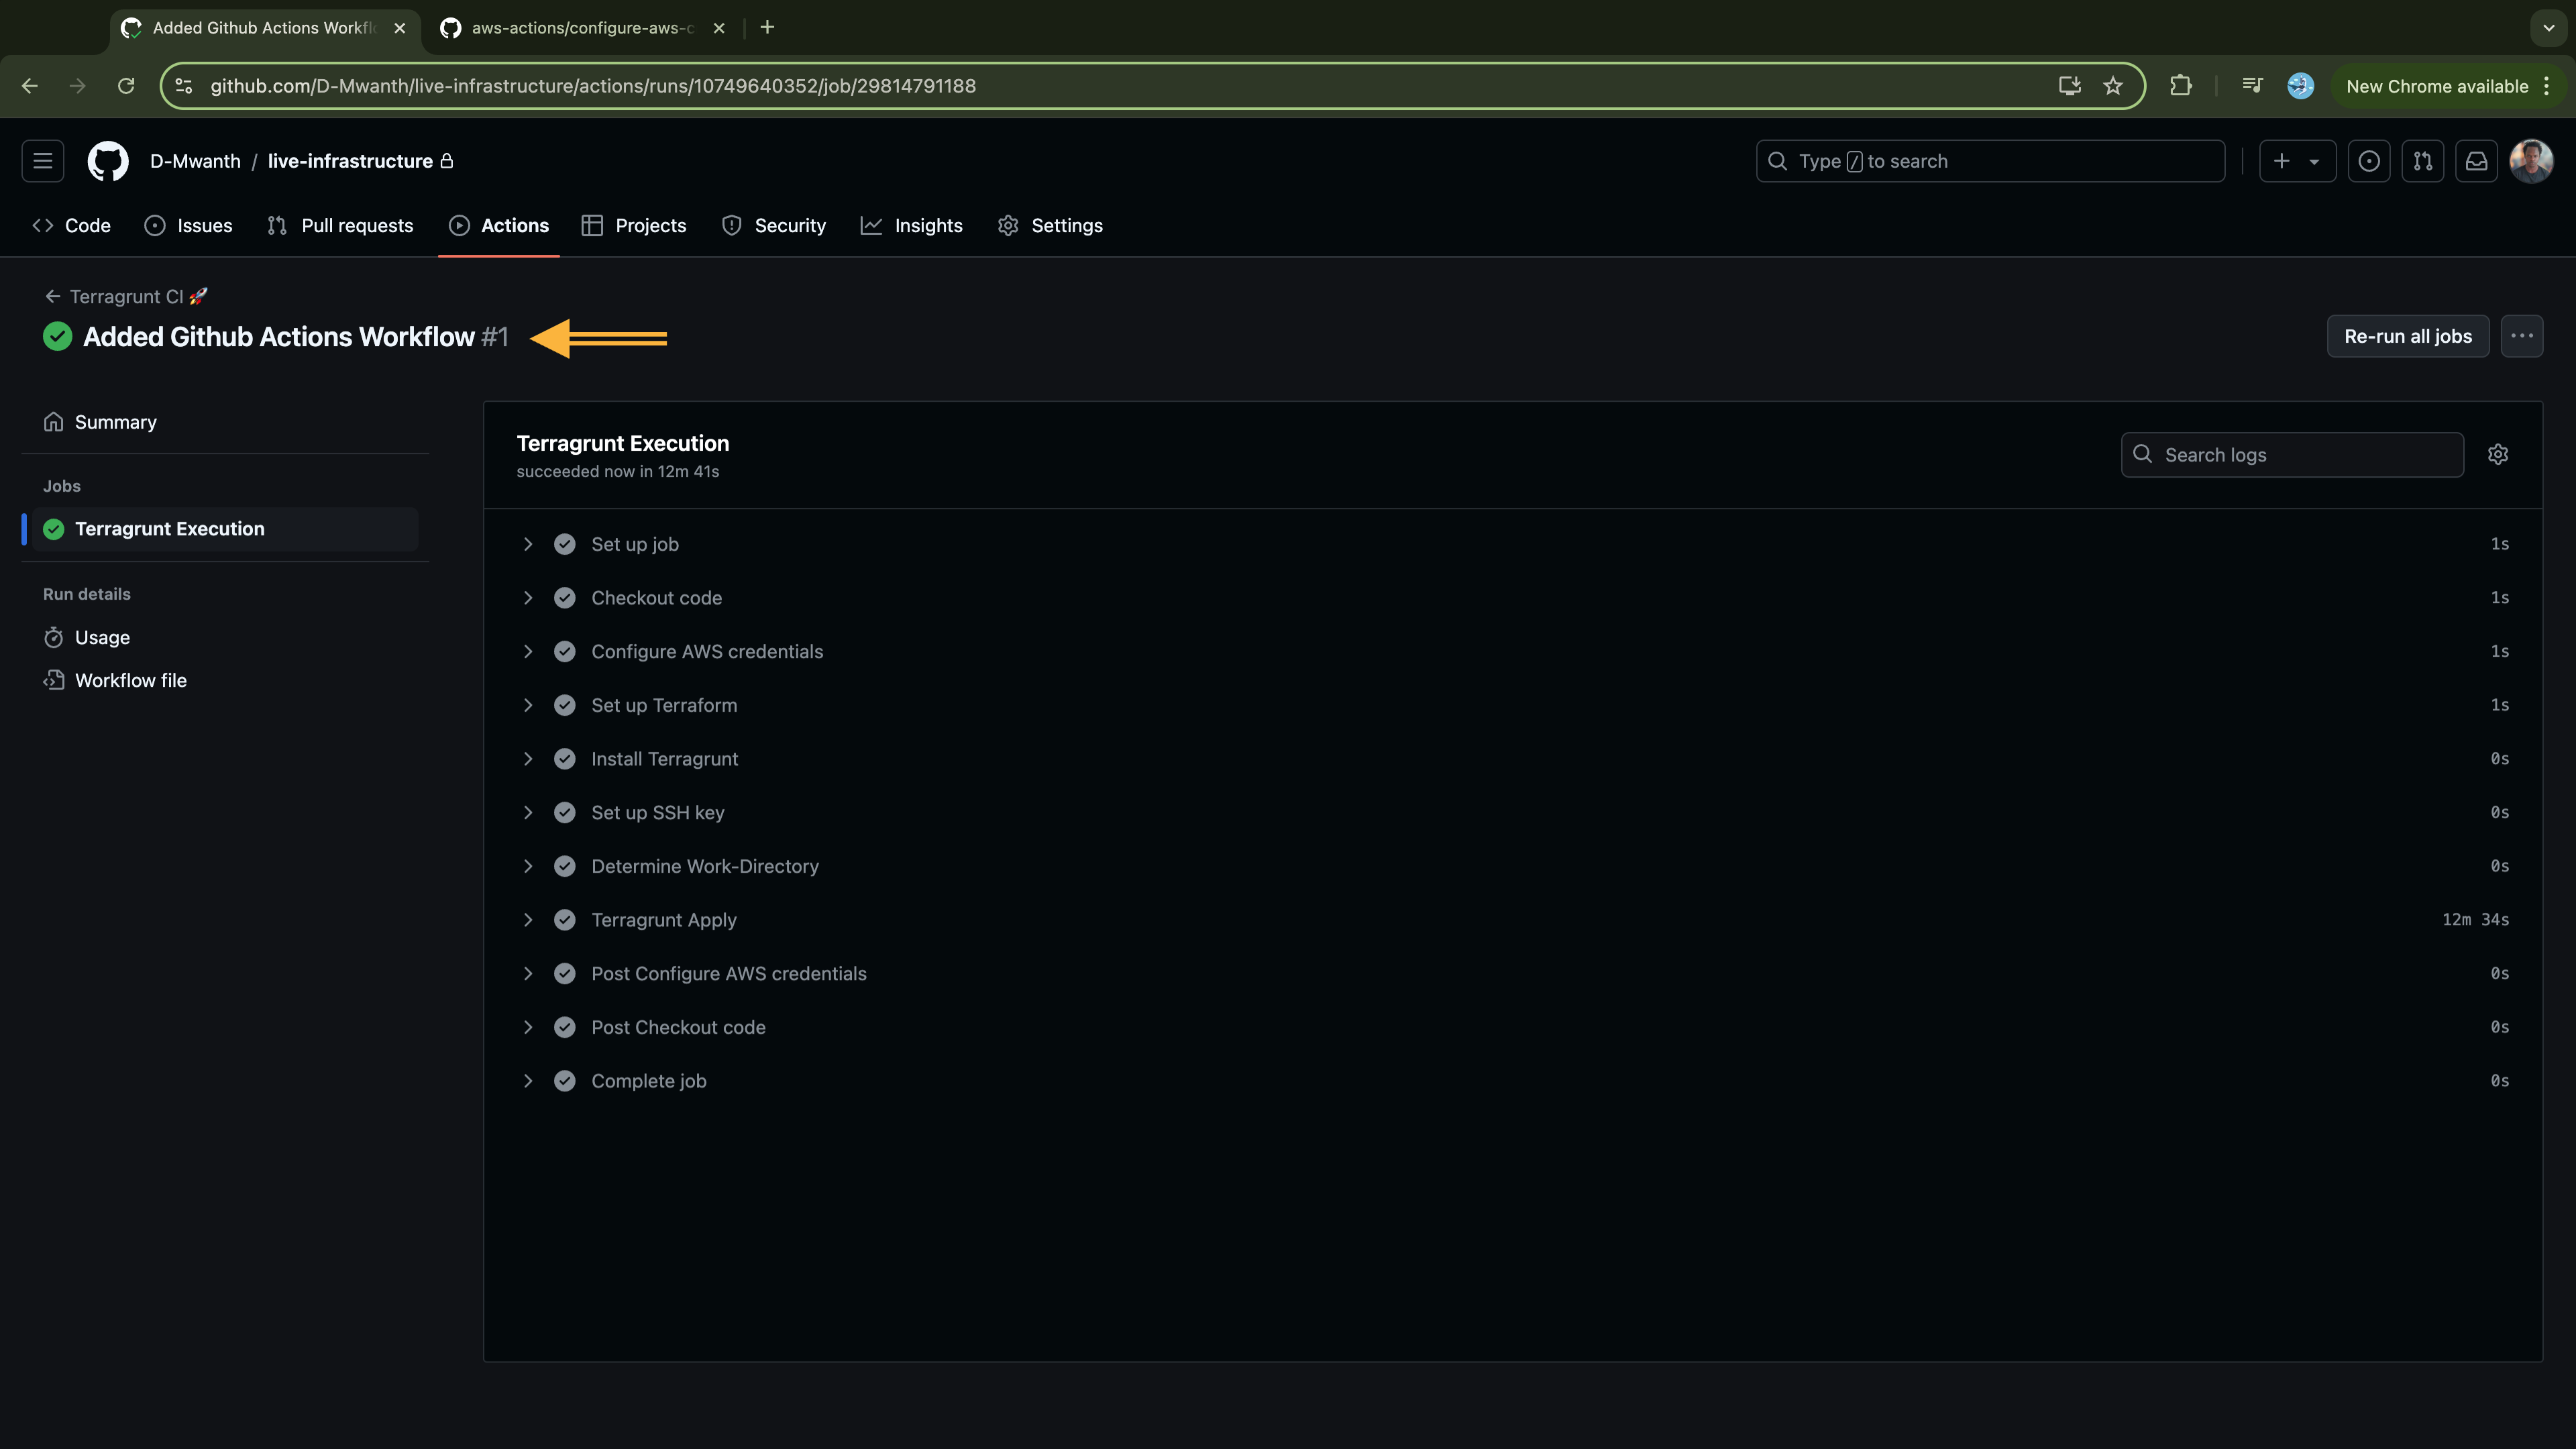
On push, the workflow will trigger and execute. The execution will be organized. into three groups:
Group 1
- Module /home/ubuntu/live-infrastructure/dev/vpc
- Module /home/ubuntu/live-infrastructure/prod/vpc
- Module /home/ubuntu/live-infrastructure/staging/vpc

Group 2
- Module /home/ubuntu/live-infrastructure/dev/eks
- Module /home/ubuntu/live-infrastructure/prod/eks
- Module /home/ubuntu/live-infrastructure/staging/eks

Group 3
- Module /home/ubuntu/live-infrastructure/dev/k8s-addons
- Module /home/ubuntu/live-infrastructure/prod/k8s-addons
- Module /home/ubuntu/live-infrastructure/staging/k8s-addons
Group 1 involves creating VPCs in all three environments. Group 2 involves creating the EKS cluster in each environment within the respective VPC, as it was set as a dependency. Finally, Group 3 involves applying the configurations for setting up the cluster autoscaler across all three environments.
Log in to GitHub and ensure your workflows execute successfully:
If the workflow executed successfully, log in to your AWS account and verify that all the infrastructure has been provisioned.
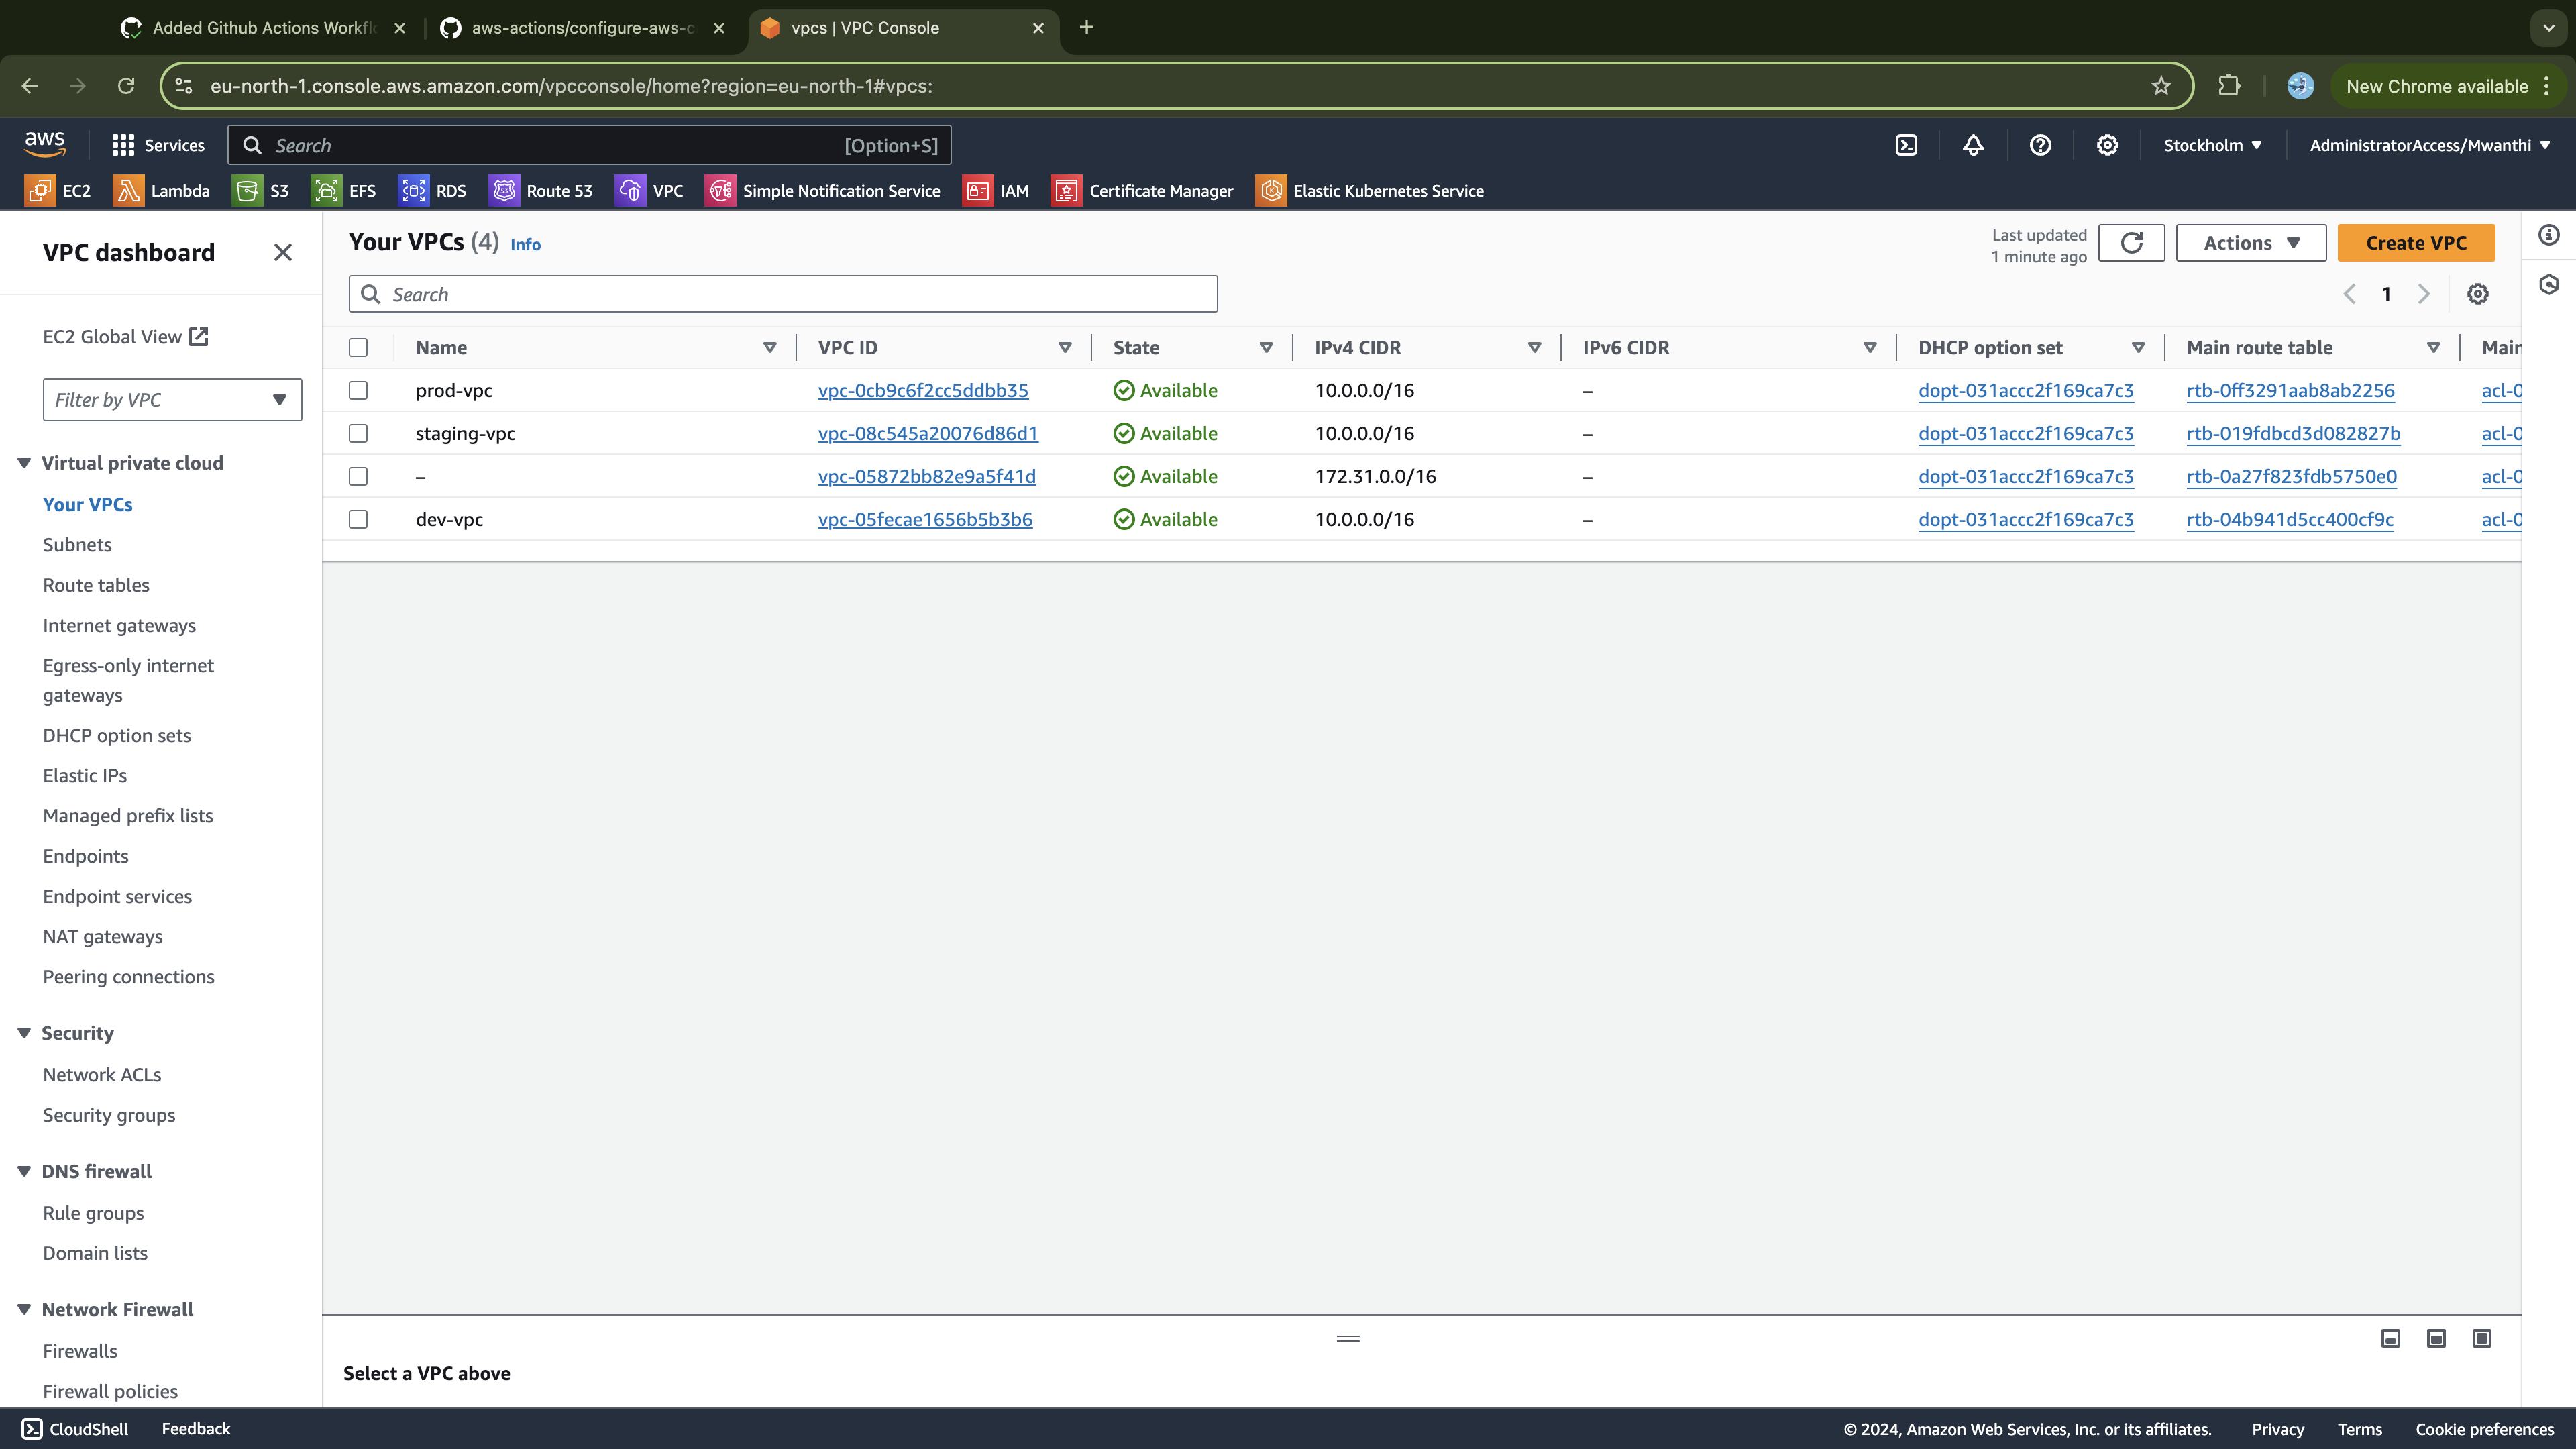
- Confirm that you have three VPCs, one for each cluster environment:
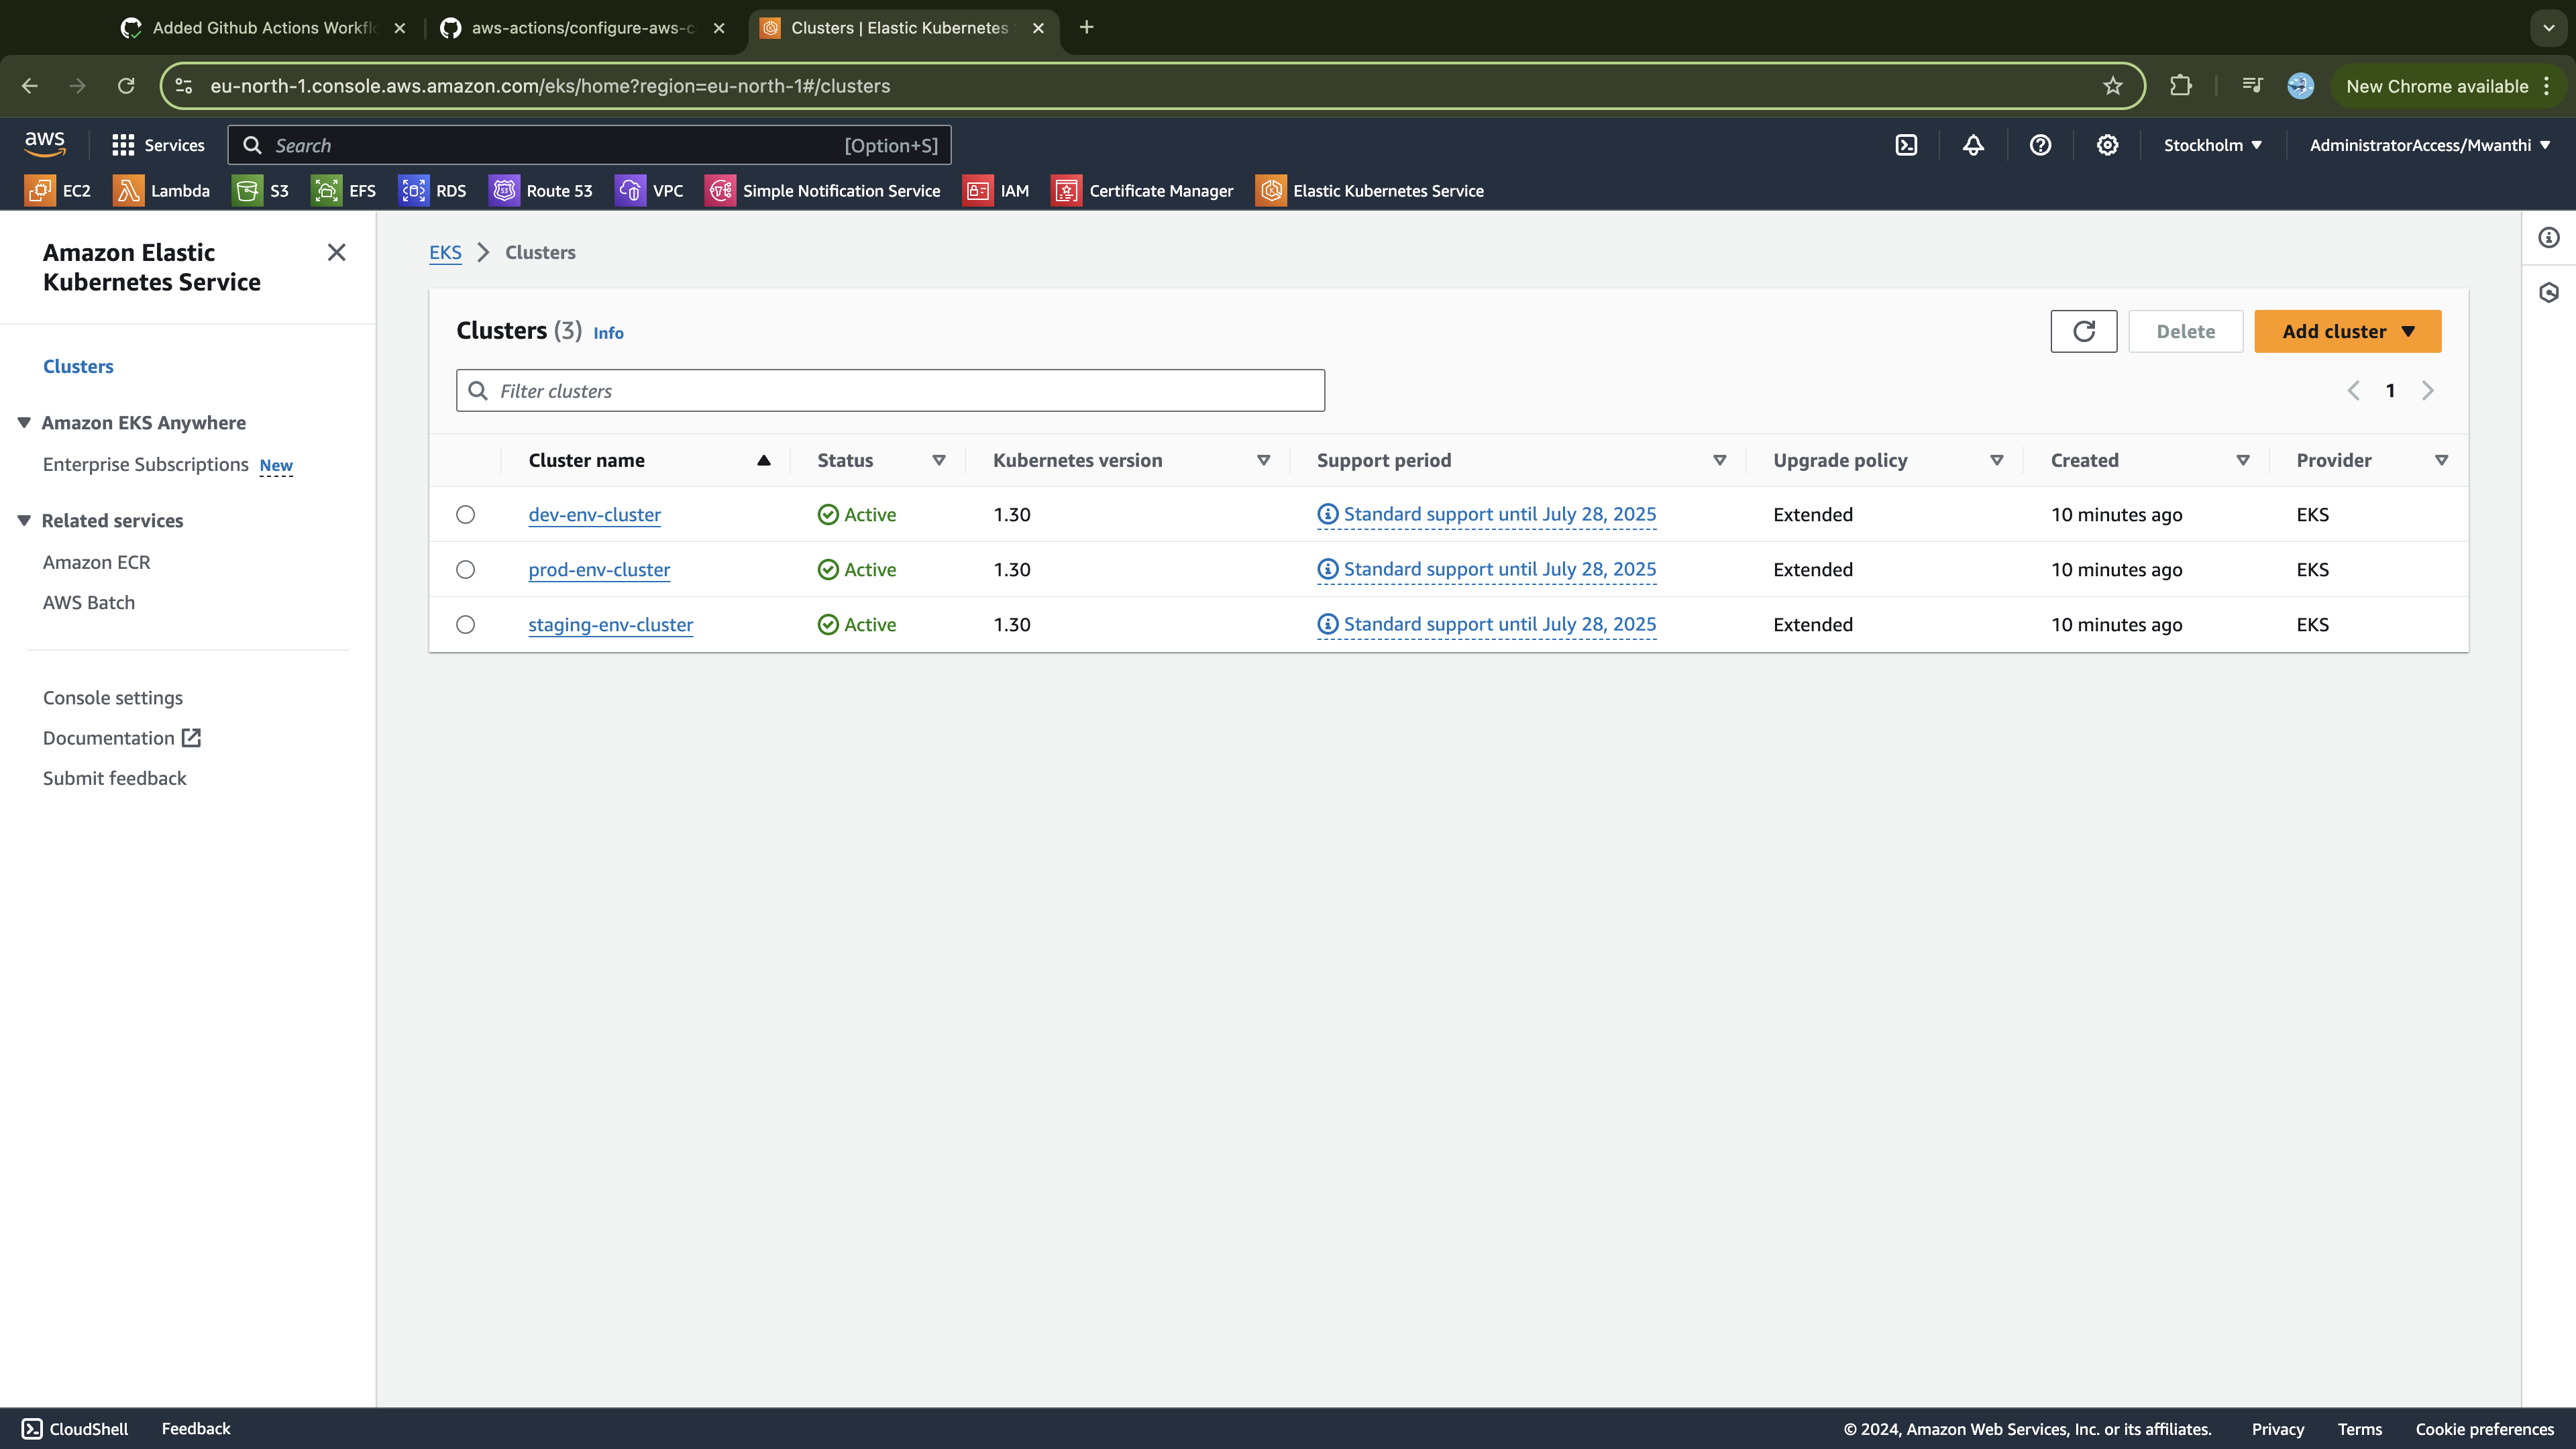
- Confirm that you have three clusters, all in an active state:
Lastly, verify that the add-ons declared in our Terraform configurations are deployed and running. To do this, you'll need access to one of the clusters.
Accessing the Clusters
In this section, we are going to test if our clusters are working as expected. For instance, we expect all the work nodes to be ready as well as to be able to deploy applications on the cluster. Since all environments are provisioned from the same Terraform configurations, we’ll test in the dev environment and assume that other environments will behave similarly.
Execute the following command from your EC2 instance to update your kubeconfig file with the necessary configuration to access the EKS cluster:
# Update the configuration to communicate
$ aws eks update-kubeconfig --region eu-north-1 --name dev-env-cluster
Added new context arn:aws:eks:eu-north-1:848055118036:cluster/dev-cluster to /home/ubuntu/.kube/config
List the nodes of your cluster and verify they are ready:
$ kubectl get nodes
NAME                                        STATUS   ROLES    AGE    VERSION
ip-10-0-45-20.eu-north-1.compute.internal   Ready    <none>   2m5s   v1.30.2-eks-1552ad0
ip-10-0-6-7.eu-north-1.compute.internal     Ready    <none>   2m     v1.30.2-eks-1552ad0
Also, confirm that the compoments deployed by the add-ons module (cluster-auto scaler, eks-pod-identities, and metrics server) are up and runing:
$ kubectl get pods -n kube-system
NAME                                                READY   STATUS    RESTARTS   AGE
autoscaler-aws-cluster-autoscaler-ffb695cd5-m28t5   1/1     Running   0          45s
aws-node-sxtz9                                      2/2     Running   0          2m25s
aws-node-xxntm                                      2/2     Running   0          2m20s
coredns-75b6b75957-7h8kr                            1/1     Running   0          4m4s
coredns-75b6b75957-l656r                            1/1     Running   0          4m4s
eks-pod-identity-agent-88f9f                        1/1     Running   0          75s
eks-pod-identity-agent-ghvml                        1/1     Running   0          75s
kube-proxy-99vx8                                    1/1     Running   0          2m20s
kube-proxy-sk4jh                                    1/1     Running   0          2m25s
metrics-server-6b76f9fd75-glbf6                     1/1     Running   0          80s
The three components are up and running, so we can be assured that our cluster should be able to scale.
Testing Cluster Scalability
For this, let’s create an NGINX deployment with two replicas. Once we verify that it is working as expected, we will scale it to stress the available cluster resources. This will trigger the cluster autoscaler to adjust the disired size property of the node group as we previously discussed, causeing a new instances provisioned and automatically added to the node group. Execute the following script to define the namespace and deployment resources:
# Make directory for your manifests and add your manifests inside it
cd ~ && mkdir -p kubernetes-manifests
# Create a resource file for defining the custom namespace
cat <<EOF > ~/kubernetes-manifests/namespace.yaml
---
apiVersion: v1
kind: Namespace
metadata:
  name: app-ns
EOF

# Create a resource file for defining the NGINX deployment
cat <<EOF > ~/kubernetes-manifests/nginx.yaml
---
apiVersion: apps/v1
kind: Deployment
metadata:
  name: nginx-app
  namespace: app-ns
spec:
  replicas: 2
  selector:
    matchLabels:
      app: nginx-app
  template:
    metadata:
      labels:
        app: nginx-app
    spec:
      containers:
        - name: nginx-app
          image: nginx:stable
          ports:
            - name: http
              containerPort: 80
          resources:
            requests:
              memory: 512Mi
              cpu: 500m
            limits:
              memory: 512Mi
              cpu: 500m
EOF
This file is configured to request more memory and CPU resources than the current cluster capabilities can offer with more than 3 replicas. Specifically, it requests 512Mi of memory and 500m of CPU per replica. Initially, the manifest is set to deploy only two replicas.
Also let's create a service manifest for exposing our deployment:
cat <<EOF > ~/kubernetes-manifests/service.yaml
apiVersion: v1
kind: Service
metadata:
  name: nginx-app-service
  namespace: app-ns
spec:
  selector:
    app: nginx-app
  ports:
    - protocol: TCP
      port: 80
      targetPort: 80
  type: ClusterIP
EOF
Now apply the configuration to create the namespace, deploy the application, and create the service:
$ cd ~/kubernetes-manifests/ && kubectl apply -f namespace.yaml -f nginx.yaml -f service.yaml

namespace/app-ns created
deployment.apps/nginx-app created
service/nginx-app-service created
Verify the created pods are in running state:
$ kubectl get pods -n app-ns
NAME                         READY   STATUS    RESTARTS   AGE
nginx-app-6674585756-2ks8p   1/1     Running   0          6s
nginx-app-6674585756-qdjhp   1/1     Running   0          6s
The two replicas are up and runing. To test the autoscaler is able to provision new worker nodes on demand, let's scale our cluster to run 10 replicas of nginx. Also let's split our terminal and watch the current pods and nodes before scaling so that we can see when new one are brought in as a result of scaling. If you are on Mac, consider installing iterm2 as it gives you ability to split your terminal window into multiple panes each with an independent session. Also, make sure each pane is connected to your ec2 instance:
- On the the top pane, watch nginx pods in the app-ns namespace
watch kubectl get pods -n app-ns
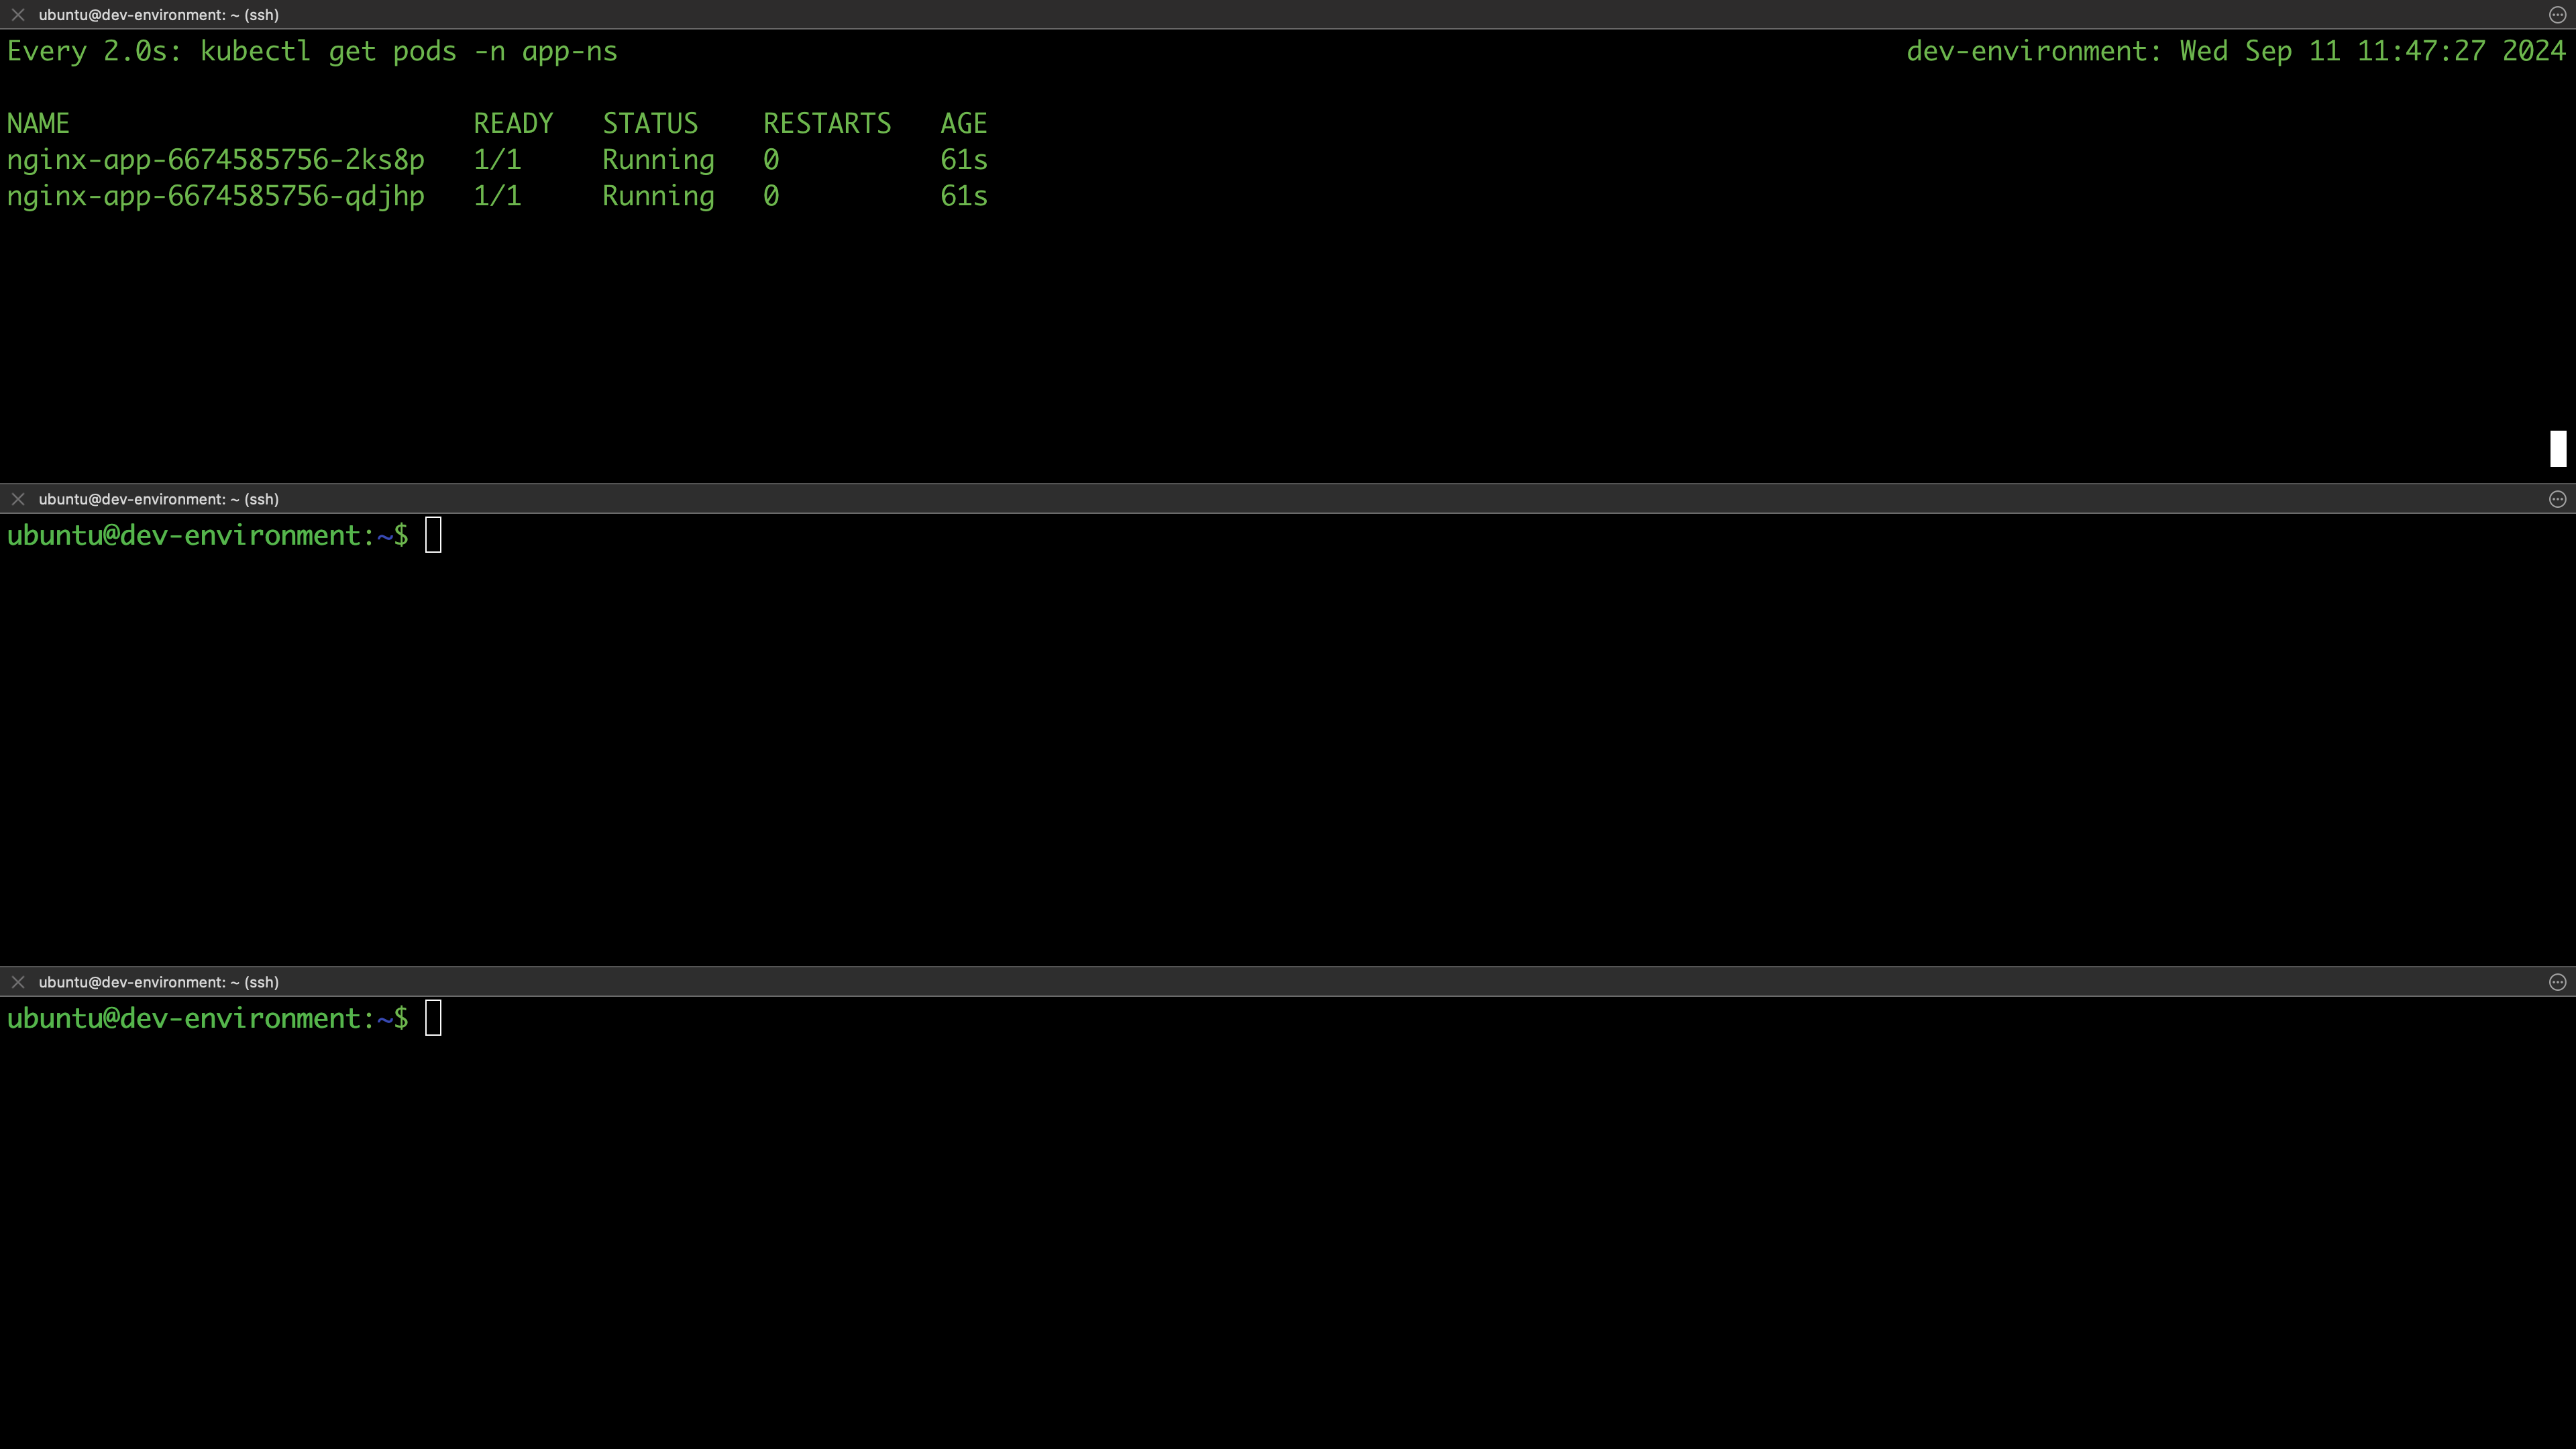
In the second pane, watch the nodes:
watch kubectl get nodes
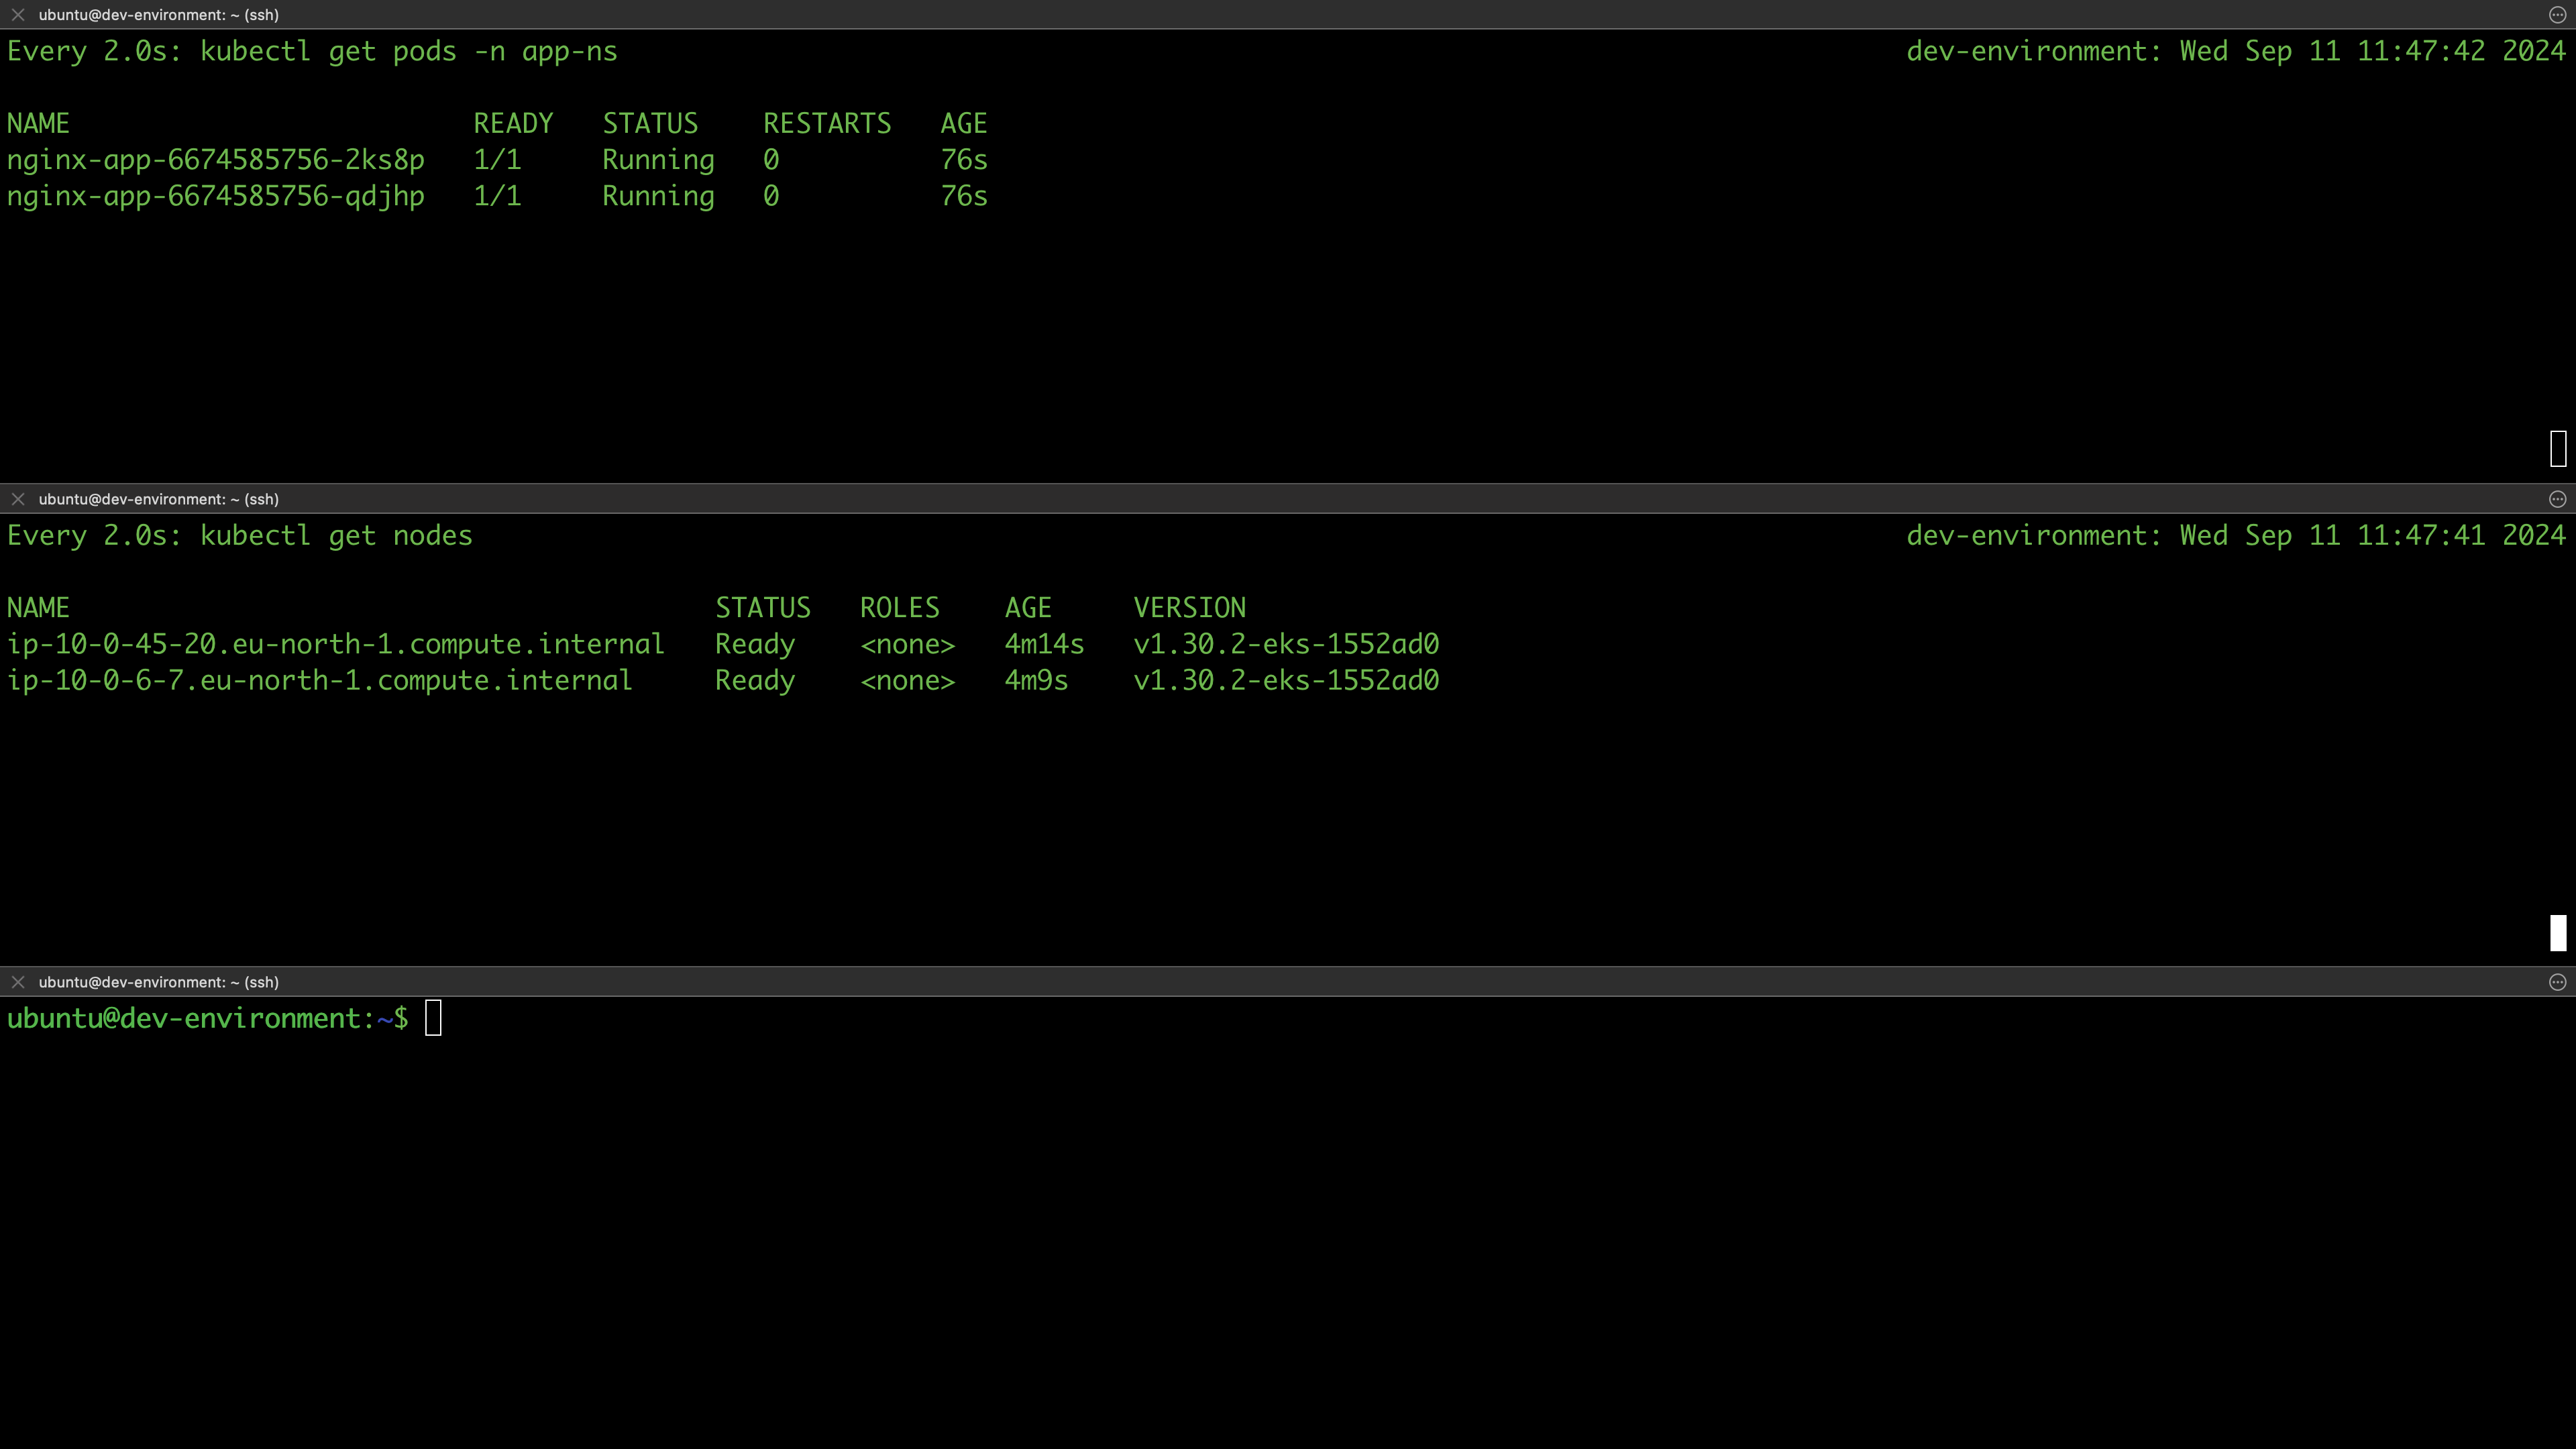
There are two node available.
In the third pane run the command below to scale your application to 10 replicas:
kubectl -n app-ns scale deployment/nginx-app --replicas=10
From the "watch pods" pane, you should see all 10 replicas created, with some successfully scheduled and others in a pending state. Let's describe one of the pending pods:
$ kubectl -n app-ns describe pod nginx-app-6674585756-ttkgv
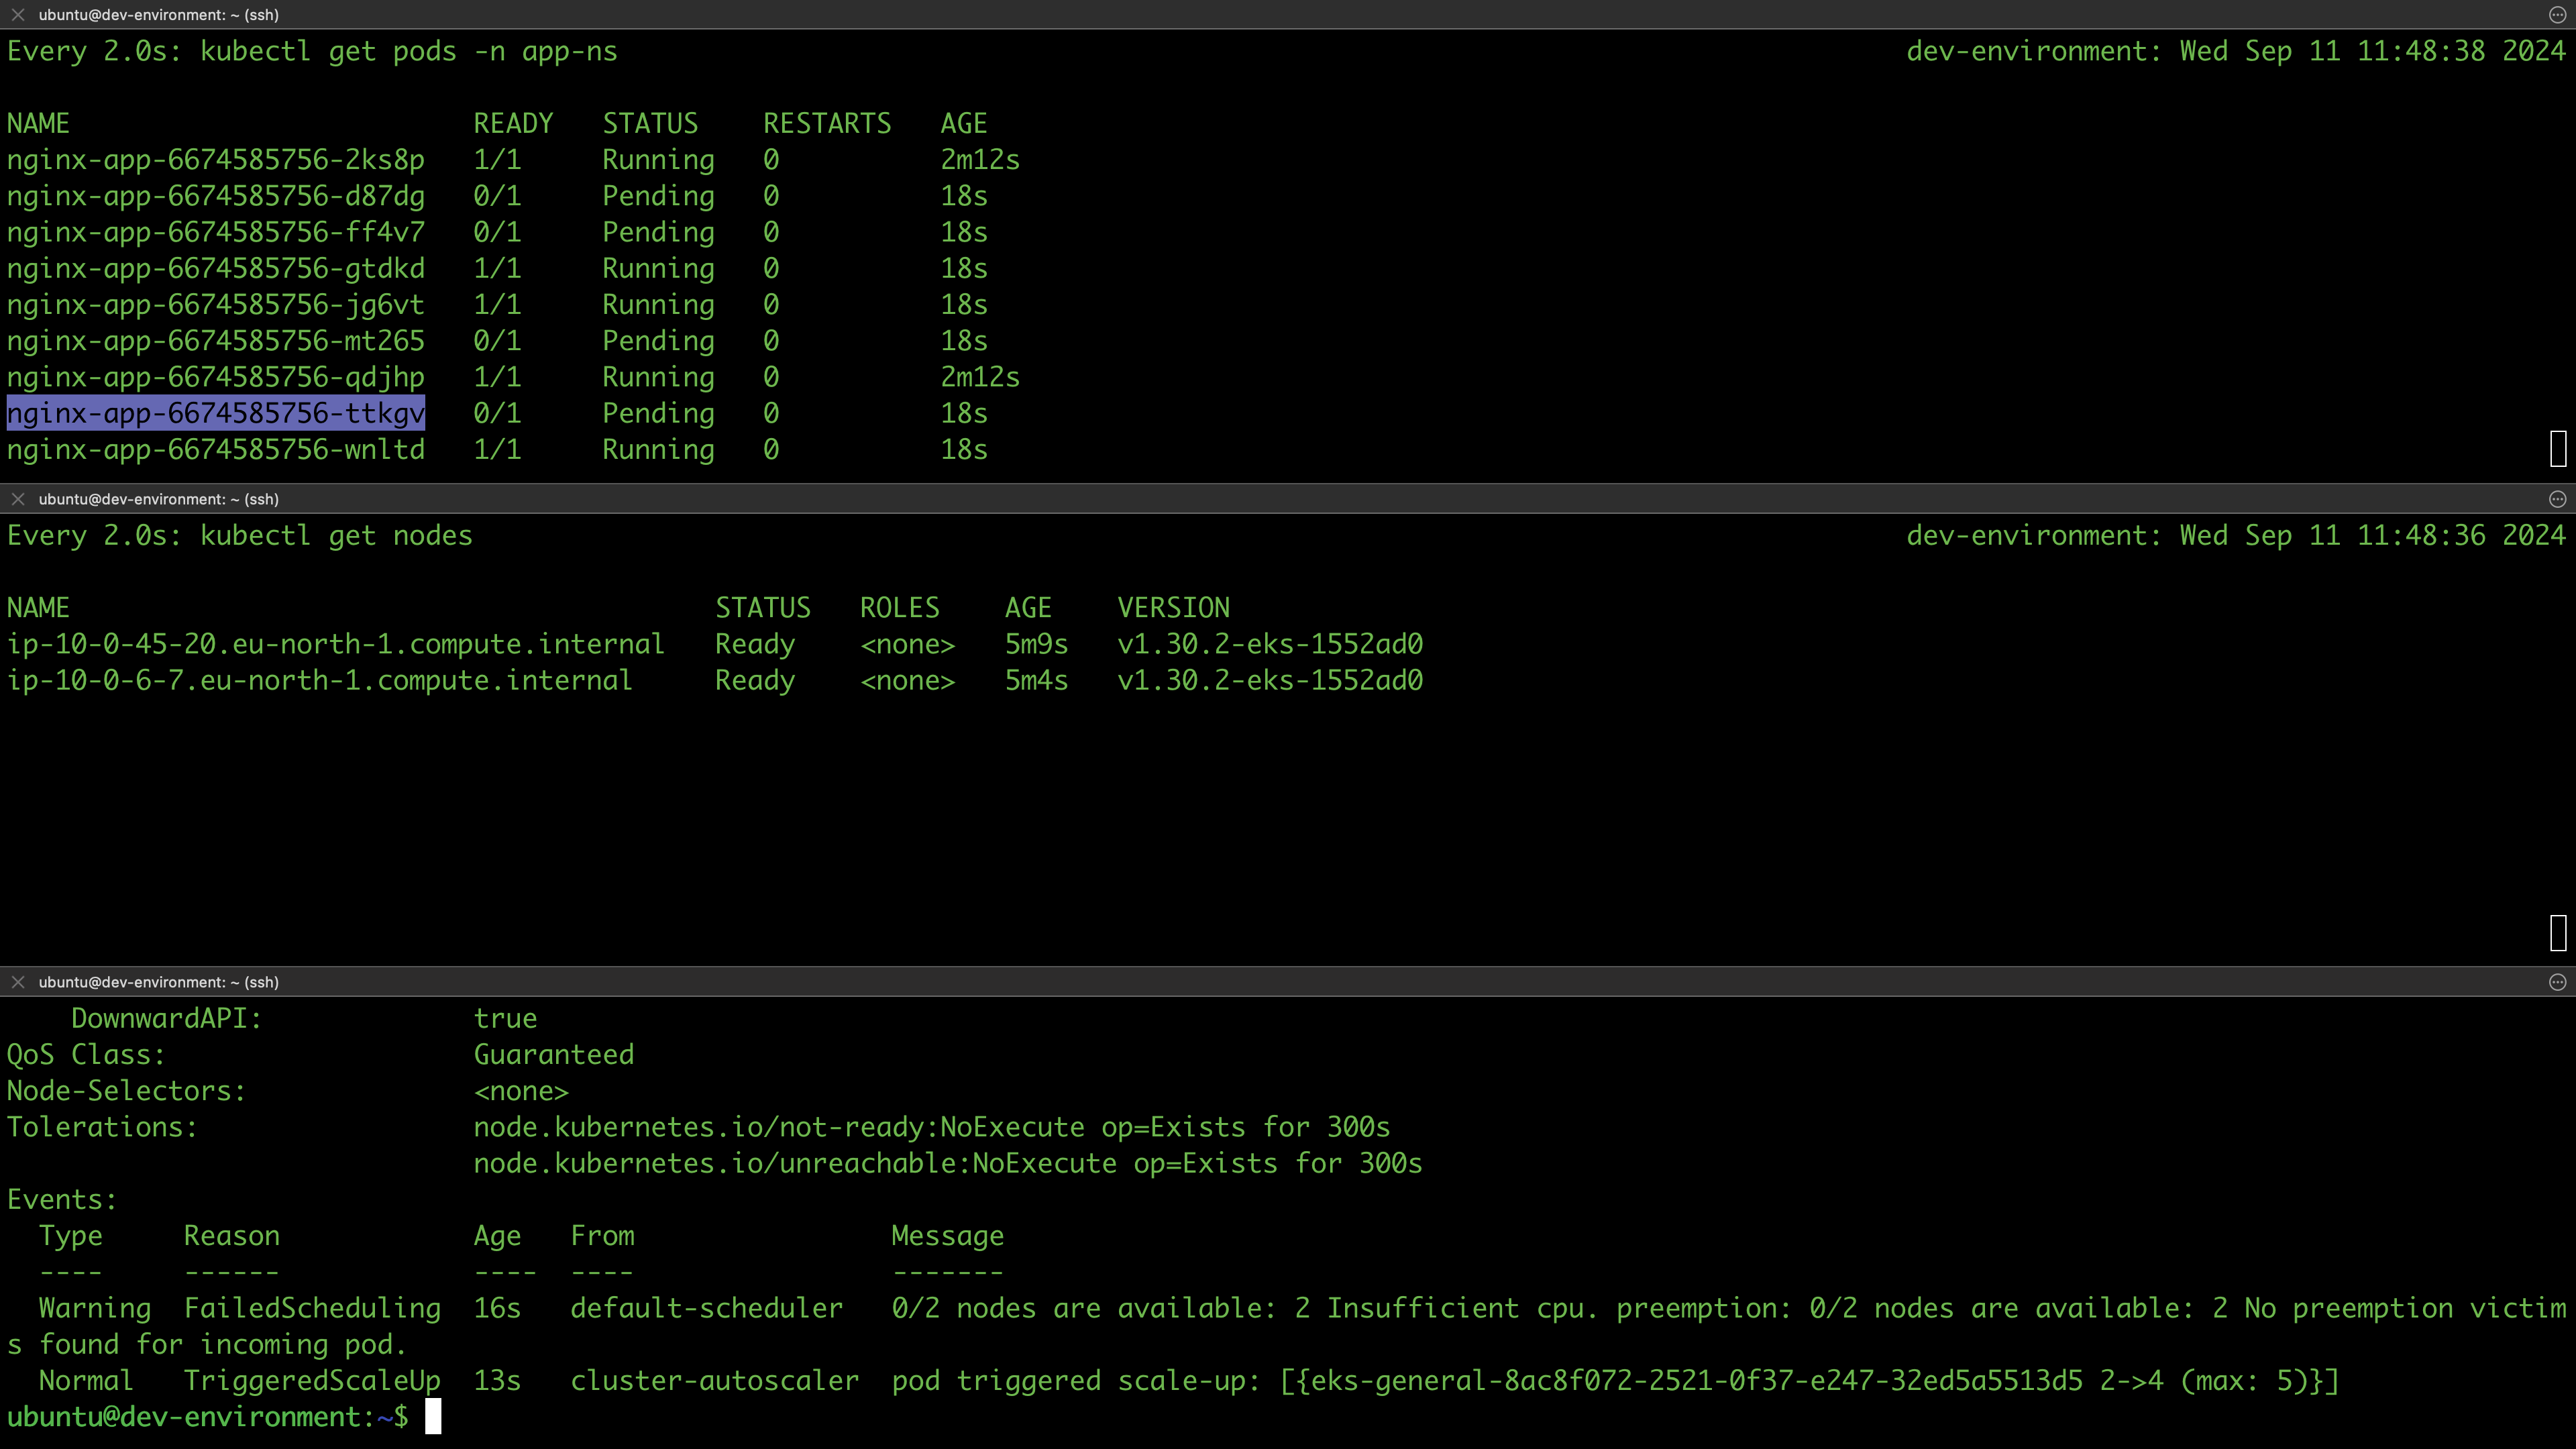
In the events section notice, 0 of available 2 nodes are available due to Insufficient cpu. However the cluster-autoscaler pod triggered scale-up.
In the "watch nodes" pane we see two new nodes are brought in. At first they're not ready:
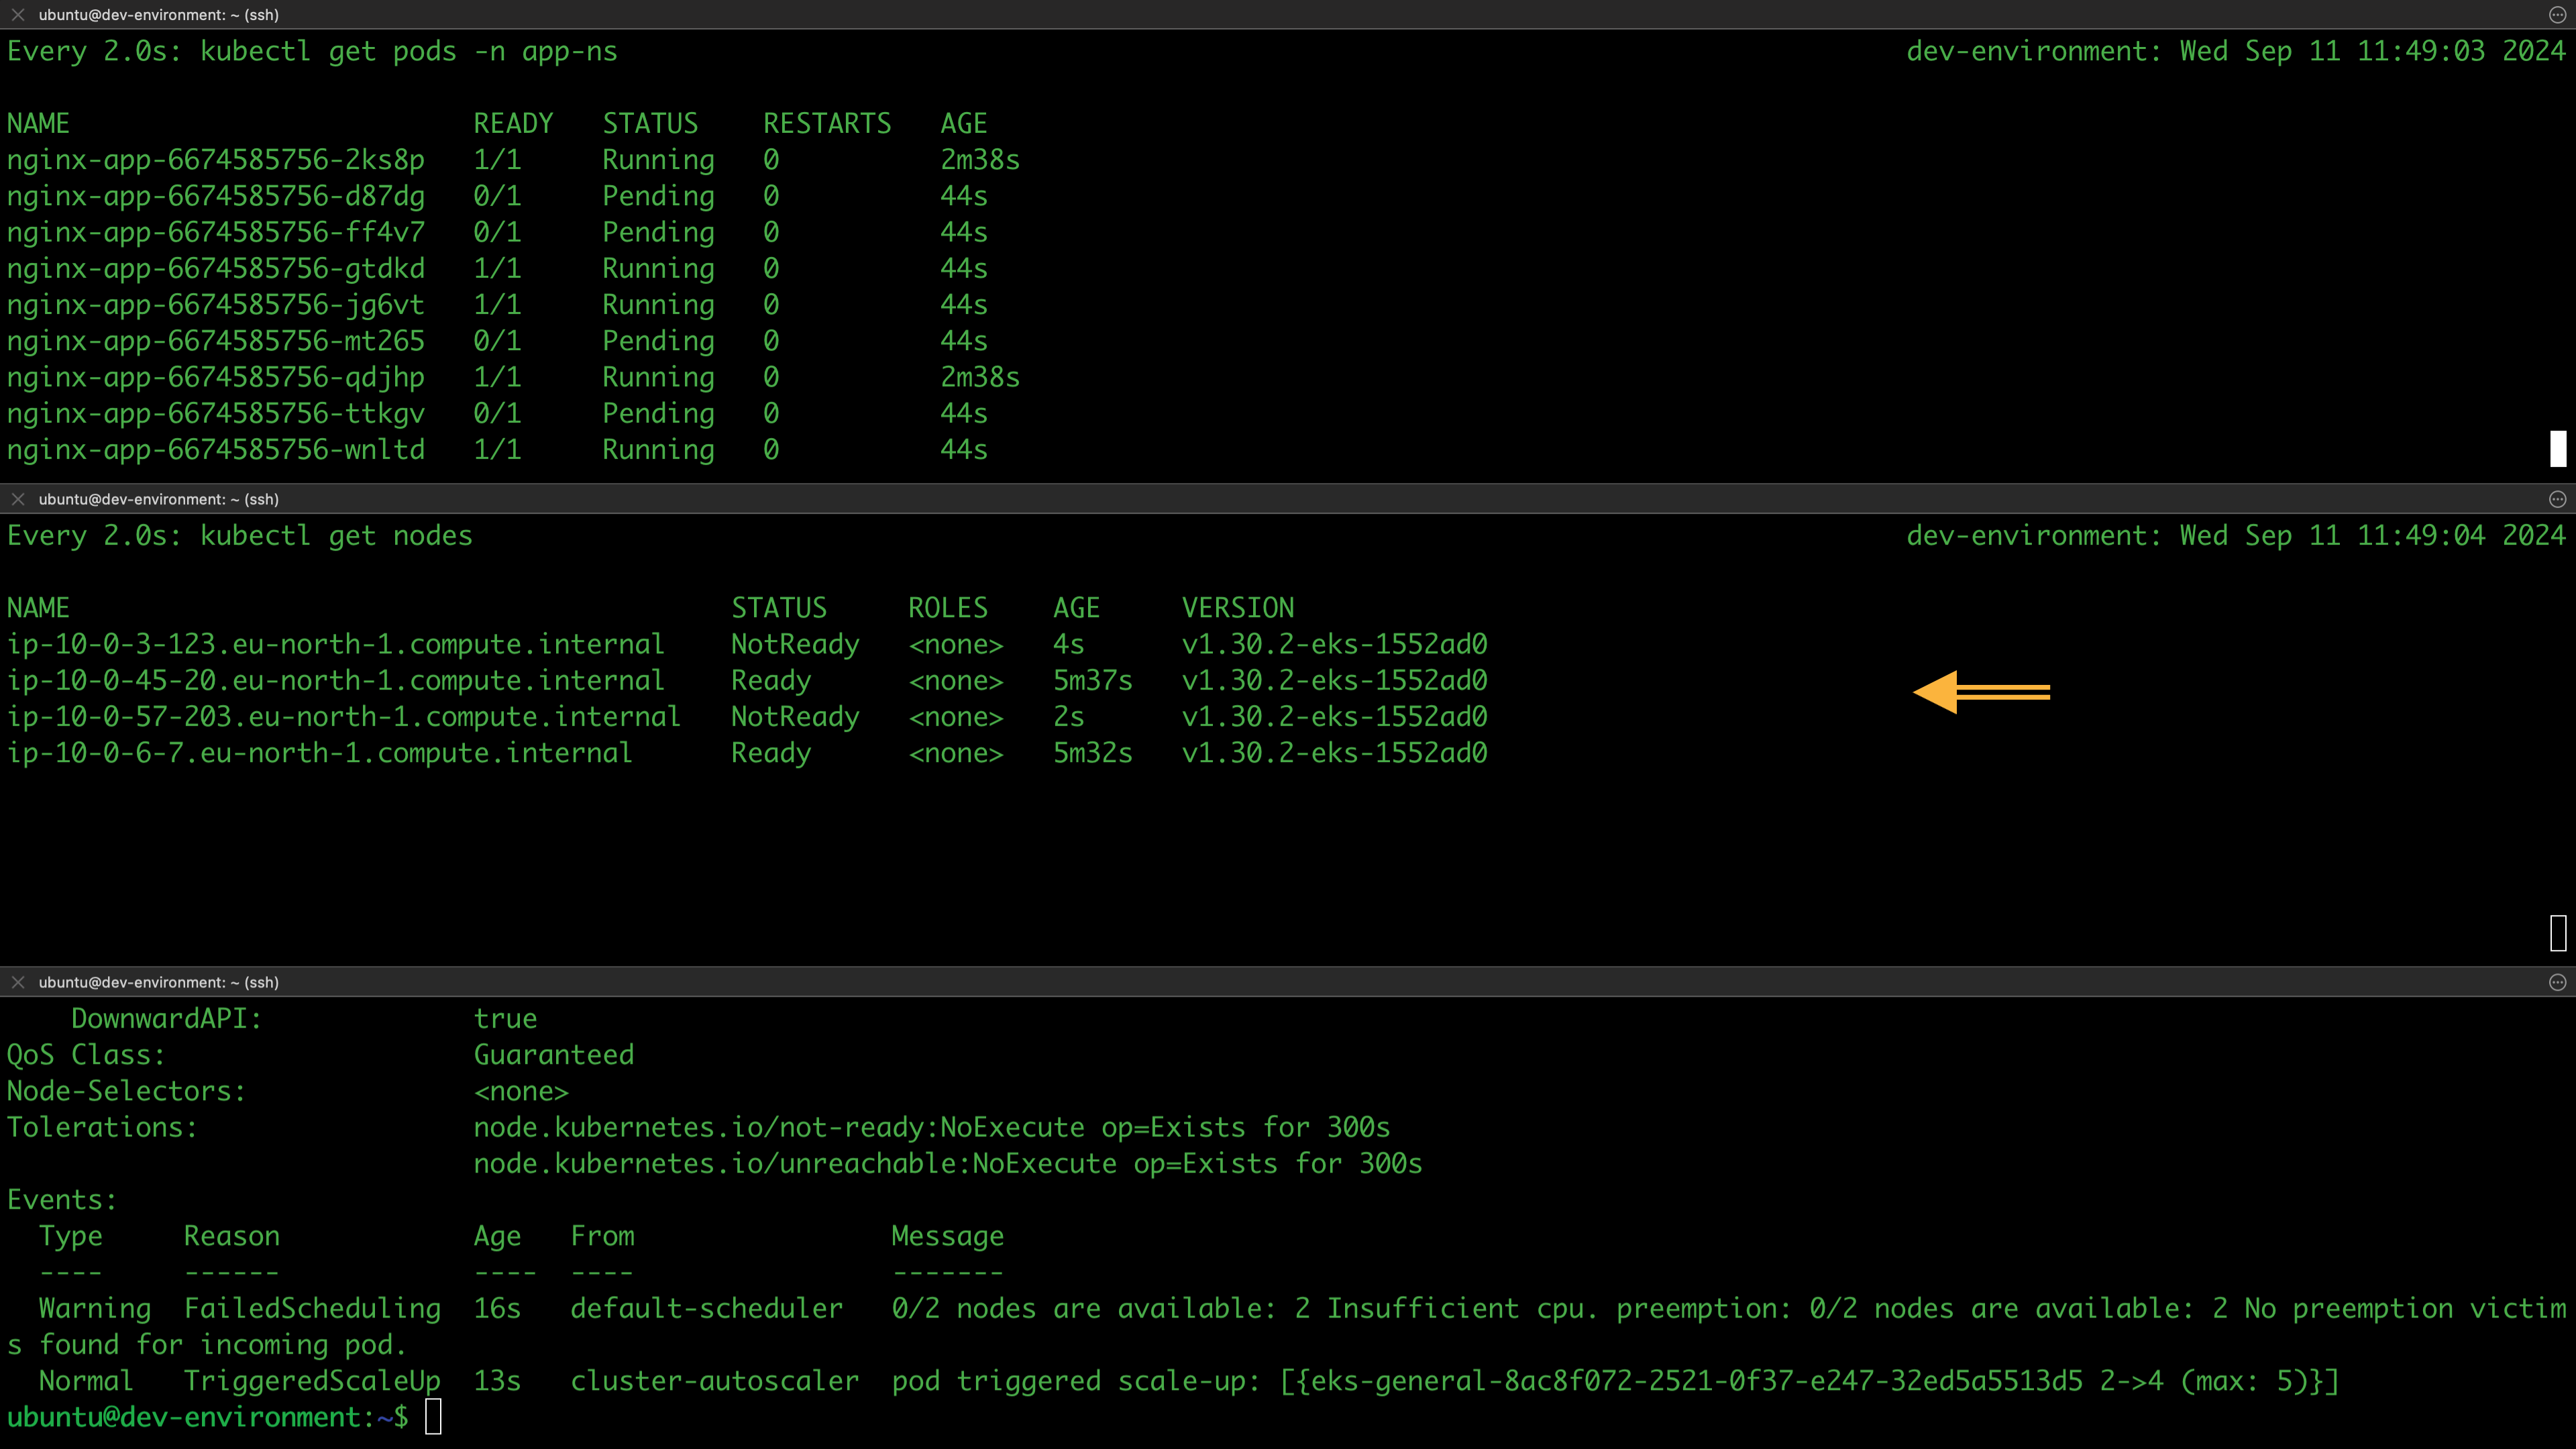
In no time, they transition to a ready state, and all pending pods, as shown below, are scheduled:
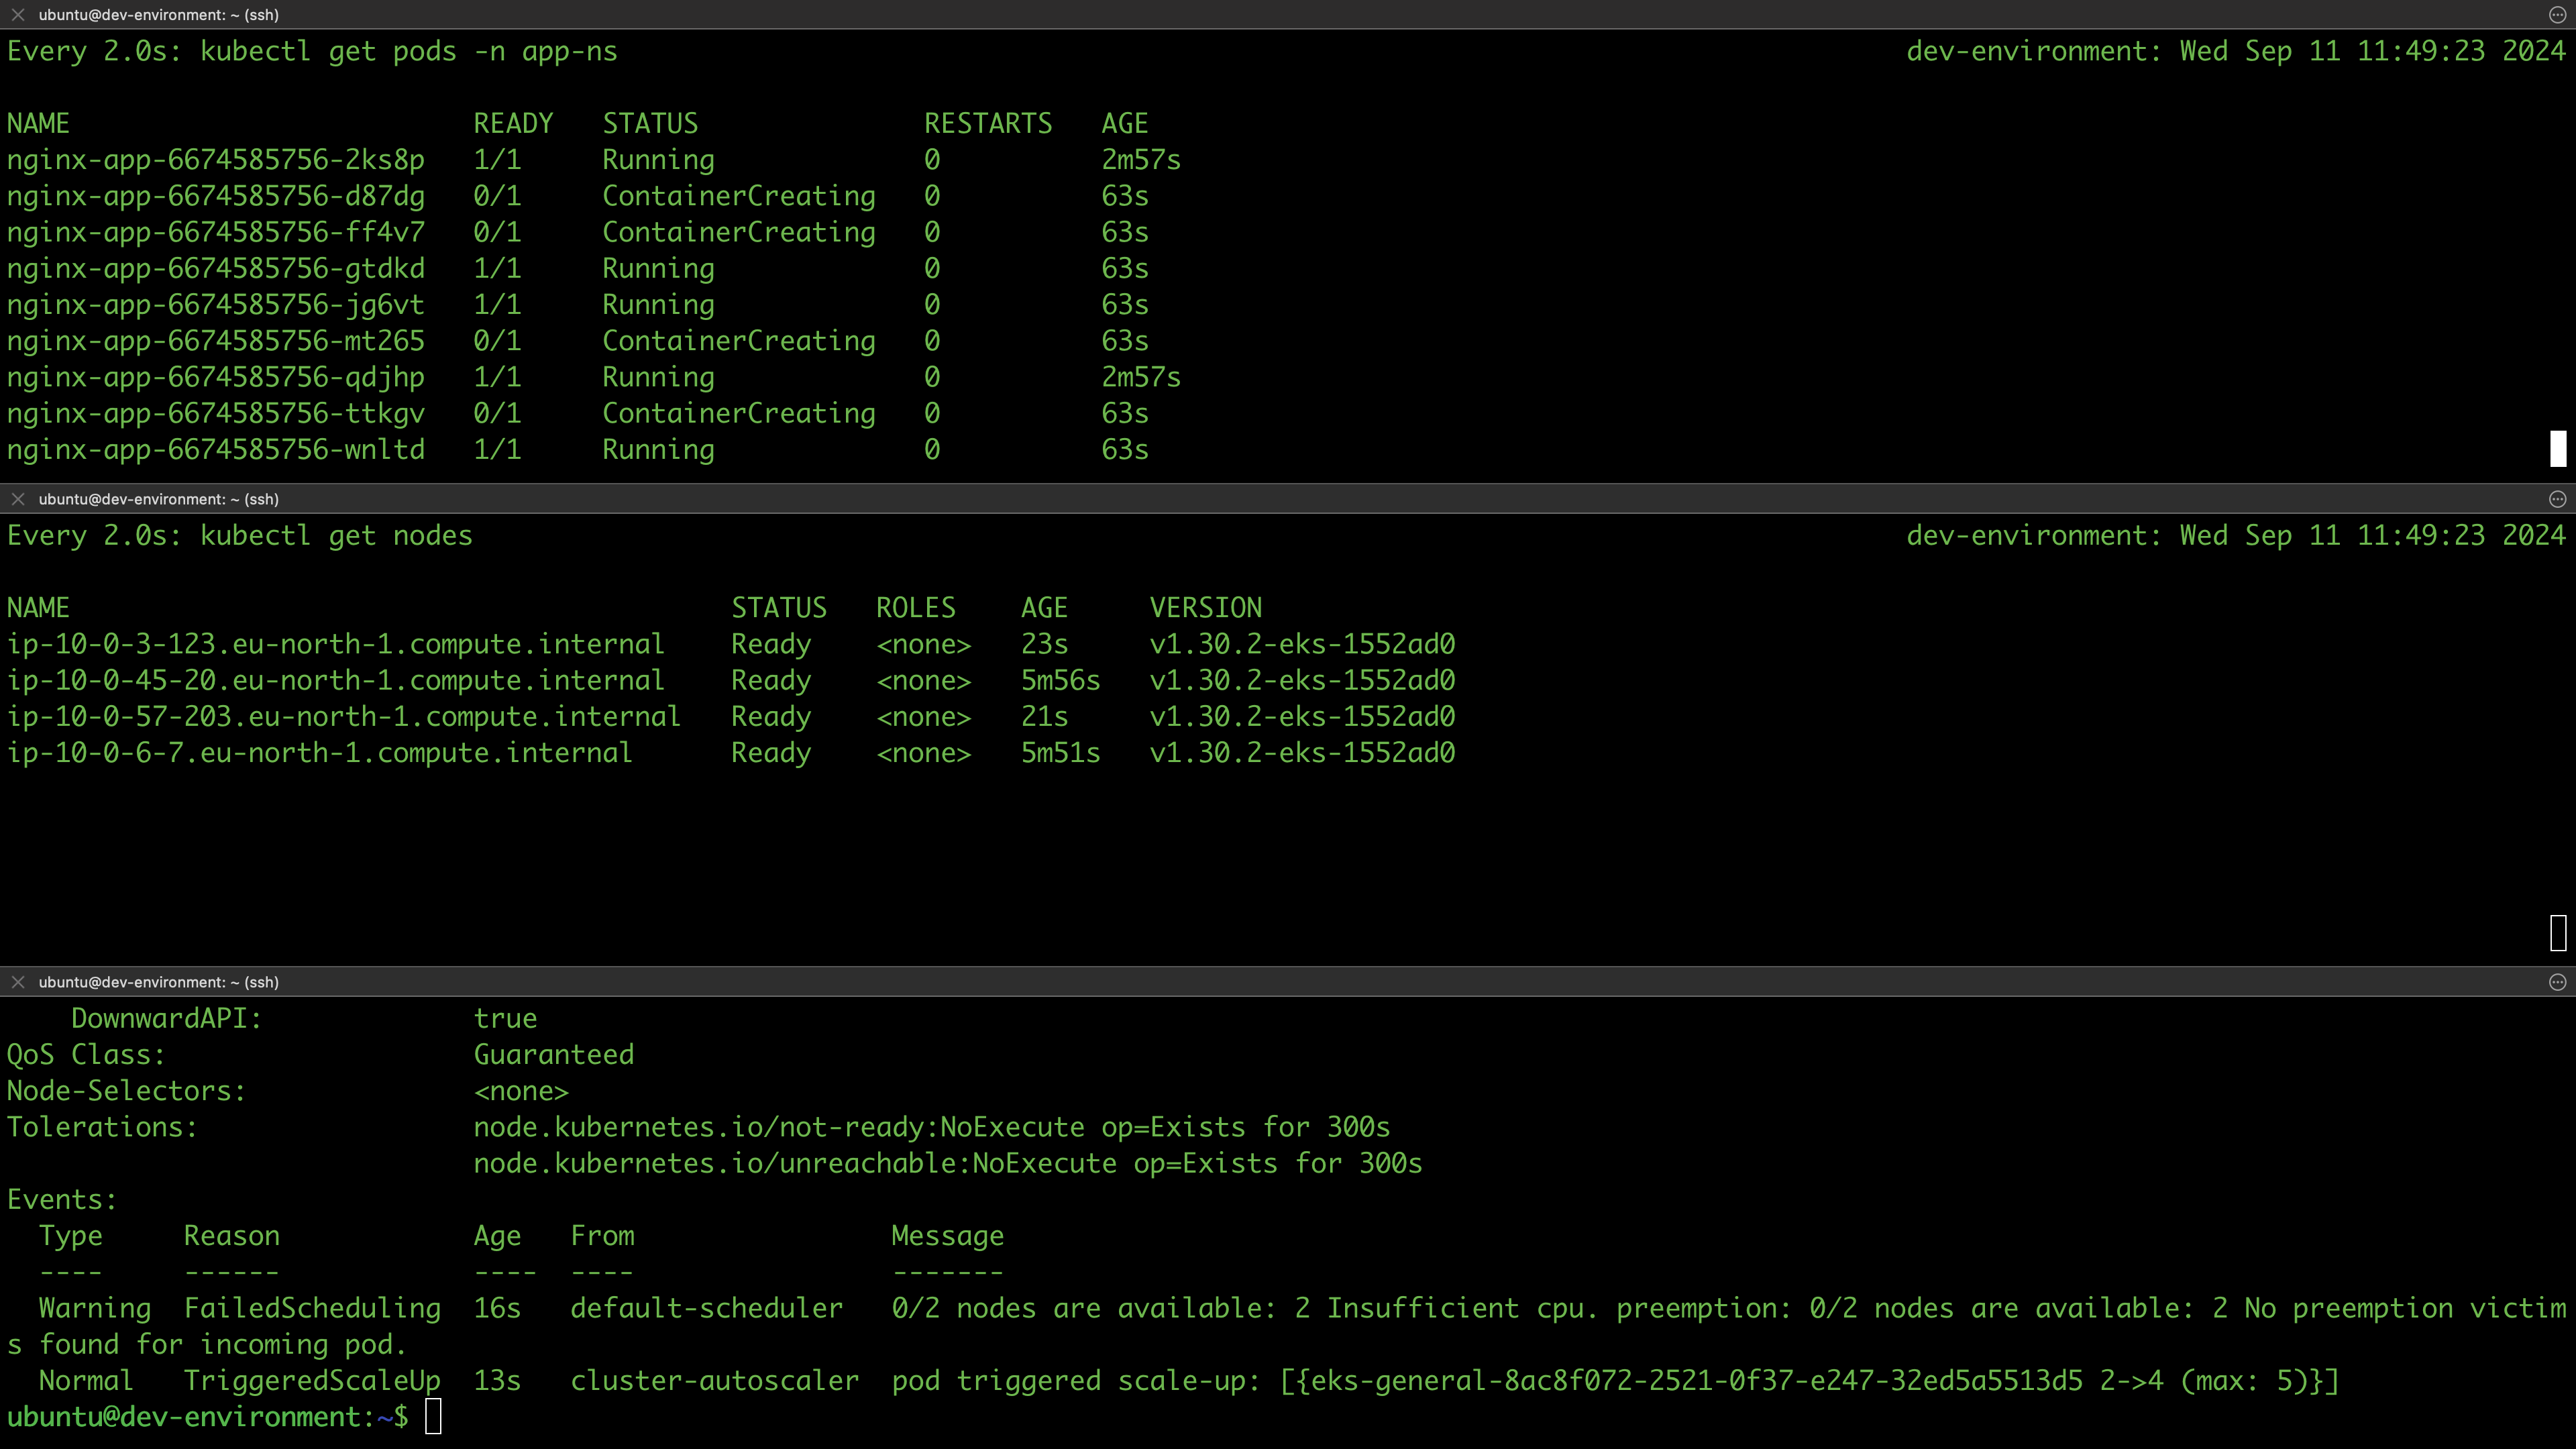
Here is all 10 replicas up and running:
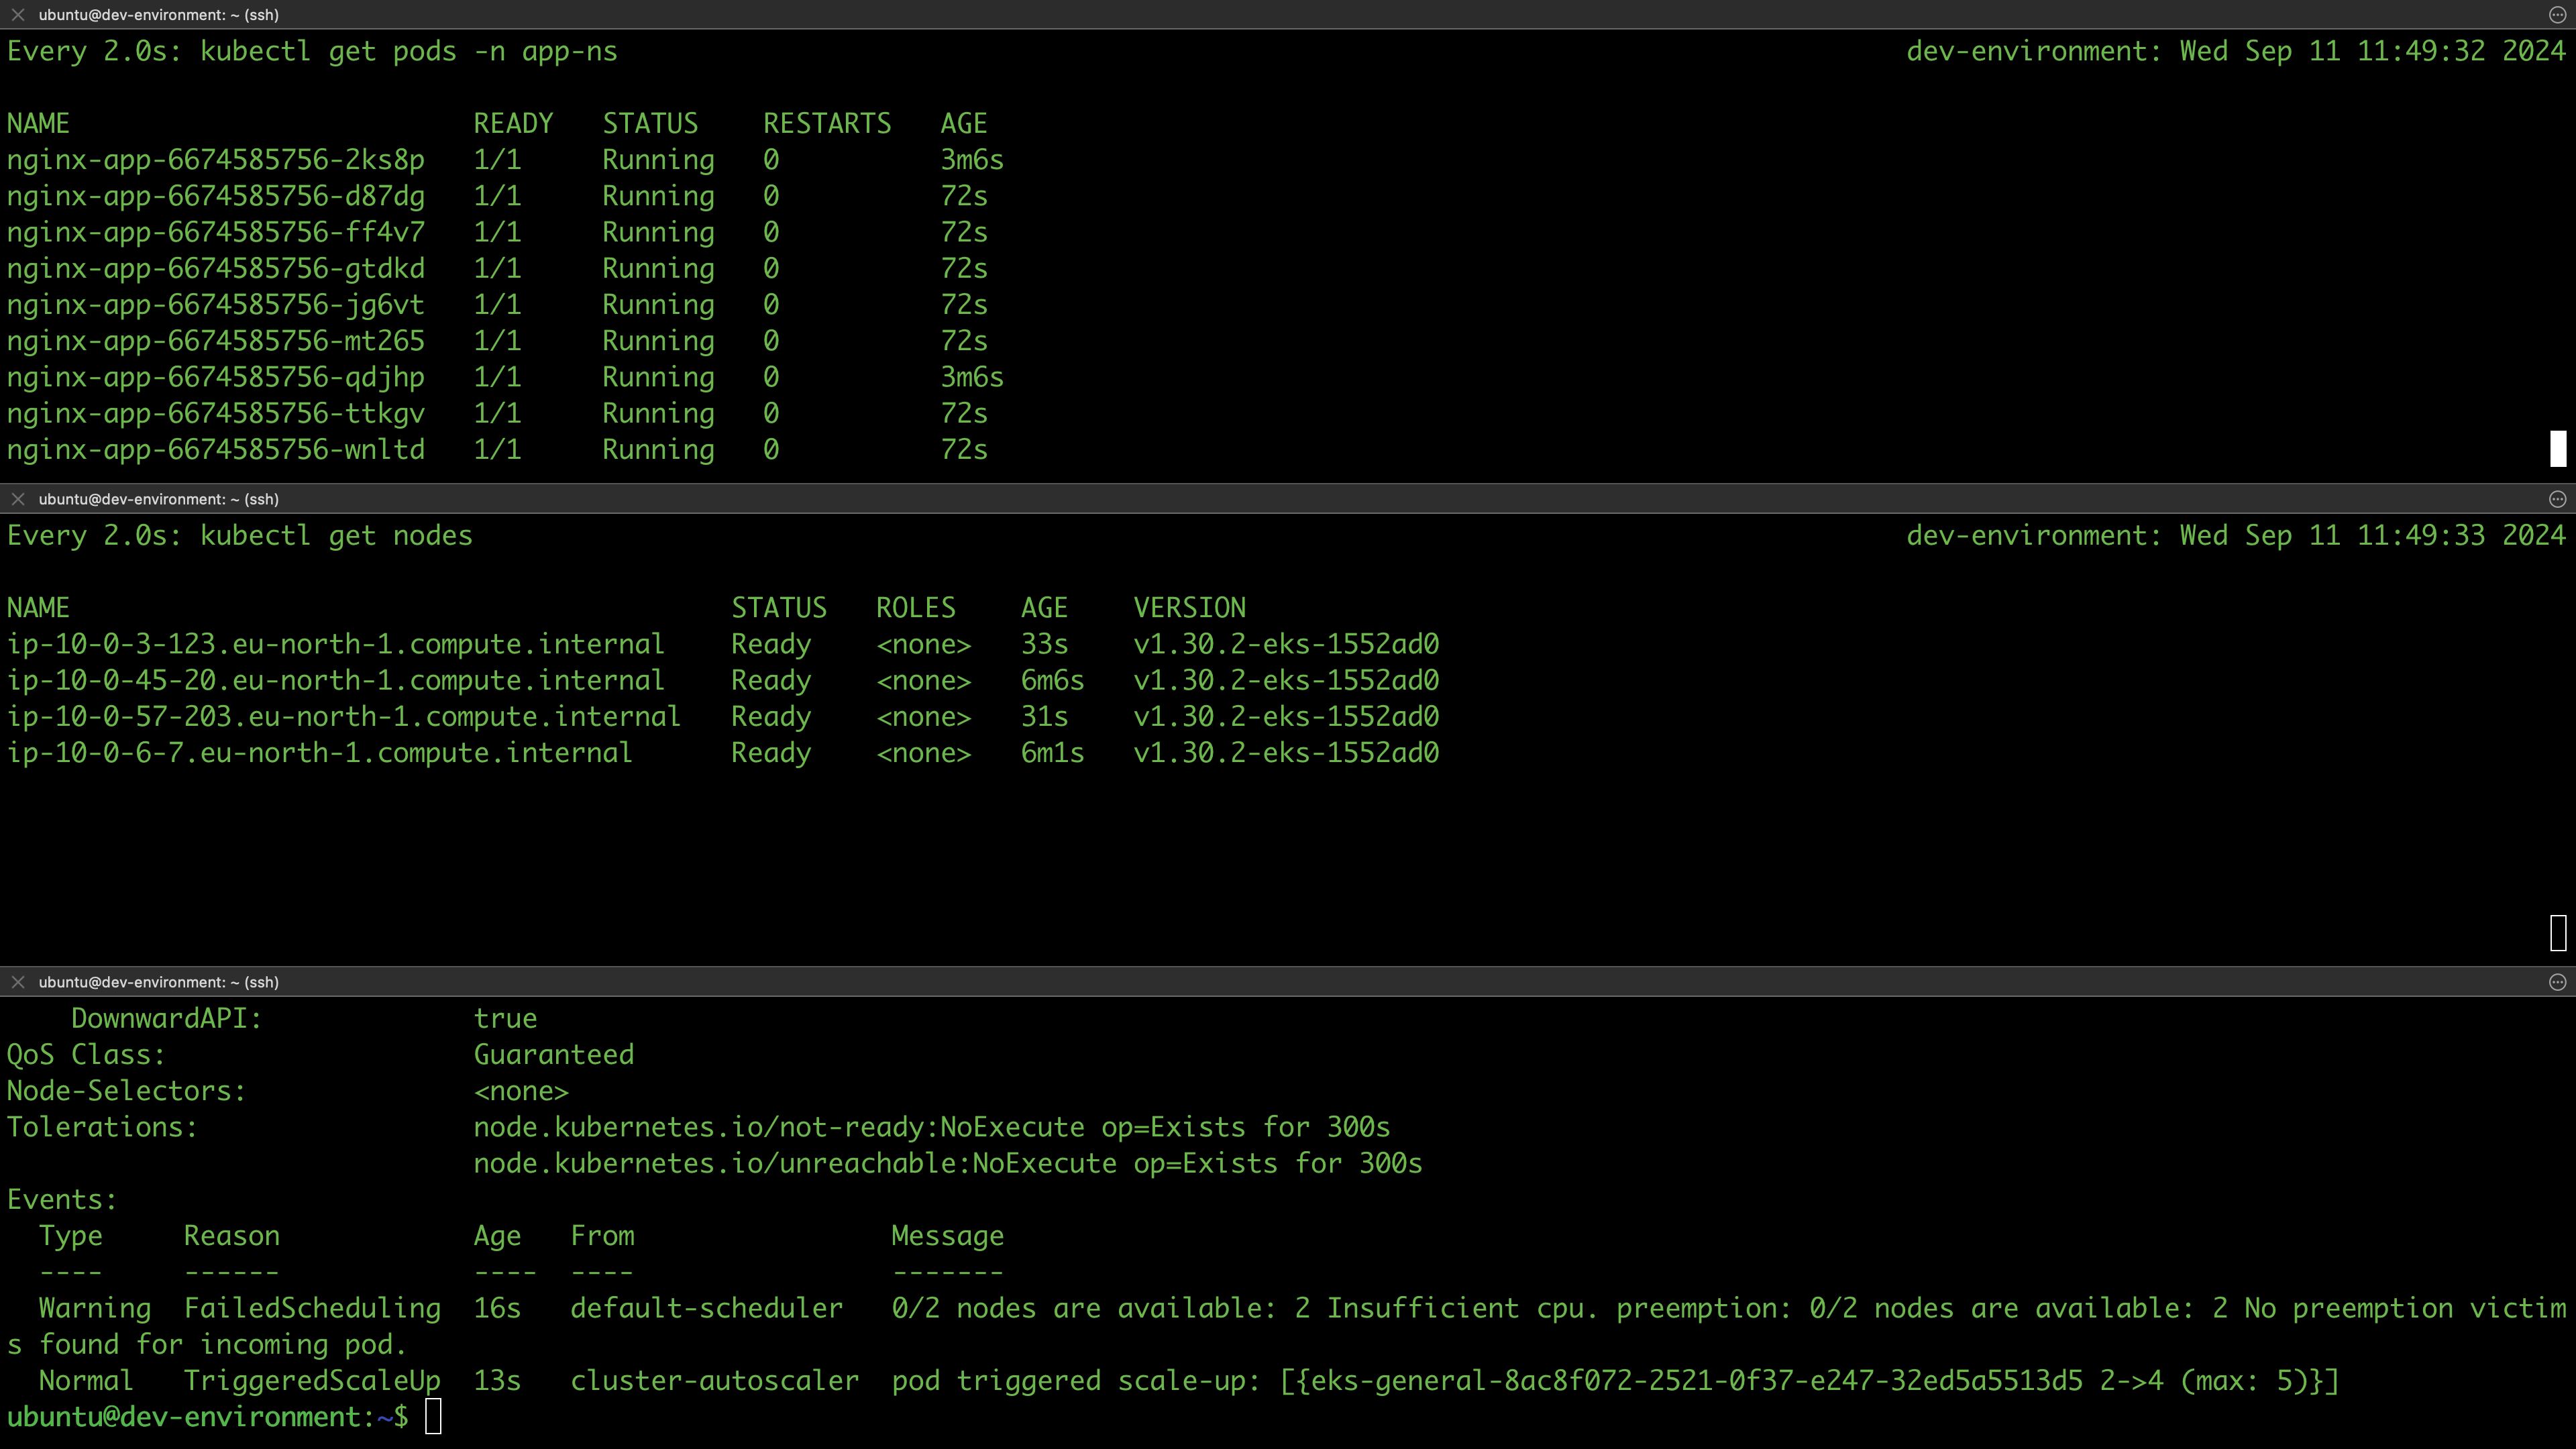
To scale down, let's run the command below:
kubectl -n app-ns scale deployment/nginx-app --replicas=2
Once executed, we see 8 replicas are instantly terminated to remain with the desired replicas (2 pods):
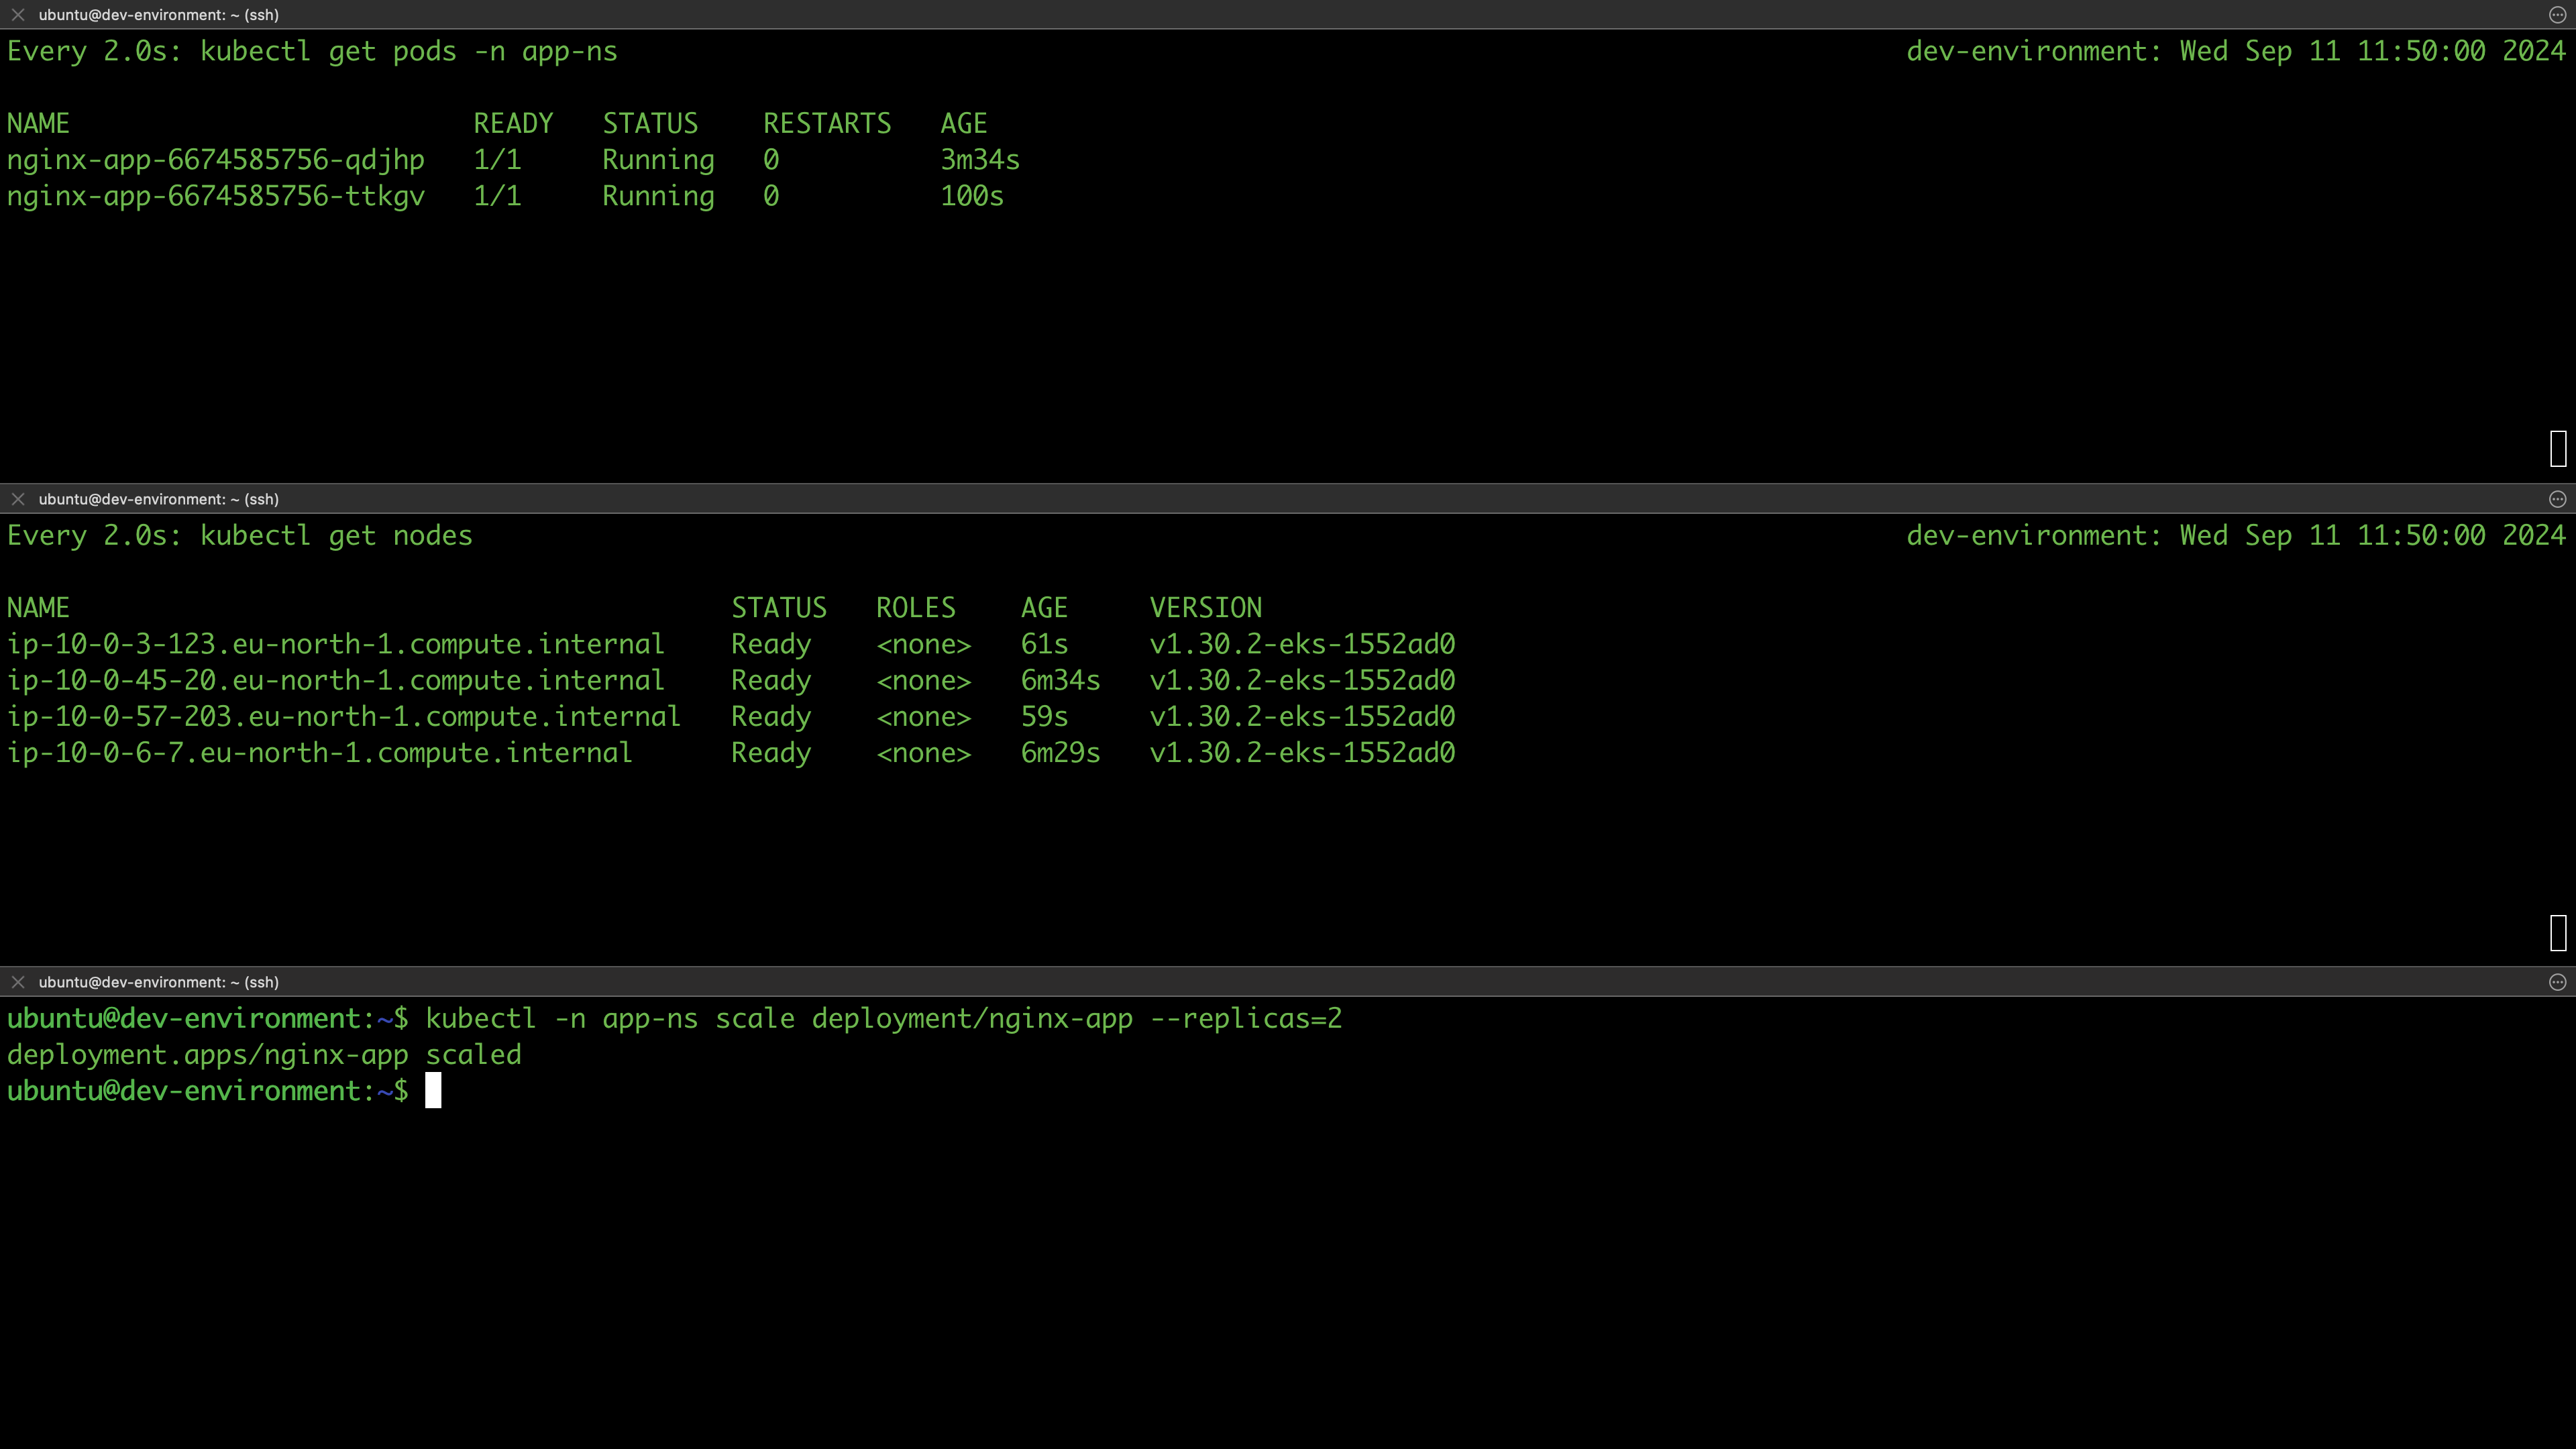

The cluster autoscaler will detect idle nodes and trigger to adjust the desired size of the underline ASG causing the idle nodes terminated. However, the scaling down of nodes does not happen instantly as in the case of the pods. It occurs over a period determined by terminationGracePeriodSeconds. Now after 10-11 minutes we see the nodes are beginning to scale down. Once the process begins, they are first marked, Ready,SchedulingDisabled, meaning the no scheduling can be performed on that node(s):
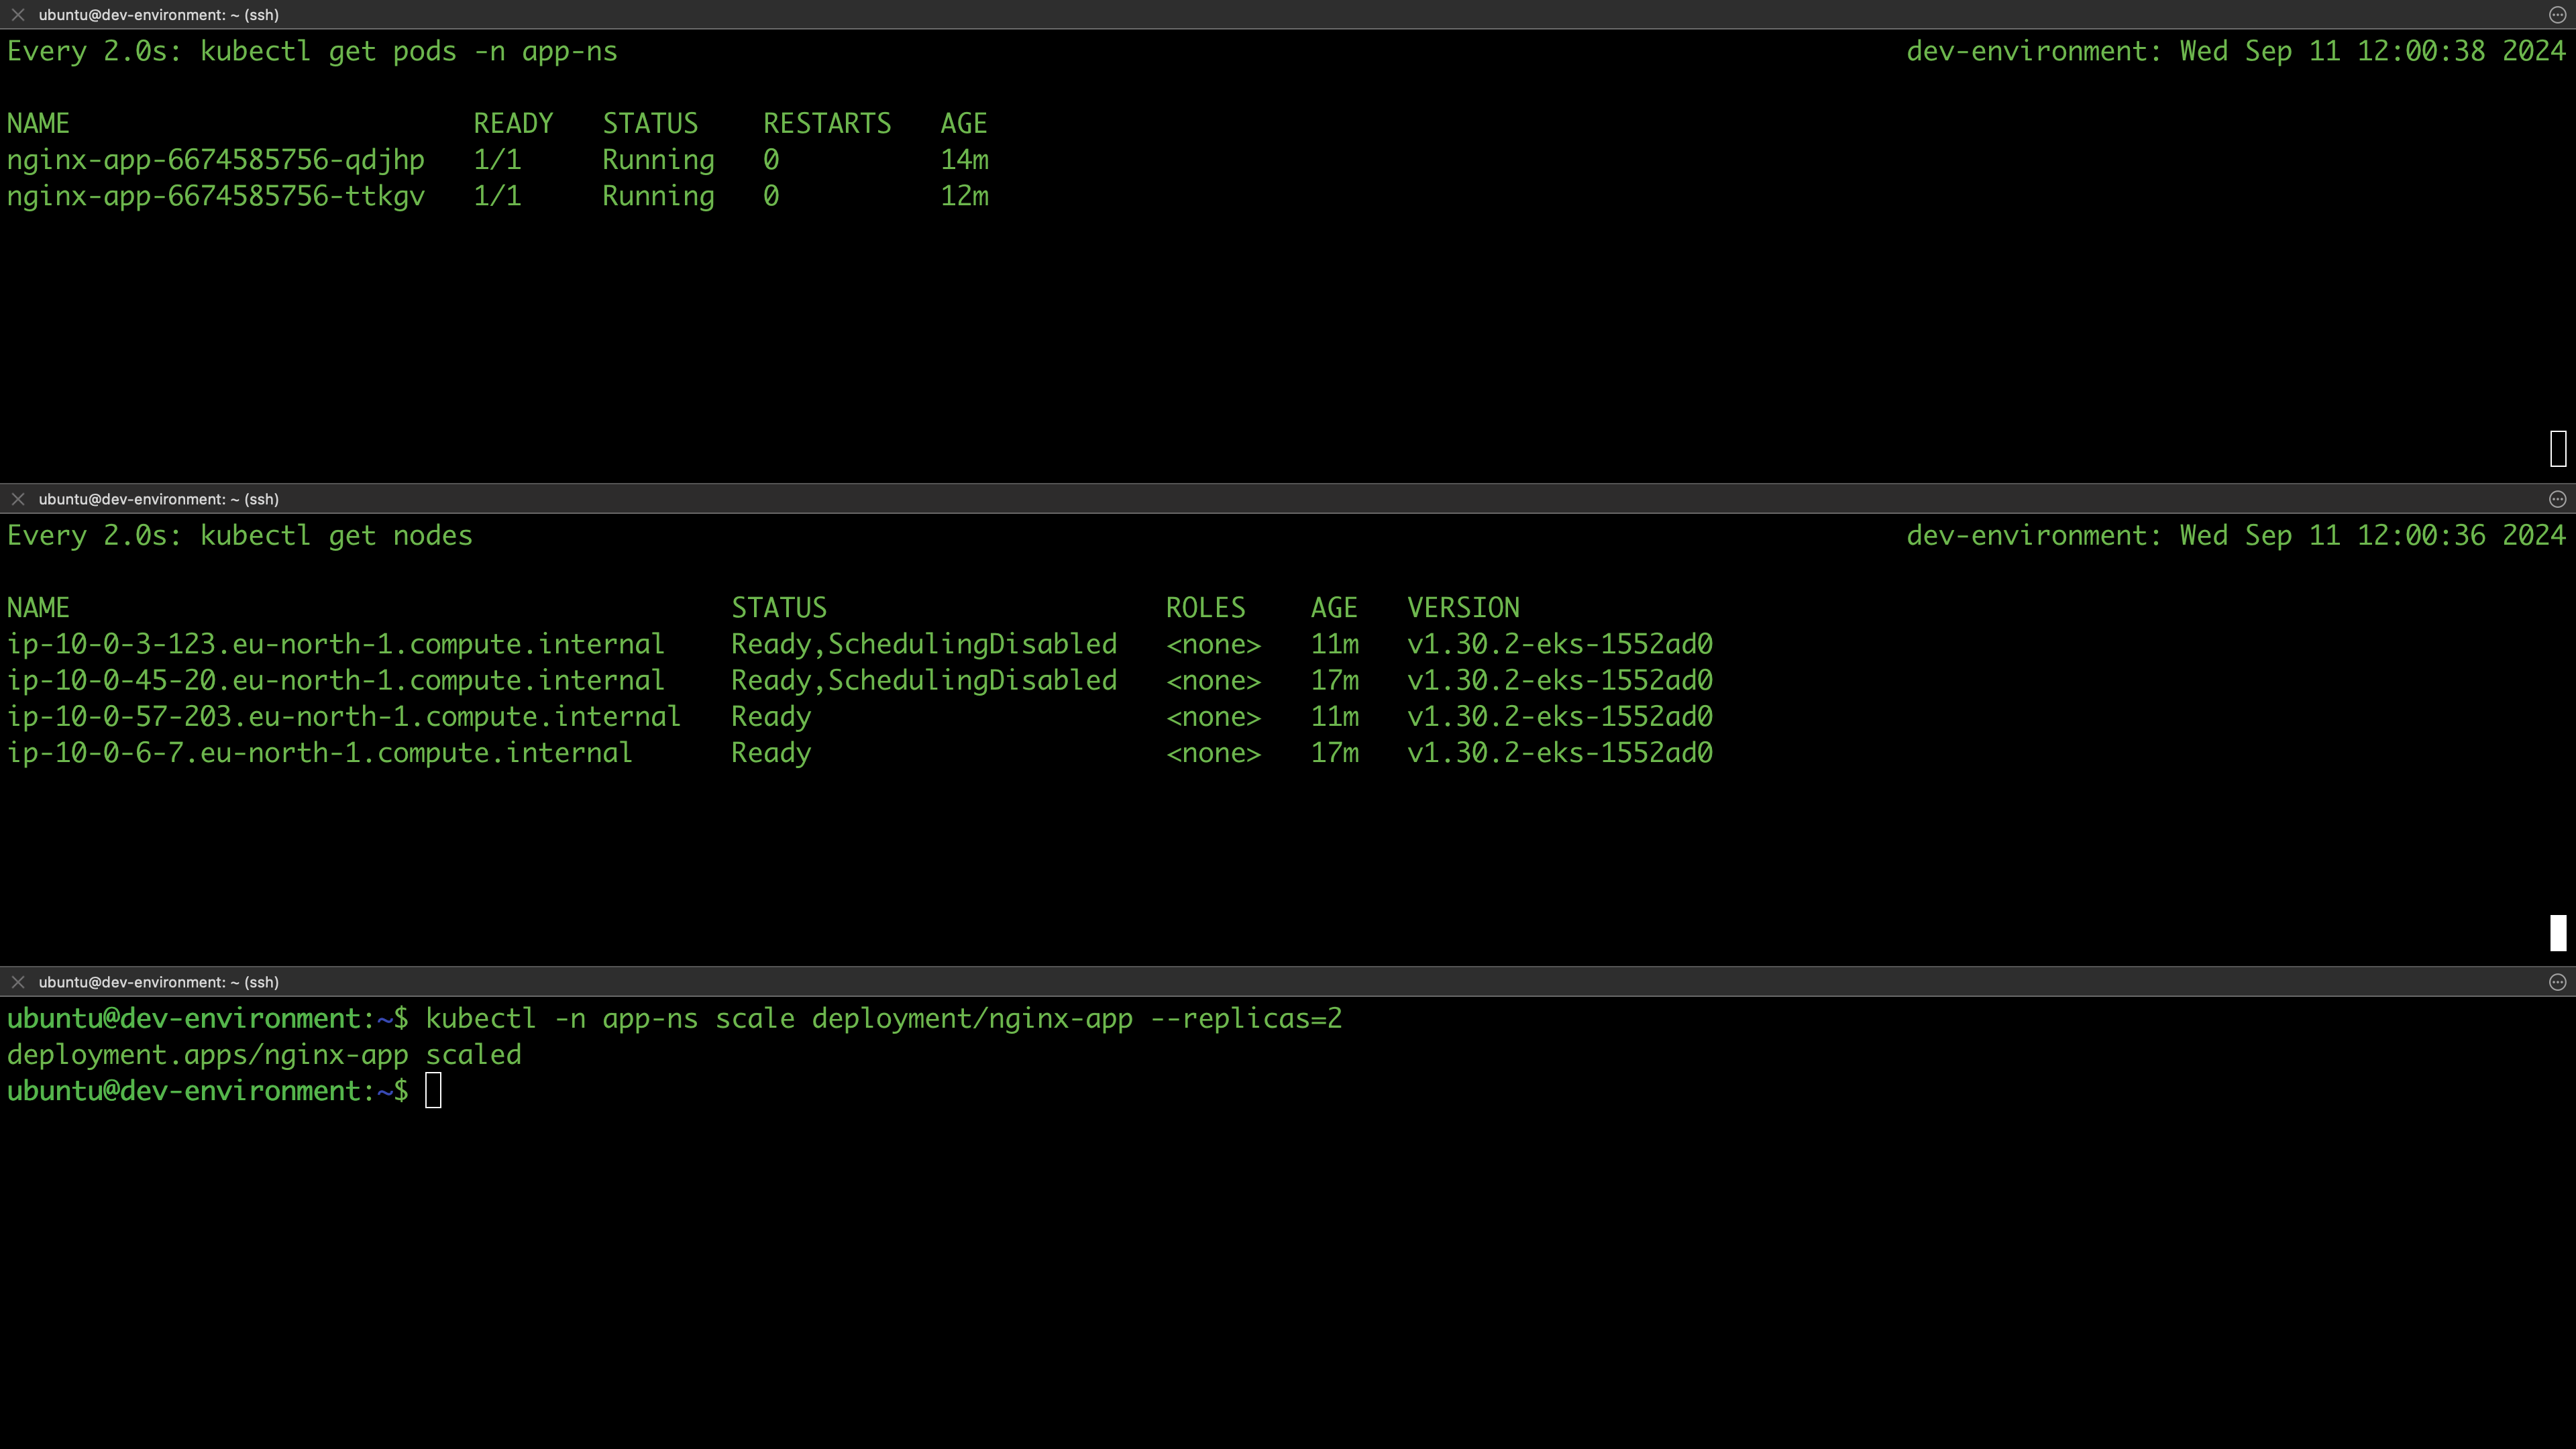
They then transition to NotReady,SchedulingDisabled state.
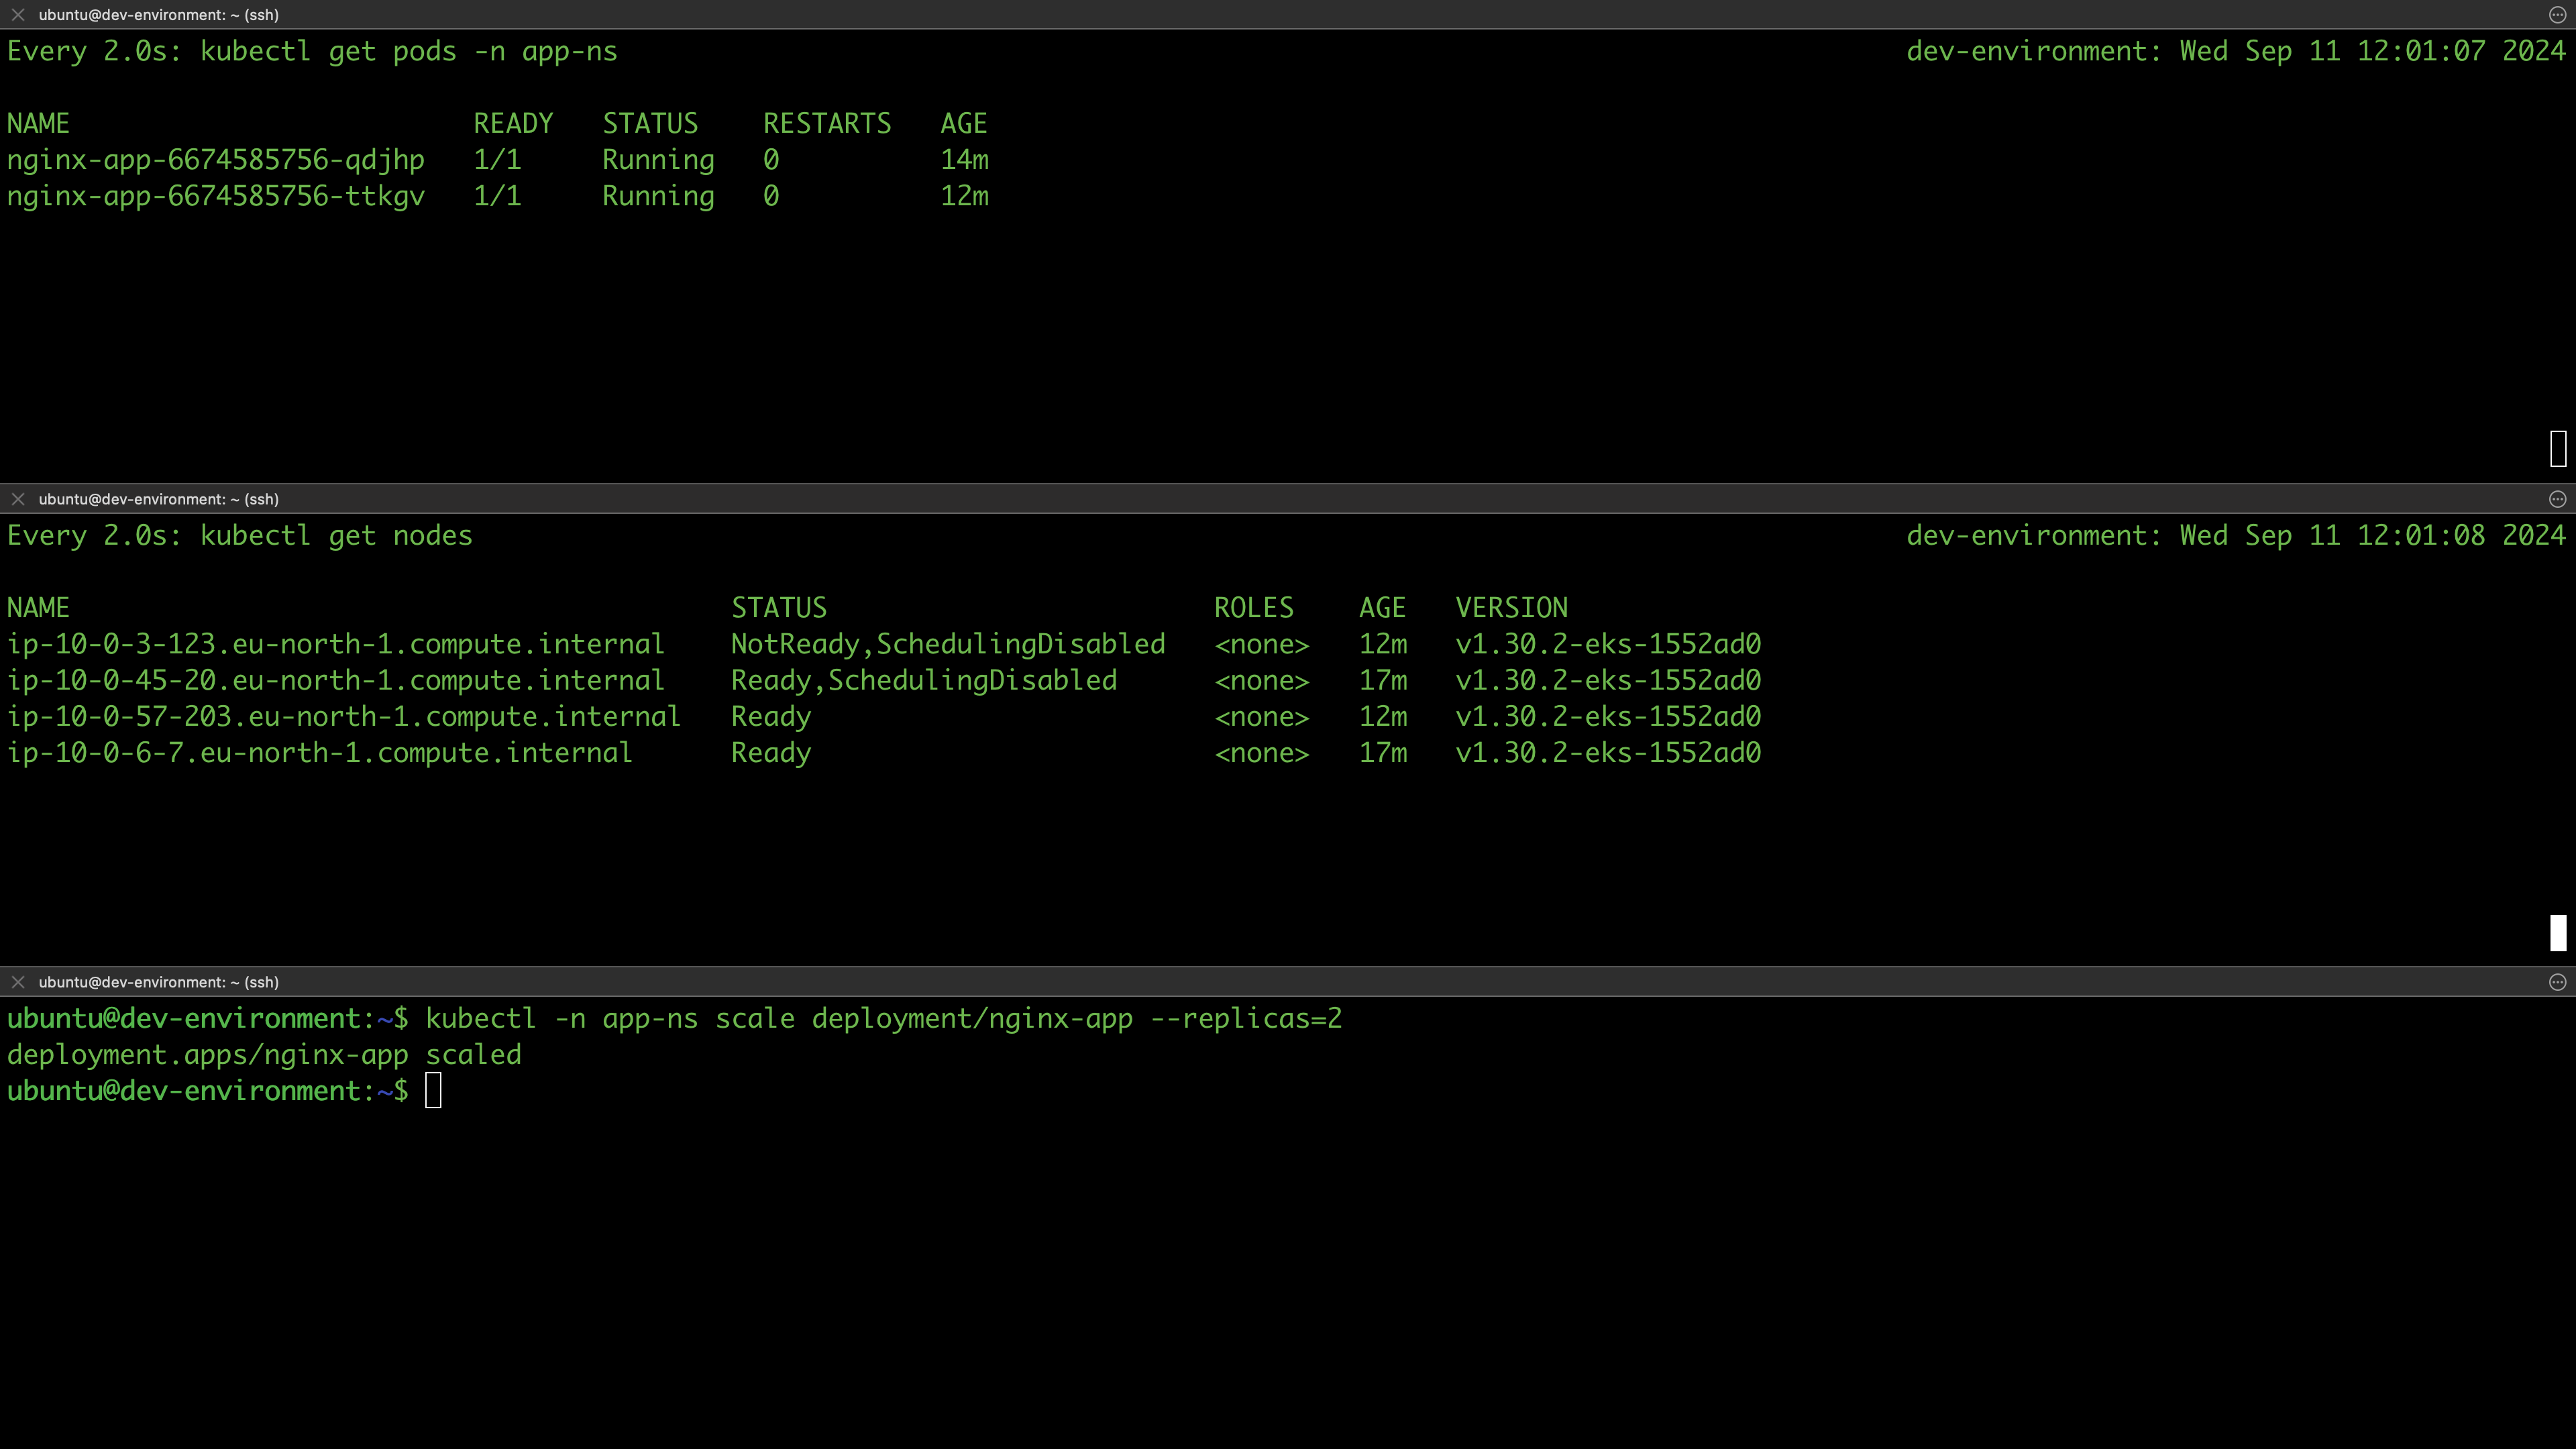
After the NotReady,SchedulingDisabled state, the unneeded nodes are dropped from the the cluster ending up with two nodes serving the two replicas:
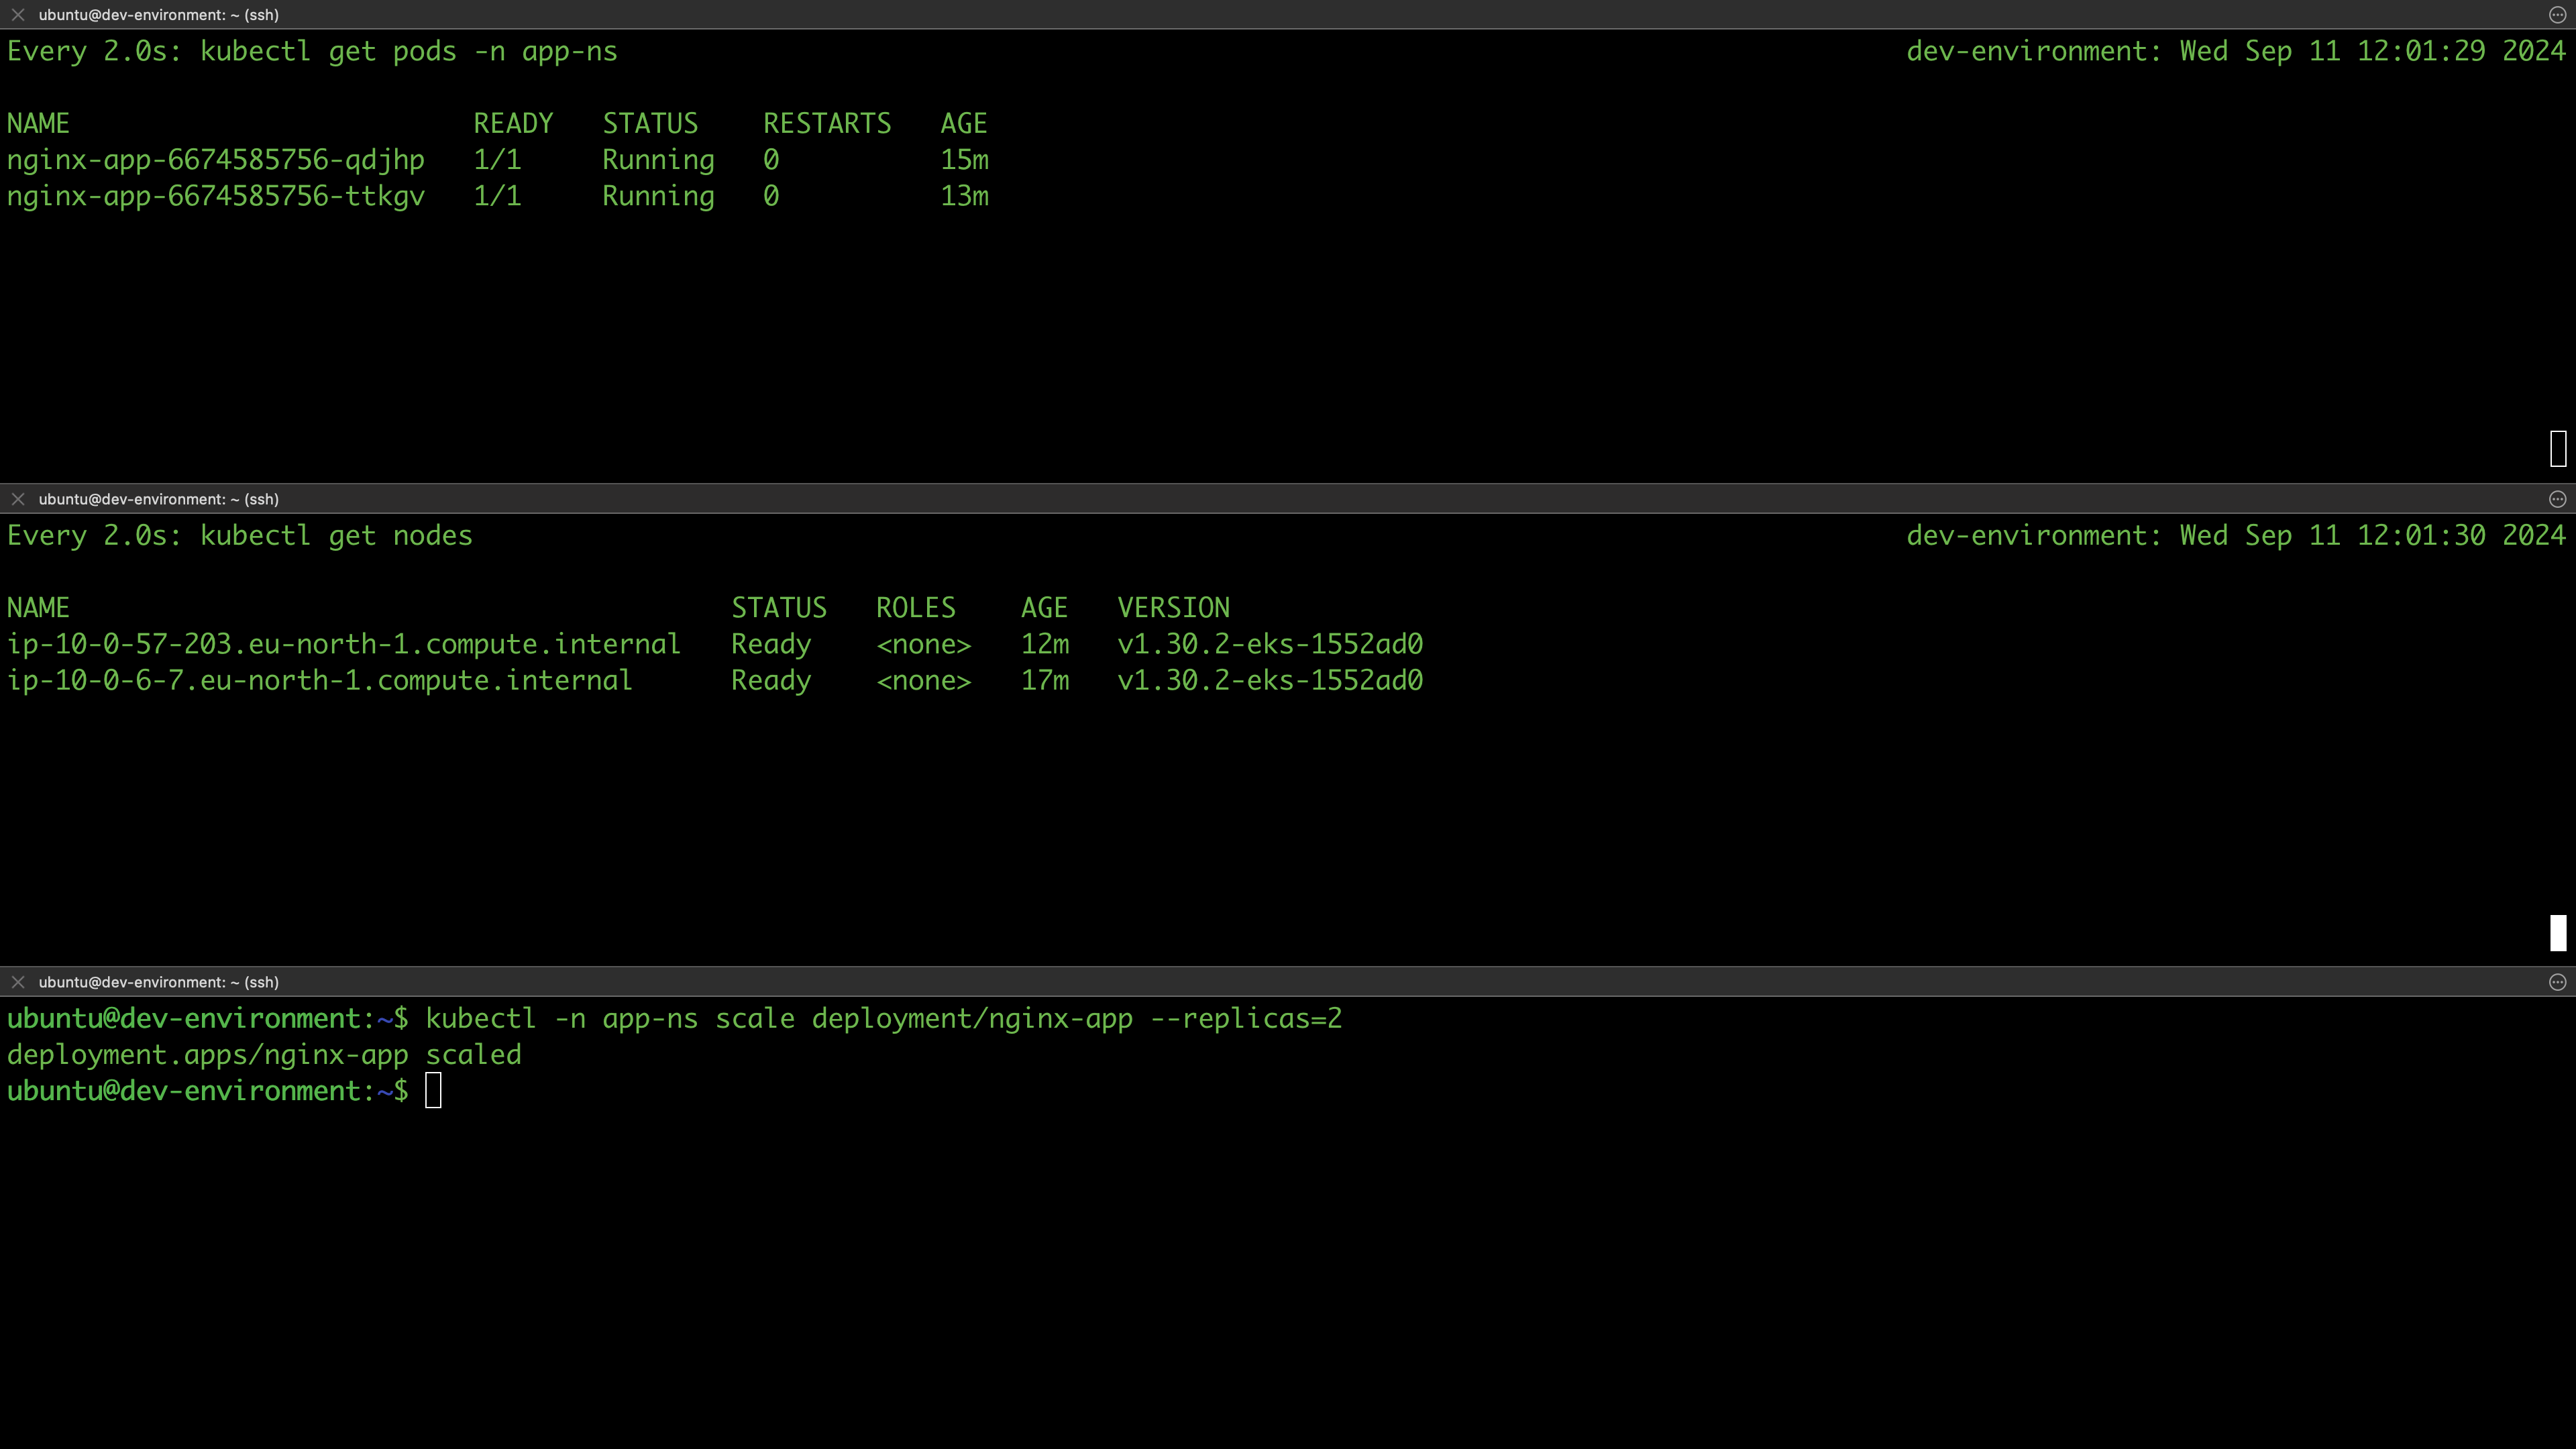
The scaling down of nodes will occur over a period determined by terminationGracePeriodSeconds. After completion, you should observe that the number of nodes has been reduced to match the current load, ensuring no idle nodes remain.
$ kubectl get nodes
NAME                                         STATUS   ROLES    AGE   VERSION
ip-10-0-57-203.eu-north-1.compute.internal   Ready    <none>   14m   v1.30.2-eks-1552ad0
ip-10-0-6-7.eu-north-1.compute.internal      Ready    <none>   19m   v1.30.2-eks-1552ad0
Let's scale the deployment to trigger the cluster autoscaler and facilitate the provisioning of additional worker nodes. This will help us understand how the cluster's capacity is affected by applying future Terraform changes:
kubectl -n app-ns scale deployment/nginx-app --replicas=6
Confirm your pods are schedule. Probably some will be pending as cluster autoscaler will have to adjust the desired size so that the autoscaler can provision additional nodes, so give it time to scale
$ kubectl -n app-ns get  deployment
NAME        READY   UP-TO-DATE   AVAILABLE   AGE
nginx-app   6/6     6            6           25m
All 6 out of 6 replicas are ready. We can as well check the nodes were added:
$ kubectl get nodes
NAME                                         STATUS     ROLES    AGE   VERSION
ip-10-0-14-145.eu-north-1.compute.internal   NotReady   <none>   6s    v1.30.2-eks-1552ad0
ip-10-0-57-203.eu-north-1.compute.internal   Ready      <none>   18m   v1.30.2-eks-1552ad0
ip-10-0-6-7.eu-north-1.compute.internal      Ready      <none>   23m   v1.30.2-eks-1552ad0
One more node was added which are currently not ready but they will get ready in no time:
$ kubectl get nodes
NAME                                         STATUS     ROLES    AGE   VERSION
ip-10-0-14-145.eu-north-1.compute.internal   Ready      <none>   59s    v1.30.2-eks-1552ad0
ip-10-0-57-203.eu-north-1.compute.internal   Ready      <none>   19m   v1.30.2-eks-1552ad0
ip-10-0-6-7.eu-north-1.compute.internal      Ready      <none>   24m   v1.30.2-eks-1552ad0
Accessing the Application
Now that we have verified our cluster can scale, let also test if we can access our application running inside these pods.
First, verify the service we created in the previous section exist in the app-ns namespace:
$ kubectl get svc -n app-ns
NAME                TYPE        CLUSTER-IP       EXTERNAL-IP   PORT(S)   AGE
nginx-app-service   ClusterIP   172.20.198.182   <none>        80/TCP    71m
As expected, this service is of type ClusterIP. Let's also confirm it targets our pods as the backend:
$ kubectl describe service nginx-app-service -n app-ns | grep Endpoints
Endpoints:         10.0.27.151:80,10.0.37.192:80,10.0.2.96:80 + 3 more...
As you can see, the service routes traffic on port 80 of our six NGINX deployment replicas (10.0.27.151:80,10.0.37.192:80,10.0.2.96:80 + 3 more...):
If we send a request to the service endpoint we should be able to get response from the NGINX server:
# First forward the port
kubectl -n app-ns port-forward svc/nginx-app-service 8080:80
Now curl on a different terminal pane (make sure you are ssh-ed in your instance):
$ curl http://localhost:8080

<!DOCTYPE html>
<html>
<head>
<title>Welcome to nginx!</title>
<style>
html { color-scheme: light dark; }
body { width: 35em; margin: 0 auto;
font-family: Tahoma, Verdana, Arial, sans-serif; }
</style>
</head>
<body>
<h1>Welcome to nginx!</h1>
<p>If you see this page, the nginx web server is successfully installed and
working. Further configuration is required.</p>

<p>For online documentation and support please refer to
<a href="http://nginx.org/">nginx.org</a>.<br/>
Commercial support is available at
<a href="http://nginx.com/">nginx.com</a>.</p>

<p><em>Thank you for using nginx.</em></p>
</body>
</html>
To serve our application to end users, simple port forwarding is not sufficient. We need to use a Load Balancer service expose our application to public. We will implement an AWS load balancer ingress, which will create an application load balancer to manage the exposure of the application publicly. This solution aligns with our architecture diagram.
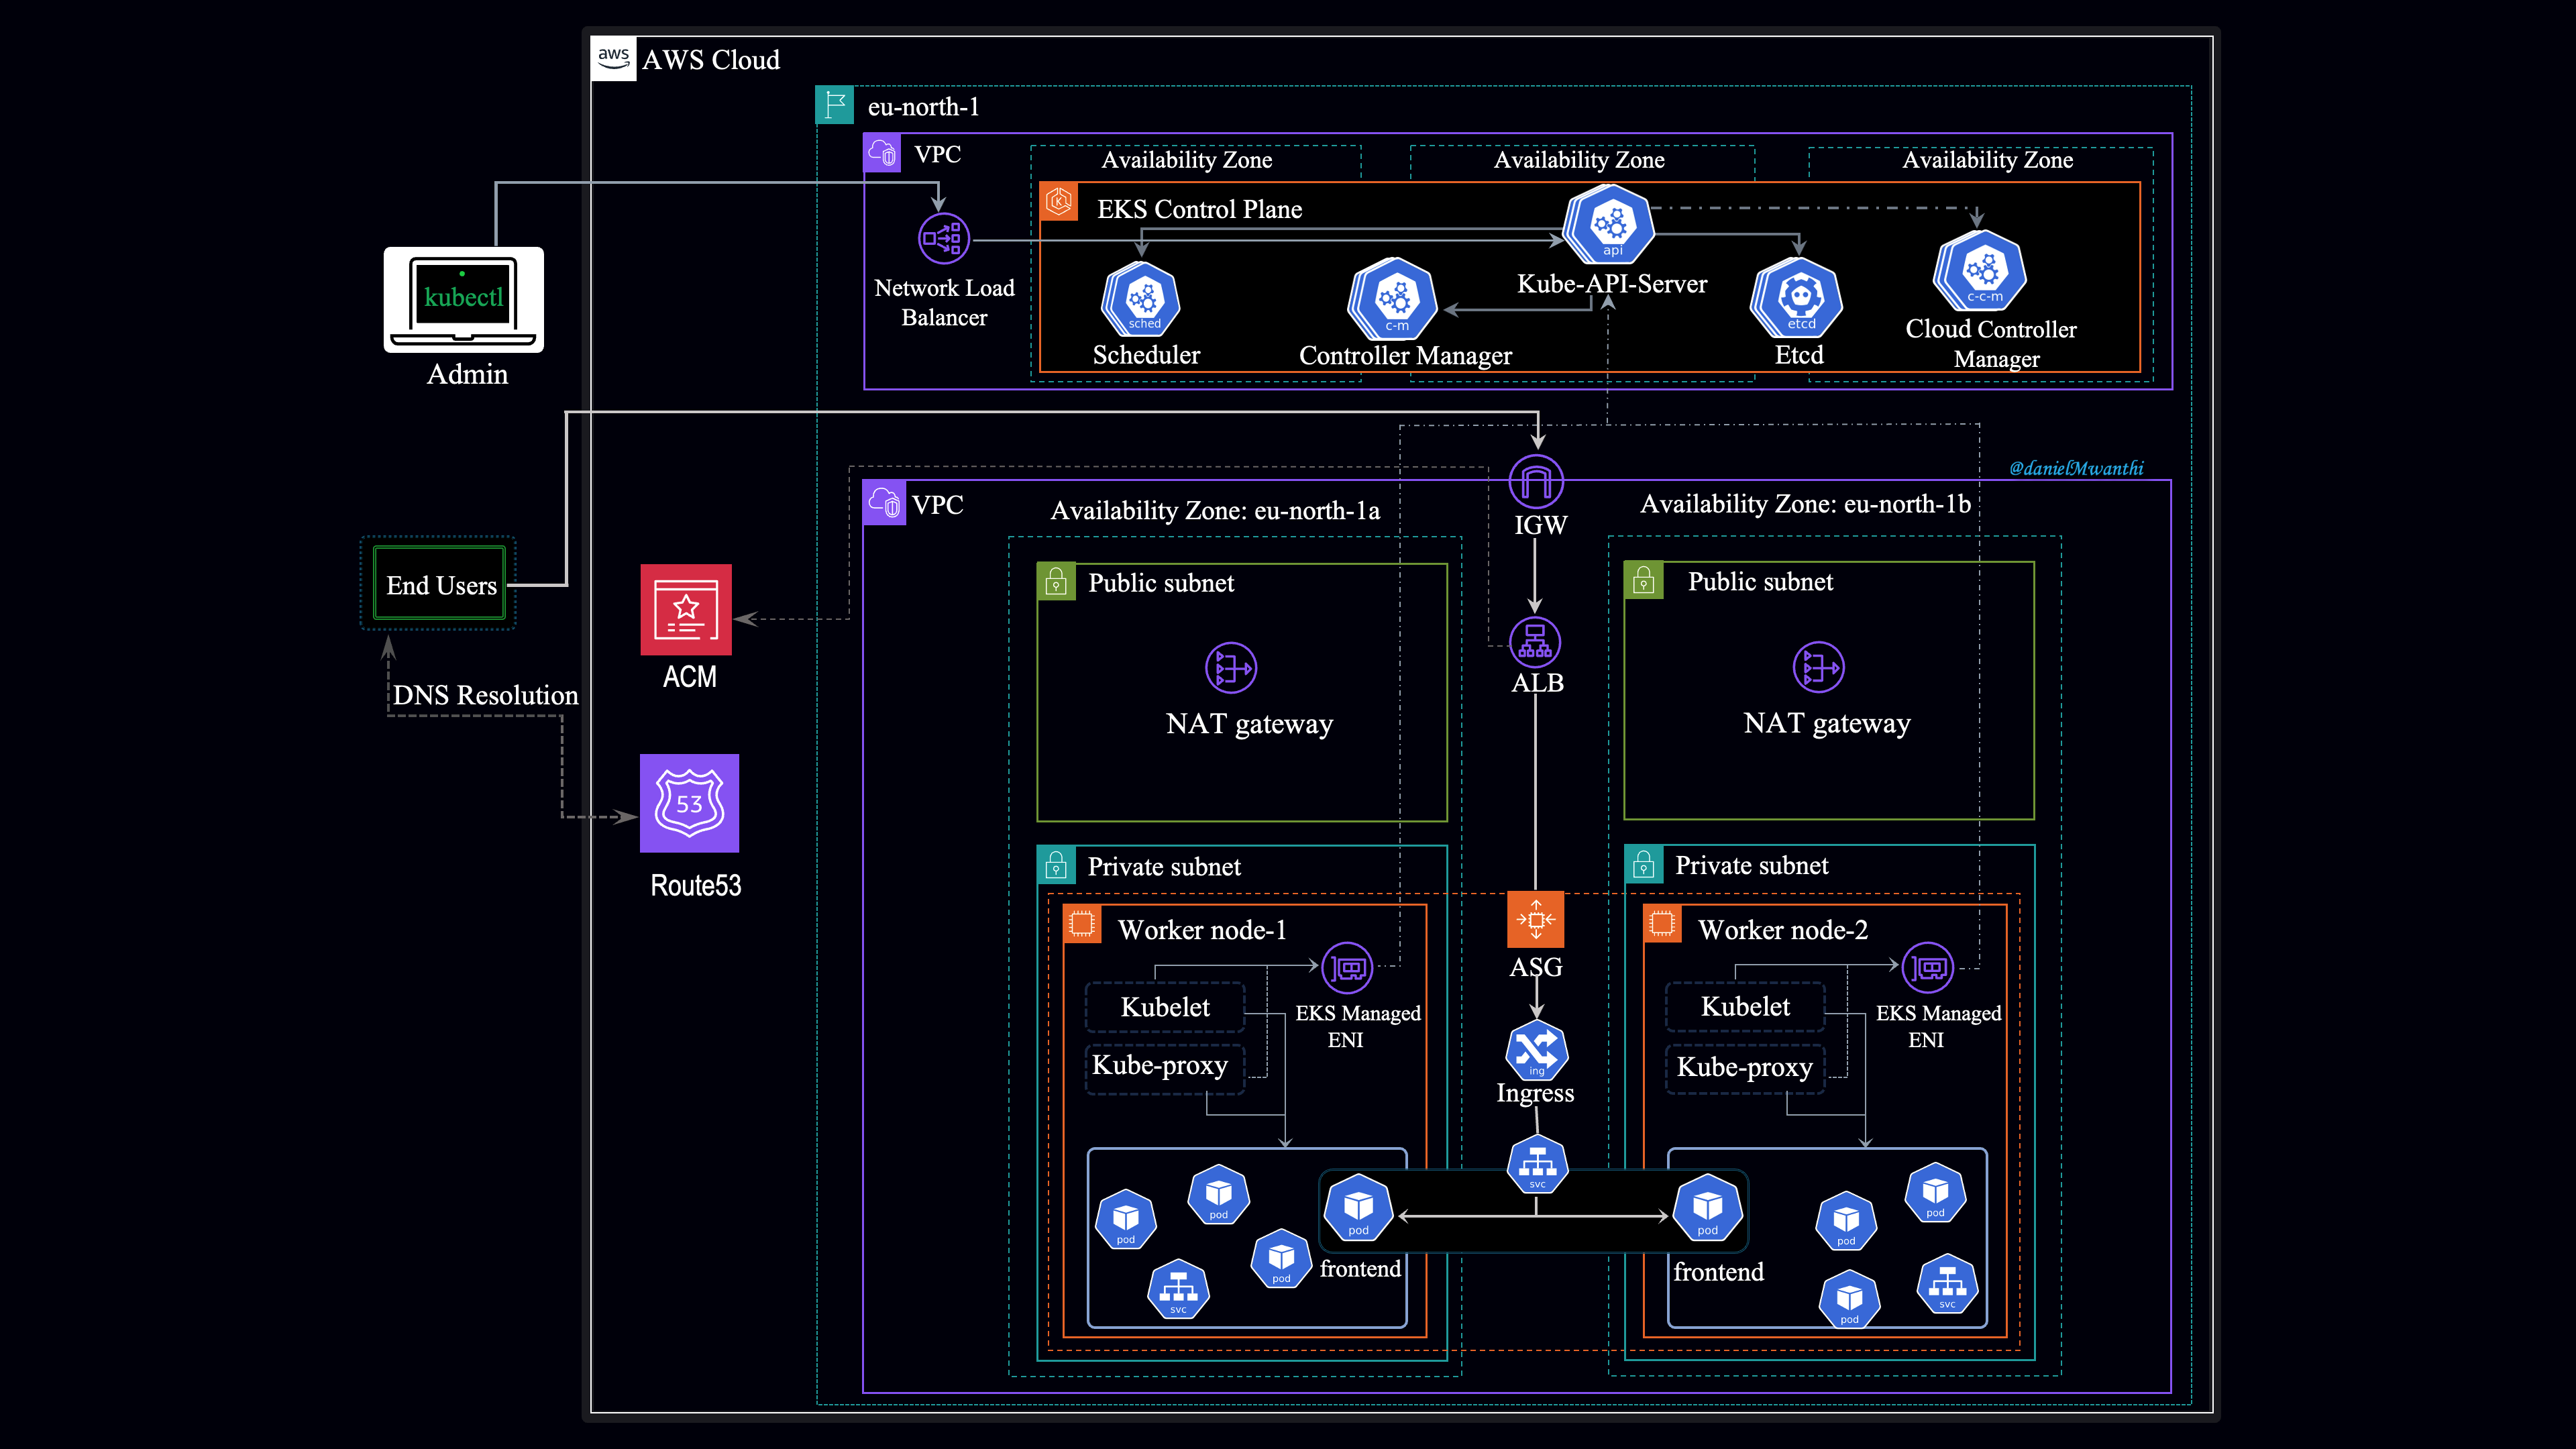
AWS Load Balancer Controller
The standard Cloud Controller Manager (CCM) for AWS in Kubernetes primarily interacts with Classic Load Balancers (CLBs). When you create a Kubernetes Service of type LoadBalancer, the CCM typically provisions a Classic Load Balancer by default. While it can be configured to work with Network Load Balancers (NLBs) via specific annotations in the Service manifest, it does not natively support Application Load Balancers (ALBs). To use ALBs, you would typically need to employ the seperate AWS Load Balancer Controller, which is not part of the standard CCM. Additionally, with standard CCM, managing SSL/TLS certificates must be done separately through the AWS Management Console or API, as the CCM lacks built-in support for handling such configurations.
In contrast, the AWS Load Balancer Controller provides extensive support for both ALBs and NLBs, allowing Kubernetes users to leverage advanced features such as path-based and host-based routing, Web Application Firewall (WAF) integration, and automatic SSL certificate management. For Kubernetes deployments requiring enhanced load balancing and security, the AWS Load Balancer Controller is a more advanced and capable choice.
Given that our application (NGINX) primarily handles HTTP/HTTPS traffic and requires secure communication, we choose to go with an Application Load Balancer (ALB). The ALB not only manages HTTP/HTTPS traffic efficiently but also handles SSL/TLS termination, which means it decrypts HTTPS traffic at the load balancer level. This reduces the processing load on our backend servers, ensuring better performance and security. While an NLB could be considered if our application needed to handle raw TCP/UDP traffic or other transport layer protocols like DNS or SIP, the ALB is the optimal choice for our current needs.
To implement this solution, we need to install the AWS Load Balancer Controller in our cluster. Since we are using Terraform, we can manage the installation by using a Helm chart in conjunction with Terraform for streamlined deployment.
Installing AWS Load Balancer Controller
Let's define a Terraform resource configurations inside the k8s-addons module to automates the deployment of the AWS Load Balancer Controller in an EKS cluster. Before install these resources, first we need to implement authentication solution ensuring the controller can access AWS and create resources. Just as we did in the cluster autoscaler session, we will use pod identity. For any process running in a pod to connect to and provision resources on AWS, the service account associated with the pod must have the necessary permissions that the pod can assume. This is what we discussed during the Autoscaler session. Therefore, we need to create an IAM role with the required policies to grant the AWS Load Balancer Controller access to the AWS API and the ability to create load balancers. I have added comments in the following configuration file to illustrate this:
cat <<EOF > ~/infrastructure-modules/k8s-addons/aws-lb-controller.tf
# Create IAM role for the AWS LB controller
resource "aws_iam_role" "this" {
  name               = "\${var.eks_name}-aws-lbc"
  assume_role_policy = jsonencode({
    Version   = "2012-10-17"
    Statement = [
      {
        Effect    = "Allow"
        Action    = [
          "sts:AssumeRole",
          "sts:TagSession"
        ]
        Principal = {
          Service = "pods.eks.amazonaws.com"
        }
      }
    ]
  })
}

# Create necessary policies
resource "aws_iam_policy" "this" {
  policy = file("./iam/aws-lb-controller-policy.json")
  name   = "\${var.eks_name}-aws-lbc"
}

# Attach the policies to the IAM role
resource "aws_iam_role_policy_attachment" "this" {
  role       = aws_iam_role.this.name
  policy_arn = aws_iam_policy.this.arn
}

# Associate the pod identity with IAM role
resource "aws_eks_pod_identity_association" "this" {
  cluster_name    = var.eks_name
  namespace       = "kube-system"
  service_account = "aws-load-balancer-controller"
  role_arn        = aws_iam_role.this.arn
}

# Controller release helm chart
resource "helm_release" "this" {
  name = "aws-load-balancer-controller"

  repository = "https://aws.github.io/eks-charts"
  chart      = "aws-load-balancer-controller"
  namespace  = "kube-system"
  version    = "1.8.1"

  set {
    name  = "clusterName"
    value = var.eks_name
  }

  set {
    name  = "region"
    value = "eu-north-1"
  }

  set {
    name = "vpcId"
    value = var.vpc_id
  }

  set {
    name  = "serviceAccount.name"
    value = "aws-load-balancer-controller"
  }

  depends_on = [helm_release.cluster_autoscaler]
}
EOF
This module starts by defining an IAM policy document for allowing EKS pods to assume a role and tag session using the STS. An IAM role is then created with this policy, that will enable the controller to interact with AWS services securely.
Next it creates specific IAM policy with predefined permission (aws-lb-controller.json) required by the AWS Load Balancer Controller. These policy is then attached to the role (aws_iam_role_policy_attachment.this), granting it necessary permissions. The policies file reference in the configurations is stored in the iam directory within the k8s-addons module.
Execute the command below to create and download the policy content to this file:
# Create the directory to store policies
mkdir -p ~/infrastructure-modules/k8s-addons/iam/

# Download the policy
curl -L -o ~/infrastructure-modules/k8s-addons/iam/aws-lb-controller-policy.json https://github.com/kubernetes-sigs/aws-load-balancer-controller/raw/v2.8.2/docs/install/iam_policy.json
The aws_eks_pod_identity_association resource links the role to the controller’s service account in the kube-system namespace, ensuring the service account has the credentials necessary needed to by the load balancer controller to authenticate and interact with the AWS API.
Finally, the module deploys the AWS Load Balancer Controller using Helm chart. In the chart, it overrides the cluster name, the vpc id, and the servie account as specified in the set block. This module is dependent on cluster autoscaler, since, some of the components that autoscaler depends on such as deployment of the cluster and pod identities are also dependent on by this module as well.
The VPC ID referenced in the module is not currently declared in the module's variables file. Executing the module as it is will result in an error. To resolve this, we need to declare the VPC ID variable in the variables file.
cat << EOF >> ~/infrastructure-modules/k8s-addons/variables.tf
variable "vpc_id" {
  description = "ID of the vpc cluster is deployed in"
  type        = string
}
EOF
Now if we apply changes of this new module, the desired_size property in the EKS module configuration will override the desired state set by the cluster autoscaler in the infrastructure. For example, if your EKS configuration initially specified 2 instances, but the autoscaler scaled up to 3 instances to handle increased load, running terraform apply would reduce the number of nodes back to 2. As you can see in the example below, the dev cluster have scaled to 3 but applying terraform is going to scale it down to two:
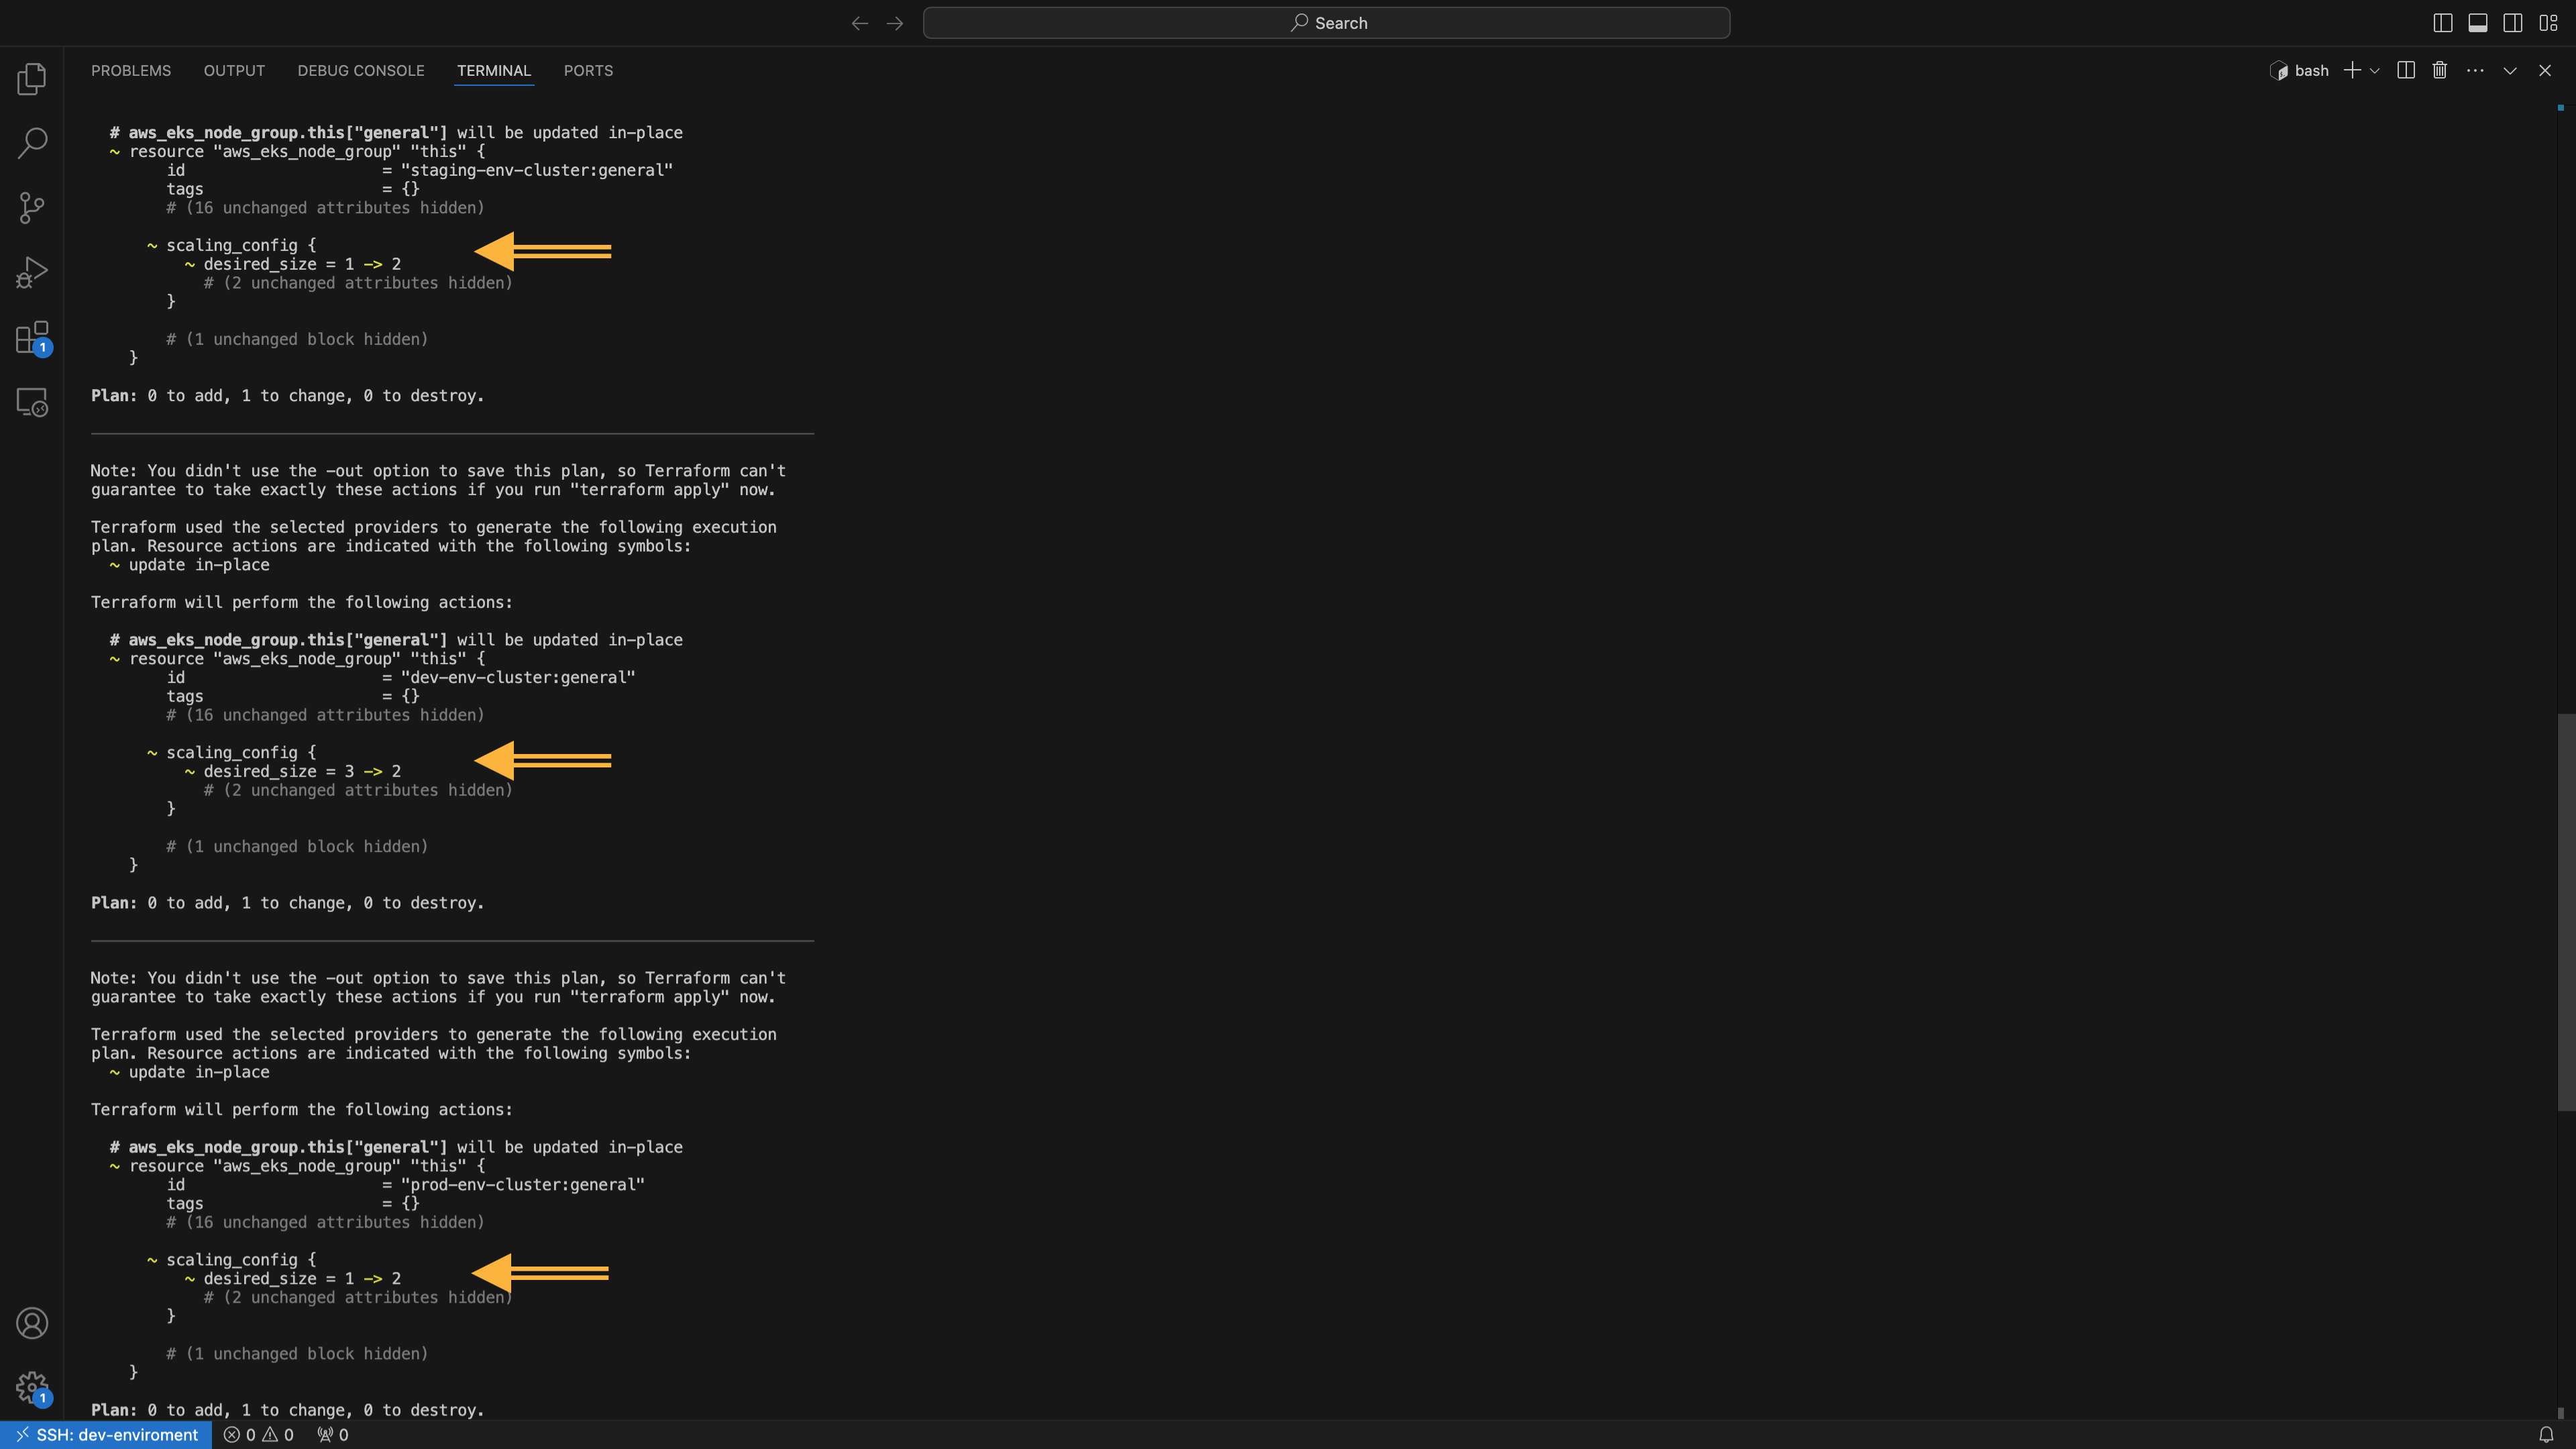
This could cause a problem if for example, during high demand, the autoscaler has scaled up to, say, 10 instances to handle high demand, but then applying Terraform changes causes Terraform to terminate the excess worker nodes to attain the desired size define in the configuration, potentially leading to downtime.
To prevent this, you can add the ignore_changes lifecycle rule for the desired_size attribute in your Terraform configuration for the node group’s Auto Scaling Group. This ensures that Terraform does not interfere with the autoscaler’s adjustments, maintaining the current number of nodes and avoiding unintended scaling down that could impact application availability.
Here’s how to implement this:
resource "aws_eks_node_group" "example" {
  # Other configurations...

  lifecycle {
    ignore_changes = [scaling_config[0].desired_size]
  }
}
After making these changes, you need to push them to the remote modules repository and upgrade the Terragrunt configurations for the EKS module in all environments to start using this new version. Let's quickly do that:
# Release new version of eks and k8s-add-ons modules
cd ~/infrastructure-modules/
git add k8s-addons
git commit -m "Added AWS Load Balancer Controller installation Chart"
git tag k8s-addons-v0.0.2 -m "K8s-addons module version 0.0.2"

git add eks
git commit -m "Updated eks module to ignore Updating desired_size proprty"
git tag eks-v0.0.2 -m "Eks module version 0.0.2"

# Push the changes to Github
git push origin main --tags
Applying Configurations with Terragrunt
Now update the terragrunt to download and apply Terraform version 0.0.2 configurations of the k8s-addons and eks modules, first in the dev enviroment. If the controller is successfully deployed in this environment, you'll upgrade the other environment (staging, and prod) to get the controller installed.
Here is the field your need to change in the Terragrunt files:
# Change the k8s-addon module version from -v0.0.1 to -v0.0.2
terraform {
  source = "git@github.com:D-Mwanth/infrastructure-modules.git//k8s-addons?ref=k8s-addons-v0.0.2"
}

# Change the eks module version from -v0.0.1 to -v0.0.2
terraform {
  source = "git@github.com:D-Mwanth/infrastructure-modules.git//eks?ref=eks-v0.0.2"
}
Now commit the changes and push them to Github repostory to trigger Github Actions to apply the changes:
git add . && git commit -m "Added AWS Load Balancer Controller Add-on Module"
git push origin main
Ensure the Terragrunt exits gracefully, indicating the installation was successful:
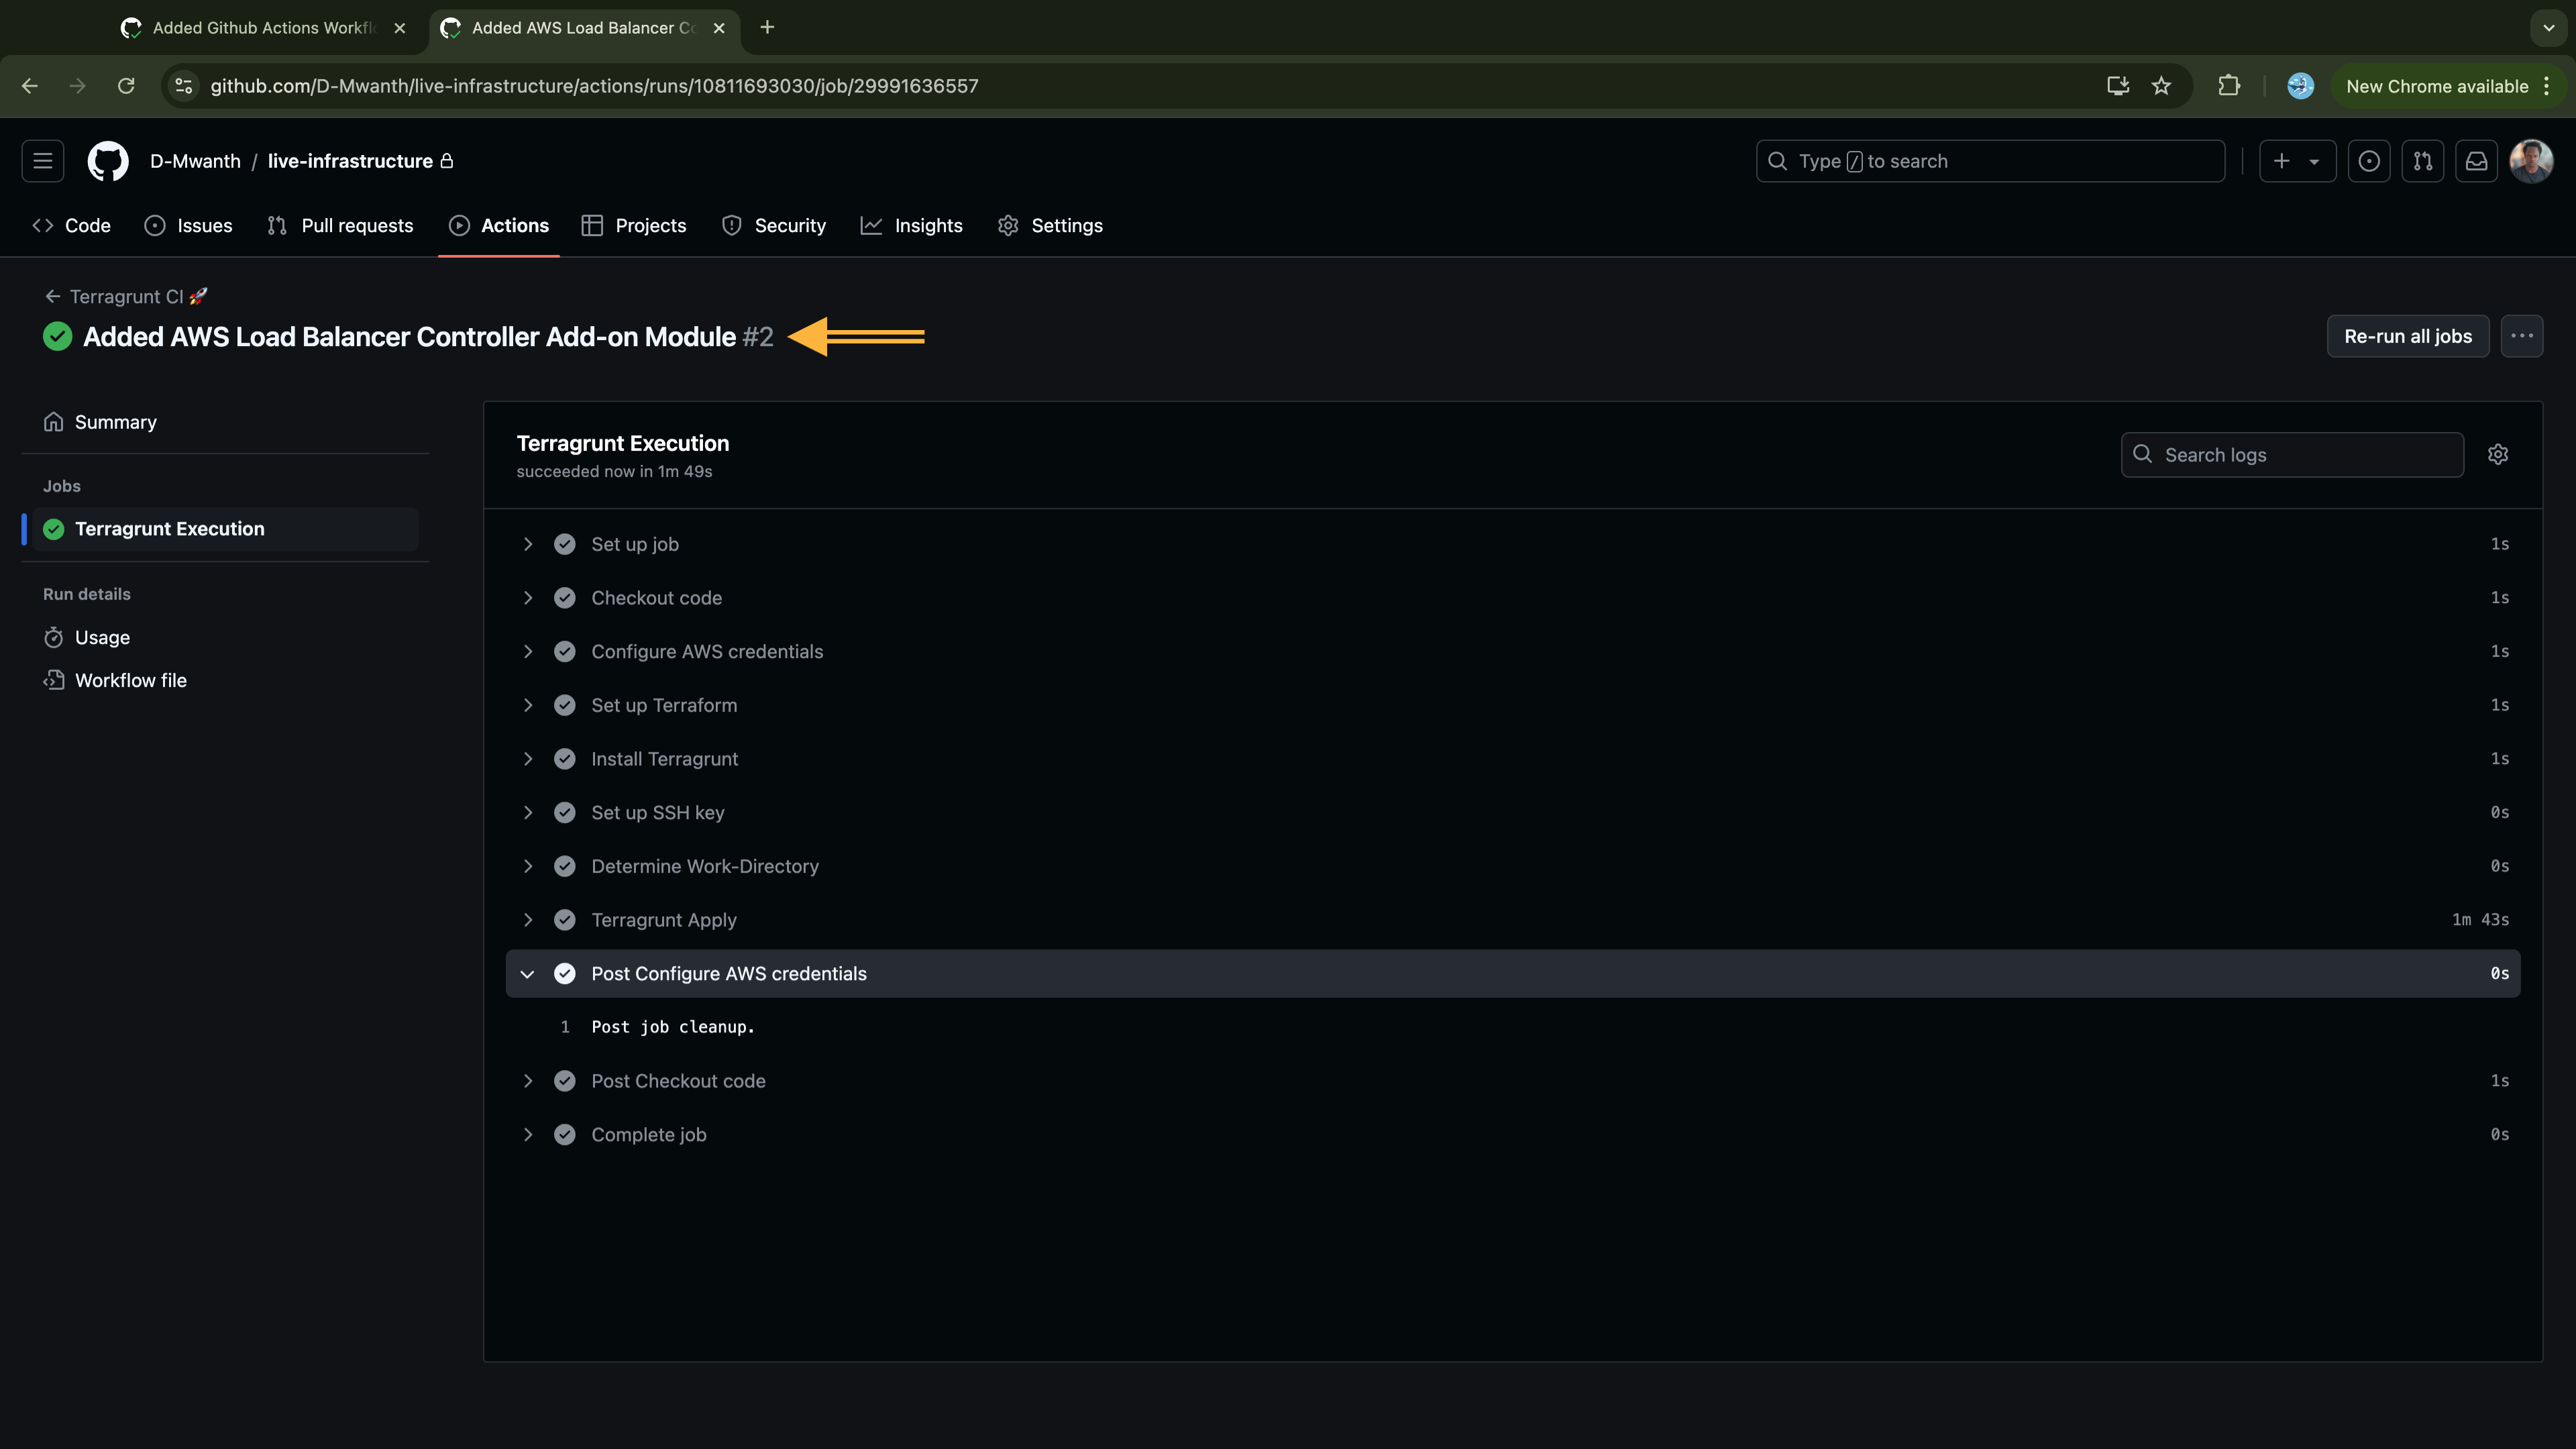
Confirm the Load Balancer Controller was installed
On your dev cluster, execute the following the command to verify the controller was successfully installed in your cluster:
$ kubectl get pods -n kube-system
NAME                                                READY   STATUS    RESTARTS   AGE
autoscaler-aws-cluster-autoscaler-ffb695cd5-nf5nc   1/1     Running   0          8m52s
aws-load-balancer-controller-84cc556d84-j2ppv       1/1     Running   0          2m45s
aws-load-balancer-controller-84cc556d84-kjnbv       1/1     Running   0          2m45s
aws-node-f4g5s                                      2/2     Running   0          7m48s
aws-node-fx72s                                      2/2     Running   0          7m40s
aws-node-p5snt                                      2/2     Running   0          8m41s
aws-node-vz45f                                      2/2     Running   0          31m
coredns-75b6b75957-89sjt                            1/1     Running   0          8m51s
coredns-75b6b75957-mf4jm                            1/1     Running   0          9m23s
eks-pod-identity-agent-9n4st                        1/1     Running   0          7m40s
eks-pod-identity-agent-9ppls                        1/1     Running   0          8m41s
eks-pod-identity-agent-ql48k                        1/1     Running   0          7m48s
eks-pod-identity-agent-wb27b                        1/1     Running   0          31m
kube-proxy-7mfxw                                    1/1     Running   0          7m40s
kube-proxy-8sndf                                    1/1     Running   0          8m41s
kube-proxy-k8mdf                                    1/1     Running   0          7m48s
kube-proxy-thqnm                                    1/1     Running   0          31m
metrics-server-6b76f9fd75-6hg66                     1/1     Running   0          8m51s
From the output, we see two replicas of aws load balancer controller are up and running:
You can also update the prod and staging environments to apply these new versions if you didn't apply with me across all the enviroments.
Configuring Ingress with AWS Load Balancer Controller
With the AWS Load Balancer controller deployed, next let's create an Ingress resource. This Ingress resource will define the routing rules that the controller uses to provision an external Application Load Balancer, which will then expose the targeted pods publicly. Currently, the traffic to our application is not secured, meaning user data is sent in plaintext (HTTP). To protect this data from unauthorized access, we need to encrypt it. AWS Load Balancer uses ACM certificates for SSL/TLS termination, so we'll request an ACM certificate for our domain name.
Request an ACM Certificate
Execute the following command to request an ACM certificate via AWS CLI:
# Replace `bughunter.life` with your domain name and set region to the AWS region where your load balancer will be deployed.
aws acm request-certificate \
    --domain-name '*.bughunter.life' \
    --validation-method DNS \
    --region eu-north-1
Note that we are requesting a wildcard certificate (*.bughunter.life), meaning covers all subdomains of bughunter.life (e.g., www.bughunter.life, api.bughunter.life) instead of just the root domain.
Validate the ACM Certificate
After requesting the certificate, ACM requires domain ownership validation before issuing it. The validation depends on the chosen method (email or DNS). Since we chose DNS validation, ACM will provide a CNAME record that must be added to our hosted zone. You can retrieve this information from the ACM as follows:
# Replace the certificate-arn value with the one returned from the output of the `aws acm request-certificate` command
aws acm describe-certificate \
    --certificate-arn arn:aws:acm:eu-north-1:848055118036:certificate/bcac1ad4-aad2-4856-8c5a-d55c9714a1c7 \
    --region eu-north-1
Look for the ResourceRecord block, which contains the DNS name and value you need to add a record for.
---
   ---
        "ResourceRecord": {
                            "Name": "_85bcb6670004a4780fa3d7b70d78fb6b.bughunter.life.",
                            "Type": "CNAME",
                            "Value": "_c74aa52d77ceebdb10733f547215b828.djqtsrsxkq.acm-validations.aws."
                        },
If your DNS is hosted in AWS Route 53, run the command below to create the validation CNAME record:
# Replace `Name` and `Value` with your specific values, and `hosted-zone` with your hosted zone ID.
aws route53 change-resource-record-sets \
    --hosted-zone-id Z01858171E8N3E8SONG97 \
    --change-batch '{
        "Changes": [{
            "Action": "UPSERT",
            "ResourceRecordSet": {
                "Name": "_85bcb6670004a4780fa3d7b70d78fb6b.bughunter.life",
                "Type": "CNAME",
                "TTL": 300,
                "ResourceRecords": [{
                    "Value": "_c74aa52d77ceebdb10733f547215b828.djqtsrsxkq.acm-validations.aws"
                }]
            }
        }]
    }'
This command will output the following:
# Output
{
    "ChangeInfo": {
        "Id": "/change/C04715922S4B09AZ42DAL",
        "Status": "PENDING",
        "SubmittedAt": "2024-09-08T08:28:19.537000+00:00"
    }
}
You can navigate to the Route 53 service to retrieve the hosted zone ID of your hosted zone, or simply run the following command in the terminal to get it:
# Replace dns name with your domain name
aws route53 list-hosted-zones-by-name --dns-name bughunter.life --query "HostedZones[0].Id"
Once the domain validation record is created, wait a few minutes until the Certificate is validated (status transitions from Pending to Issued):
% aws acm describe-certificate --certificate-arn arn:aws:acm:eu-north-1:848055118036:certificate/bcac1ad4-aad2-4856-8c5a-d55c9714a1c7 --region eu-north-1

{
    "Certificate": {
        "CertificateArn": "arn:aws:acm:eu-north-1:848055118036:certificate/bcac1ad4-aad2-4856-8c5a-d55c9714a1c7",
        "DomainName": "*.bughunter.life",
        "SubjectAlternativeNames": [
            "*.bughunter.life"
        ],
        "DomainValidationOptions": [
            {
                "DomainName": "*.bughunter.life",
                "ValidationDomain": "*.bughunter.life",
                "ValidationStatus": "SUCCESS",
                "ResourceRecord": {
                    "Name": "_85bcb6670004a4780fa3d7b70d78fb6b.bughunter.life.",
                    "Type": "CNAME",
                    "Value": "_c74aa52d77ceebdb10733f547215b828.djqtsrsxkq.acm-validations.aws."
                },
                "ValidationMethod": "DNS"
            }
        ],
        "Serial": "0e:43:51:3f:98:5d:ef:3f:9f:ca:a5:c1:41:2b:de:de",
        "Subject": "CN=*.bughunter.life",
        "Issuer": "Amazon",
        "CreatedAt": "2024-09-11T11:51:07.583000+03:00",
        "IssuedAt": "2024-09-11T11:53:28.184000+03:00",
        "Status": "ISSUED",
        "NotBefore": "2024-09-11T03:00:00+03:00",
        "NotAfter": "2025-10-11T02:59:59+03:00",
        "KeyAlgorithm": "RSA-2048",
        "SignatureAlgorithm": "SHA256WITHRSA",
        "InUseBy": [],
        "Type": "AMAZON_ISSUED",
        "KeyUsages": [
            {
                "Name": "DIGITAL_SIGNATURE"
            },
            {
                "Name": "KEY_ENCIPHERMENT"
            }
        ],
        "ExtendedKeyUsages": [
            {
                "Name": "TLS_WEB_SERVER_AUTHENTICATION",
                "OID": "1.3.6.1.5.5.7.3.1"
            },
            {
                "Name": "TLS_WEB_CLIENT_AUTHENTICATION",
                "OID": "1.3.6.1.5.5.7.3.2"
            }
        ],
        "RenewalEligibility": "INELIGIBLE",
        "Options": {
            "CertificateTransparencyLoggingPreference": "ENABLED"
        }
    }
}
From this output, the validation was success as well as the certificate was issued. If in your case it remains Pending state, verify that the name and value of the validation record are correct as provided in the Amazon Certificate Manager console for the requested certificate. Specifically, ensure you didn't include a period (.) at the end of each provided value.
Deploying Load Balancer Ingress
With the certificate now issued, let's define the Ingress configuration to deploy an Ingress resource that will expose our application, using this certificate for secure communication.
cat <<EOF > ~/kubernetes-manifests/ingress.yaml
apiVersion: networking.k8s.io/v1
kind: Ingress
metadata:
  name: alb-ingress
  namespace: app-ns
  annotations:
    alb.ingress.kubernetes.io/certificate-arn: arn:aws:acm:eu-north-1:848055118036:certificate/bcac1ad4-aad2-4856-8c5a-d55c9714a1c7
    alb.ingress.kubernetes.io/listen-ports: '[{"HTTP": 80}, {"HTTPS": 443}]'
    alb.ingress.kubernetes.io/scheme: internet-facing
    alb.ingress.kubernetes.io/ssl-redirect: "443"
    alb.ingress.kubernetes.io/target-type: ip
    alb.ingress.kubernetes.io/healthcheck-path: /
spec:
  ingressClassName: alb
  rules:
    - host: app.bughunter.life
      http:
        paths:
          - path: /
            pathType: Prefix
            backend:
              service:
                name: nginx-app-service
                port:
                  number: 80
EOF
This manifest sets up an internet-facing Application Load Balancer (ALB) in AWS to route traffic directly to pods targeted by the nginx-app-service service in the app-ns namespace.
It is configured with annotations that controls the behaviour of the created Application Load Balancer in AWS. The alb.ingress.kubernetes.io/scheme: internet-facing annotation configures the ALB to be publicly accessible. The alb.ingress.kubernetes.io/certificate-arn specifies the ARN of an SSL/TLS certificate from AWS Certificate Manager (ACM), enabling secure HTTPS traffic for the app.bughunter.life domain. The alb.ingress.kubernetes.io/target-type: ip annotation directs the ALB to route traffic directly to the IP addresses of the pods behind the nginx-app-service service. It is important to note that this setting routes traffic to the individual pods rather than to the service itself.
A health check is configured at the / path using the alb.ingress.kubernetes.io/healthcheck-path annotation, ensuring the ALB routes traffic only to healthy instances.
In the spec.rules section, traffic to app.bughunter.life is routed to the pods behind the nginx-app-service on port 80. The pathType: Prefix indicates that any request path starting with / will match this rule.
Now, let's apply the manifest to create the ingress resource:
$ kubectl apply -f ~/kubernetes-manifests/ingress.yaml
ingress.networking.k8s.io/alb-ingress created
Let's list the ingresses in the app-ns namespace and confirm that our Ingress was successfully deployed:
$ kubectl get ingress alb-ingress -n app-ns
NAME          CLASS   HOSTS                ADDRESS                                                                 PORTS   AGE
alb-ingress   alb     app.bughunter.life   k8s-appns-albingre-b98cbbf39f-1677060279.eu-north-1.elb.amazonaws.com   80      23s
Our ingress was successfuly created. Also, go to AWS and confirm an application load balancer with the dns name similar to external ip of the ingress above was created. In my case it’s still provisioning:
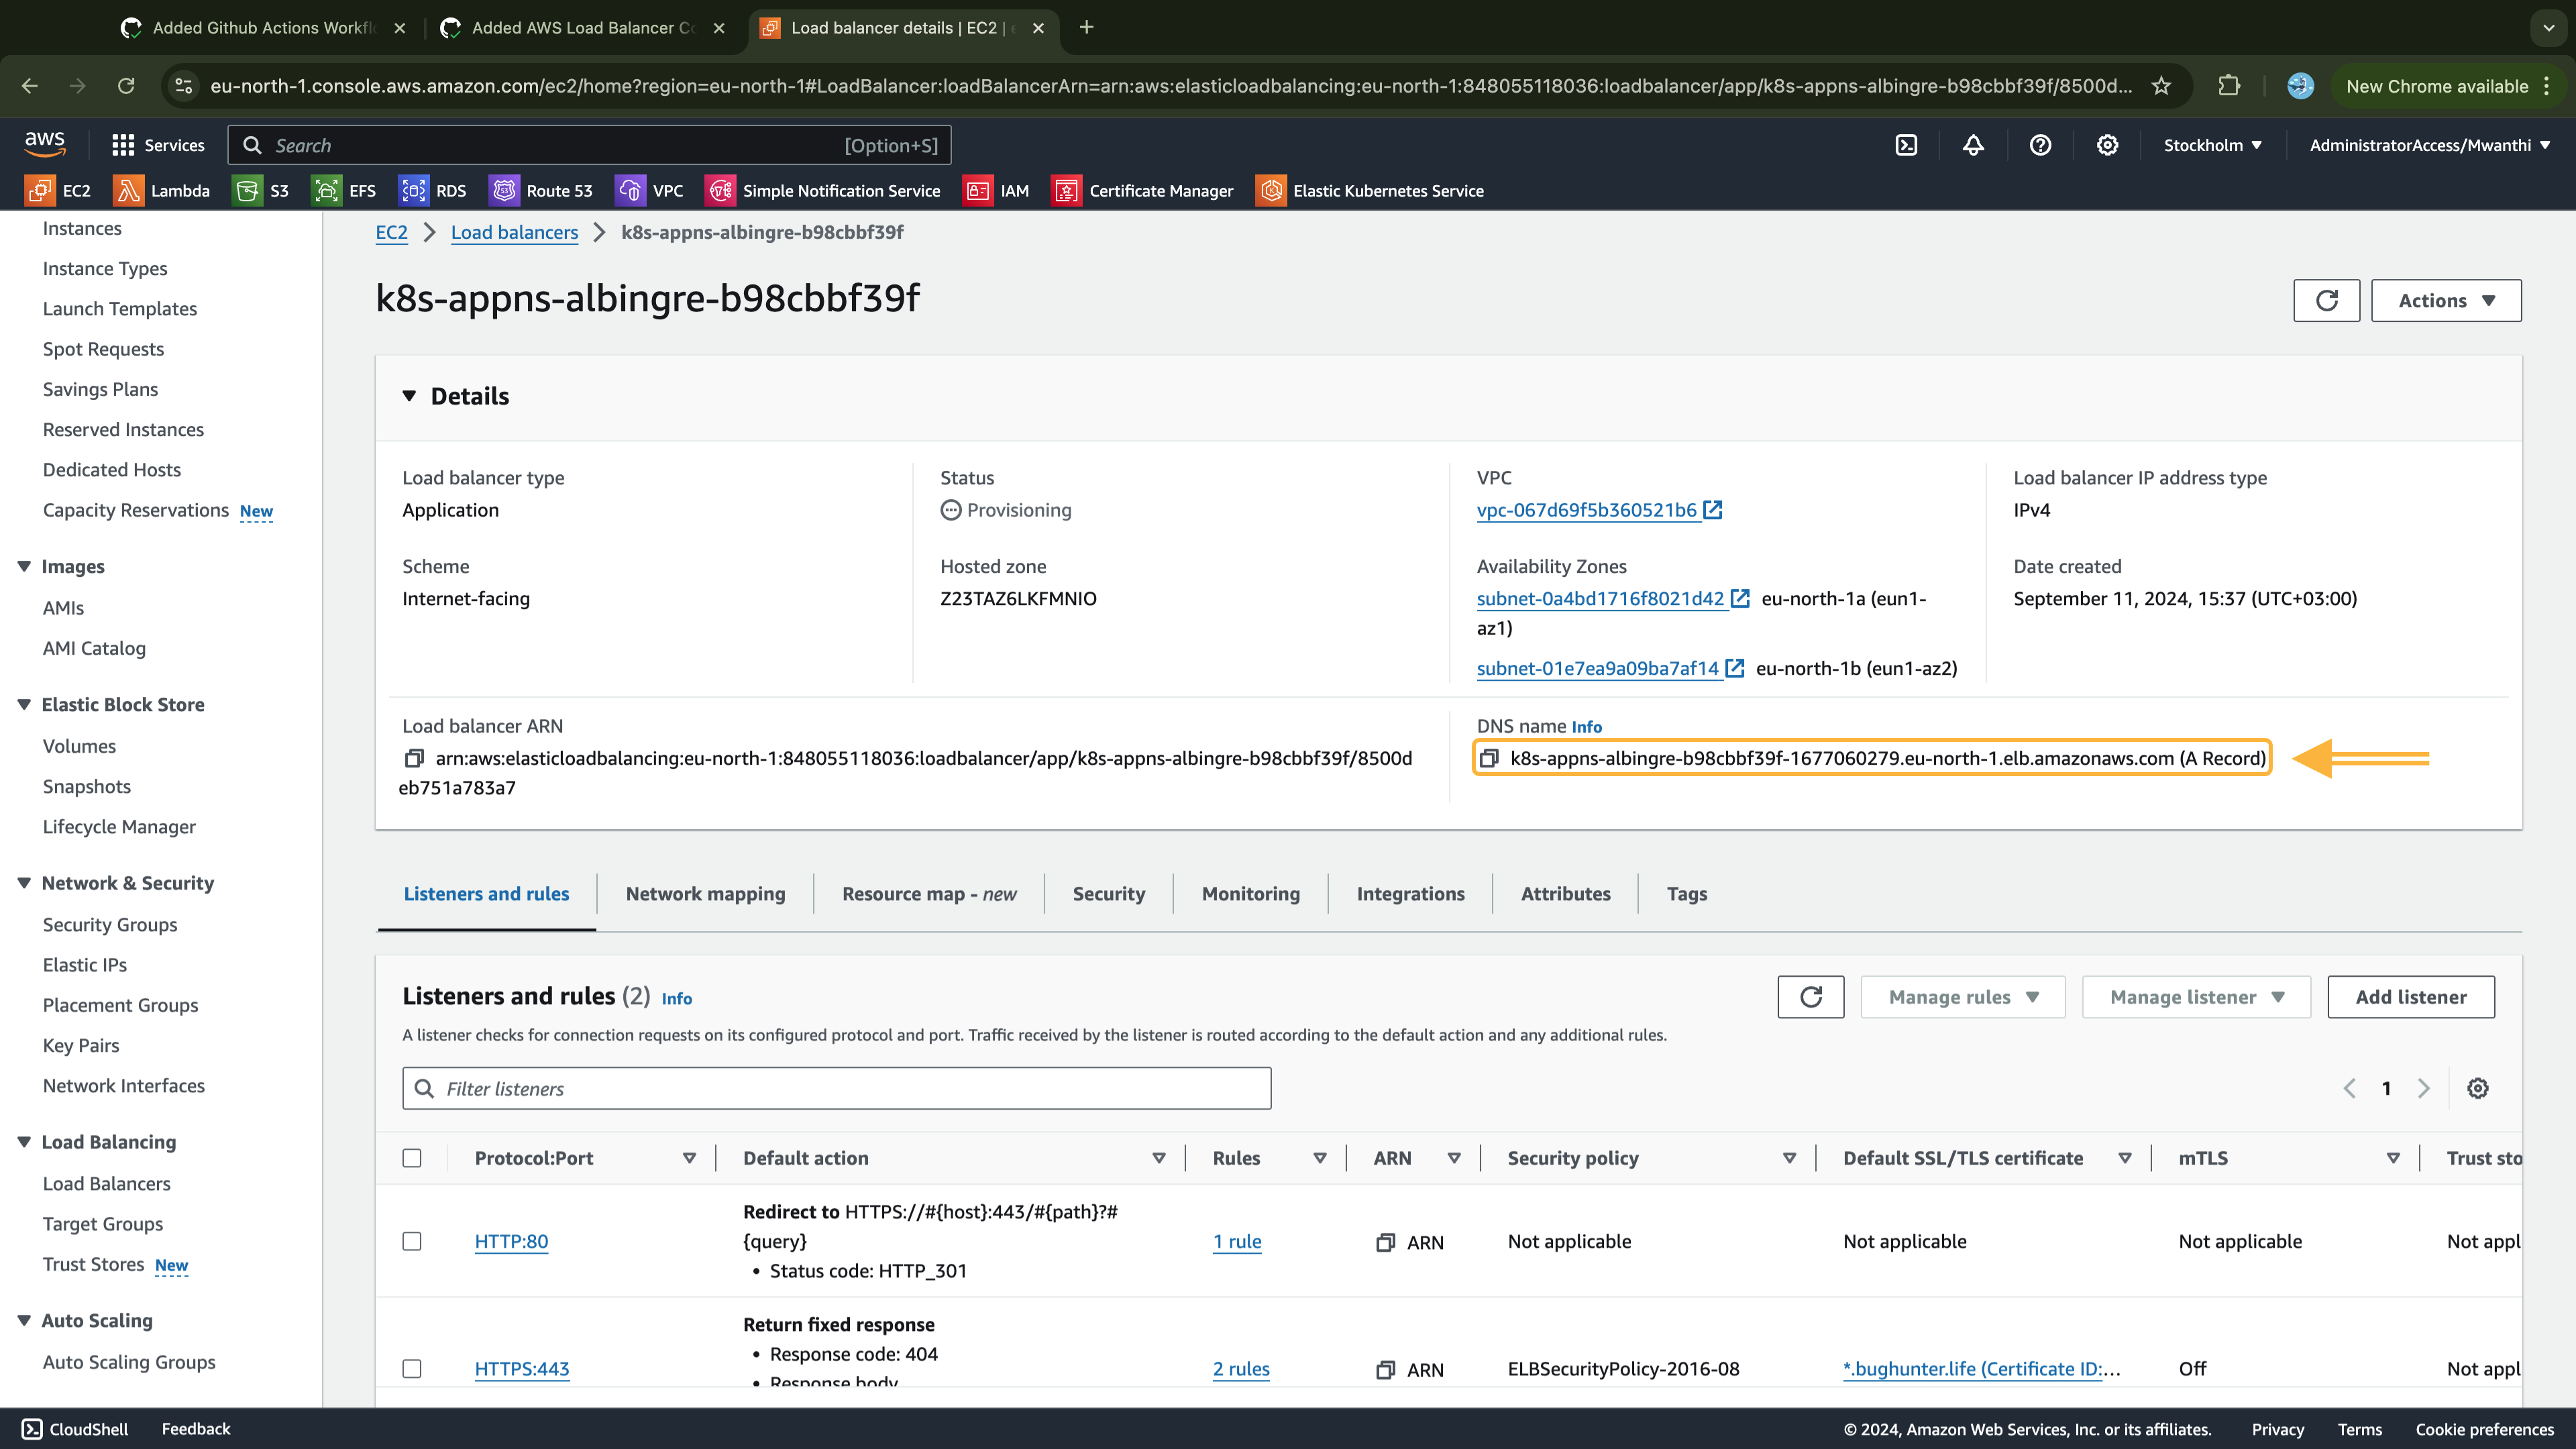
Now let's get the pods in our cluster again:
$ kubectl get pods -n app-ns -o wide
NAME                         READY   STATUS    RESTARTS   AGE   IP            NODE                                         NOMINATED NODE   READINESS GATES
nginx-app-6674585756-cgqh5   1/1     Running   0          13m   10.0.62.89    ip-10-0-54-199.eu-north-1.compute.internal   <none>           <none>
nginx-app-6674585756-gjxr8   1/1     Running   0          36m   10.0.8.210    ip-10-0-7-141.eu-north-1.compute.internal    <none>           <none>
nginx-app-6674585756-ltf5k   1/1     Running   0          36m   10.0.2.96     ip-10-0-7-141.eu-north-1.compute.internal    <none>           <none>
nginx-app-6674585756-n9ksq   1/1     Running   0          13m   10.0.37.192   ip-10-0-54-199.eu-north-1.compute.internal   <none>           <none>
nginx-app-6674585756-s54hh   1/1     Running   0          13m   10.0.54.105   ip-10-0-54-199.eu-north-1.compute.internal   <none>           <none>
nginx-app-6674585756-x4hqt   1/1     Running   0          13m   10.0.27.151   ip-10-0-25-239.eu-north-1.compute.internal   <none>           <none>
Now verify the target group associated with the application load balancer directly targets the pod ip address on port 80 where our application is running:
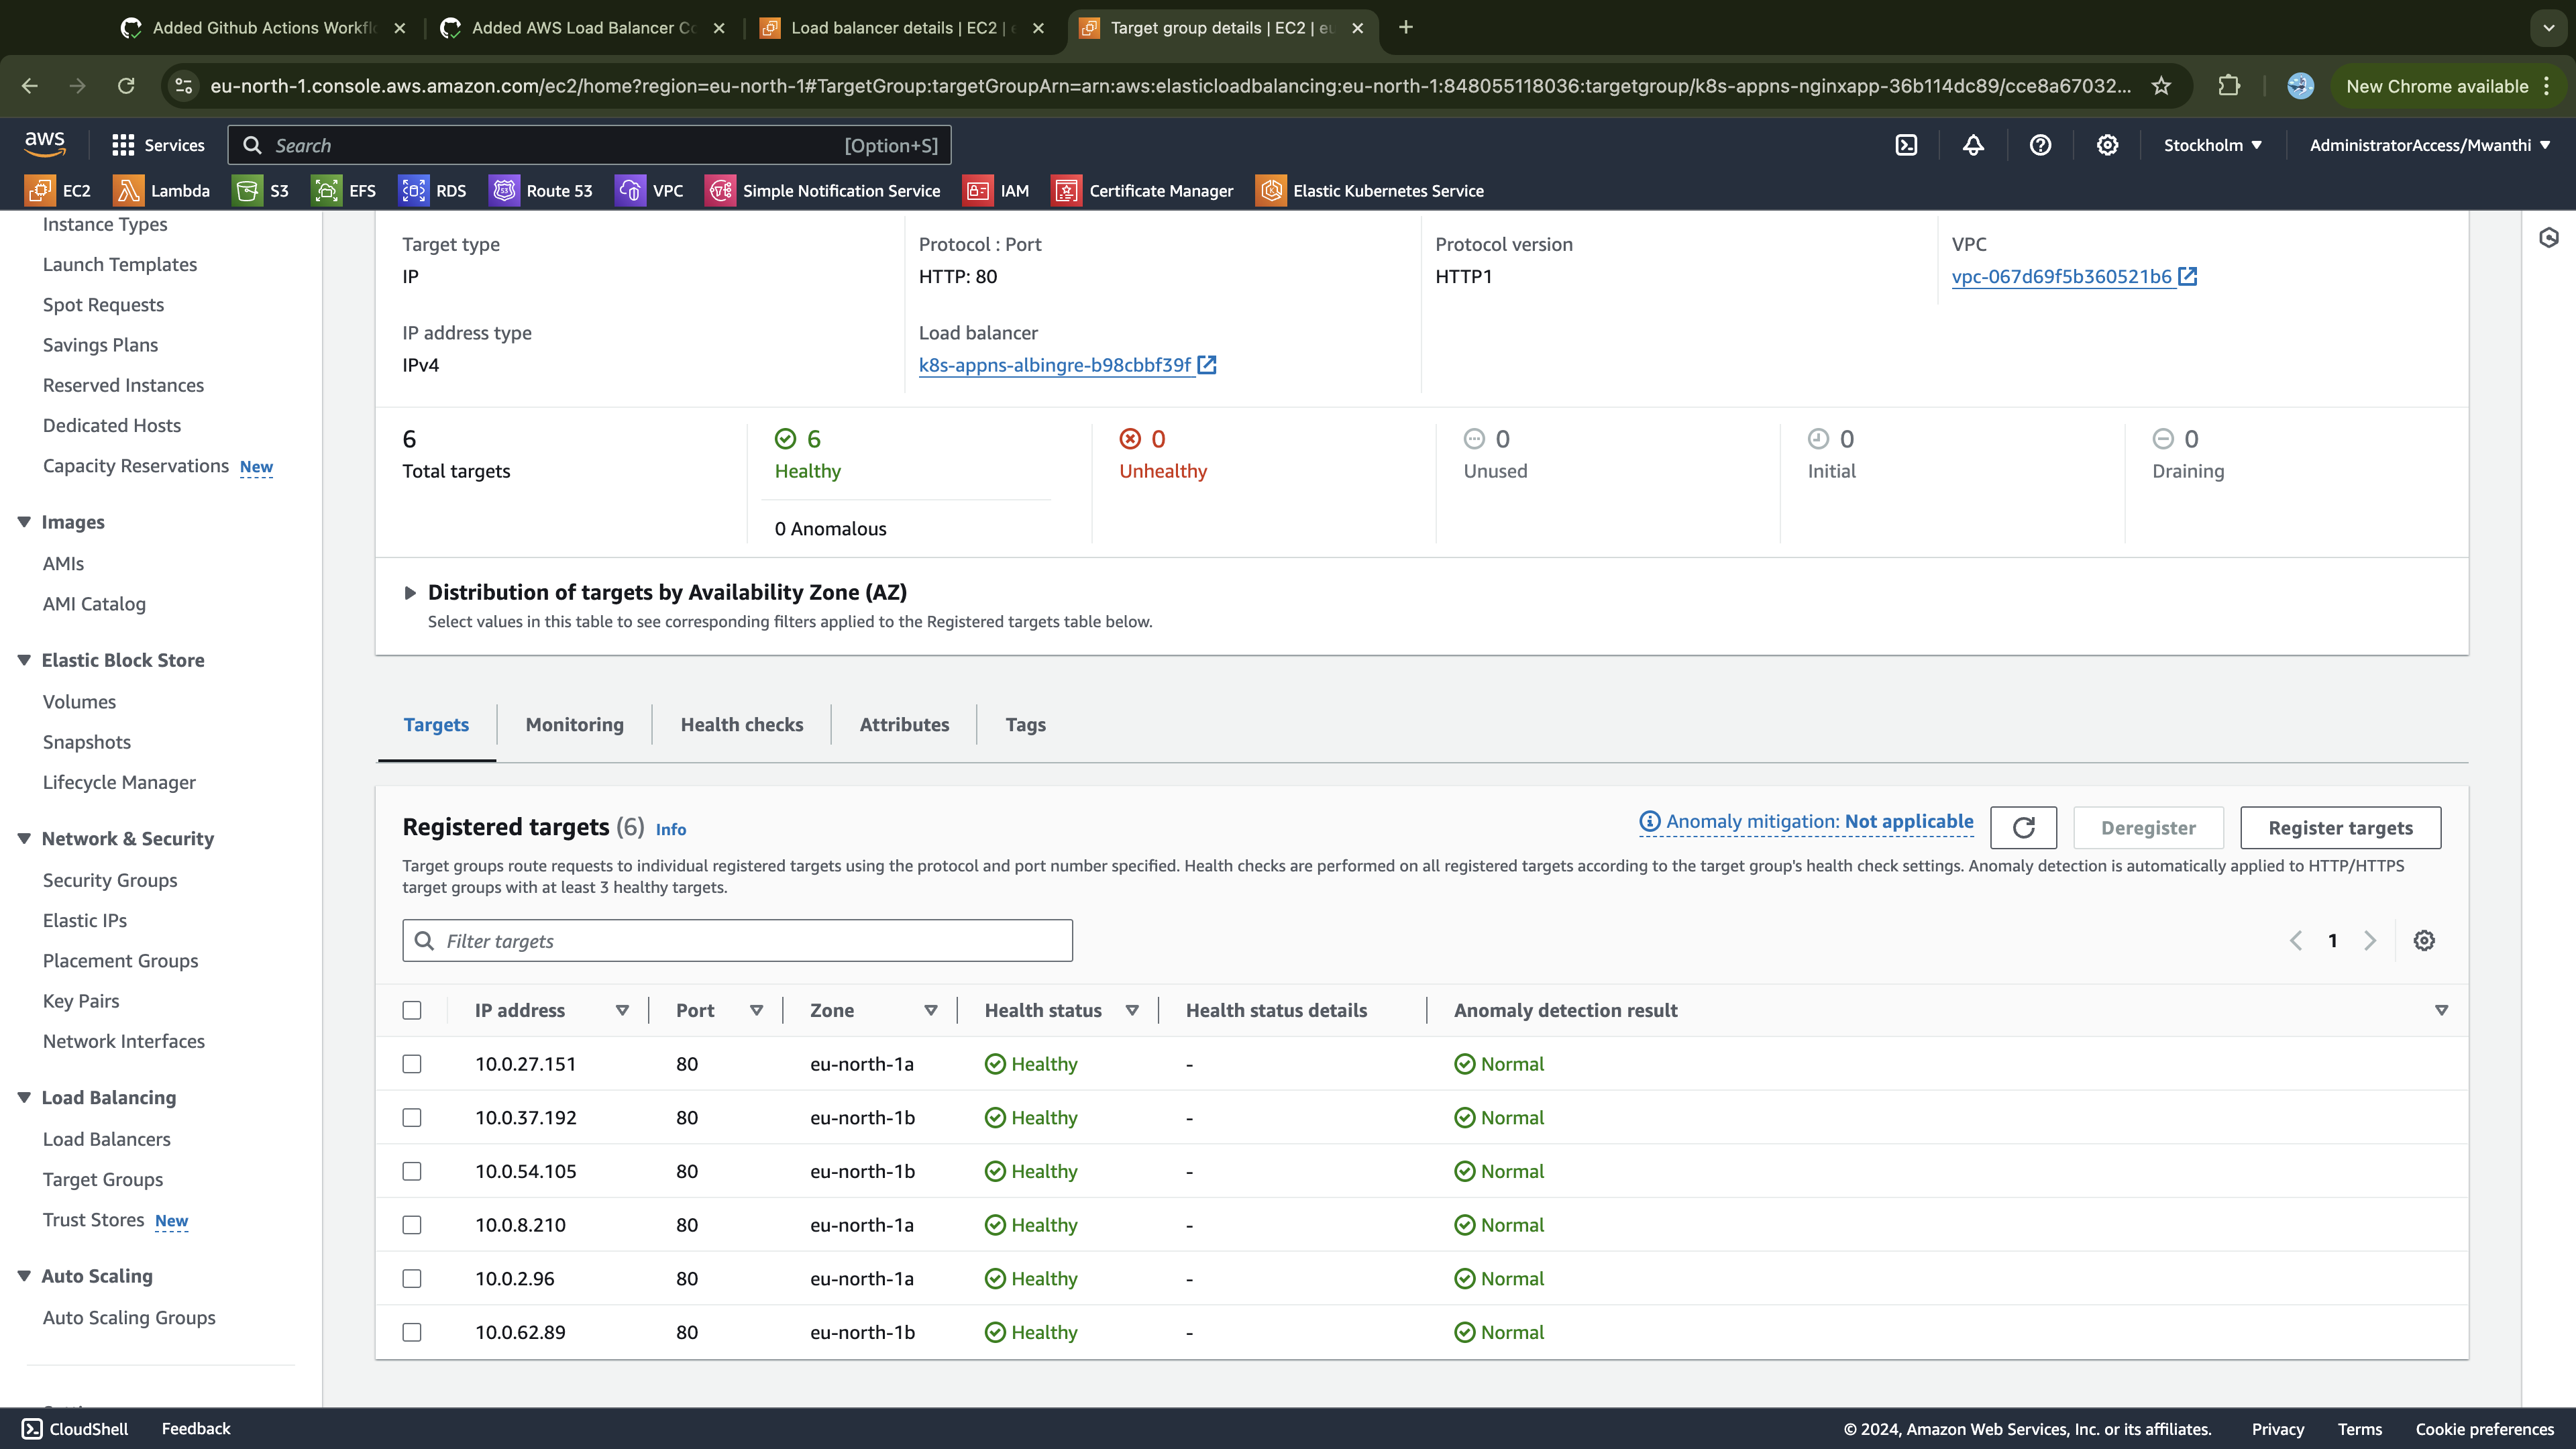
If we scale down our deployment, the ip address of the pods terminated will also be removed from the target group of the load balancer:
kubectl -n app-ns scale deployment/nginx-app --replicas=3
Confirm the deployment was scaled down:
$ kubectl get pods -n app-ns -o wide
NAME                         READY   STATUS    RESTARTS   AGE   IP            NODE                                         NOMINATED NODE   READINESS GATES
nginx-app-6674585756-gjxr8   1/1     Running   0          43m   10.0.8.210    ip-10-0-7-141.eu-north-1.compute.internal    <none>           <none>
nginx-app-6674585756-ltf5k   1/1     Running   0          43m   10.0.2.96     ip-10-0-7-141.eu-north-1.compute.internal    <none>           <none>
nginx-app-6674585756-x4hqt   1/1     Running   0          20m   10.0.27.151   ip-10-0-25-239.eu-north-1.compute.internal   <none>           <none>
In the Target Group console, notice that targets associated with the IP addresses of terminated pods are marked as "Draining," while active ones are marked as "Healthy." The draining targets are in the process of being deregistered from the target group.
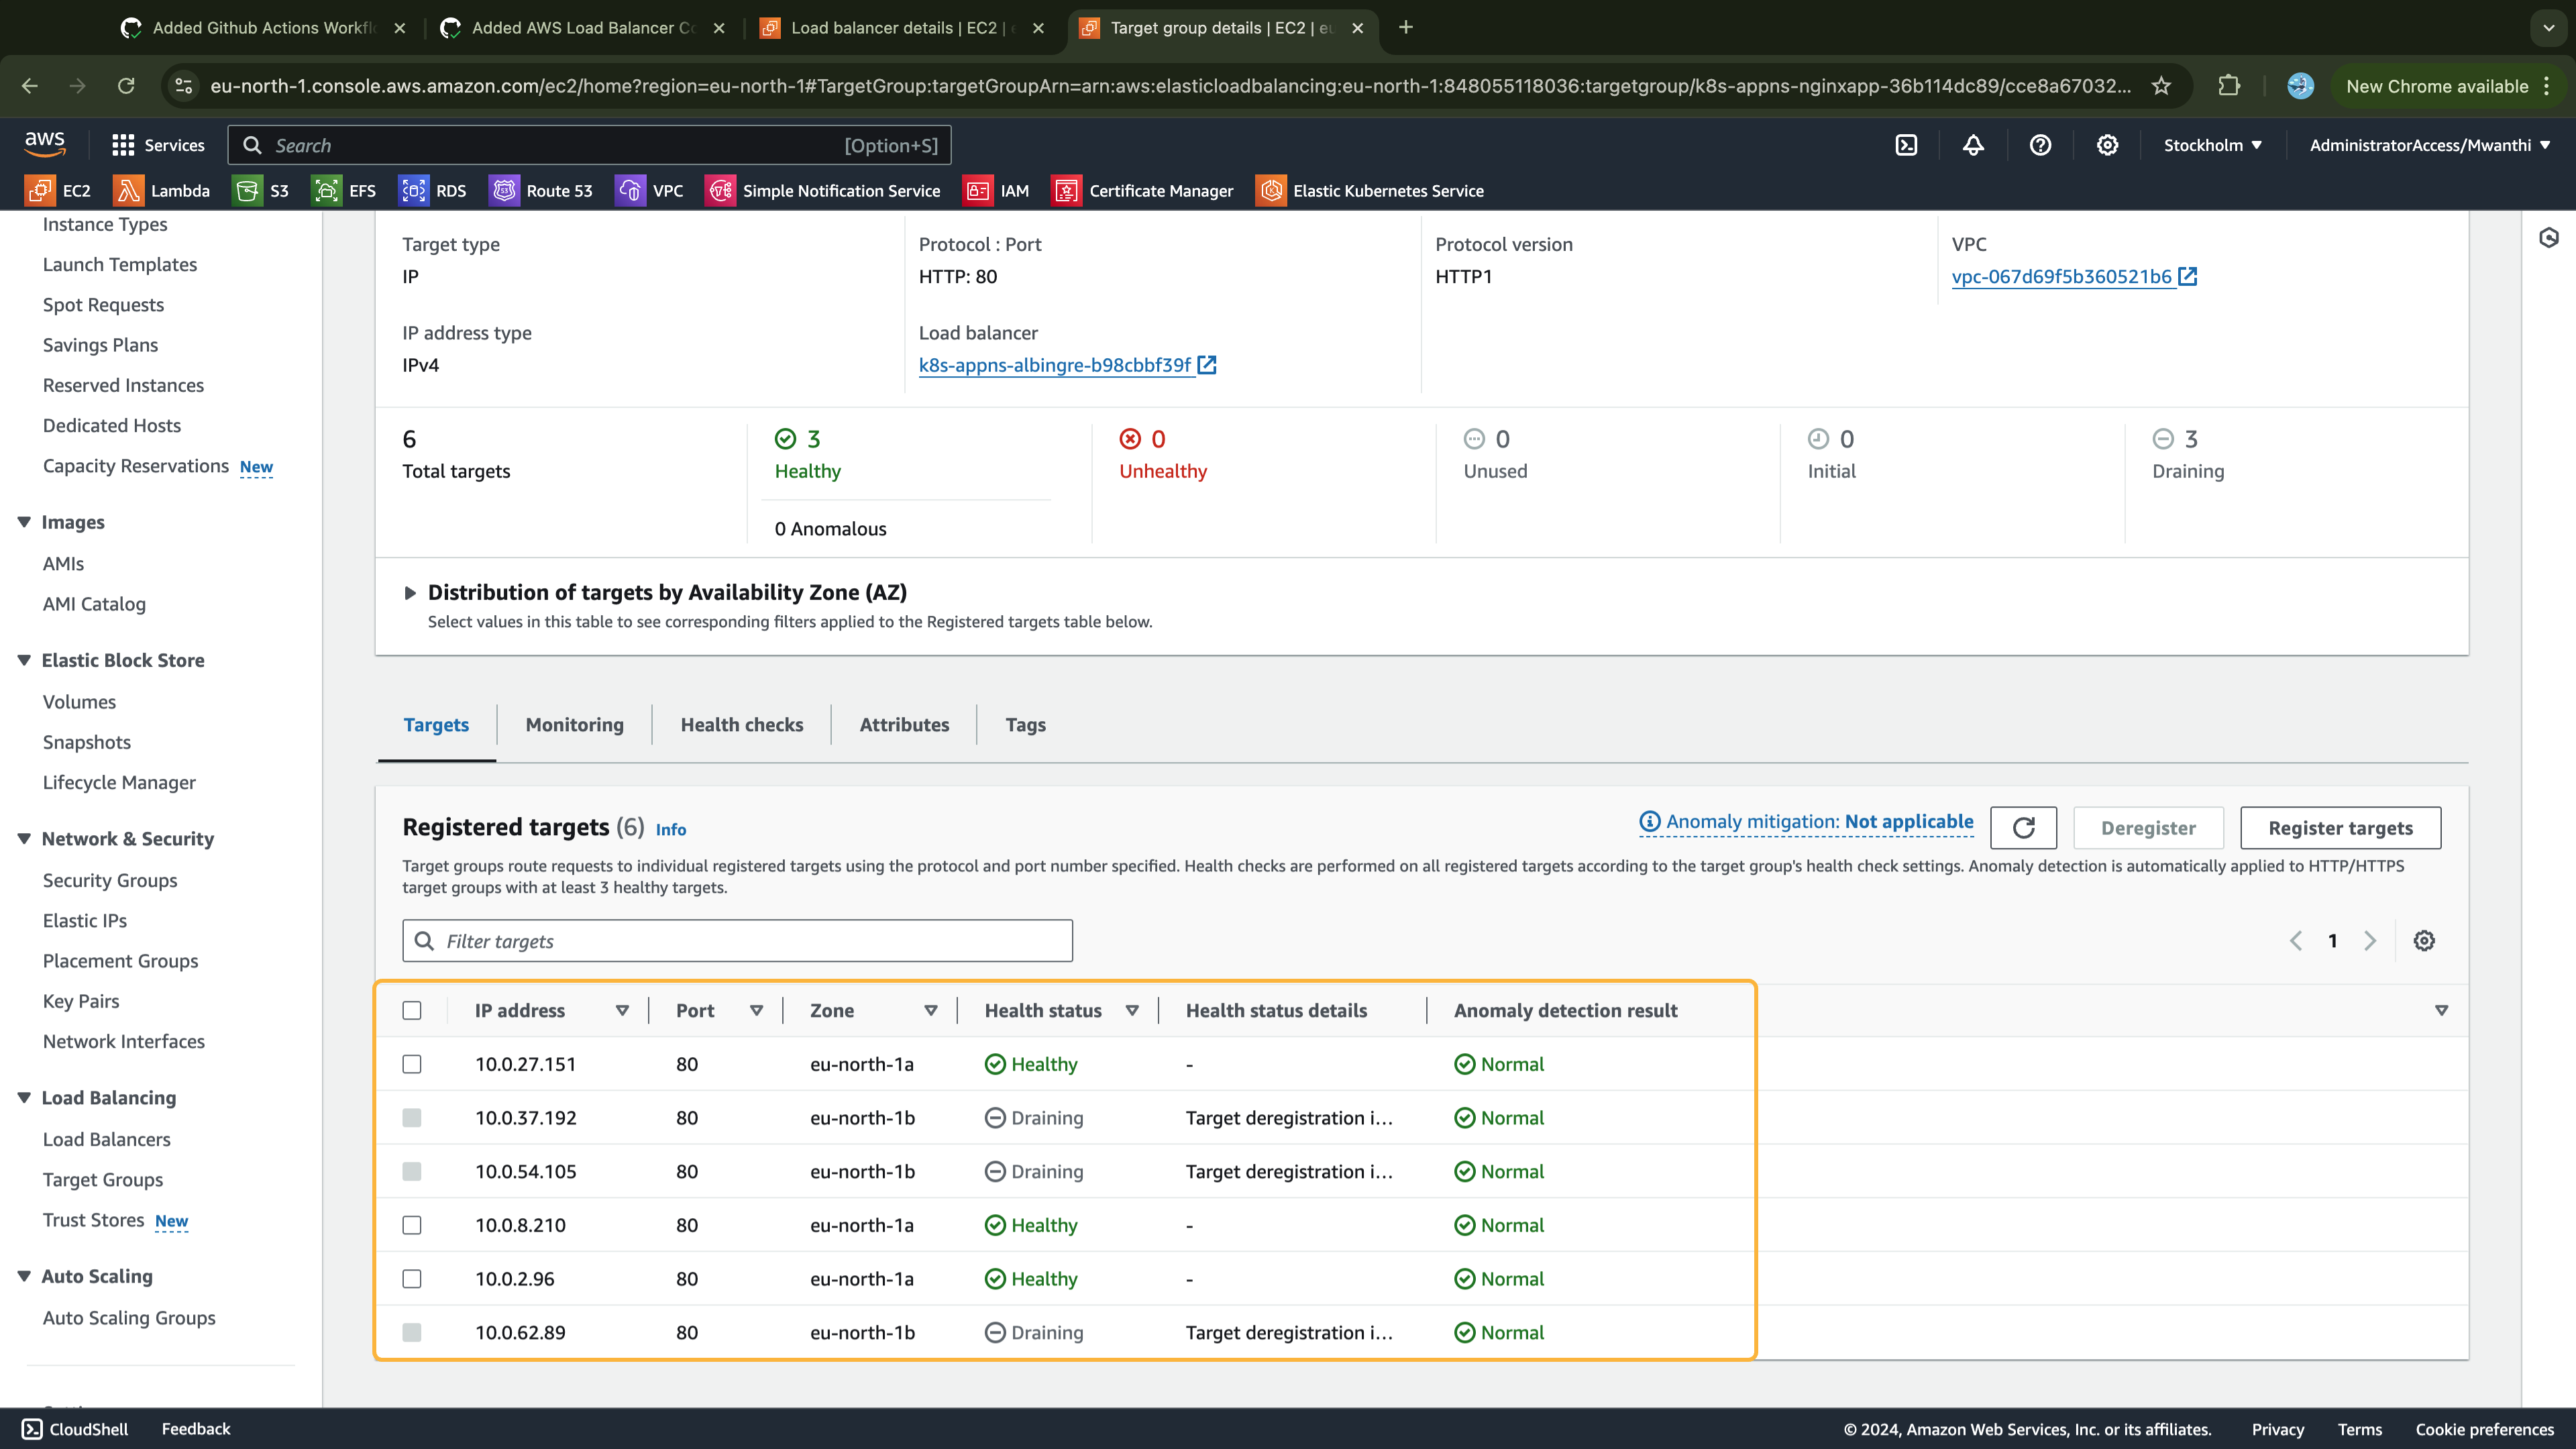
In no time, the draining targets will be removed from the target group, as shown below:
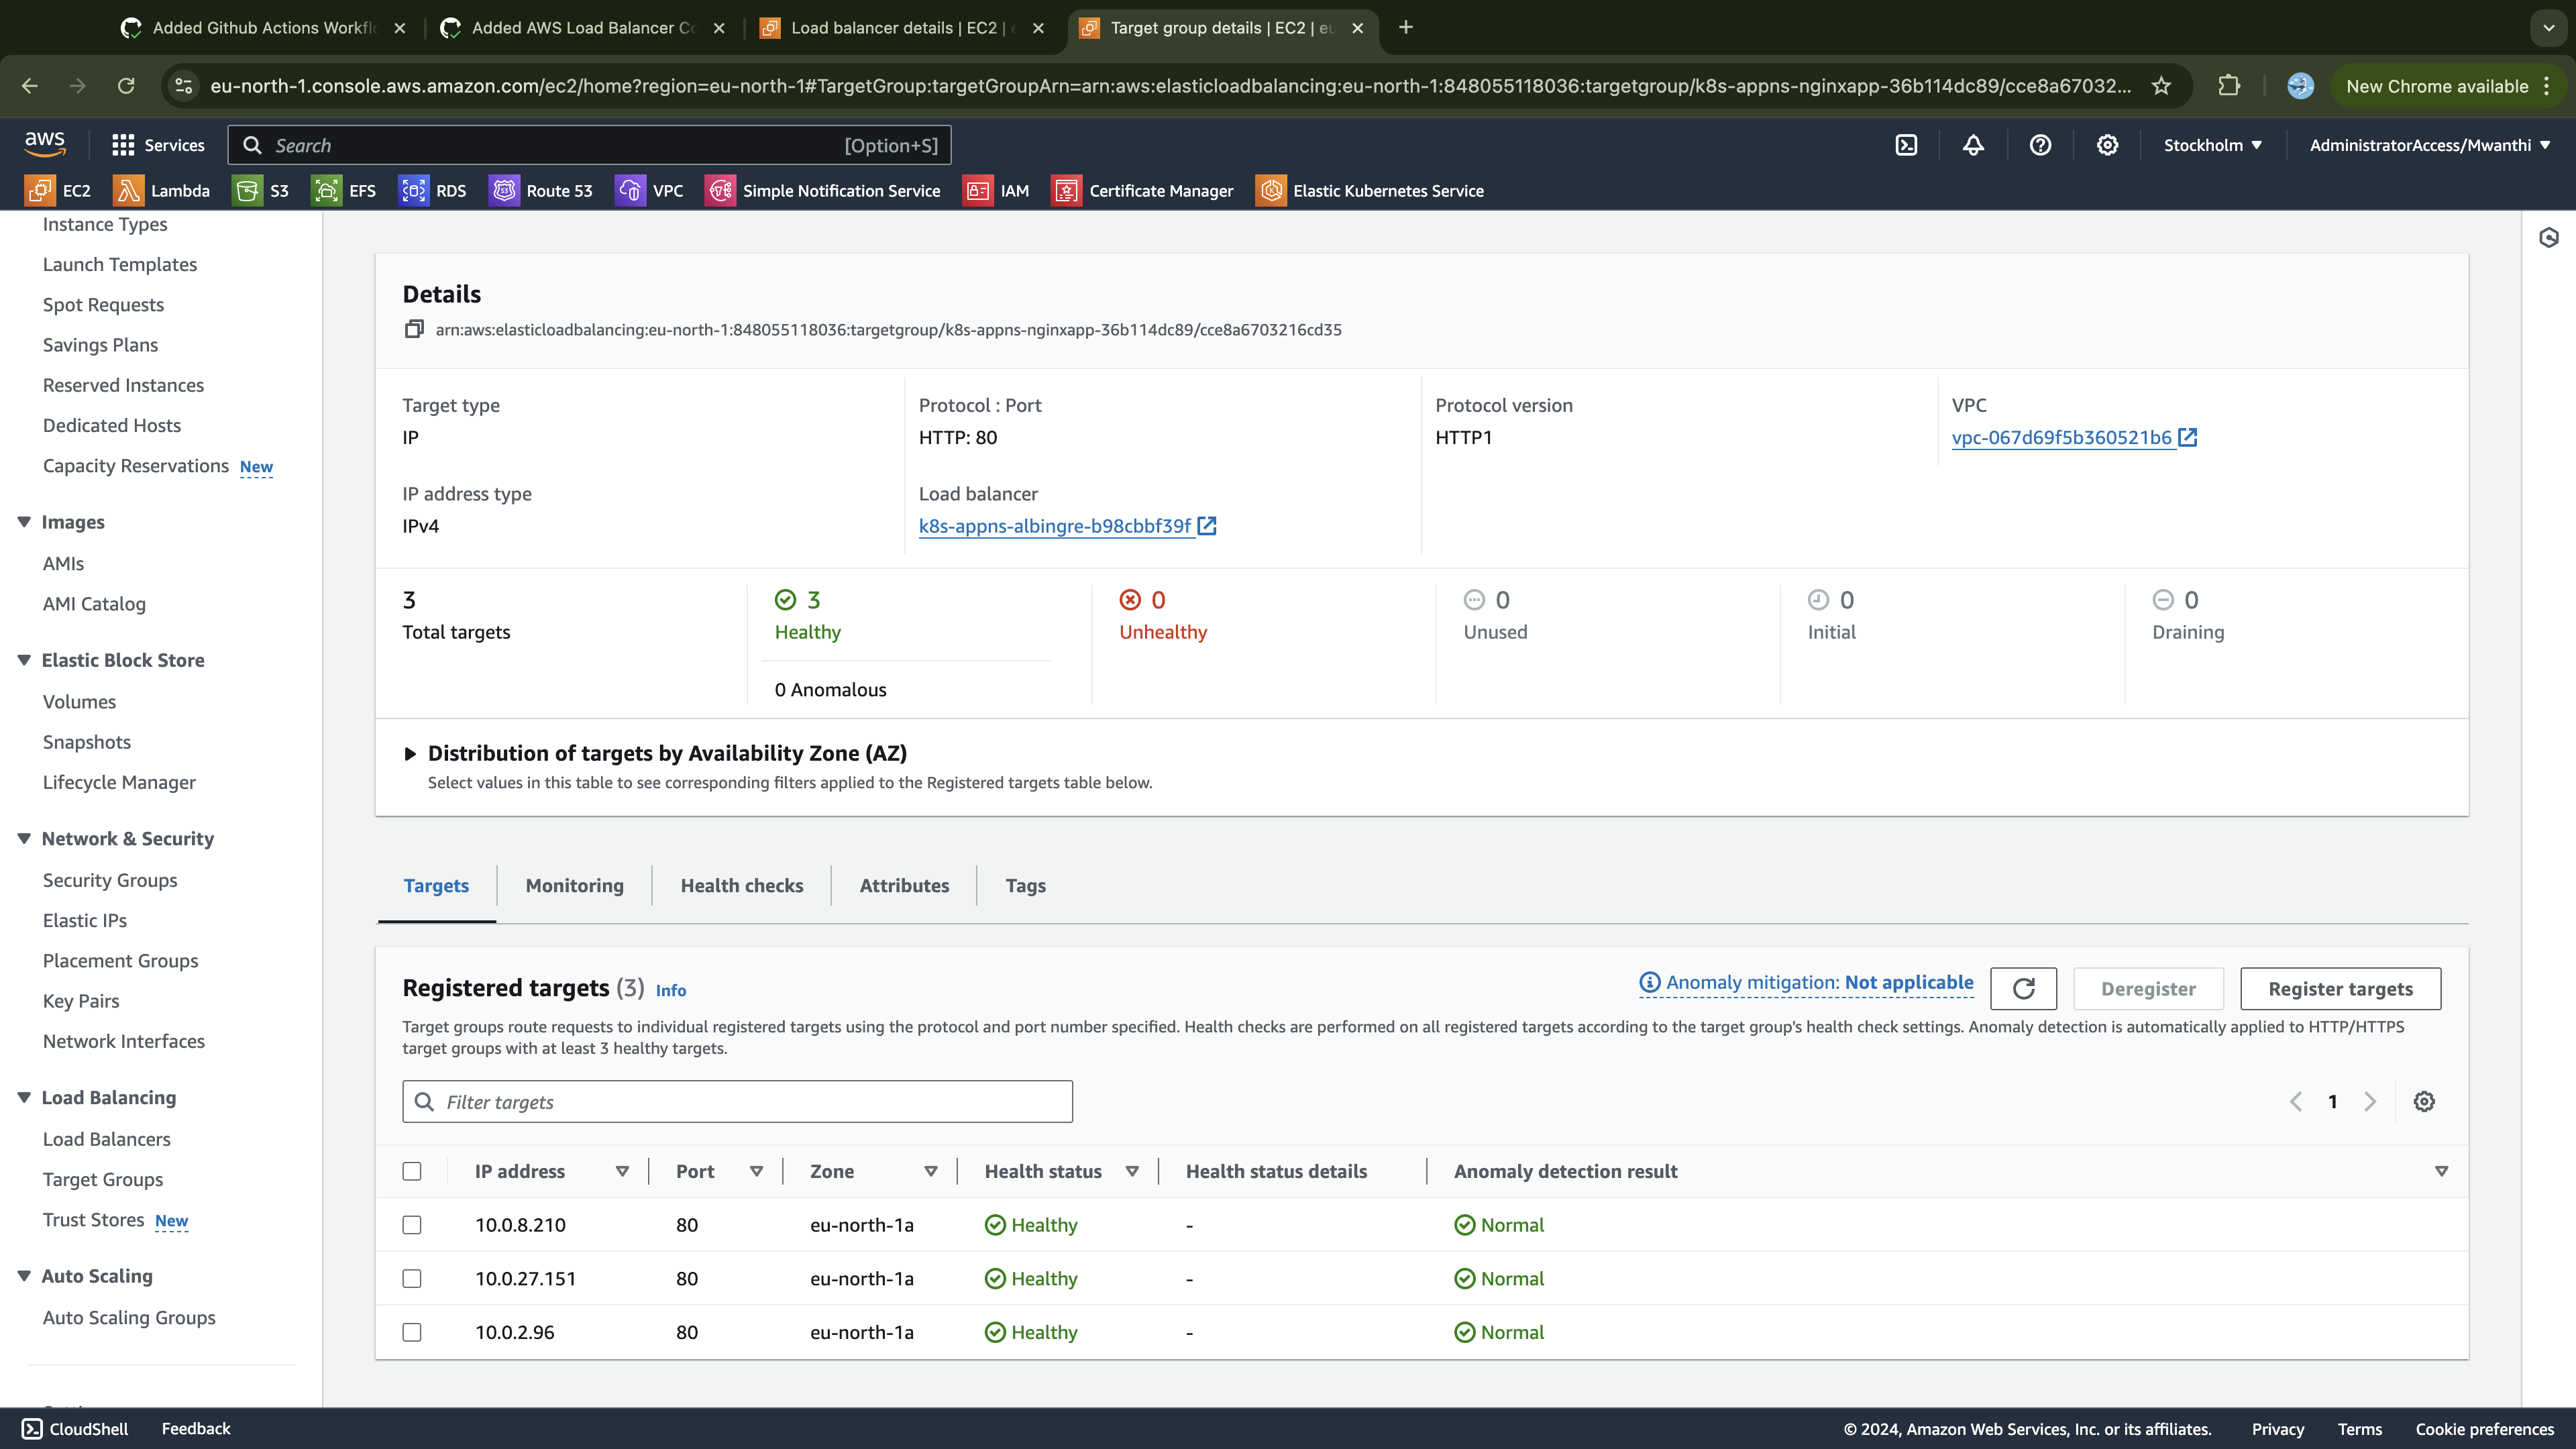

Testing the Ingress
If you try to access your application directly using the ALB DNS name, you will get a "resource not found" error (404). This happens because the ALB is unaware of the specific routing rules defined in your Ingress resource, which rely on the host header to determine how traffic should be routed. To test our application's accessibility, we need to create a CNAME record in our DNS configuration that points to the Application Load Balancer. This record will resolve the domain name to the ALB, which then forwards the traffic according to the Ingress rules defined in the Kubernetes cluster.
Now, the record's name must match the host specified in your Ingress resource, and its value should be the DNS name of the Application Load Balancer (ALB). Since my GoDaddy registered domain is hosted in AWS Route 53, and there I'll create the record within the corresponding Route 53 hosted zone using the AWS CLI.
# Replace the value of `Name` key with Ingress host values and `Value` block with alb dns name
aws route53 change-resource-record-sets \
    --hosted-zone-id Z01858171E8N3E8SONG97 \
    --change-batch '{
        "Changes": [{
            "Action": "UPSERT",
            "ResourceRecordSet": {
                "Name": "app.bughunter.life",
                "Type": "CNAME",
                "TTL": 300,
                "ResourceRecords": [{
                    "Value": "k8s-appns-albingre-b98cbbf39f-1677060279.eu-north-1.elb.amazonaws.com"
                }]
            }
        }]
    }'
Verify that the record is in the INSYNC state, indicating it is ready.
# ID was returned in the output of the previous command
% aws route53 get-change --id C01013891QS26BM0HPAHY
You should get an output similar to one below:
{
    "ChangeInfo": {
        "Id": "/change/C01013891QS26BM0HPAHY",
        "Status": "INSYNC",
        "SubmittedAt": "2024-09-11T13:01:29.200000+00:00"
    }
}
If your DNS record is ready (INSYNC), open your browser and securely access your application using the domain name as specified in the record.
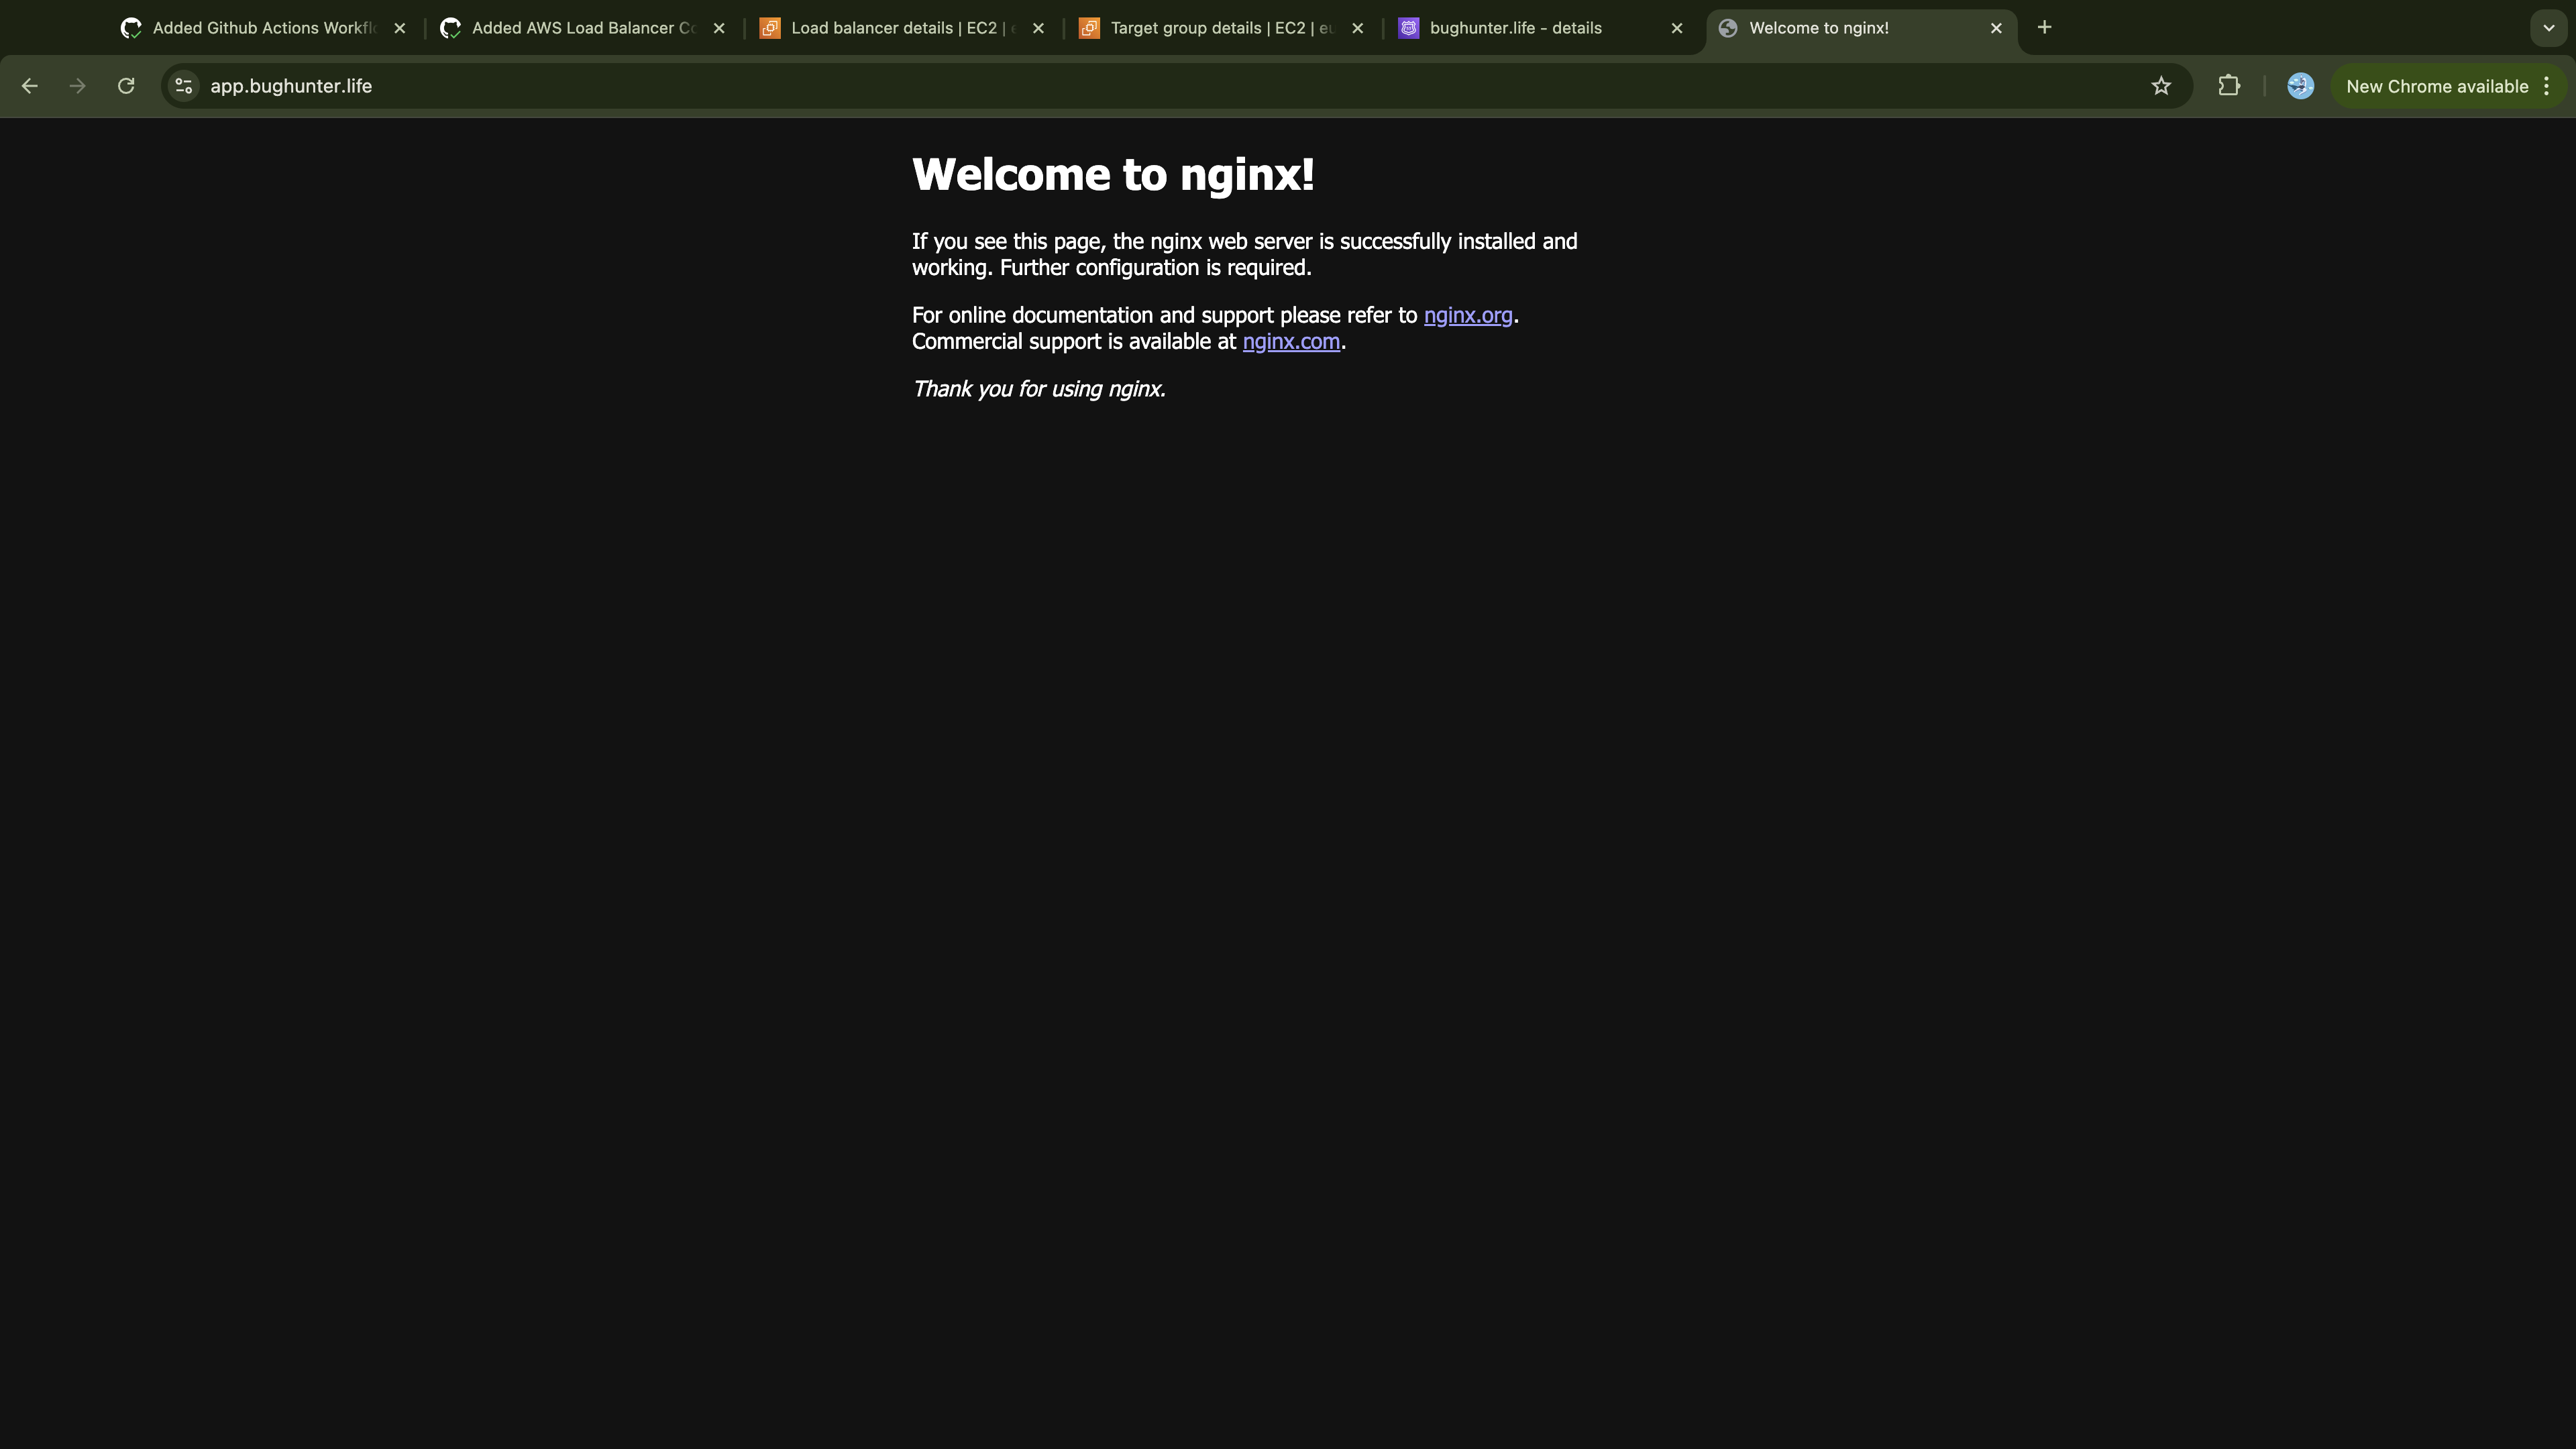
Your application should be securely accessible over HTTPS, as demonstrated:
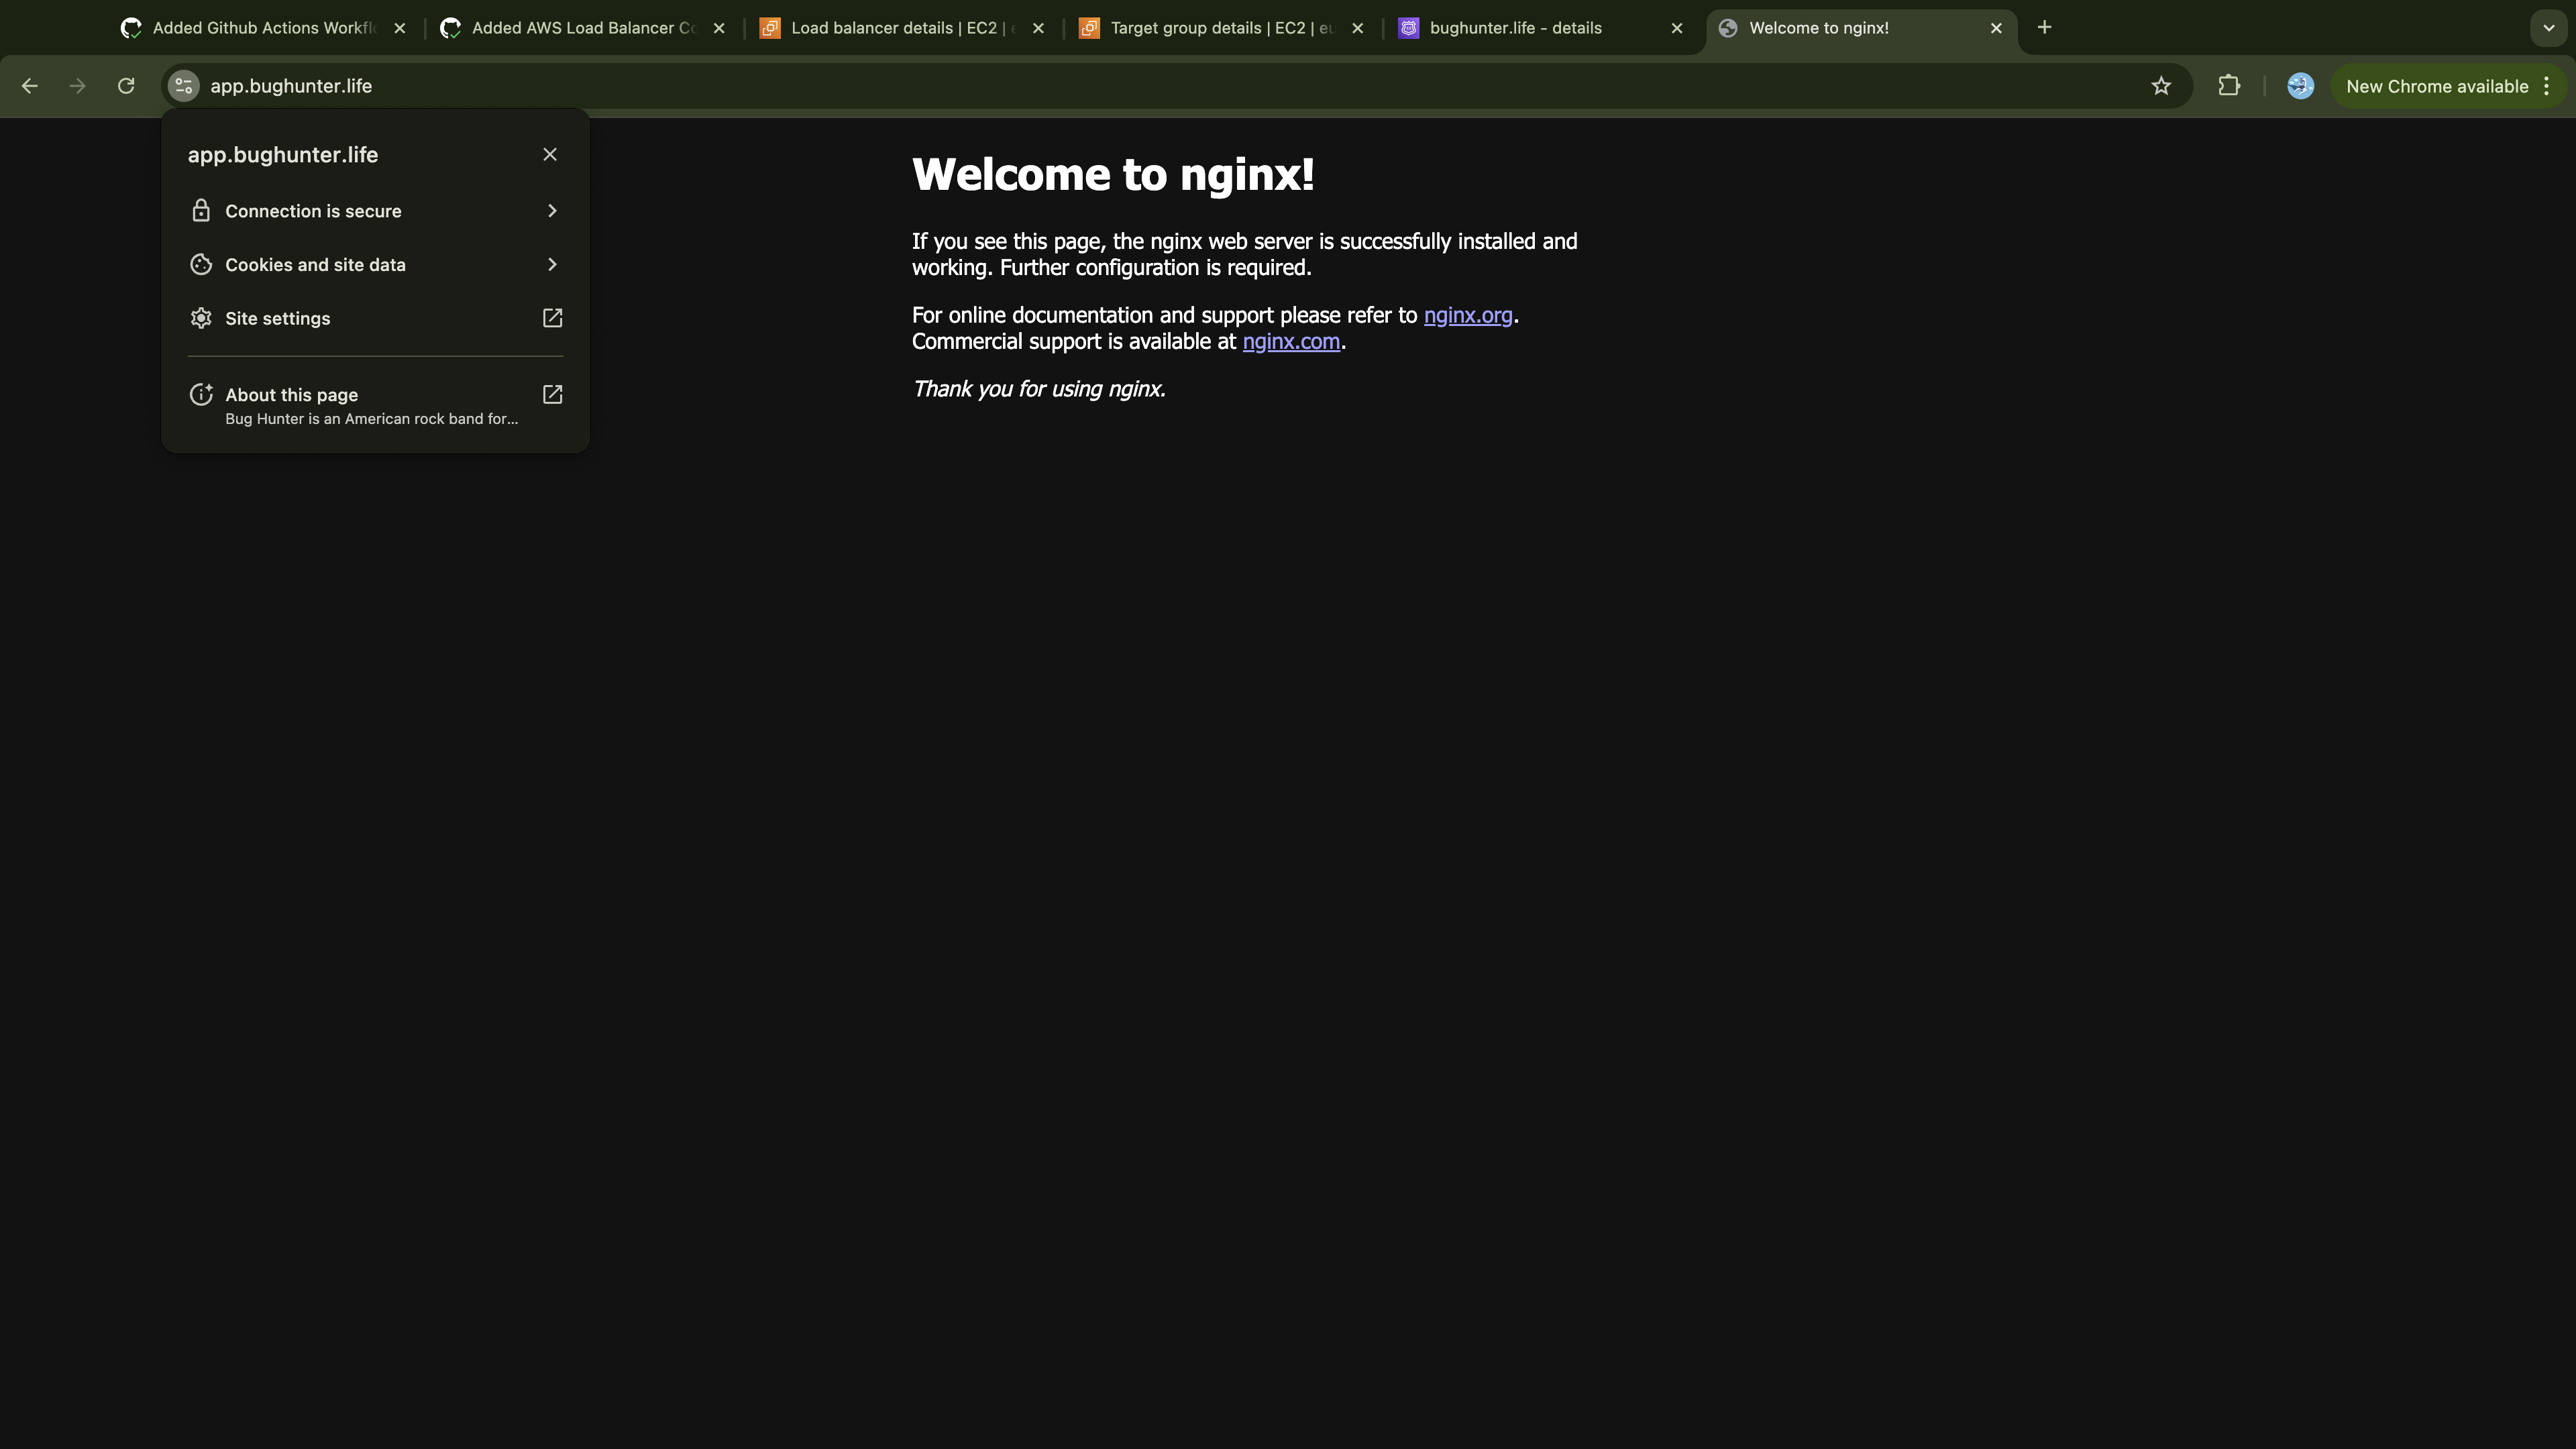
If you investigate the certificate, you'll see it is issued by Amazon Certificate Manager and is valid for one year:
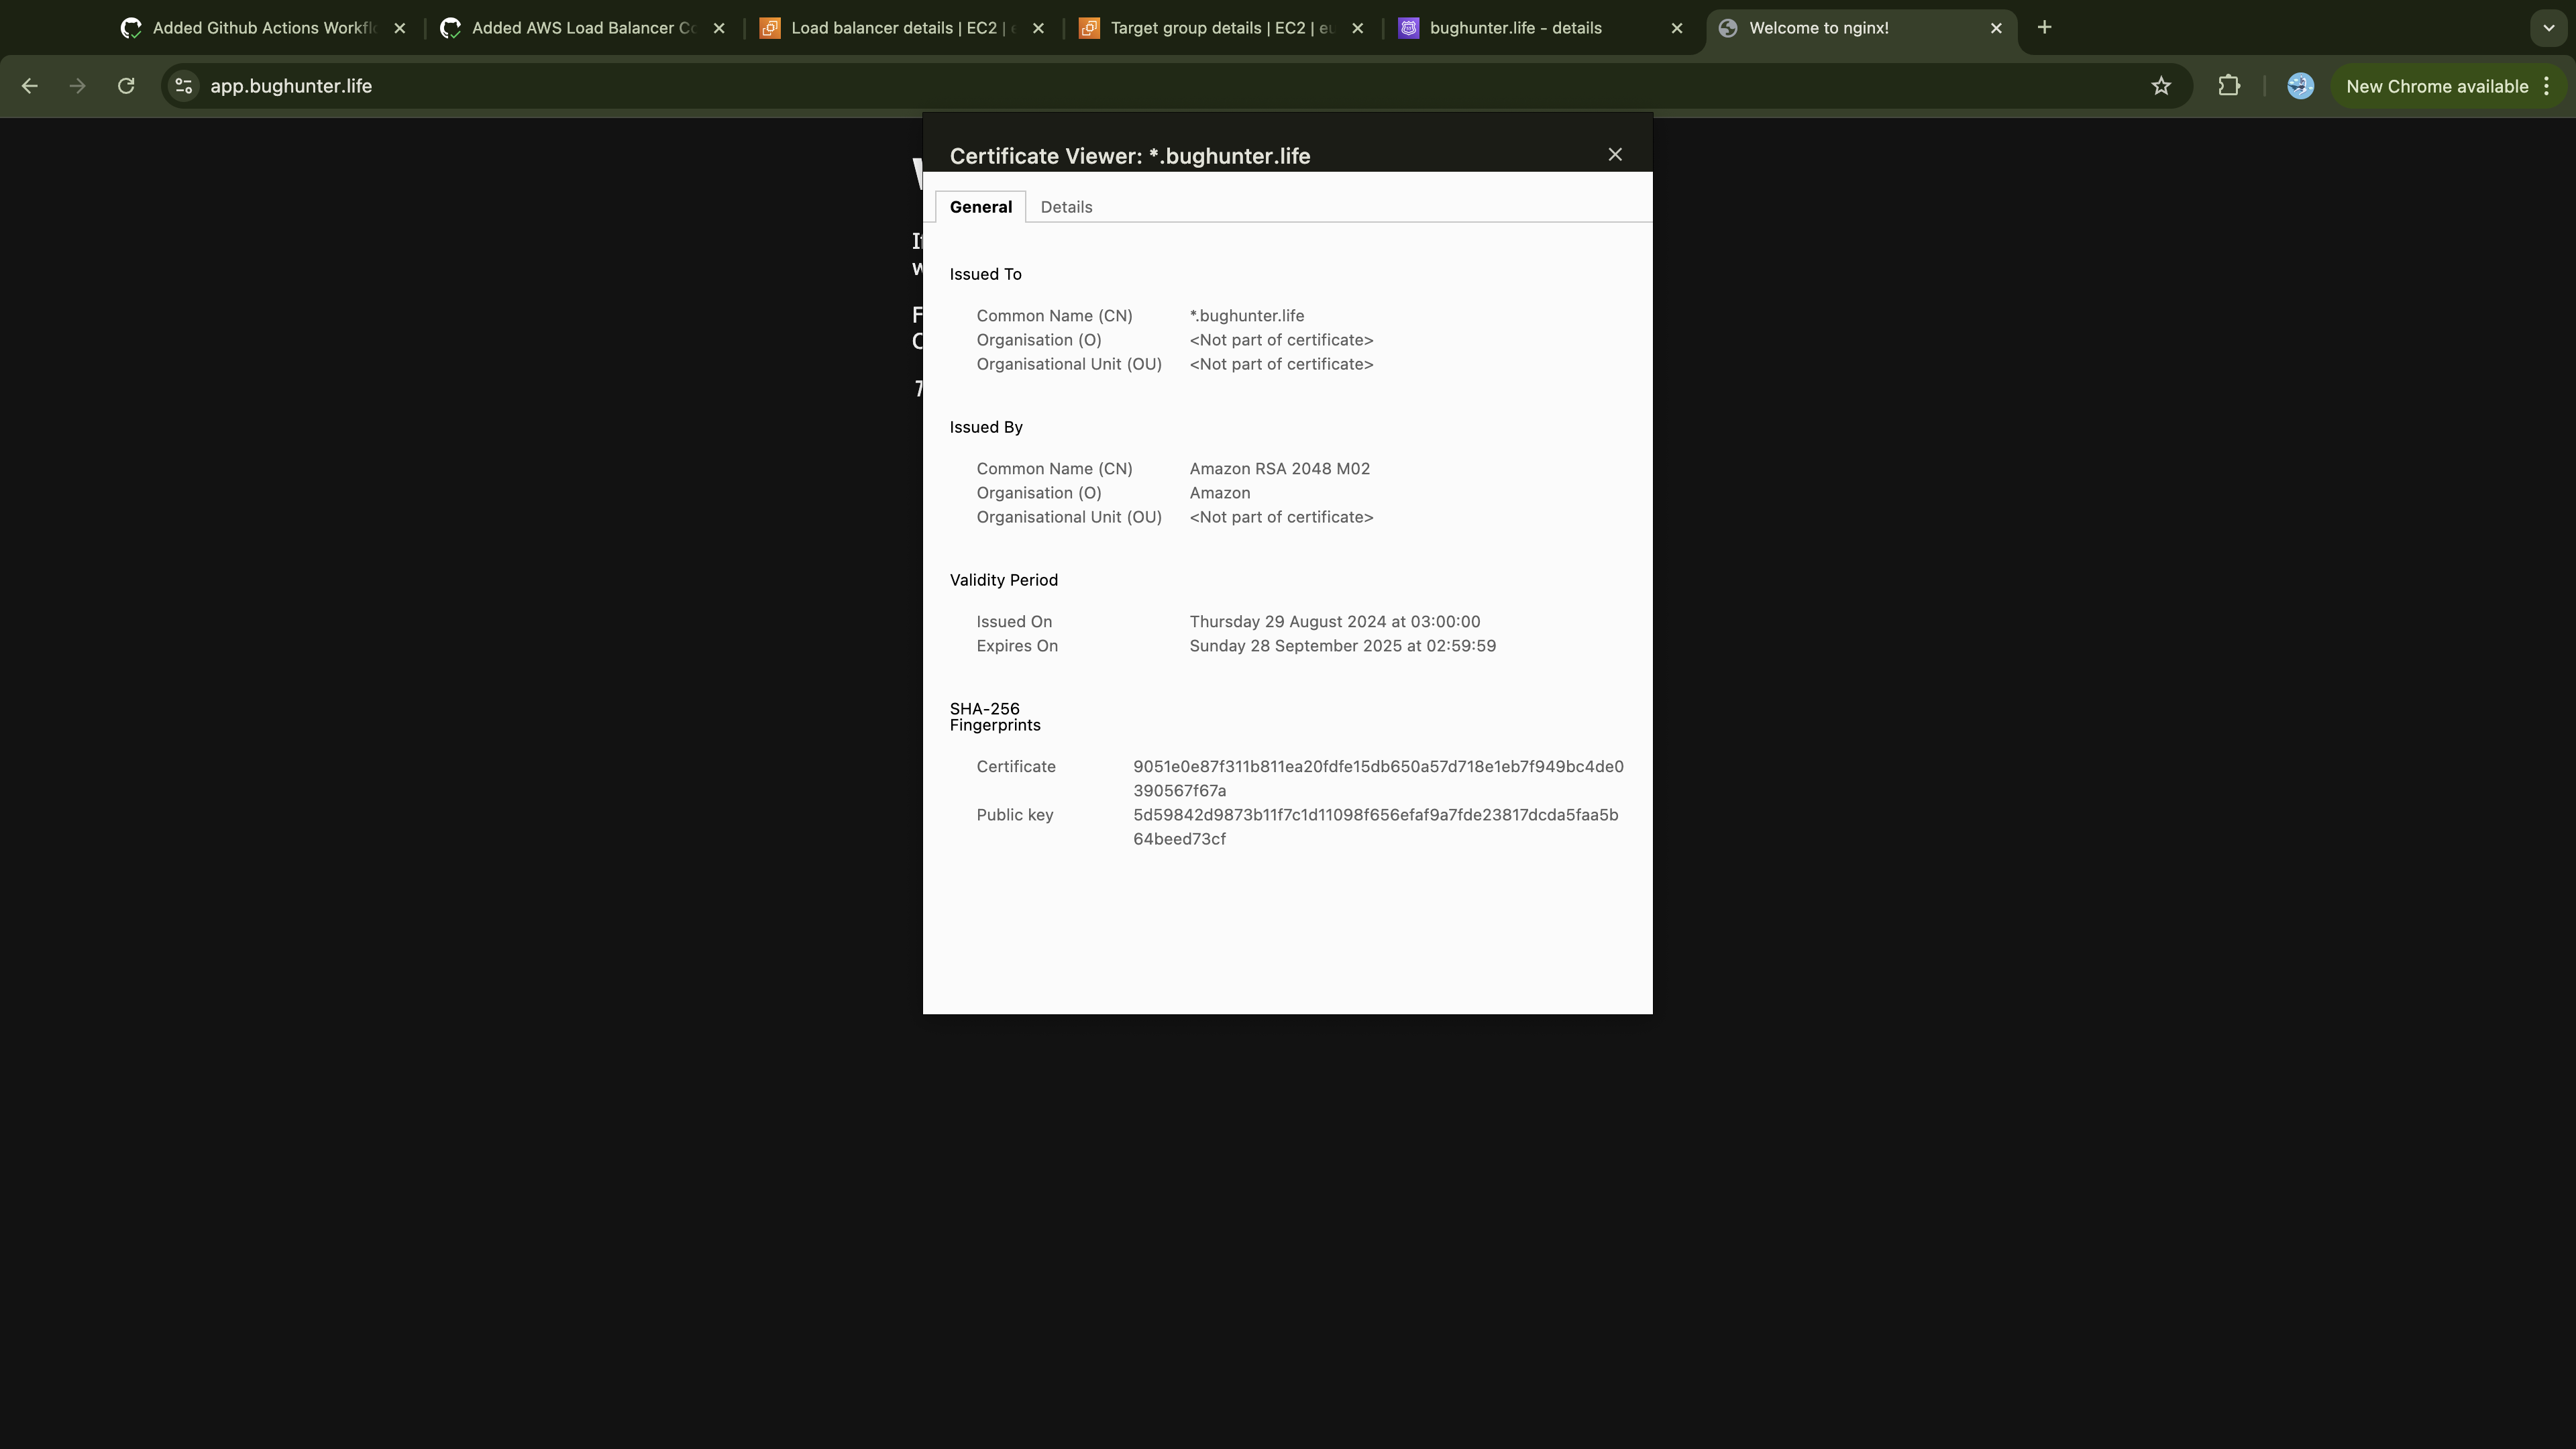
That all for this project.
Clean Up
First, we need to manually delete the Ingress resource to remove the Application Load Balancer (ALB) and its associated security groups on AWS. If we skip this step, Terraform will encounter issues when attempting to delete the VPC because the Ingress resource, which uses the ALB, won't be automatically deleted during the cluster destruction process. Since the VPC is still in use, Terraform won't be able to destroy it.
To delete the Ingress resource, run the following command:
kubectl delete ingress alb-ingress -n app-ns
This process may take some time as it waits for cloud resources to be fully destroyed. Please be patient and avoid forcing it to exit (e.g., by using Control + C). If immediate termination is necessary, you can edit the Ingress resource and remove the finalizer block and its contents.
  finalizers:
    - kubernetes.io/ingress.class
Now, update the Terragrunt GitHub Action workflow to destroy all infrastructures across the three environments. To do this, change the Terragrunt command in the actions workflow from apply to destroy as shown below:
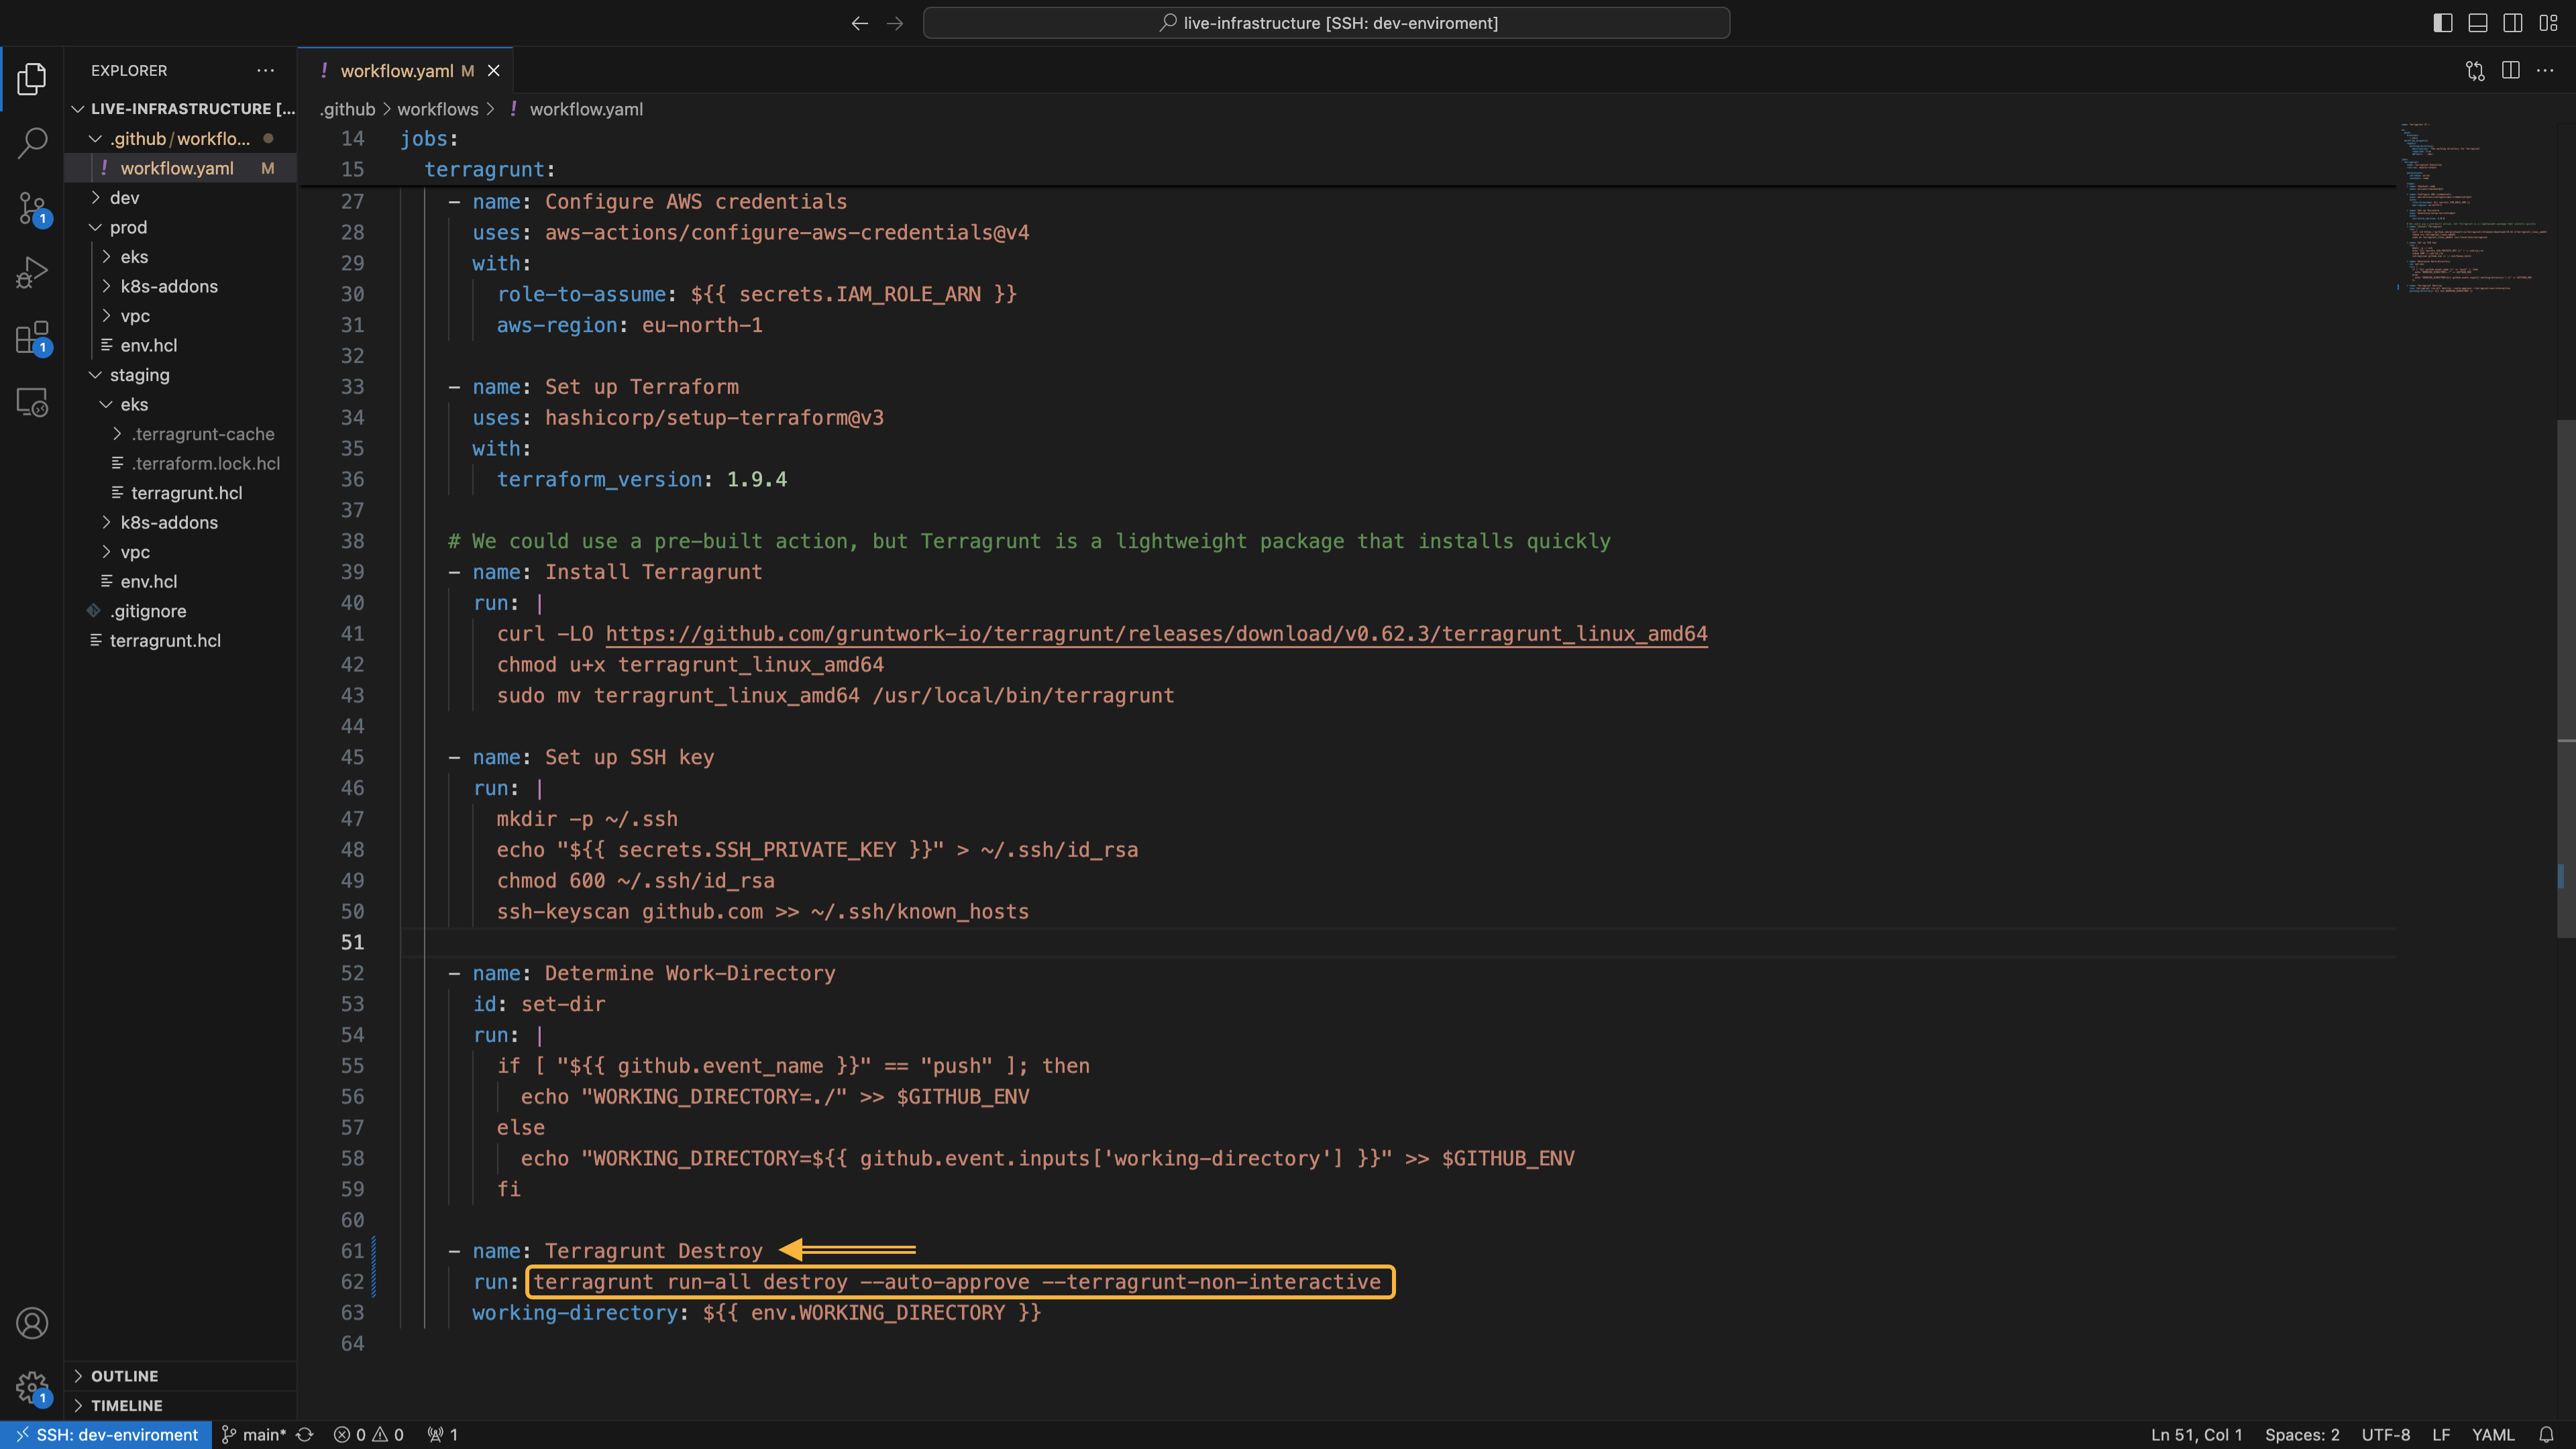
Now, commit and push the changes to the remote repository to trigger the Actions workflow, which will destroy the infrastructures.
git add .
git commit -m "Infrastructure Destroy "
git push origin main
The process should take approximately 10-50 minutes to complete. Monitor the Actions UI to ensure the execution completes successfully.
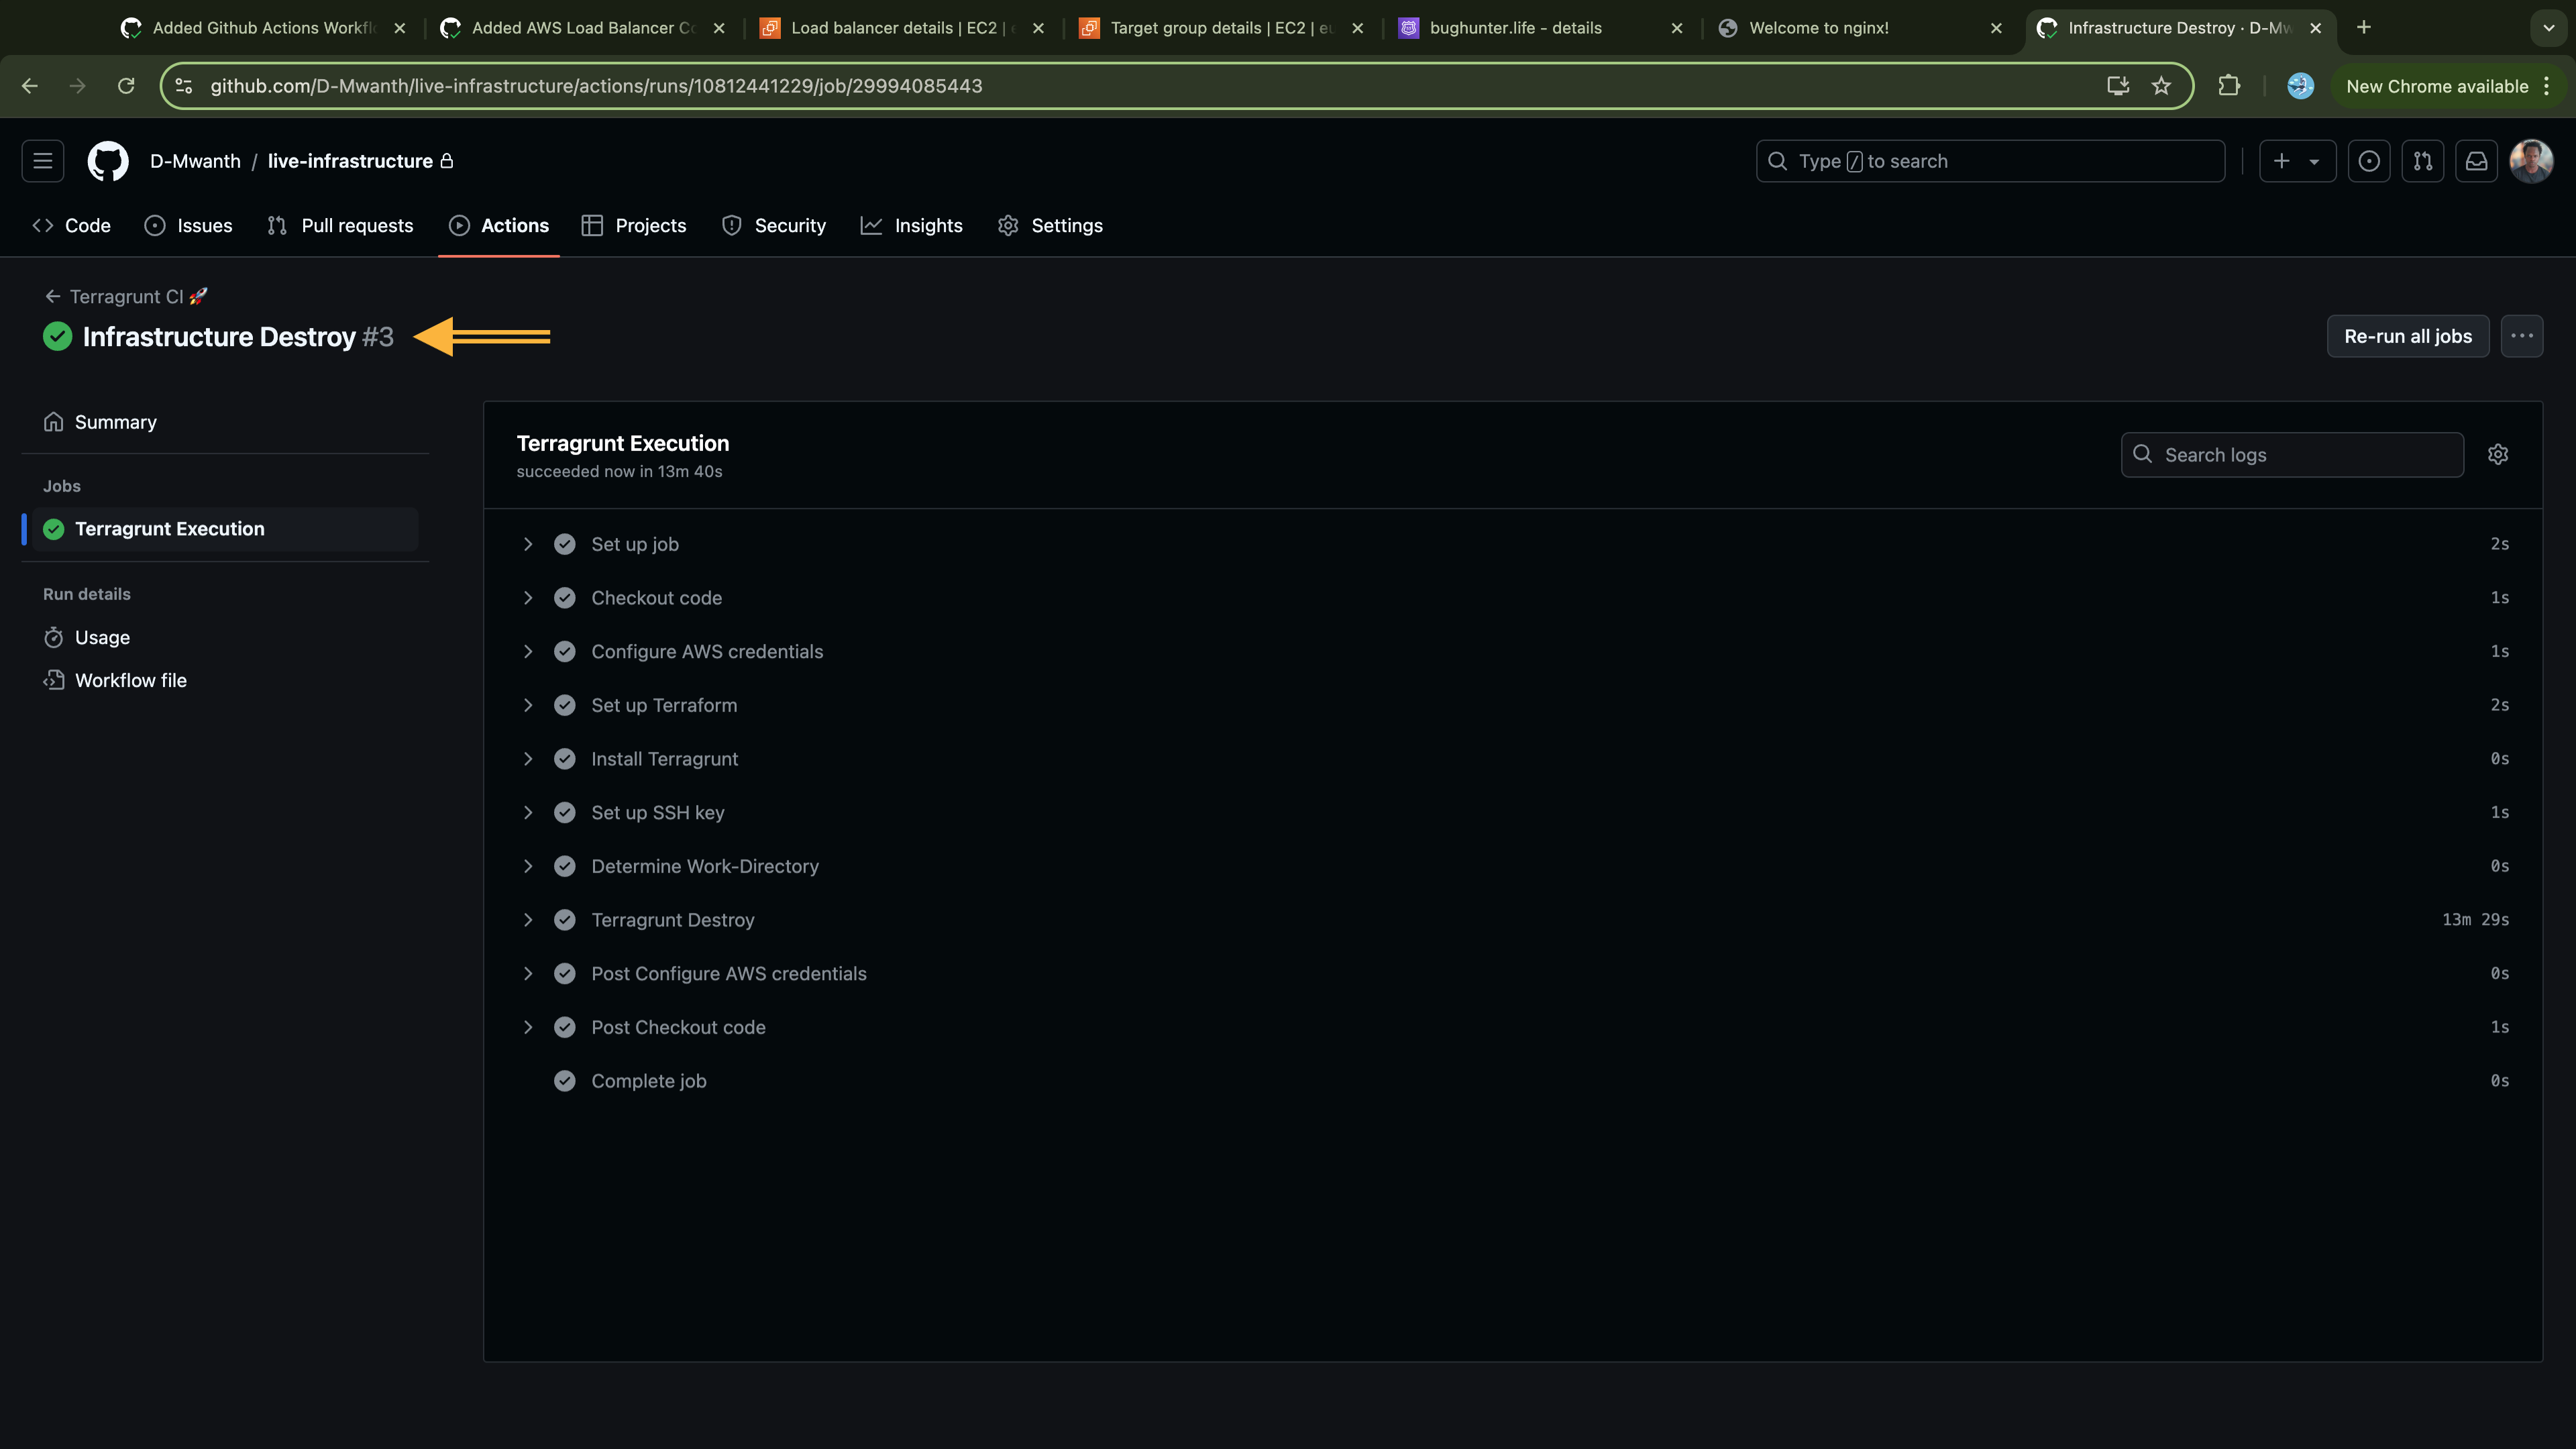
Next, destroy the S3 and Dynamodb created for infrastructure state management:
# Delete all versions (might take a while based on how many times your executed Terraform)
aws s3api list-object-versions --bucket infra-bucket-by-daniel --query 'Versions[].{Key:Key,VersionId:VersionId}' --output json \
  | jq -c '.[]' \
  | while read -r obj; do
      aws s3api delete-object --bucket infra-bucket-by-daniel --key $(echo $obj | jq -r '.Key') --version-id $(echo $obj | jq -r '.VersionId')
    done

# Delete all delete markers
aws s3api list-object-versions --bucket infra-bucket-by-daniel --query 'DeleteMarkers[].{Key:Key,VersionId:VersionId}' --output json \
  | jq -c '.[]' \
  | while read -r obj; do
      aws s3api delete-object --bucket infra-bucket-by-daniel --key $(echo $obj | jq -r '.Key') --version-id $(echo $obj | jq -r '.VersionId')
    done

# Finally, delete the bucket
aws s3 rb s3://infra-bucket-by-daniel --force


# Delete the Dynamodh table
aws dynamodb delete-table --table-name infra-terra-lock --region eu-north-1
Next, delete the requested ACM certificate, the Route 53 DNS record for domain validation, and the DNS record created for end users to access the application.
# Delete ACM Certificate
aws acm delete-certificate --certificate-arn arn:aws:acm:eu-north-1:848055118036:certificate/bcac1ad4-aad2-4856-8c5a-d55c9714a1c7

# Delete Route 53 DNS Record for Domain Validation
aws route53 change-resource-record-sets \
    --hosted-zone-id Z01858171E8N3E8SONG97 \
    --change-batch '{
        "Comment": "Deleting a DNS record",
        "Changes": [
            {
                "Action": "DELETE",
                "ResourceRecordSet": {
                    "Name": "_85bcb6670004a4780fa3d7b70d78fb6b.bughunter.life",
                    "Type": "CNAME",
                    "TTL": 300,
                    "ResourceRecords": [
                        {
                            "Value": "_c74aa52d77ceebdb10733f547215b828.djqtsrsxkq.acm-validations.aws"
                        }
                    ]
                }
            }
        ]
    }'

# Delete DNS Record Created for End Users:
aws route53 change-resource-record-sets \
    --hosted-zone-id Z01858171E8N3E8SONG97 \
    --change-batch '{
        "Comment": "Deleting a DNS record",
        "Changes": [
            {
                "Action": "DELETE",
                "ResourceRecordSet": {
                    "Name": "app.bughunter.life",
                    "Type": "CNAME",
                    "TTL": 300,
                    "ResourceRecords": [
                        {
                            "Value": "k8s-appns-albingre-b98cbbf39f-1677060279.eu-north-1.elb.amazonaws.com"
                        }
                    ]
                }
            }
        ]
    }'
Next, delete the Admin Server (EC2 instance) created for development purpose and the corresponding key:
# command to terminate that instance
aws ec2 terminate-instances --instance-ids i-085d29d6ffd7bd0db --region eu-north-1

# delete key pair
aws ec2 delete-key-pair --key-name my-aws-key
Also let's delete the role assumed by the Admin server and the workflow:
# First we need to detach the policies attached to the role
# List the attached policies
aws iam list-attached-role-policies --role-name terra-ec2-Role

# Use the arn of the policy returned
aws iam detach-role-policy --role-name terra-ec2-Role --policy-arn arn:aws:iam::aws:policy/AdministratorAccess

# Remove the role from the instance profile:
aws iam remove-role-from-instance-profile --instance-profile-name terra-ec2-InstanceProfile --role-name terra-ec2-Role

# Delete the instance profile
aws iam delete-instance-profile --instance-profile-name terra-ec2-InstanceProfile

# Delete the IAM role
aws iam delete-role --role-name terra-ec2-Role
To keep your account tidy, you can proceed with deleting the security groups created during this session. Since all resources from this session have been removed, we can be confident that no unexpected charges will arise.
Conclusion:
In this walkthrough, we learned how to create a highly available, scalable and secure Kubernetes cluster across multiple environments using Terraform and Terragrunt. We successfully provisioned a VPC and EKS clusters for development, staging, and production environments and deployed a test application that was securely exposed through an ALB.
I hope you found this guide helpful and gained valuable insights. Feel free to connect with me on LinkedIn to stay updated on future publications.
Subscribe to my newsletter
Read articles from Mwanthi Daniel directly inside your inbox. Subscribe to the newsletter, and don't miss out.
Written by

Mwanthi Daniel
Mwanthi Daniel
A DevOps Engineer with expertise in implementing robust application delivery pipelines and optimizing cloud-native solutions. Proficient in cloud computing, containerization, Infrastructure as Code (IaC), orchestration, and systems monitoring.