Puppeteer Web Scraping: in Docker of Browserless
 nstbrowser
Docker Image Introduction
A Docker image is a file used to execute code in a Docker container. It acts as a set of instructions for building a Docker container, similar to a template. In other words, they are equivalent to snapshots in a virtual machine environment.
The Docker image contains all the libraries, dependencies, and files required to run a container, making it a standalone executable file for the container. These images can be shared and deployed in multiple locations so that they are highly portable.
What Is Browserless?
Browserless of Nstbrowser is a headlesschrome cloud service that operates online applications and automates scripts without a graphical user interface.
For jobs like web scraping and other automated operations, it is especially helpful.
Do you have any wonderful ideas and doubts about web scraping and Browserless?
Let's see what other developers are sharing on Discord and Telegram!
What Are the Benefits of Using Puppeteer in Docker?
Using Puppeteer in Docker has at least the following 3 benefits:
- Ensure consistent environments.
- Simplify dependency management.
- Improve scalability and enhance security.
Besides, by running Puppeteer in a Docker container, you can ensure consistent operating system and browser versions across all development, test, and production environments. This can also simplify the installation process of the Chrome browser and its dependencies, and easily scale container instances to handle large-scale tasks.
In addition, Docker containers provide an isolated environment, which reduces potential security risks.
How to Use Nstbrowser's Docker Image?
Before using Nstbrowser's Docker image, you need to do the following preparatory work:
- You must have a Docker environment. If you haven't installed Docker yet, you can refer to Docker Docs.
- You need a Nstbrowser account. If you don't have an account yet, you can register on the Nstbrowser official website.
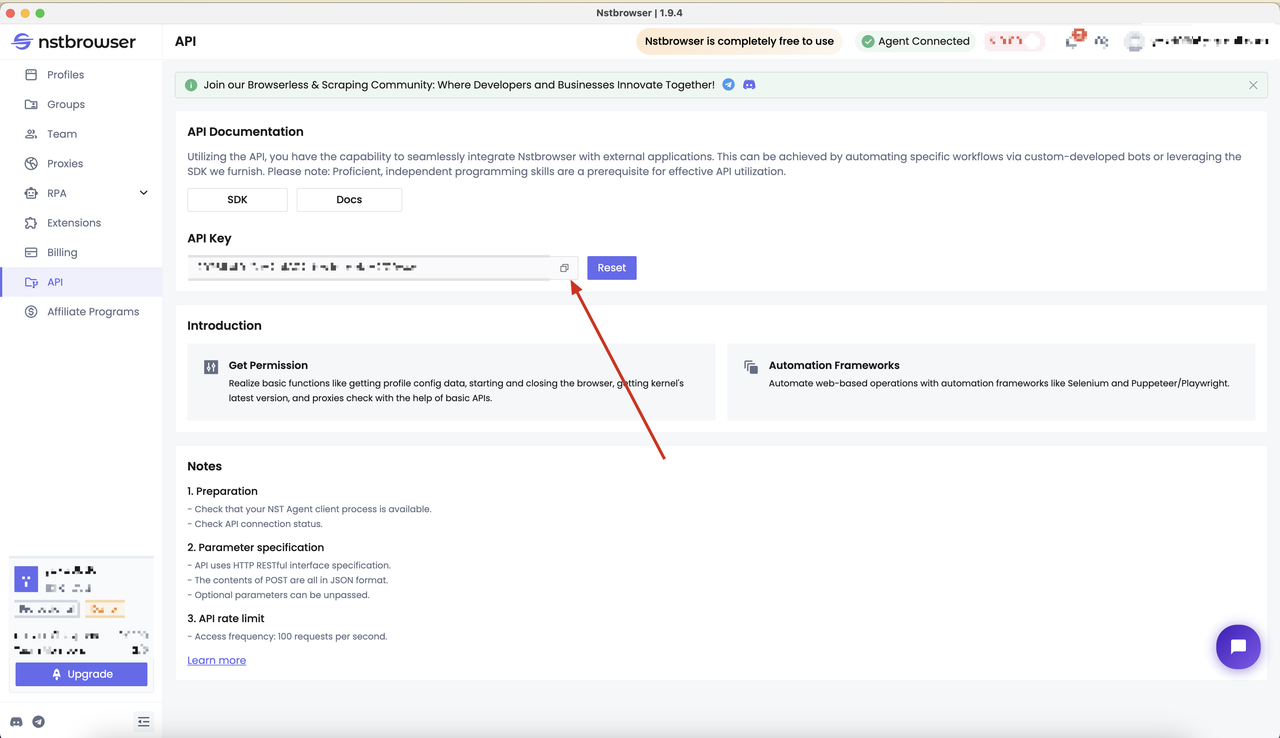
- Once you have an account, go to the following page to get your API key.

After you have completed the above preparatory work, you can use the following command to pull the Docker image of Nstbrowser:
# Pull the Browserless image
docker pull nstbrowser/browserless:0.0.1-beta

# Run the Browserless image
docker run -it -e TOKEN=xxx -e SERVER_PORT=8848 -p 8848:8848 --name nstbrowserless nstbrowser/browserless:0.0.1-beta

# After running, you can use the docker ps command to check whether the container is running properly
docker ps

Use Puppeteer in Docker to Crawl Dynamic Websites
Now, I will show you how to use Puppeteer based on the Nstbrowser Docker image to crawl dynamic websites. And take you step by step to complete a simple example.
Step 1: Determine the crawling target
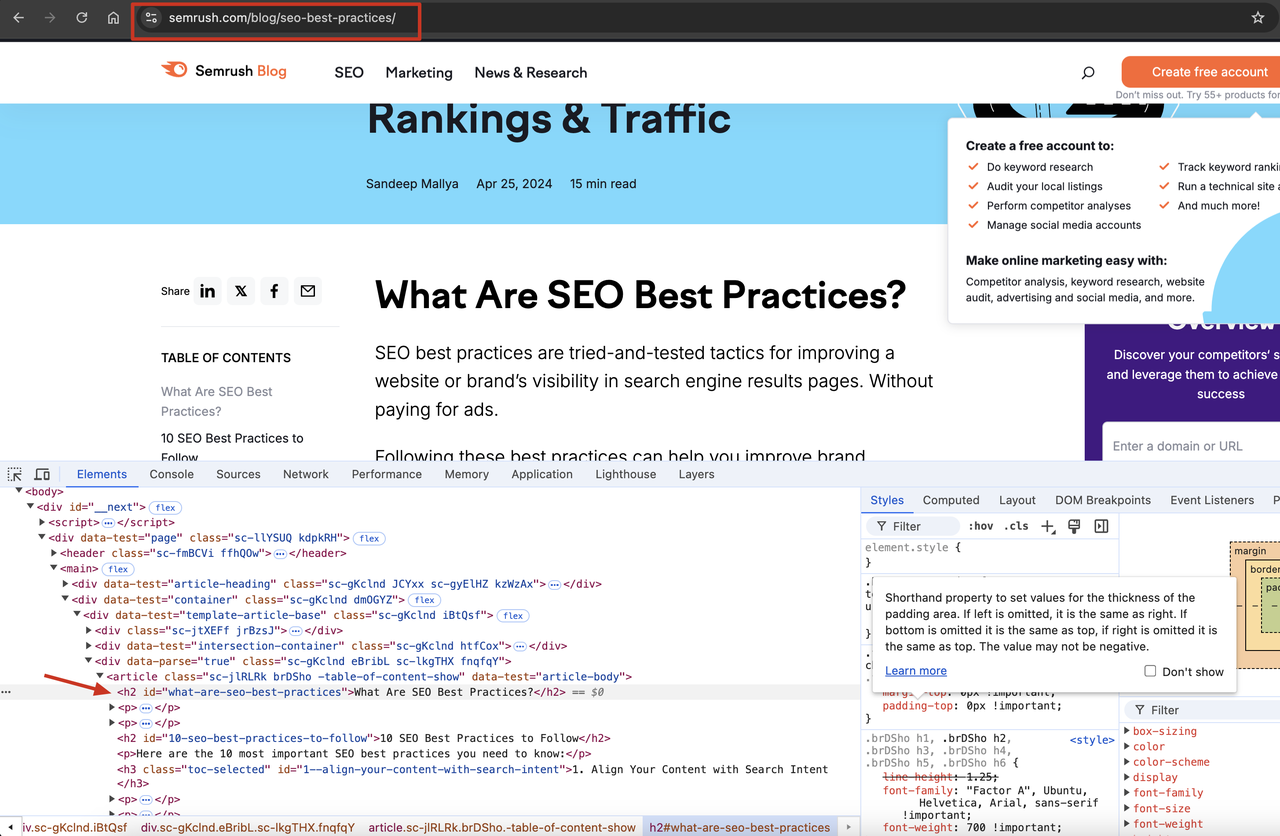
What we have to do at the very beginning is to determine the information we want to crawl. In this example, we choose to crawl all the H2 tag content of a Semrush Blog and print it to the console.

Step 2: Write a Puppeteer script
Next, we need to write a Puppeteer script to crawl our target information. Here you can find the code for Puppeteer to enter the target page and get the H2 tag content:
const page = await browser.newPage();

// Enter the target page
await page.goto('https://www.semrush.com/blog/seo-best-practices/');

// Get the h2 tag content
const h2s = await page.evaluate(() => {
  const h2s = Array.from(document.querySelectorAll('h2'));
   return h2s.map(h2 => h2.textContent);
});

// Print the h2 tag content
console.log(h2s);
Step 3: Project initialization
Before implementing this step, please execute the following command to initialize a new project:
cd ~
makedir puppeteer-docker
cd puppeteer-docker
Well done! What do we need to do next? Just create the following 3 files with our code:
- index.mjs
import puppeteer from 'puppeteer-core';

async function execPuppeteer(browserWSEndpoint) {
  try {
    const browser = await puppeteer.connect({
      browserWSEndpoint: browserWSEndpoint,
      defaultViewport: null,
    });
    const page = await browser.newPage();

    // Navigate to the target URL
    await page.goto('https://www.semrush.com/blog/seo-best-practices/');

    // Get h2 tag content
    const h2s = await page.evaluate(() => {
      const h2s = Array.from(document.querySelectorAll('h2'));
      return h2s.map((h2) => h2.textContent);
    });

    // Print h2 tag content
    console.log(h2s);

    // Close the browser
    await browser.close();
  } catch (err) {
    console.error('launch', err);
  }
}

async function launchAndConnectToBrowser() {
  const host = 'host.docker.internal:8848';
  const config = {
    once: true,
    headless: true, // Set headless mode
    autoClose: true,
    args: { '--disable-gpu': '', '--no-sandbox': '' }, // browser args should be a dictionary
    fingerprint: {
      name: '',
      platform: 'mac',
      kernel: 'chromium',
      kernelMilestone: 124,
      hardwareConcurrency: 8,
      deviceMemory: 8,
    },
  };
  const browserWSEndpoint = `ws://${host}/ws/connect?${encodeURIComponent(
    JSON.stringify(config)
  )}`;
  await execPuppeteer(browserWSEndpoint);
}

launchAndConnectToBrowser().then();
- Dockerfile
FROM node:18-alpine AS base

# Install dependencies only when needed
FROM base AS deps
RUN set -eux && sed -i 's/dl-cdn.alpinelinux.org/mirrors.ustc.edu.cn/g' /etc/apk/repositories
RUN apk add --no-cache libc6-compat

RUN npm config set registry https://registry.npmmirror.com/
RUN npm install -g pnpm

# Set working directory
WORKDIR /app

# Copy package.json and install dependencies
COPY package*.json pnpm-lock.yaml ./

RUN pnpm install

WORKDIR /app
COPY --link ./ .

FROM base AS runner

# Copy dependencies
COPY --from=deps /app/node_modules ./node_modules

# Copy application code
COPY --from=deps /app .

# Default startup command
CMD ["node", "index.mjs"]
- package.json
{
  "name": "docker-puppeteer",
  "version": "1.0.0",
  "main": "index.mjs",
  "dependencies": {
    "puppeteer-core": "^23.1.0"
  },
  "scripts": {
    "start": "node index.mjs"
  }
}
Great! We have created the three files we need! There is only one last preparation left: install the project dependencies.
pnpm install
Step 4: Build and run the Docker image
Are you ready? We can finally build and crawl the Docker image:
- Open the console
- Go to the project directory
- Run the following script command to build the Docker image
docker build -t puppeteer-docker.
Are you done? Please execute the following script to run our puppeteer-docker image. It will automatically run our Puppeteer script to perform the crawling operation:
docker run --rm --network="host" puppeteer-docker
You will eventually see the following output. The result is that we crawled all the H2 titles on the target website page:

Optimizing Puppeteer Performance in Docker
Optimizing Puppeteer performance in a Docker environment involves several key strategies to ensure that browser automation tasks run efficiently.
1. Reduce container size
Choose a lightweight base image, such as node:alpine or node:slim, to reduce the size of the image.
Remove unnecessary dependencies and files, and keep the image simple by using .dockerignore files and selectively including required files.
2. Enable headless mode
Activate the headless mode ({ headless: true }) of Puppeteer. It will run the browser without a graphical user interface, reducing resource consumption and improving performance.
3. Allocate resources properly
Please ensure that the Docker container gets enough CPU and memory resources to successfully complete the browser automation task.
You can use Docker's resource limit features (such as --cpus and --memory) to manage the resource usage of the container and prevent resource contention in a multi-container environment.
4. Optimize Dockerfile
Reduce the number of layers in the Dockerfile and merge multiple commands into a single RUN instruction to shorten the image build time.
Use multi-stage builds to separate dependencies between the build and run stages, and generate a more streamlined final image.
Improve build efficiency and shorten subsequent build times by properly arranging Dockerfile commands to take advantage of the build cache.
5. Adjust browser startup options
Customize Puppeteer's browser startup parameters, such as args, executablePath, and ignoreDefaultArgs, to optimize browser behavior and resource usage.
Adjust Chromium startup flags to disable unnecessary features or enable performance enhancement options, such as turning off GPU acceleration through --disable-gpu.
6. Container orchestration
Deploy Puppeteer applications on container orchestration platforms such as Docker Swarm or Kubernetes, and take advantage of the automatic expansion, load balancing, and resource management capabilities provided by these platforms.
Achieve horizontal expansion, distribute the load to multiple containers, and improve performance under high-traffic conditions.
7. Monitor and tune the performance
Use Docker’s monitoring tools (such as Docker Stats, Docker Events, and Docker Healthchecks) to monitor container resource usage and health.
Implement an application performance monitoring (APM) solution (such as Prometheus, Grafana, or Datadog) to track and analyze key performance indicators such as response time, throughput, and error rate to identify and resolve performance bottlenecks.
Final Thoughts
Running Puppeteer in a Docker environment brings more convenience to developers! It provides a flexible and scalable solution for browser automation tasks.
In this blog, we discussed:
- The meaning and function of Docker image
- Specific steps to crawl pages using Puppeteer-Docker
- 7 tips to ensure Puppeteer runs efficiently in Docker
Subscribe to my newsletter
Read articles from nstbrowser directly inside your inbox. Subscribe to the newsletter, and don't miss out.
Written by
