Project: AWS DevOps Deployment
 Harshit Sahu
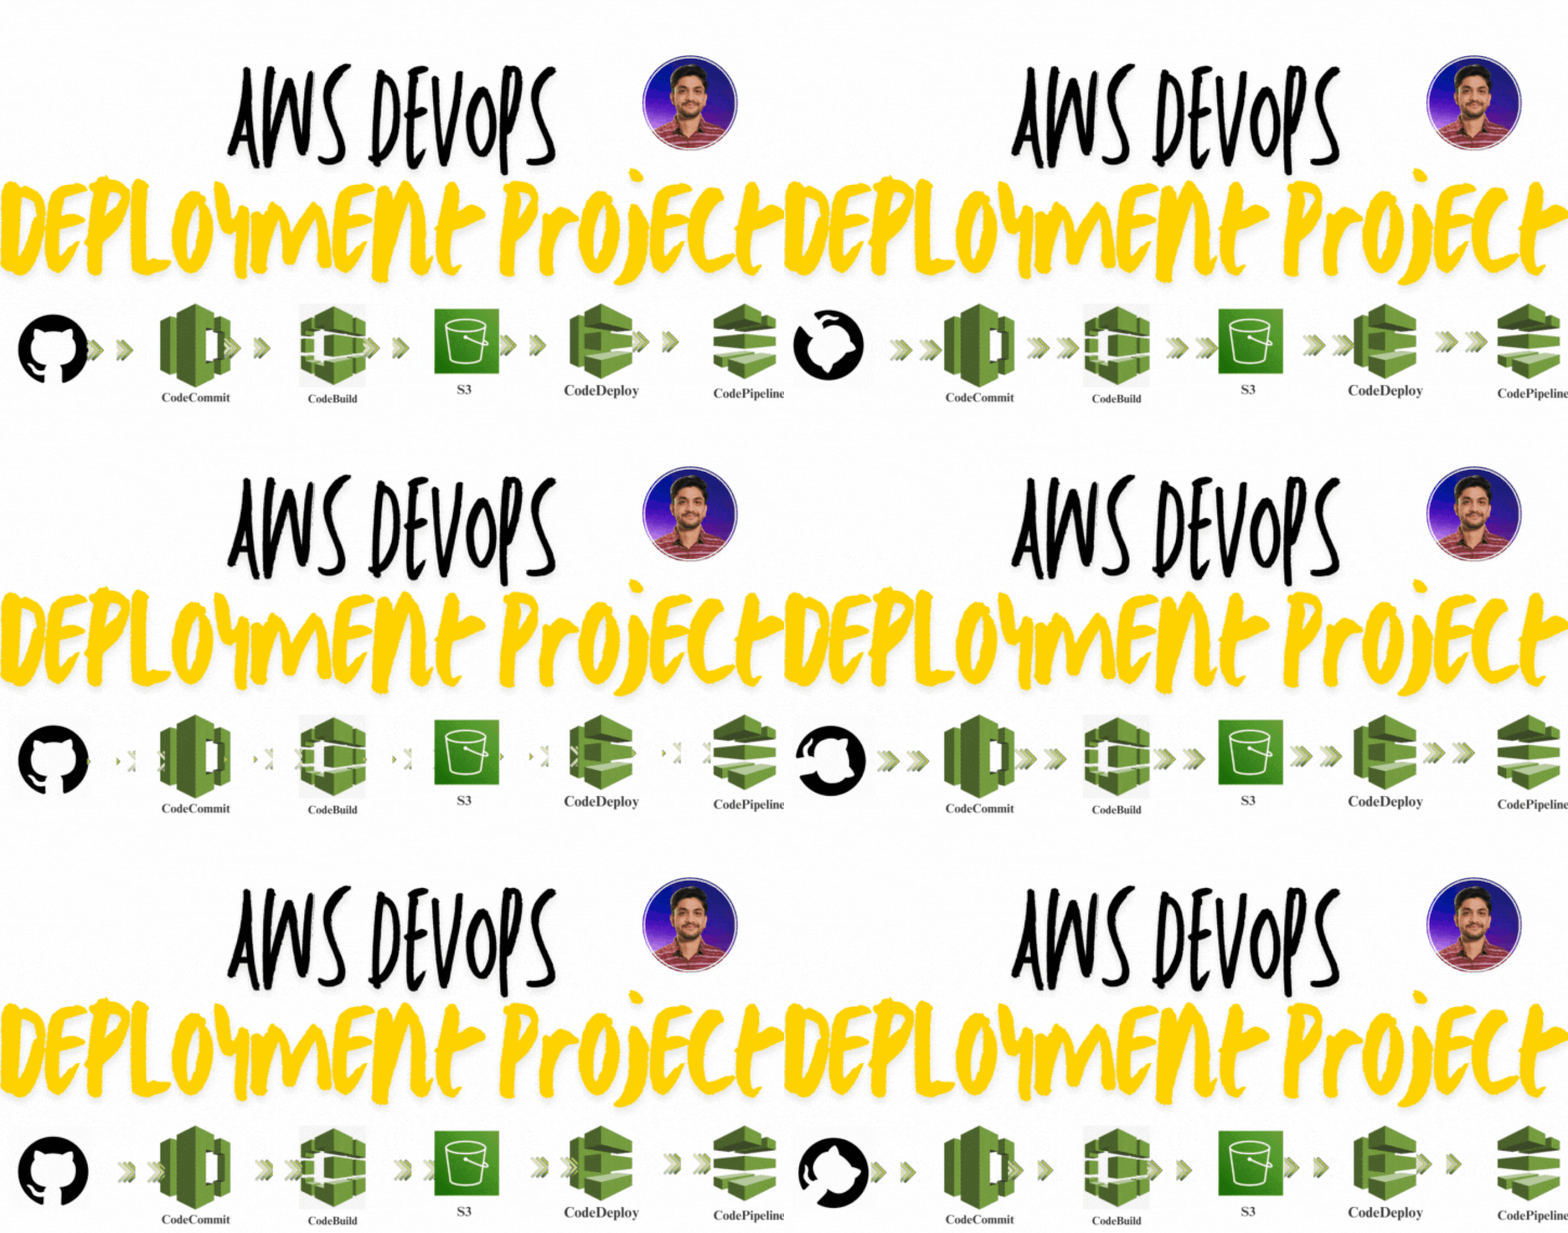
I built a complete Continuous Integration and Continuous Deployment (CI/CD) pipeline using various AWS services in this project. The goal was to automate deploying an application from a GitHub repository to an EC2 instance using AWS CodeCommit, CodeBuild, S3, CodeDeploy, and CodePipeline.
The project begins by cloning the code from a GitHub repository and setting up AWS CodeCommit as the version control system. The code is then pushed to CodeCommit via the AWS CLI. Next, AWS CodeBuild is configured to build the application, and the compiled code is stored in an S3 bucket. AWS CodeDeploy is used to automate the deployment process by pulling the code from S3 and deploying it to an Ubuntu EC2 instance.
The EC2 instance is configured with the AWS CodeDeploy Agent to manage deployments. A deployment group is created in CodeDeploy to manage the EC2 instance and deploy the application. Finally, AWS CodePipeline is set up to automate the entire process, from code commits in CodeCommit to deployment in EC2, providing a fully automated DevOps workflow.
STEPS -
Clone the code from GitHub using the following command:
git clone https://github.com/harshitsahu2311/AWS-DevOps-ProjectSet up a CodeCommit repository in AWS.
Push the cloned code to AWS CodeCommit using the AWS CLI.
Configure AWS CodeBuild to compile and build the code.
Create an S3 bucket to store the built code.
Set up AWS CodeDeploy.
Launch an EC2 instance where the application will be deployed.
Install and configure the AWS CodeDeploy Agent on the Ubuntu EC2 instance.
Create a Deployment group in CodeDeploy and deploy the application to the EC2 instance.
Set up an AWS CodePipeline to automate the entire process from CodeCommit to deployment.
Let’s Start the Process -
Step 1 → Clone the Repository
git clone https://github.com/harshitsahu2311/AWS-DevOps-Project
above command will pull the code from GitHub to your Local Machine.
Step 2 → Setup CodeCommit Repository
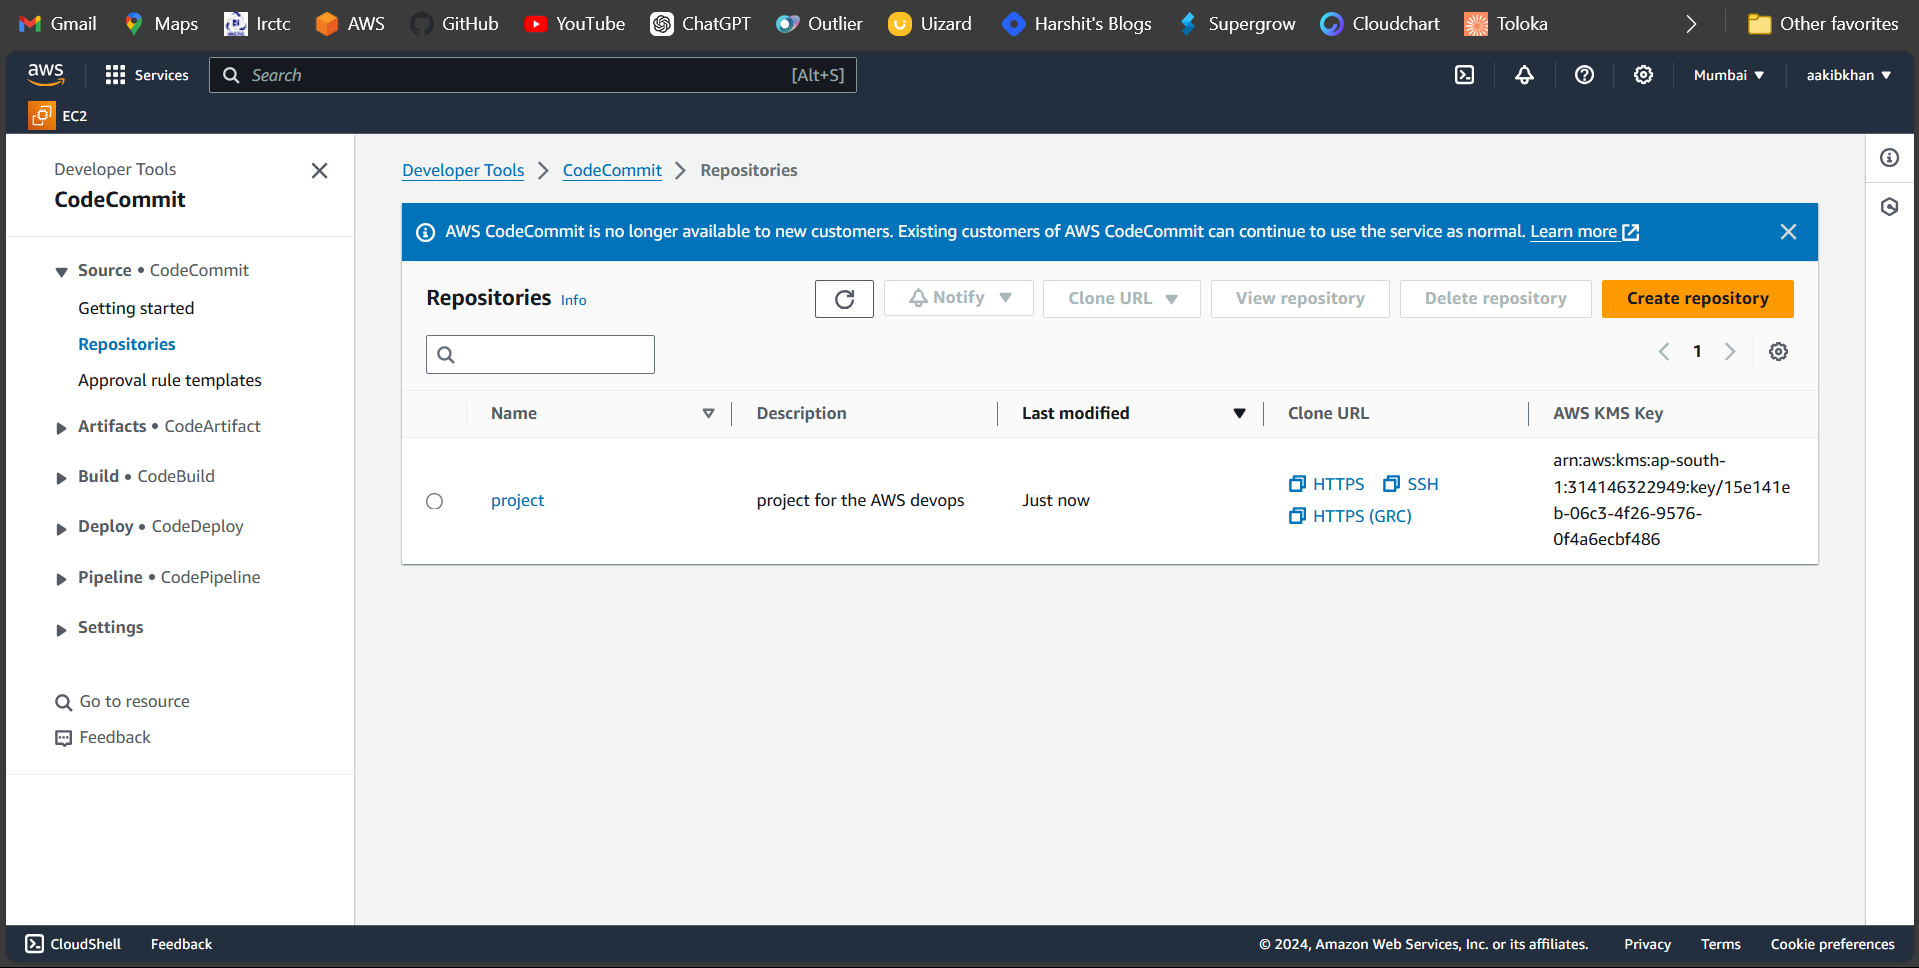
Go to the AWS console. Click on Services, search for codecommit and create a project repository.
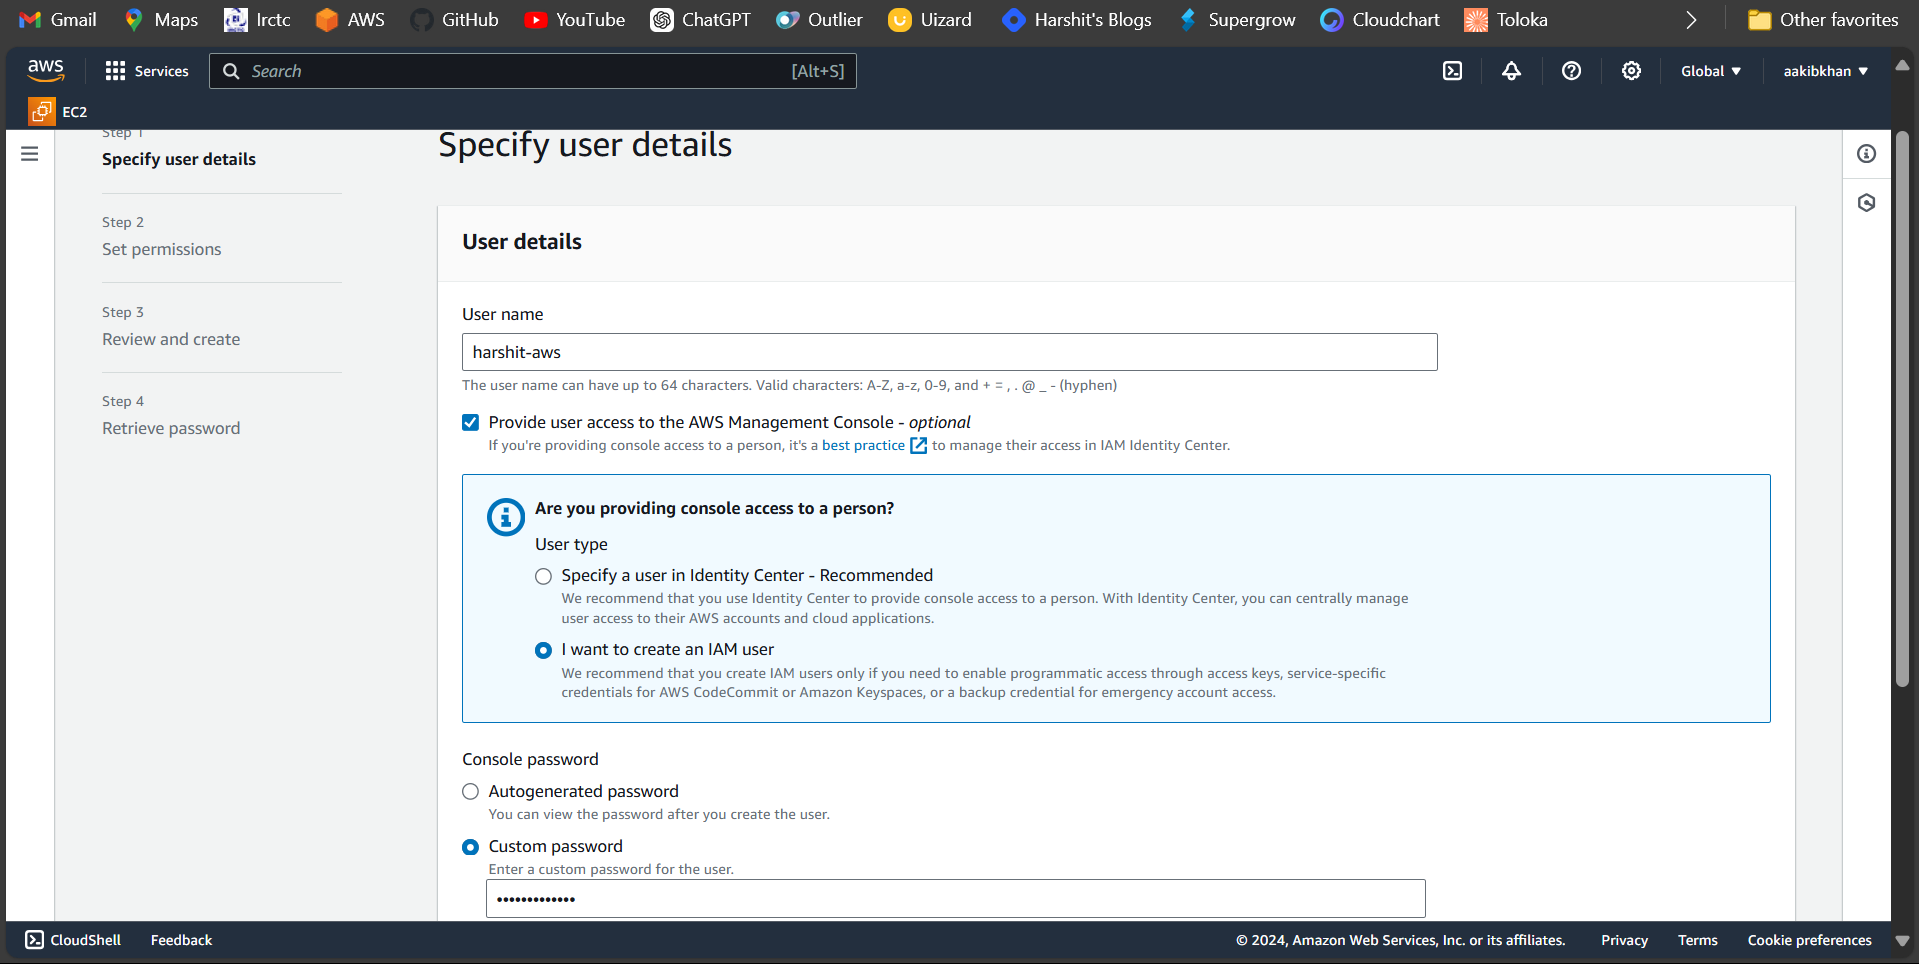
To use aws code commit with aws cli, you must first create an IAM user with aws code commit permissions. Search IAM in Services and click on create user
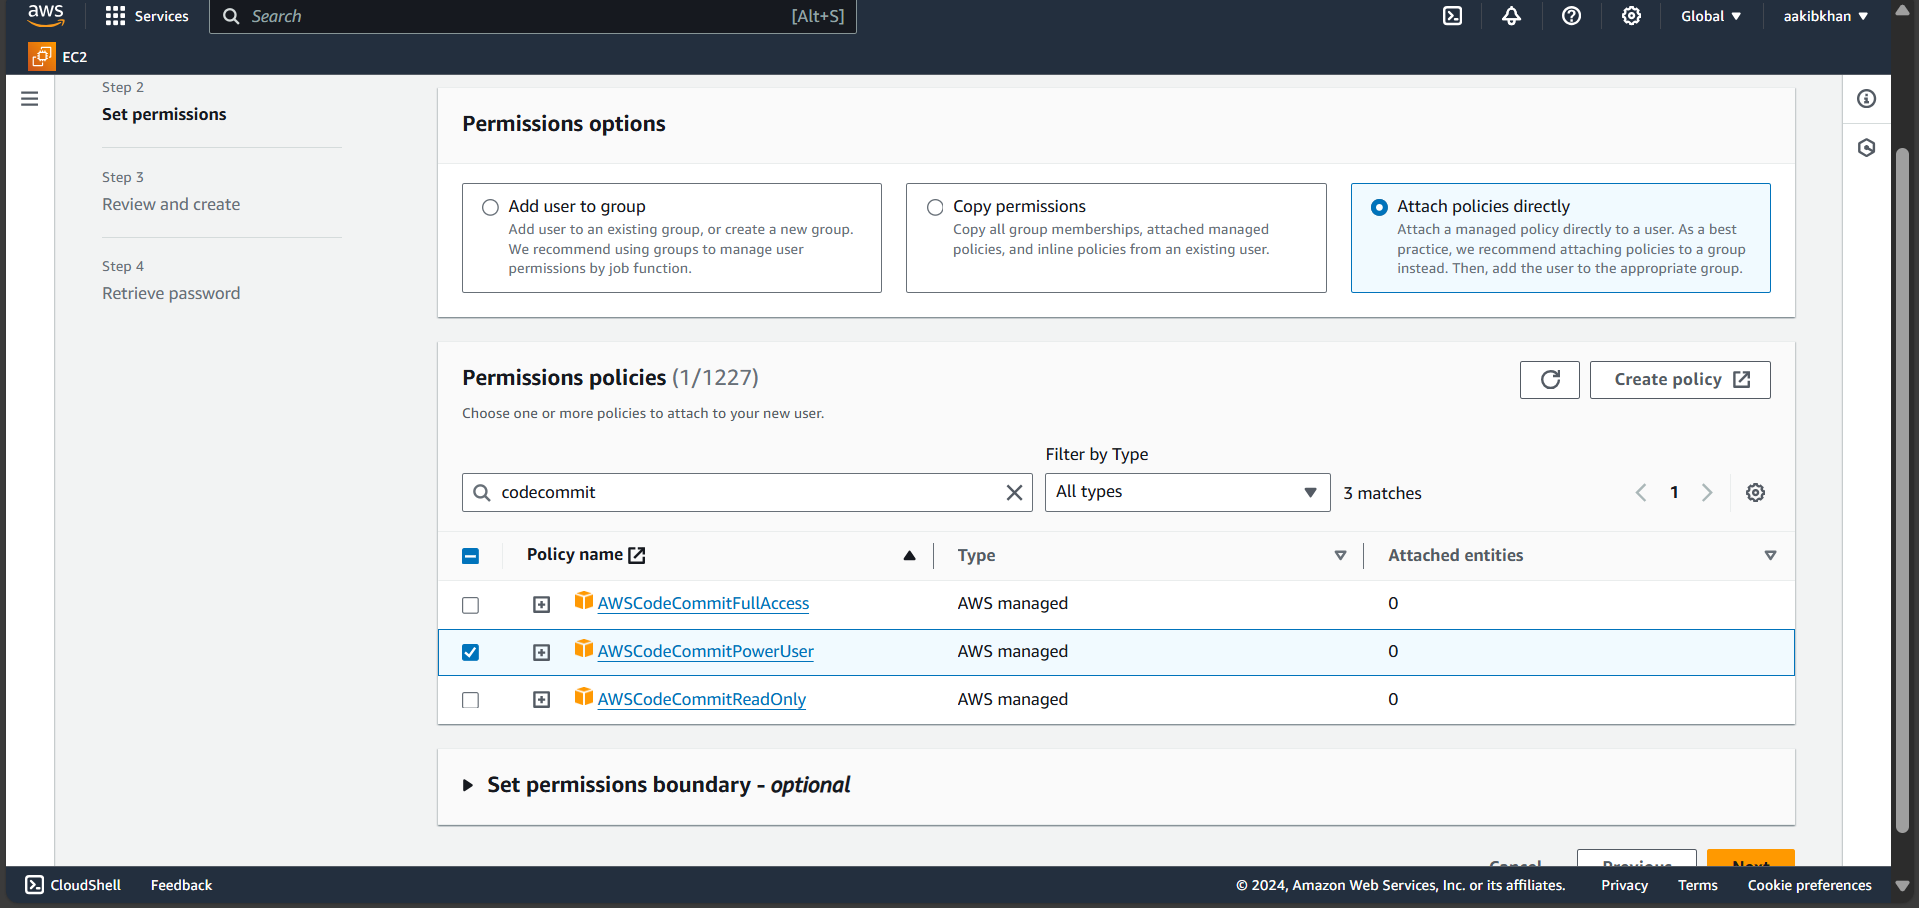
Click Next and Set Permissions for the user
Click Next and review the user and then create a user.
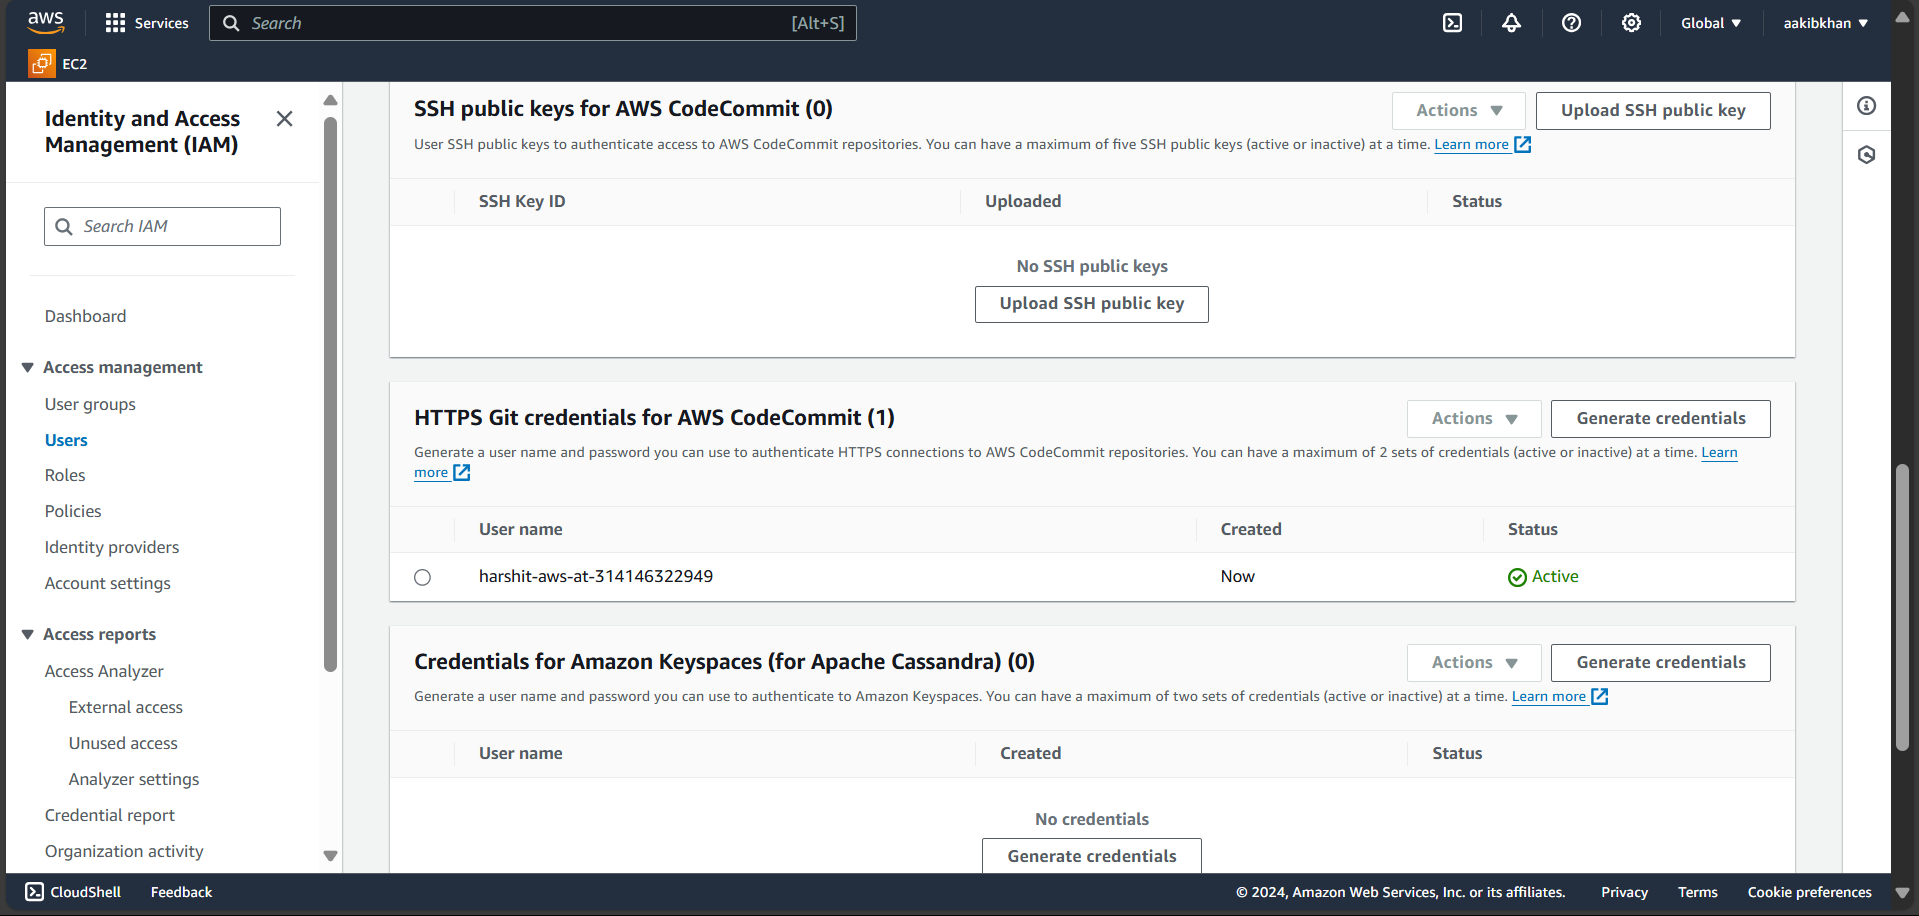
Click on username (harshit-aws) → Security Credentials → scroll down for HTTPS Git credentials for AWS CodeCommit → Click on generate credentials and download csv.credentials file.
Step 3 - Push the cloned code to AWS CodeCommit
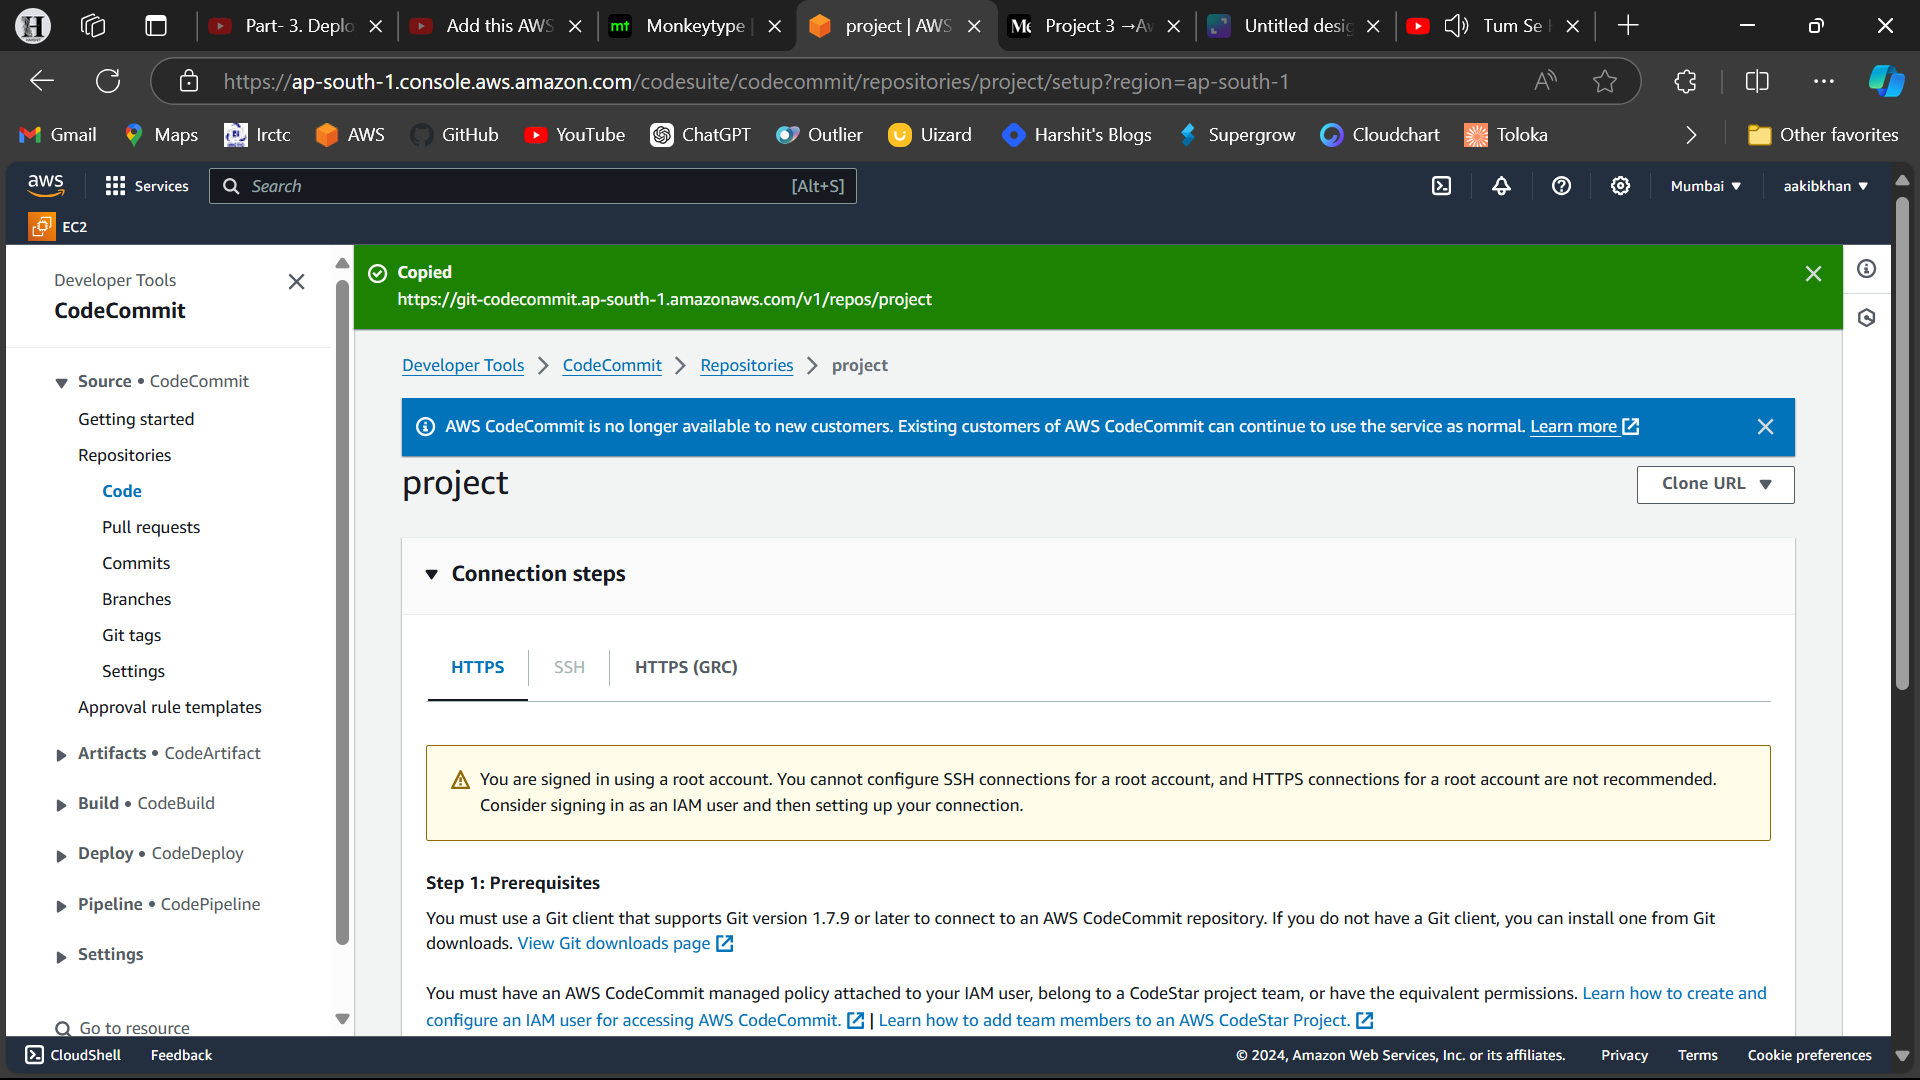
Again, go to codecommit service → project repository → Clone URL → Copy the path of the repository. Open the Terminal and run
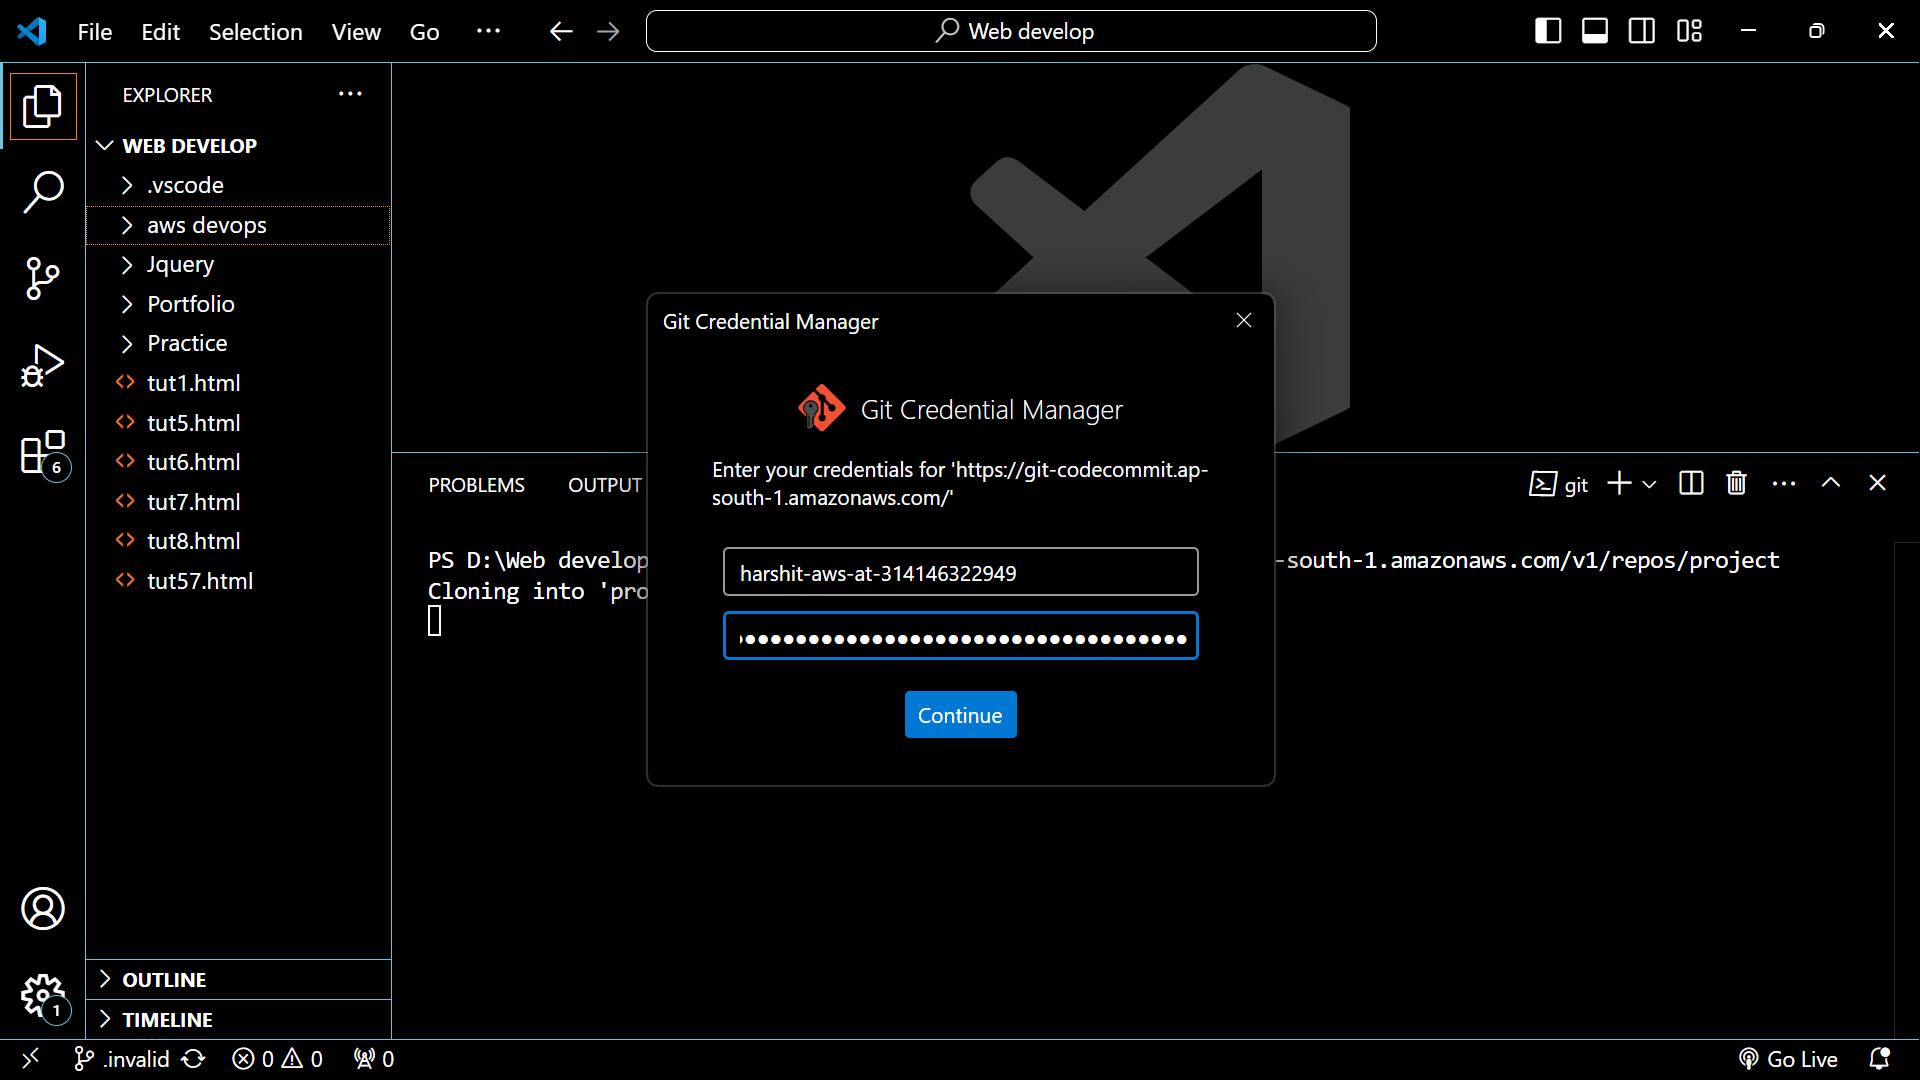
git clone <Clone URL>You will be asked for your login and password. Give it to the code commit credentials you generated.
Now you have to push all the cloned code of the project repository to your codecommit repository using commands.
 cd project
 git clone https://github.com/harshitsahu2311/AWS-DevOps-Project
 git add .
 git commit -m "aws devops"
 git push -u origin master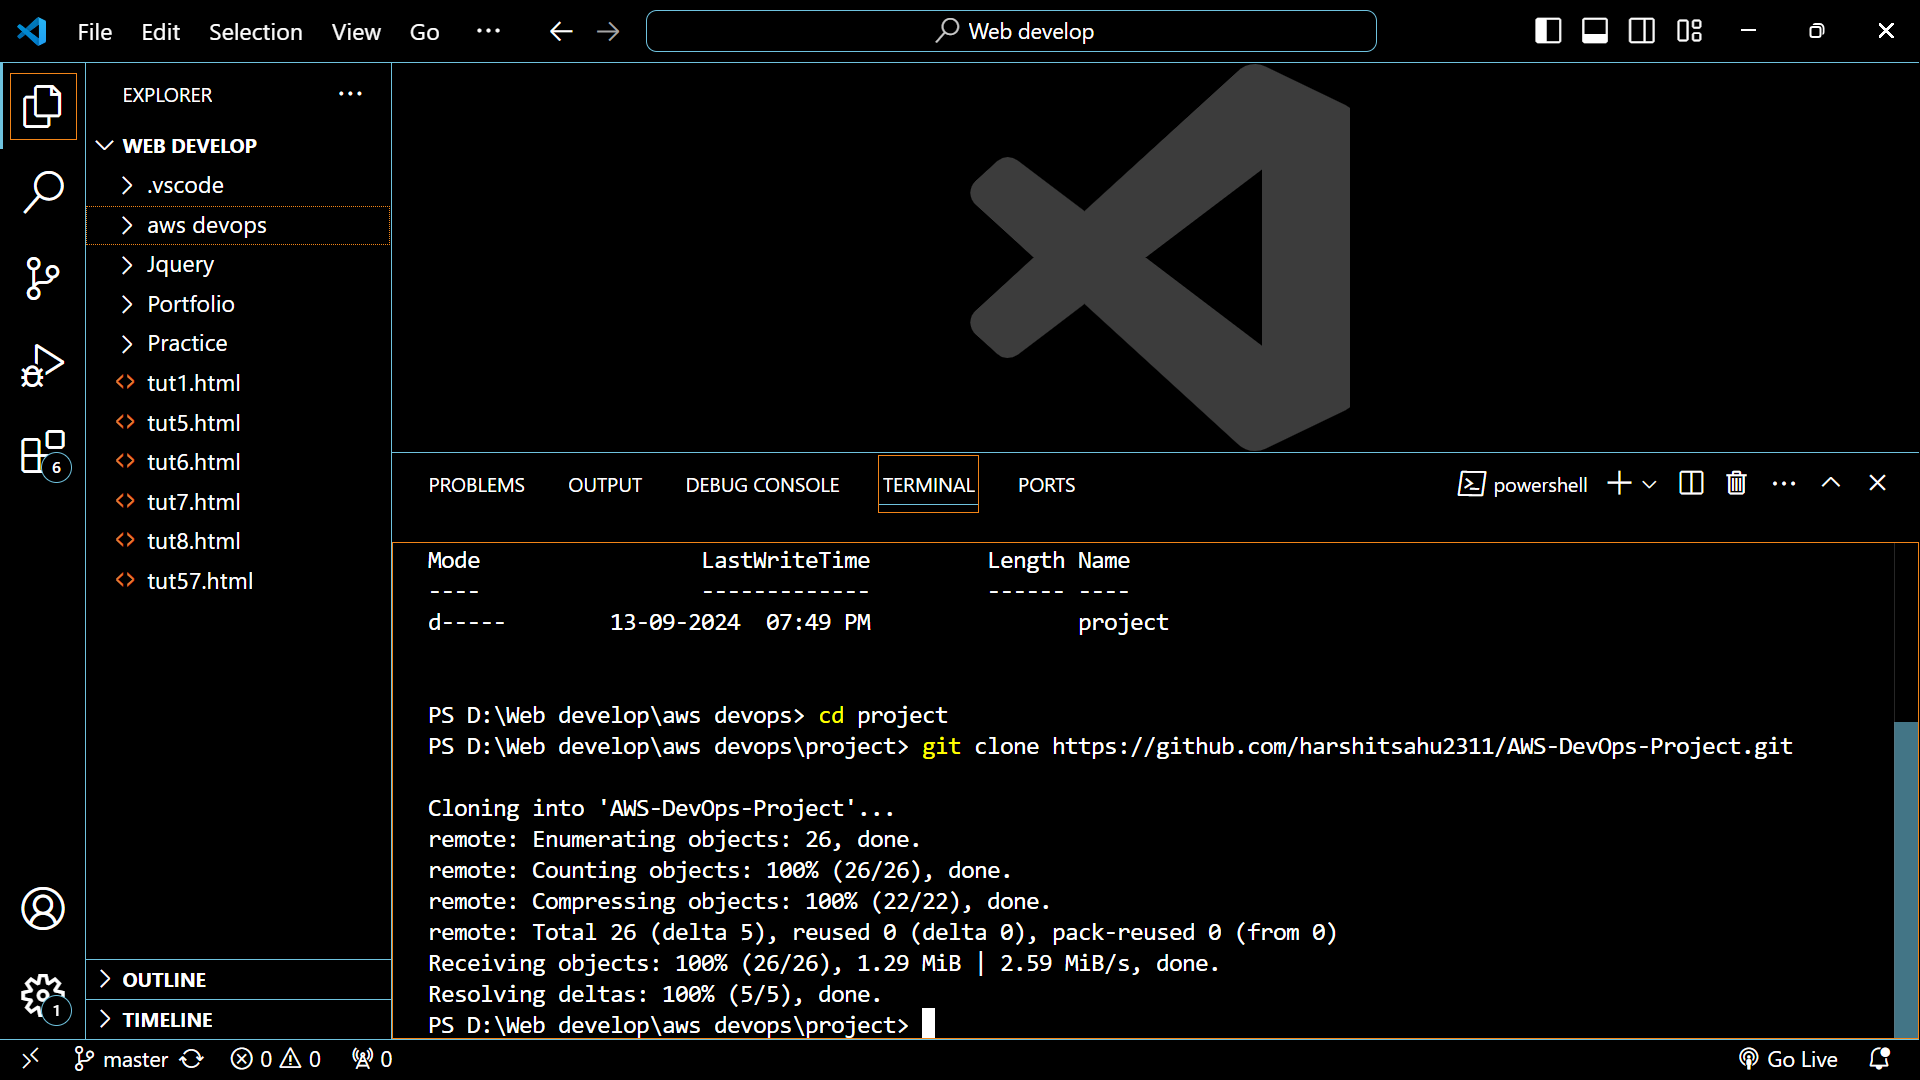
Step 4 - Configure AWS CodeBuild to compile and build the code
Navigate to the AWS interface and search for AWS code build.
Click on Create Project option.
Give your project the name "project-app-build".
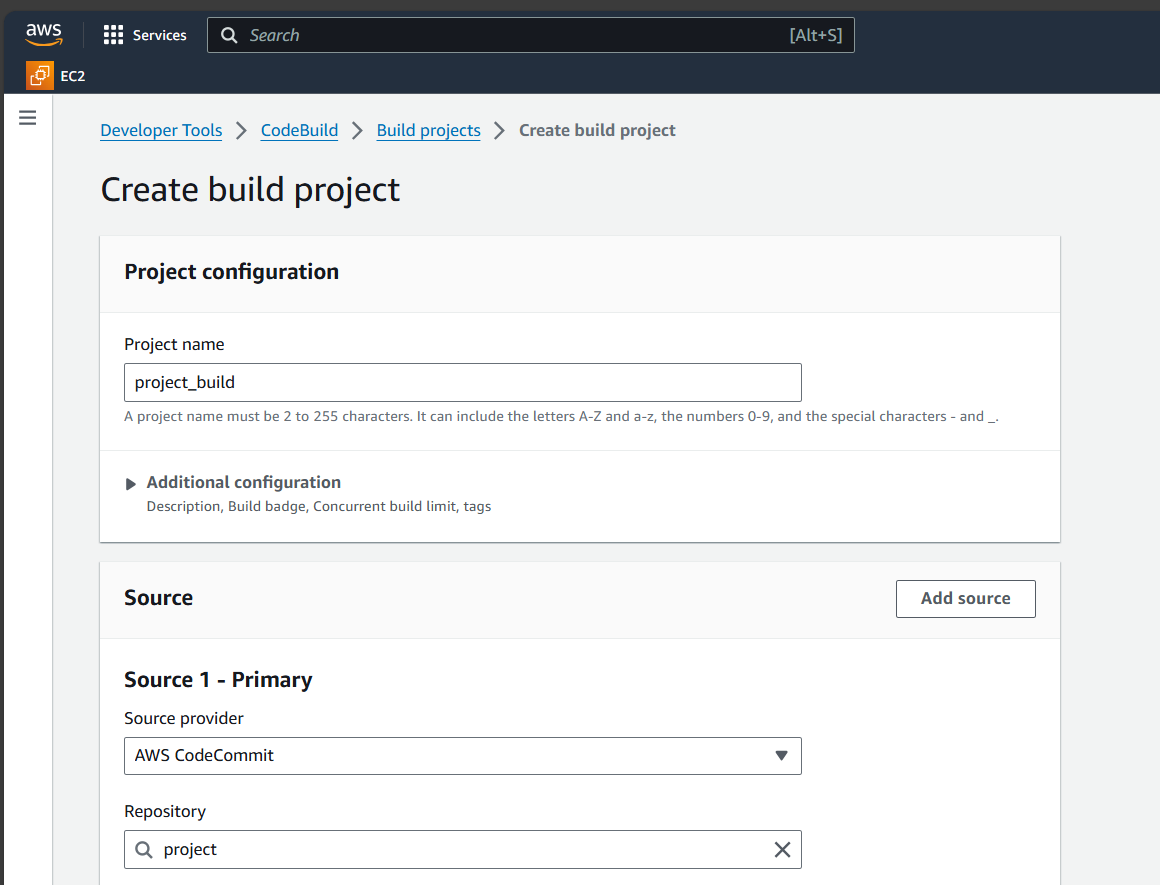
On the repo option Click on Project and Branch to Master.
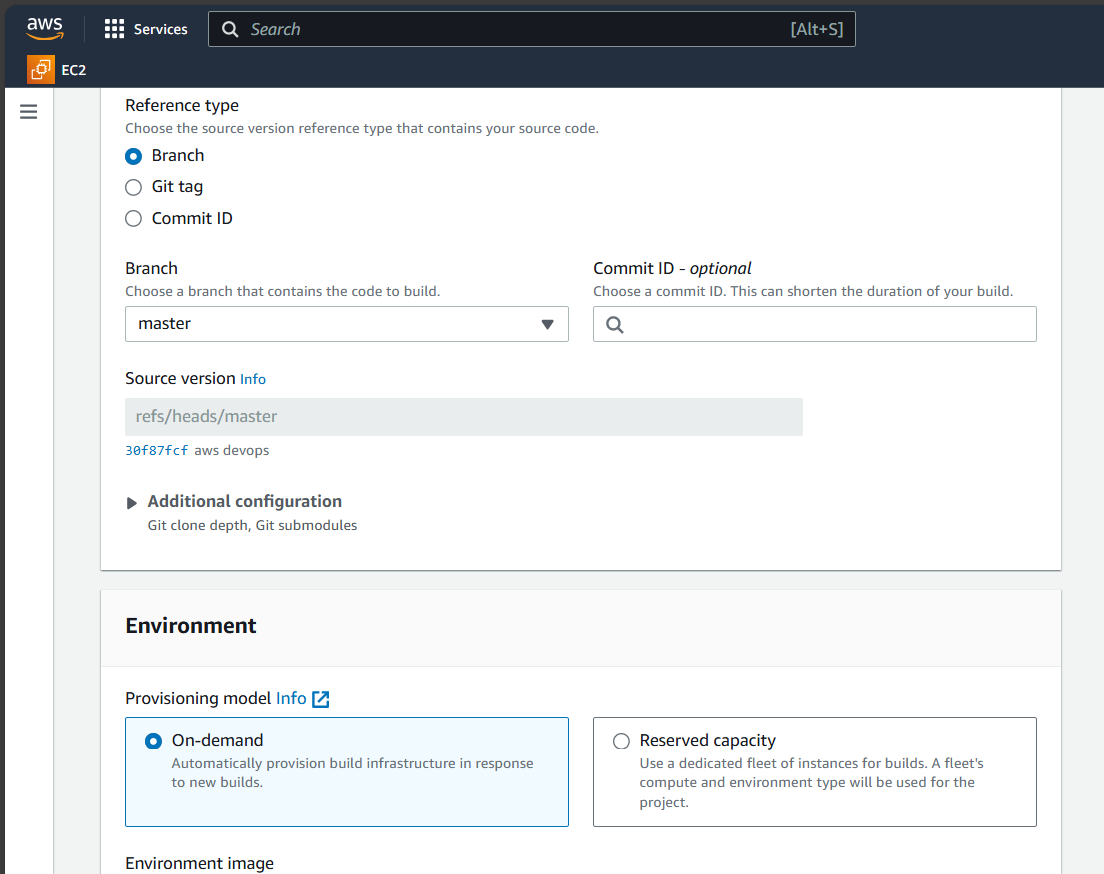
For OS choose Ubuntu, Runtime to standard, and image to the latest version.
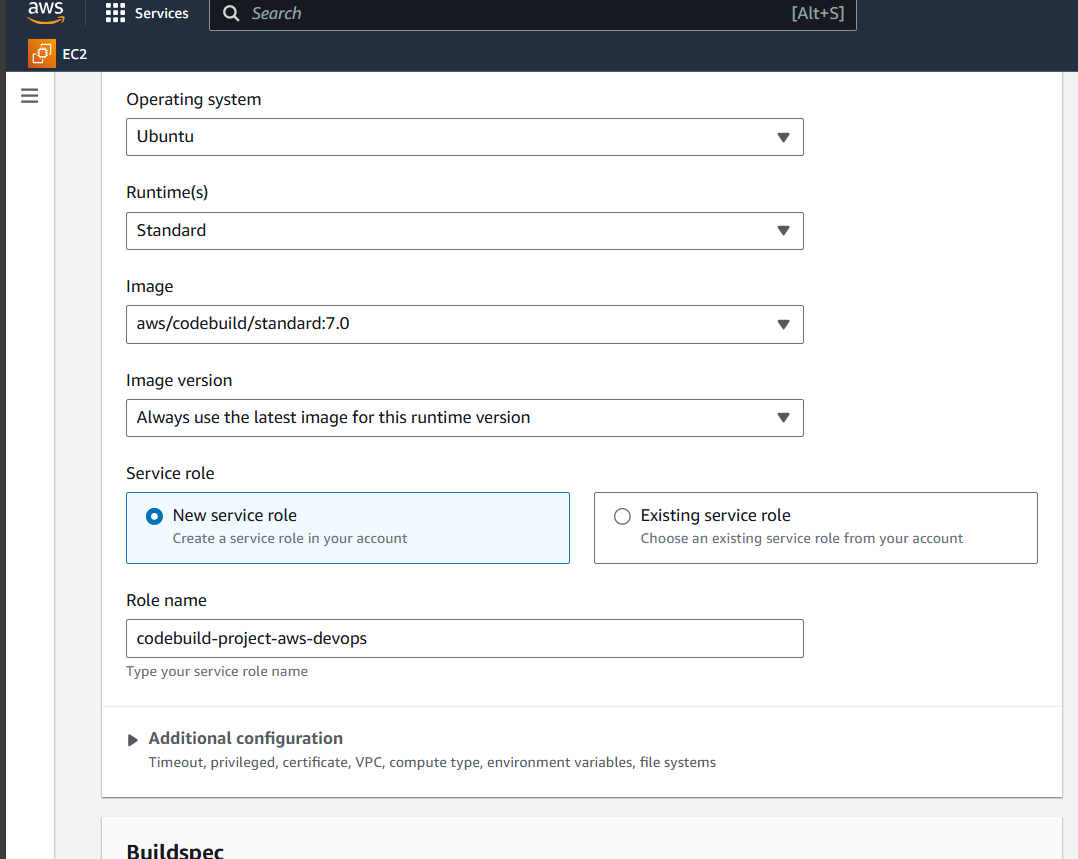
BuildSpec:- A buildspec is a collection of build commands and related settings, in YAML format, that CodeBuild uses to run a build. You can include a buildspec as part of the source code or you can define a buildspec when you create a build project. S
o “click on use a buildsepc file” option
Click on the Create Build project option and keep everything as it is.
Now Click on start Build option.
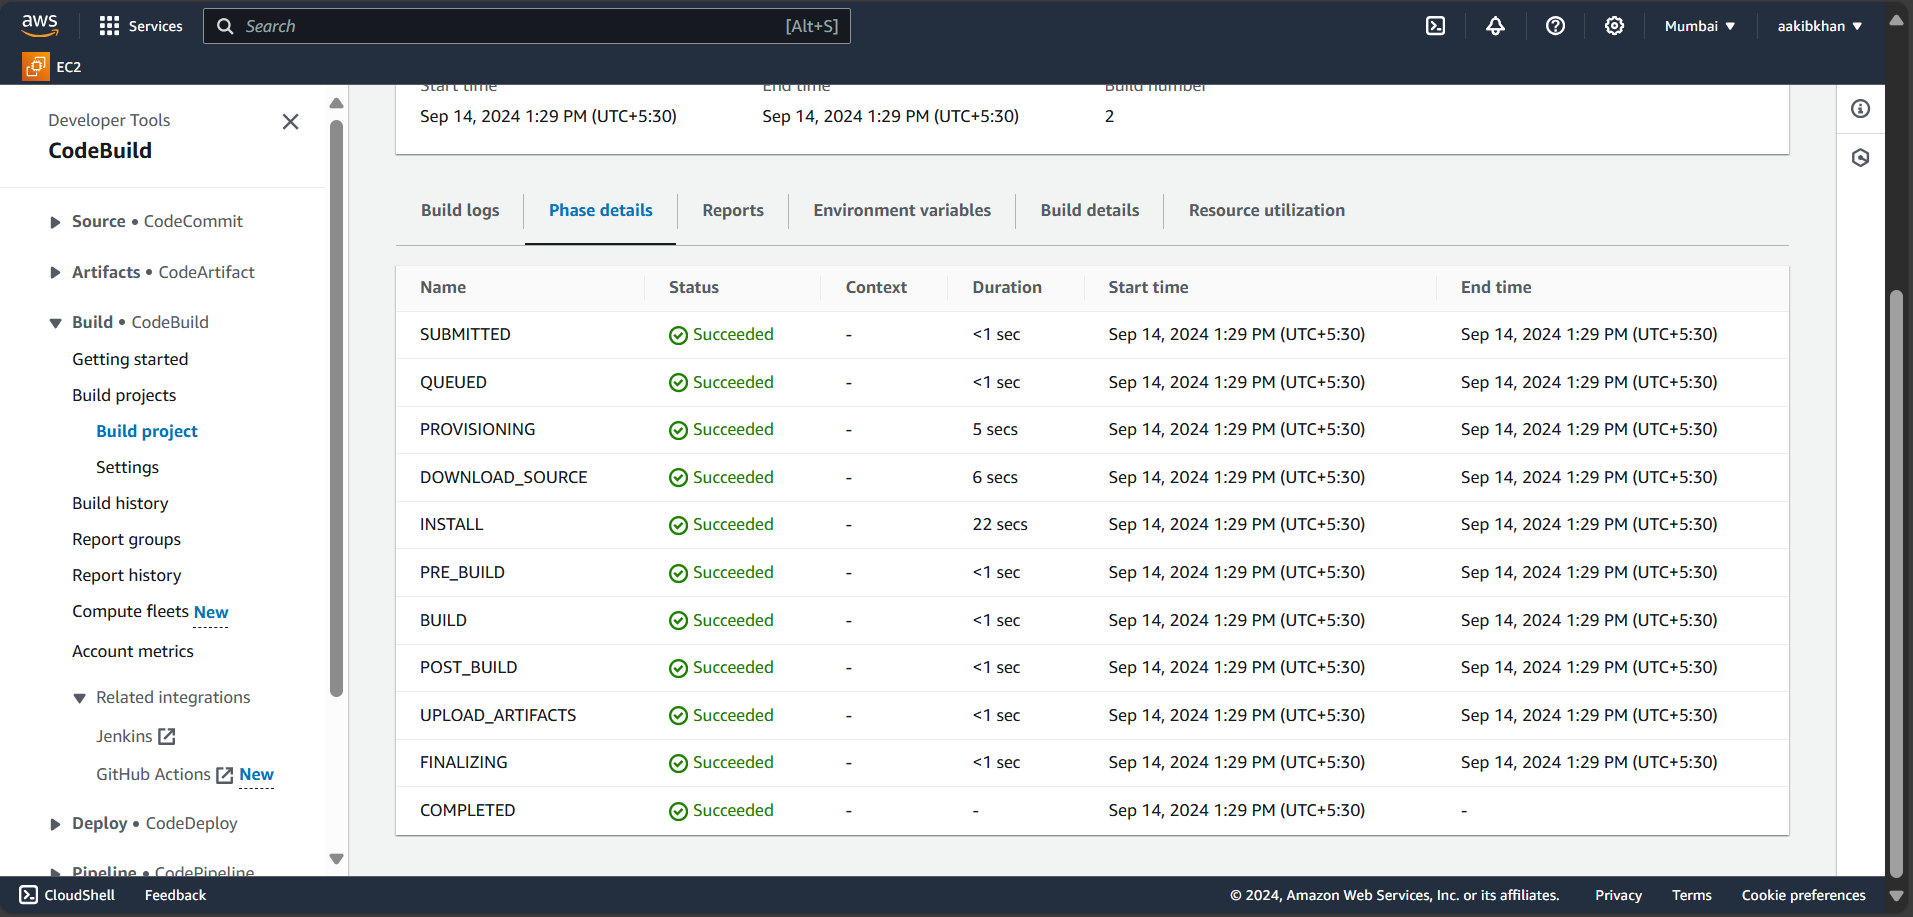
Now, you need to store this code in S3, which is then used by code deploy for deployment.
Step 5 - Create an S3 bucket to store the built code
Go to the console, search for S3, and create a bucket. (bucket name should be unique globally)

Navigate to Code Build and select Edit → Artifact → Change no artifact to s3 and select a bucket created in the preceding stage.
Select the zip file for storing.
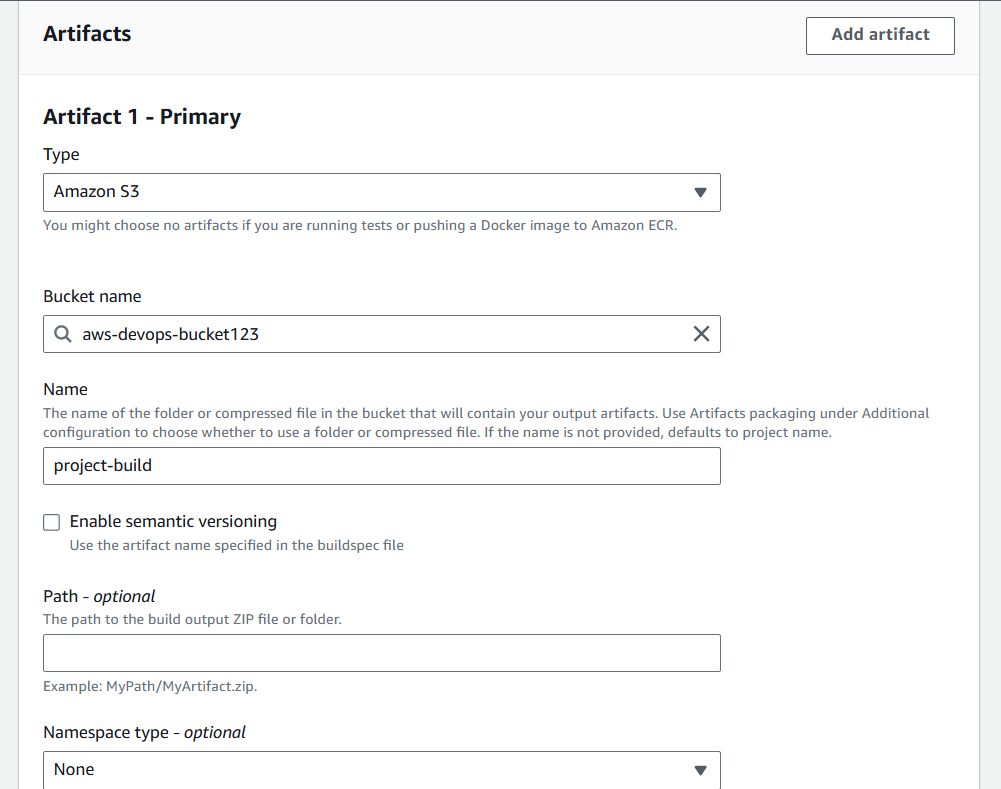
Click on Update artifacts and rebuild the project with this extra step of artifacts.
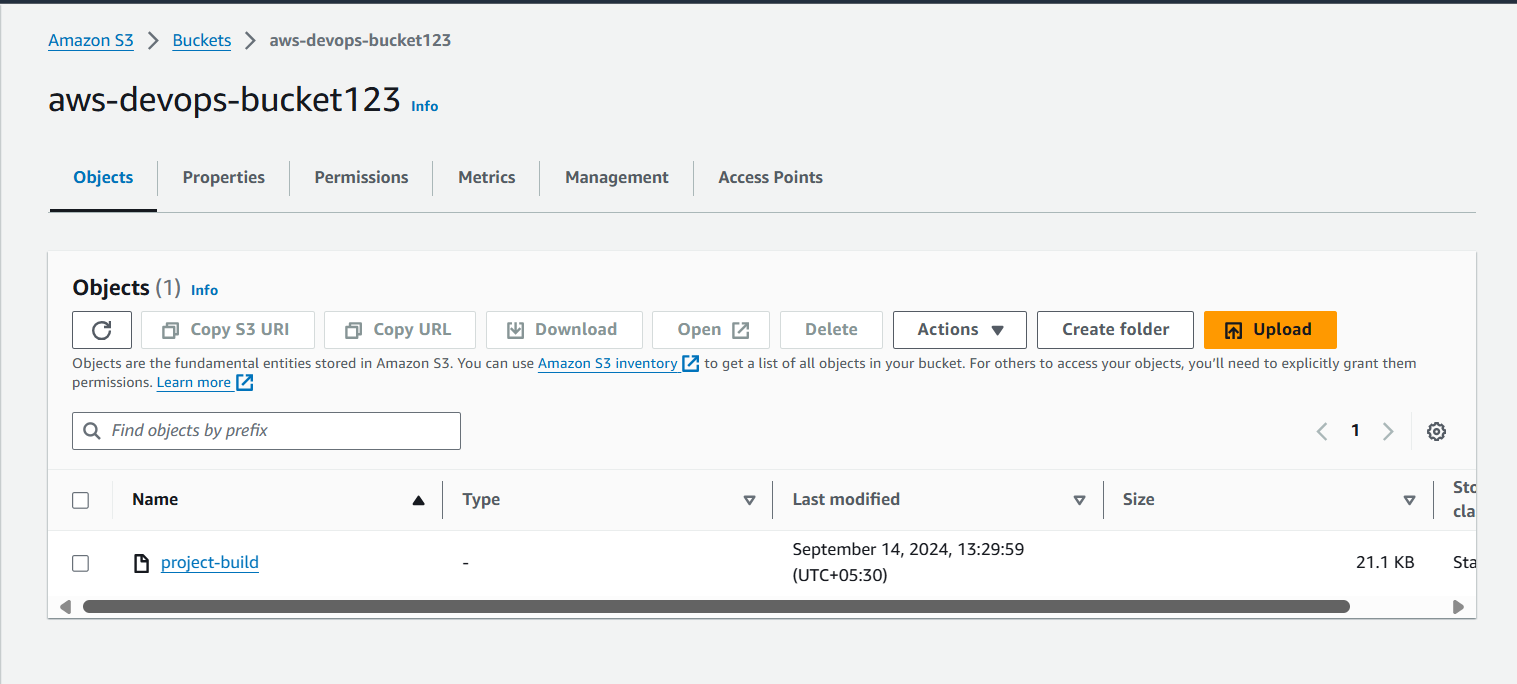
After building, you'll see that your code is stored in an S3 bucket.
Step 6 - Set up application for CodeDeploy
Go to console and search for aws code deploy and click on Create Application option

Step 7 - Launch an EC2 instance where the application will be deployed
Go to EC2 and launch an instance on Ubuntu 22.04 AMI.
Note: Choose this AMI only.

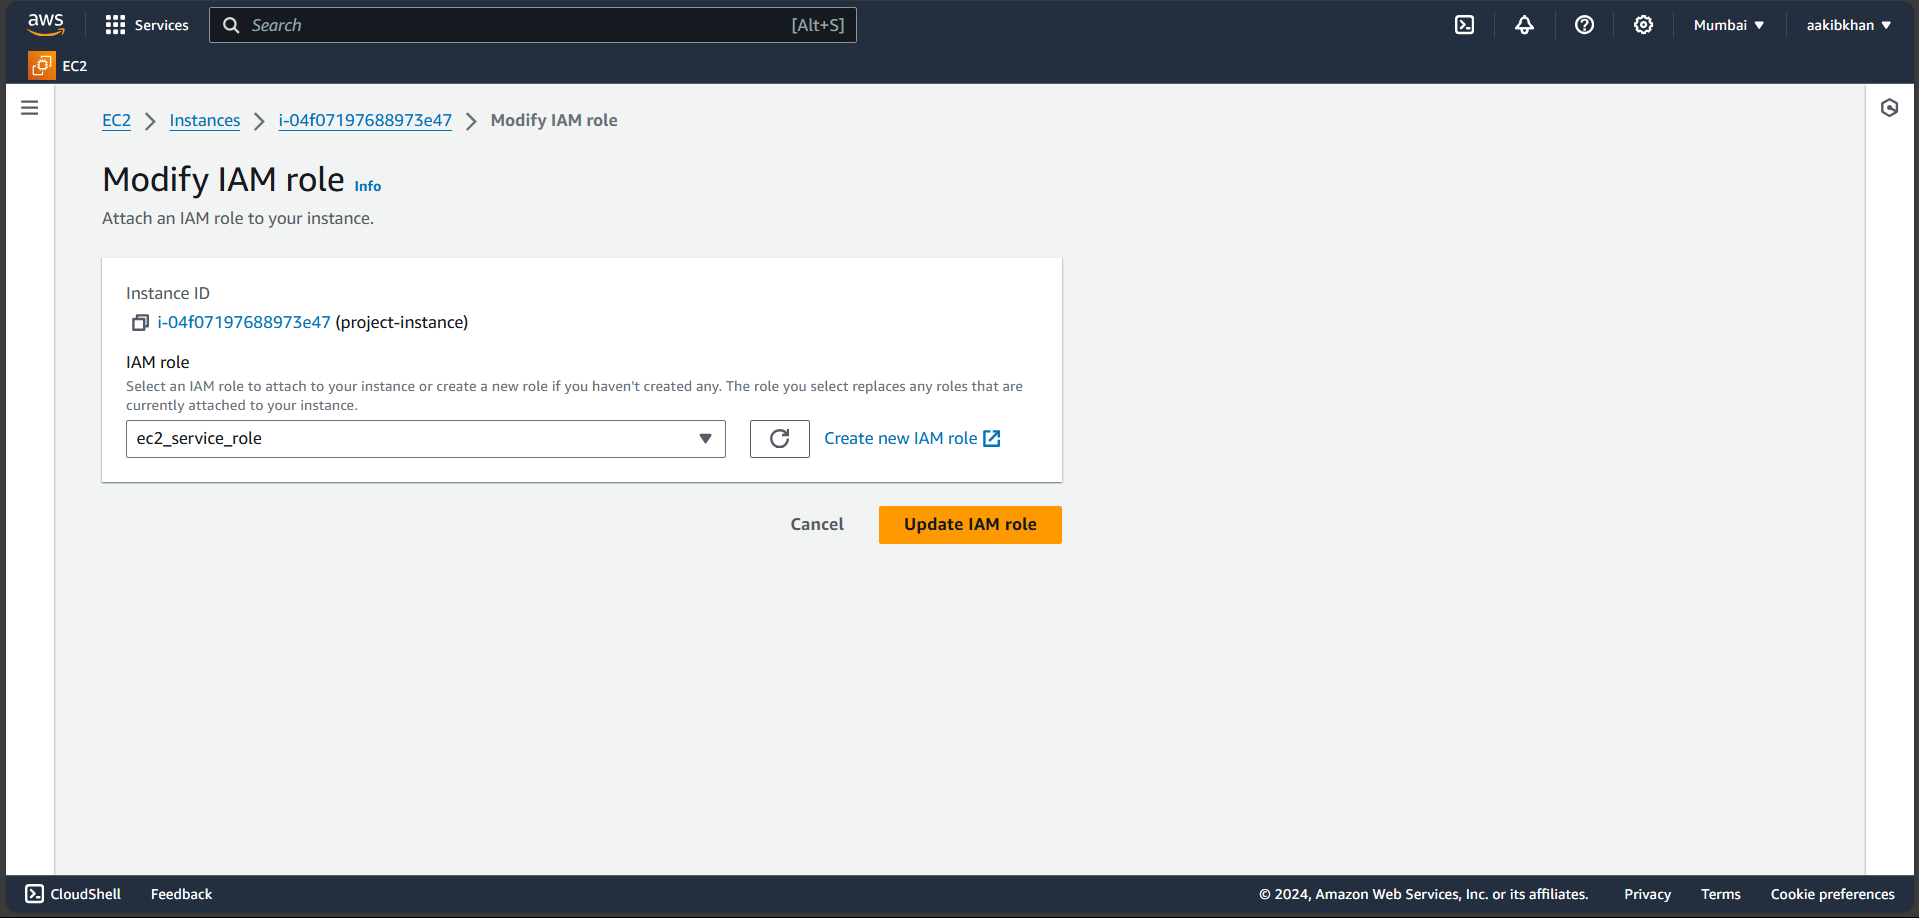
Create an AWS ec2-service-role with the necessary permissions to communicate with code deployment.
Trust Entity Type: AWS Service
Service or use case: EC2
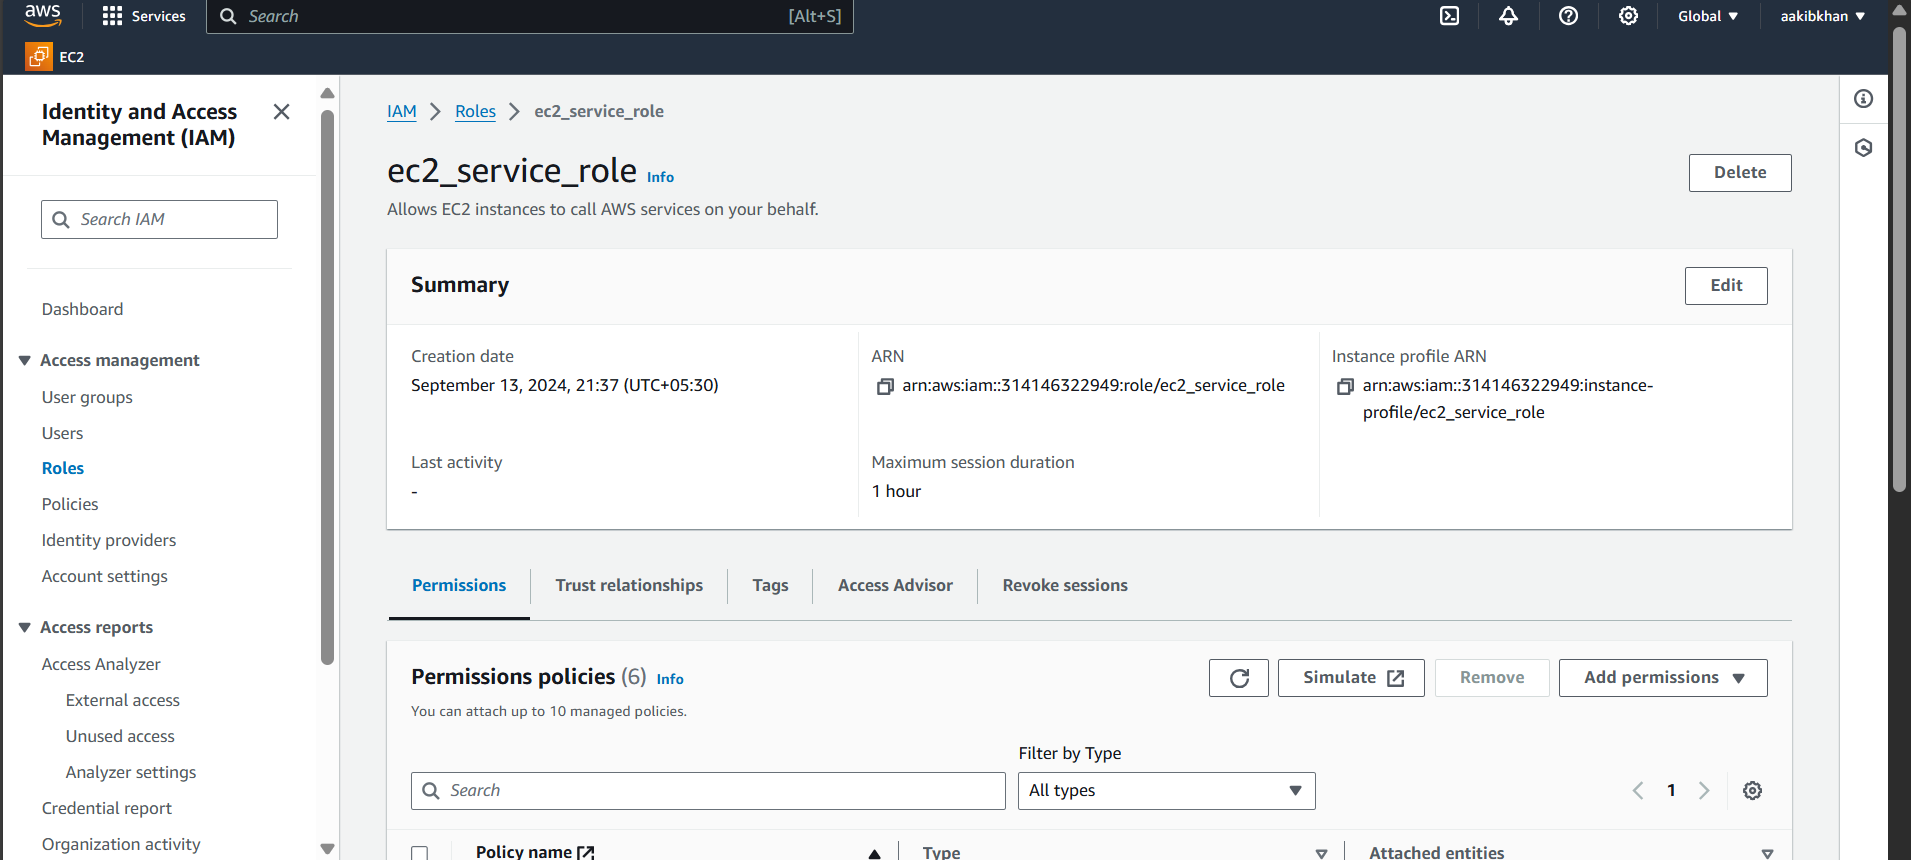
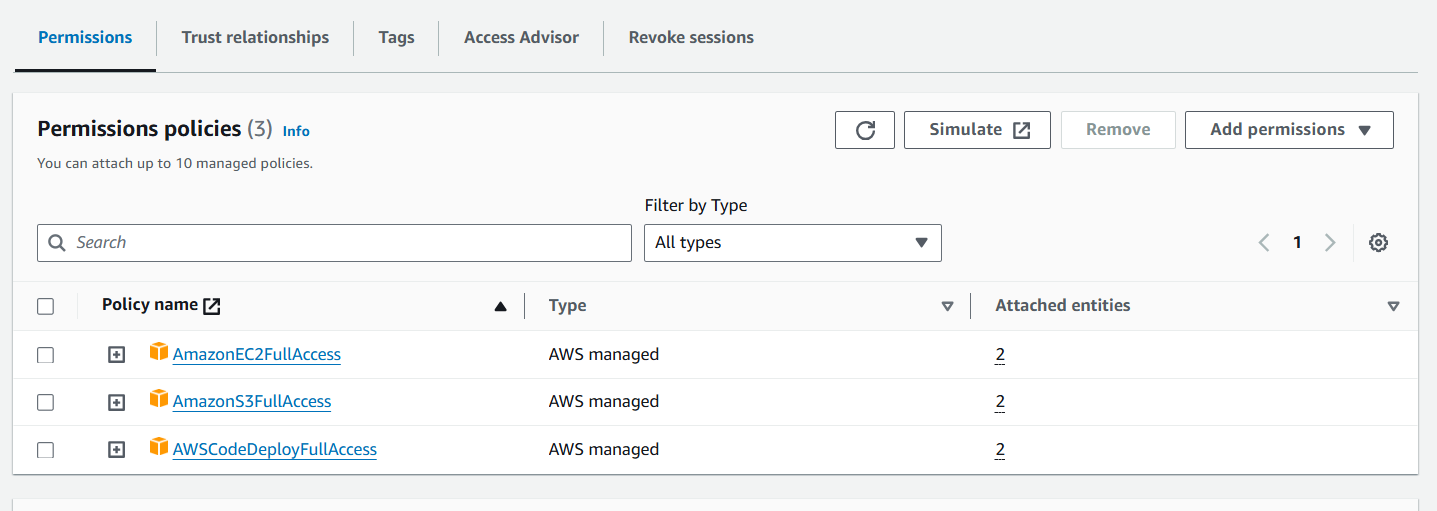
Attach that role to your EC2 → Actions → Security → Modify IAM role
create a aws code_deploy_service_role
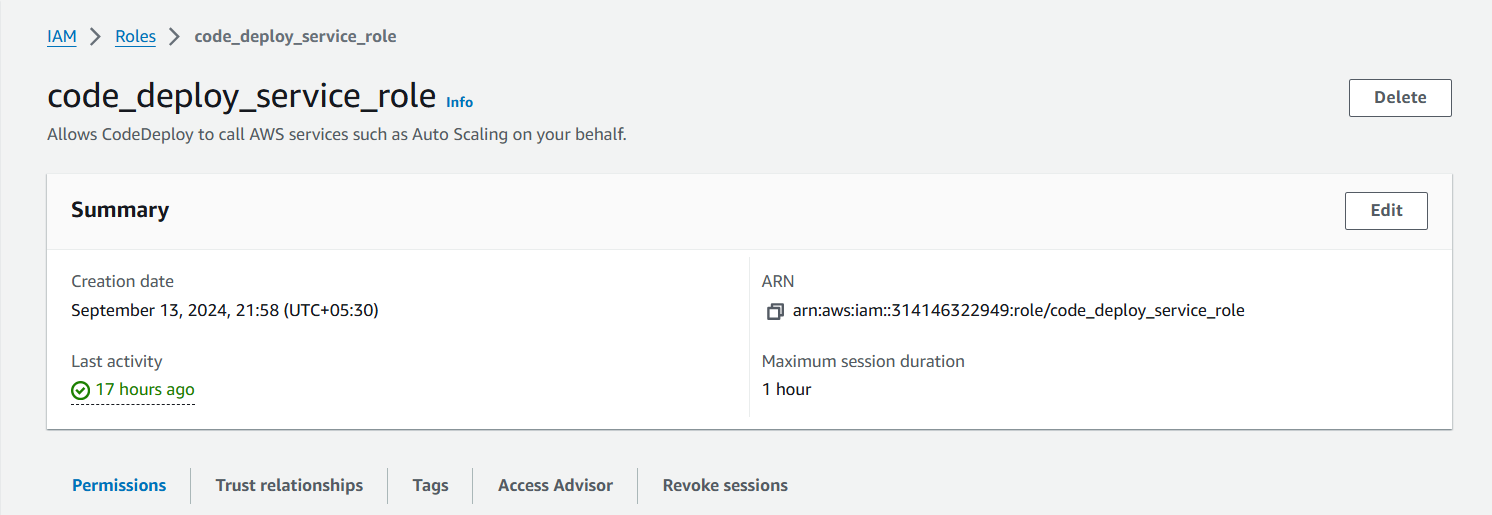
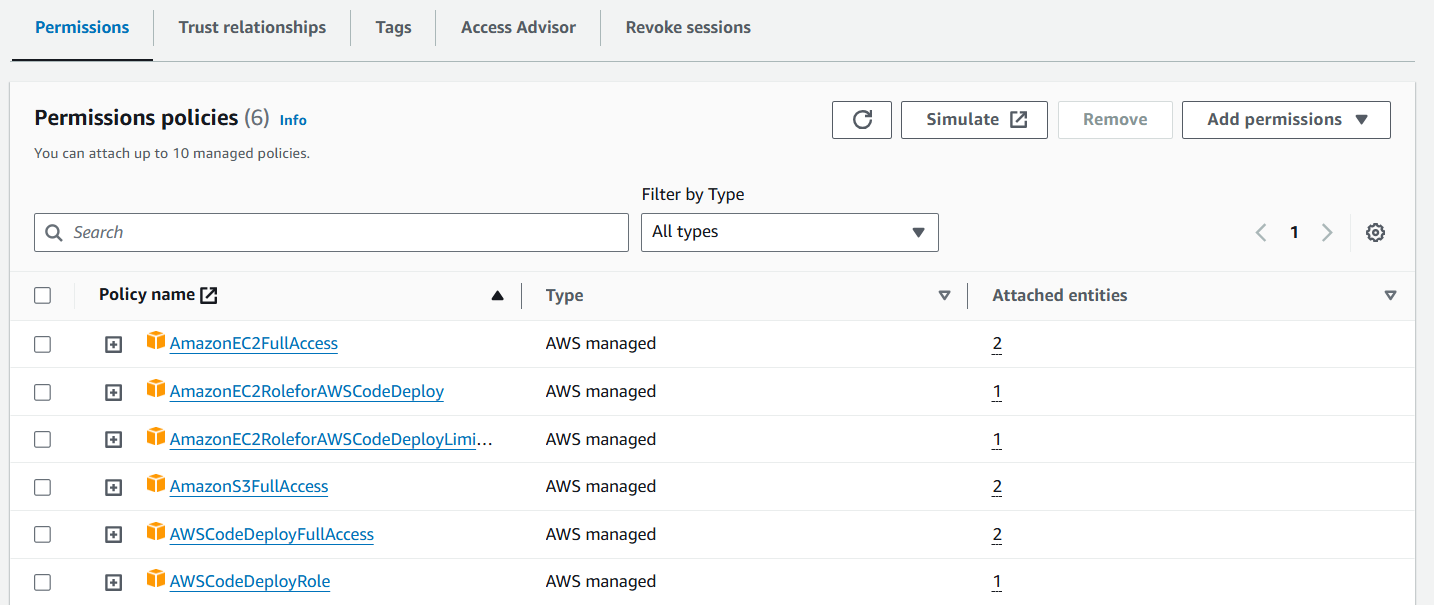
this role needs to be attached on codedeploy to allow it to make contact with EC2 and S3.
Step 8 - Setup and configure the AWS CodeDeploy Agent on the Ubuntu EC2 instance
To deploy your project to EC2, CodeDeploy requires an agent to actually deploy the code on your EC2.
So let us set it up.
Create a shell script with the following contents and run it.Connect to your EC2 and execute the following commands.
sudo su
apt update
vim agent.sh
- Copy and paste the code below into your file.
#!/bin/bash
# This installs the CodeDeploy agent and its prerequisites on Ubuntu 22.04.
sudo apt-get update
sudo apt-get install ruby-full ruby-webrick wget -y
cd /tmp
wget https://aws-codedeploy-us-east-1.s3.us-east-1.amazonaws.com/releases/codedeploy-agent_1.3.2-1902_all.deb
mkdir codedeploy-agent_1.3.2-1902_ubuntu22
dpkg-deb -R codedeploy-agent_1.3.2-1902_all.deb codedeploy-agent_1.3.2-1902_ubuntu22
sed 's/Depends:.*/Depends:ruby3.0/' -i ./codedeploy-agent_1.3.2-1902_ubuntu22/DEBIAN/control
dpkg-deb -b codedeploy-agent_1.3.2-1902_ubuntu22/
sudo dpkg -i codedeploy-agent_1.3.2-1902_ubuntu22.deb
systemctl list-units --type=service | grep codedeploy
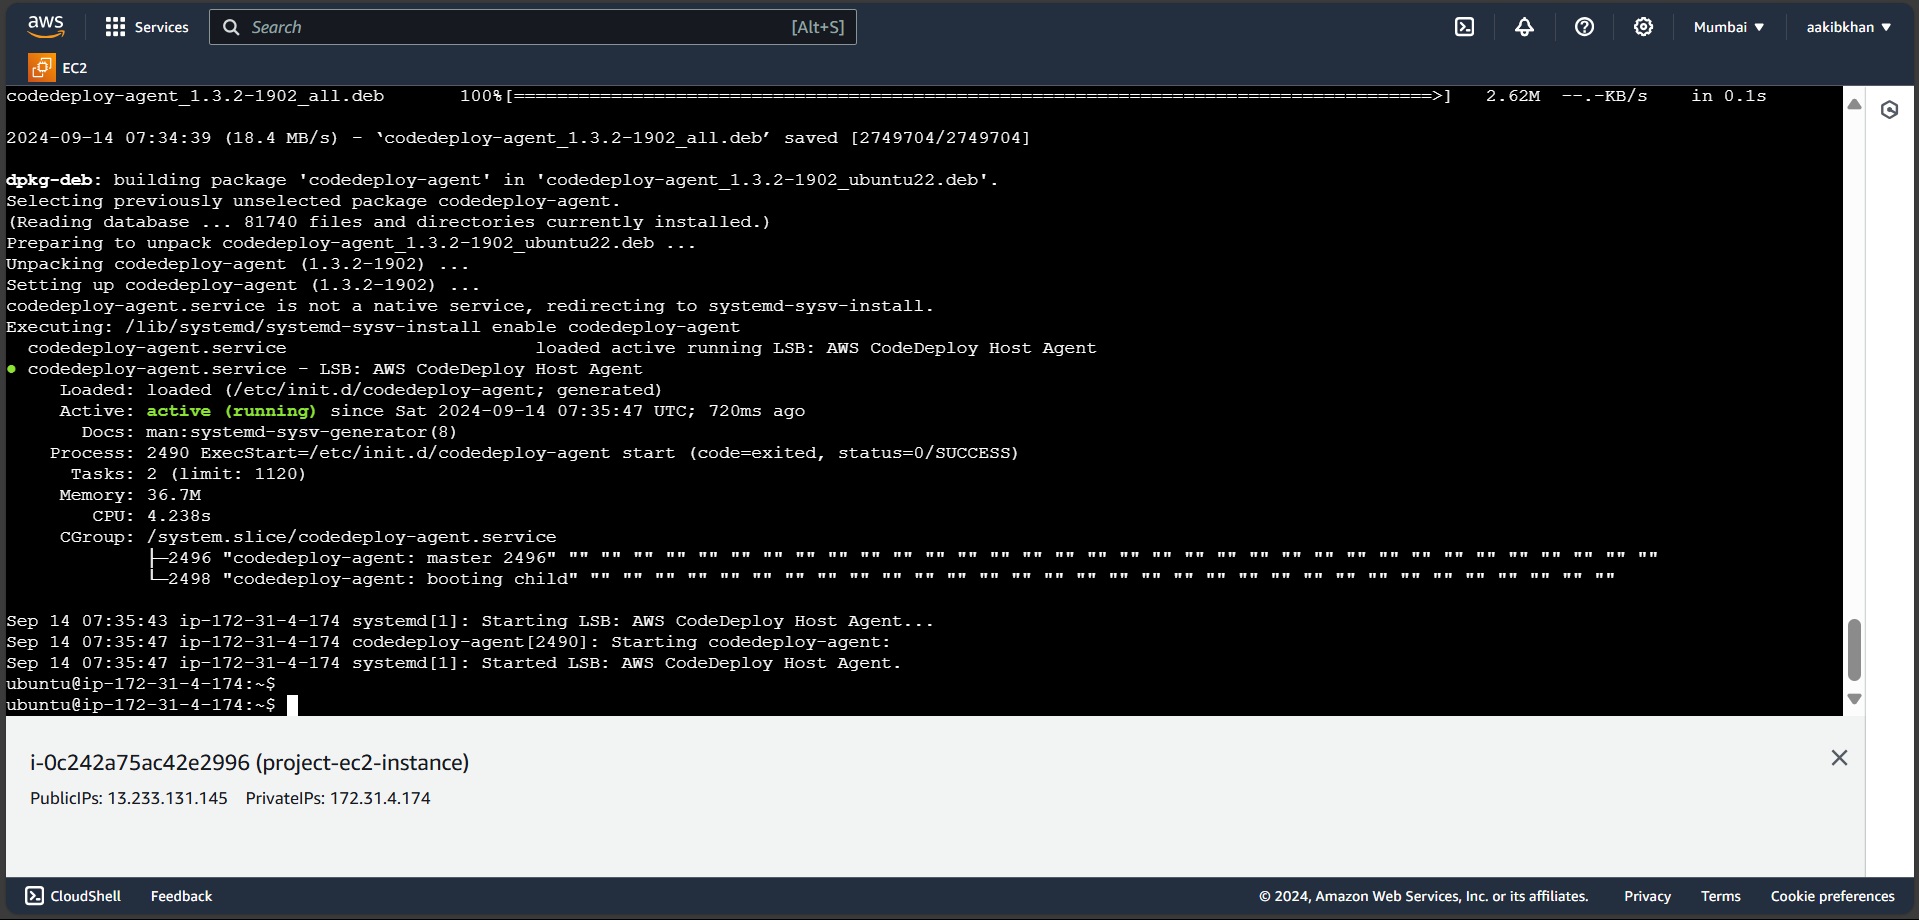
sudo service codedeploy-agent status
Don’t forget to change the region “us-east-1” as per your AWS Region.
To Run this file, use the command → bash agent.sh
Step 9 - Create a Deployment group in CodeDeploy and deploy the application to the EC2 instance
Go to your codedeploy and create a deployment group
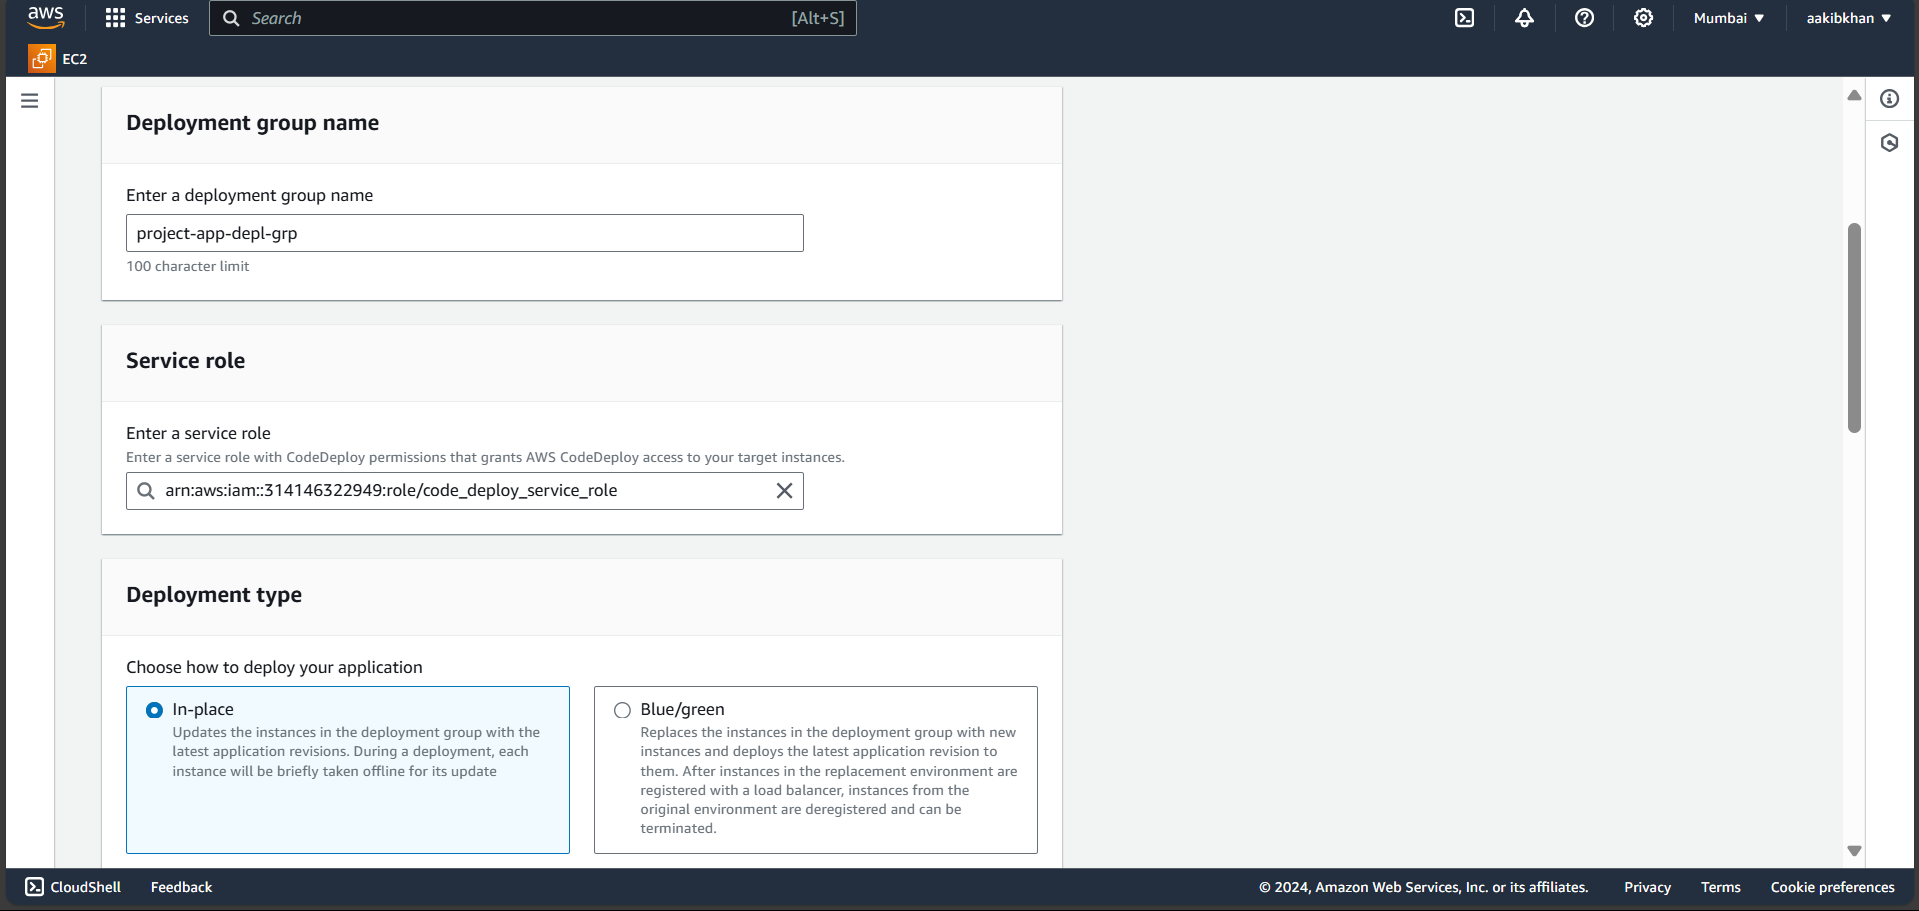
Choose In-place in Deployment type
Select ec2 instances → Name → Choose your EC2 in which codedeploy agent is running
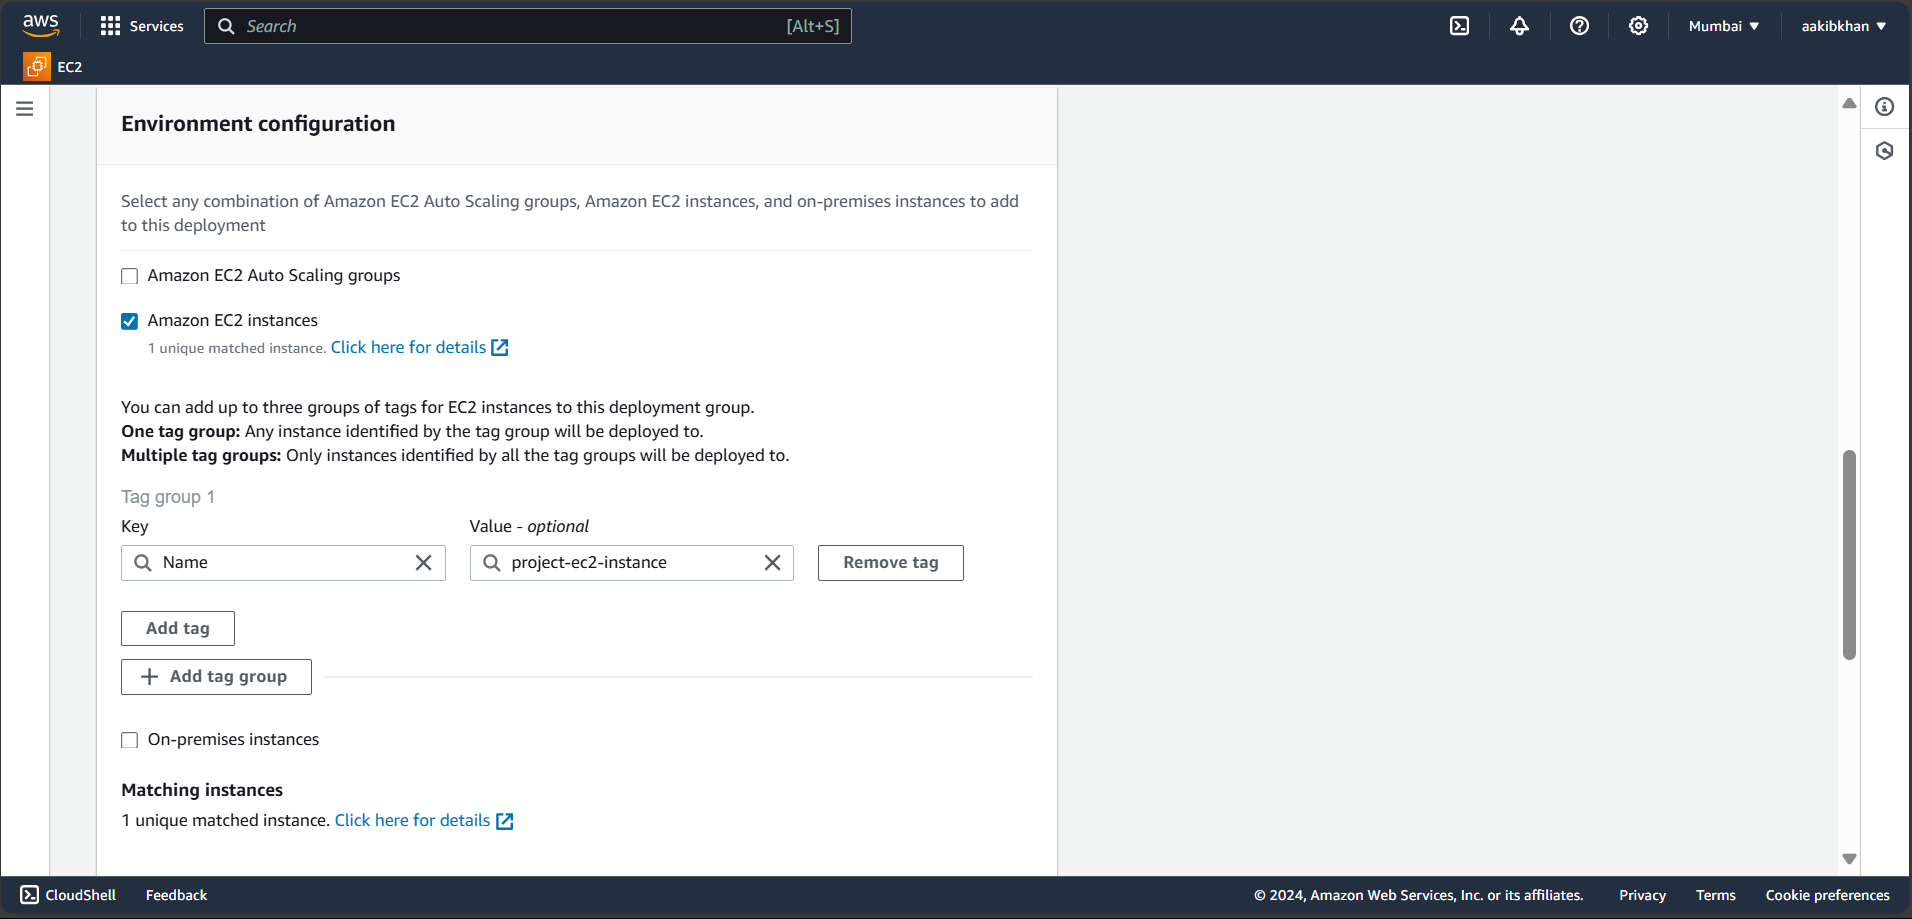
Untick on the enable load balancing option and never on install aws code deploy agent and click on Create Deployment option you will see the following page
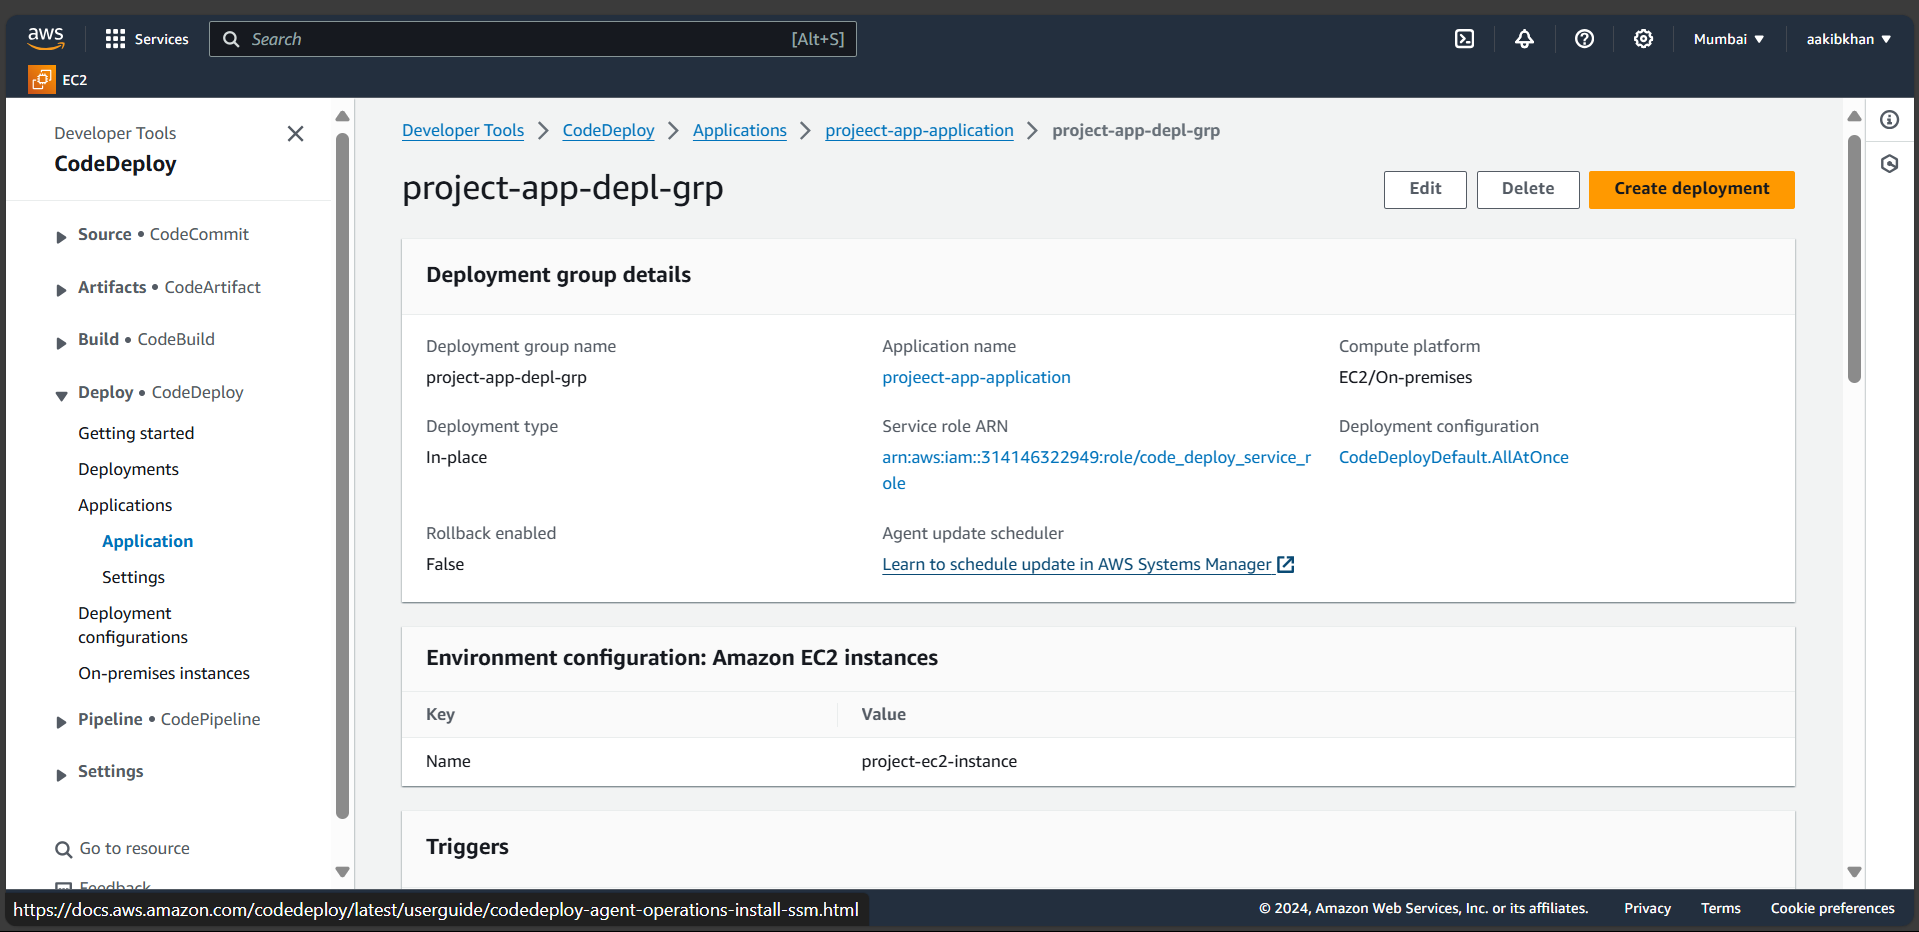
Click on Create deployment
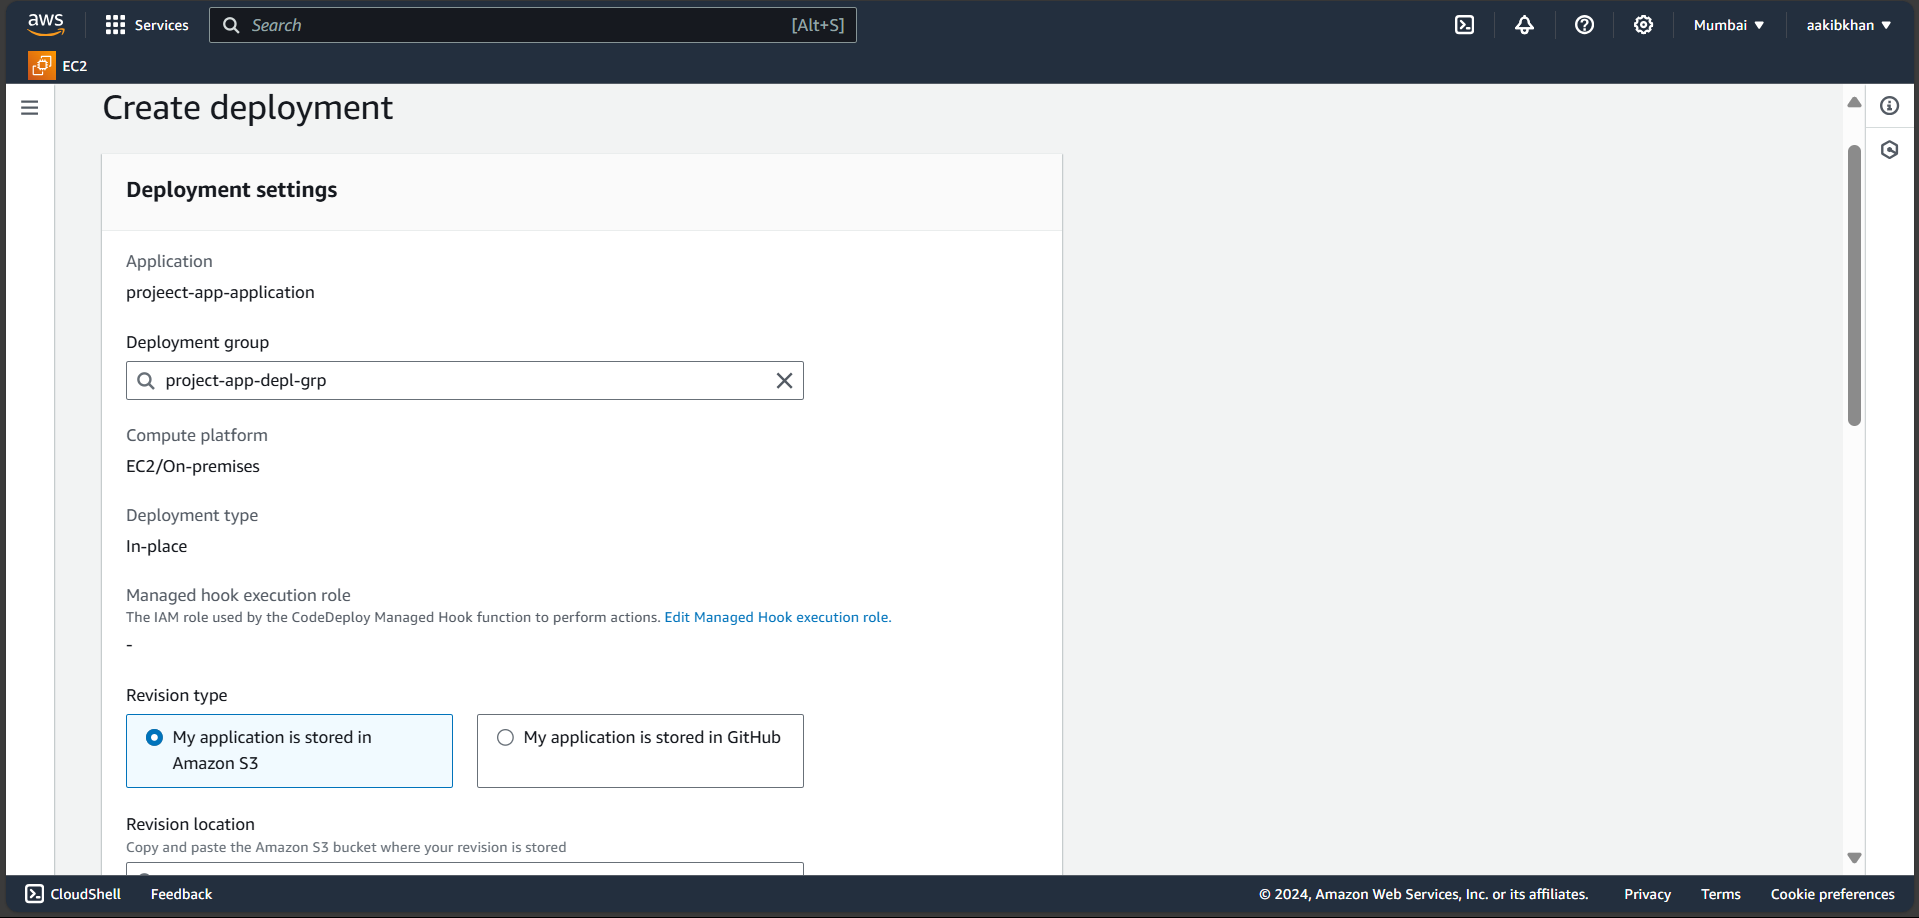
Select the above options and paste the path of your build code that is stored in S3 just go to S3 choose folder and copy S3 URL.
Click on Create Deployment after a few seconds.

Now go to your EC2 and click on your public IP you will see your application is running.
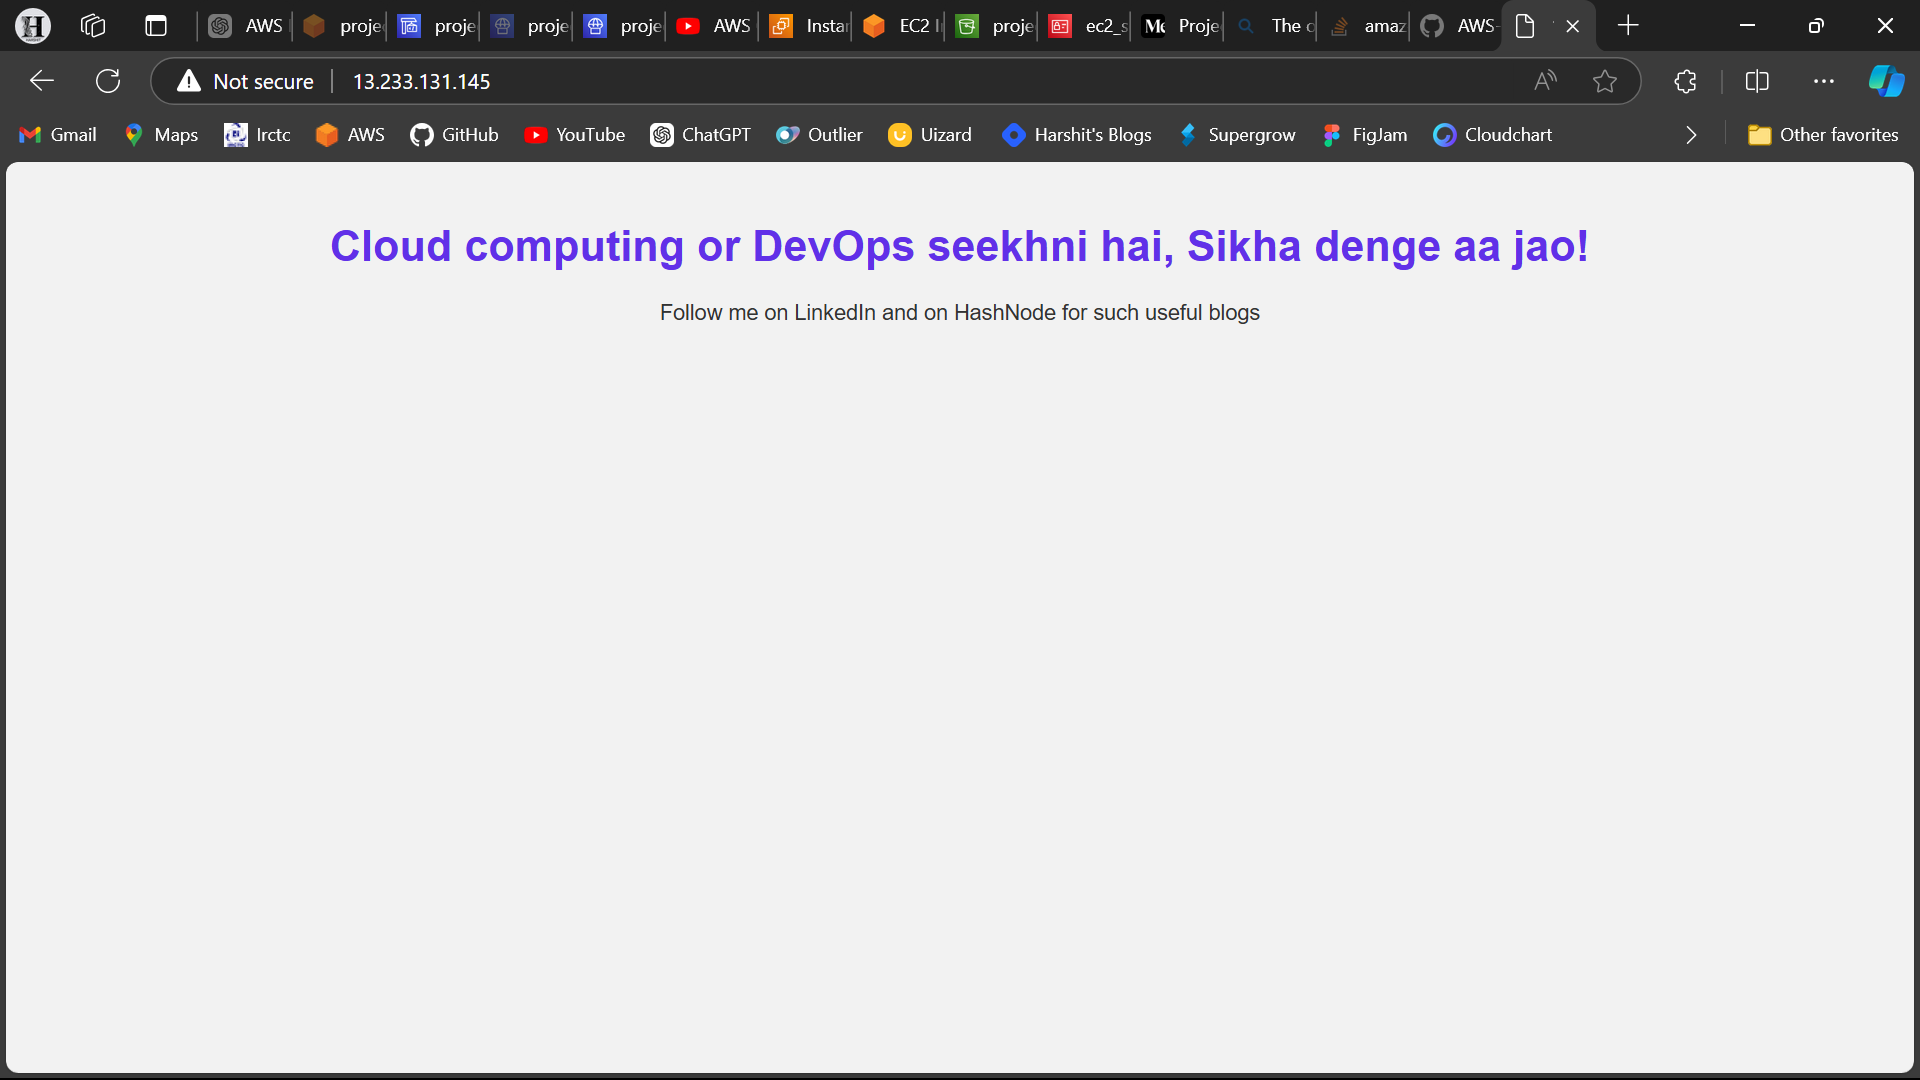
Congrats!!! Your deployment is Done
Step 10 - Set up an AWS CodePipeline to automate the entire process from CodeCommit to deployment.
Navigate to codepipeline from services and create a pipeline
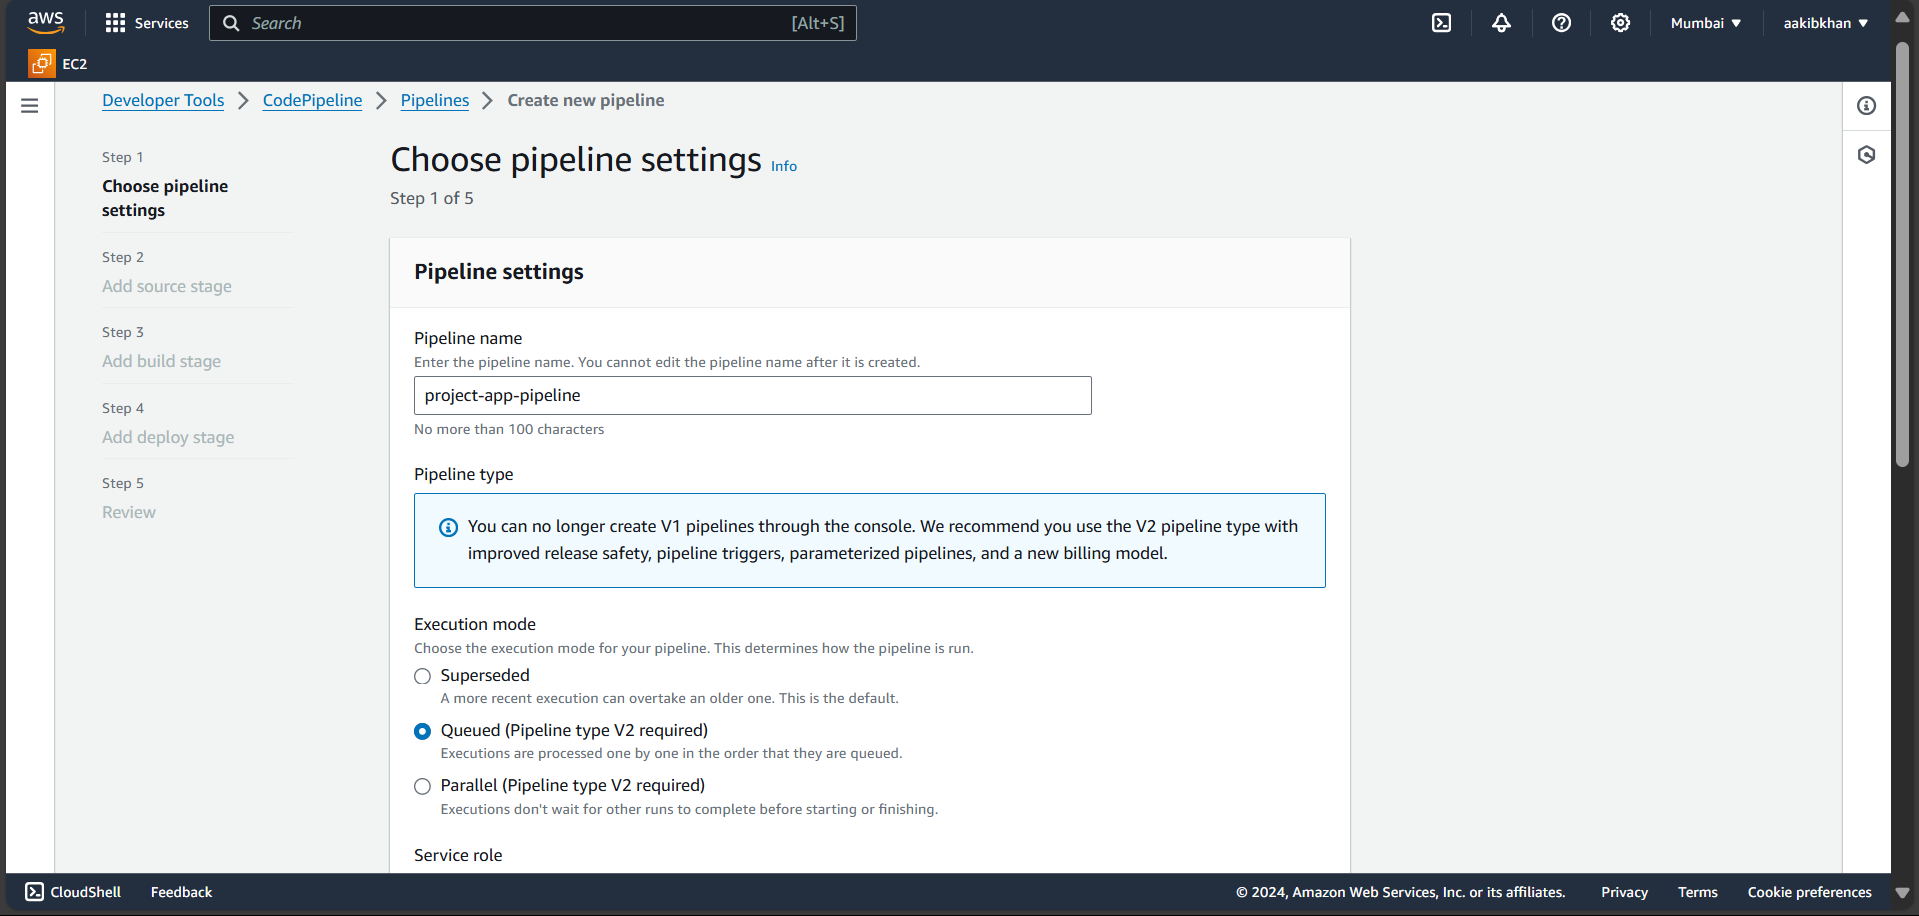
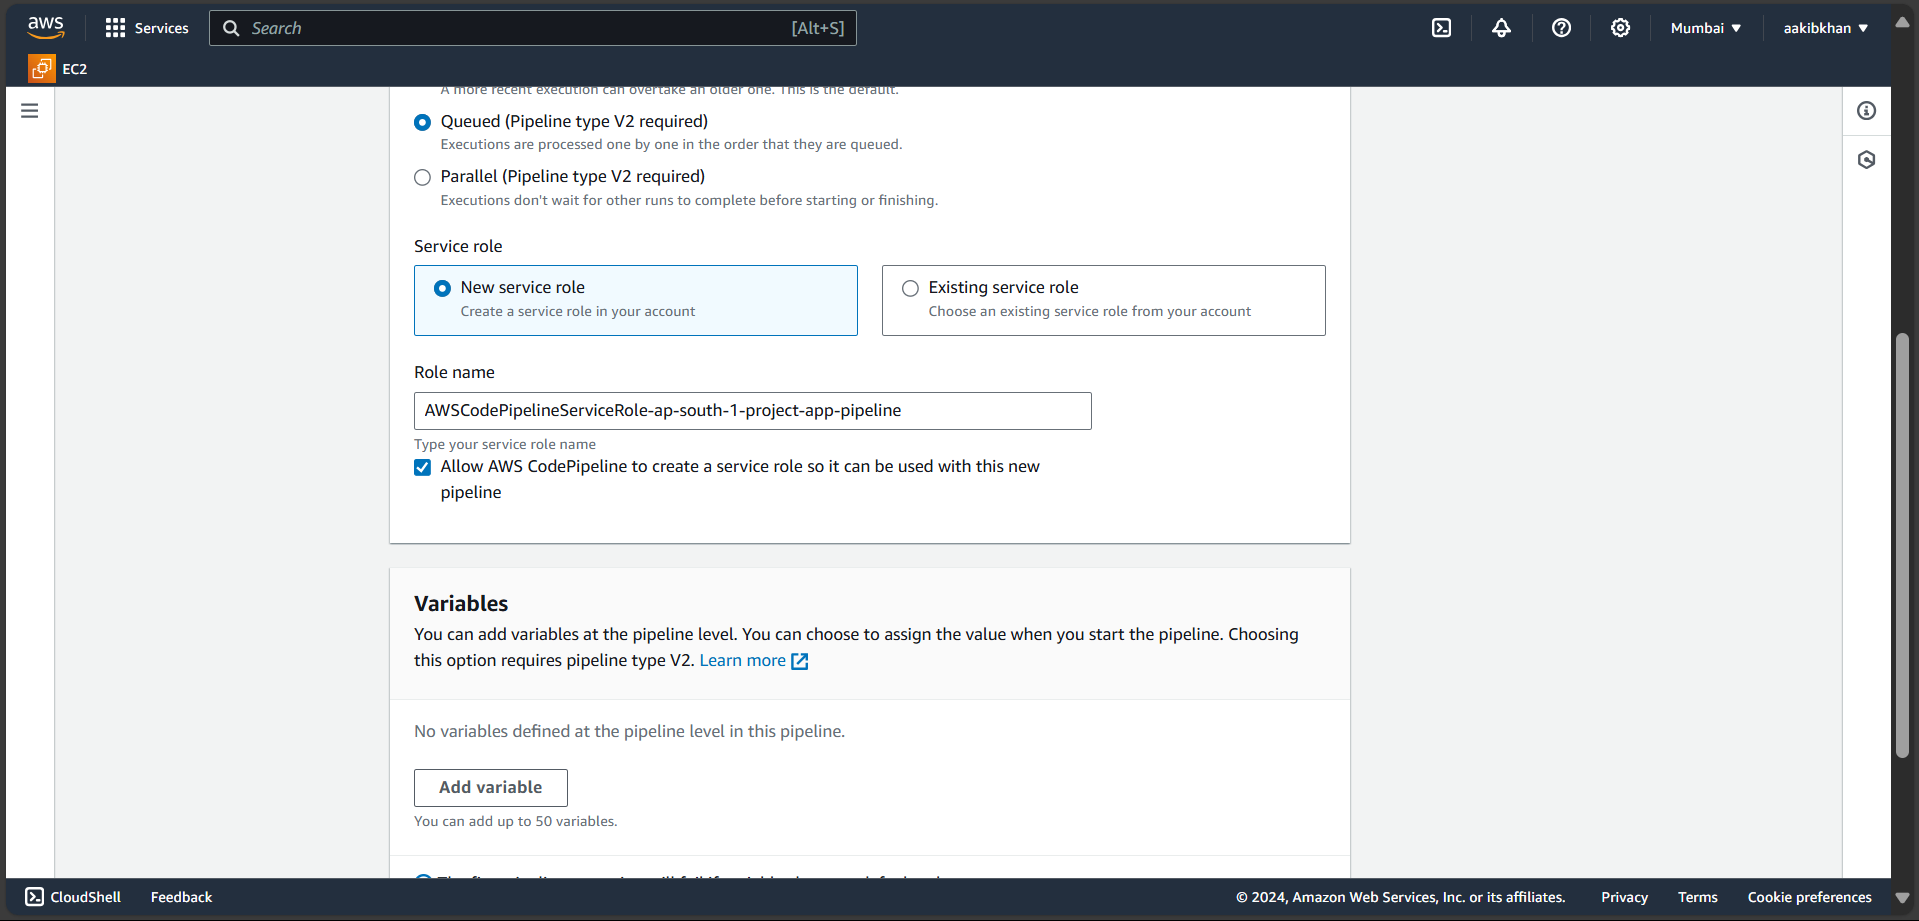
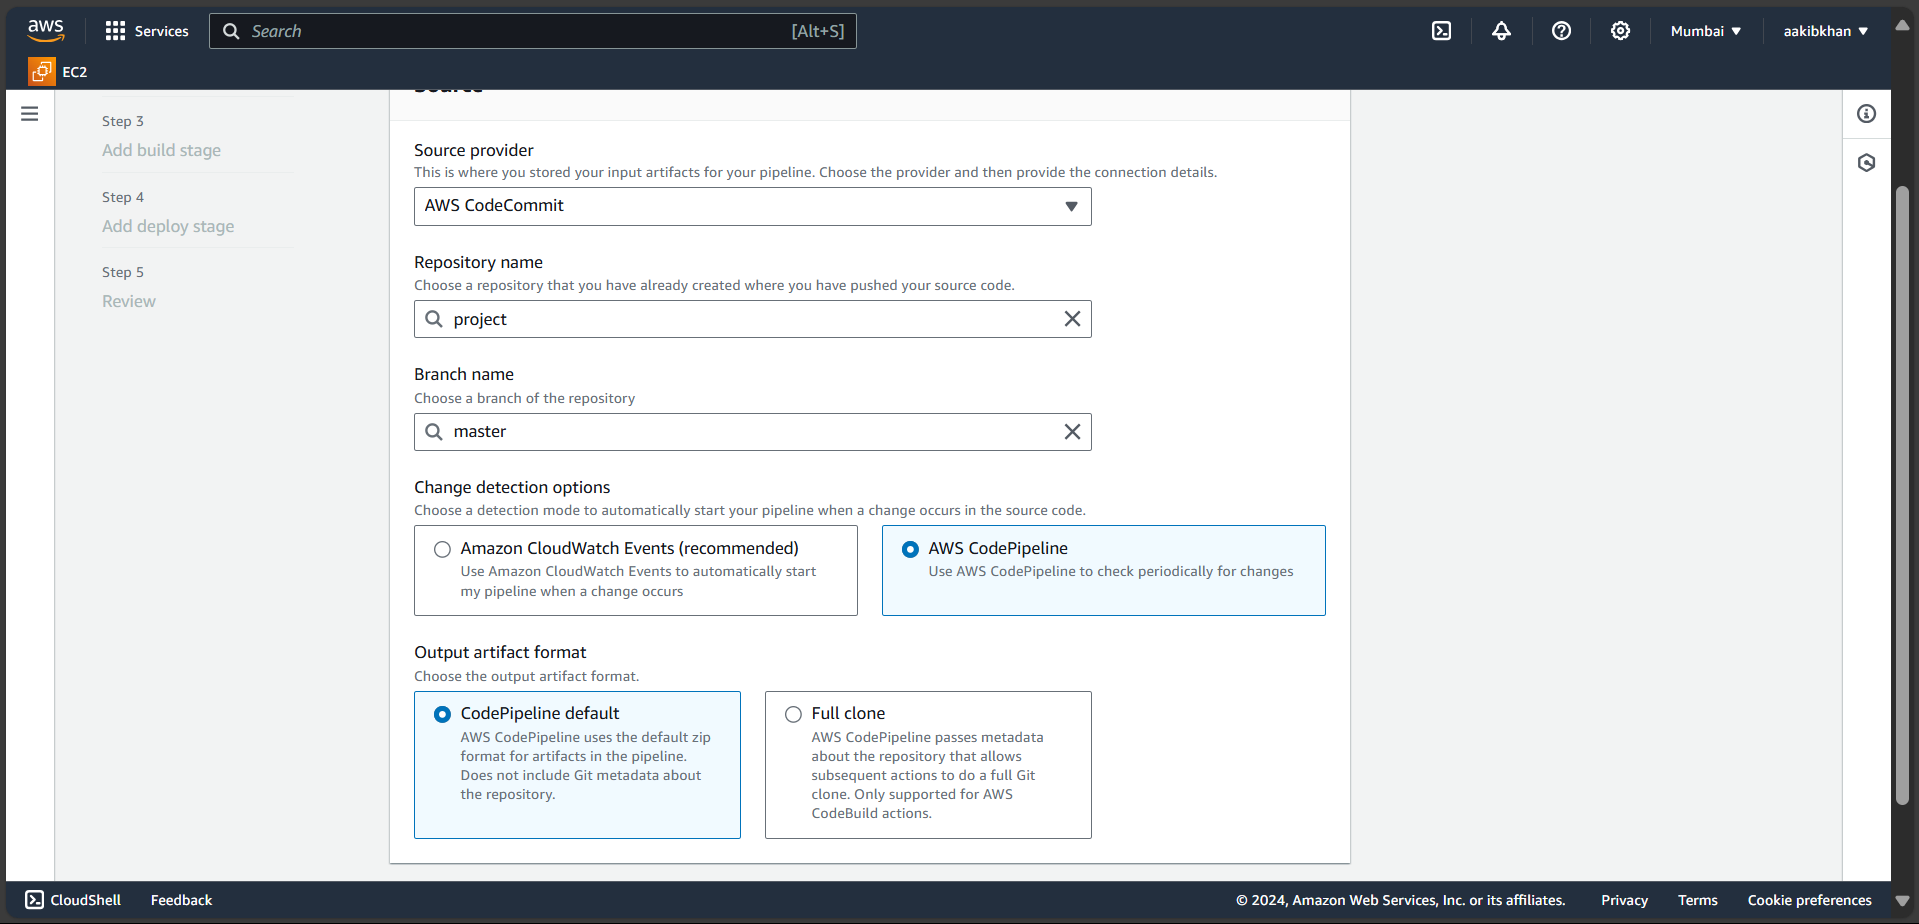
Add Source Stage
Add Build Stage
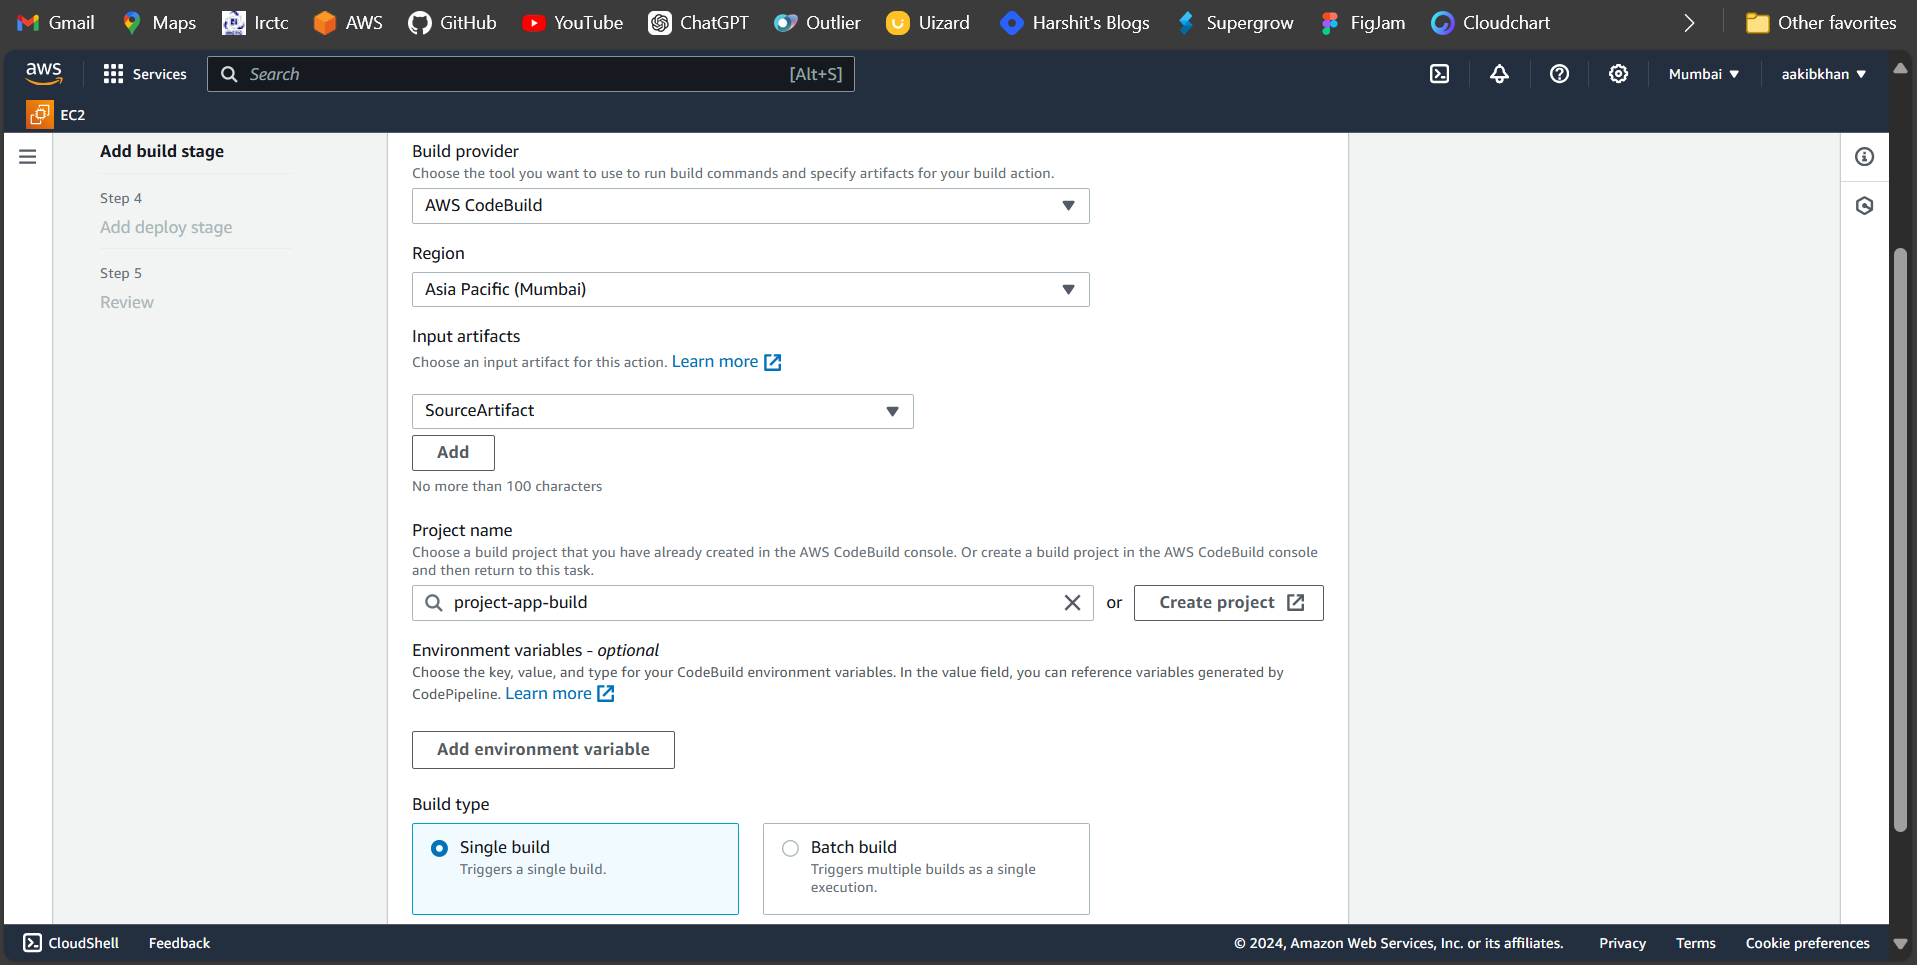
Add Deploy Stage
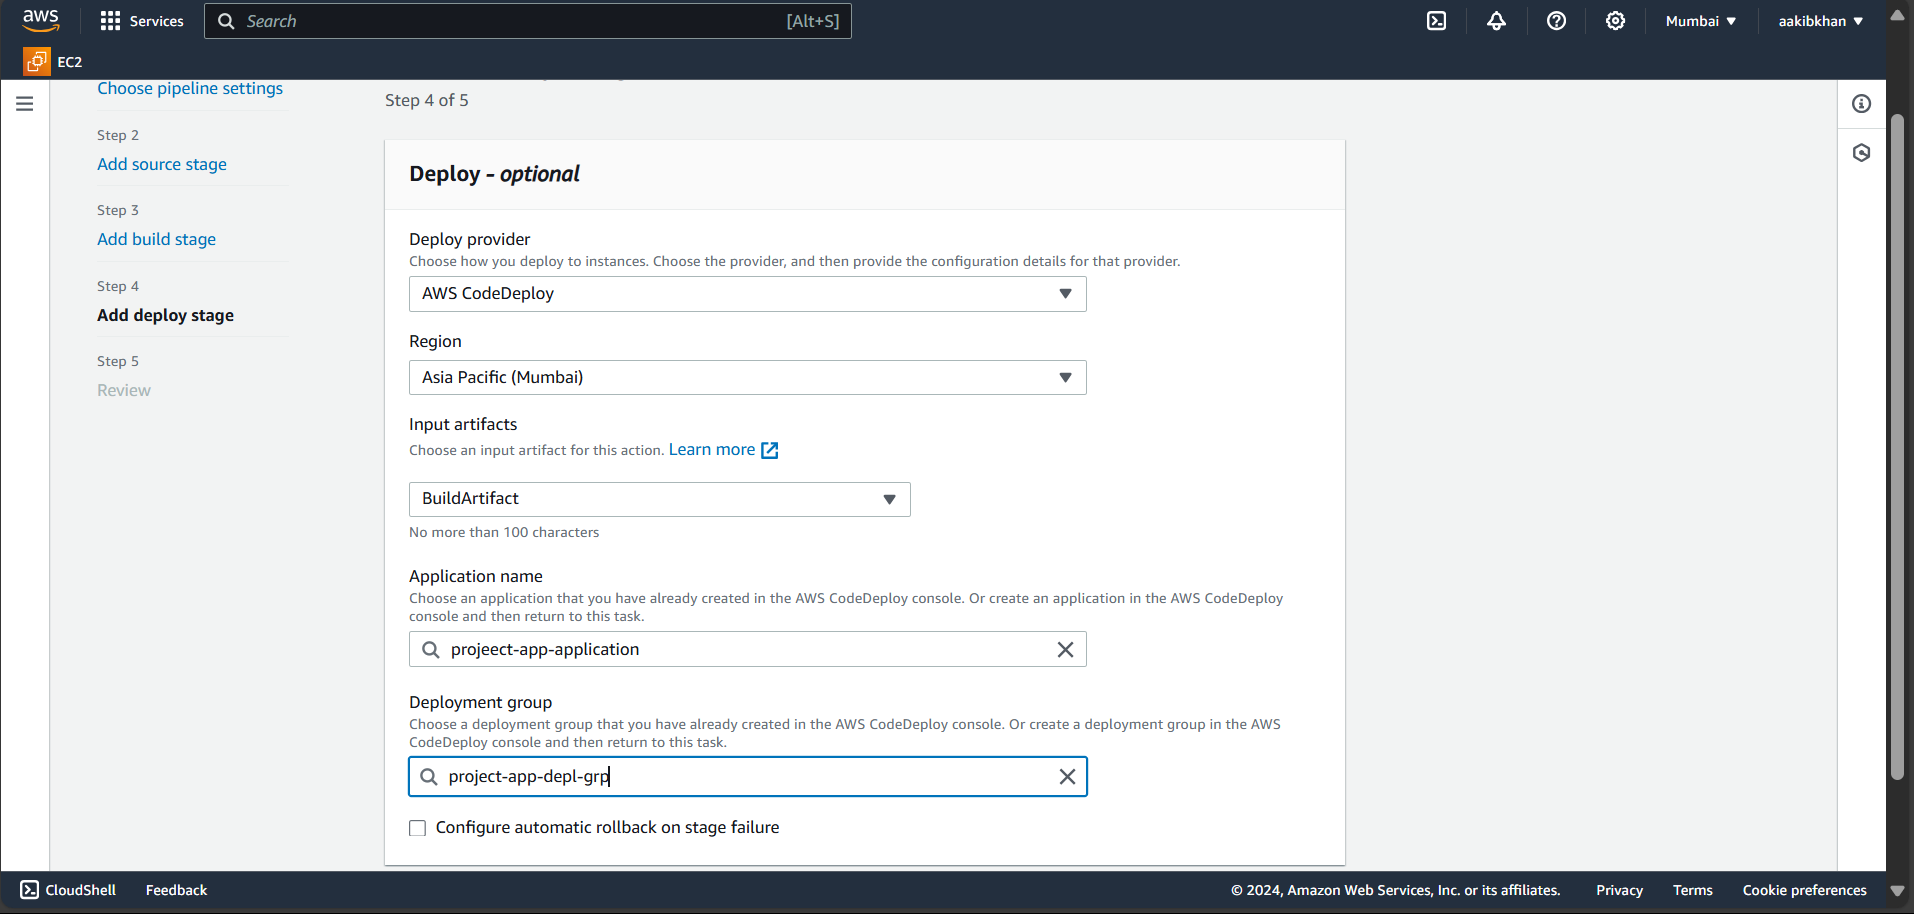
Review the pipeline and start it
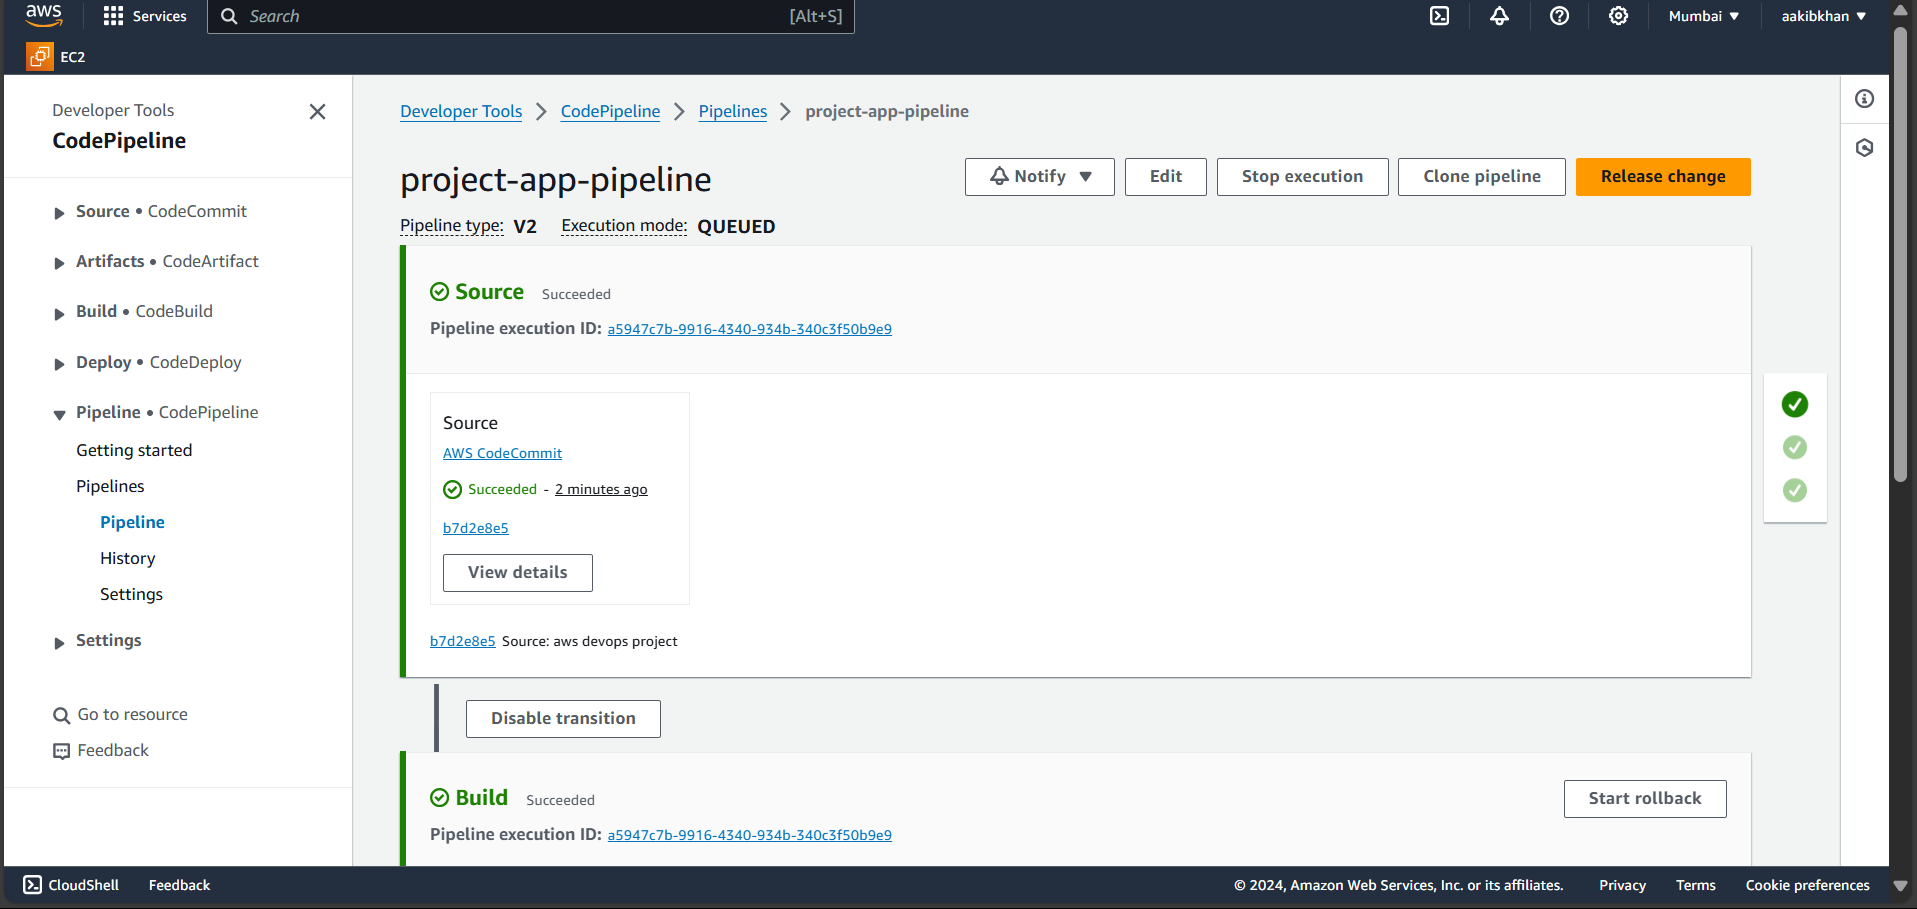
To check if it triggers or not whenever I commit some changes in the file and now the result is the following image.
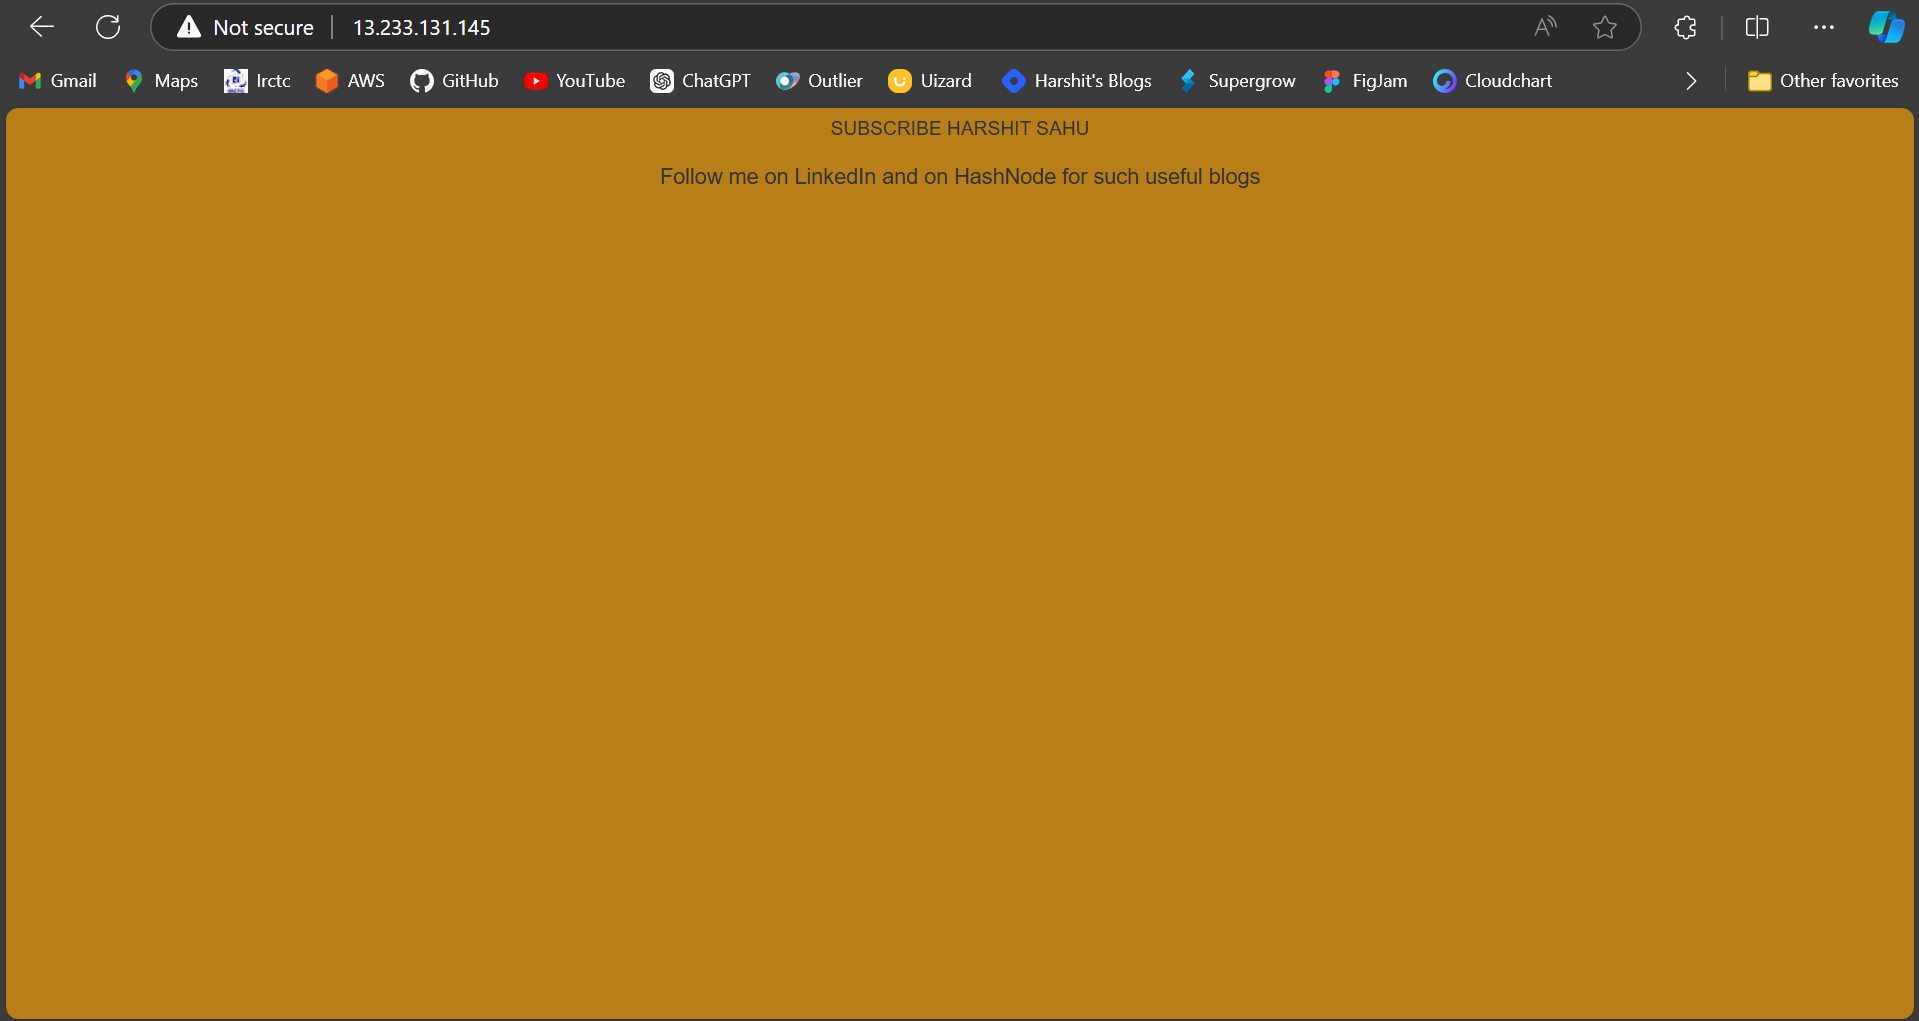
We finished this project and hope you like it. See you on the next project.
Subscribe to my newsletter
Read articles from Harshit Sahu directly inside your inbox. Subscribe to the newsletter, and don't miss out.
Written by

Harshit Sahu
Harshit Sahu
Enthusiastic about DevOps tools like Docker, Kubernetes, Maven, Nagios, Chef, and Ansible and currently learning and gaining experience by doing some hands-on projects on these tools. Also, started learning about AWS and GCP (Cloud Computing Platforms).