Build a Customizable Text Editor with TipTap
 Chidinma Nwakor
Perhaps, this is not your first time building a text editor, or maybe it is. Either way, you’re going to appreciate this developer tool right here. If you’ve ever attempted to build a text editor from scratch, you know the journey can be both exhilarating and exhausting. The vision is clear—something sleek and powerful, like Google Docs or Notion, where users can effortlessly format text, create lists, and collaborate in real-time. But the path to get there? It’s a labyrinth of handling key events, managing content states, and adding endless customizations.
You might find yourself thinking, "Surely, there's a better way." And that’s where TipTap comes into the picture—not as a one-size-fits-all solution, but as a tool that understands these frustrations and provides a more streamlined approach to building rich text editors. With this tool, you don’t have to start from square one. Instead, you have a solid foundation to build upon, saving you time and letting you focus on the finer details that make your editor unique.
In this guide, we’ll look into setting up TipTap and explore the different features you could take based on your need and how to enhance it with features like lists, custom toolbars, and more. Whether you’re looking to add a touch of sophistication to a basic editor or create a fully-fledged document editor, there’s a lot you can achieve with it. Let's see how it all comes together.
Exploring the Versatility of TipTap: More Than Just an Editor
One of the standout qualities of TipTap is its versatility. It’s not just a tool for creating text editors; it’s a comprehensive framework that opens up a world of possibilities for developers. You can build a simple note-taking app, a collaborative document editor, or even integrate AI-powered content suggestions, It provides a solid foundation to get started.
You’re not limited to just one kind of functionality. Here are some of the key features you can implement with this tool:
Rich Text Editor: At its core, You can create highly customizable text editors. It allows developers to build editors that are, complete with extensions such as
bold,italics,lists,headings, and much more. The editor can be tailored to fit the specific needs of your application, whether it's a simple blog editor or a full-fledged content management system.Collaboration: You can also add real-time collaboration to your applications. Imagine multiple users editing a document simultaneously, seeing changes happen in real time, similar to Google Docs. The collaborative features are built to be robust and scalable, making them suitable for both small team projects and larger organizational needs.
Content AI: You can also integrate AI-powered features that help users enhance their content. Think of smart suggestions, auto-completions, grammar corrections, or even content rewriting. These features can make your editor not just a static tool but an intelligent assistant that boosts productivity. You need to subscribe to their paid plan to use this feature.
Comments: Adding a comment feature is essential for any application that requires collaboration or feedback. It provides tools to implement an efficient commenting system that integrates smoothly within the editor, making it easier for users to discuss changes, suggest edits, or leave feedback without disrupting the content creation process.
Document Management: Beyond editing, It supports collaborative editing, version control, and content injection, allowing for real-time updates and seamless document handling through its REST API and webhooks. With flexible deployment options like cloud, dedicated cloud, or on-premises hosting, it easily integrates into existing infrastructures for scalable, high-performance document management.
Another interesting thing about this tool is that it’s framework-agnostic. This means that it’s not being tied down to one or two frameworks. Currently, TipTap works with, JavaScript, React, NextJs, Vue2, Vue3, Nuxt, Svelte, Alpine.js, PHP, CDN, Angular, and Solid. While TipTap offers an array of possibilities, in this article, we’ll focus on creating a customizable text editor using React. We’ll look into setting up the editor and adding a few formatting options, So, let’s roll up our sleeves and explore how to bring this to life.
Building a simple editor
To get started with TipTap, setting up the rich text editor is quite straightforward. Since we are using React for this example, we’ll first create our project using Vite, which is a fast and modern build tool recommended in TipTap's documentation.
Step 1: Create a New Project
Run the following command to create your react project:
npm create vite@latest my-tiptap-project -- --template react-ts
This will set up a TypeScript-based React project for you. Once that’s done, install the necessary TipTap dependencies by running:
npm install @tiptap/react @tiptap/pm @tiptap/starter-kit
These dependencies include the core functionality of TipTap and the StarterKit, which provides basic formatting options and extensions like bold, italic, lists, heading, etc.
Step 2: Build the Editor Component
Next, let’s create a component called TiptapDemo. This component will handle the editor instance and render it on the page.
// components/TiptapDemo.tsx
import { useEditor, EditorContent} from '@tiptap/react'
import StarterKit from '@tiptap/starter-kit'

// define your extension array
const extensions = [StarterKit]

const content = '<p>This is a TipTap editor with a custom toolbar.</p>'

const Tiptap = () => {
  const editor = useEditor({
    extensions,
    content,
  })

  return (
    <>
      <EditorContent editor={editor} />
    </>
  )
}

export default Tiptap
This basic setup creates a functioning text editor using the default starter kit, which includes common features like bold, italic, and headings. The useEditor hook initializes the editor instance and the EditorContent component renders the editor on the page.
Then, add it to your app, by importing the TiptapDemo to your App.tsx
import TiptapDemo from './TiptapDemo'

const App = () => {
  return (
    <div className="card">
      <TiptapDemo />
    </div>
  )
}

export default App
Step 3: Integrating the Toolbar
Now that we have the basic editor, we can add a custom toolbar. For this demo, we’ll include formatting options like Bold , Italic, lists and underline You can add more features as you go along.
const Toolbar = ({ editor }) => {
  if (!editor) return null;

  return (
    <div className="toolbar">
      <button onClick={() => editor.chain().focus().toggleBold().run()}>
        Bold
      </button>
      <button onClick={() => editor.chain().focus().toggleItalic().run()}>
        Italic
      </button>
    </div>
  );
};

export default Toolbar;
Then, include this toolbar in your TiptapDemo component:
import Toolbar from './Toolbar';

const TiptapDemo = () => {
  const editor = useEditor({
    extensions: [StarterKit],
    content,
  });

  return (
    <div>
      <Toolbar editor={editor} />
      <EditorContent editor={editor} />
    </div>
  );
};
This setup gives you a simple but customizable text editor with a toolbar to apply basic formatting. To get full access to all extensions, check here.
Step 4: Adding List Functionality
One of the key features you might want to add is list support, which includes bullet points and ordered lists. TipTap makes it easy to integrate this by using the ListItem, BulletList, and OrderedList extensions.
We can achieve this by updating the Toolbar component to include buttons for creating bullet and ordered lists:
<button onClick={() => editor.chain().focus().toggleBulletList().run()}>
  Bullet List
</button>
<button onClick={() => editor.chain().focus().toggleOrderedList().run()}>
  Ordered List
</button>
Styling and Customization
A critical part of building a text editor is ensuring that it fits seamlessly into the overall design of your app. TipTap gives you full control over the editor’s styling. For example, if you want to remove the default outline from the editor, simply update your CSS:
.ProseMirror {
  outline: none;
}

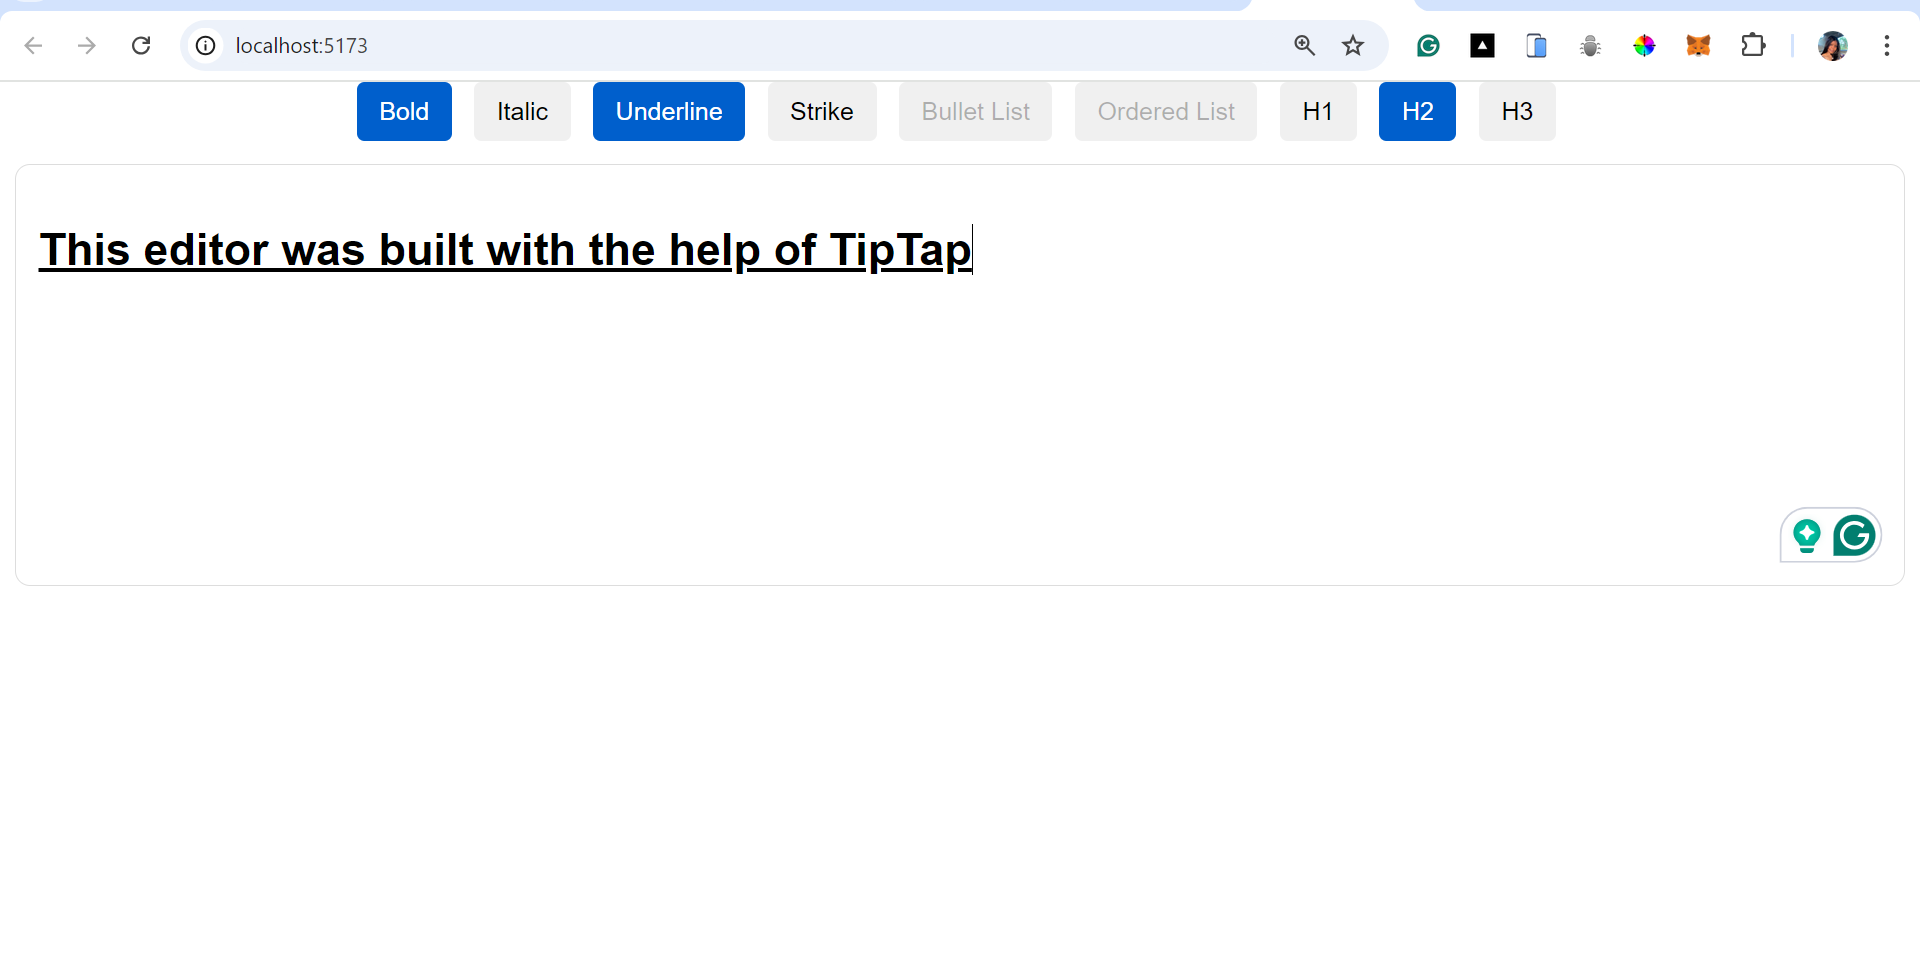
Depending on how you choose to style your editor, you can come up with something simple like this.
You should also note that there are some other functionalities or extensions you may want to add to your editor that are not included in the StarterKit, to get this working, you would need to install the package for that particular extension on your terminal. Remember, You can always refer to the full list of extensions here.
Conclusion
In this article, we focused on setting up a basic editor with formatting options. However, TipTap’s true potential goes far beyond that. From adding AI-powered content suggestions to implementing a commenting system, the possibilities are nearly endless. Its simple setup, flexible extension system, and framework-agnostic nature make it the perfect tool for building modern, feature-rich text editors.
Subscribe to my newsletter
Read articles from Chidinma Nwakor directly inside your inbox. Subscribe to the newsletter, and don't miss out.
Written by

Chidinma Nwakor
Chidinma Nwakor
I am a Developer Advocate dedicated to empowering developers and fostering vibrant tech communities. My journey in the tech world is driven by my love for connecting with people and sharing knowledge. I advocate for developers through various channels, such as public speaking, Technical Writing, Community Building, Creating and nurturing communities, Video Content, and Hosting Spaces.