Deployed a Voting App & Set up a KinD & Argo CD with Kubernetes cluster on AWS EC2.
 RAKESH DUTTA
In this article, we’ll guide you through deploying the Voting App from the kubernetes-kind-voting-app GitHub project on an AWS EC2 instance. First, we’ll briefly introduce Kubernetes and Kind, the tool we'll use for local Kubernetes clusters.
Prerequisites are of this Project.
Having an AWS account and launch an ubuntu instance with type of t2.xlarge.
Then we’ll go through with basics of Linux and Docker commands.
Step 1 : On the AWS Console need to launch an ubuntu instance with type of t2.xlarge( where we expect the space is 16GB and 4 cpu ) with the name of kubernetes cluster and configure the storage of this instance is 15GB then click on launch instance.

Step 2 : After a while when instance is up and running then ssh into it and install docker on it with this commad. First thing is to update your terminal through this command.
$ sudo apt-get update
$ sudo newgrp docker
$ sudo apt-get install docker.io

Step 3 : Start the Docker service and ensure it runs on boot. And to verify that Docker is installed and running or not.


$ sudo usermod -aG docker $USER
$ sudo reboot
$ docker --version
$ docker ps
Step 4 : Download and install kind here we will write a bash script to install kind and give it a permission for execute.


$ vim install_kind.sh
#!/bin/bash
curl -Lo ./kind https://kind.sigs.k8s.io/dl/v0.20.0/kind-linux-amd64
chmod 421 ./kind
sudo mv ./kind /usr/local/bin/kind
Step 5 : After installation we will run this command on terminal.

curl -Lo ./kind https://kind.sigs.k8s.io/dl/v0.20.0/kind-linux-amd64
chmod +x ./kind
sudo mv ./kind /usr/local/bin/kind
Step : 6 Here we will install kubectl on our vm.
curl -LO "https://dl.k8s.io/release/$(curl -L -s https://dl.k8s.io/release/stable.txt)/bin/linux/amd64/kubectl"
chmod +x kubectl
sudo mv kubectl /usr/local/bin/kubectl
Step 7 : Verify the installation.

$ kind --version
$ kubectl version --client
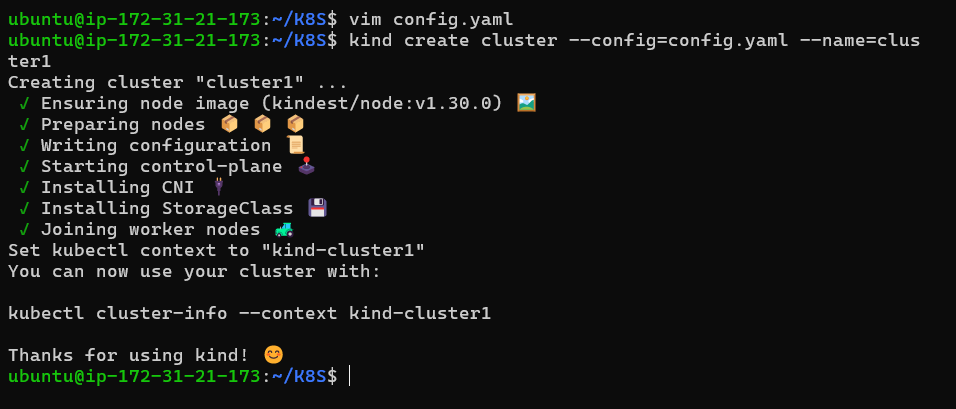
Step 8 : Create a Kubernetes Cluster with kind.
We will create a 3-node Kubernetes cluster using kind. This will include one control plane node and two worker nodes.


$ vim cinfig.yaml
kind: Cluster
apiVersion: kind.x-k8s.io/v1alpha4

nodes:
- role: control-plane
  image: kindest/node:v1.31.0  # Match this with kubectl version
- role: worker
  image: kindest/node:v1.31.0  # Match this with kubectl version
- role: worker
  image: kindest/node:v1.31.0  # Match this with kubectl version
Step 9 : Create the Cluster
Now, use this configuration file to create a 3-node cluster with kind
$ kind create cluster —config=config.yaml.yaml —name=<cluster1>
Step 10 : Verify the cluster.

$ kubectl cluster-info
$ kubectl get nodes
Step 11 : Installing and Configuring Argo CD & Create an ArgoCD Namespace
In this step, we will install Argo CD, a declarative GitOps continuous delivery tool for Kubernetes.
Step 12 : First, create a dedicated namespace for ArgoCD.


$ kubectl create namespace argocd
$ dockr ps

Step 13 : Install ArgoCD Now, install ArgoCD by applying the installation YAML file.
$ kubectl apply -n argocd -f https://raw.githubusercontent.com/argoproj/argo-cd/stable/manifests/install.yaml
Step 14 : This command will download and install all the necessary resources for Argo CD in your Kubernetes cluster.
Step 15 : Check Argo CD Services. Verify that the services for Argo CD have been created and are running.
$ kubectl get svc -n argocd

The output will show the services created by Argo CD, including the argocd-server. By default, the argocd-server service will be of type ClusterIP, meaning it is accessible only within the Kubernetes cluster.
To make the argocd-server accessible from outside the cluster, we need to change the service type from ClusterIP to NodePort. This will expose the Argo CD server on a port accessible via the external IP of any node in the cluster. We will do this in the next step.
Step 16 : Expose the Argo CD Server using NodePort Expose the Argo CD server to allow access via a NodePort.

$ kubectl patch svc argocd-server -n argocd -p '{"spec": {"type": "NodePort"}}'
Step 17 : Access the Argo CD Server. Forward the Argo CD server port to your local machine to access the Argo CD UI
$ kubectl port-forward --address 0.0.0.0 -n argocd service/argocd-server 8443:443 &
$ https://<EC2_PUBLIC_IP>:8443 (on your search engine)

Step 18 : Login to ArgoCD. Retrieve the initial ArgoCD admin password.
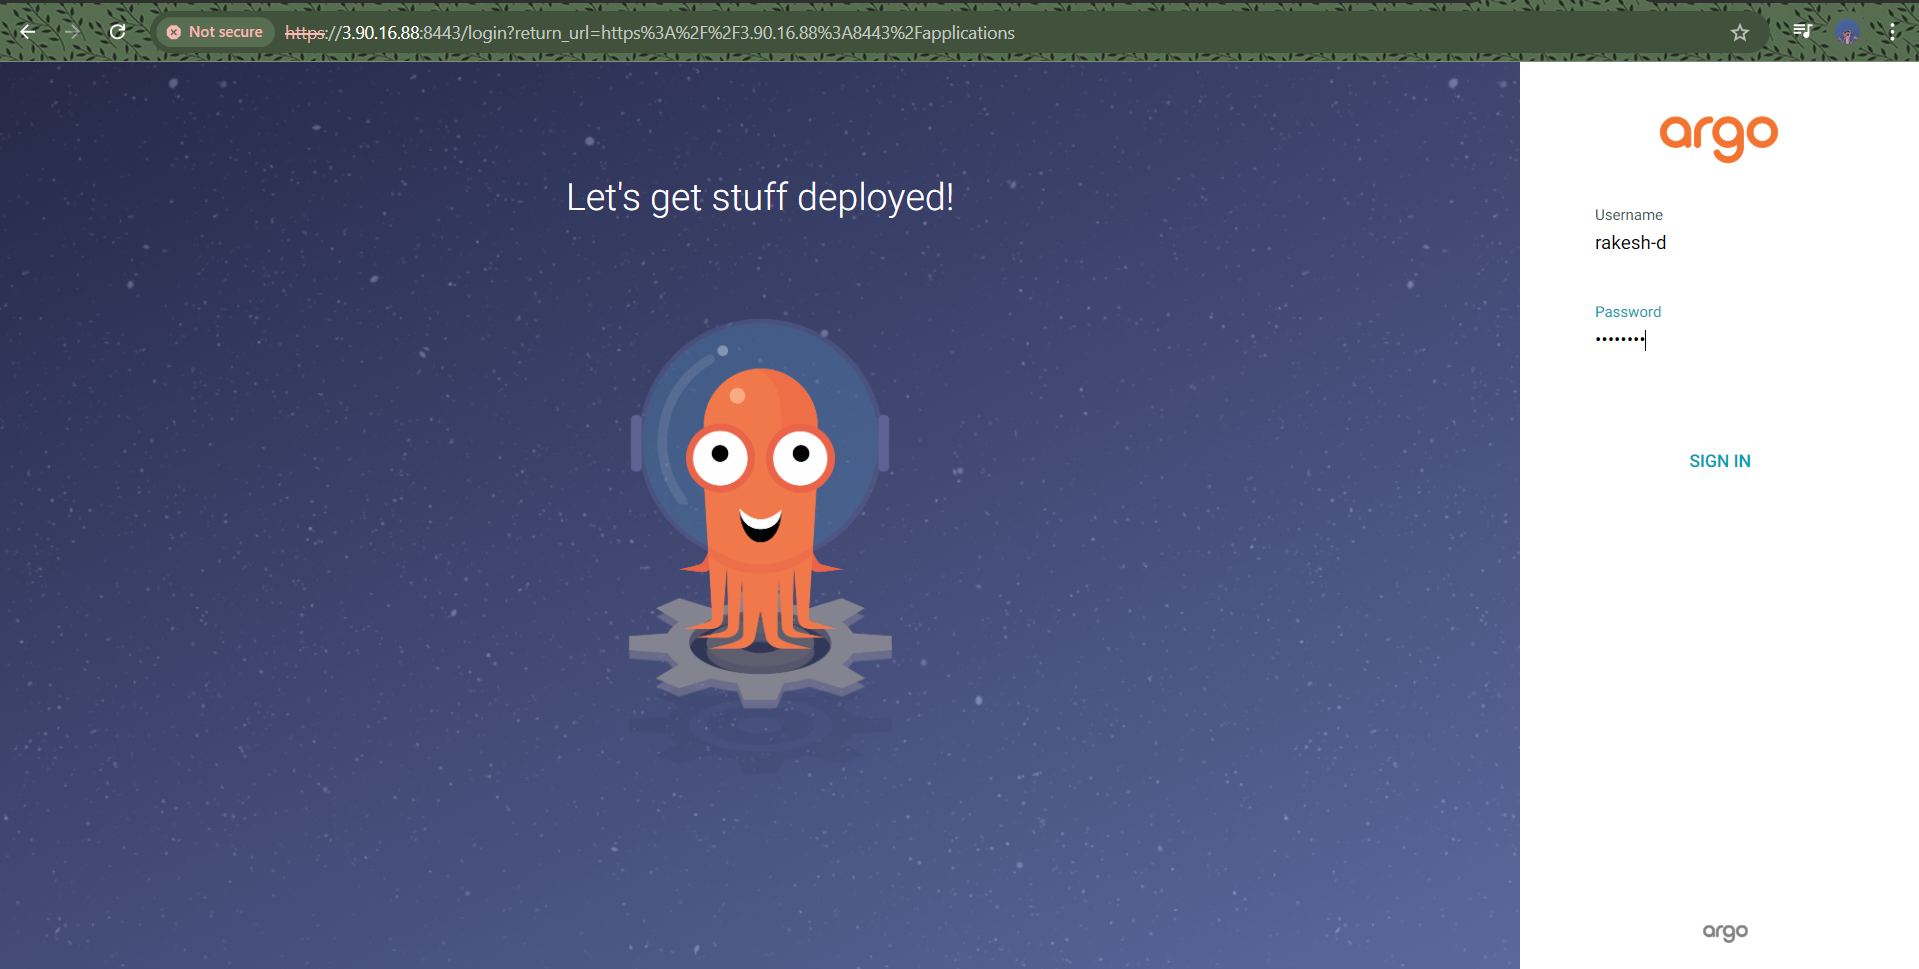
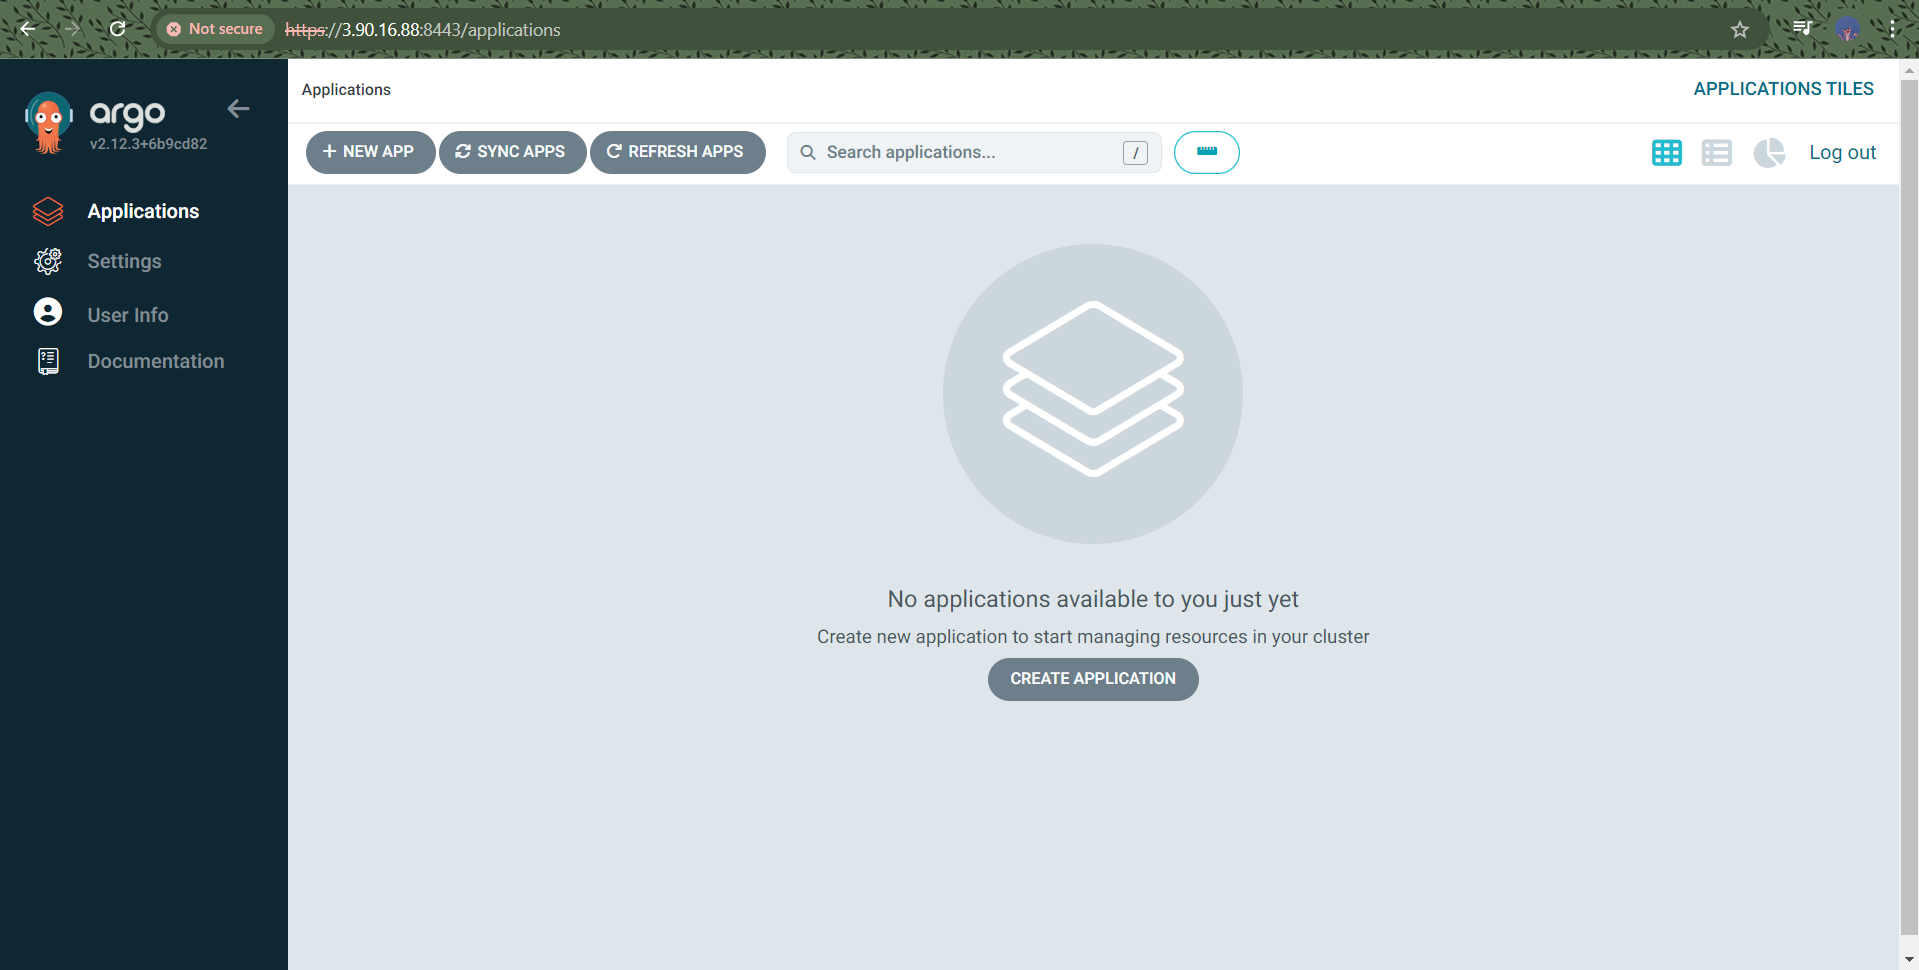
$ kubectl get secret argocd-initial-admin-secret -n argocd -o jsonpath="{.data.password}" | base64 -d
Step 19 : You will get this type of reply as -
$ kubectl get secret argocd-initial-admin-secret -n argocd -o jsonpath="{.data.password}" | base64 -d
  && echo a3ls9GRXpSrhq9Xv

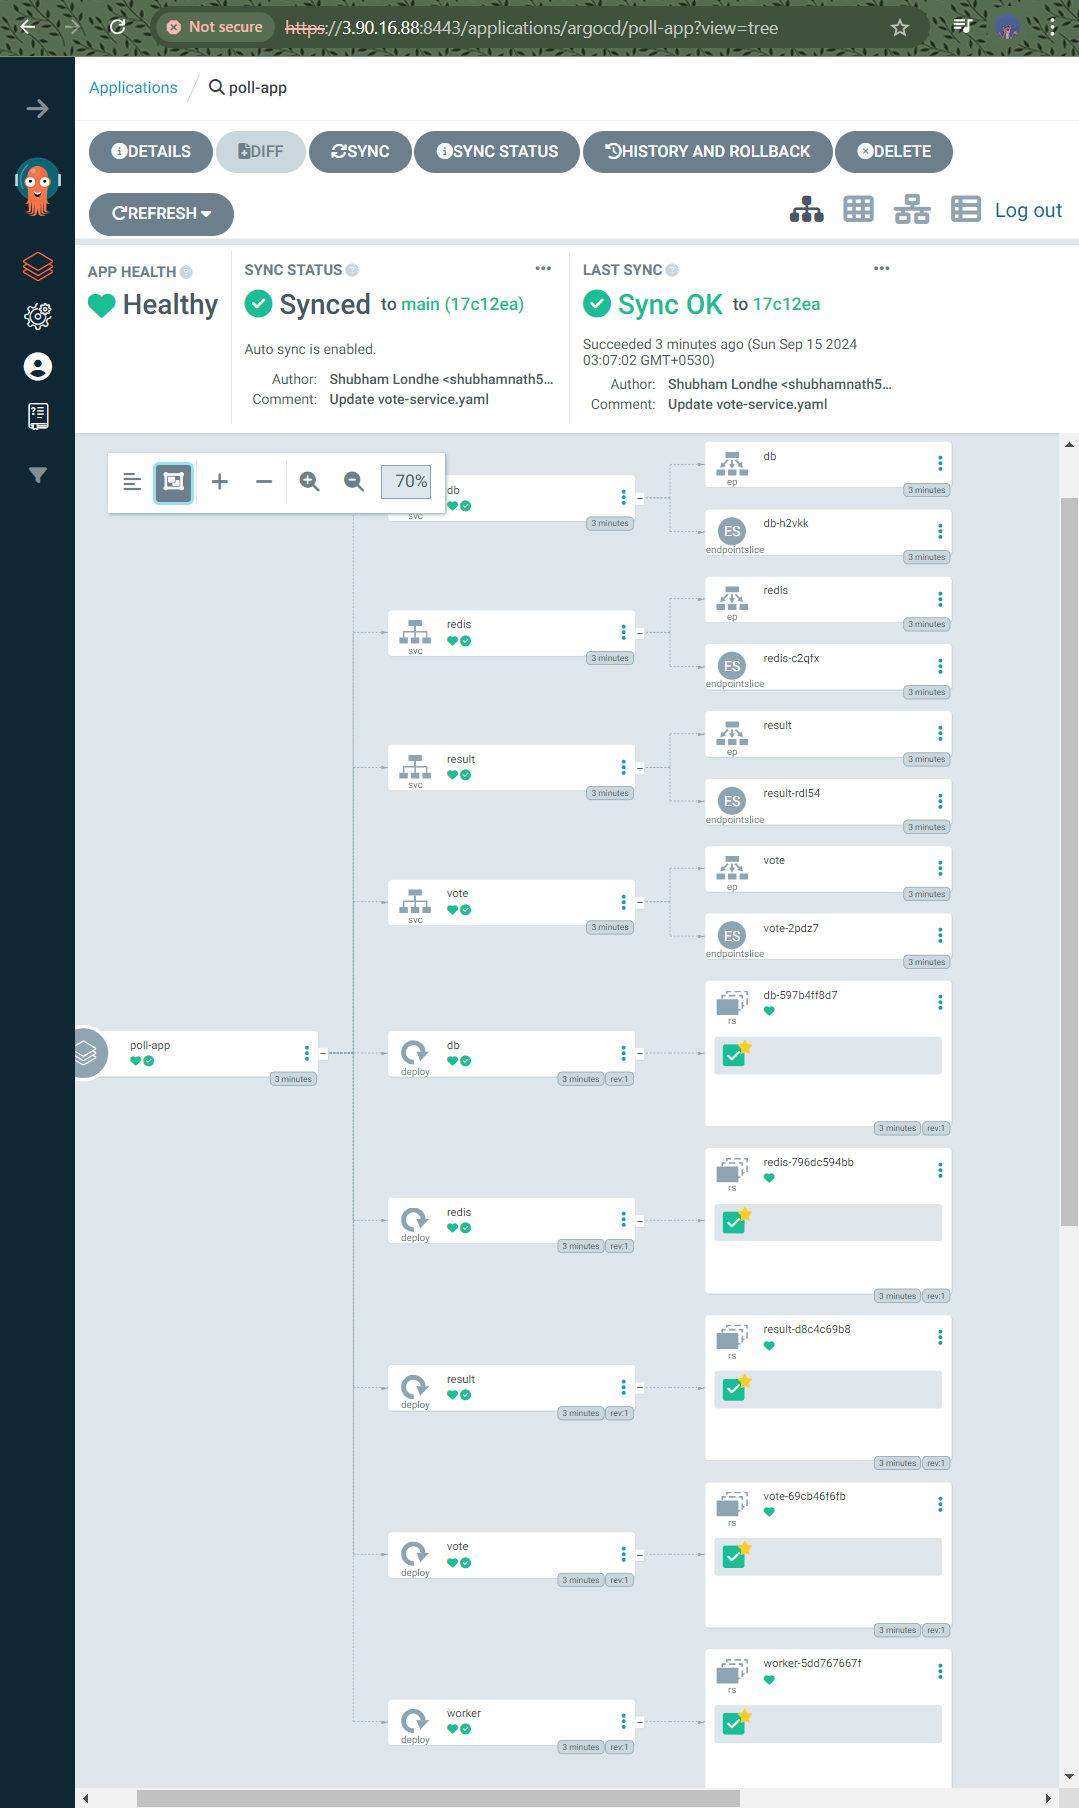
Step 20 : Deploy the Poling App & Create an Argo CD Application
Next, you’ll create an Argo CD application to deploy the Polling App.
In the Argo CD UI, go to Applications and click Create Application.
Fill in the following fields :
Application Name: polling-app
Project: default
Sync Policy: You can either choose manual or automated sync as needed.
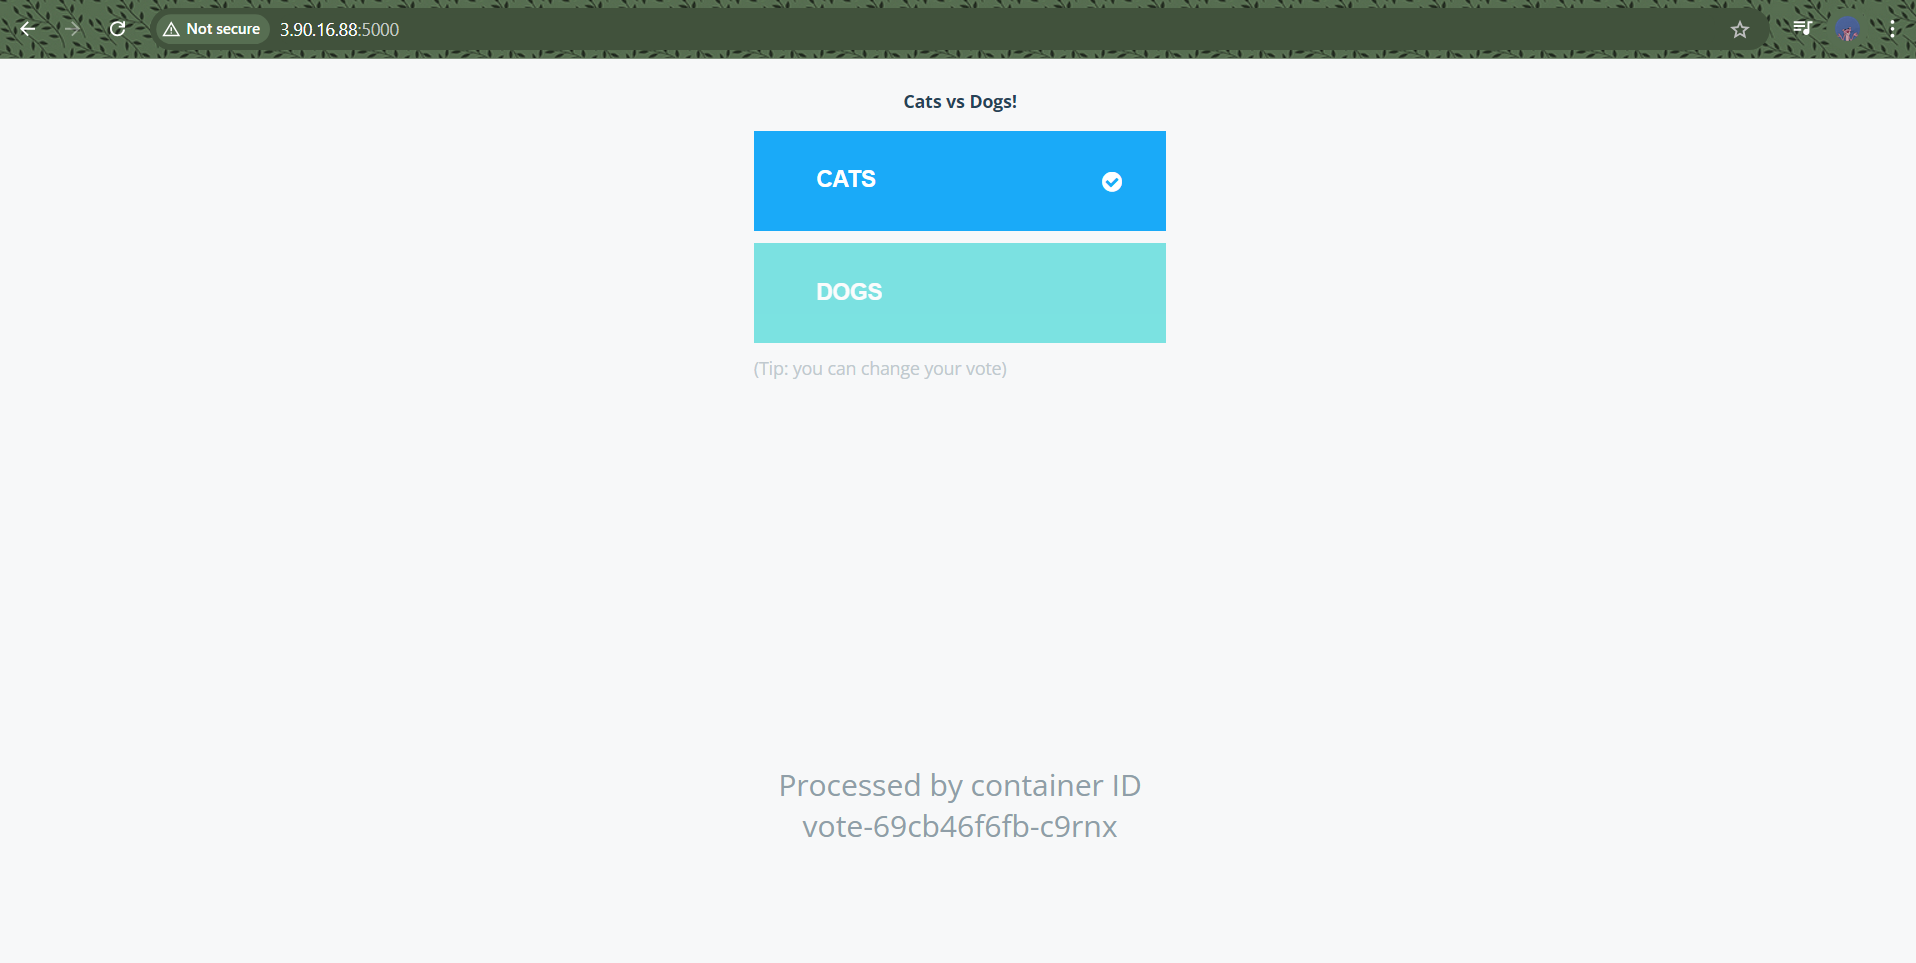
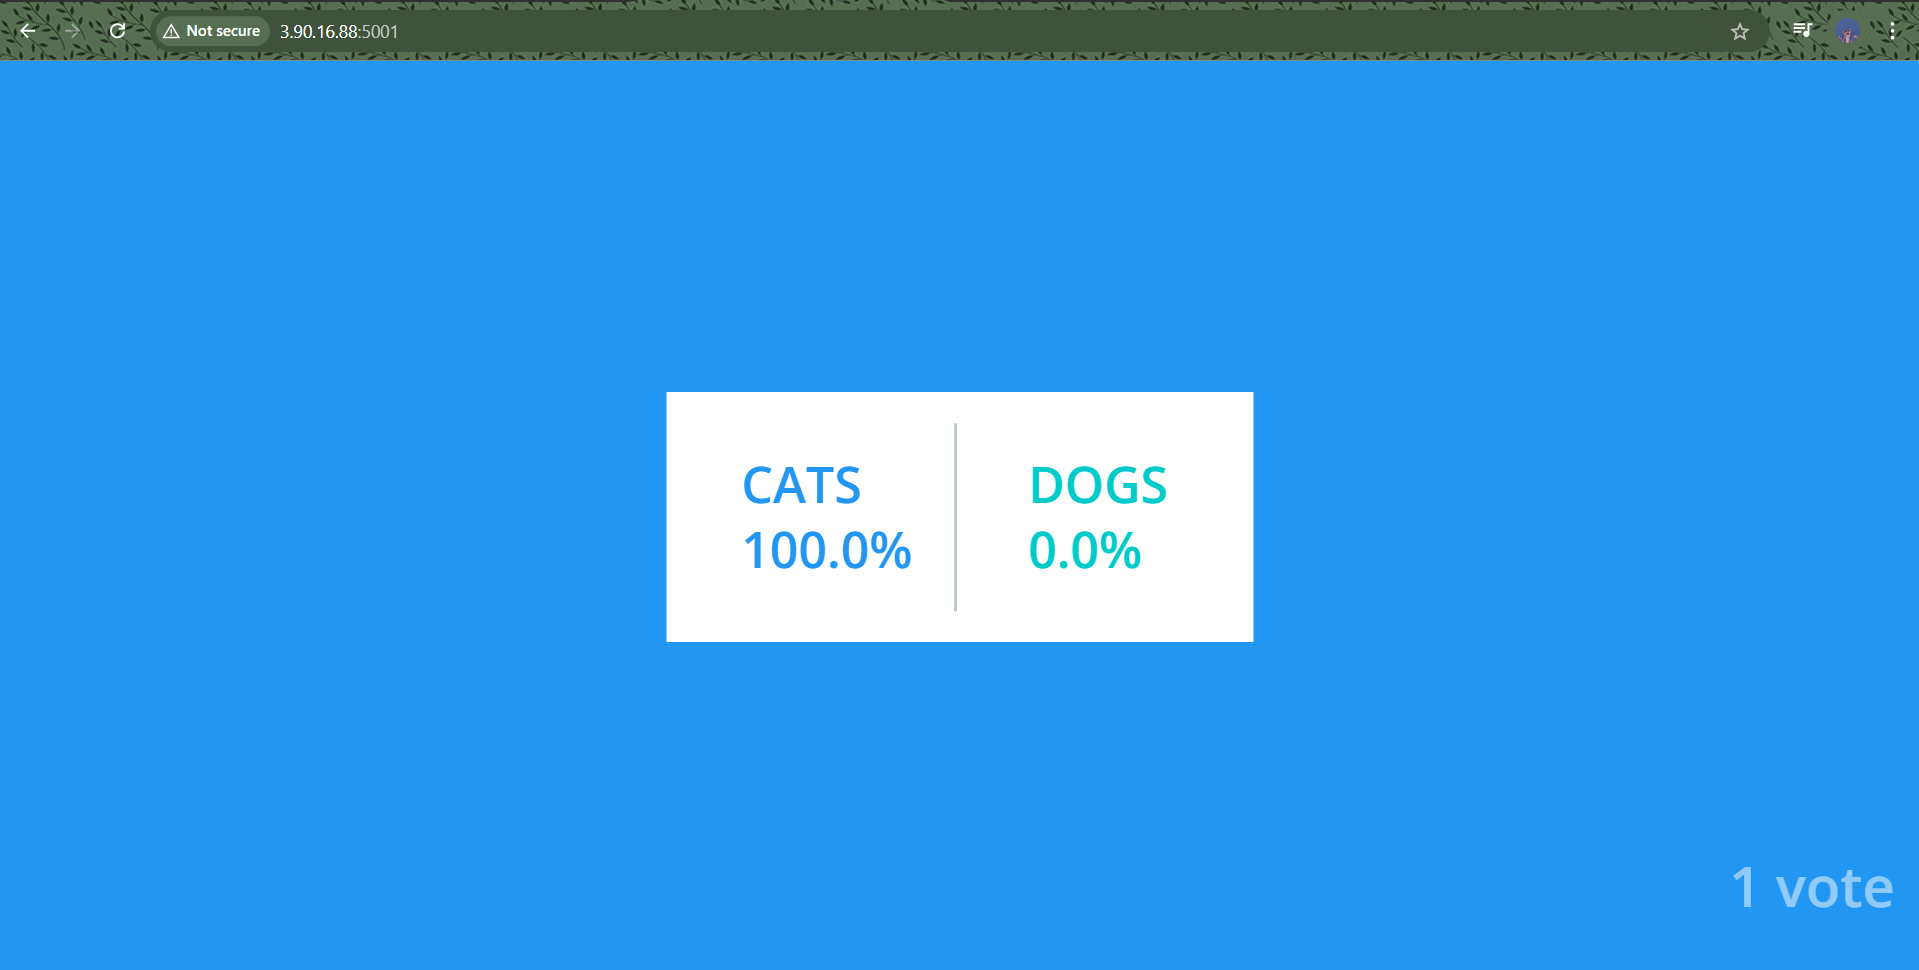
Step 21 : Access the Voting App. Now that the Voting App is deployed and the pods are running, you can access the application by exposing the services.
Step 22 : Verify Services & First, check that the services for the app have been created.
$ kubectl get pods
$ kubectl get svc
Step 23 : Port Forward to Access Services. To access the application locally, forward the ports for both the vote and result services. Use the --address=0.0.0.0 flag to allow connections from outside localhost:
Forward port for the vote service

$ kubectl port-forward svc/vote 5000:5000 --address=0.0.0.0 &
$ kubectl port-forward svc/result 5001:5001 --address=0.0.0.0 &


Step 24 : Configure Security Group & Ensure that your EC2 security group allows inbound traffic on ports 5000 and 5001. You can do this by expose on the aws instance security inbound rule 5000 & 5001.
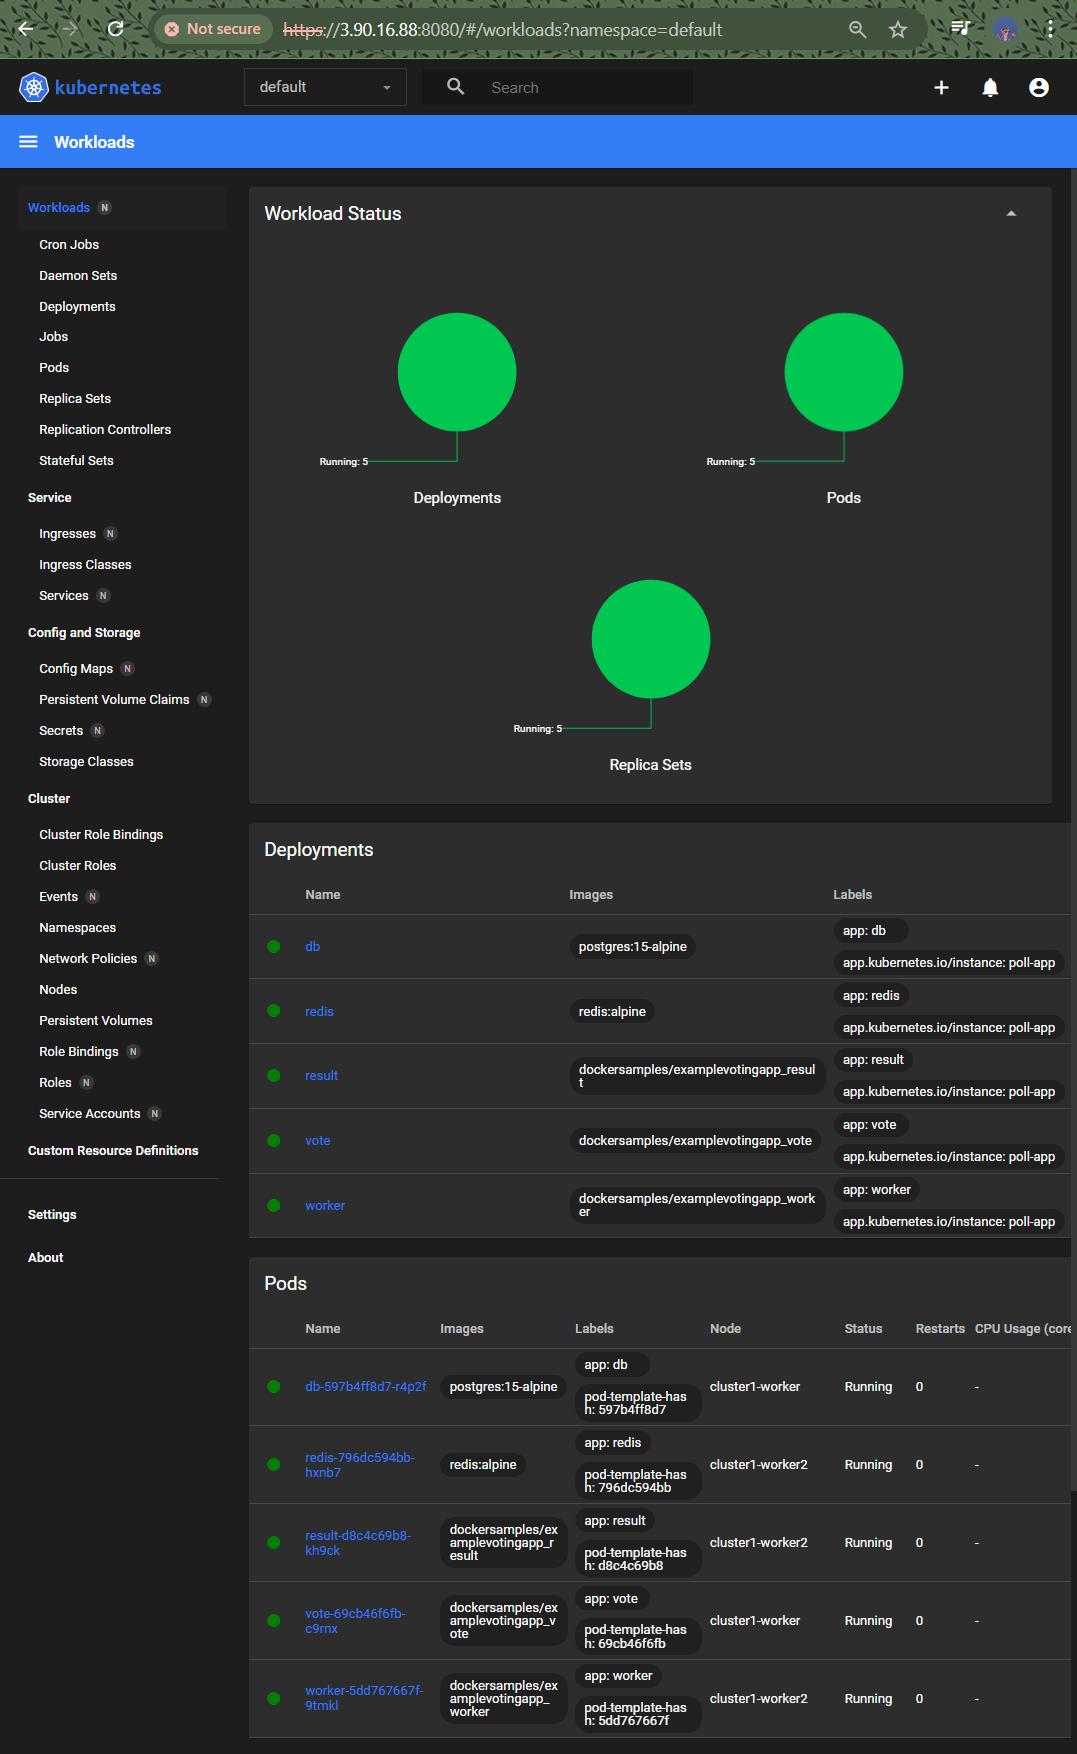
Step 25 : Installing Kubernetes Dashboard. To manage your Kubernetes cluster more effectively, you can install the Kubernetes Dashboard. Follow these steps to deploy the dashboard and set up access.


$ kubectl create namespace kubernetes-dashboard namespace/kubernetes-dashboard created
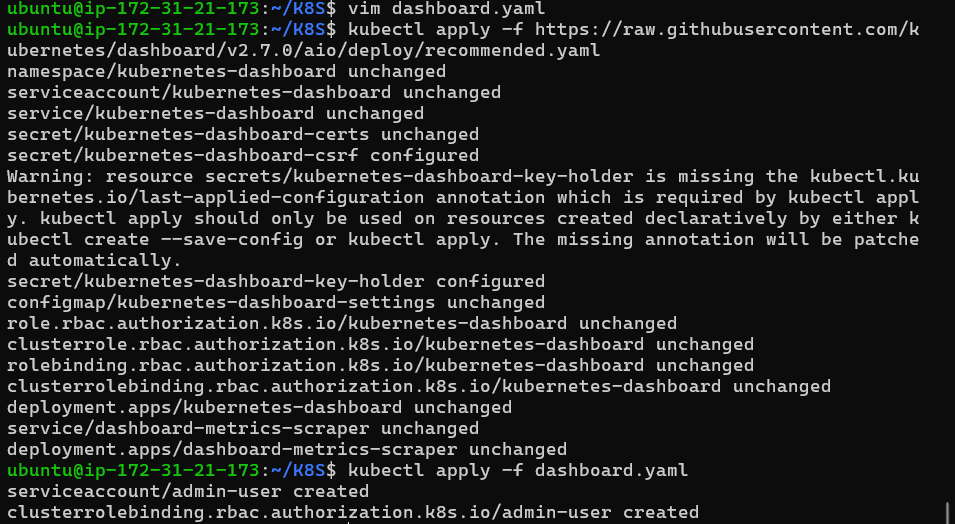
$ kubectl apply -f https://raw.githubusercontent.com/kubernetes/dashboard/v2.7.0/aio/deploy/recommended.yaml
Step 26 : To create dash first we need this
$ vim dashboards.yaml
apiVersion: v1
kind: ServiceAccount
metadata:
  name: admin-user
  namespace: kubernetes-dashboard
---
apiVersion: rbac.authorization.k8s.io/v1
kind: ClusterRoleBinding
metadata:
  name: admin-user
roleRef:
  apiGroup: rbac.authorization.k8s.io
  kind: ClusterRole
  name: cluster-admin
subjects:
- kind: ServiceAccount
  name: admin-user
  namespace: kubernetes-dashboard
Step 27 : Deploy Kubernetes Dashboard & Install the Kubernetes Dashboard by applying the recommended manifest…

$ kubectl apply f dashboard.yaml
serviceaccount/admin-user created clusterrolebinding.rbac.authorization.k8s.io/admin-user created (output will came out)
Step 28 : After applying the Service Account and RBAC configuration, create a token for the admin-user
$ kubectl -n kubernetes-dashboard create token admin-user
eyJhbGciOiJSUzI1NiIsImtpZCI6Ii1JSTFpWHBMaXhQc1NMM0Vmdy1LR3FVbnNPczN6RGQ5dGowRUExRGV6S2cifQ.eyJhdWQiOlsiaHR0cHM6Ly9rdWJlcm5ldGVzLmRlZmF1bHQuc3ZjLmNsdXN0ZXIubG9jYWwiXSwiZXhwIjoxNzI2MzQ1NTk3LCJpYXQiOjE3MjYzNDE5OTcsImlzcyI6Imh0dHBzOi8va3ViZXJuZXRlcy5kZWZhdWx0LnN2Yy5jbHVzdGVyLmxvY2FsIiwianRpIjoiM2M1ODQ5MTgtNjNkMi00M2JlLWEzMTUtN2FkNWM2MWI4OWU3Iiwia3ViZXJuZXRlcy5pbyI6eyJuYW1lc3BhY2UiOiJrdWJlcm5ldGVzLWRhc2hib2FyZCIsInNlcnZpY2VhY2NvdW50Ijp7Im5hbWUiOiJhZG1pbi11c2VyIiwidWlkIjoiZDg4NmQxYmUtYzgxYS00MmU2LTllNjctOWJmZmQ1MzI2MTE2In19LCJuYmYiOjE3MjYzNDE5OTcsInN1YiI6InN5c3RlbTpzZXJ2aWNlYWNjb3VudDprdWJlcm5ldGVzLWRhc2hib2FyZDphZG1pbi11c2VyIn0.MBD0WKLphctpx9pSG6TwQUfsGQ8gfGRhXqpEVXcIaDYdge9LPs3gvrSCQb6_b9mPmiJ-BsXnrz1ynT_Ozp8ZzPUt7XX7y8xp0lzfrzeCRLVeJG7htXc3AIerTtUz5zZ7n18mnsxqPjTNFEjCD6EkZYwv4Z0oudNxpuxuXr7v_2Uj_cZfuWvQYsx6zbo7l-wKTsMJP8EM9bbawLi45Q3ttUkW2QO5OqKmiZGFOo5hTSmVFeI0dQARZWE5ZdexEKp4aH68iyXKNB3QnMmYq4Eh5aTybSmSuhm0nvMQm9eq94DFdPNeuuLNreRENgquCmLbK95RGHMrPmN8Gd4065lY2Q
(the token)
Step 29 : Access the Kubernetes Dashboard & to access the dashboard locally, forward the port for the Kubernetes Dashboard service.

$ kubectl port-forward -n kubernetes-dashboard svc/kubernetes-dashboard 8080:443 --address=0.0.0.0 &
$ https://98.80.212.3:8080/ (on your search engine)

Introduction to Kind and ArgoCD : We introduced Kubernetes in Docker (Kind) for creating local clusters and ArgoCD for continuous deployment.
Prerequisites : We ensured that we had an AWS account, basic Linux, and Docker knowledge, and outlined the steps to set up an EC2 instance with Ubuntu.
Setting Up EC2 : We created an EC2 instance, configured security groups, and installed Docker and Kind.
Creating a Kubernetes Cluster with Kind : We created a 3-node Kubernetes cluster using Kind with the appropriate Kubernetes version.
Installing ArgoCD We deployed ArgoCD, exposed its service, and configured port forwarding. We also set up the necessary security group rules for external access.
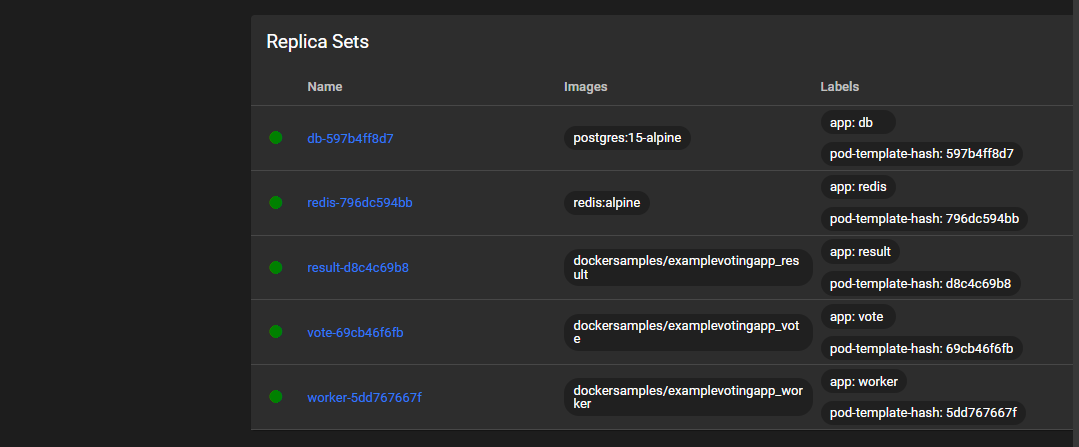
Deploying the Voting App : We created an ArgoCD application to deploy the Voting App from a GitHub repository, synced the application, and verified that the pods were running correctly.
Accessing the Application : We configured port forwarding for the vote and result services and updated the EC2 security group to allow traffic on the necessary ports.
Installing Kubernetes Dashboard : We deployed the Kubernetes Dashboard, set up a Service Account and RBAC, created a token for access, and configured port forwarding for the dashboard.
In this blog post, we successfully deployed a Kubernetes-based Voting App on AWS EC2, utilizing Kind for local Kubernetes clusters and ArgoCD for continuous deployment. We also set up the Kubernetes Dashboard for enhanced cluster management.
thank yu !!
Subscribe to my newsletter
Read articles from RAKESH DUTTA directly inside your inbox. Subscribe to the newsletter, and don't miss out.
Written by
