Linux Foundation Certified System Administrator (LFCS) : Service management , storage (Part 5)
 Md Shahriyar Al Mustakim Mitul
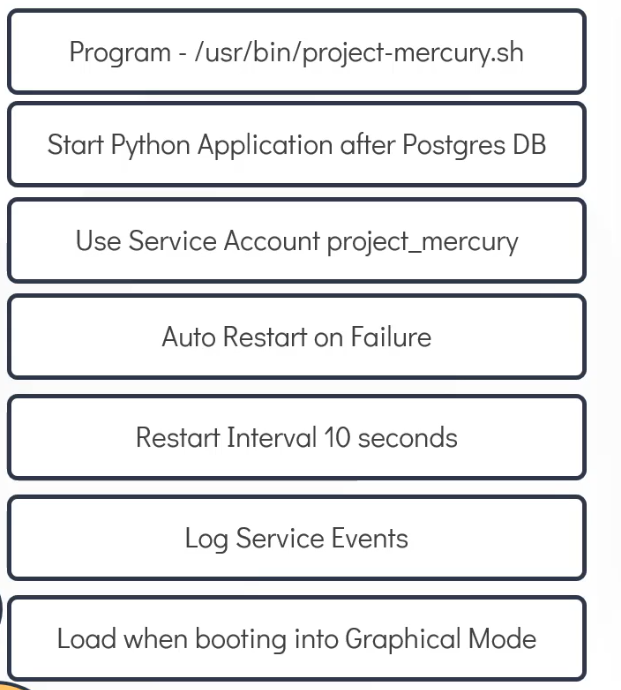
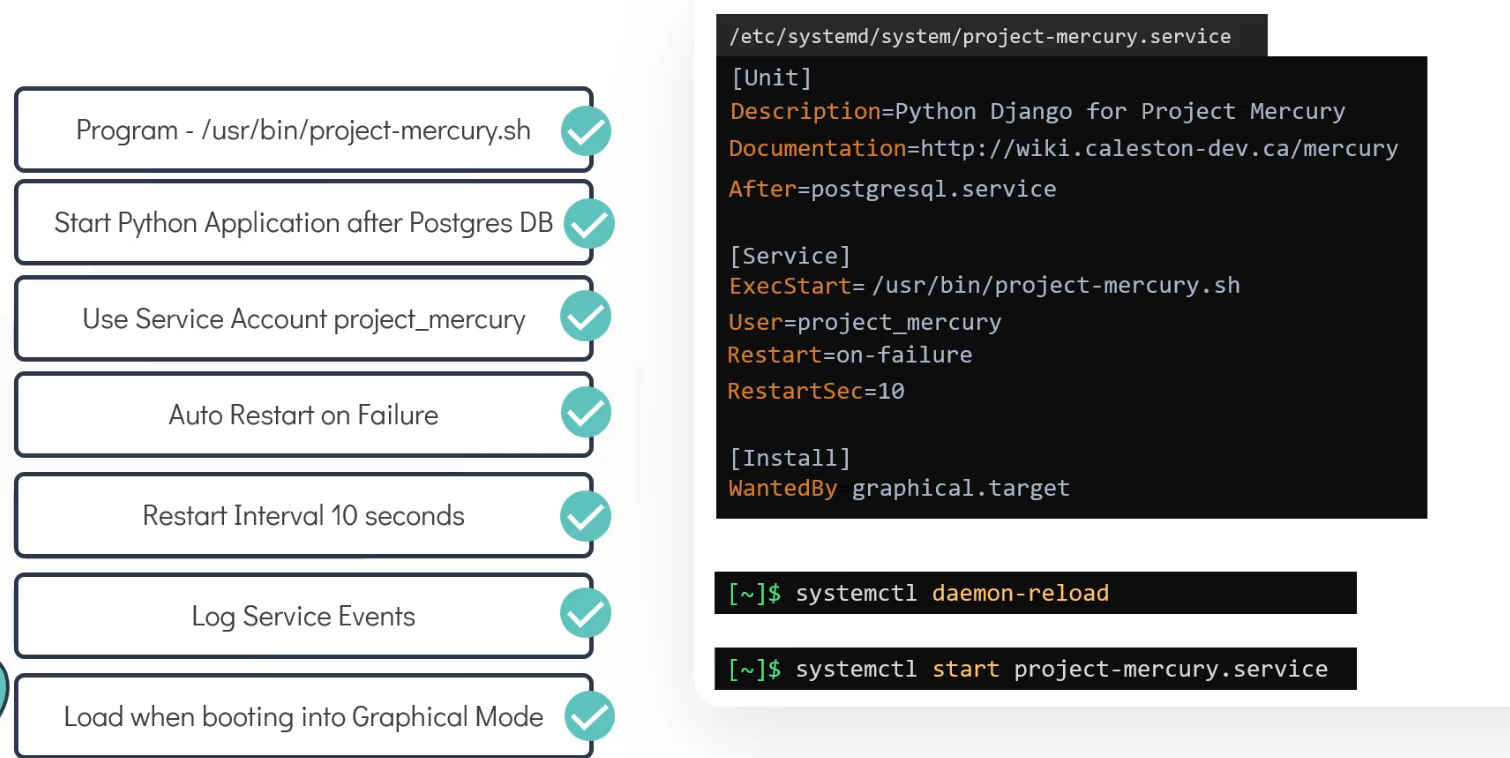
Assume you have a shell script which needs to start during boot. The script works with your python script which depends on Postgres database. So, the database should be up and running prior to the python application.
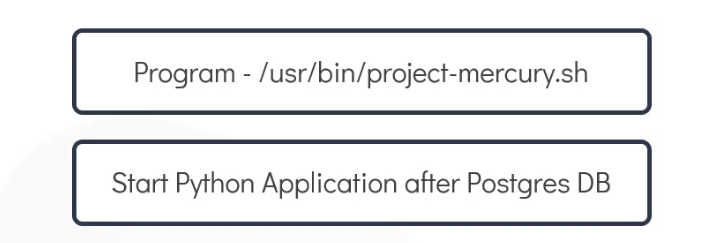
Assume that there is a service account created named “project_mercury”

If the application fails, it should restart automatically

If it fails again, we want to restart after 10 seconds.

All of these incidents should be saved as a long event so that we can investigate later

We also want to use graphical target as the default.

So, let’s start solving them all together
Let’s start
Assume that we have the script at this location /usr/bin/project-mercury.sh
To do all of the processes, we need to open a system file on a location called /etc/systemd/system
With a file name project-mercury.service
So, now we need to add the <shell type> <script file location>

Here the shell type is bash type . So, we used /bin/bash and then provided the script file location. This will ensure the scrip runs in the background.
Now, we can run the service and check the status
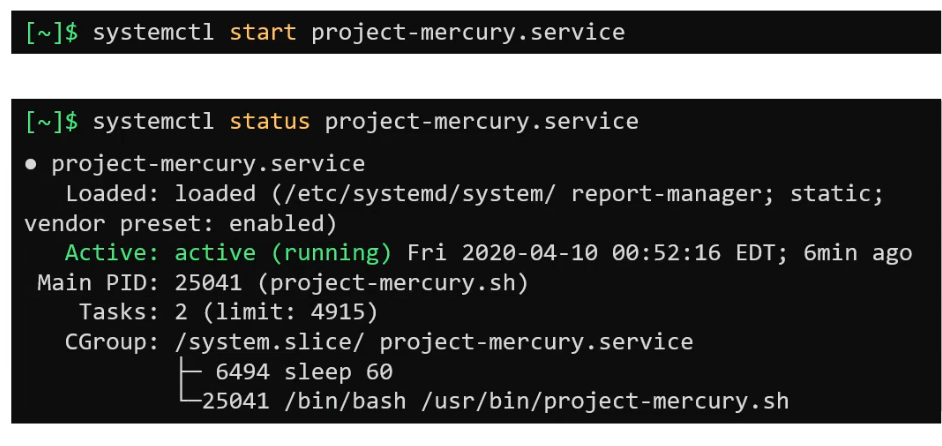
The script is running
The service runs in the background but we can’t enable it to start automatically during boot yet. So, let’s stop this service first

Now, let’s modify the service file
To allow this service to be enabled during boot, we can add [Install] section
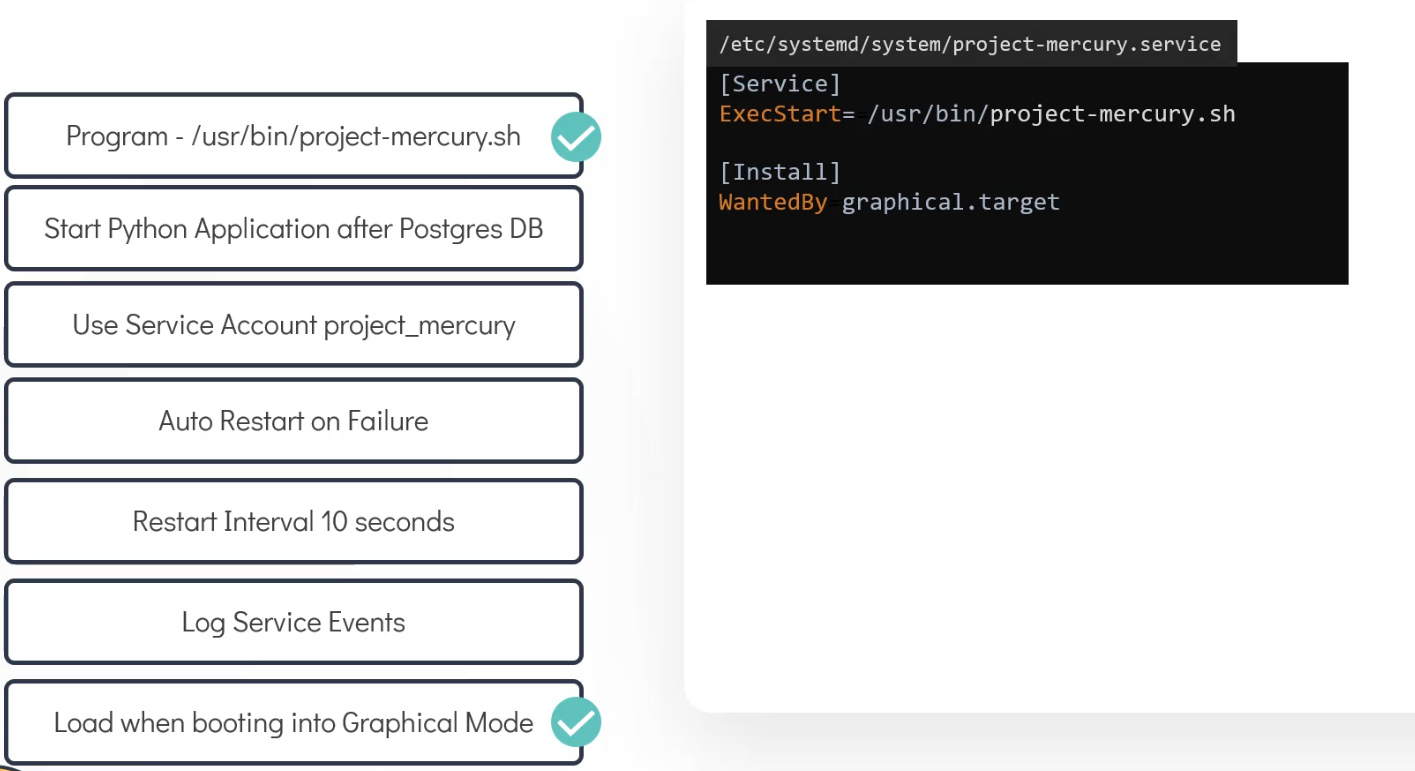
As we are running on the graphical mode, we set the value to graphical.target
Then we can add the service account name
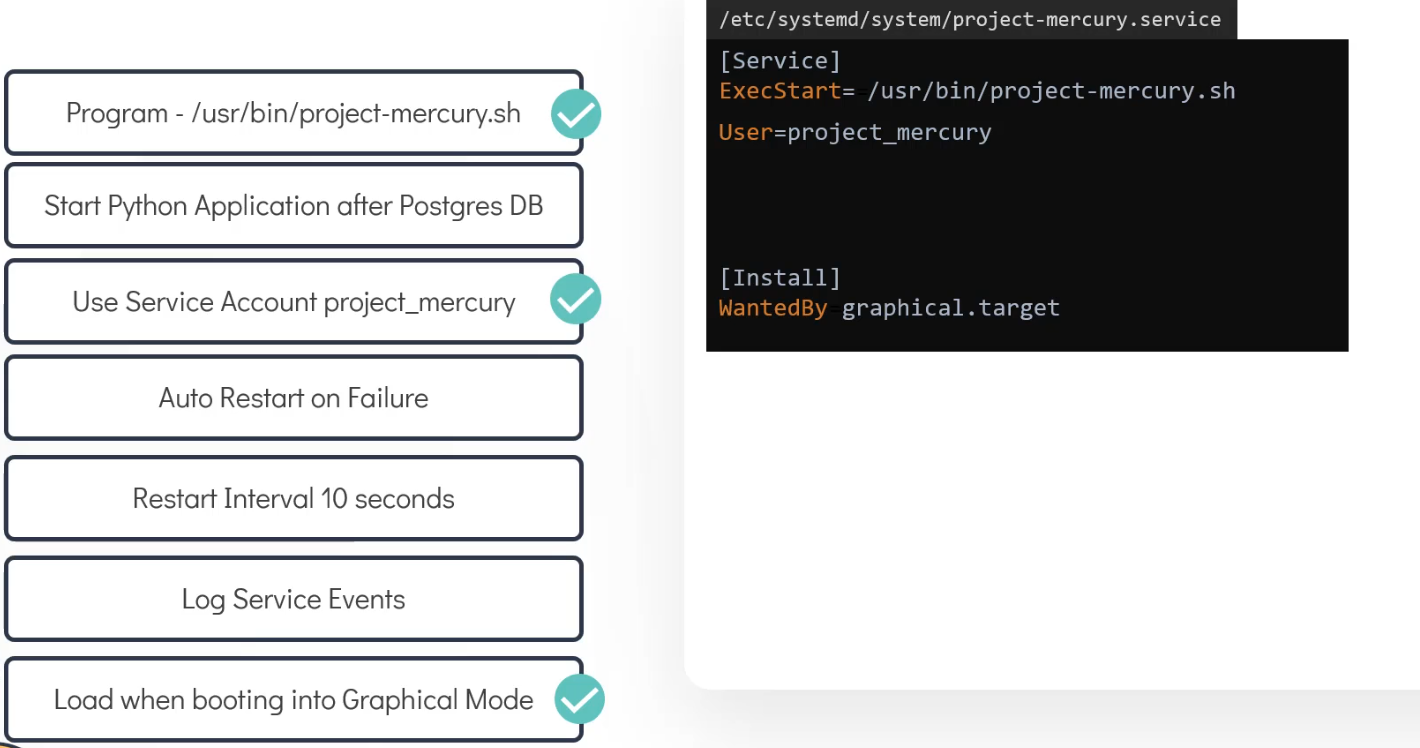
Set the auto restart on failure
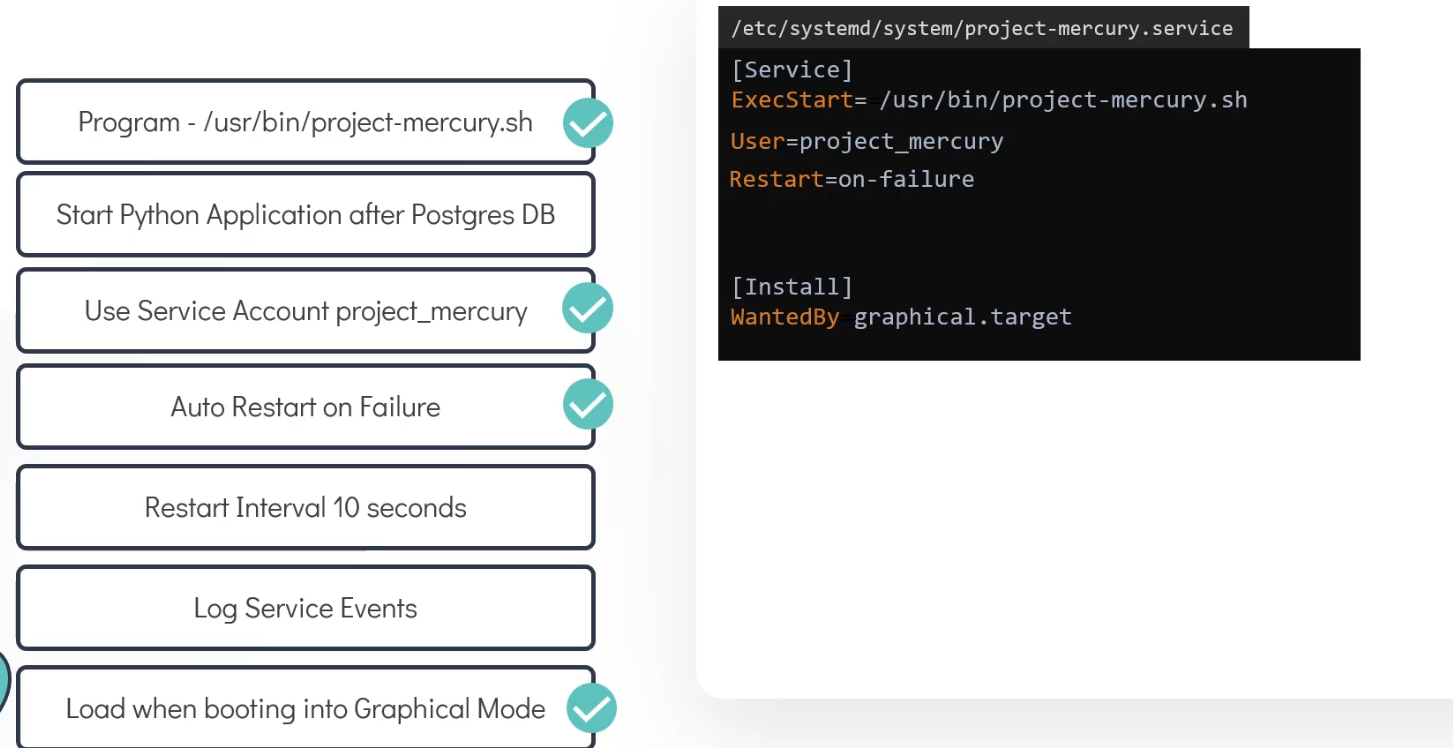
Restart on 10 seconds
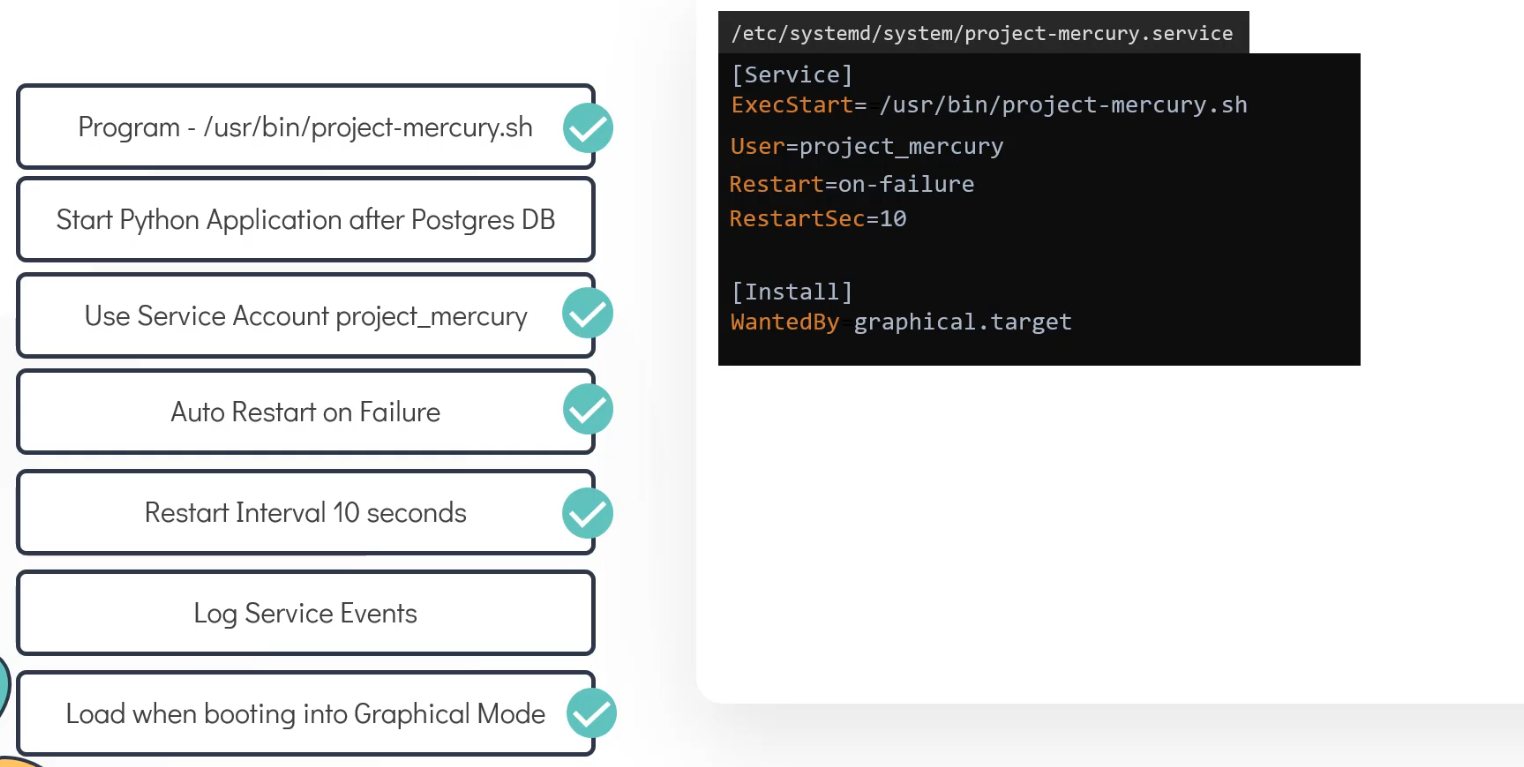
also, systemd enables us to add loggs automatically.So, no need to add codes
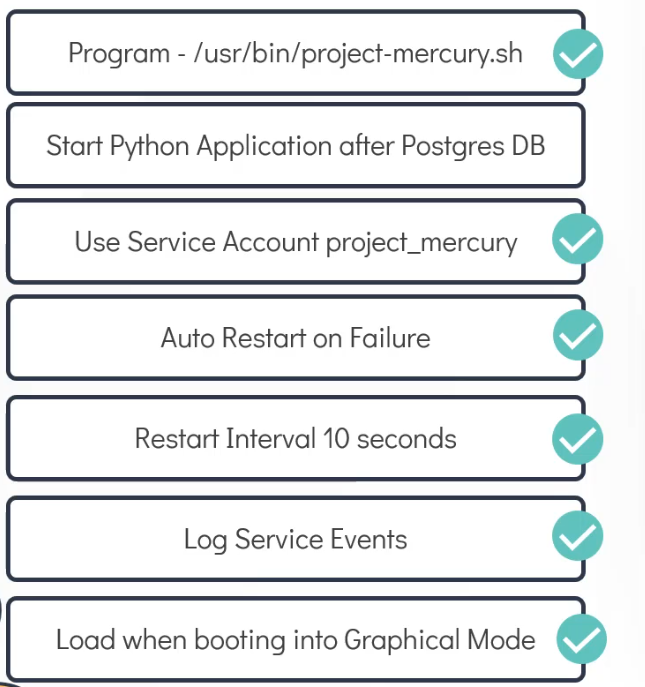
Finally, we need to ensure that postgres db runs prior to the python application
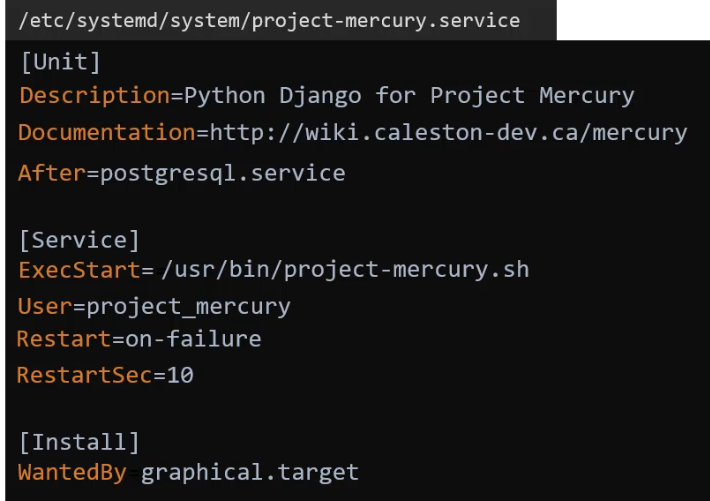
we can add this [Unit] portion. Here after ensures that the application runs after the postgresql.service. We can also add description and documentation details
To detect the changes we made in the file, run this

Now, we can start the service account
Systemctl
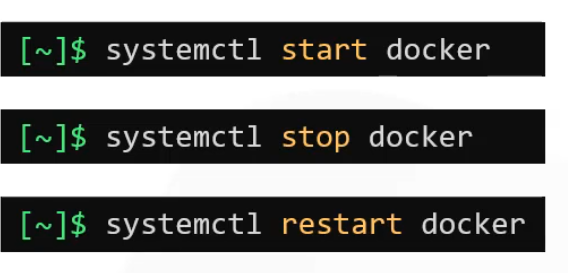
To start a service use the start command. For example, let’s start, stop and restart the docker service
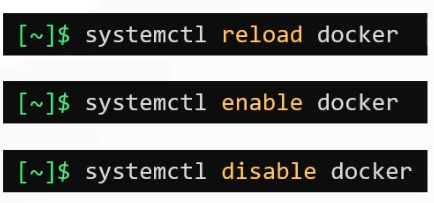
To reload, use reload command. To enable service and make it persistent across reboot , use enable command. To disable, use disable command
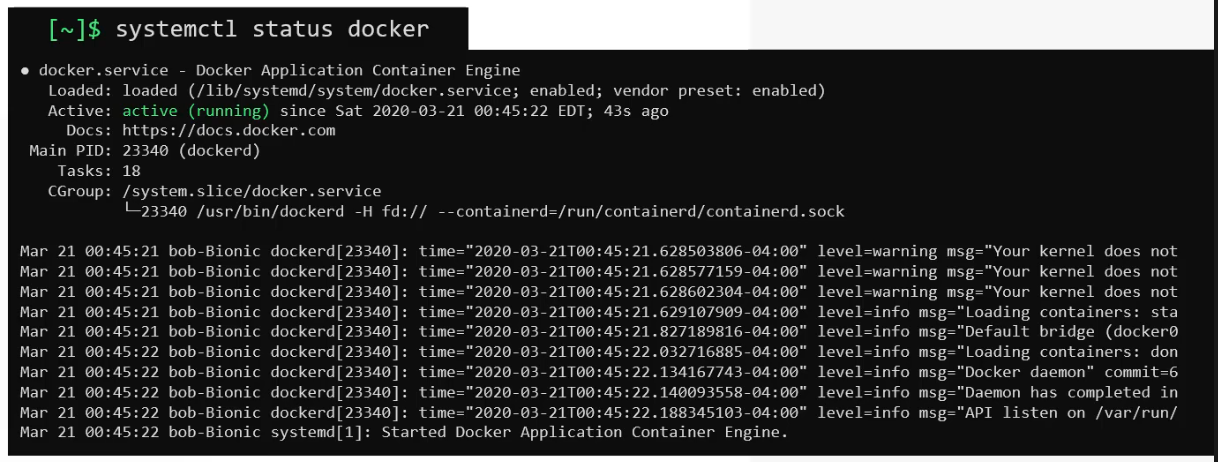
To get status check,
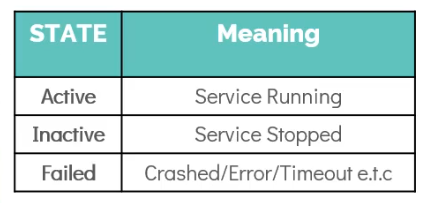
These are the states we can have during the status check
If we make any changes to our service file, specially the [Unit] section, we need to use daemon-reload so that it updates the system manager configuration and makes systemd aware of changes

To edit the service file (here, project-mercury.service), we can also use this command

Now, if we make changes to [Unit] portion, we don’t need to use daemon-reload . It will automatically update the changes.
To see default target for the system run this

To change it to a different target, use this

To know a lot of information about the system, use this

Here you an see units that are active , inactive , dead etc.
JournalCTL
It helps in troubleshooting issues with systemd units as it checks the journal/log entries from all parts of the sytem.

To check logs from current boot use this

To see logs for a specific service , use this
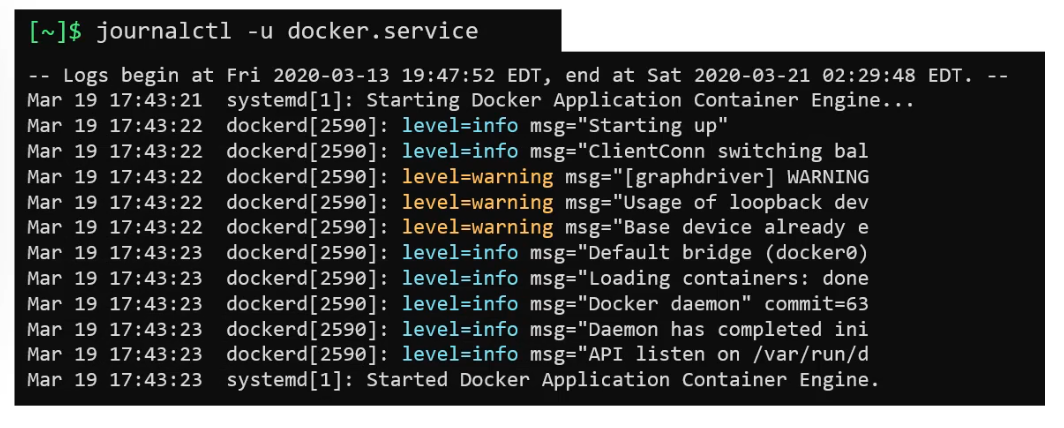
Here we checked logs for docker.service
Storage
Block device is a type of file that can be found under /dev/ directory.
It usually represents a piece of hardware that can store data. To see the list of block devices, write lsblk

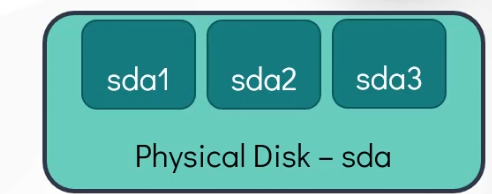
Here we have 119 GB and divided into 3 parts (sd1, sd2 ,sd3)
We can also see they have Major and Minor number. This is what Major (MAJ) means
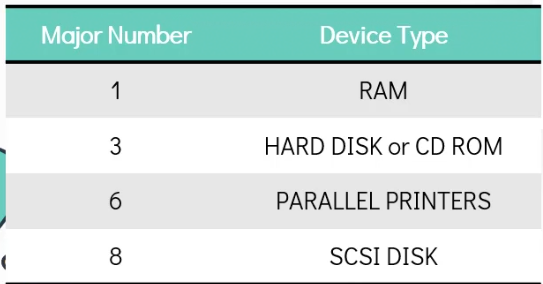
The value 8 represents a SCSI device which has a fixed naming convention that starts with SD. This is the reason why the disk in the partition names start with SD.
The minor numbers are used to distinguish individual, physical or logical devices which in this case identify the whole disk and the partitions created.
The entire device (sda) can be divided into partitions (sd1,sd2,sd3)
Here we can see sda3 is used for root

sda2 has a storage of 72.5G which is used to store the backup in the system.

sda1 has 100 Megabyte and mounted on /boot/efi which is used during system boot loaders for the installed OS.

To see all of the partitions, use fdisk -l and then drive location.Note you can also create partition using fdisk command as well.
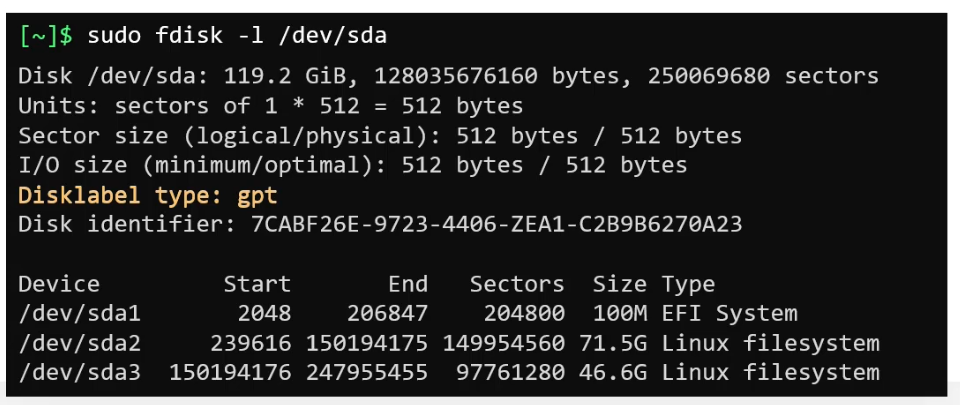
Partition type
In a physical disk, we can have limited number of primary partitions . Here we have 4 primary partitions according to MBR (Master Boot Record) scheme
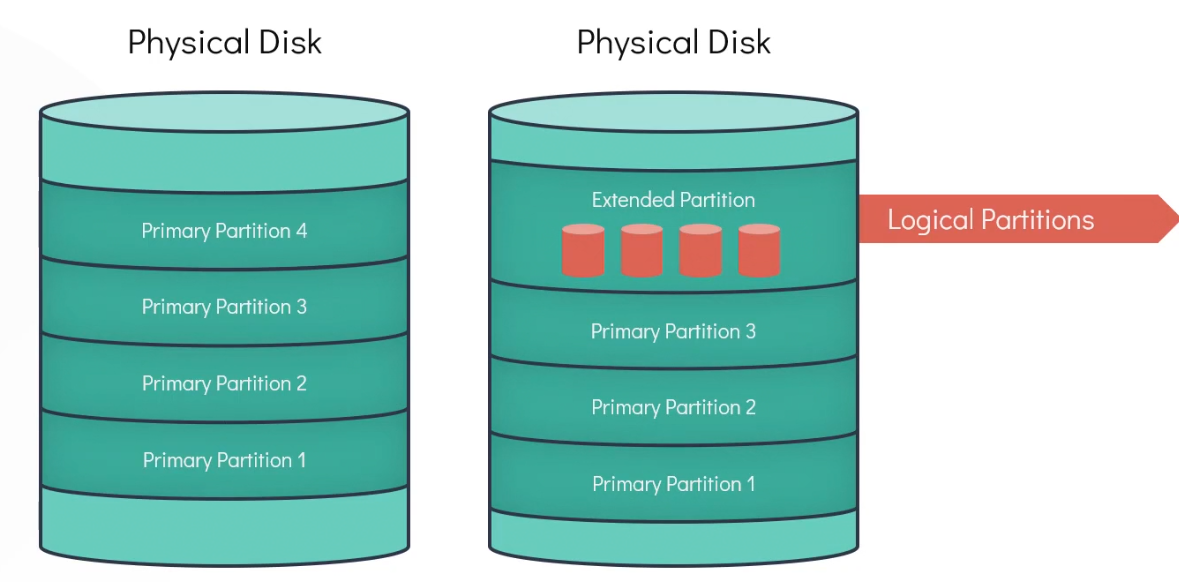
What we can do is, we can use the 4th one as extended partition and then use logical partition inside.
As MBR limits number of Primary partition,we can use newer scheme called GPT (GUID Partition Table)
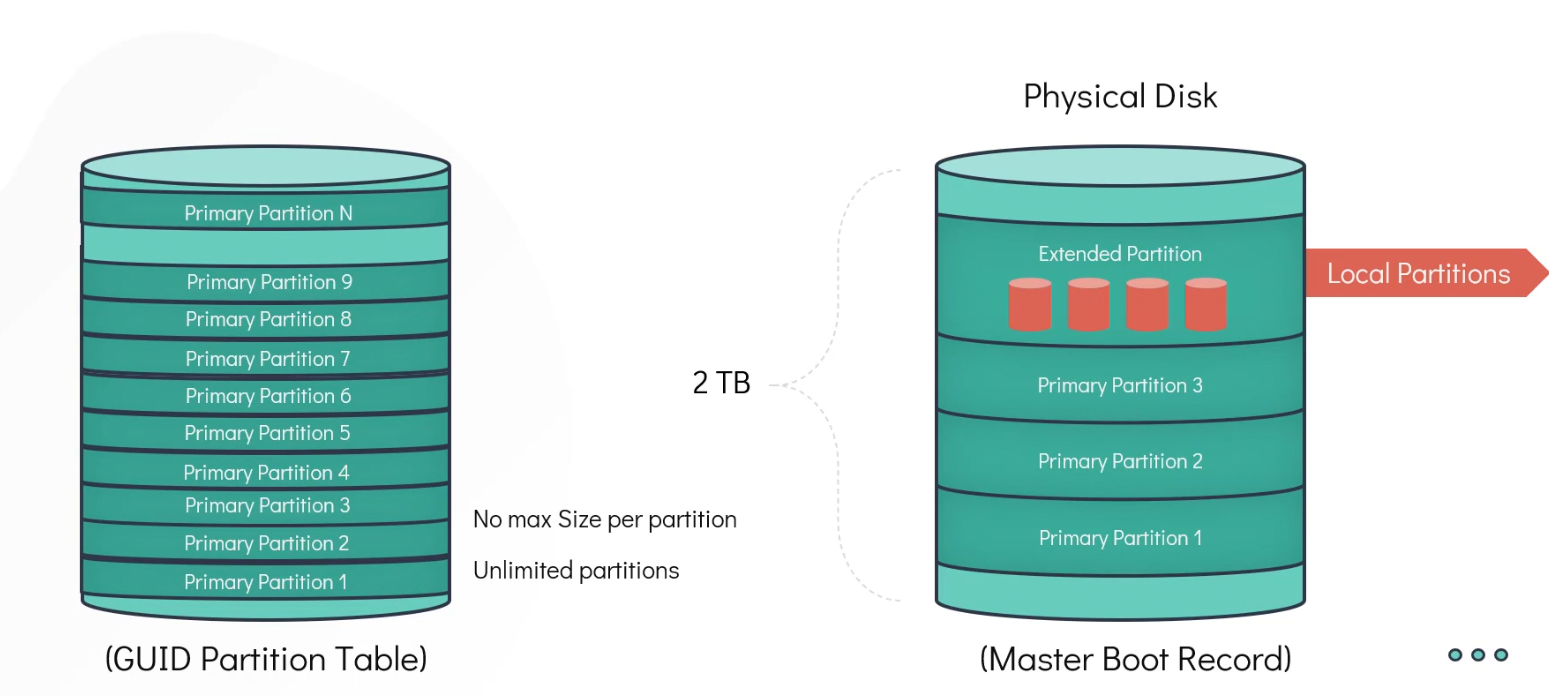
How to create a partition?
Assume that you have 2 drives (sda, sdb)

sda already has 3 paritions (sda1,sda2,sda3)
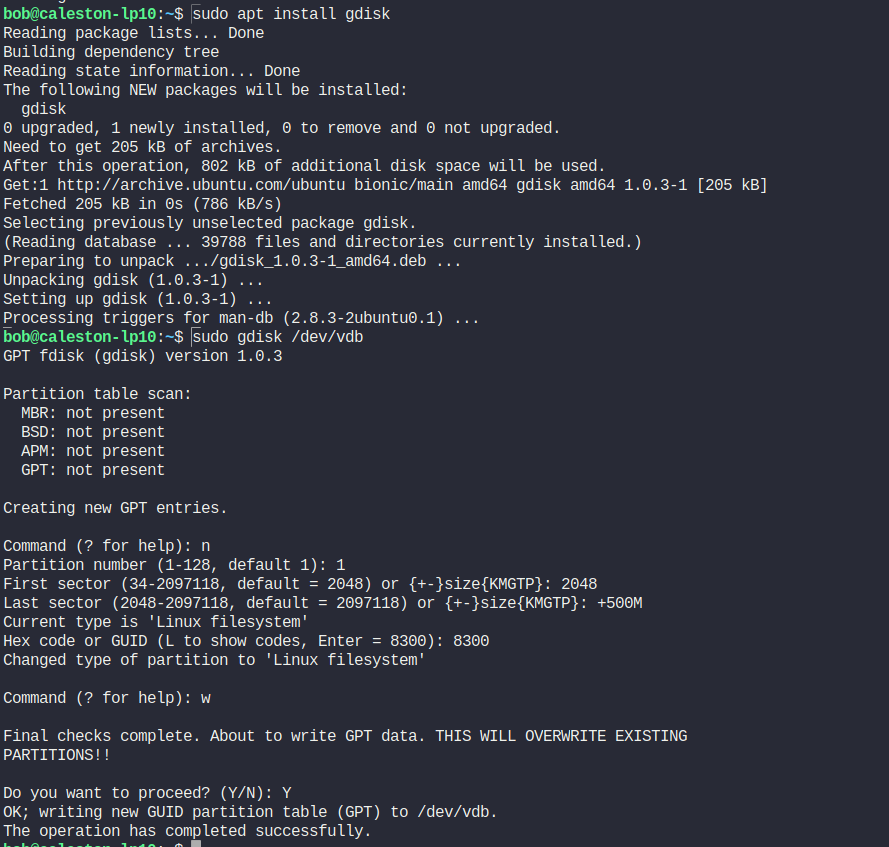
We can create our partition on sdb now. We will use gdisk instead of fdisk to use GPT scheme
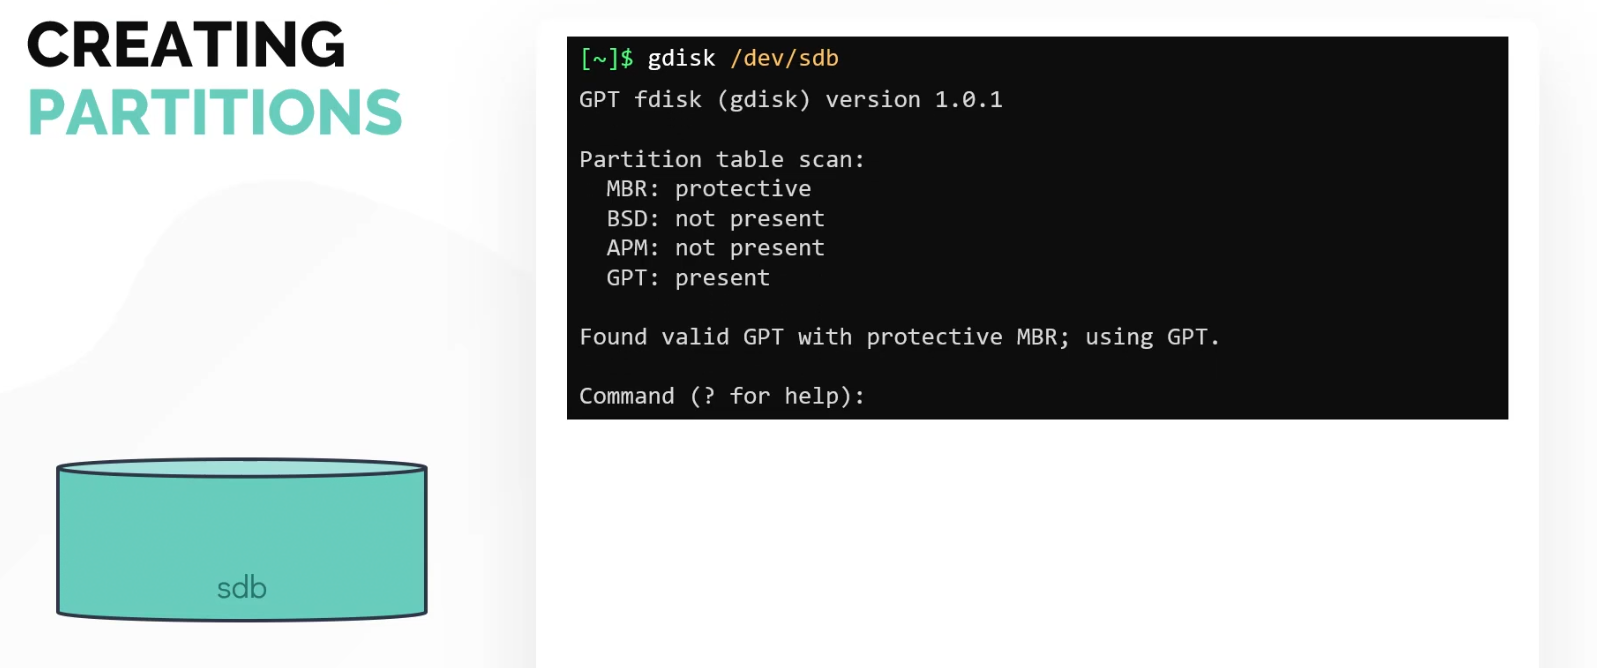
then press “?” for help
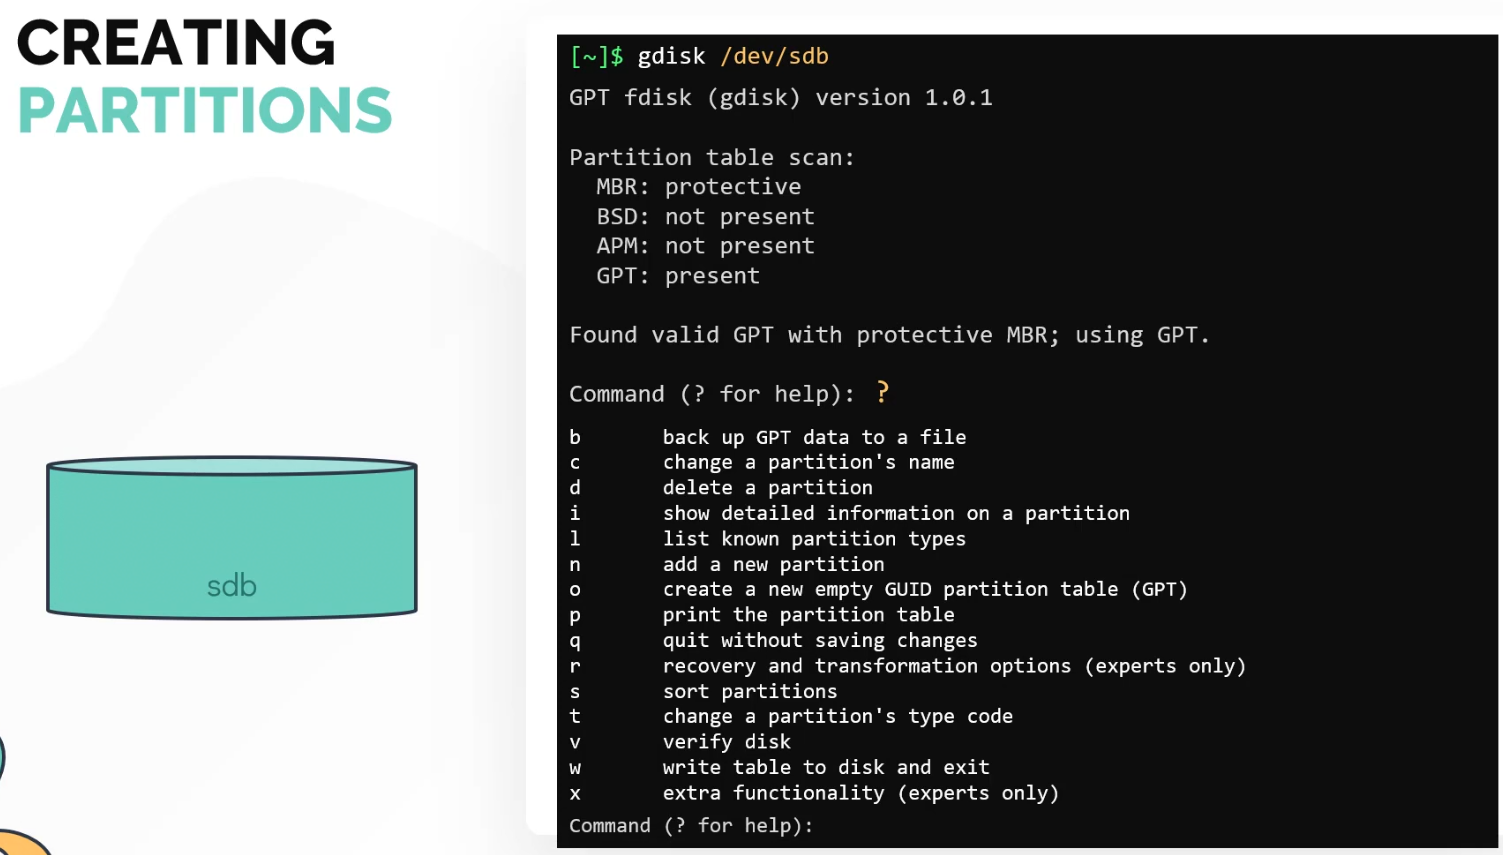
as we want a new partition, use “n”
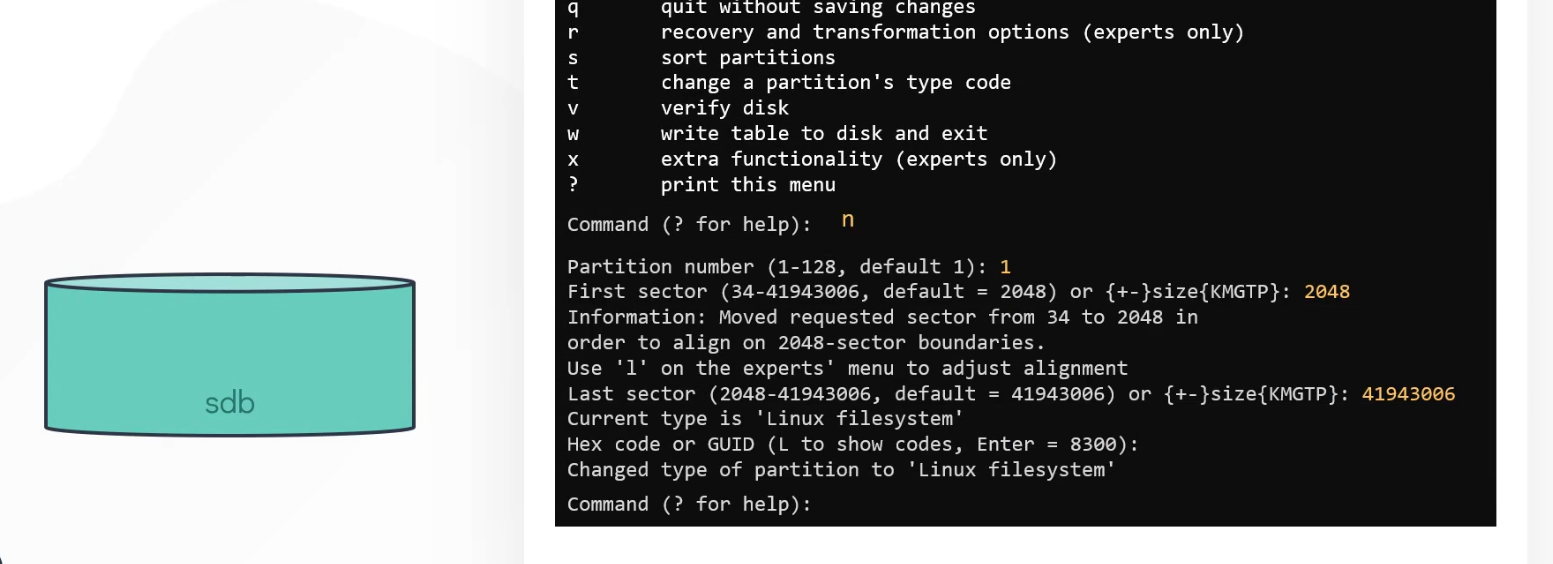
Then mention the partition number, partition size (2048= 20 GB), hex code for the partition type (give the default value 41943…..)
Then “w” command to write down the partition table
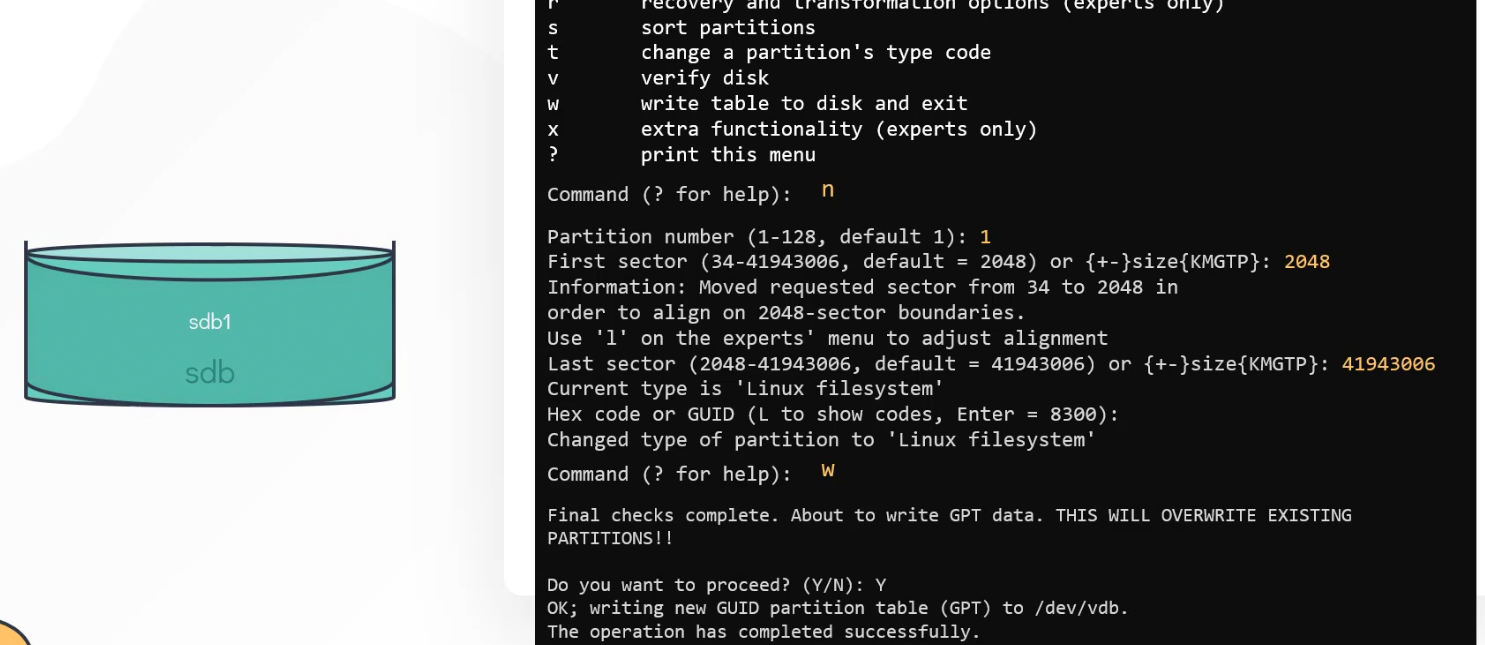
You can verify the partition with fdisk now

Task

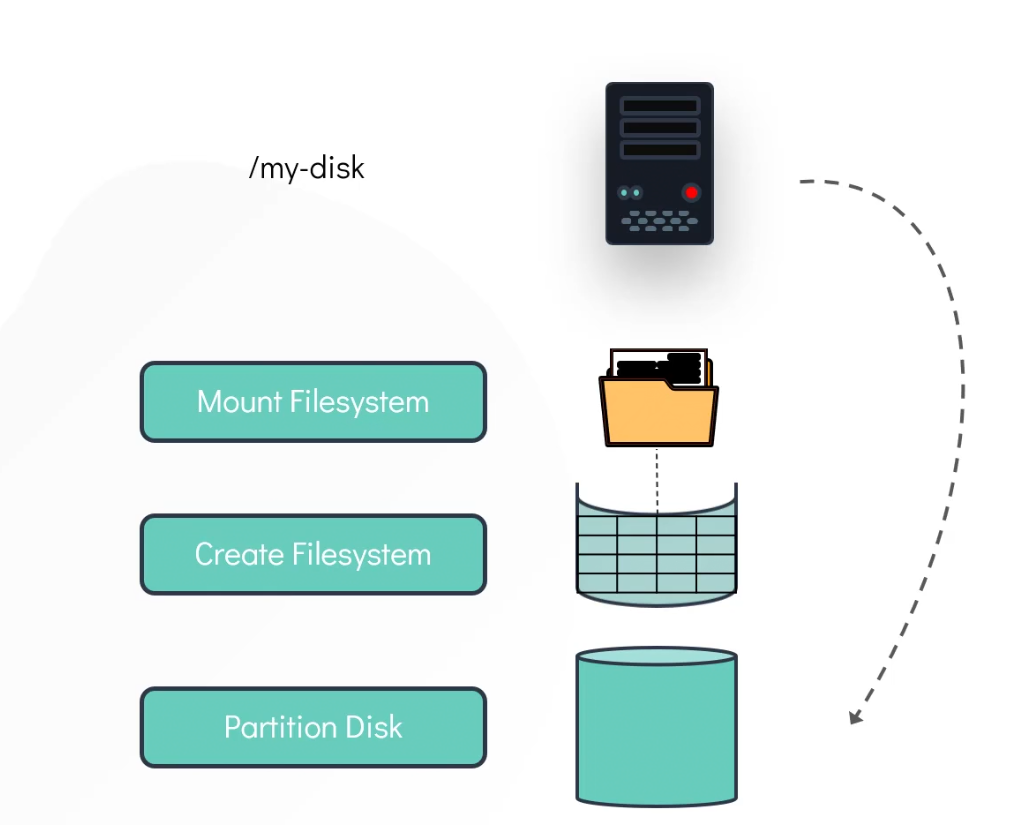
So, how do we work on a partition?
Within a partition disk, we create a filesystem and mount it, we then need to appoint a directory to it
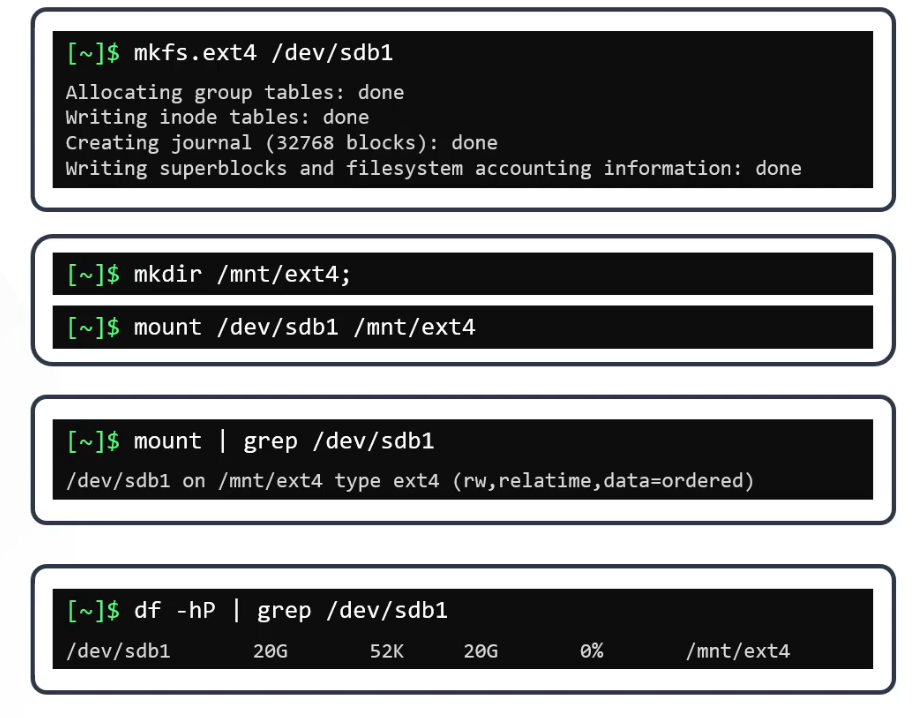
Let’s compare extended file system files

Let’s use the EXT4 filesystem to one of our partitions (/dev/sdb1) and then we can mount the filesystem.
to make this mount available after reboot, use this
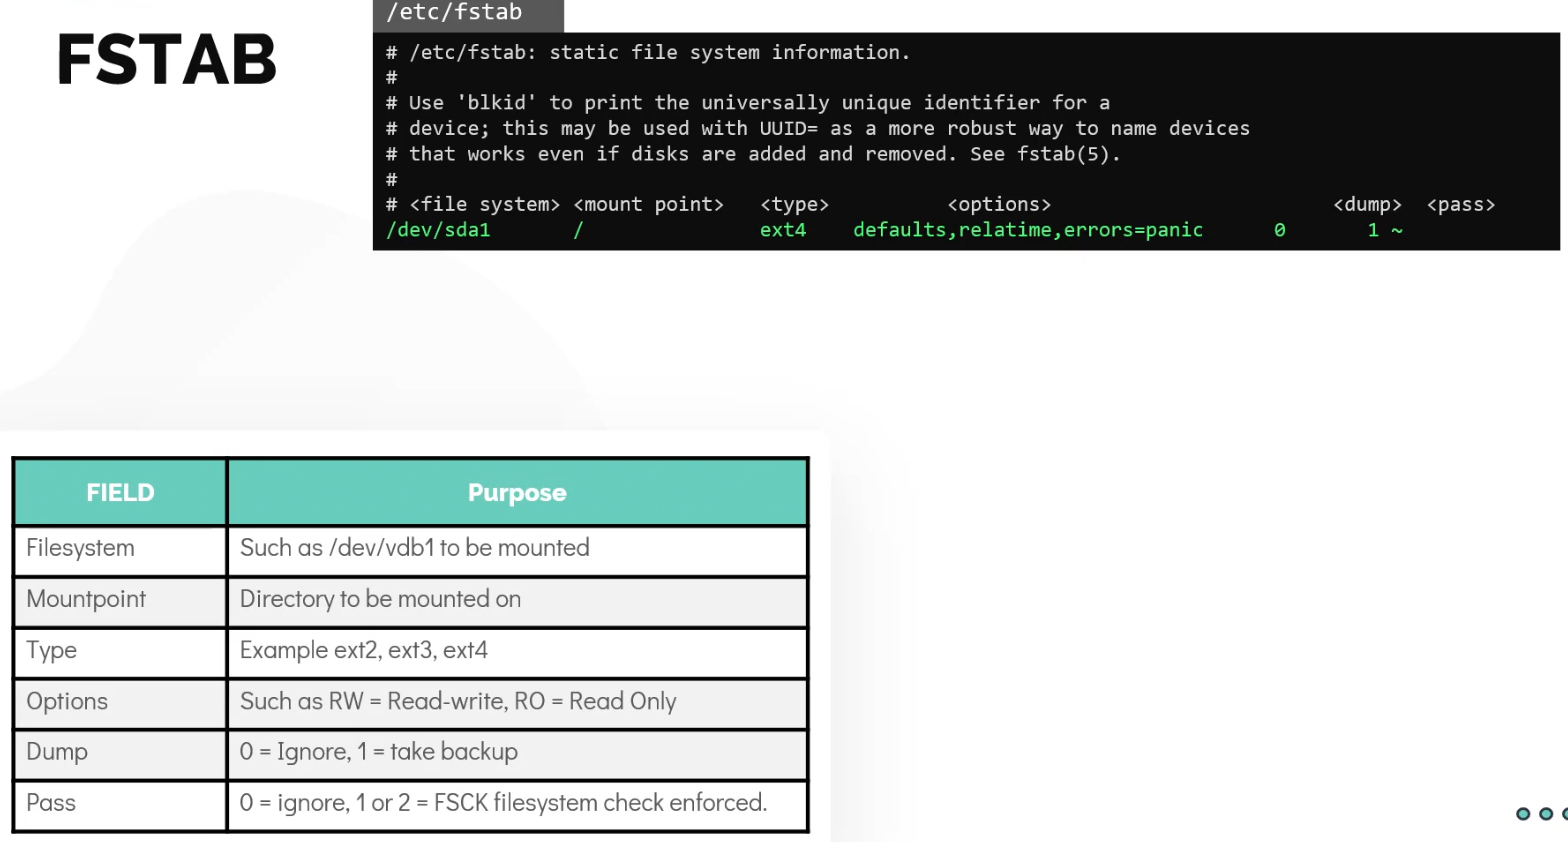
then echo “<partition> <mounted file system> <file system type> <access to file> <dump number= backup the filesystem using dump utility> <priority to check filesystem check>”
Then we pass this to /etc/fstab file to make it accessable after the reboot

External storage
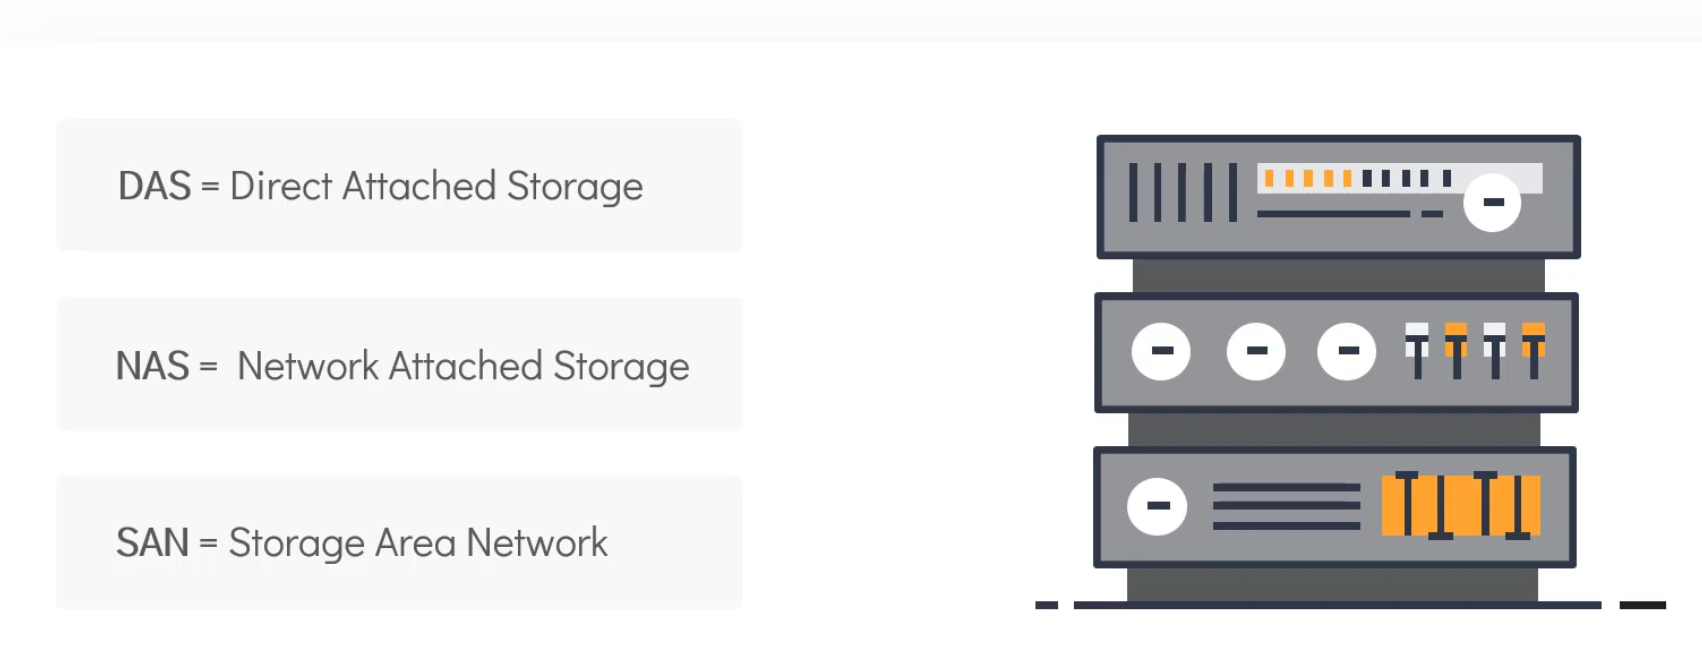
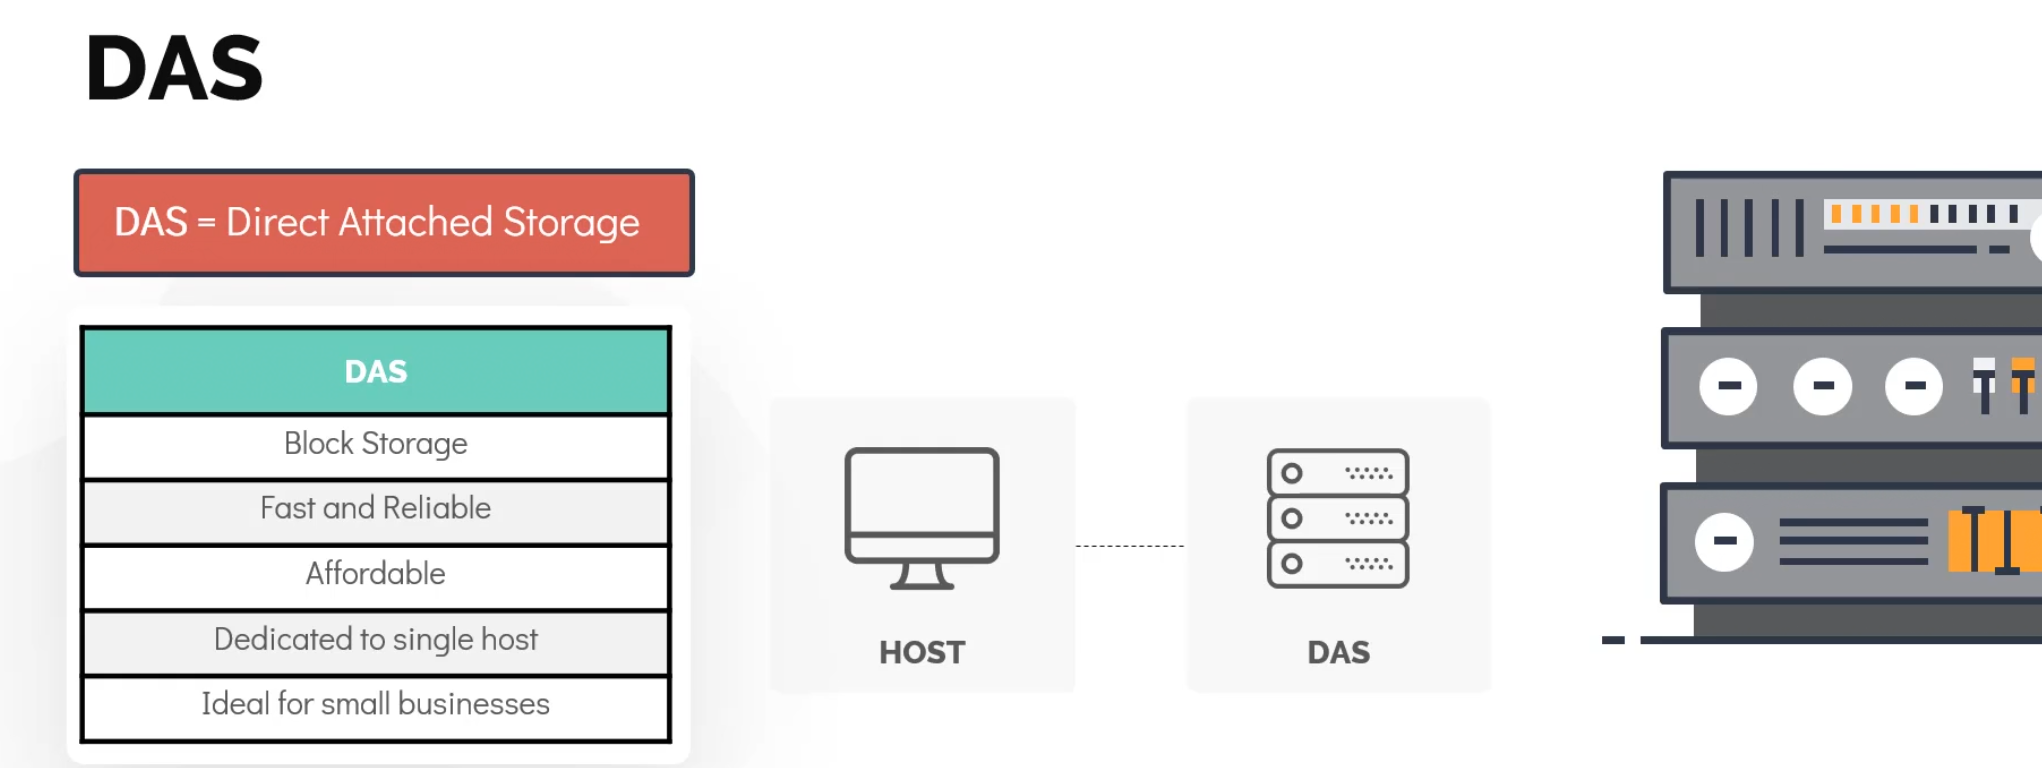
DAS
SUitable for small business and directly connected without firewall.
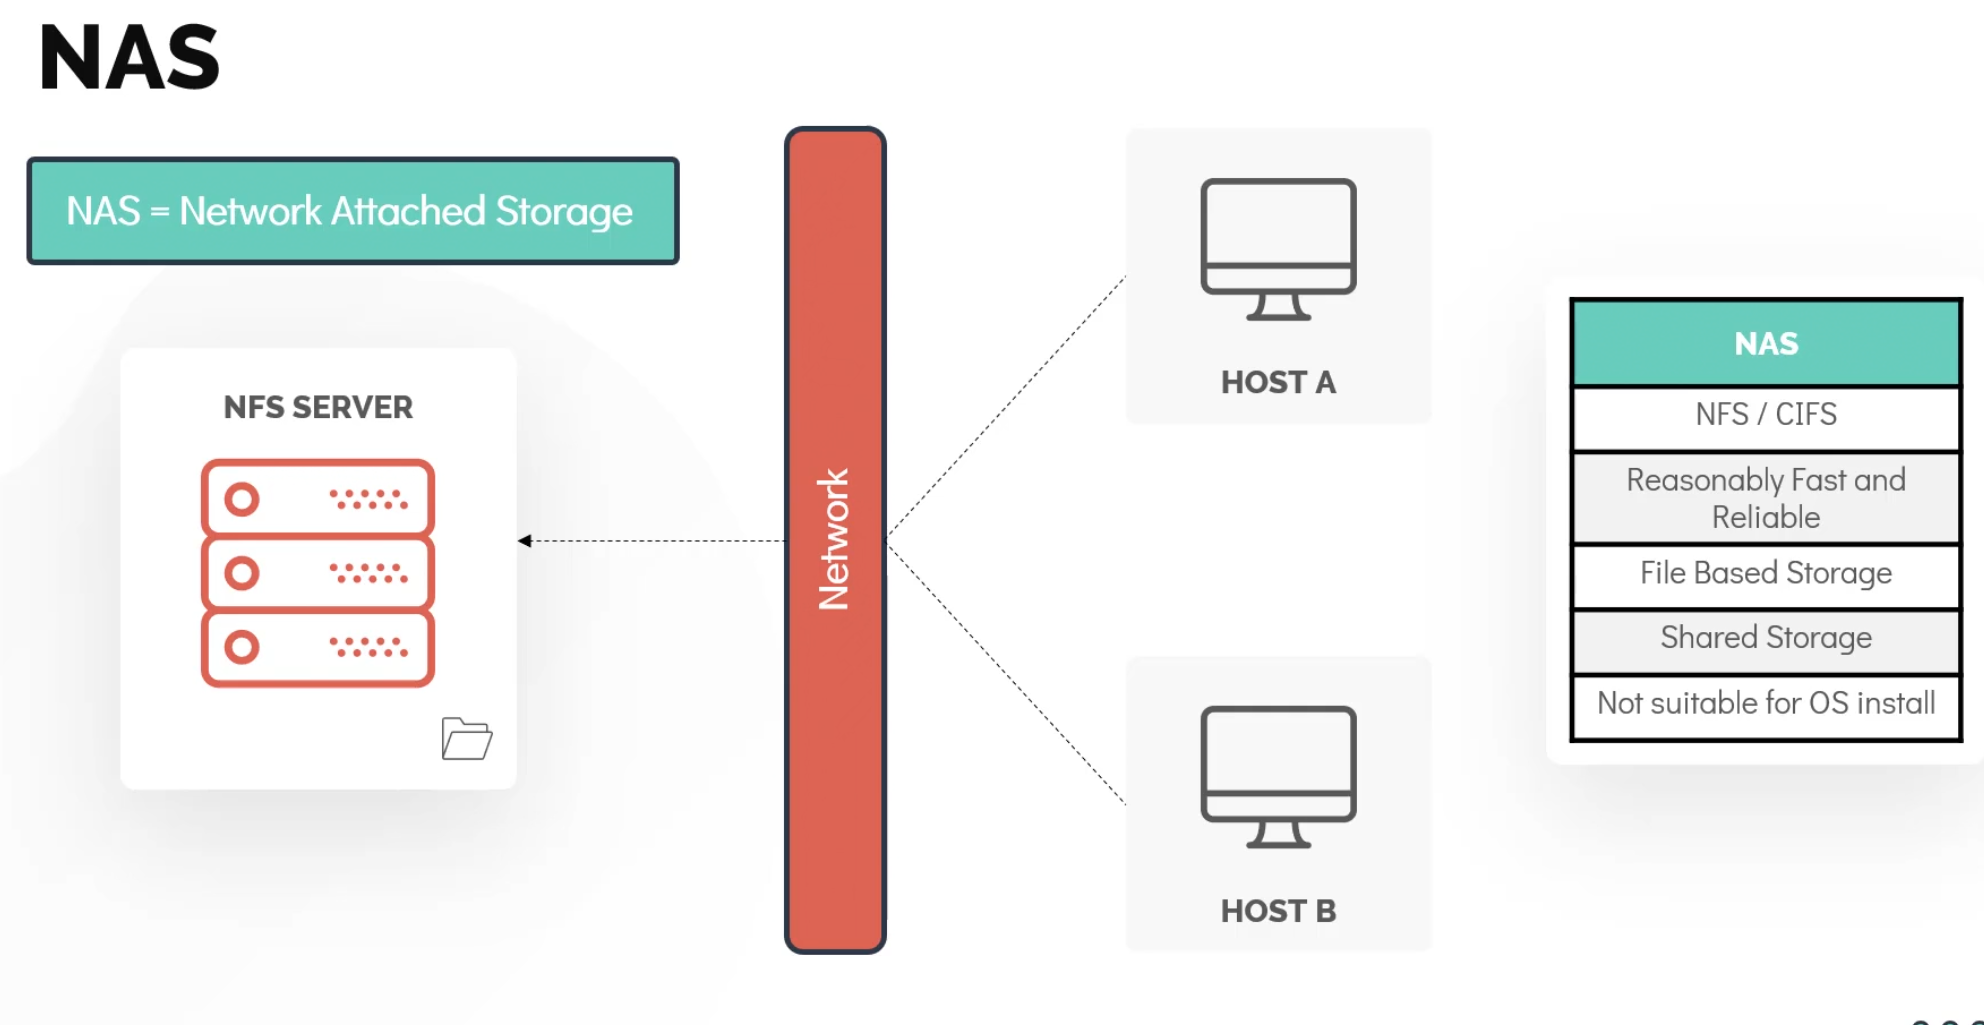
NAS
Ideal for centralized shared storage.
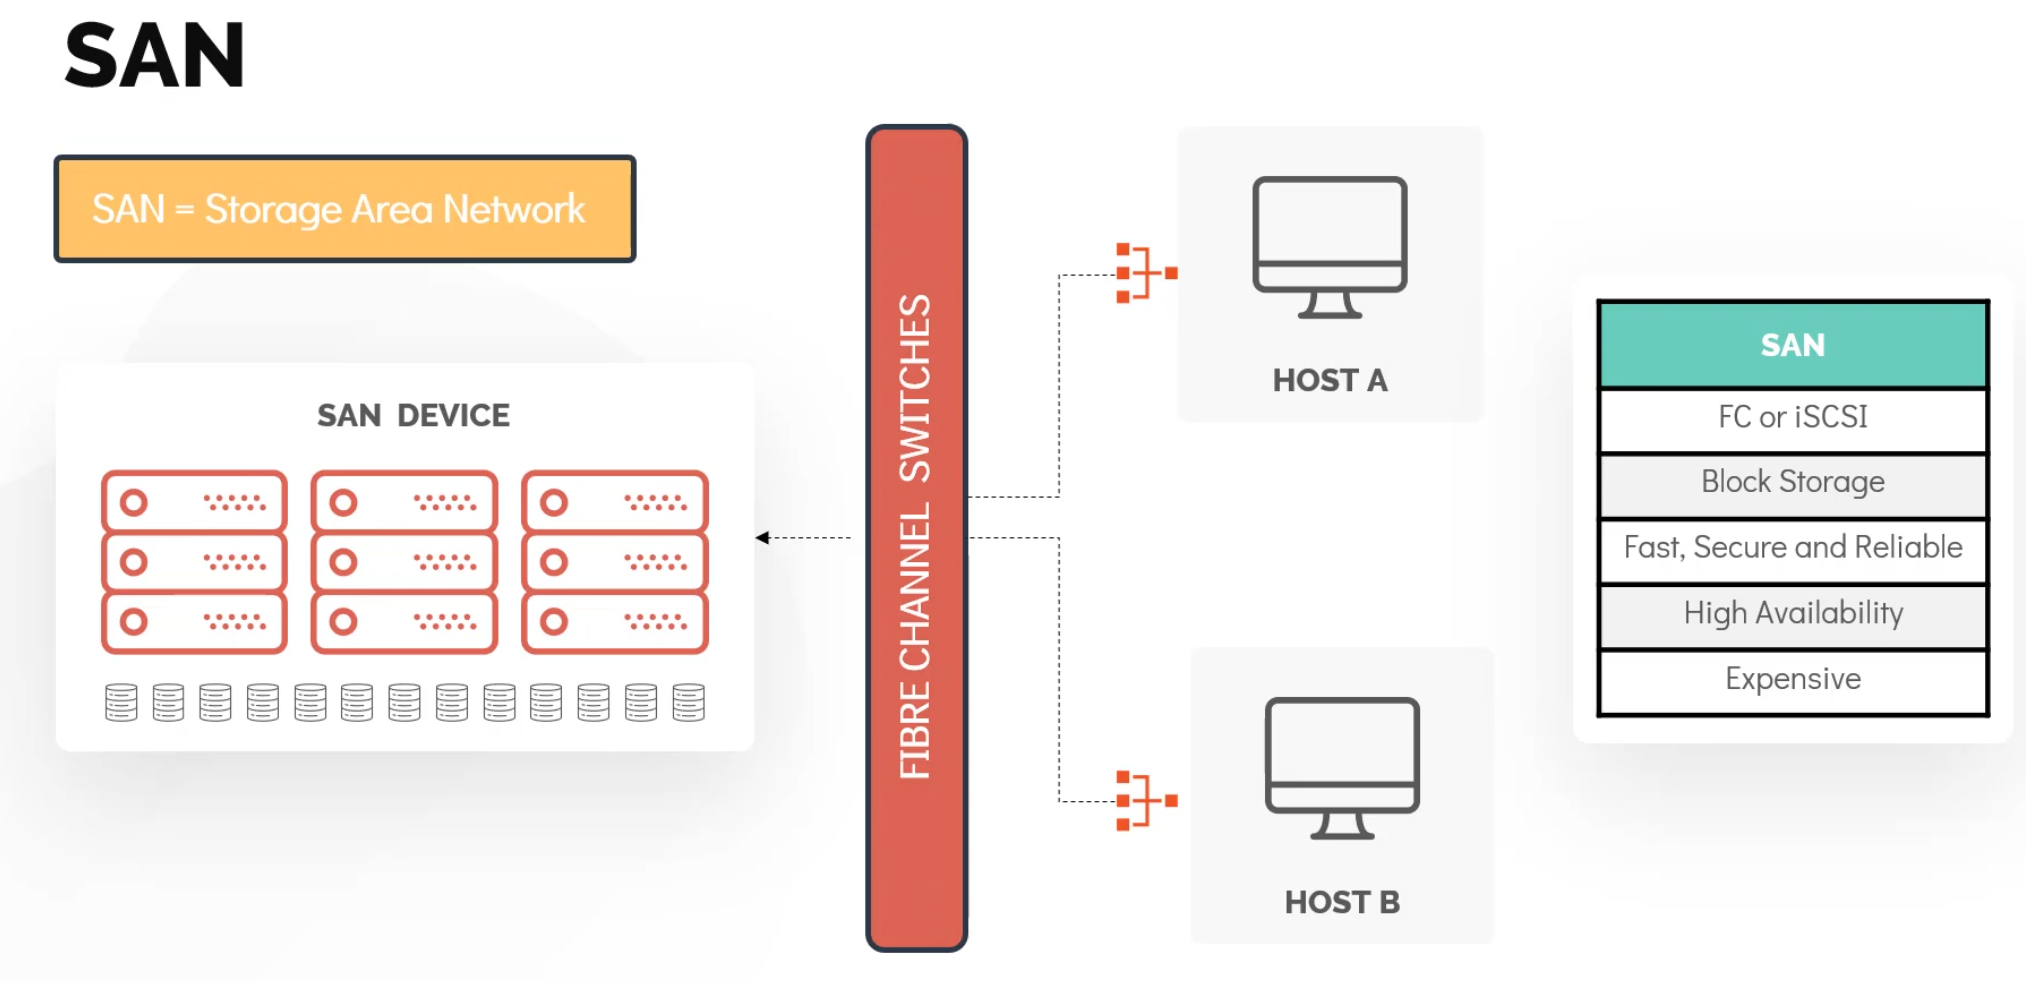
SAN
It basically makes use of a fiber channel switch to establish communication with the host.It can be hosted for mission critical applications and databases due to its vastly superior performance and reliability.
NFS
NFS works on a server client model.
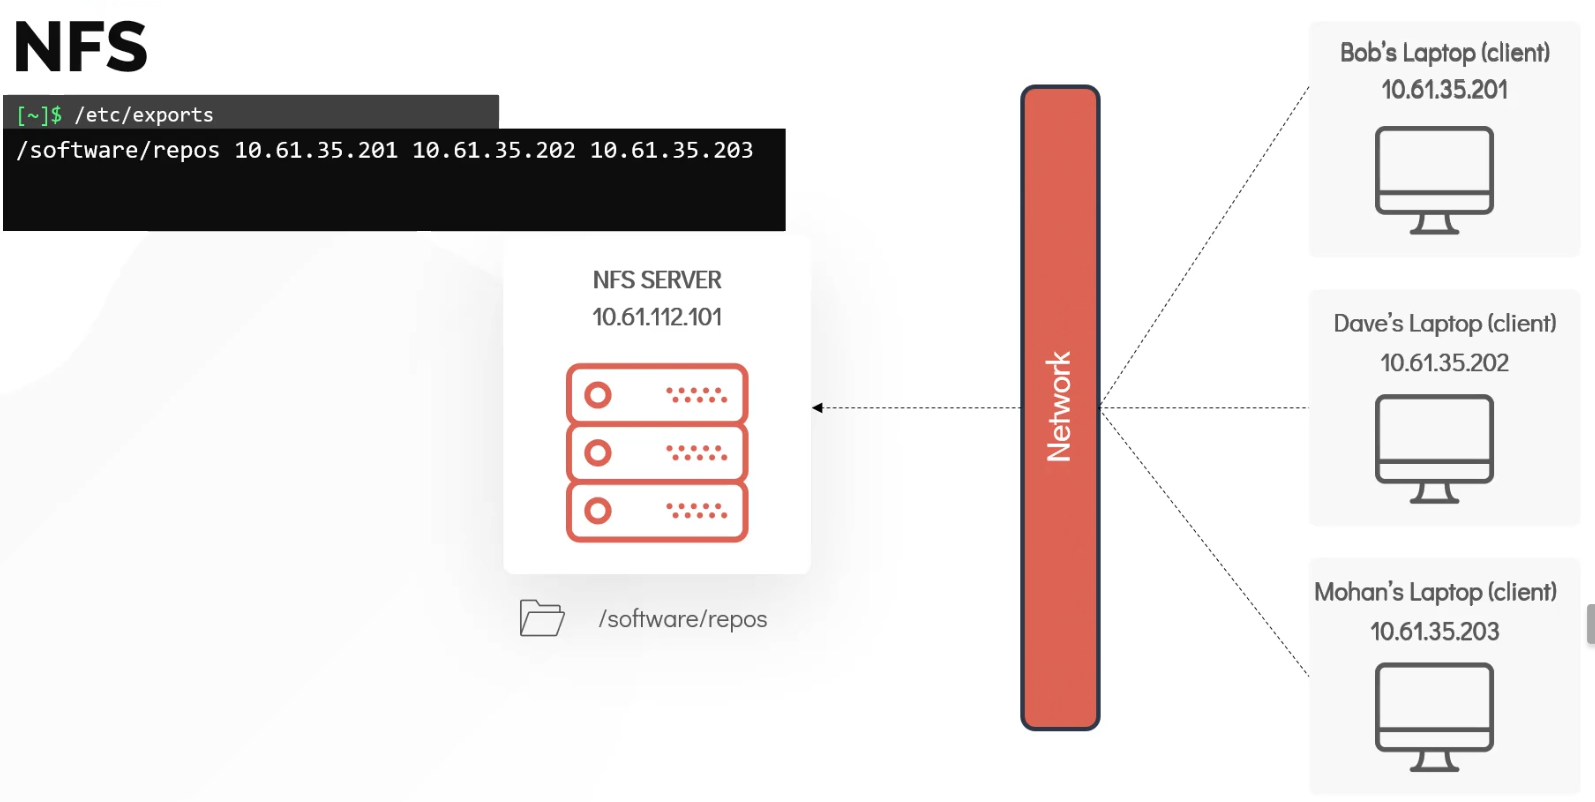
using /etc/exports we can add the client’s IP
then we can export all of the mounts using exportfs -a or manually add using exportfs -o
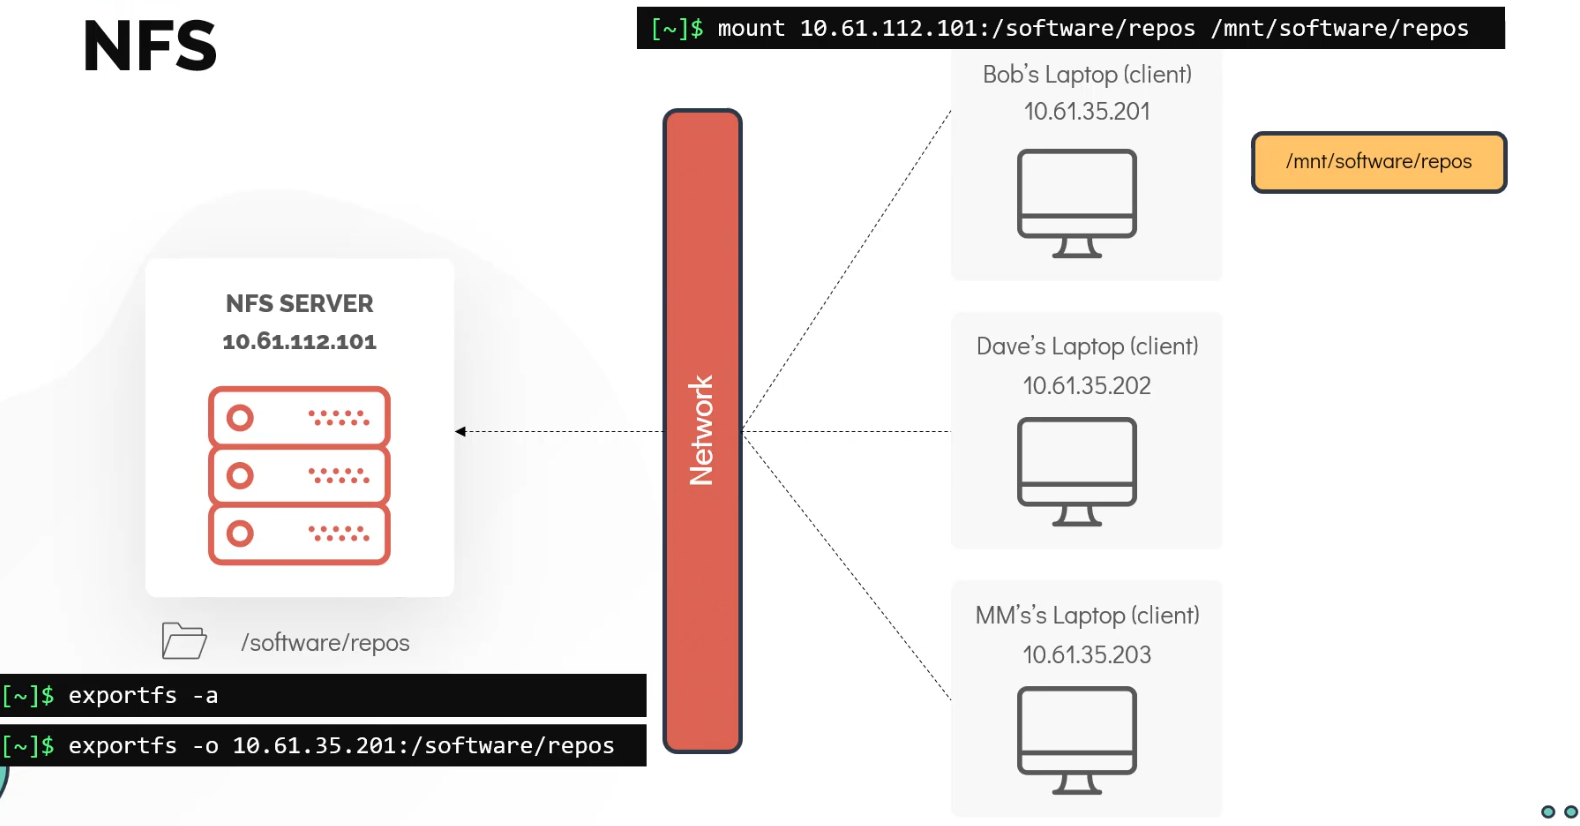
Now, we can mount it on a local directory such as /mnt/software/repos using the mount command on the client side.
LVM
LVM allows us grouping multiple physical volumes, which are hard disk/partition into a volume group.
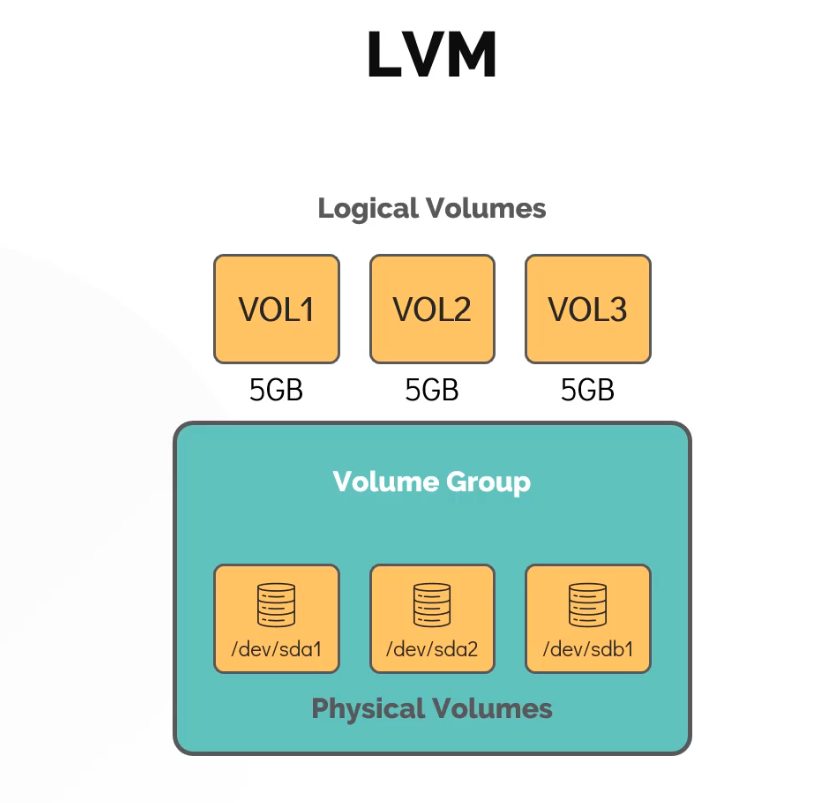
From this volume group, you can crave out logical volumes.
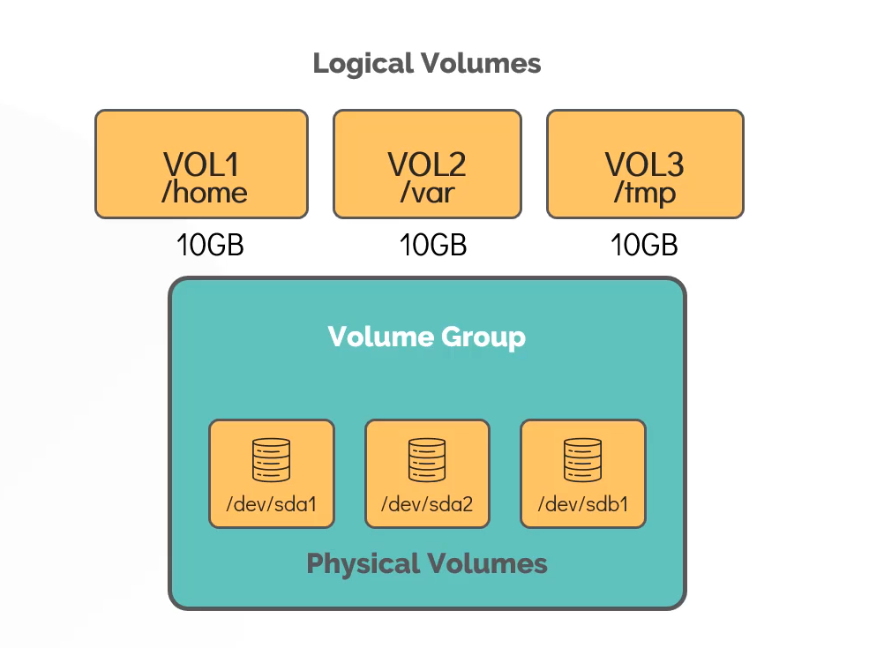
You can have the filesystem such as /home/var/tmp created on top of LVM managed volumes.

Subscribe to my newsletter
Read articles from Md Shahriyar Al Mustakim Mitul directly inside your inbox. Subscribe to the newsletter, and don't miss out.
Written by
