Week 16: Azure Data Factory Fundamentals 🏗
 Mehul Kansal
Hey data engineers! 👋
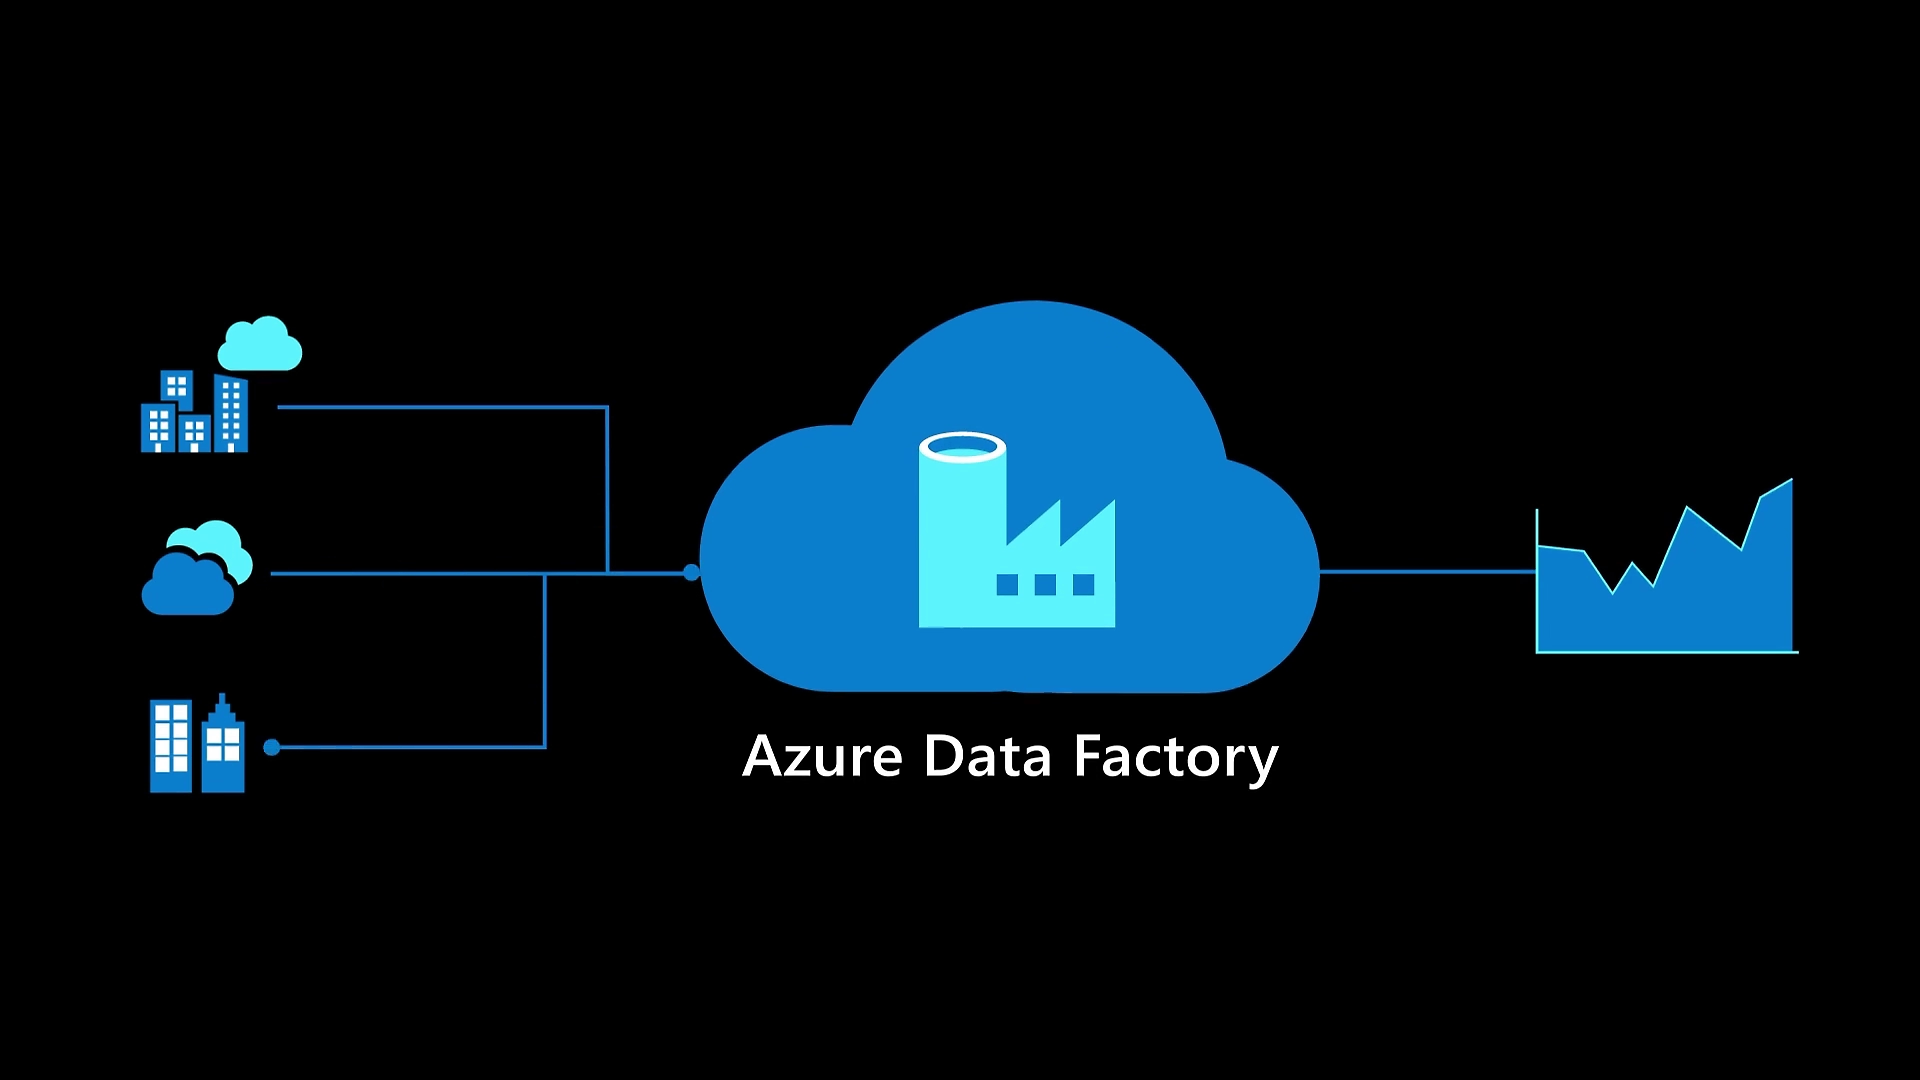
Azure Data Factory plays a key role in automating data workflows, allowing organizations to transfer, transform, and orchestrate large amounts of data with minimal operational overhead. In this blog, we’ll explore ADF's core features through practical use cases, including data ingestion from a relational database and an external URL, along with implementing basic data transformations. Let’s get started!
Use-case 1
- Consider a requirement to ingest the data from source (RDBMS table) and then transfer and load the data to sink (ADLS GEN2).
Creation of source system
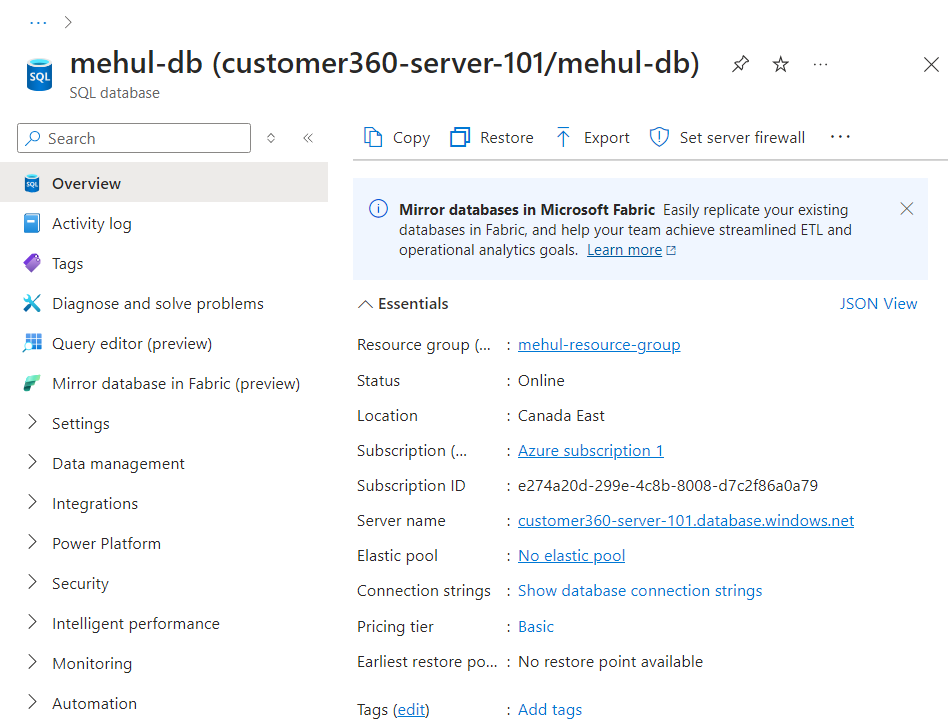
- We create an Azure SQL Database (SQL Server), named as ‘mehul-db‘, which will act as the source for our scenario.
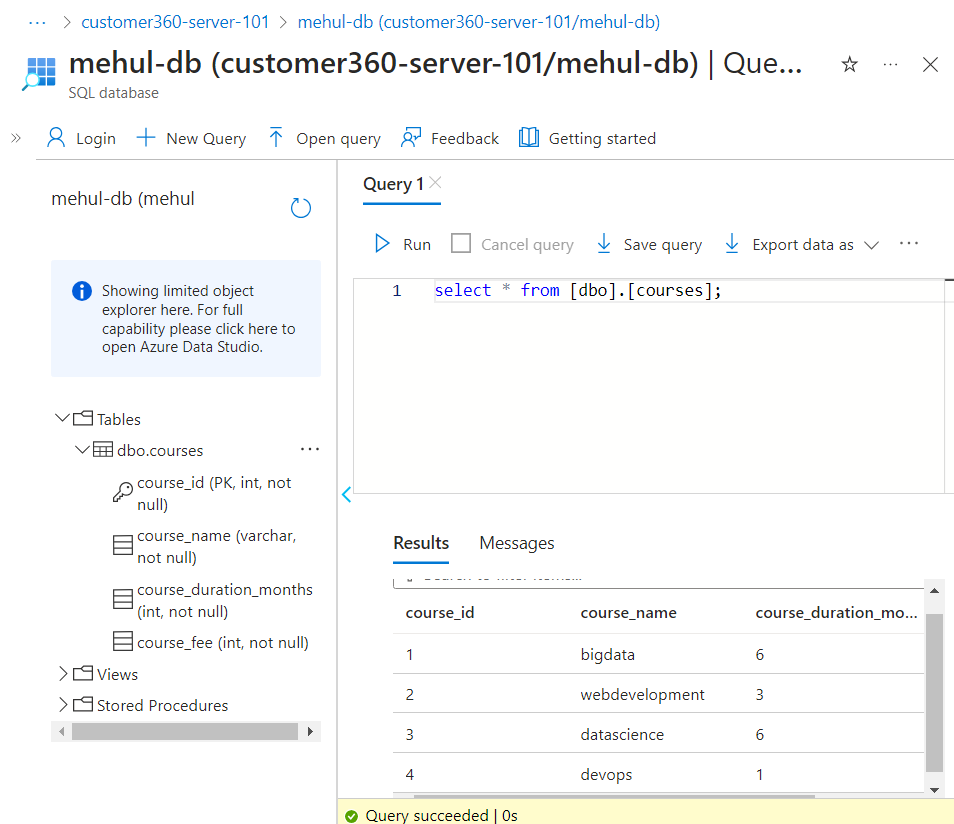
- We login to the SQL terminal of our database inside Azure and create the following table structure.
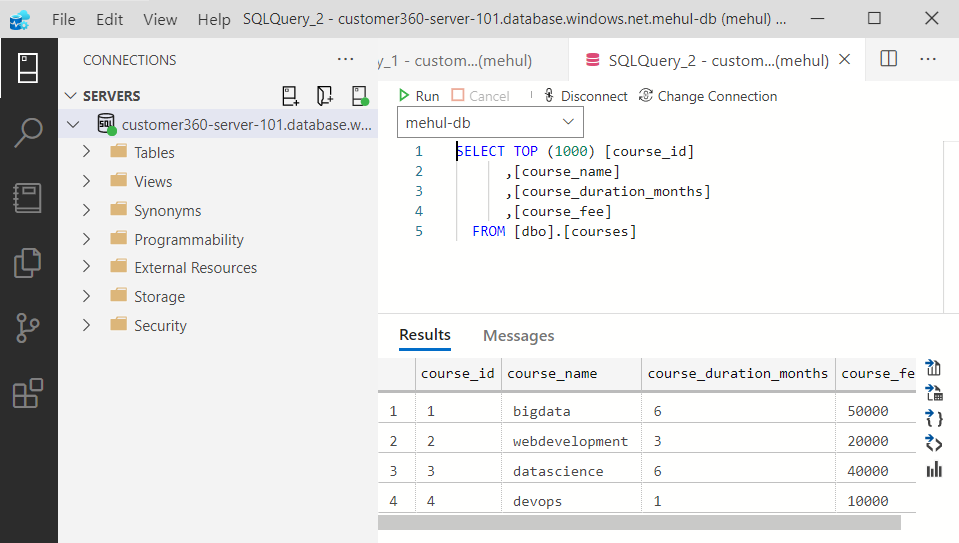
- Alternatively, we can connect to our database through Azure Data Studio as well.
Creation of sink system
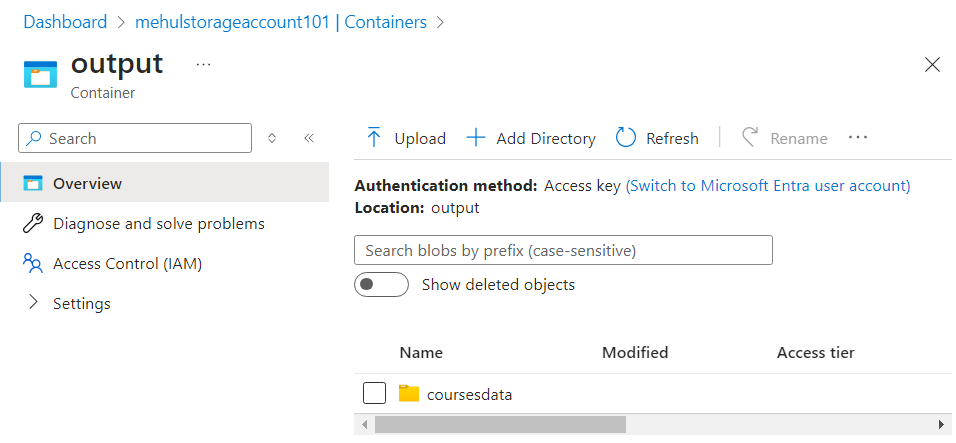
We create a storage account and a container inside it, namely ‘output’, inside which the ‘coursesdata‘ directory will contain the output data.
Note that this is a data lake storage and not just the blob storage.
Ingesting data from source and loading to sink
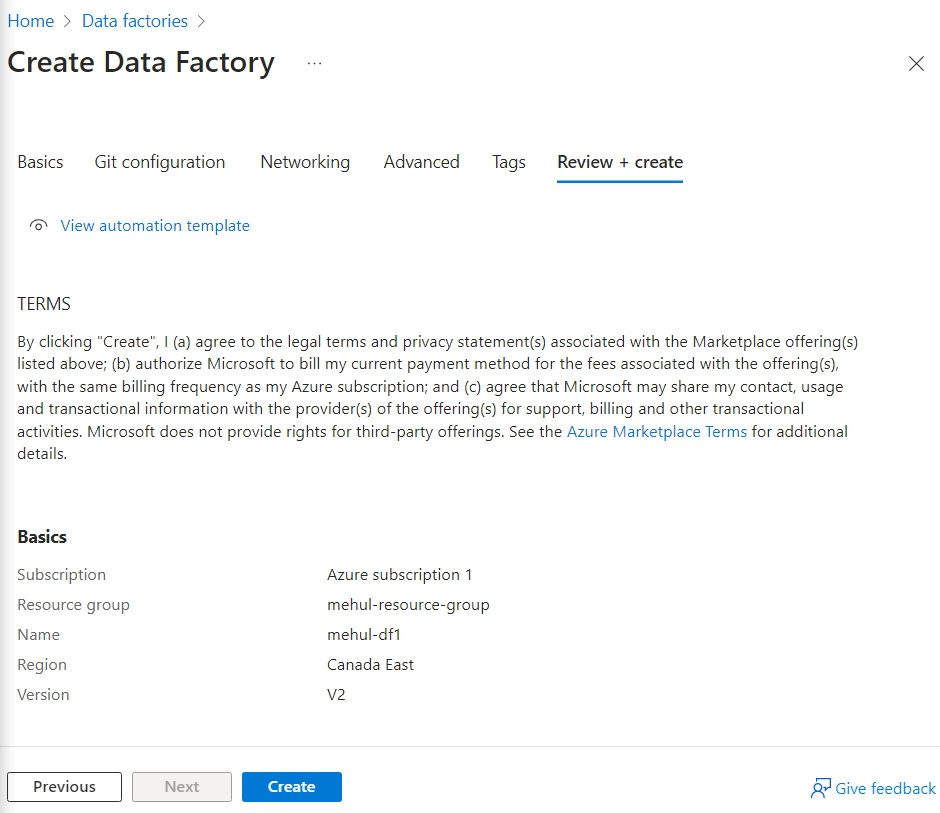
- We create an Azure Data factory resource.
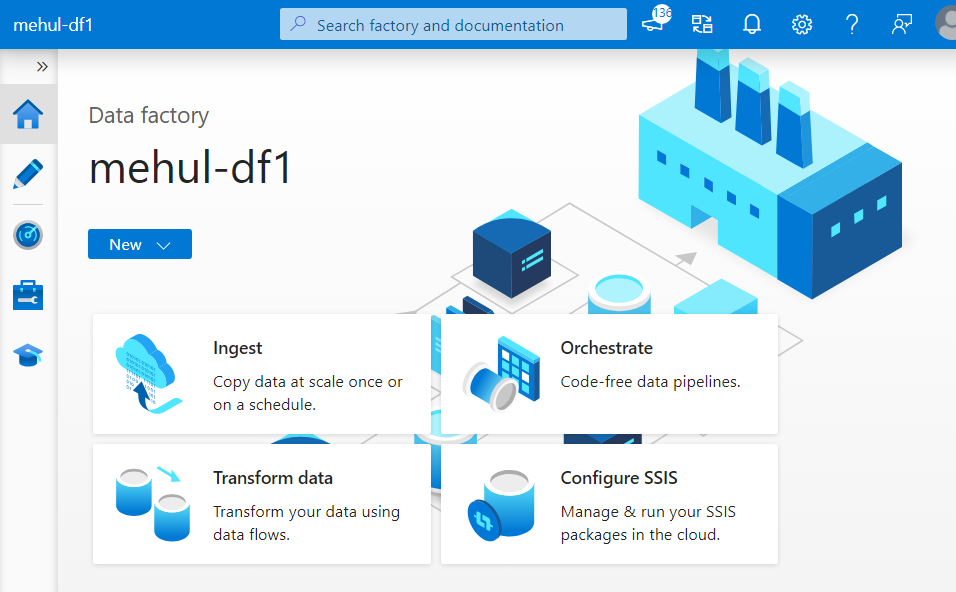
- We open the Azure Data Factory Studio after the resource is deployed.
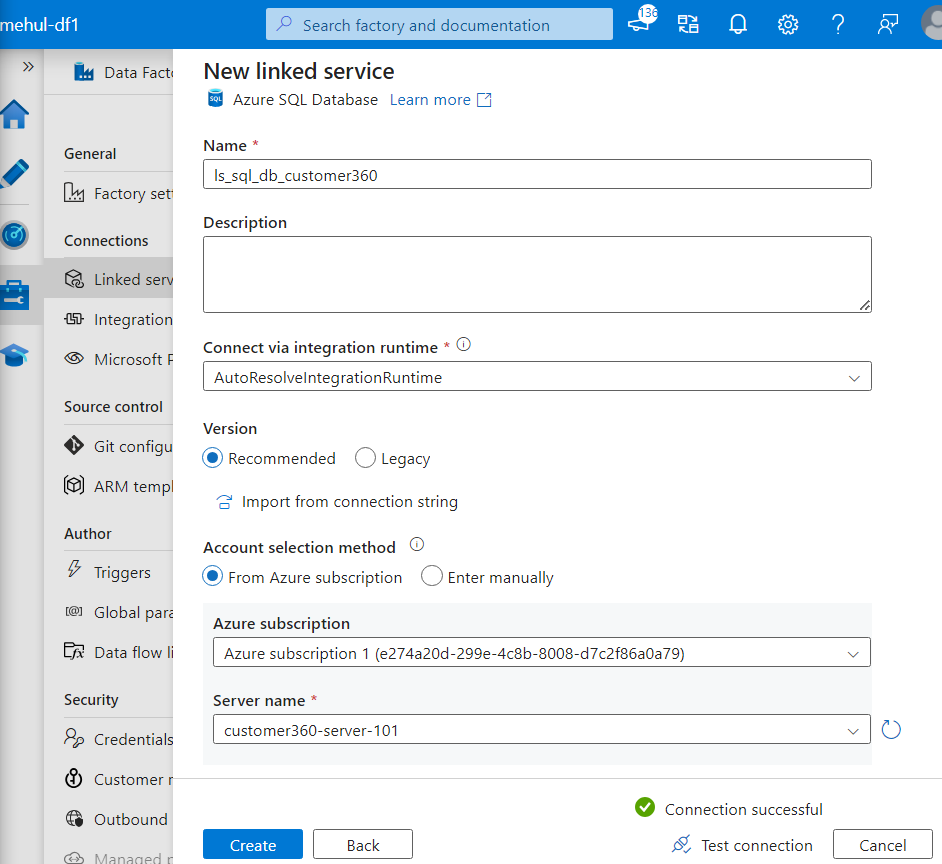
Firstly, we connect to the source and the sink using Linked Service.
While connecting to the source, we provide the server name of our database in the Linked Service options.
- While connecting to the sink, we provide the name of our storage account in the Linked Service options for ADLS Gen2.
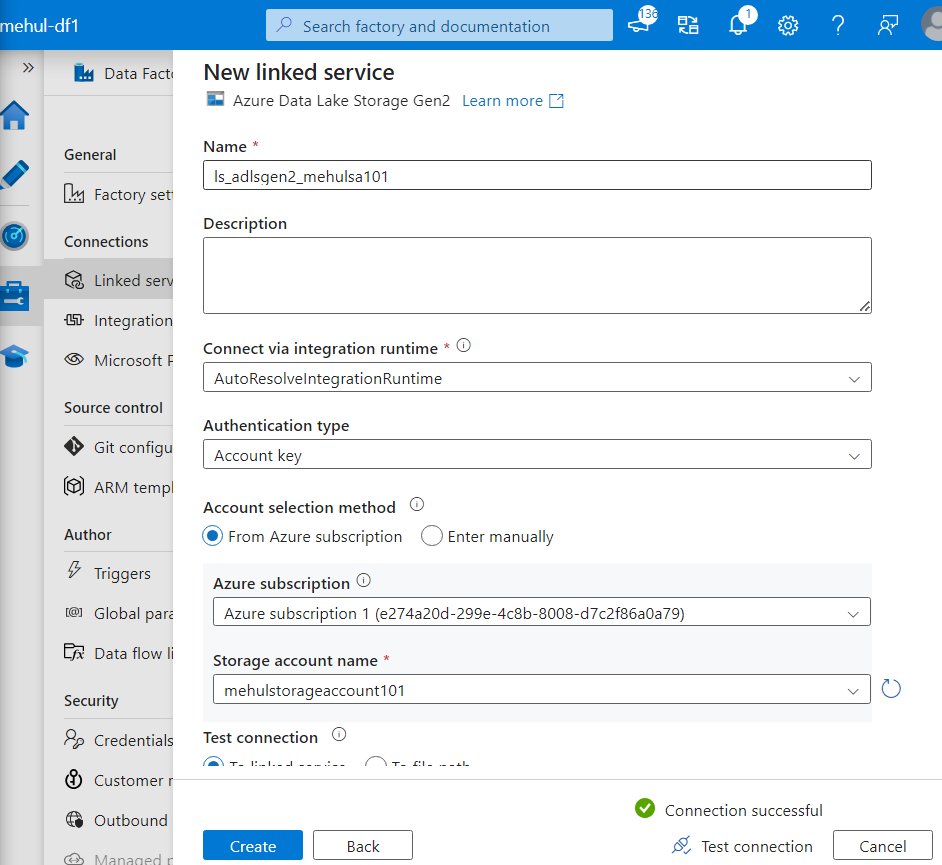
- Now, both the linked services have been created.
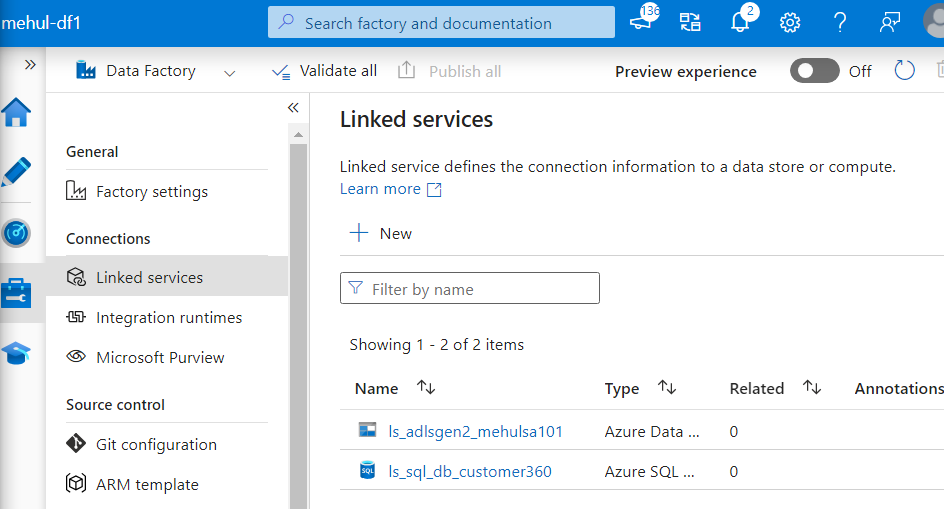
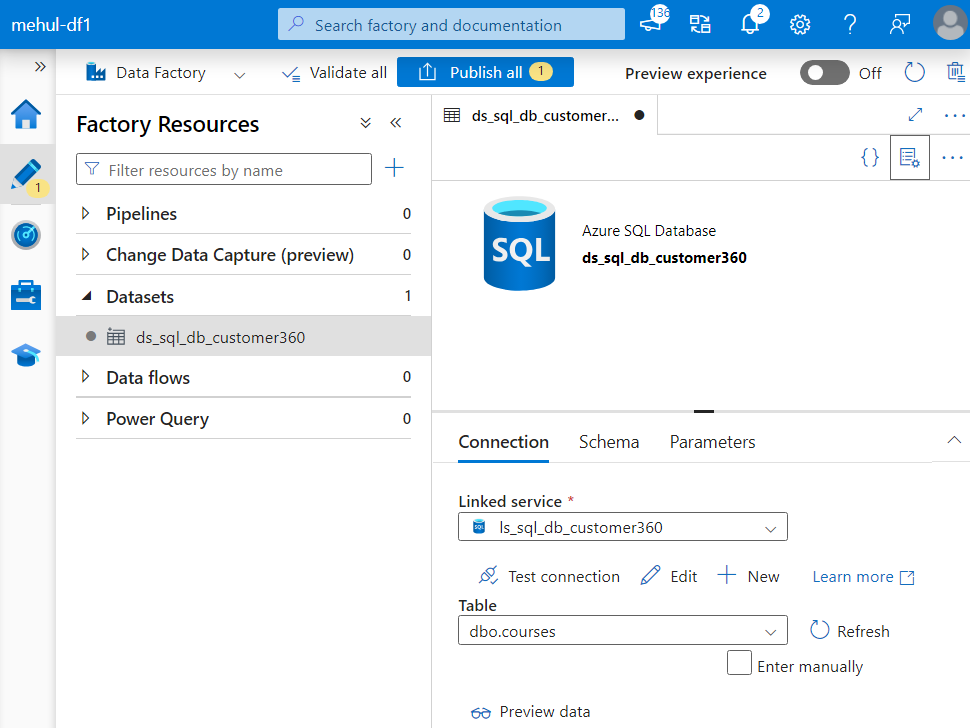
Further, in order to specify the format of data to be stored underneath, we need to create datasets on top of both the source and the sink.
For the source, we create a dataset based upon Azure SQL database as follows.
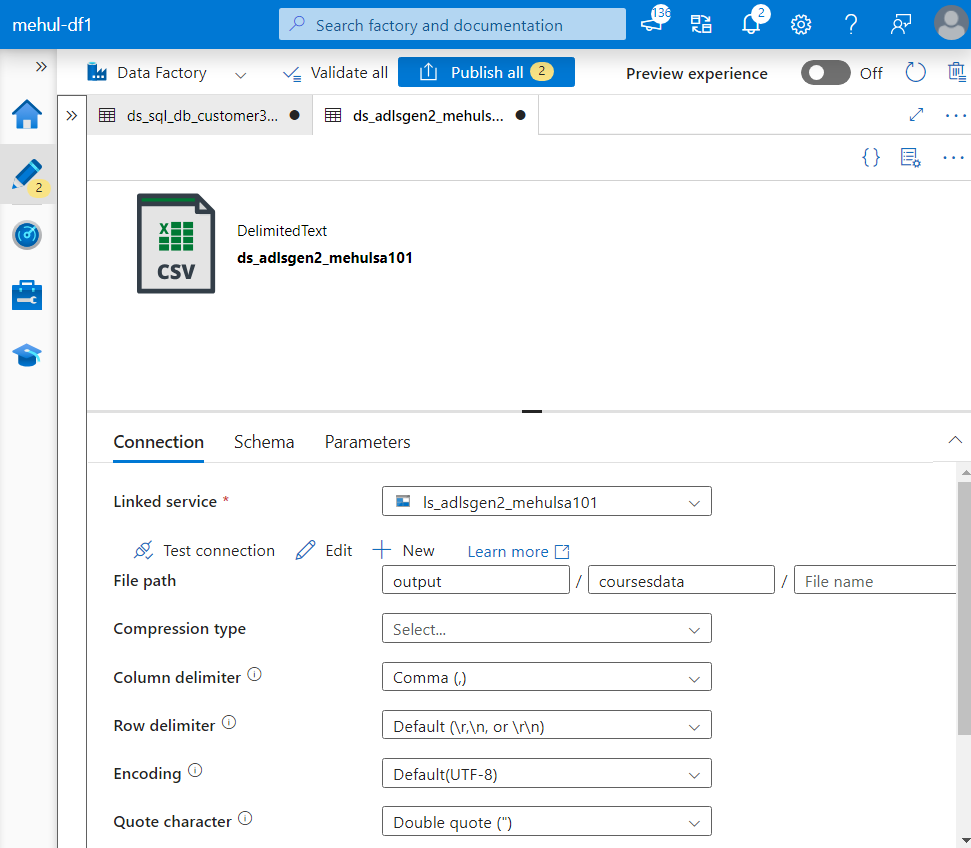
- For the sink, we create a dataset based upon ADLS Gen2 and specify the format as CSV because we want the data to get transferred as a CSV file.
- Now, we create a pipeline and place a Copy activity inside the pipeline.
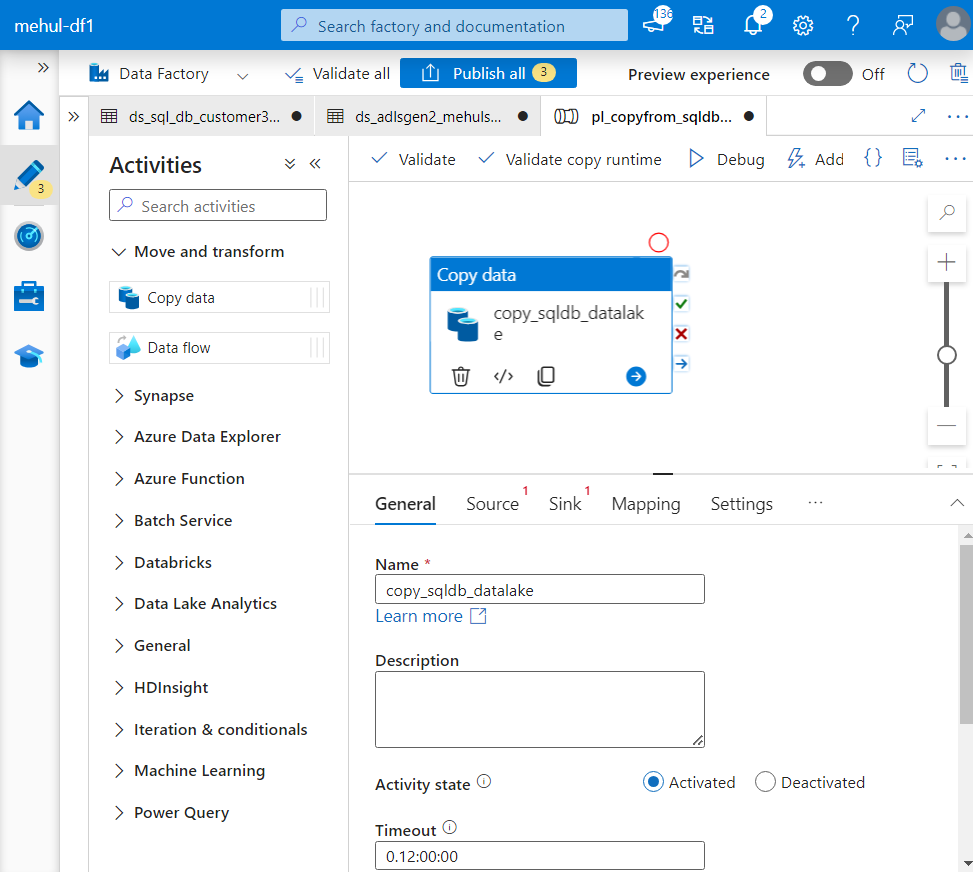
- We select the source as the dataset created for Azure SQL Database source.
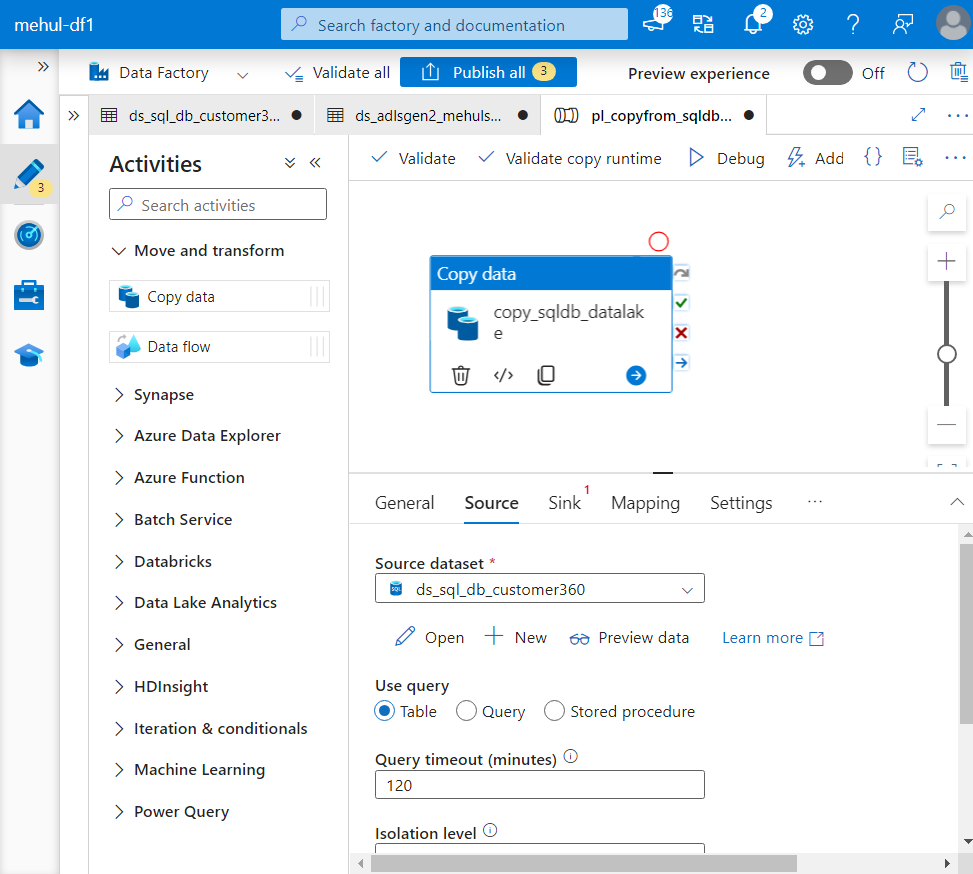
- We select the sink as the dataset created for ADLS Gen2 sink.
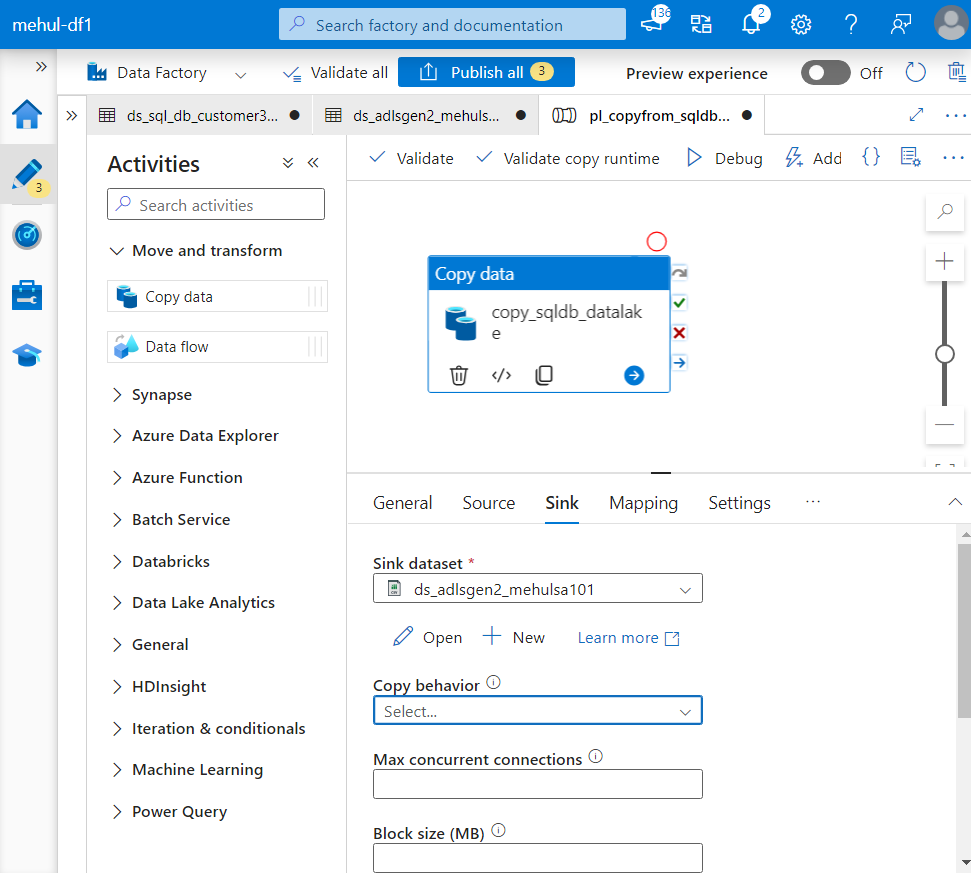
- Finally, we debug the pipeline and the Copy activity gets executed.
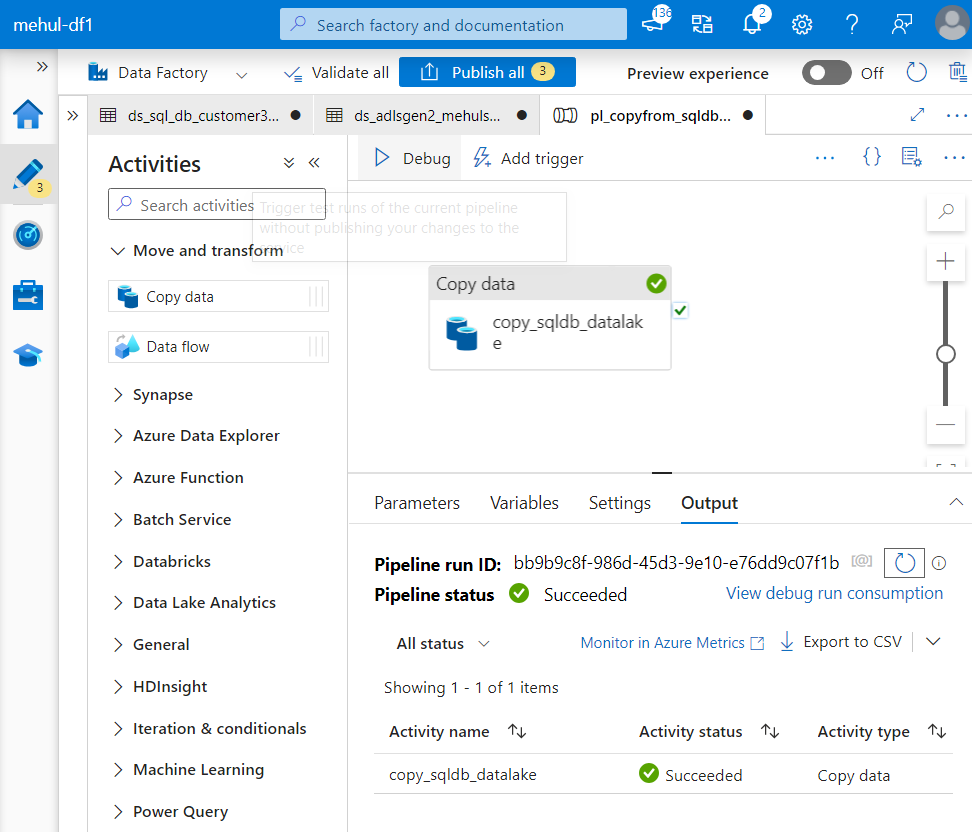
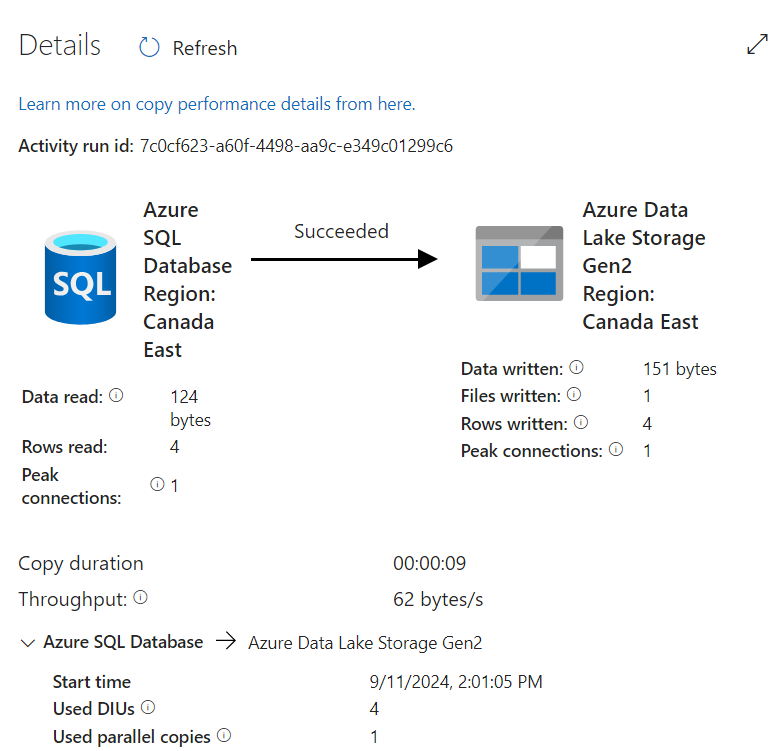
- We can check the progress of our activity as well.
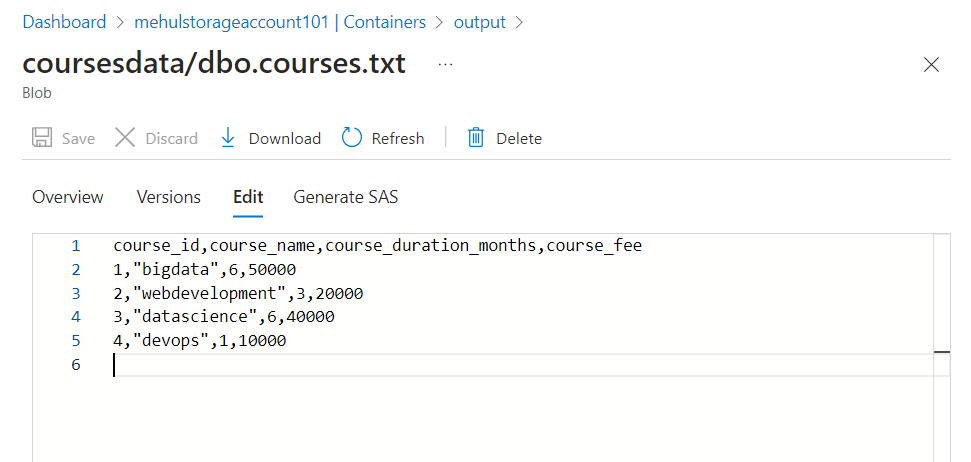
- We can validate that the pipeline ran successfully because the sink storage account contains the required data file in CSV format.
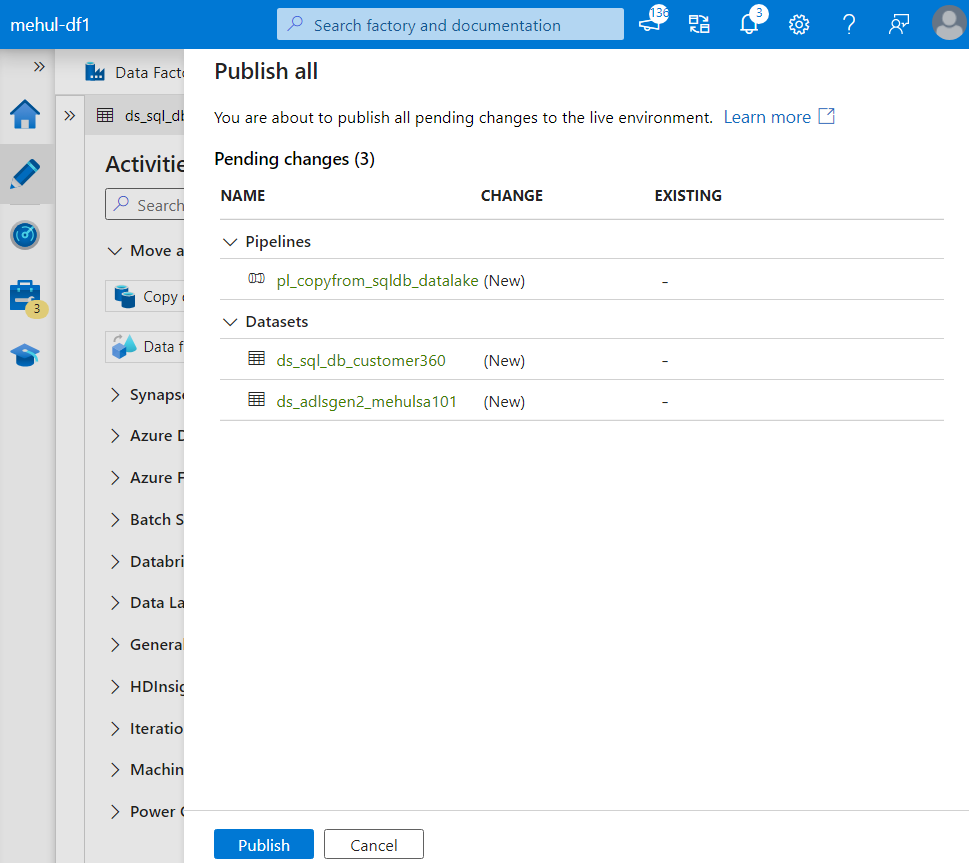
- Now, we can publish the changes made in the pipeline and save it for future use.
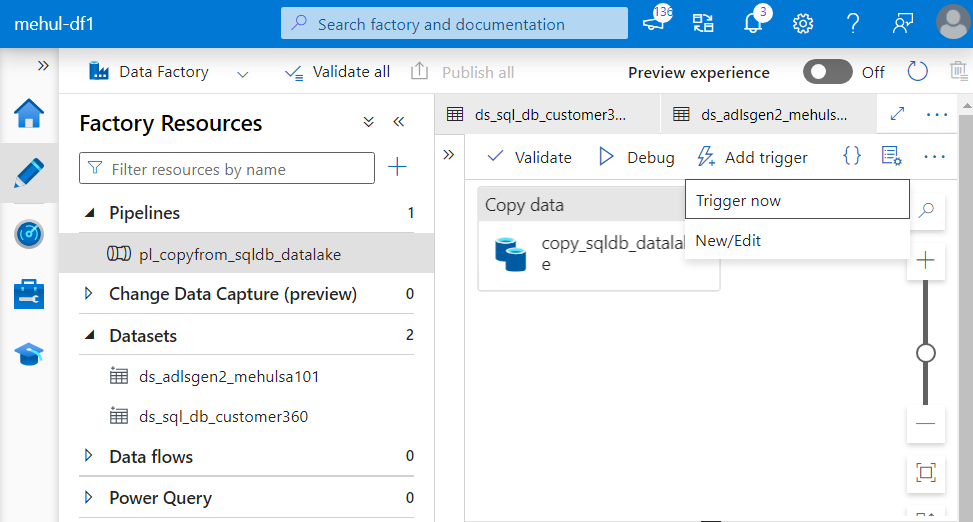
- Now, we get the capability to trigger the pipeline either immediately or at schedules.
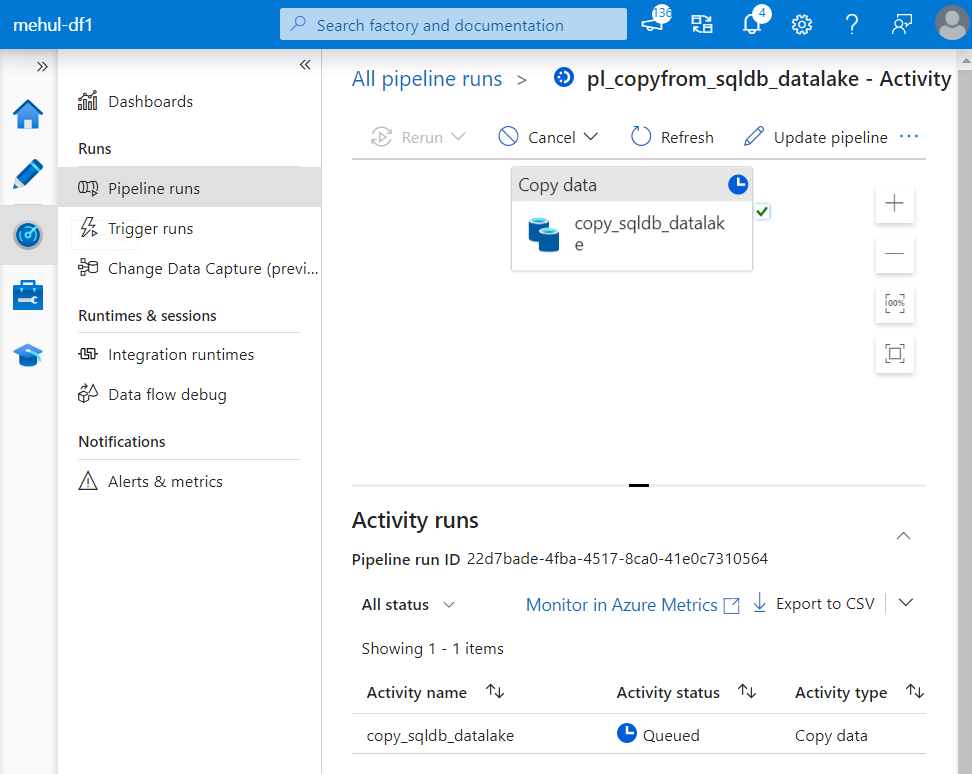
- When we trigger a pipeline, we can check the status of execution inside ‘Monitor’ tab in data factory.
Use-case 2
Consider a scenario where we have to ingest ‘orders‘ data from an external URL to ADLS Gen2.
Firstly, we need to create Linked services.
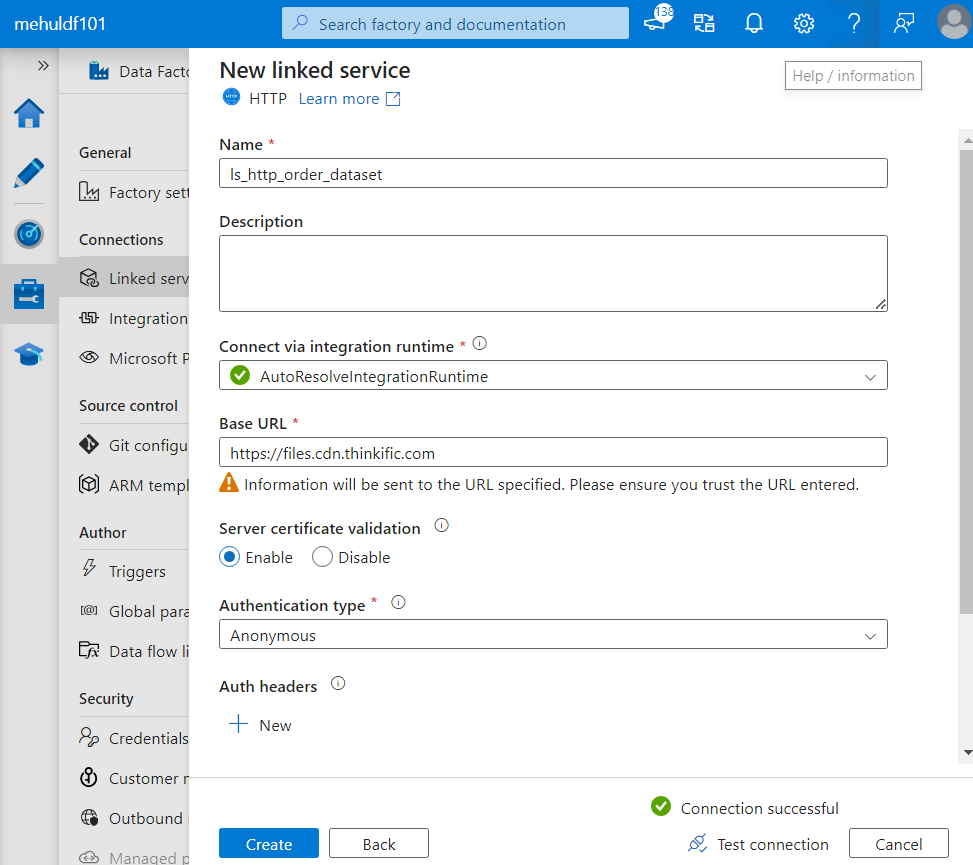
While creating the linked service for the source, we choose HTTP connector and provide the Base URL from where data needs to be extracted.
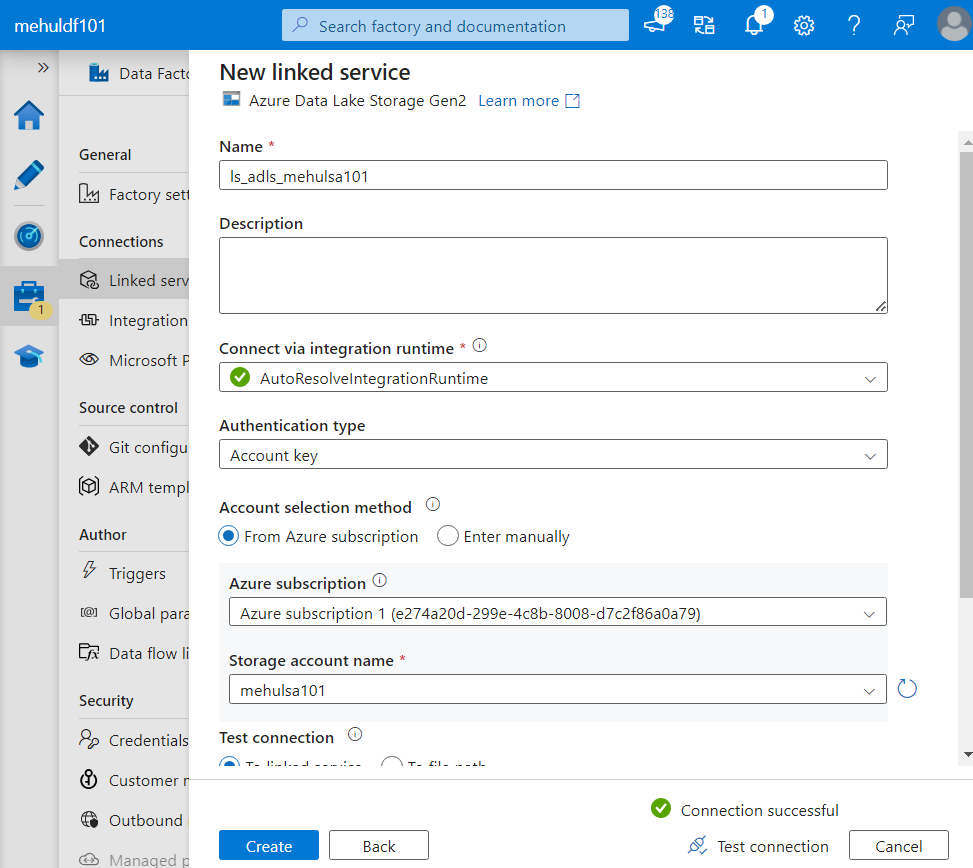
- While creating the linked service for the sink, we choose Datalake Gen2 connector and provide the name of the storage account.
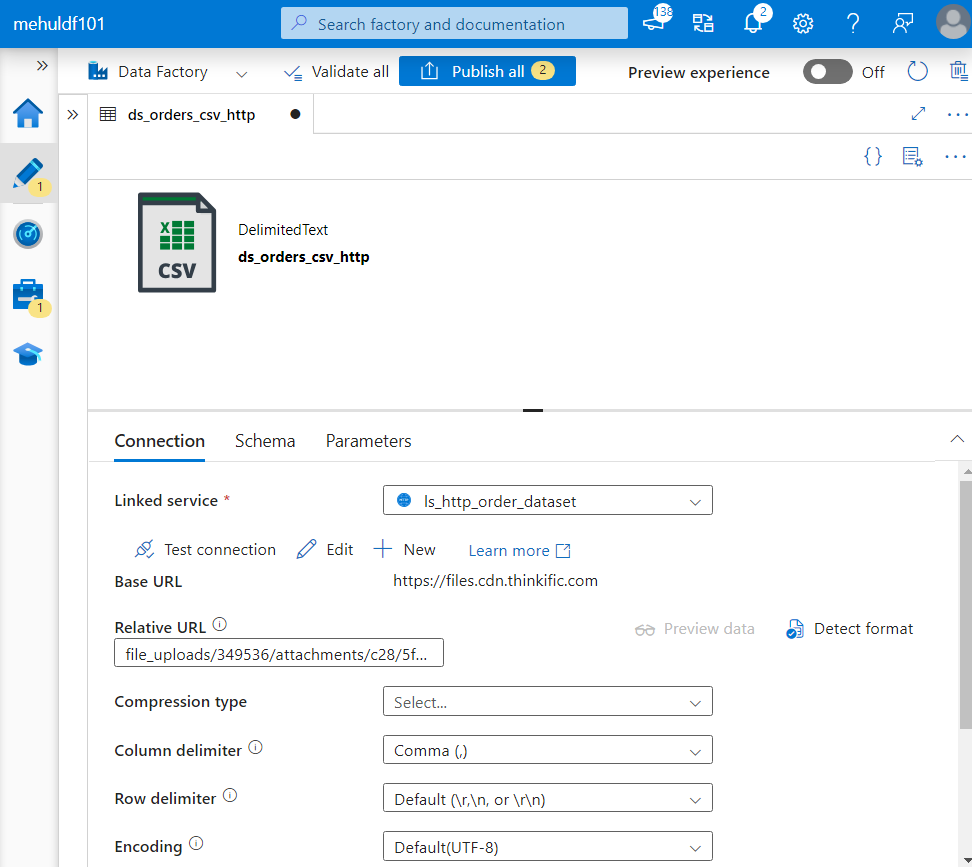
- While creating the dataset for the source, we choose the format as CSV and provide the relative URL from where the data will be fetched.
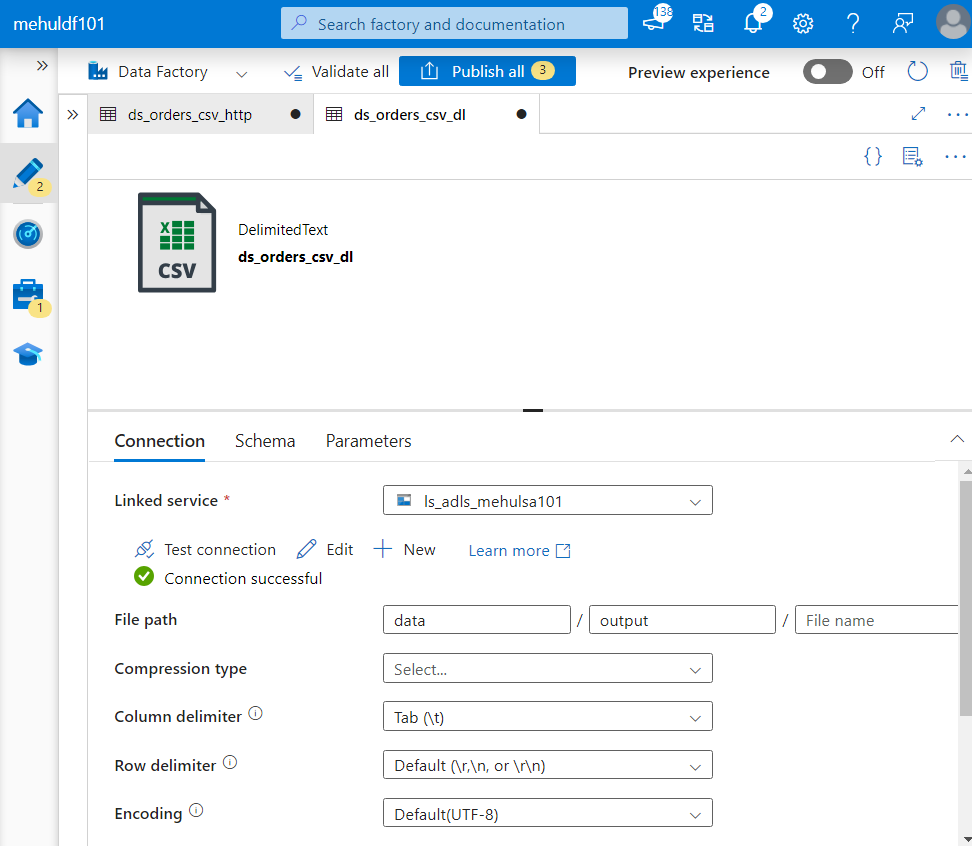
- We create the dataset for the sink in CSV format as well.
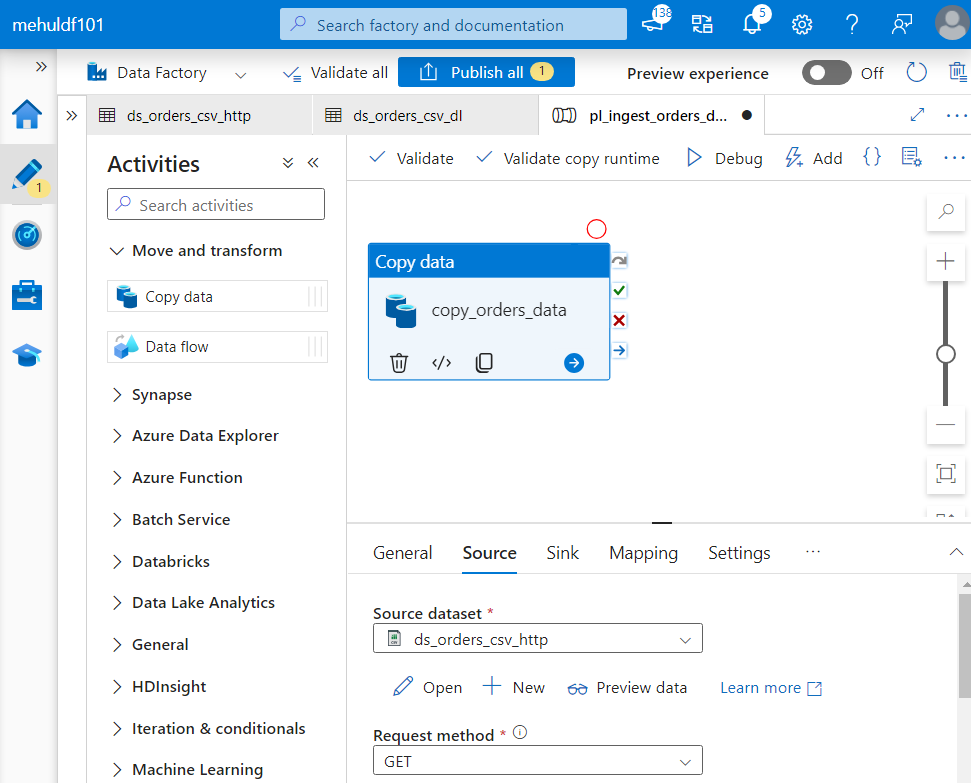
- Now, we create a copy activity inside the pipeline, with the source and sink as the datasets we just created.
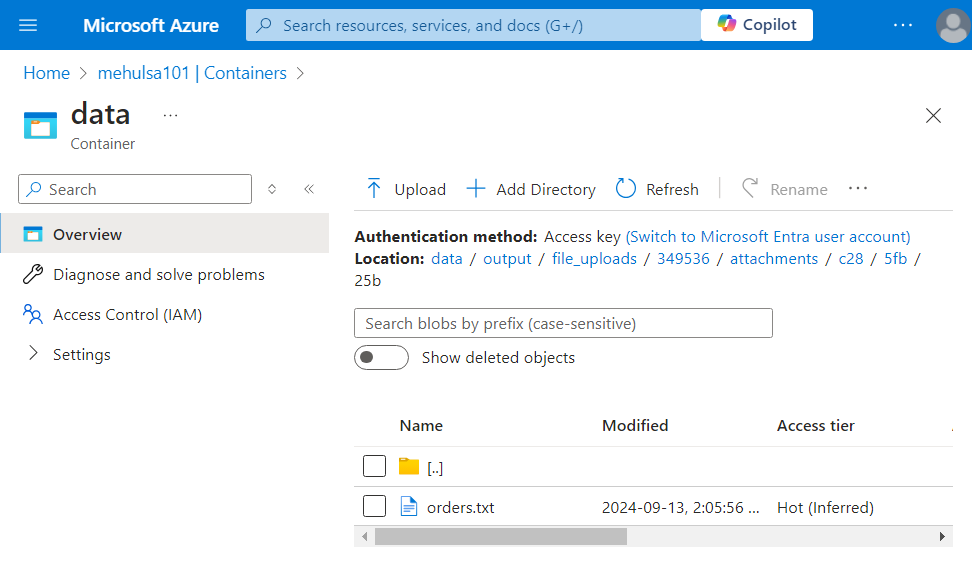
- After debugging the pipeline, the required ‘orders.txt‘ file gets loaded into the storage account.
Mapping data flow
- Dataflow is used to perform basic transformations on the ingested data.
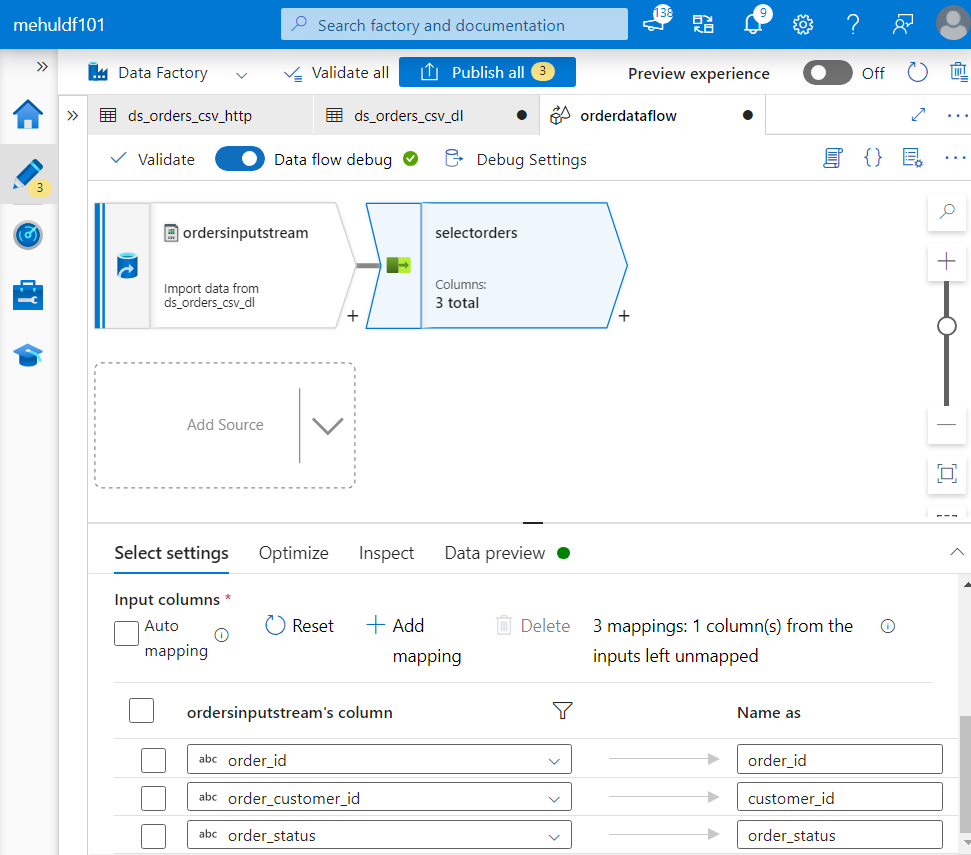
The ‘orders‘ data needs to be transformed as follows:
Remove order_date column
Rename order_customer_id to customer_id
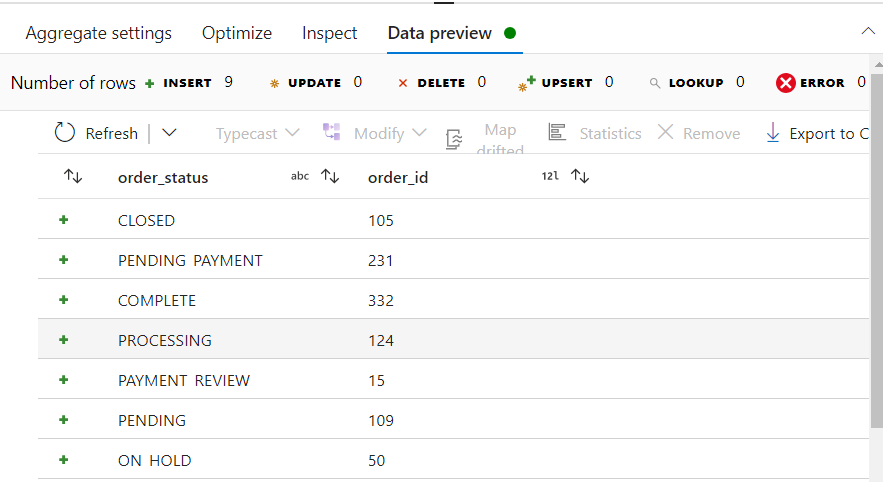
Calculate the count of each order status
Firstly, dataflow needs to have a source, the data from which gets transformed and loaded into the sink.
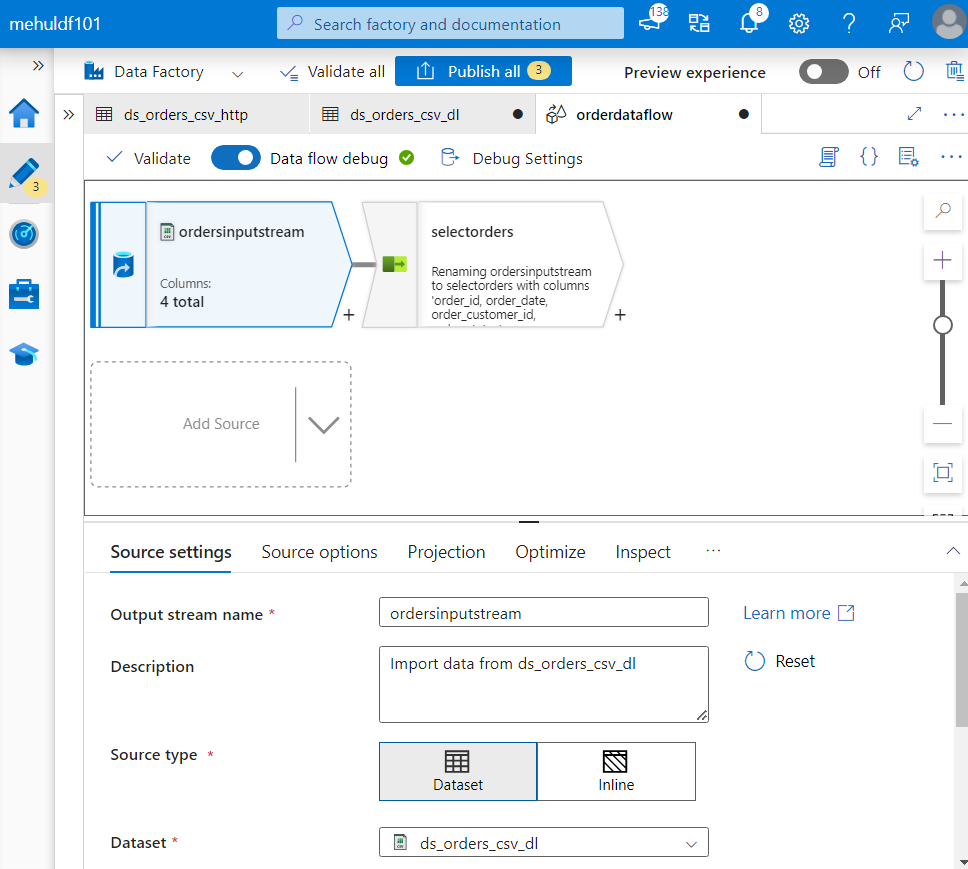
We create the source ‘ordersinputstream‘ and we choose the source type as Dataset, because we would use it multiple times.
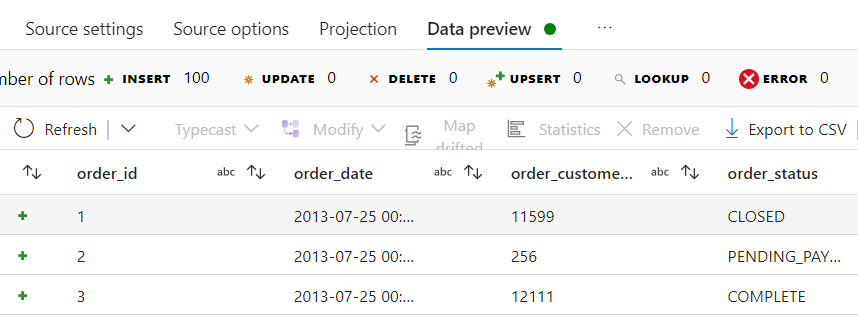
- As we can see inside Data preview, the ‘orders‘ data looks like this before any transformations.
- Now, in order to satisfy our requirements, we attach a SELECT transformation to the source. Inside columns, we remove the order_date column and rename order_customer_id to customer_id.
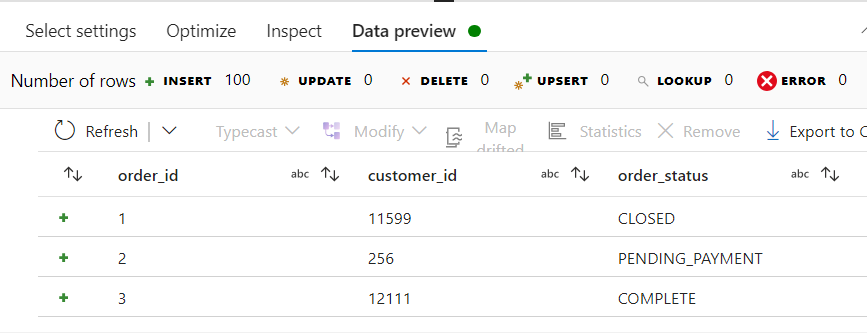
- After applying the SELECT transformation, the Data preview looks like this.
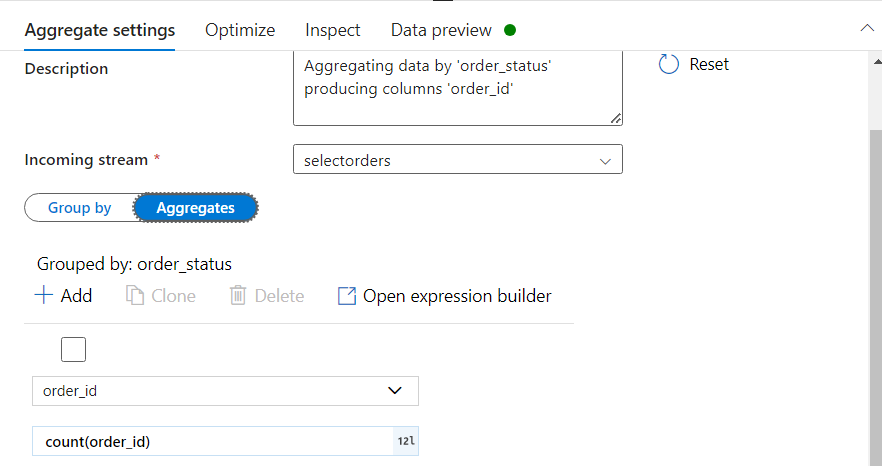
For the requirement of calculating the count of each order_status, we attach AGGREGATE transformation.
Note that we group the data on the basis of order_status.
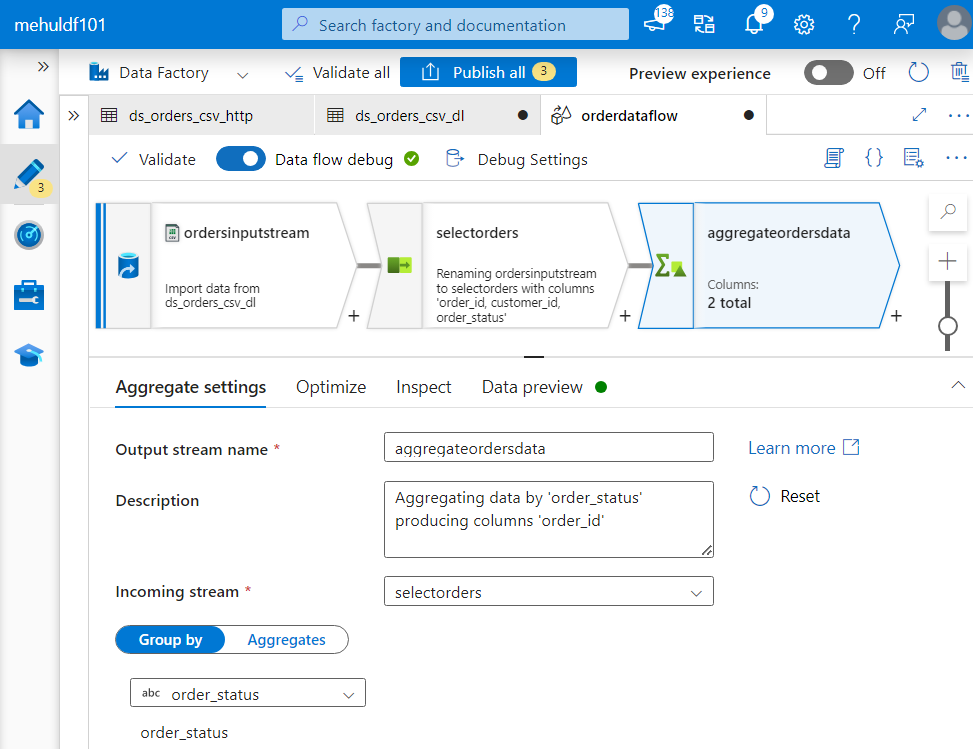
- Also, we will be aggregating on the basis of order_id, in order to get the count.
- After aggregating, the Data preview gives us the following.
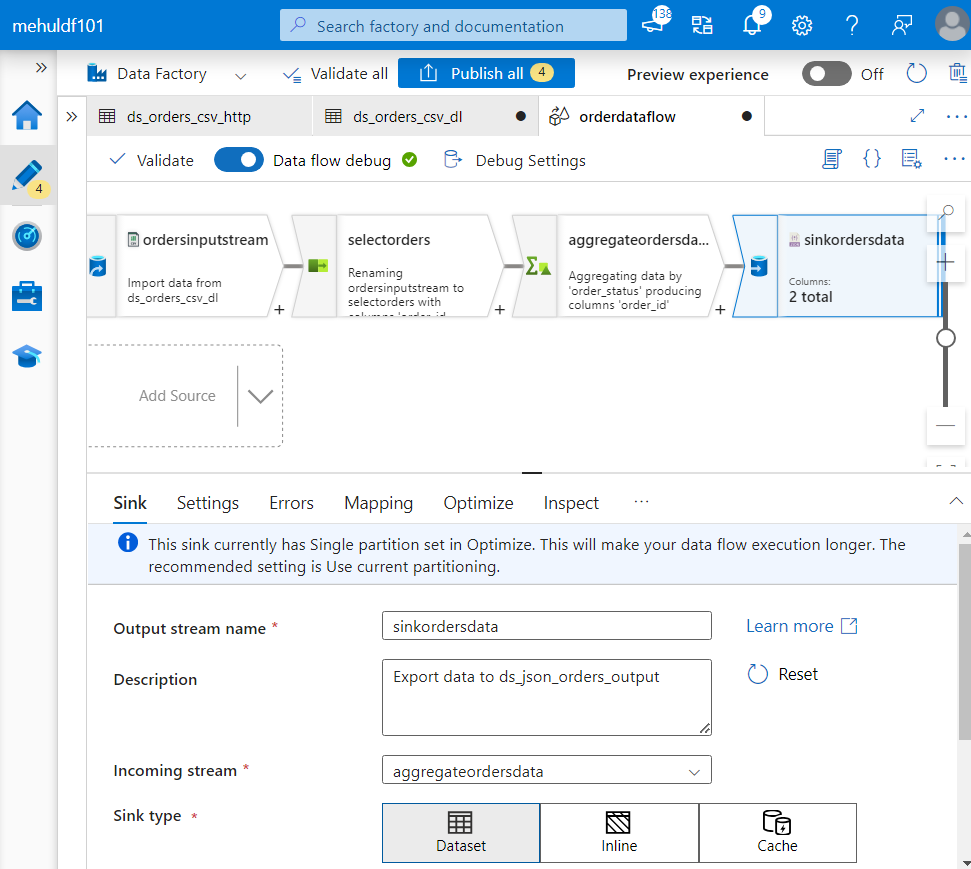
- Finally, we need to load the result of transformations into the sink. We set the file format as JSON for the sink.
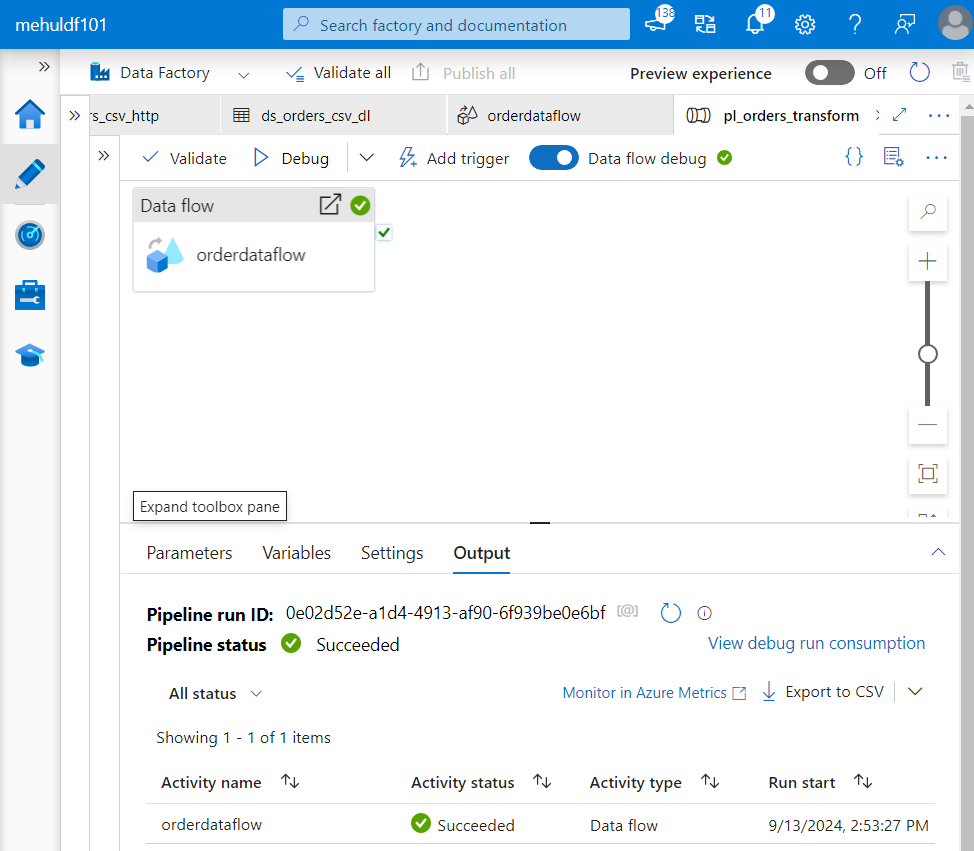
- Now, we create a pipeline and place the ‘orderdataflow‘ inside it, so that when the pipeline runs, the dataflow gets executed.
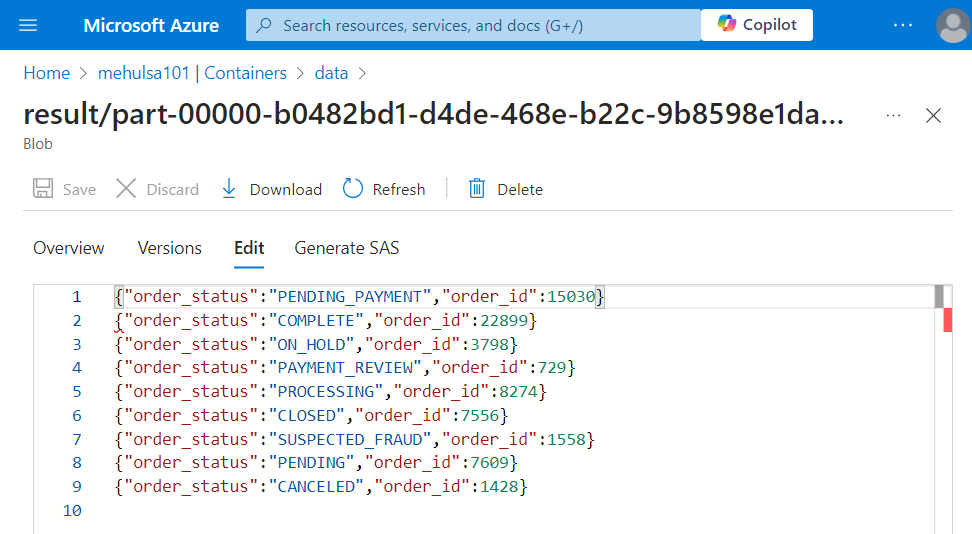
- After successful execution of the pipeline and the dataflow inside it, we get the following result in JSON format.
Conclusion
Azure Data Factory simplifies the process of building and managing data pipelines with its robust, server-less architecture. Whether ingesting data from on-premises or cloud sources, ADF streamlines the process and supports diverse use cases, from simple data copying to advanced transformation workflows. As demonstrated through the use cases in this blog, ADF is an essential tool for modern data engineering, capable of meeting the growing data integration demands of today’s businesses.
Stay tuned for more!
Subscribe to my newsletter
Read articles from Mehul Kansal directly inside your inbox. Subscribe to the newsletter, and don't miss out.
Written by
