Meet noteX: The AI Tool for Smart Note-Taking
 Soumyaranjan Panda
Table of contents

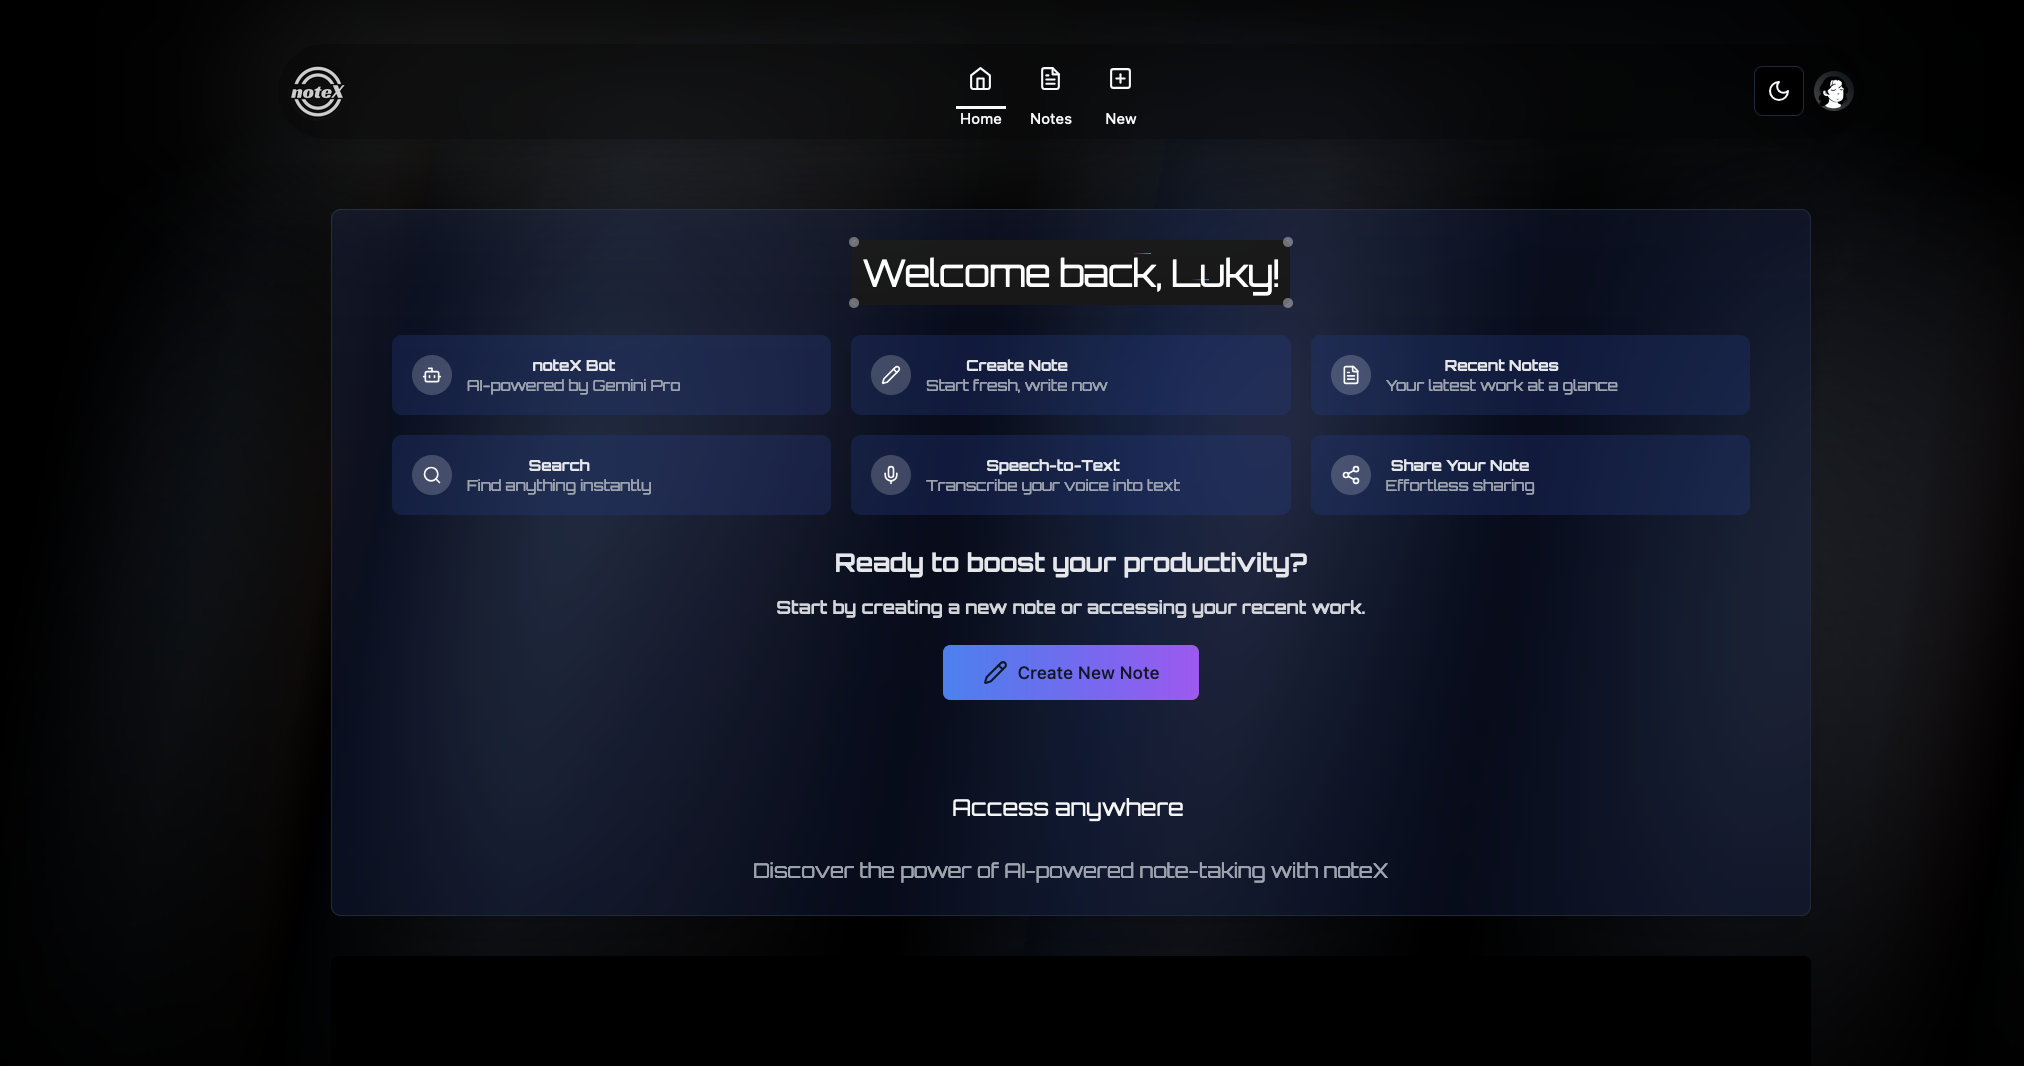
In this article, I’ll show you how I built noteX, an AI-powered note-taking app, using a mix of free tools for both the frontend and backend. NoteX uses modern web technologies like Vite, React, Shadcn, Acternity-UI, Appwrite, and Google’s Gemini Pro AI service — all of which are either open-source or have generous free tiers. Here’s how I put everything together.
Project Overview
NoteX is designed to boost productivity with seamless note-taking and AI-powered assistance. It’s fully open-source, so anyone can contribute. The project offers various features, such as:
• Organize Your Thoughts
• Secure Your Notes
• Gemini Pro AI Assistance
• Smart Semantic Search
• Speech-to-Text
• Enhanced Productivity
• Share Your Note With Others
• Seamless Experience Across Devices
Let's break down how I used free tools to build this project.
- Vite + React for a Fast Frontend
I chose Vite as the build tool because it’s fast, and when paired with React, it offers an excellent developer experience. To set up a new project with Vite and React, you can follow these steps:
Initialize the Project
First, you need to install Vite and create a React project:
npm create vite@latest noteX -- --template react
cd noteX
npm install
npm run dev
This will give you a blazing-fast development server out of the box.
Setting Up Shadcn
To install and initialize Shadcn, you can run the following commands:
npm install shadcn
npx shadcn init
This sets up the design system in your project. Now, you can start using components like buttons, inputs, and more by importing them directly from Shadcn. Here’s an example of a Shadcn button in action:
Example Usecase
import { Button } from 'shadcn';

function App() {
  return (
    <div>
      <Button>Click Me</Button>
    </div>
  );
}

export default App;
This code imports the Button component from Shadcn and uses it in a simple React component. When you run your app, you'll see a button labeled "Click Me".
- Free Backend with Appwrite
For the backend, I used Appwrite, a free and open-source backend as a service (BaaS). It handles user authentication, databases, and cloud functions—all in one package.
Setting Up Appwrite: To get started, you can install the Appwrite SDK:
npm install appwrite
Then, initialize it in your project with your Appwrite endpoint and project ID:
import { Client, Account } from 'appwrite';

const client = new Client()
  .setEndpoint('https://your-appwrite-server/v1') // Replace with your Appwrite server URL
  .setProject('your_project_id');

const account = new Account(client);
With this setup, you can now manage user authentication and other backend services using Appwrite’s API. The best part? Appwrite’s free tier is more than enough for small to medium-sized projects.
- AI-Powered Features with Google Gemini
One of the standout features of NoteX is its AI assistance, powered by Google’s Gemini Pro. This AI service offers features like smart semantic search and speech-to-text, which are essential for boosting productivity.
Installing Google Gemini
You can use Google’s AI services through their free API or npm package. Here’s how you can install it:
npm i @google/generative-ai
To demonstrate how to use Google Gemini, let's look at an example:
import { Gemini } from '@google/generative-ai';

const gemini = new Gemini({
  apiKey: 'your_google_gemini_api_key',
});

async function useGemini() {
  try {
    const response = await gemini.semanticSearch({
      query: 'How to improve productivity?',
    });
    console.log(response);
  } catch (error) {
    console.error('Error using Google Gemini:', error);
  }
}

useGemini();
This code snippet shows how to perform a semantic search using Google Gemini. Replace 'your_google_gemini_api_key' with your actual API key. The useGemini function sends a query to Google Gemini and logs the response. If there's an error, it will be caught and logged.
import { Gemini } from '@google-cloud/gemini';

const gemini = new Gemini({ keyFilename: './path-to-your-key.json' }); // Ensure you have your service account key

async function analyzeText(inputText) {
  const response = await gemini.analyze({
    content: inputText,
    features: [{ type: 'TEXT_CLASSIFICATION' }]
  });

  console.log(response);
}
- Deployment with Vercel (Free Hosting)
For deployment, I used Vercel, which offers free hosting for frontend apps. Here’s how you can deploy your NoteX project:
Deploying on Vercel
Commit your code to a GitHub repository.
Go to Vercel, sign in, and connect your GitHub repo.
Click “Deploy” — Vercel will handle everything from building your app to deploying it live.
Vercel’s free tier allows you to deploy and host static sites with unlimited bandwidth, making it perfect for projects like NoteX.
- Final Thoughts
By using free tools like Vite, React, Shadcn, Appwrite, Google Gemini, and Vercel, I built NoteX without spending any money on software licenses or services. These tools are flexible and powerful, allowing you to create robust, scalable applications while keeping costs low.
Whether you're working on personal projects or building for production, these free tools can enhance your development. Plus, since NoteX is open-source, you can contribute and help improve the project. Check it out on GitHub and start building!
Let me know if you'd like to tweak anything or explore specific sections further!
Subscribe to my newsletter
Read articles from Soumyaranjan Panda directly inside your inbox. Subscribe to the newsletter, and don't miss out.
Written by

Soumyaranjan Panda
Soumyaranjan Panda
I'm a dedicated Frontend Web Developer with a passion for creating intuitive, user-friendly, and high-performance websites. I have a strong understanding of modern web technologies and a keen eye for design.