Installing and Configuring WSUS on Windows Server
 Dinesh Kumar K
Windows Server Update Services (WSUS) is a Microsoft tool that allows administrators to manage the distribution of updates released through Microsoft Update to computers in a corporate environment. This blog will guide you step-by-step through the installation and configuration of WSUS.
Step 1: Install the WSUS Role
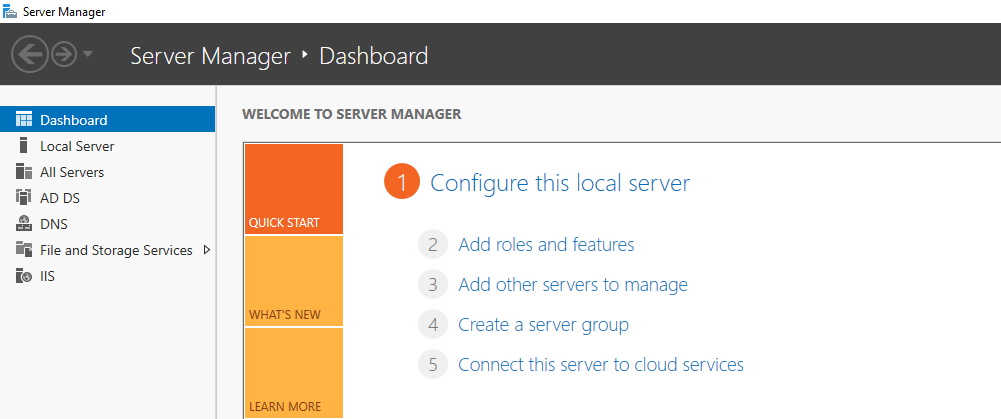
Open Server Manager:
Log in to your Windows Server as an Administrator and open Server Manager.
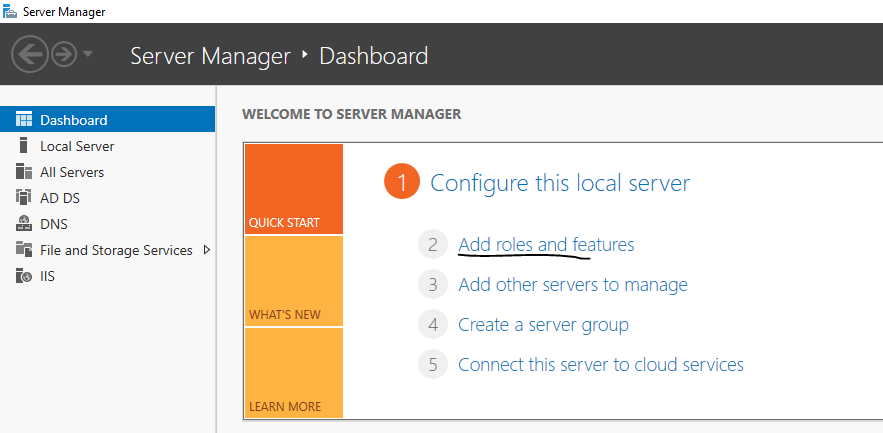
Add Roles and Features:
Click on Add Roles and Features.
In the Before You Begin section, click Next.
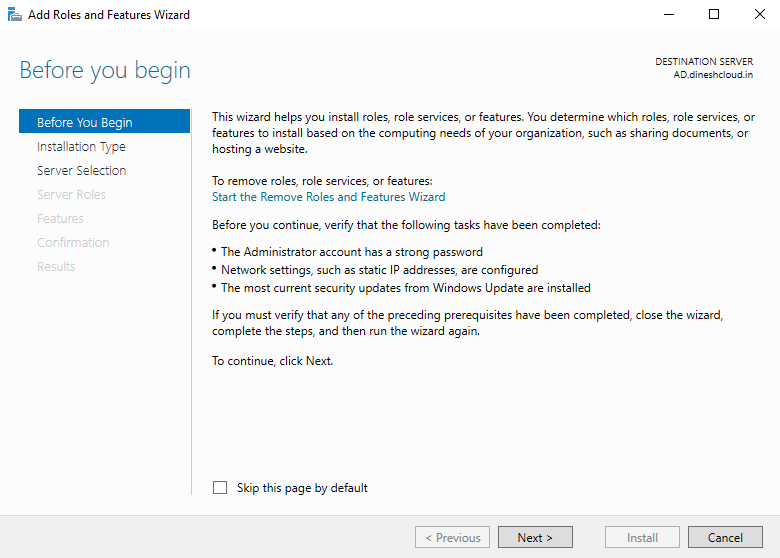
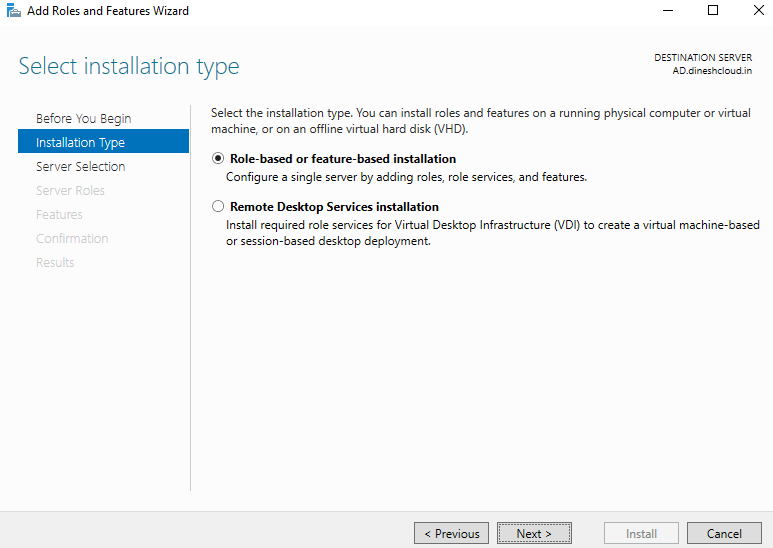
Select Role-Based Installation:
Choose Role-based or feature-based installation and click Next.
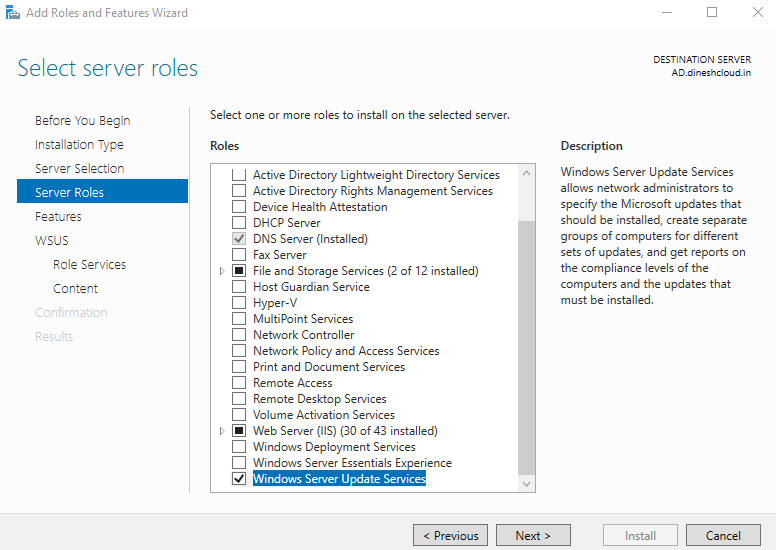
Select WSUS:
In the list of server roles, check Windows Server Update Services (WSUS) and click Next.
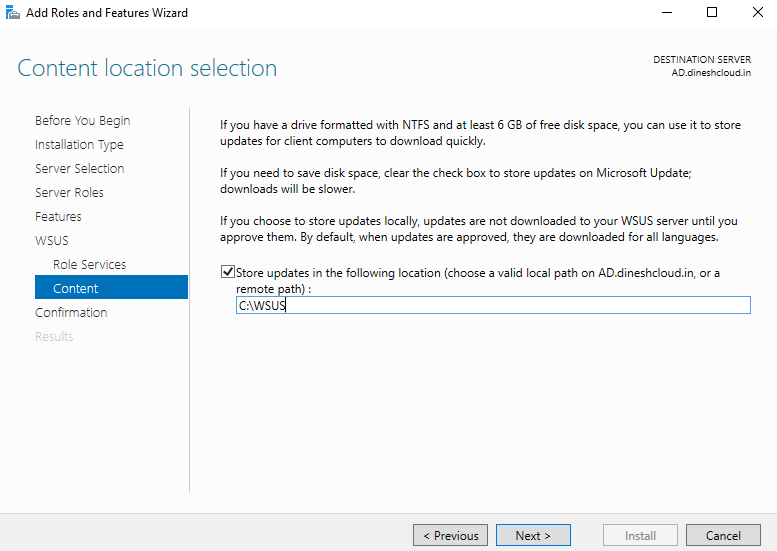
Configure WSUS Database:
Select a location to store WSUS updates. It is recommended to use a separate drive for storing updates. Choose the path and click Next.
Install WSUS:
Review your selections and click Install.
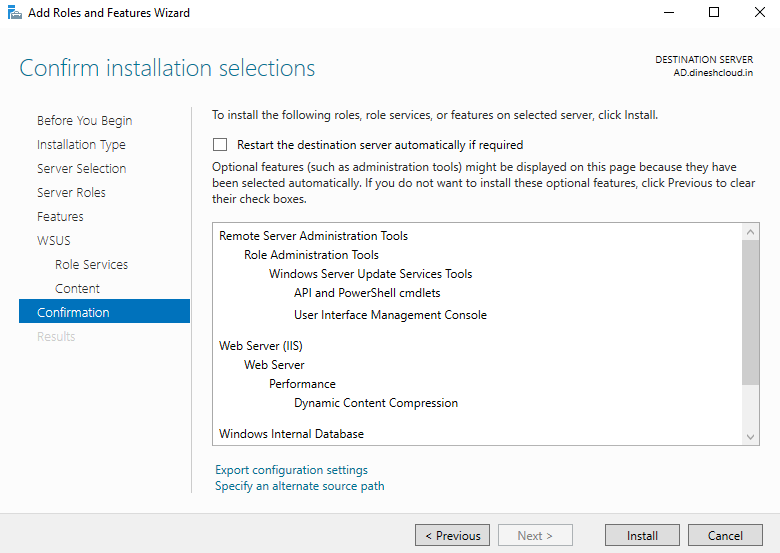
The installation process may take a few minutes. After completion, click Close.
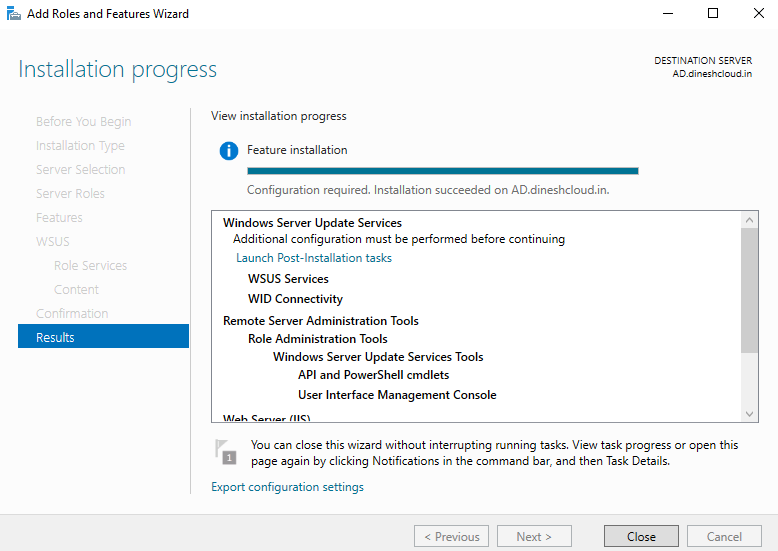
Step 2: Create a New Organizational Unit (OU) and Add Client Servers
Open Active Directory Users and Computers:
Go to Active Directory Users and Computers.
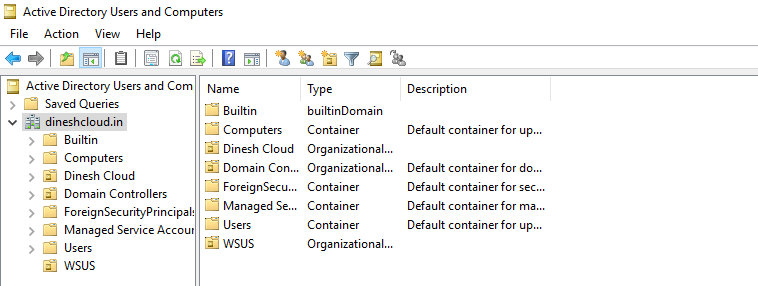
Create a New Organizational Unit:
Right-click on your domain and choose New > Organizational Unit (OU).
Name the OU (e.g., WSUS ) and click OK.
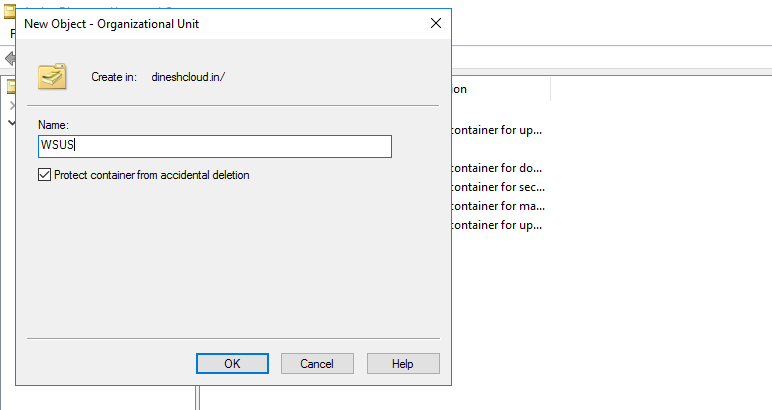
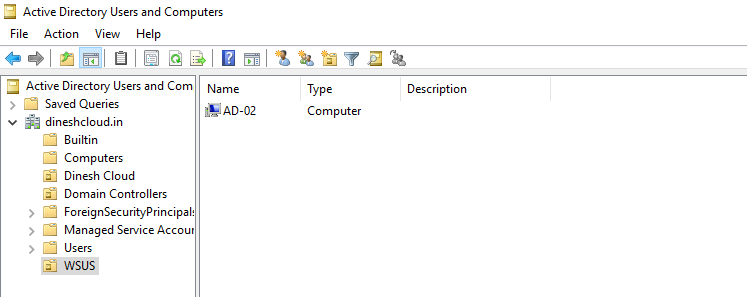
Add Client Servers:
Drag and drop the computer objects (servers or workstations) you want to manage with WSUS into the newly created OU.
Step 3: Create a Group Policy for WSUS
Open Group Policy Management:
Go to Group Policy Management.
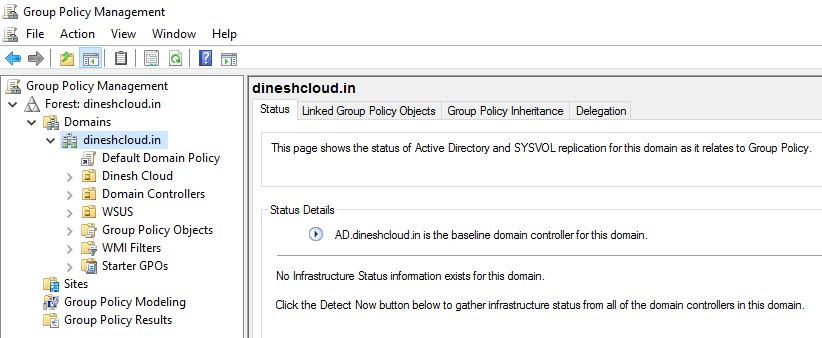
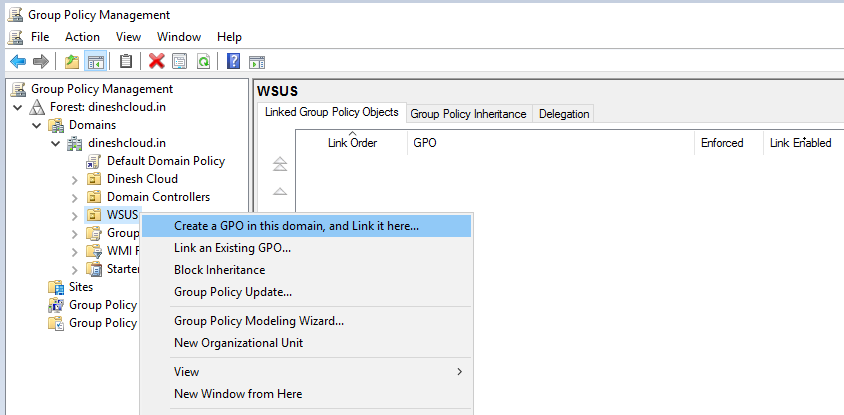
Create a New Group Policy Object (GPO):
Right-click on the newly created OU (e.g., WSUS) and select Create a GPO in this domain, and link it here.
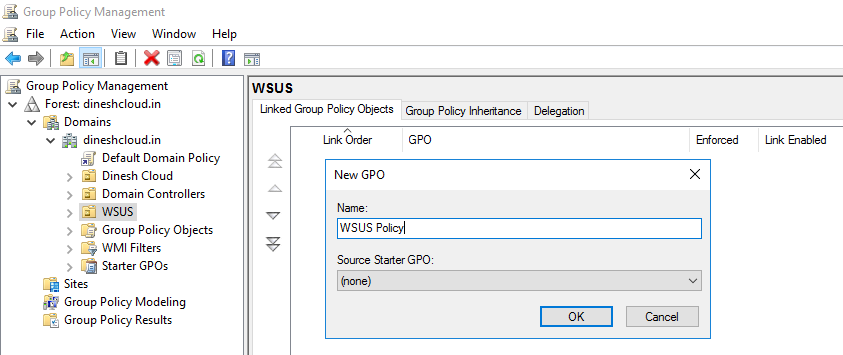
Name the GPO (e.g., WSUS Policy) and click OK.
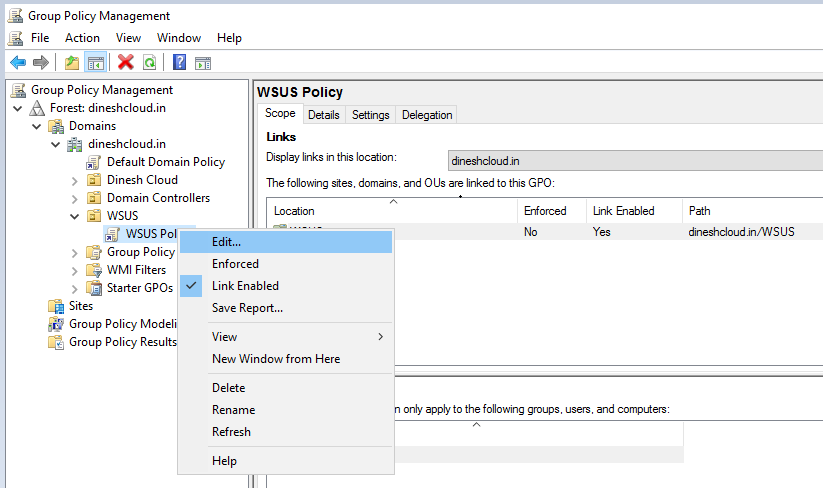
Edit the WSUS Group Policy:
Right-click the new GPO and select Edit.
Navigate to Computer Configuration > Administrative Templates > Windows Components > Windows Update.
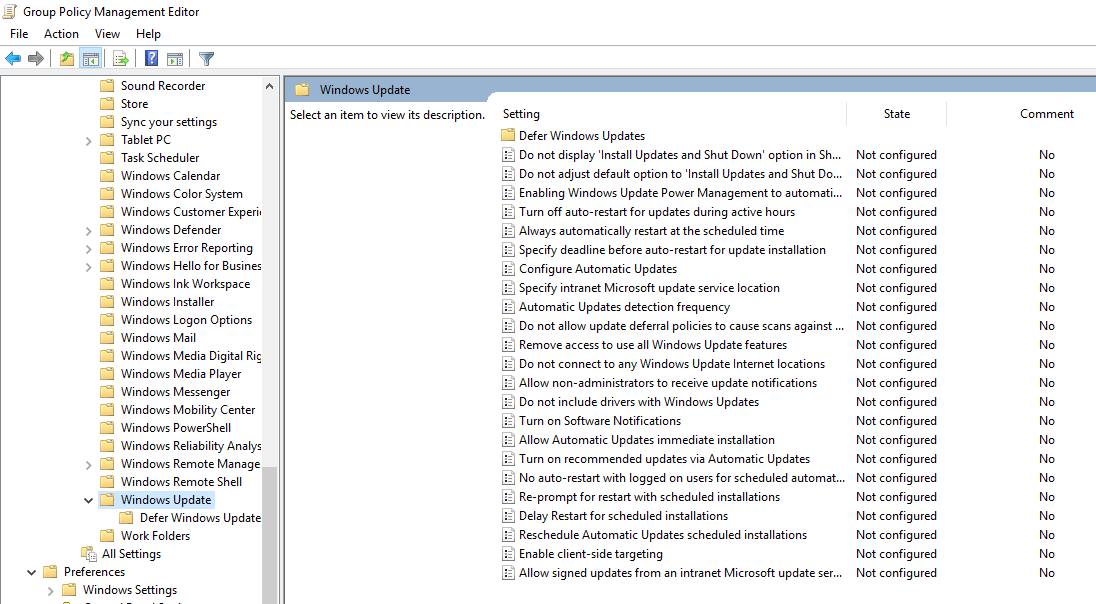
Enable the WSUS Service:
Find the setting Configure Automatic Updates and enable it.
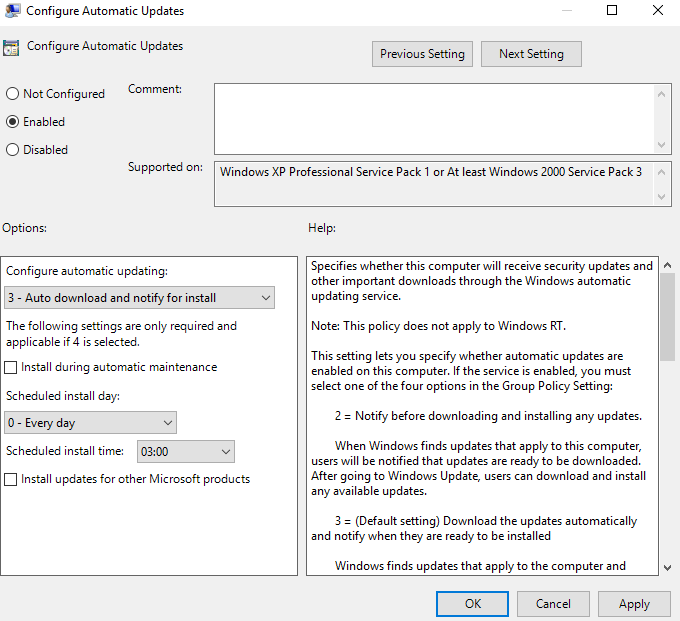
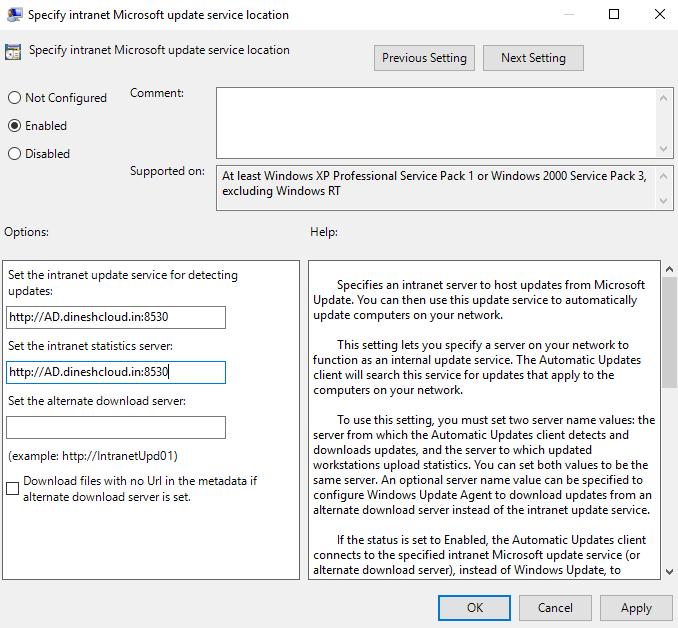
Find the setting Specify intranet Microsoft update service location and enable it.
Set both Intranet update service and Intranet statistics server to your WSUS server’s URL (e.g., http://WSUS_Server_Name:8530).
Step 4: Force Group Policy Update
Run GPUpdate /Force Command:
Open Command Prompt on your client machines (those added to the new OU).
Run the following command:
gpupdate /force

This ensures that the group policies configured for WSUS are applied immediately.
Step 5: Configure WSUS
Open WSUS Console:
After installation, open the Windows Server Update Services (WSUS) Console.
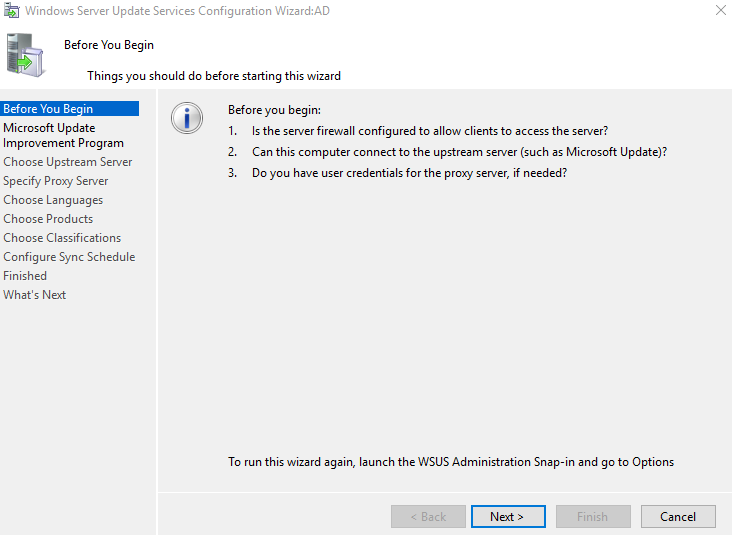
Initial Configuration Wizard:
The WSUS configuration wizard will automatically launch.
Choose whether to join the Microsoft Update Improvement Program (optional).
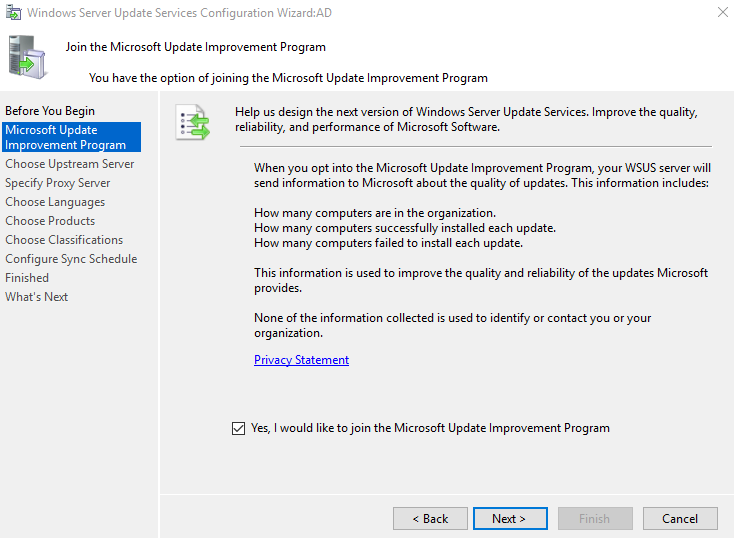
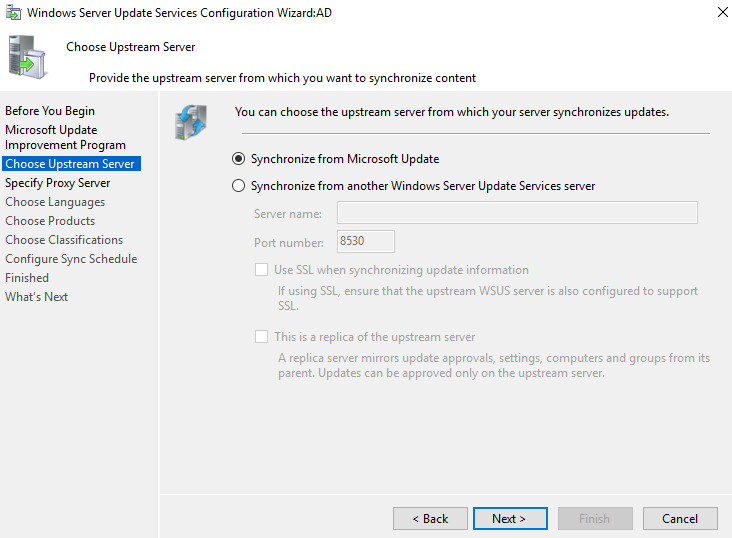
Select Upstream Server. If your WSUS server is standalone, choose Synchronize from Microsoft Update.
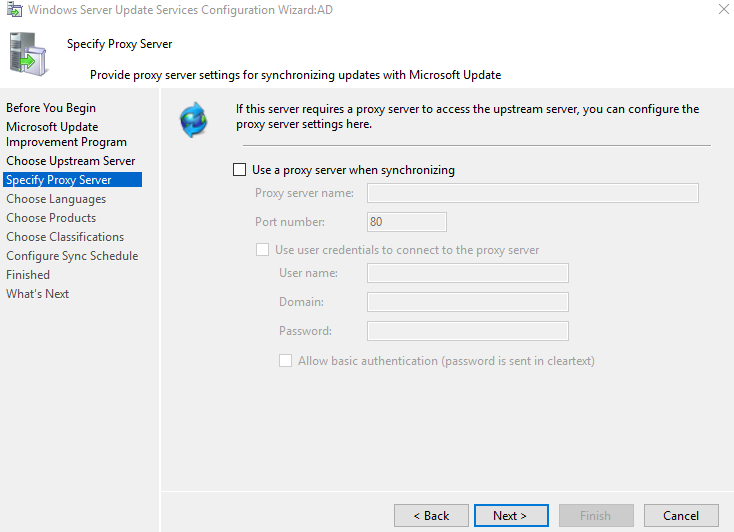
Configure the Proxy Server settings if needed.
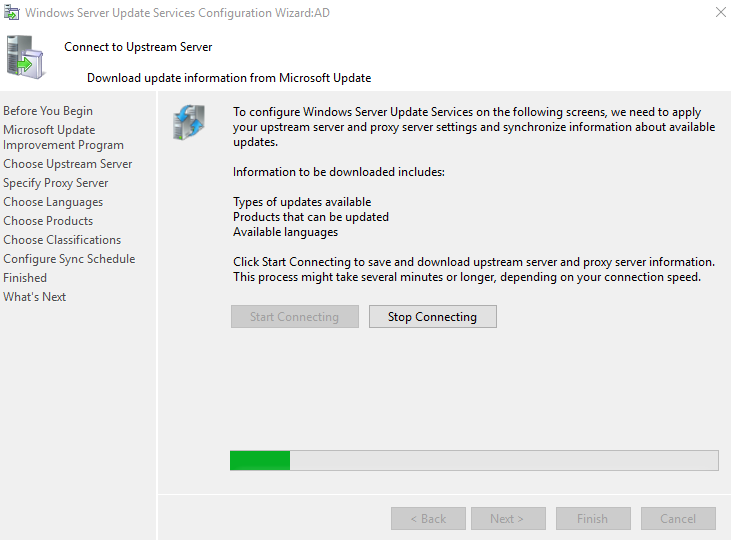
Click on Start Connecting
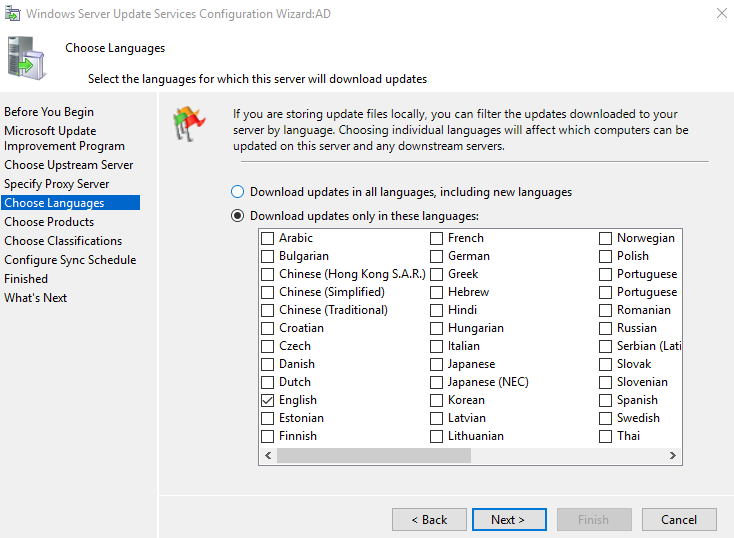
Choose language
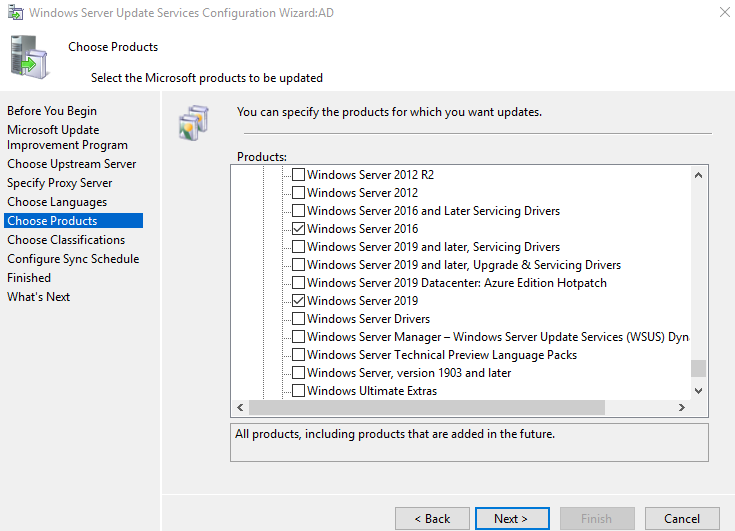
Choose the products (e.g.,Windows Server, Windows 10)
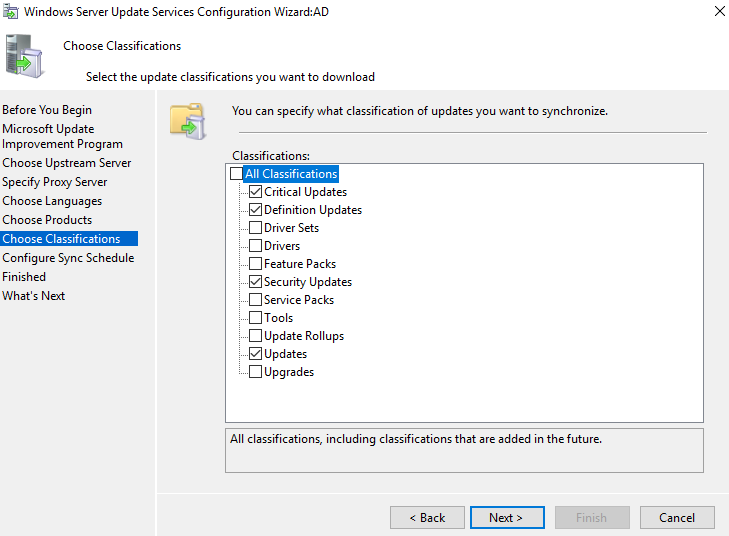
Choose the classifications (e.g., Security Updates, Critical Updates) you want WSUS to download.
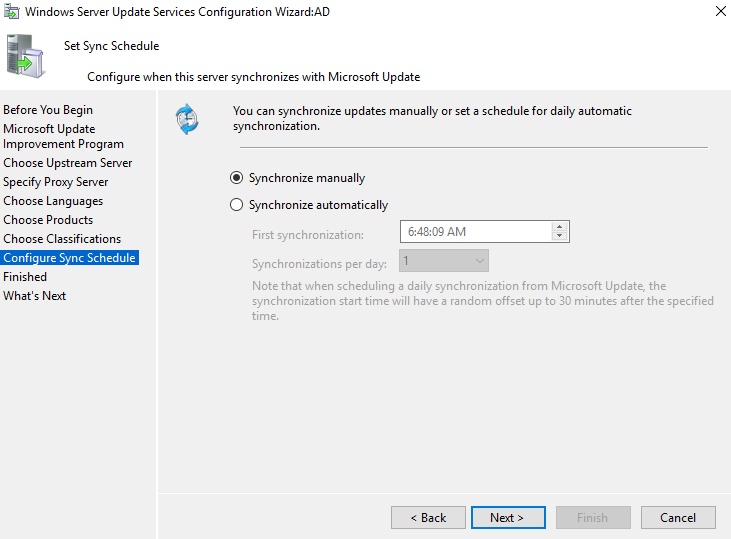
Set the Synchronization Manually or Synchronization Auomatically
Select Begin initial Synchronization
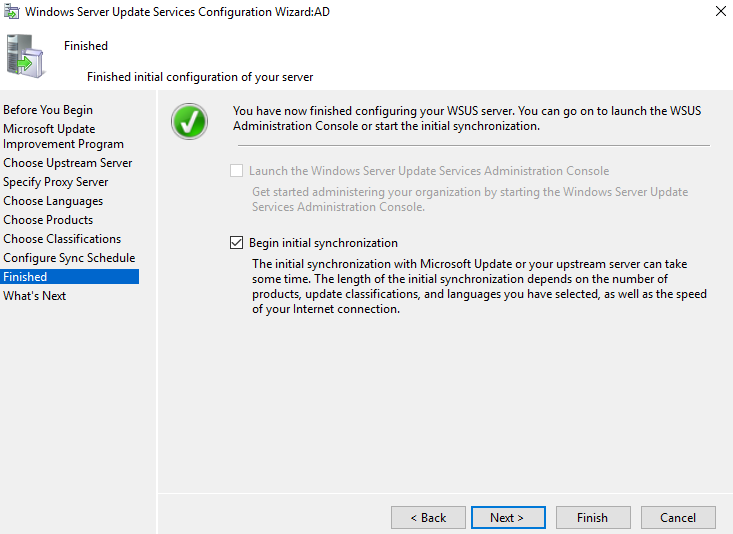
Click Finish
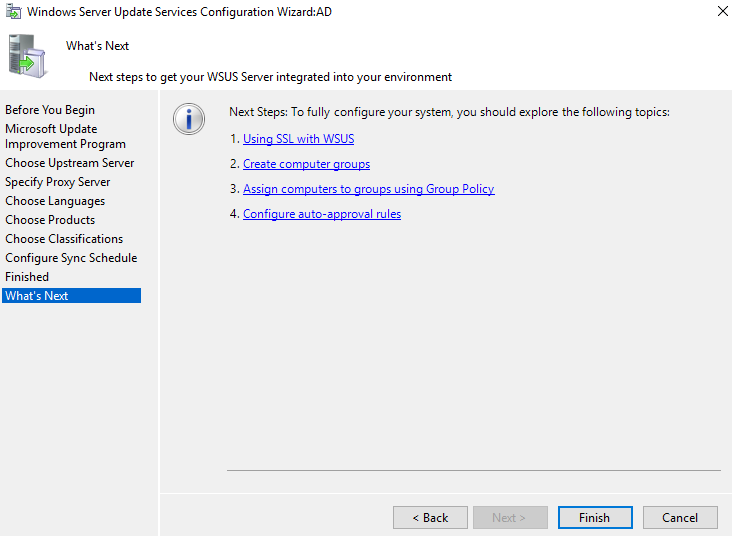
Start Synchronization:
Click Synchronize Now to begin downloading updates from Microsoft.
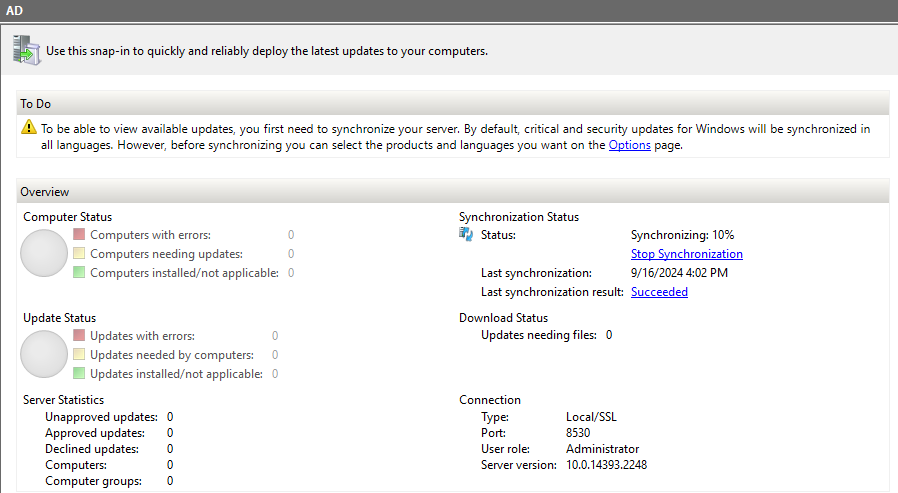
Approve Updates:
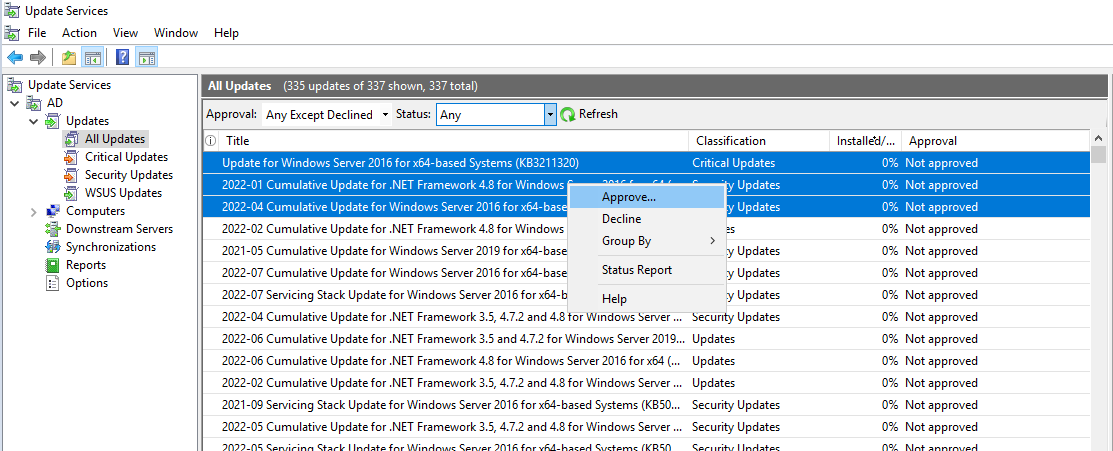
After the synchronization, approve updates by going to Updates > All Updates.
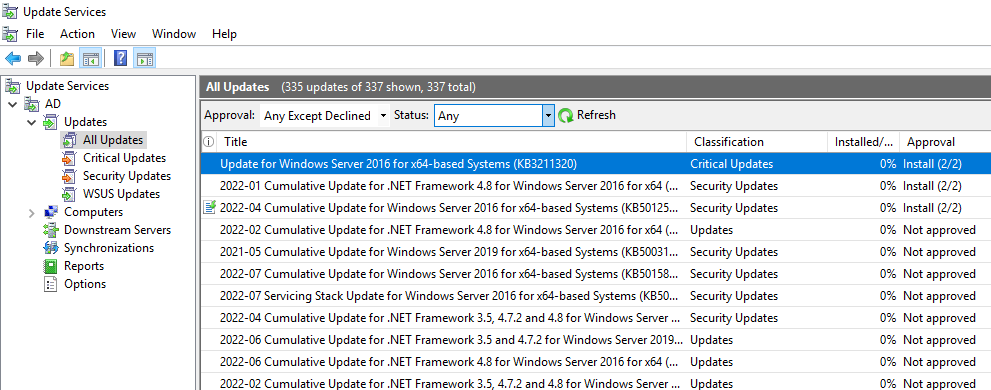
Right-click on updates and select Approve to distribute them to your client machines.
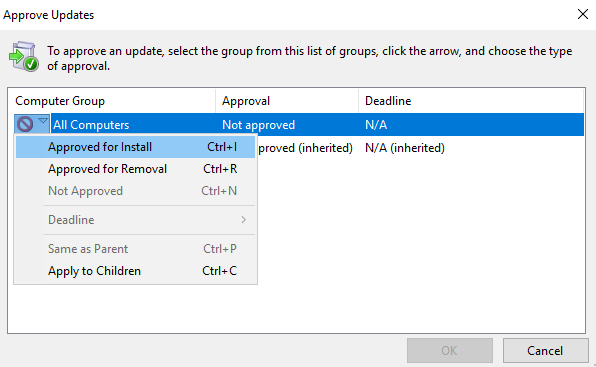
In Approved Updates, Right click on the Computer group (All Computers & Unassigned Computer) > Select Approved for install
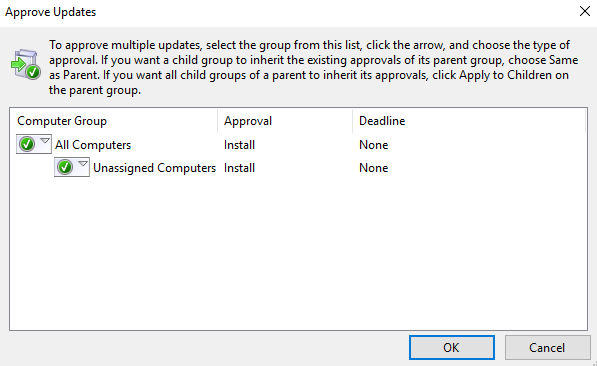
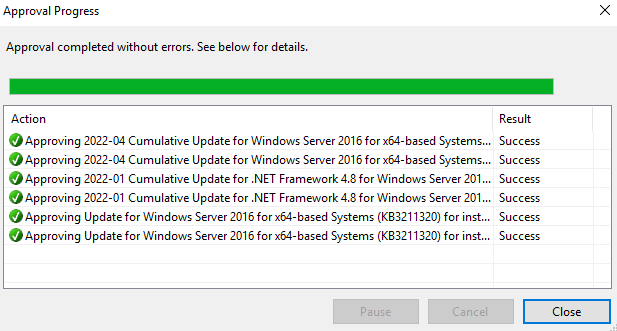
Now, Approval completed without errors.
Conclusion
By following these steps, you've successfully installed and configured WSUS on your Windows Server. WSUS allows you to manage updates efficiently, ensuring that your client machines stay up to date with the latest security patches and software updates. Regularly monitor the WSUS console for update approvals and synchronize updates as needed to keep your systems secure.
Subscribe to my newsletter
Read articles from Dinesh Kumar K directly inside your inbox. Subscribe to the newsletter, and don't miss out.
Written by

Dinesh Kumar K
Dinesh Kumar K
Hi there! I'm Dinesh, a passionate Cloud and DevOps enthusiast. I love to dive into the latest new technologies and sharing my journey through blog.