Comprehensive Guide to Developing Cross-Chain Smart Contracts
 Rushikesh Jadhav
Table of contents

GM Builders!
In a previous article, we broke down how cross-chain smart contracts work. Now, it’s time to take things a step further and get hands-on with implementing cross-chain messaging between two chains. Fire up your code editors because we’re diving into practical implementation!
Cross-chain messaging is the core mechanism that enables the transfer of data from one blockchain to another. Think of it as a bridge between chains, allowing seamless communication and actions across different ecosystems. For instance, you can send data from Avalanche to BSC (Binance Smart Chain) and trigger operations on BSC upon receiving it.
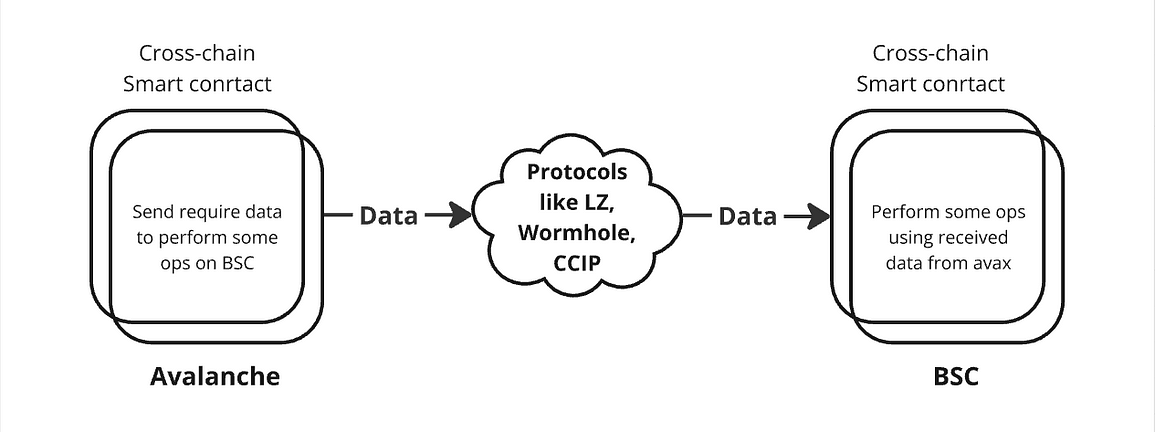
Here’s a real-world use case to illustrate this: Imagine a staking protocol that offers higher returns on BSC compared to Avalanche. Using cross-chain messaging, you can:
Send a Cross-Chain Message: On the Avalanche chain, send a message containing necessary staking data, like the amount to stake and any specific parameters.
Receive and Process the Message: On the BSC side, the message is received and verified via the cross-chain messaging protocol.
Execute the Staking Operation: Once the message is processed, the staking function on BSC is automatically invoked using the data received from Avalanche.
This process allows you to maximize the advantages of protocols across multiple chains without having to manually interact with both. Let’s break down how you can build this in practice.
Getting hands dirty
Now..

We are going to dive into the implementation of simple cross-chain messaging between the two chains straight away without wasting too much time.
For this article, We are going to use Wormhole. Wormhole provides solidity SDK for cross-chain messaging. We will utilize the cross-chain messaging by Wormhole to send data from one chain to another.
You can use Remix IDE to compile and deploy smart contracts or do the same locally on your machine by setting up a hardhat or foundry project.
Let’s define our contract WormholeCcm.sol.
The first step in implementing cross-chain messaging is defining our smart contract. In this case, we’ll call it WormholeCcm.sol (short for Cross-Chain Messaging).
// SPDX-License-Identifier: UNLICENSED
pragma solidity ^0.8.13;
import "wormhole-solidity-sdk/interfaces/IWormholeRelayer.sol";
import "wormhole-solidity-sdk/interfaces/IWormholeReceiver.sol";contract WormholeCcm is IWormholeReceiver{}
In this initial step, we start by defining the contract structure and importing the necessary Wormhole interfaces that will help us handle cross-chain communication.
SPDX License Identifier:
The line // SPDX-License-Identifier: UNLICENSED is a standard convention in Solidity contracts to specify the license under which the code is distributed. In this case, it’s marked as unlicensed, but feel free to choose a license that suits your project.
Solidity Version:
We define the Solidity version as ^0.8.13, meaning the contract will be compatible with Solidity version 0.8.13 and above. It’s important to specify the correct version to avoid compatibility issues with newer versions.
Importing Wormhole Interfaces:
We import two essential interfaces from the Wormhole SDK:
IWormholeRelayer: This interface will allow us to interact with Wormhole's relayer, which is responsible for sending cross-chain messages.IWormholeReceiver: This interface is required for receiving messages from other chains. By inheriting from this, our contract will be capable of handling incoming cross-chain messages.
Defining the Contract:
The contract WormholeCcm inherits from the IWormholeReceiver interface. This inheritance will later enable us to implement a function to handle incoming messages, but for now, we’re just setting up the base structure of the contract.
With this foundation in place, we are ready to move forward and start implementing the core functionality for sending and receiving cross-chain messages.
Define state variables
Now that we’ve defined the basic structure of our WormholeCcm.sol contract, it's time to introduce the state variables that will store important data and handle cross-chain message events.
event GreetingReceived(string greeting, uint16 senderChain, address sender);

uint256 constant GAS_LIMIT = 200_000;
uint16 public _srcChainId;

IWormholeRelayer public immutable wormholeRelayer;

string public latestGreeting;
address public owner;

mapping(uint16 => bytes32) private peerContracts;
Let’s break down what each comp
Greeting Received Event
event GreetingReceived(string greeting, uint16 senderChain, address sender);
This event is crucial for tracking when a message is received from another chain. The event will emit whenever a greeting is successfully received via cross-chain messaging, logging the following information:
greeting: The greeting message is sent from the other chain.senderChain: The chain ID of the chain that sent the message.sender: The address on the sender chain that initiated the message.
Gas Limit Constant:
uint256 constant GAS_LIMIT = 200_000;We define a constant
GAS_LIMITfor executing cross-chain transactions.Here, we set it to 200,000, but this value can be adjusted based on the complexity of the operation you are relaying across chains.
Source Chain ID:
uint16 public _srcChainId;Wormhole chain ID of the chain where the contract is going to be deployed.
Wormhole Relayer Interface:
IWormholeRelayer public immutable wormholeRelayer;We define a state variable
wormholeRelayerthat is an instance of theIWormholeRelayerinterface. This will be used to interact with Wormhole's relayer service, allowing us to send cross-chain messages from one blockchain to another.It’s marked as
immutable, meaning that it can only be set once during contract deployment and cannot be changed later, ensuring the integrity of the contract.
Latest Greeting:
string public latestGreeting;This variable will store the most recent greeting received from a cross-chain message. By making it
public, we allow anyone to query this data directly from the contract.
Owner:
address public owner;This variable will store the address of the owner of the contract.
Peer Contracts mapping:
mapping (uint16 => bytes32) private peerContracts;This mapping will store the address(in bytes32 format) of the peer contracts on other chains associated with the chain ID of that particular chain.
It will allow us to check if only peer contracts are allowed to send and receive messages across the chains.
By defining these state variables, we now have the necessary framework to store incoming data, limit gas usage, and manage interactions with the Wormhole relayer.
Define the “onlyOwner” modifier.
The “onlyOwner” modifier prechecks the condition of “msg.sender” being the owner of the contract. This allows us to restrict the access of some important functions.
Functions like the “setPeer” function will only be callable by the owner. Hence we need to use this modifier.
modifier onlyOwner() {
    require(msg.sender == owner);
    _;
}
Define the constructor
Now that we’ve set up our state variables, the next step is to define the constructor for our contract, WormholeCcm.sol. The constructor is responsible for initializing the contract with important parameters when it is deployed.
constructor(address _wormholeRelayer, uint16 srcChainId){
    wormholeRelayer = IWormholeRelayer(_wormholeRelayer);
    _srcChainId = srcChainId;
    owner = msg.sender;
}
Inside the constructor, we assign the wormholeRelayer state variable using the provided _wormholeRelayer address. This address must point to the correct instance of the Wormhole Relayer on the specific blockchain where your contract is deployed. You can get this address from wormhole docs.
We use IWormholeRelayer(_wormholeRelayer) to cast the address to the IWormholeRelayer interface, ensuring that our contract can properly interact with the Wormhole Relayer's functions. It is important to make sure we initialize the wormholeRelayer as it is immutable.
We also set the “srcChainId” variable’s value to the passed chain ID value. Which is the wormhole chain ID of the current chain.
We also initialize the owner variable by setting it to “msg.sender”. This means the deploying address will be the owner of the contract. It will allow only the owner to access functions like the “setPeer” function.
The “setPeer” function
This function is responsible for setting the peer contract addresses associated with respective chain IDs.
It takes two parameters :
ChainId: The chain ID of the target blockchain where the message is meant to be sent.peerContract: The address of the contract on the target chain associated with the provided chain id. This should be in bytes32 type.To convert an address to bytes32 we have to append 24 zeros before the address.
For eg, “0x1502e497B95e7B01D16C9C4C8193E6C2636f98C2” in bytes32 will be “0x000000000000000000000000**1502e497b95e7b01d16c9c4c8193e6c2636f98c2**”
The function also checks if the provided address is not a null address to avoid setting a null address for a particular chain ID.
function setPeer(uint16 chainId, bytes32 peerContract) public onlyOwner{
    require(peerContract != bytes32(0));
    peerContracts[chainId] = peerContract;
}
The “sendMessage” function
In this step, we implement the sendMessage function, which is responsible for sending cross-chain messages using Wormhole. This function allows us to send a greeting from one blockchain to another.
function sendMessage(
        uint16 targetChain,
        address targetAddress,
        string memory greeting
) public payable {
   uint256 cost = quoteCrossChainGreeting(targetChain);
   require(msg.value == cost);
   wormholeRelayer.sendPayloadToEvm{value: cost}(
        targetChain,
        targetAddress,
        abi.encode(greeting, msg.sender), // payload
        0, // no receiver value needed since we're just passing a message
        GAS_LIMIT,
        targetChain,
        msg.sender
   );
}
Here’s how this function works step-by-step:
- Function Signature:
The function is called
sendMessage, and it is marked aspublic, meaning anyone can call it.It takes three parameters:
targetChain: The chain ID of the blockchain where the message is being sent.targetAddress: The address of the contract on the target chain that will receive the message.greeting: The greeting message is to be sent cross-chain.
Cost Calculation:
uint256 cost = quoteCrossChainGreeting(targetChain);This line calls the function
quoteCrossChainGreetingto determine the cost of sending the message to thetargetChain. Sending messages cross-chain requires payment for the relayer service, which is chain-dependent.
Message Fee Validation:
require(msg.value == cost);The function checks whether the sender has provided the correct amount of Ether to cover the relaying costs. If the
msg.value(the amount of Ether sent with the transaction) is not equal to the calculatedcost, the transaction will fail.
Sending the Cross-Chain Message:
wormholeRelayer.sendPayloadToEvm{value: cost}(...):
This is where the actual cross-chain message is sent using Wormhole'ssendPayloadToEvmfunction. The function parameters include:
targetChain (uint16):
- This is the chain ID in Wormhole format that identifies the target blockchain where the message will be sent.
targetAddress (address):
- This specifies the contract address on the target chain that will receive the cross-chain message. It ensures that the message is delivered to the correct contract on the target blockchain.
payload (bytes memory):
The
payloadis the actual message being sent across chains, encoded asbytes.In this example, we use
abi.encode(greeting, msg.sender)to bundle the greeting string and the address of the sender (msg.sender) into a byte array. This encoding ensures that data is properly transmitted across chains and can be decoded on the receiving end.
receiverValue (uint256):
- This parameter indicates the amount of value (e.g., native tokens like Ether or BNB) to attach to the delivery transaction on the target chain. In this case, we pass
0, meaning no extra value is sent, as the function only delivers the message payload and doesn’t involve a token transfer.
gasLimit (uint256):
This defines the gas limit for the delivery transaction on the target chain. It’s the maximum amount of gas that can be used to execute the transaction on the destination chain.
In this example, we use the pre-defined
GAS_LIMITconstant (set to200,000earlier).
refundChainId (uint16):
This defines chain ID where the remaining gas should be refunded.
We have passed this as the target chain ID.
So refund will be received on the target chain.
refundAddress (address):
This defines the address where the remaining gas should be refunded.
We have passed this as “msg.sender” so the user who is sending the message will get a refund.
This sendMessage function encapsulates the core logic for sending data between blockchains. It ensures that the user pays the correct fee for the cross-chain message and uses Wormhole’s relayer to transport the encoded greeting message to the specified target chain and address.
Fees for sending cross-chain messages
Sending cross-chain messages incurs fees. Now to get cross-chain fee at a certain block wormhole offers a function to get the cross-chain fee.
function quoteCrossChainGreeting(
    uint16 targetChain
) public view returns (uint256 cost) {
    (cost, ) = wormholeRelayer.quoteEVMDeliveryPrice(
        targetChain,
        0,
        GAS_LIMIT
    );
}
Input: It takes the
targetChain(the destination chain ID).Output: It returns the
costrequired to send the message, based on the target chain and the gas limit.
“receiveWormholeMessages” function
With the cross-chain messaging setup in place, the next crucial component is the receiveWormholeMessages function. This function is responsible for processing incoming messages sent from other blockchains via Wormhole.
function receiveWormholeMessages(
    bytes memory payload,
    bytes[] memory, // additionalVaas
    bytes32 sender,
    uint16 sourceChain,
    bytes32 /*deliveryHash*/
) public payable override {
    require(msg.sender == address(wormholeRelayer), "Only relayer allowed");
    require(peerContracts[sourceChain] == sender);

    // Parse the payload and do the corresponding actions!
    (string memory greeting, address senderAddress) = abi.decode(
        payload,
        (string, address)
    );
    latestGreeting = greeting;
    emit GreetingReceived(latestGreeting, sourceChain, senderAddress);
    }
Here’s what this function does:
Purpose: It processes messages received from other chains. When a cross-chain message arrives, this function decodes and handles it. This function is only called by the wormhole relayer contract.
Inputs:
bytes memory payload:
Description: This is the main message data passed from the source contract on the originating chain.
Purpose: It contains the actual content that needs to be processed. In this function, the payload includes the greeting message and the sender’s address, encoded as bytes.
bytes[] memory additionalVaas:
Description: This is an array of additional Verified Account Addresses (VAAs) that may be included with the message. These VAAs are typically used for additional verification but are not used in this function.
Purpose: They provide supplementary data that might be relevant for advanced use cases, although they are not used in the current implementation.
bytes32 sender:
Description: This is the address of the source contract on the originating chain that sent the message.
Purpose: It identifies the contract from which the message originated. This can be useful for verifying the source of the message or routing it to the correct contract.
uint16 sourceChain:
Description: The Wormhole chain ID of the originating chain where the message was sent from.
Purpose: It specifies which chain the message came from. This helps in tracking the source chain and can be used for logging or processing decisions based on the origin.
bytes32 deliveryHash:
Description: A unique hash representing the contents of the delivery. This hash is used for replay protection.
Purpose: It ensures that each message is unique and helps prevent replay attacks, where the same message could be maliciously replayed multiple times
Not all of these parameters are always used but we should be aware of them.
Outputs:
State Update: The function updates the
latestGreetingstate variable with the new greeting message.Event Emission: It emits a
GreetingReceivedevent with the updated greeting, source chain ID, and sender’s address.
Security Check:
The function ensures that only the Wormhole relayer can invoke it, protecting against unauthorized access.
The function ensures that only a peer contract from the other chain has sent the message.
This function completes the cross-chain communication process by handling incoming messages and updating the contract state accordingly. It ensures that your contract can respond to messages from other chains and provides a way to track and act upon received data.
Overall contract
// SPDX-License-Identifier: UNLICENSED
pragma solidity ^0.8.13;

import "wormhole-solidity-sdk/interfaces/IWormholeRelayer.sol";
import "wormhole-solidity-sdk/interfaces/IWormholeReceiver.sol";

contract WormholeCcm is IWormholeReceiver {
    event GreetingReceived(string greeting, uint16 senderChain, address sender);

    uint256 constant GAS_LIMIT = 200_000;
    uint16 public _srcChainId;

    IWormholeRelayer public immutable wormholeRelayer;

    string public latestGreeting;
    address public owner;

    mapping(uint16 => bytes32) private peerContracts;

    modifier onlyOwner() {
        require(msg.sender == owner);
        _;
    }

    constructor(address _wormholeRelayer, uint16 srcChainId){
        wormholeRelayer = IWormholeRelayer(_wormholeRelayer);
        _srcChainId = srcChainId;
        owner = msg.sender;
    }

    function quoteCrossChainGreeting(
        uint16 targetChain
    ) public view returns (uint256 cost) {
        (cost, ) = wormholeRelayer.quoteEVMDeliveryPrice(
            targetChain,
            0,
            GAS_LIMIT
        );
    }

    function setPeer(uint16 chainId, bytes32 peerContract) public onlyOwner{
        require(peerContract != bytes32(0));
        peerContracts[chainId] = peerContract;
    }

    function sendMessage(
        uint16 targetChain,
        address targetAddress,
        string memory greeting
    ) public payable {
        uint256 cost = quoteCrossChainGreeting(targetChain);
        require(msg.value == cost);
        wormholeRelayer.sendPayloadToEvm{value: cost}(
            targetChain,
            targetAddress,
            abi.encode(greeting, msg.sender), // payload
            0, // no receiver value needed since we're just passing a message
            GAS_LIMIT,
            targetChain,
            msg.sender
        );
    }


    function receiveWormholeMessages(
        bytes memory payload,
        bytes[] memory, // additionalVaas
        bytes32 sender,
        uint16 sourceChain,
        bytes32 /*deliveryHash*/
    ) public payable override {
        require(msg.sender == address(wormholeRelayer), "Only relayer allowed");
        require(peerContracts[sourceChain] == sender);

        // Parse the payload and do the corresponding actions!
        (string memory greeting, address senderAddress) = abi.decode(
            payload,
            (string, address)
        );
        latestGreeting = greeting;
        emit GreetingReceived(latestGreeting, sourceChain, senderAddress);
    }
}
Let’s test it
Compile & deploy on two chains.
Let’s compile the above contract on remix IDE and deploy it on two chains Avalanche fuji and BSC testnet.
Compile the contract
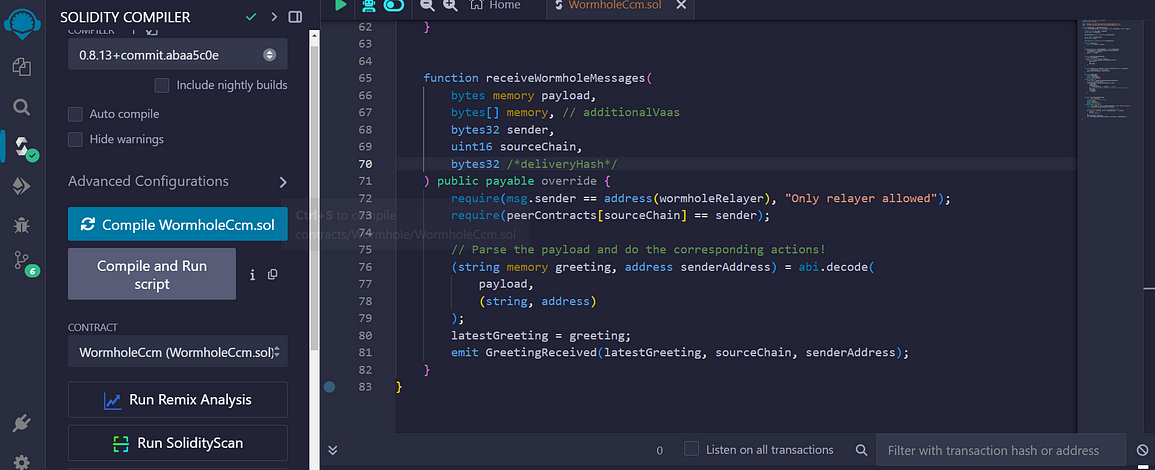
Go to the compile tab on the sidebar while keeping the contract open on the editor. Hit the compile button. Upon successful compilation move to the next step.
Connect the metamask wallet with REMIX IDE & deploy the contract
Switch to the “deploy and run transaction” tab on the remix IDE. Select the injected metamask option in the environment drop-down.
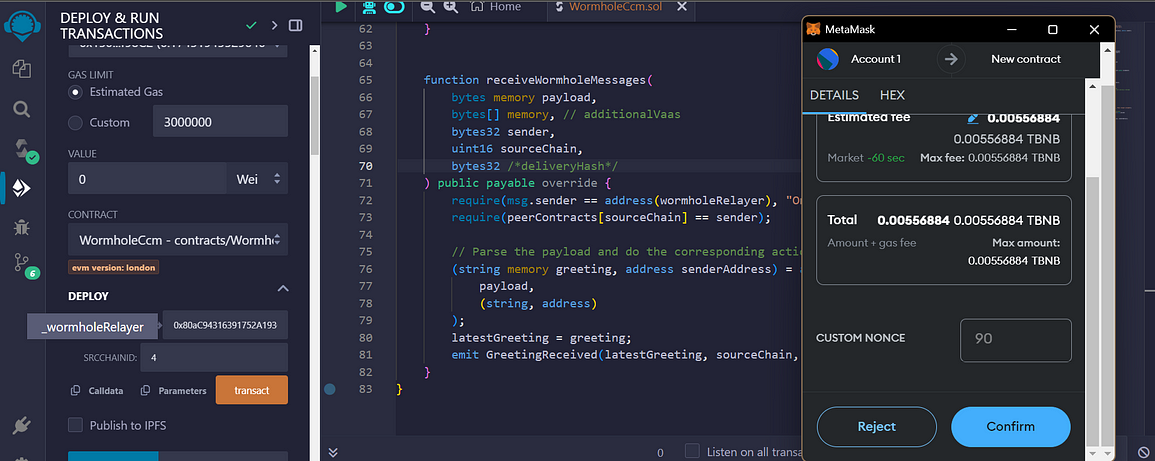
Get the relayer address from wormhole documentation here. Enter the relayer address for the connected chain as a constructor argument in the deploy input field.
Hit the deploy button and confirm the transaction in metamask. The following screenshot shows the deployment transaction for the BSC Testnet chain. Repeat the same procedure after switching the metamask wallet to the avalanche fuji chain and deploy the contract on the avalanche fuji.
Configure peer contracts
To set up the peer contract, you’ll need to invoke the setPeer function. This ensures that only authorized contracts on the corresponding chains can communicate with each other.
Here’s how it works:
Invoke the
setPeerfunction: On the target chain (e.g., BSC), call thesetPeerfunction to establish a connection with the contract on the Avalanche chain.Pass the required parameters:
Chain ID: Use the Wormhole format for the Avalanche chain, which is 6.
Contract Address: Provide the address of the deployed contract on the Avalanche chain in bytes32 format.
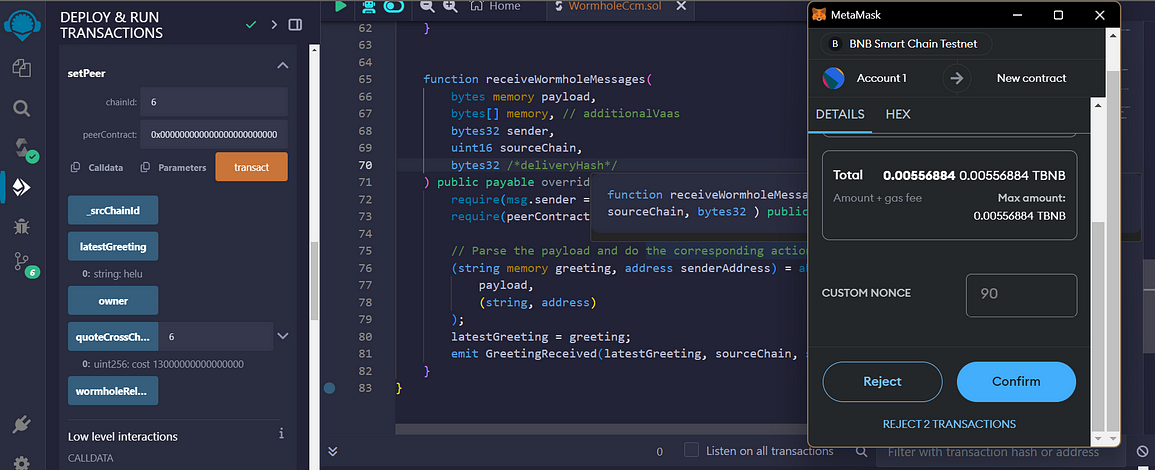
By setting up this peer connection, you ensure that only the authorized contract on the Avalanche chain can send cross-chain messages to the BSC contract and vice-versa. This step is crucial for securing the communication between contracts across chains, preventing unauthorized messages from being processed.
Make sure you repeat the same on the avalanche fuji chain and authorize the BSC testnet chain contract address.
Get fees required for sending a message.
Before sending a message across chains, it’s essential to determine the fee required for delivery. In our case, we use the quoteCrossChainGreeting function to get an accurate fee estimate. This function takes the destination chain ID, formatted according to Wormhole’s specifications (you can easily find the chain IDs in Wormhole's documentation).
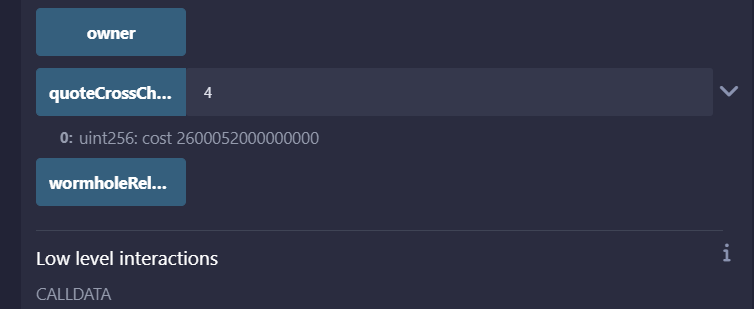
For example, after calling the function, we received a fee estimate of 2600052000000000 wei, which is equivalent to 0.002600052 AVAX. Compared to other cross-chain protocols, Wormhole’s fees are remarkably low, making it a cost-effective choice for cross-chain messaging.
With this information in hand, we now know that when invoking the sendMessage function, we must pass 0.002600052 AVAX as the required value to successfully send the message. This fee ensures that our message will be relayed across chains with the necessary gas limits for execution on the destination chain.
Send message
Now that we’ve estimated the fee, it’s time to send the cross-chain message from the AVAX Fuji Testnet to the BSC Testnet.
To do this, we will invoke the sendMessage function with the value received from the quoteCrossChainGreeting function, which is 0.002600052 AVAX.
Here’s the step-by-step process:
Set the value: In the value field, enter 2600052000000000 wei (equivalent to 0.002600052 AVAX).
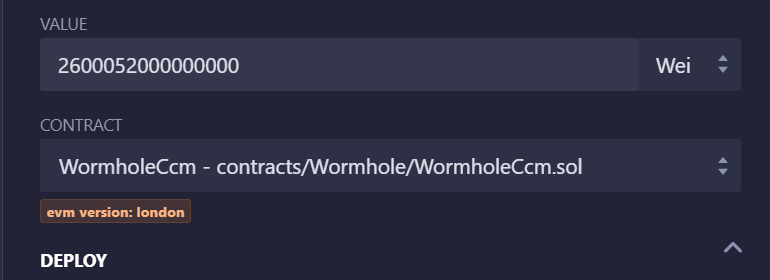
Passing value before initiating the transaction
Invoke the function: Call the sendMessage function by passing in the required parameters:
Target Chain ID: Get the appropriate chain ID for BSC Testnet from Wormhole documentation.
Target Contract Address: Enter the address of the contract deployed on the BSC Testnet that will receive the message.
Greeting Message: Include the greeting message you wish to send across chains.
Once these parameters are provided, the cross-chain message will be sent from the AVAX Fuji Testnet to the BSC Testnet.
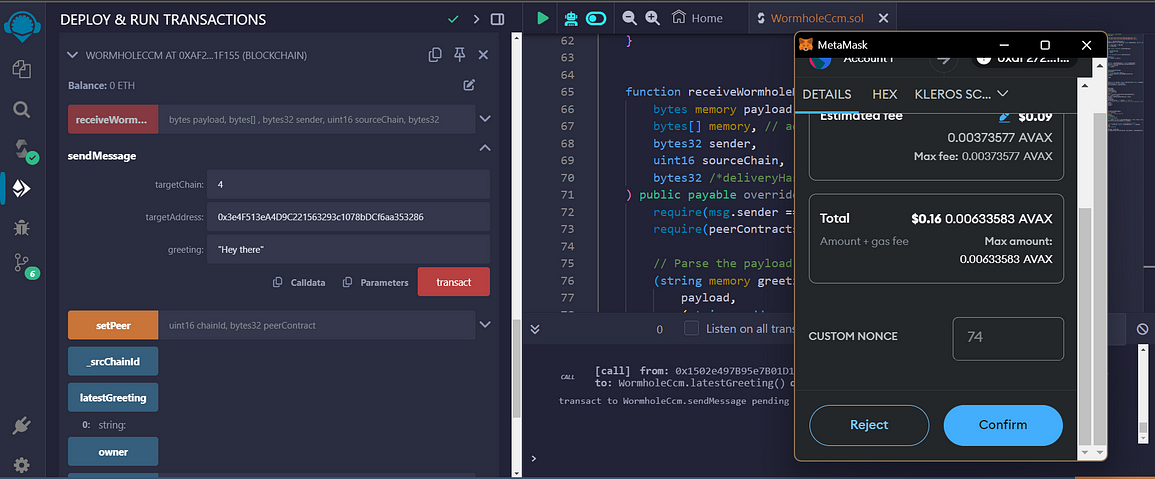
Monitoring Cross-Chain Transaction Status
After sending a cross-chain message, it’s important to monitor its status to ensure successful delivery. Wormhole provides an easy-to-use tool for this: Wormhole Scan.
To track the progress of your cross-chain transaction:
Copy the transaction hash from the source chain (e.g., AVAX Fuji Testnet).
Navigate to Wormhole Scan.
Paste the transaction hash into the search bar.
Wormhole Scan will display the status of your transaction, allowing you to confirm that the message has been successfully relayed across chains.
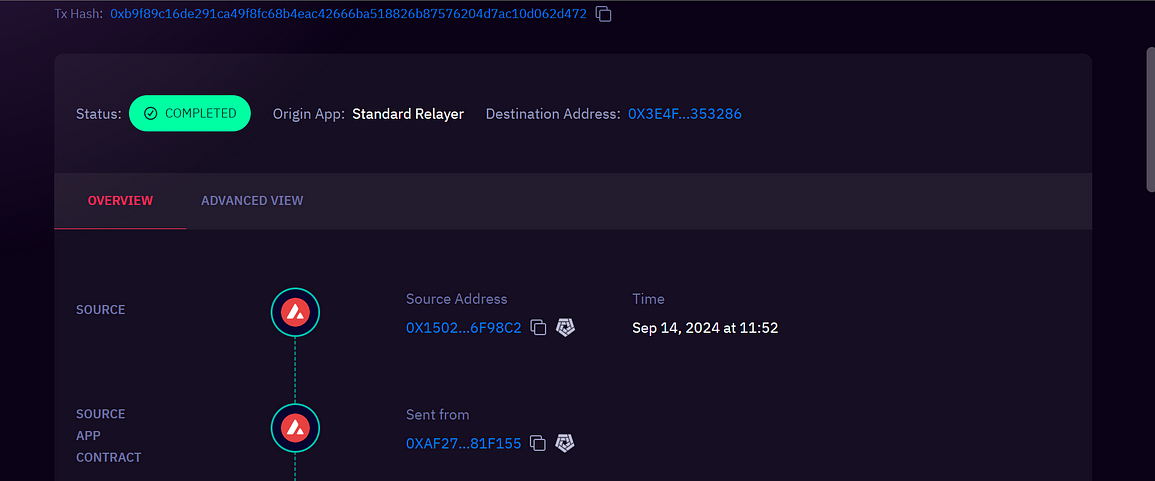
It’s already completed!!. Wormhole is superfast. The speed of sending data or message across the chain depends on what protocol we use and what mechanism that protocol uses for cross-chain data transfer.
Protocols like Chainlink CCIP may take more time to deliver a message as it waits for the finality of transactions on the target chain. While wormhole uses a different mechanism network of guardian nodes and on-chain relayers. You can learn more about it here.
Verifying Message Reception on the Destination Chain
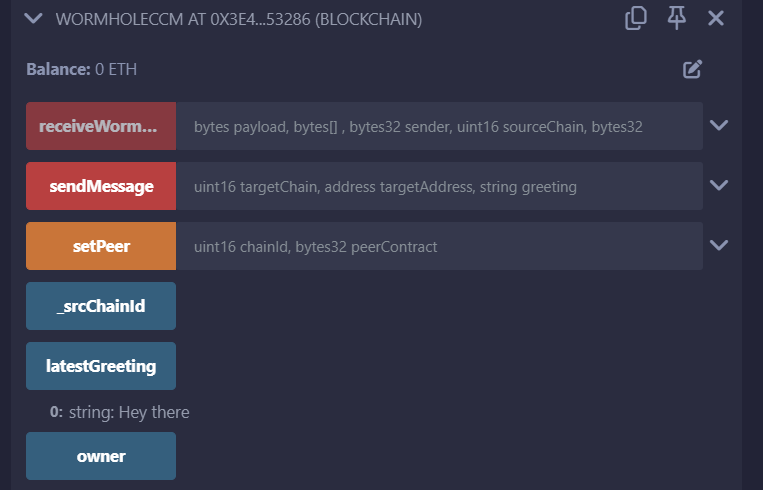
After sending the cross-chain message, you can verify if it has been successfully received on the destination chain by reading the latestGreeting variable. This variable should update to reflect the message you sent, in this case, "Hey there".
Here’s how you can confirm the message reception:
Check on Wormhole Scan:
You can confirm the transaction’s status and message reception using Wormhole Scan by entering the transaction hash. It will show the cross-chain message’s journey, including its delivery to the destination chain.

Read the latestGreeting on BSC Testnet:
Switch your MetaMask wallet to the BSC Testnet chain & make sure remix IDE is connected to the BSC testnet chain.
Invoke the
latestGreetinggetter function in Remix to read the value stored in the contract.
The result should return the message you sent from the Avalanche Fuji chain, which is “Hey there”. This confirms the successful delivery of the cross-chain message.
That’s all it takes — just two key functions: sendMessage and receiveMessage, along with configuring the endpoints and pathways, and you're ready to go with Wormhole cross-chain messaging! But wait, what about other protocols that also offer cross-chain messaging?
Don’t worry, I’ve got you covered! While this guide focuses on Wormhole, different protocols follow a similar structure, but with some variations. To help you navigate through them, here’s a link to a Remix workspace and a GitHub repository where you can explore contracts using various cross-chain messaging protocols:
Remix: Remix Workspace
GitHub: Cross-Chain Messaging Repository
These resources will guide you through setting up cross-chain messaging with other protocols like LayerZero, Axelar, and more.
But do we have to learn each protocol separately? Not at all. As you explore the contracts, you’ll quickly notice that sending cross-chain messages essentially boils down to three key steps:
A function to send messages from the source chain.
A function to receive messages on the destination chain.
Configuring the endpoint addresses and peer contracts, which may have different names depending on the protocol, but the core functionality remains the same.
Once you grasp these basic steps, switching between protocols becomes simple. Whether it’s Wormhole, LayerZero, or any other, the underlying logic is consistent. With this understanding, you can confidently implement cross-chain messaging using any protocol!
Conclusion
Cross-chain messaging is an essential tool for enabling seamless communication between blockchains, allowing data and transactions to flow freely across different networks. Whether you’re using Wormhole, LayerZero, or another protocol, the core concepts remain consistent: sending a message from the source chain, receiving it on the destination chain, and configuring the necessary endpoints and contracts.
Once you grasp these fundamental steps, you’ll find that implementing cross-chain messaging becomes straightforward, regardless of the protocol. With this knowledge, you’re now equipped to start building powerful cross-chain applications. Happy coding!
Subscribe to my newsletter
Read articles from Rushikesh Jadhav directly inside your inbox. Subscribe to the newsletter, and don't miss out.
Written by

Rushikesh Jadhav
Rushikesh Jadhav
Innovative Smart Contract & Backend Developer building cross-chain interoperable smart contracts and Dapps. With over a year of hands-on experience in smart contract and backend development, I’m passionate about transforming blockchain technology into powerful, user-friendly solutions. My expertise lies in developing cross-chain decentralized applications that streamline interactions and enhance user experiences. From designing upgradeable smart contracts to optimizing token strategies and developing dynamic algorithms, I thrive on solving complex challenges and delivering impactful results. My work has led to significant improvements in user returns and project rankings, reflecting my commitment to innovation and excellence. I’m all about making blockchain technology more accessible and effective. Let’s connect and see how we can push the boundaries of blockchain together! 🚀