New Volume Mounting using AWS EC2 in Linux File system | Linux (1) #LinuxAdmin
 Karthi S
Get inside the console of AWS→EC2→Volumes

Configure the New Volume:
In the Create Volume wizard:
Volume Type: Select the type of volume (e.g., General Purpose SSD, Provisioned IOPS SSD, Magnetic).
Size (GiB): Specify the size of the volume in gigabytes.
Availability Zone: Choose the same availability zone as your EC2 instance to ensure they can be attached together.
Optionally, you can set other configurations such as Snapshot, Encryption, etc., based on your requirements.
Attach the Volume to Your EC2 Instance:
Once the volume is created, go back to the Volumes dashboard.
Right-click on the newly created volume & select Attach Volume.

NOTE: [this use to show clearly in white indication]
In the Instance field, select the EC2 instance to which you want to attach the volume.
Specify the Device (e.g., /dev/sdf, /dev/xvdf) [you’ll also name them when you attach it to the instance] where the volume will appear inside the instance.
1. Partitioning the Disk
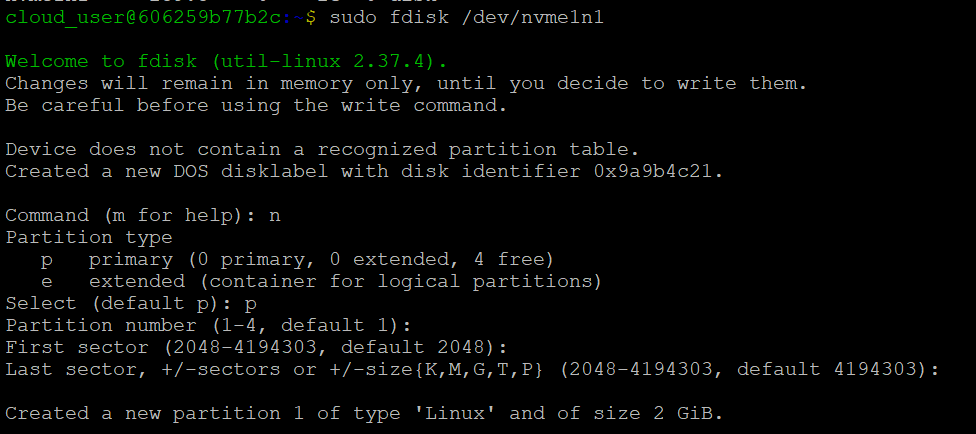
To create a new partition on
/dev/nvme1n1:Run
fdiskto start partitioning:sudo fdisk /dev/nvme1n1In the
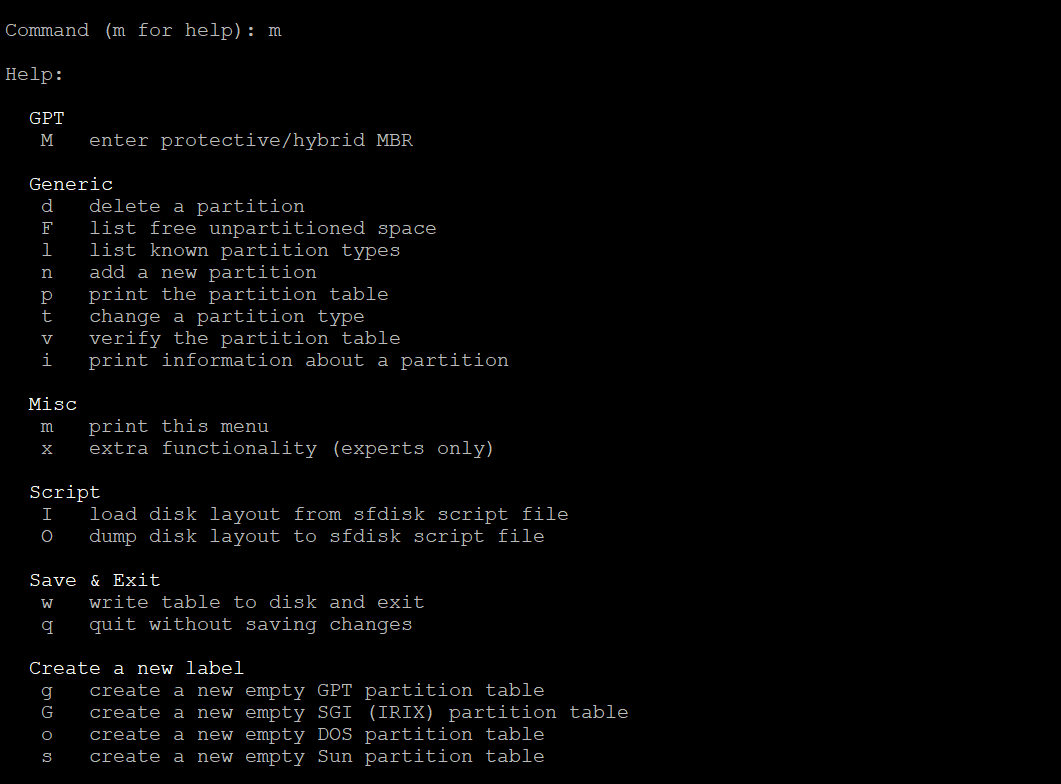
fdiskmenu:
Press
nto create a new partition.Accept the default partition number by pressing
Enter.Accept the default first sector by pressing
Enter.Accept the default last sector by pressing
Enter(this will create a partition using the whole disk).Press
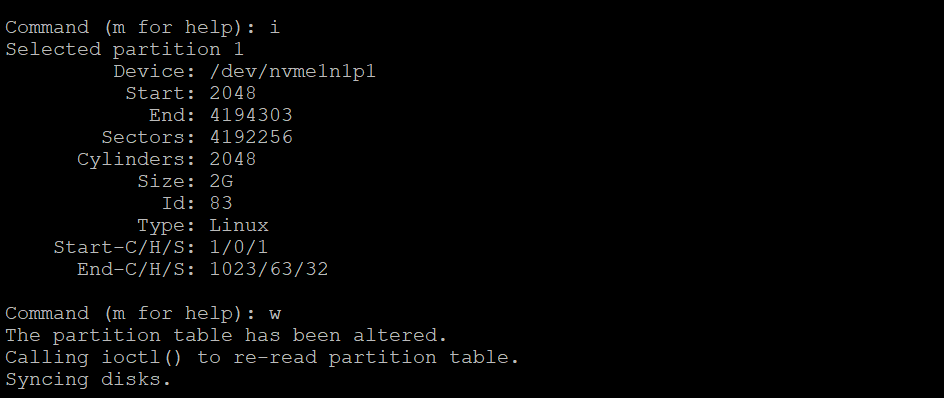
wto write the partition table to the disk and exitfdisk.

Now the partition
/dev/nvme1n1p1is created.
2. Formatting the Partition with XFS
Next, format the partition using the XFS filesystem:
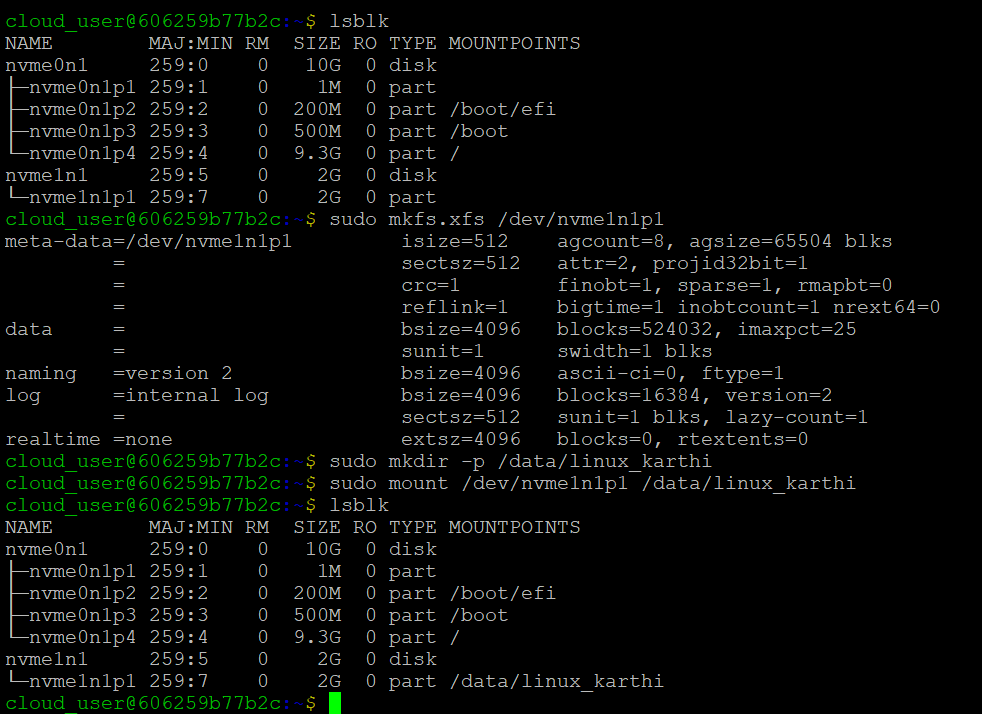
Run the following command to format
/dev/nvme1n1p1:sudo mkfs.xfs /dev/nvme1n1p1
3. Mount the Partition to /data/linux_karthi/
Now, mount the newly formatted partition to the desired directory:
Create the mount point if it doesn't exist:
sudo mkdir -p /data/linux_karthiMount the partition to
/data/linux_karthi:sudo mount /dev/nvme1n1p1 /data/linux_karthi

/data/linux_karthi mount point will no longer be available because it’s a temporary mount. To ensure the mount persists across reboots, you need to add its corresponding UUID or blkid entry to the /etc/fstab file. Once the entry is added, the mount will remain active even after a reboot."4. Making the Mount Permanent.
To make the mount persistent across reboots, add an entry to the /etc/fstab file:
Open
/etc/fstabwith an editor vi,get the blkid first hand

sudo vi /etc/fstab
Add the following line to the file:
UUID /data/linux_karthi xfs defaults 0 0
Save the file and exit the editor.
5. Verifying the Mount
To verify that the partition is mounted properly, use:
df -h /data/linux_karthi
This command will display the disk usage of the newly mounted partition. If everything is set up correctly, you'll see the details of /dev/nvme1n1p1 mounted at /data/linux_karthi.

HAPPY LEARNING!!
Subscribe to my newsletter
Read articles from Karthi S directly inside your inbox. Subscribe to the newsletter, and don't miss out.
Written by

Karthi S
Karthi S
Evolving around Devops and multi-cloud. Cloud - AWS/Azure Container & orchestration -> Docker & Kubernetes Automating -> golang/shell scripting Certified AZ900 | AZ104 | RHSCA