What is CORS !! Let's Configure Cross-Origin Resource Sharing (CORS) for S3.
 RAKESH DUTTA
What is CORS !!
In the digital playground of the web, applications love to share their toys — whether it’s fetching cool data from another site or grabbing some snazzy images hosted elsewhere. But as with any playground, there are rules to keep things safe. Enter Cross-Origin Resource Sharing (CORS), the web’s very own hall monitor. CORS lets web apps interact across different domains while keeping everything secure and above board. Let’s dive into how CORS works, why it’s so important, and how it helps your apps share data without letting the bullies take over.
Basics of CORS
CORS is like the web’s equivalent of a backstage pass. Normally, the web’s Same-Origin Policy (SOP) acts like a strict bouncer, making sure that only resources from the same domain can talk to each other. While SOP is great at stopping shady interactions, it can be a buzzkill when your app needs to fetch cool stuff from other domains. That’s where CORS steps in, saying, “Hey, it’s cool, they’re with me,” and allowing safe cross-origin requests.
How CORS Works !!
When your web app asks for something from a different domain (a cross-origin request), the browser goes, “Hold on a second, are you allowed to do that?” It then checks the server’s response headers to see if the server says, “Yep, it’s cool.” If the server includes headers like Access-Control-Allow-Origin, the browser nods approvingly and lets the request go through. If not, it blocks the request faster than a cat knocks over a glass of water.
Example Scenario: Imagine your website, https://example-client.com, wants to grab some juicy data from https://example-api.com. For the request to go through, example-api.com has to give the green light with a header like:
Access-Control-Allow-Origin: https://example-client.com
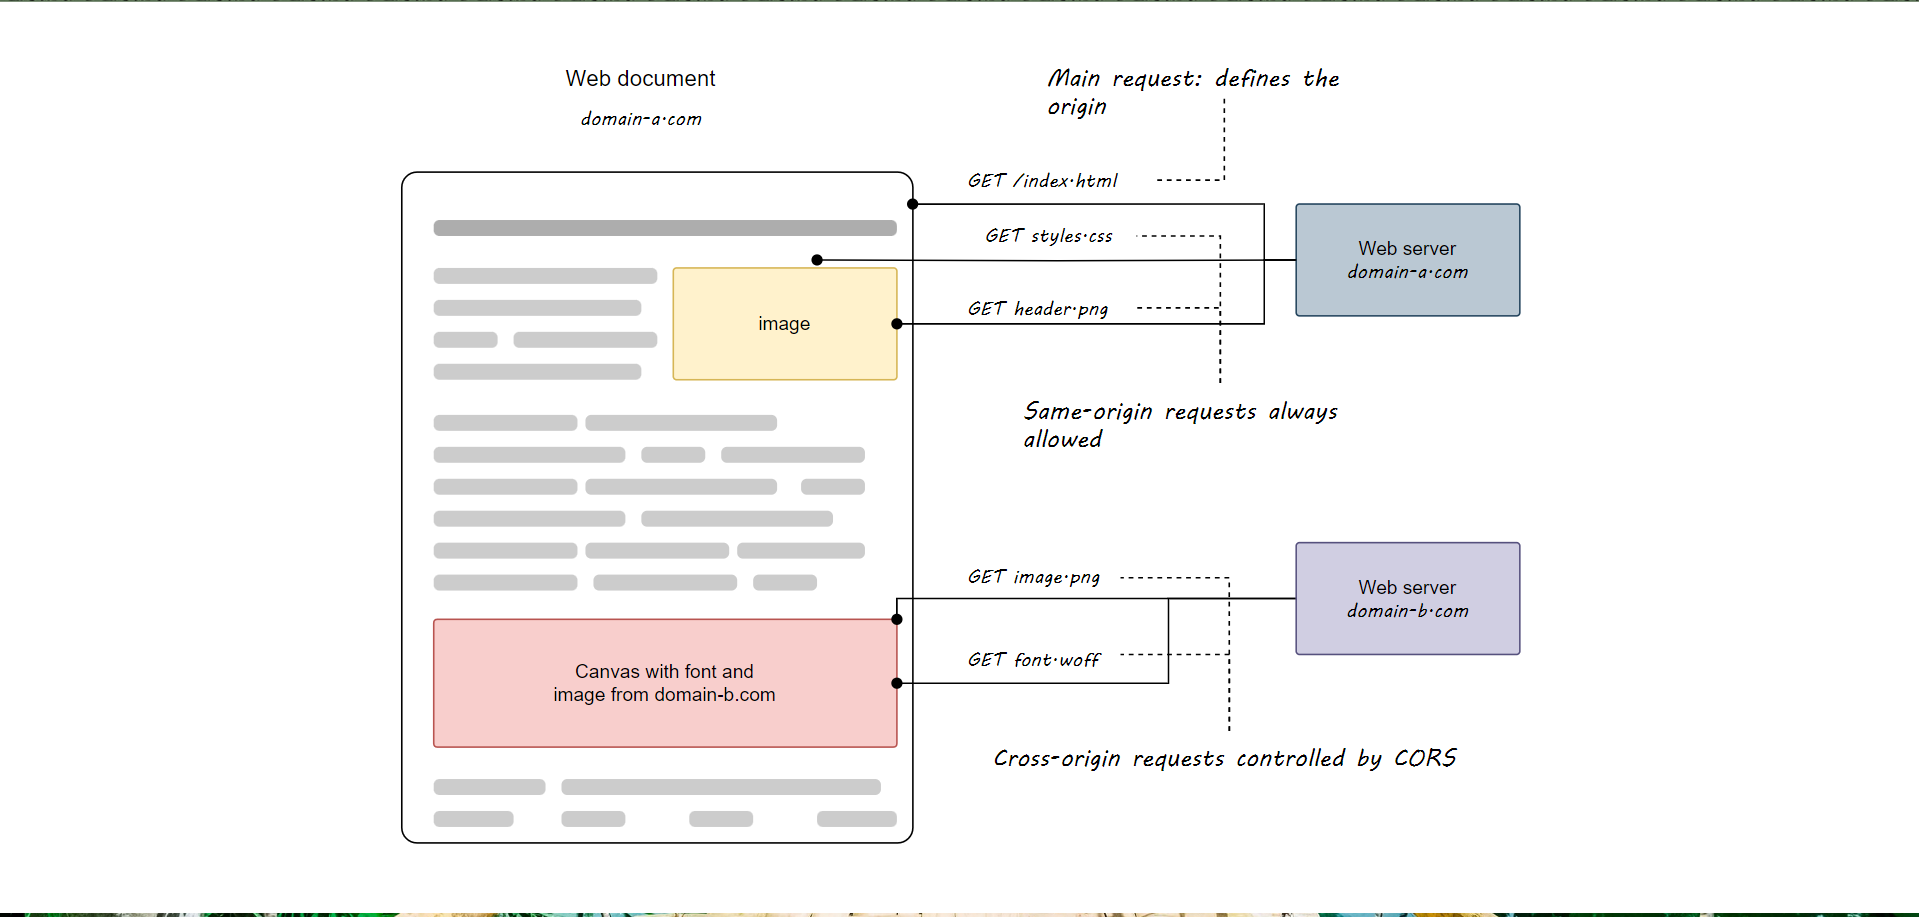
This tells the browser, “Hey, it’s all good! Let them have what they need.” If this header is not present or is set to a different domain, the browser will block the request due to the same-origin policy.
Why CORS is Crucial for Web Security !!
CORS doesn’t just hand out free passes to anyone who asks. It’s like that really strict friend who makes sure only the right people get invited to the party. By controlling which domains can access your resources, CORS helps keep your web app safe from sneaky tricks like Cross-Site Request Forgery (CSRF) and other nasty web-based attacks.
Use Case : Fetching Data from a Third-Party API
Consider a scenario where you have a front-end application hosted on https://frontend-app.com that needs to access a third-party API hosted on https://third-party-api.com to fetch data. Since these are two different origins, the third-party API must enable CORS for the domain https://frontend-app.com.
Here’s how this works:
The front-end application sends an HTTP GET request to
https://third-party-api.com.The browser checks the CORS policy set by
https://third-party-api.com.If the response header includes
Access-Control-Allow-Origin: https://frontend-app.com, the browser allows the request, and the response is returned to the front-end application.If the CORS policy does not allow the origin or the header is not present, the browser blocks the request, and the front-end application receives an error.
In AWS, GCP, and Azure, several services allow you to configure Cross-Origin Resource Sharing (CORS) to control how resources are accessed across different domains. Here’s a breakdown of the services in each cloud provider that support CORS configuration :
Amazon S3 (Simple Storage Service)
S3 buckets allow you to configure CORS rules directly from the AWS Management Console, CLI, or SDK. These rules define the allowed origins, methods, headers, and other CORS settings.
Amazon CloudFront
As a content delivery network (CDN), CloudFront allows you to configure CORS headers at the origin server or by creating custom HTTP responses using LambdaEdge.
AWS Lambda (with Amazon API Gateway)
When exposing a Lambda function via API Gateway, you can configure CORS settings on the API Gateway to handle preflight OPTIONS requests.
Amazon Elastic Load Balancer (Application Load Balancer)
For services behind an Application Load Balancer, you can add CORS headers in the response returned from the backend application or through custom responses.
Overall, CORS isn’t just a security feature — it’s essential for modern web applications. By enabling secure cross-origin requests, CORS makes apps more interactive, integrated, and enjoyable. Whether you're building a single-page app, using third-party services, or delivering content through a CDN, understanding CORS is crucial for creating secure and user-friendly web experiences. So, next time you set up a web app, remember CORS — the unsung hero keeping things running smoothly behind the scenes.
Here we going to apply CORS configuration on S3 Bucket.
Step 1 : Let’s create a bucket with open public and put some object like webpage in it.

Step 2 : Verify that bucket has the open for public.

Step 3 : Or you can also modify it after creation of the bucket.
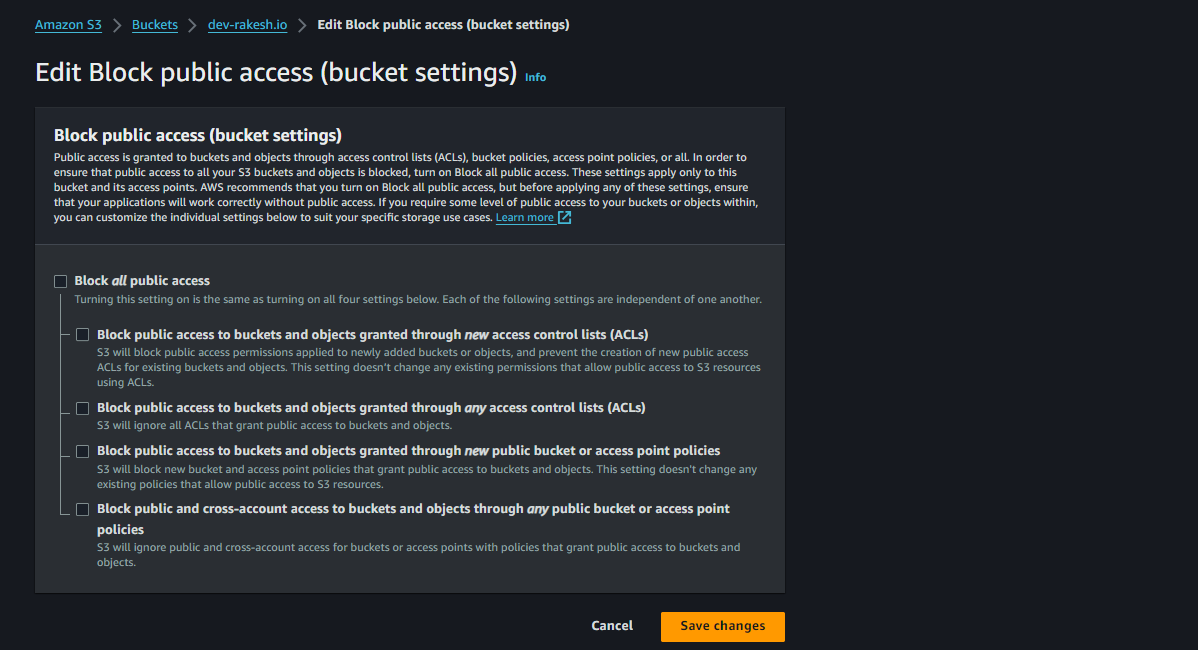
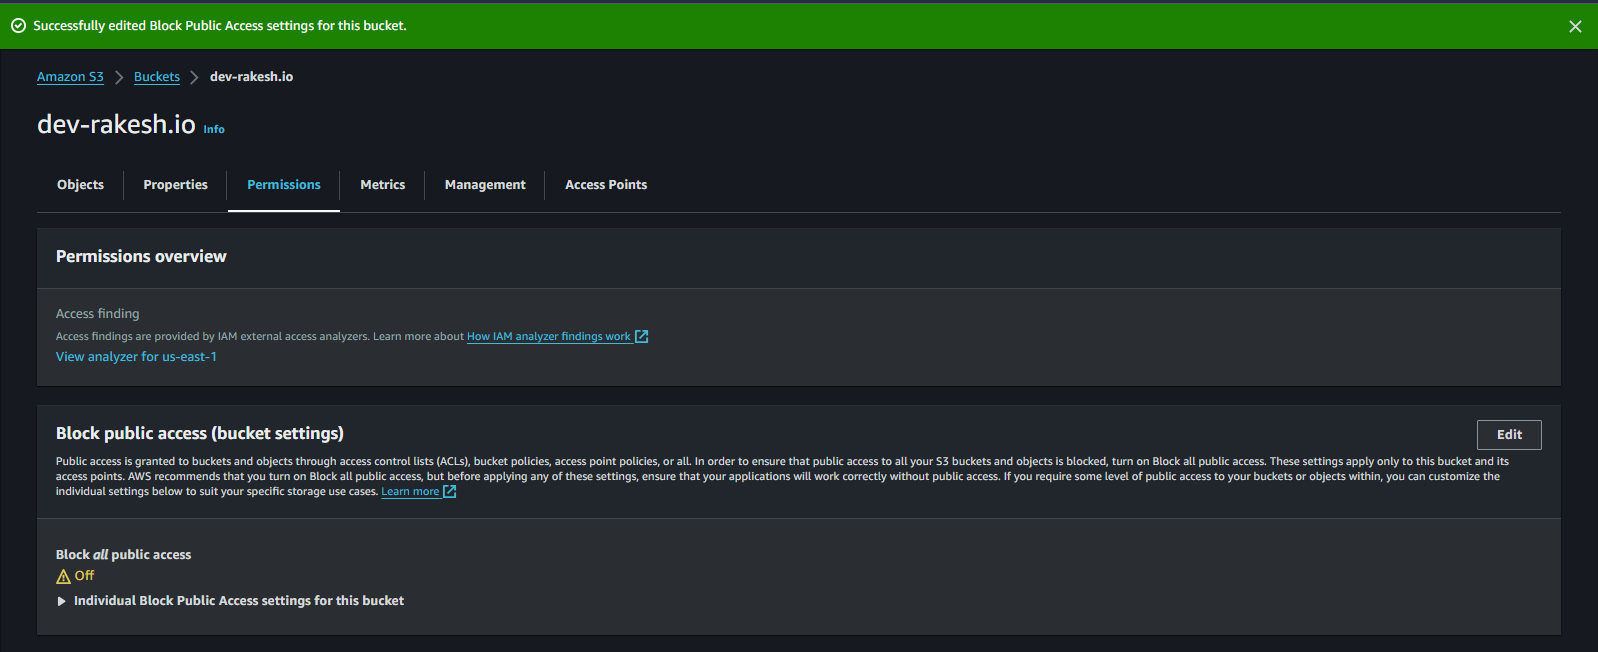
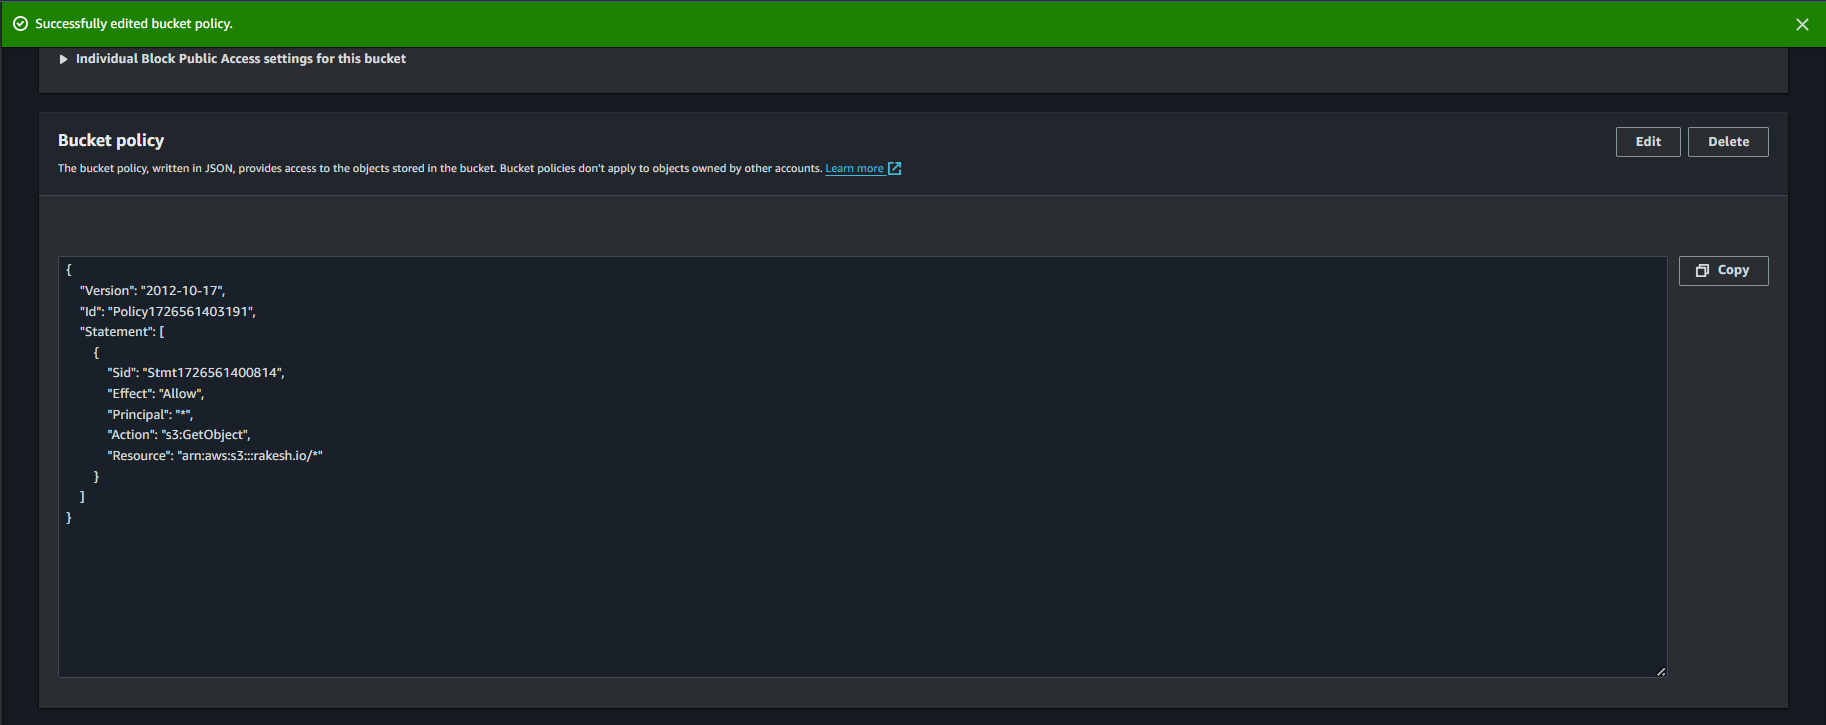
Step 4 : Here we just need to add mandatory policy for publishing our bucket object.

Step 5 : Then hit the policy generator and generate policy and then pick the policy from here.
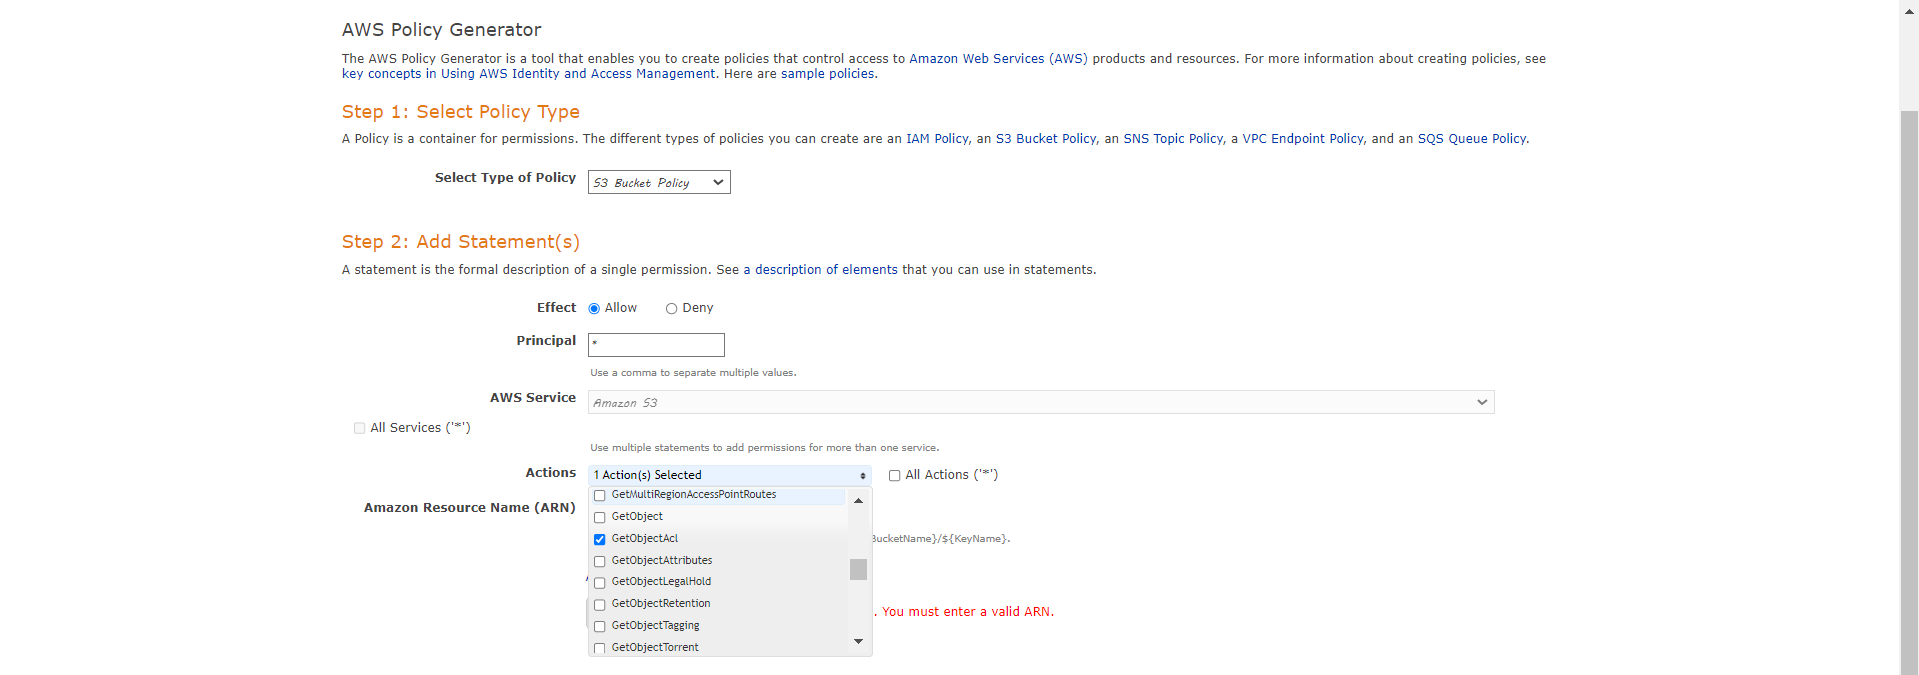
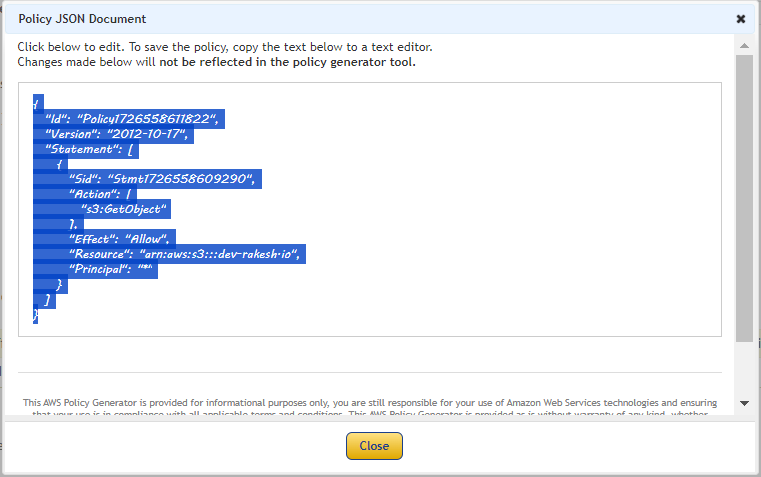
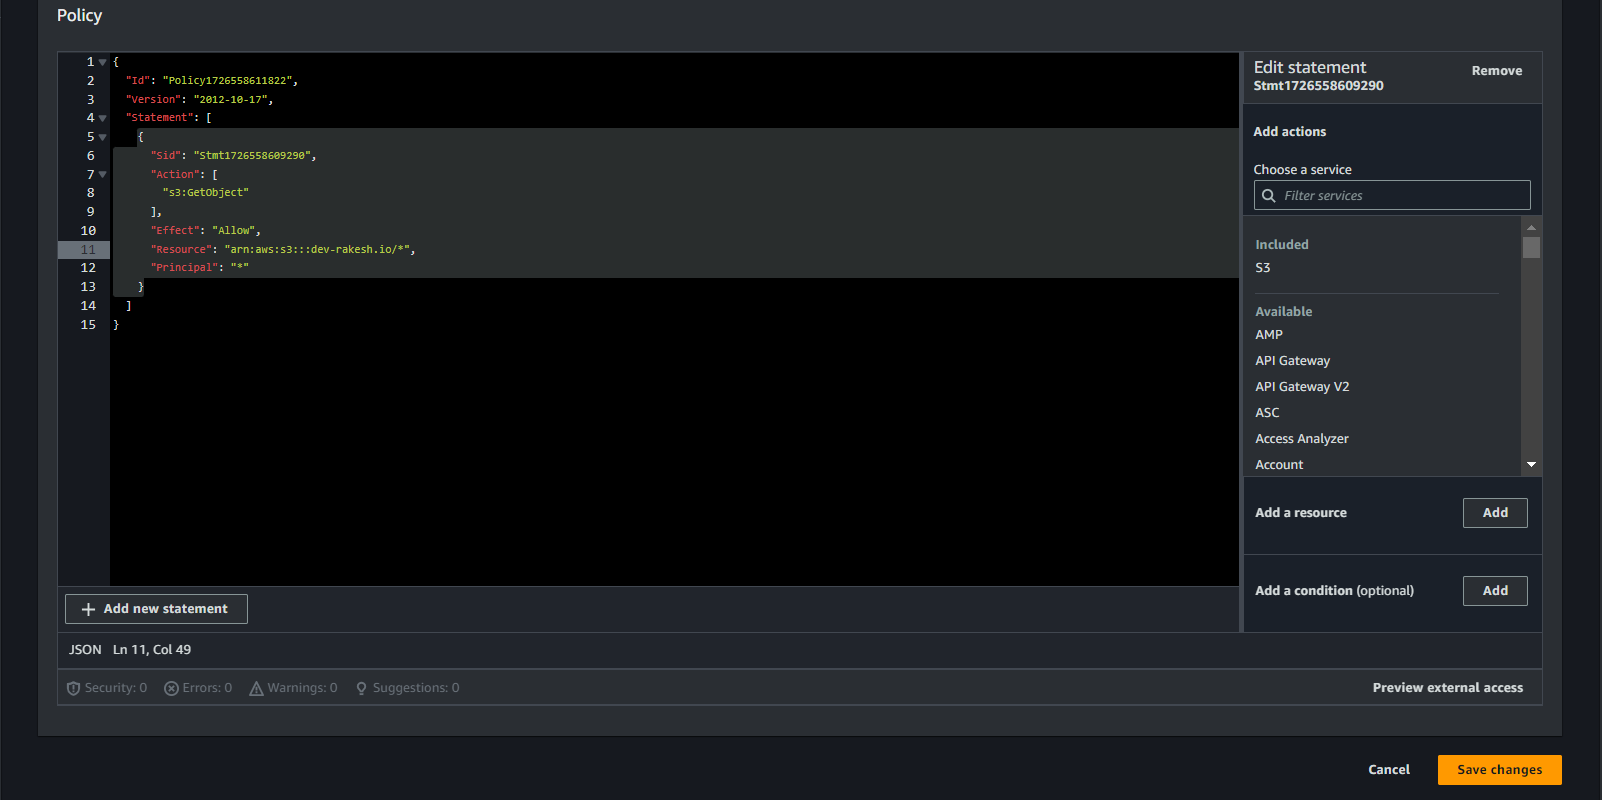
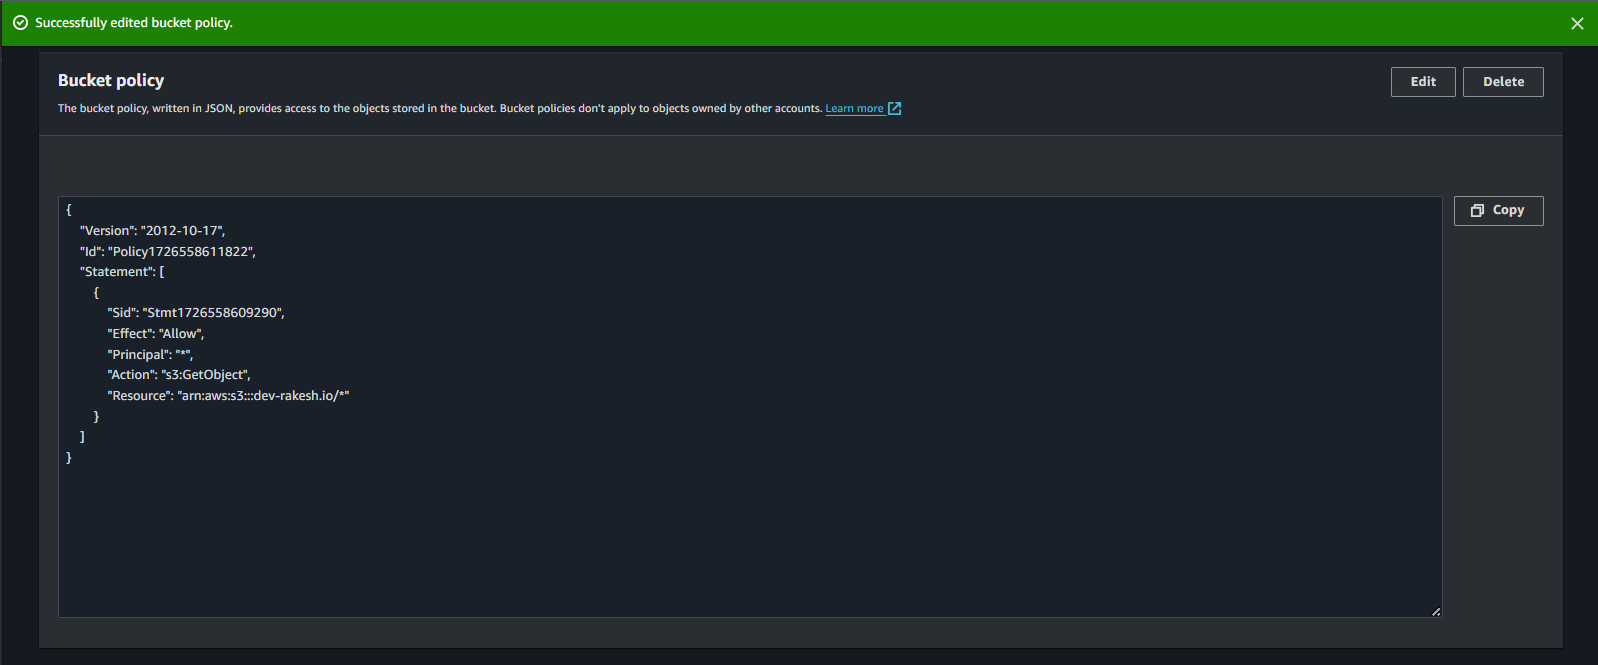
Step 6 : Put the policy here and hit on save changes.
Step 7 : Then go to the Bucket Properties tab and at the end of the page you’ll see Static Website Hosting.
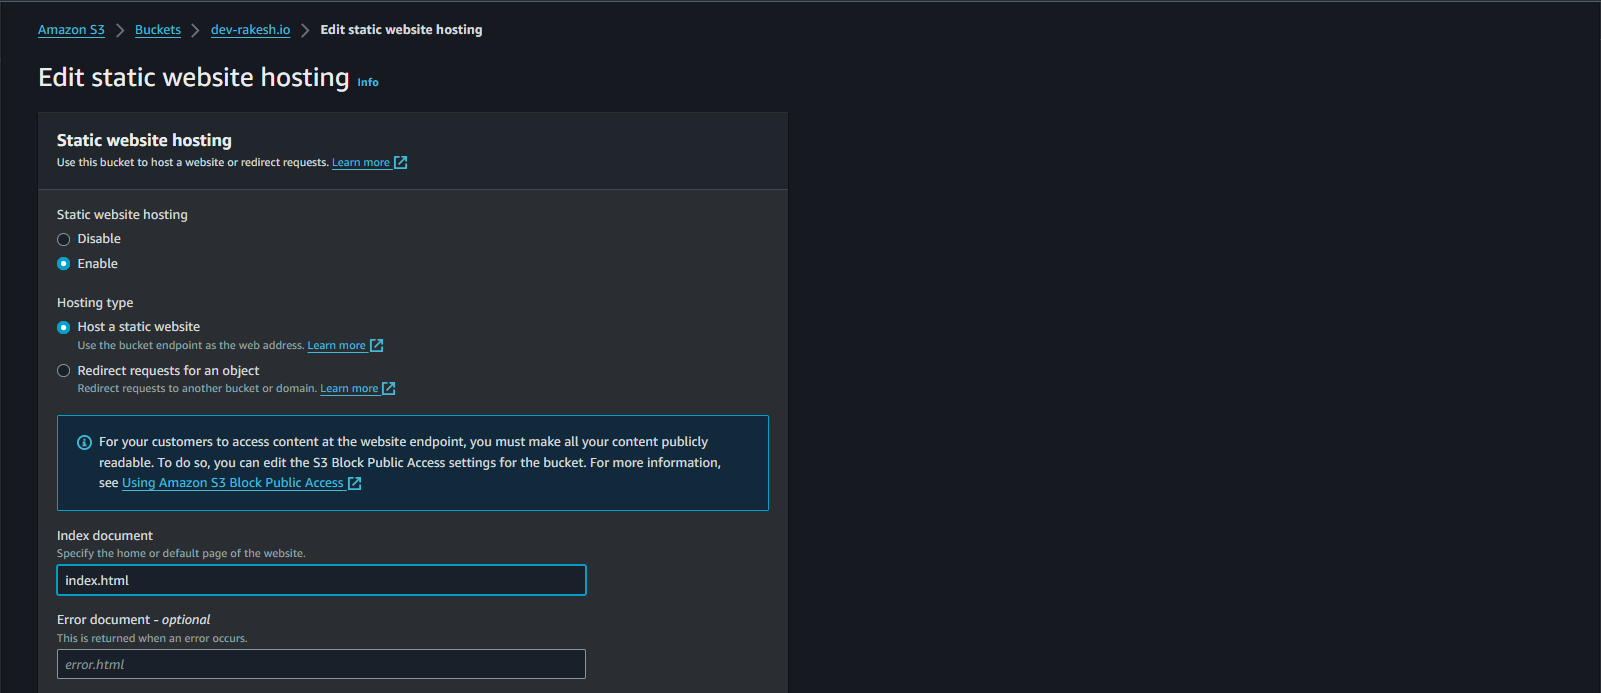
Step 8 : Hit on edit and give the object name then hit save changes.


Step 9 : Here we can see our websites hosting is enable now.

Step 10 : If you putted object on your bucket earliar there is no need to put again here.
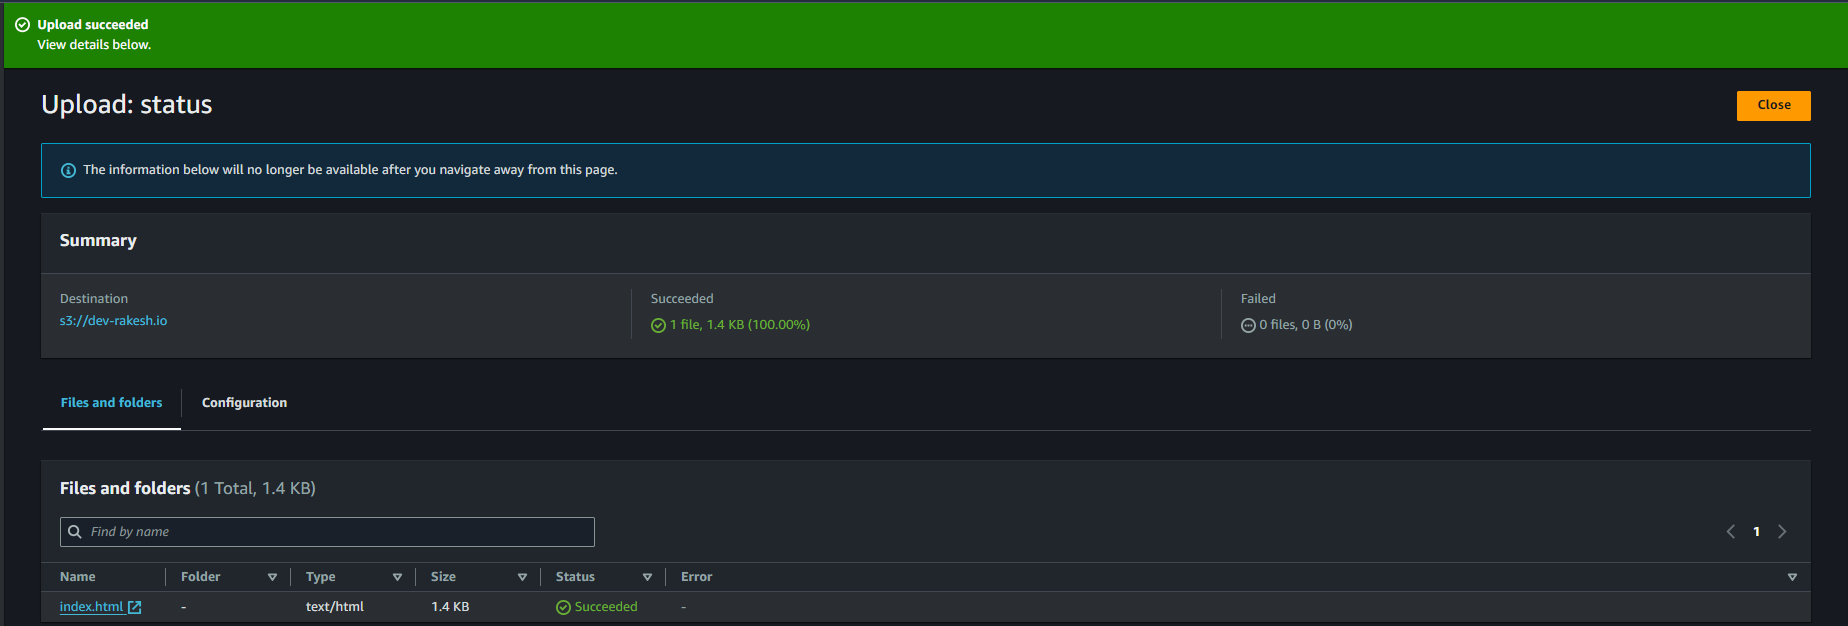
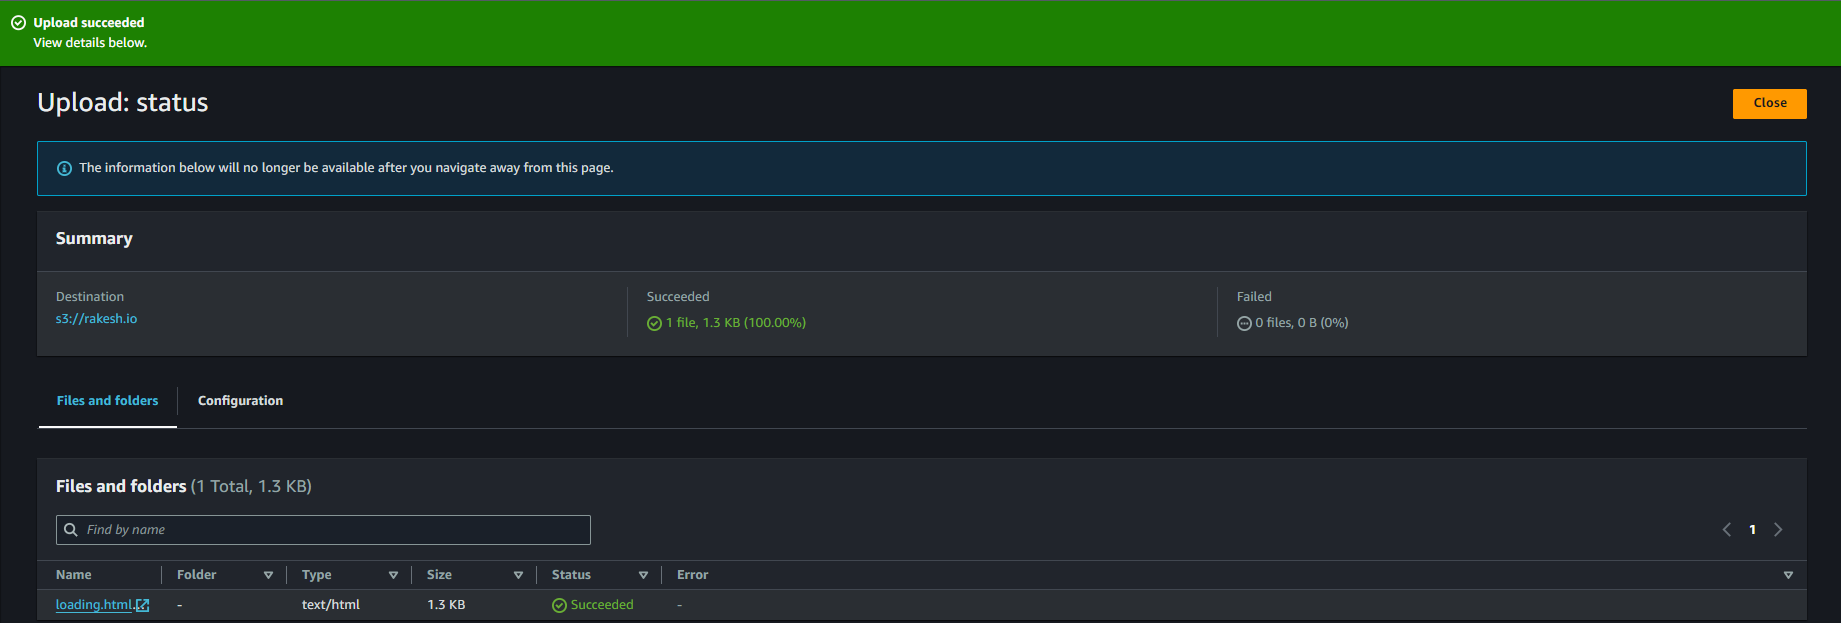
Step 11 : Then Create one more bucket like that and put a loading.html in it. With enabling public access and bucket policy and static website hosting.


Step 12 : After many steps you need to check your website running or not.
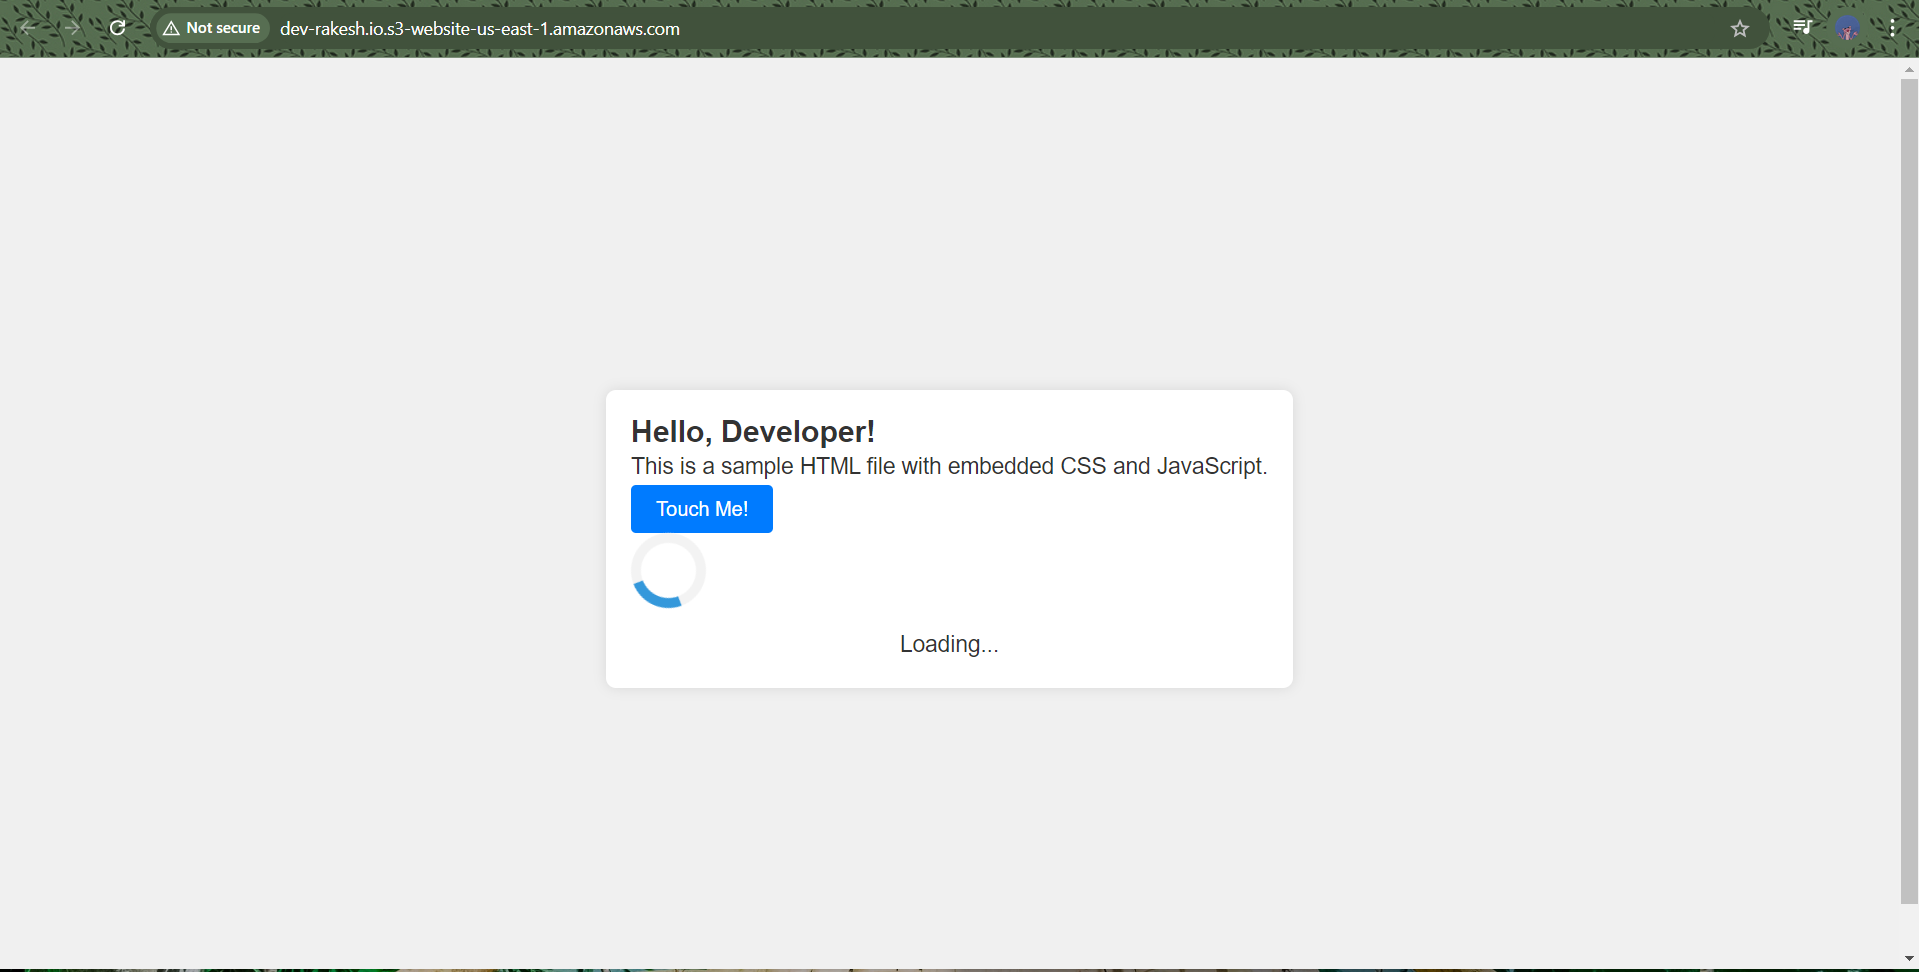
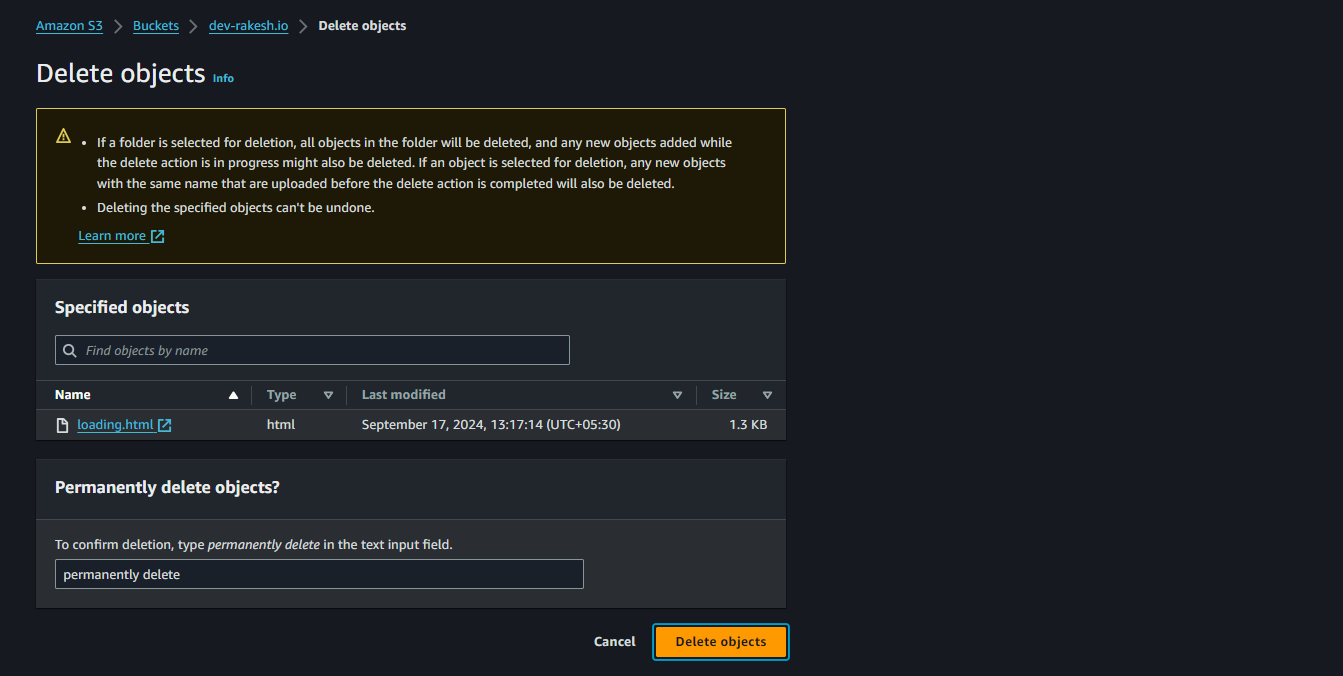
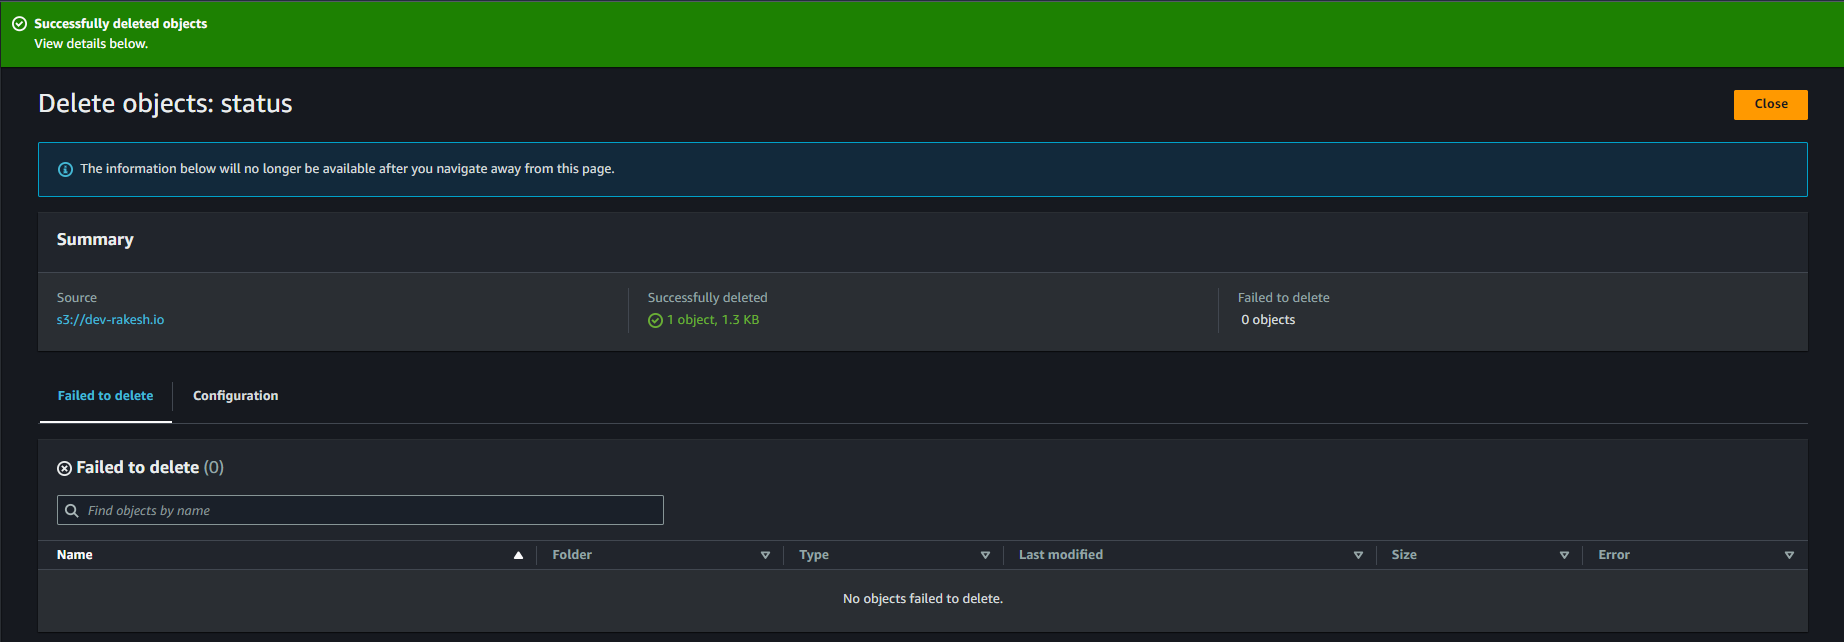
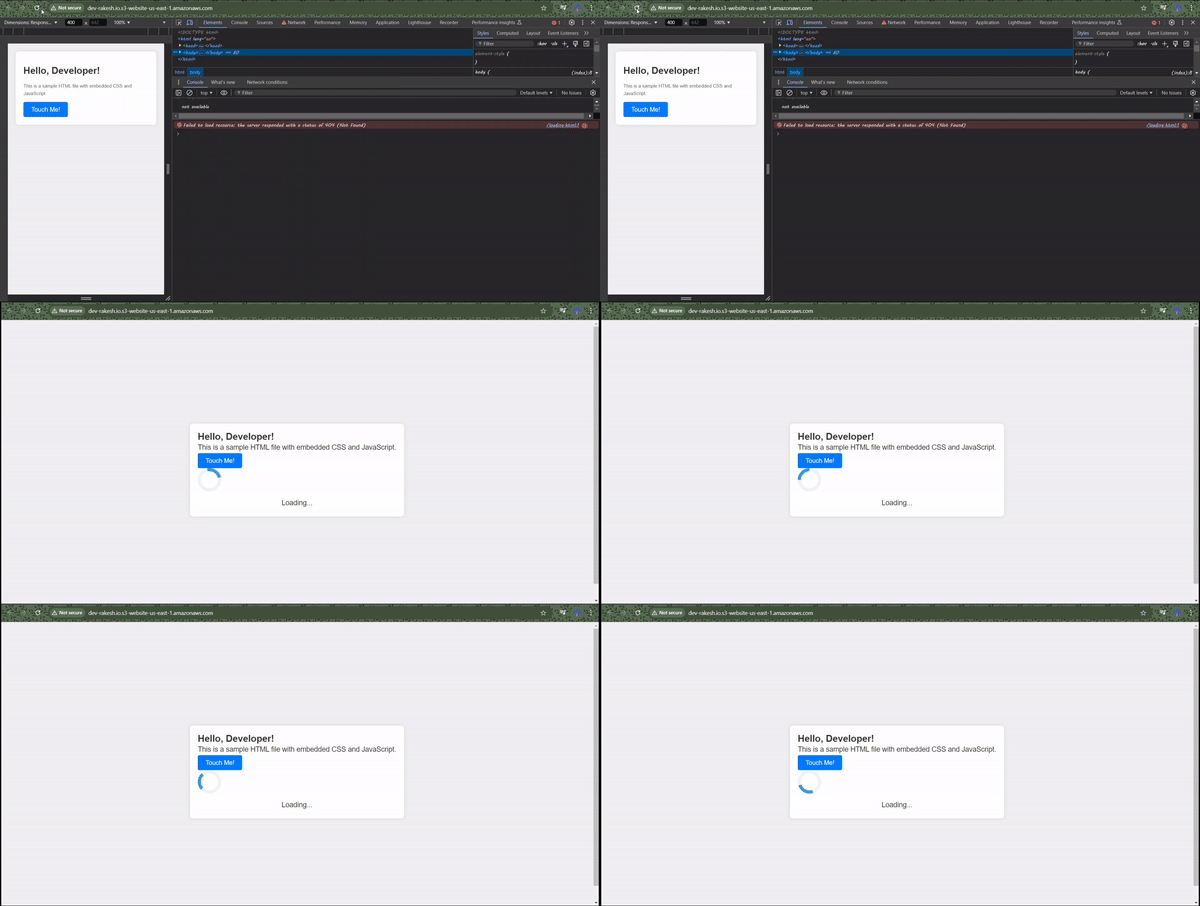
Step 13 : Here we can see our webpage giving us a error that it couldn’t load the loading page. To fix that we need to update CORS.

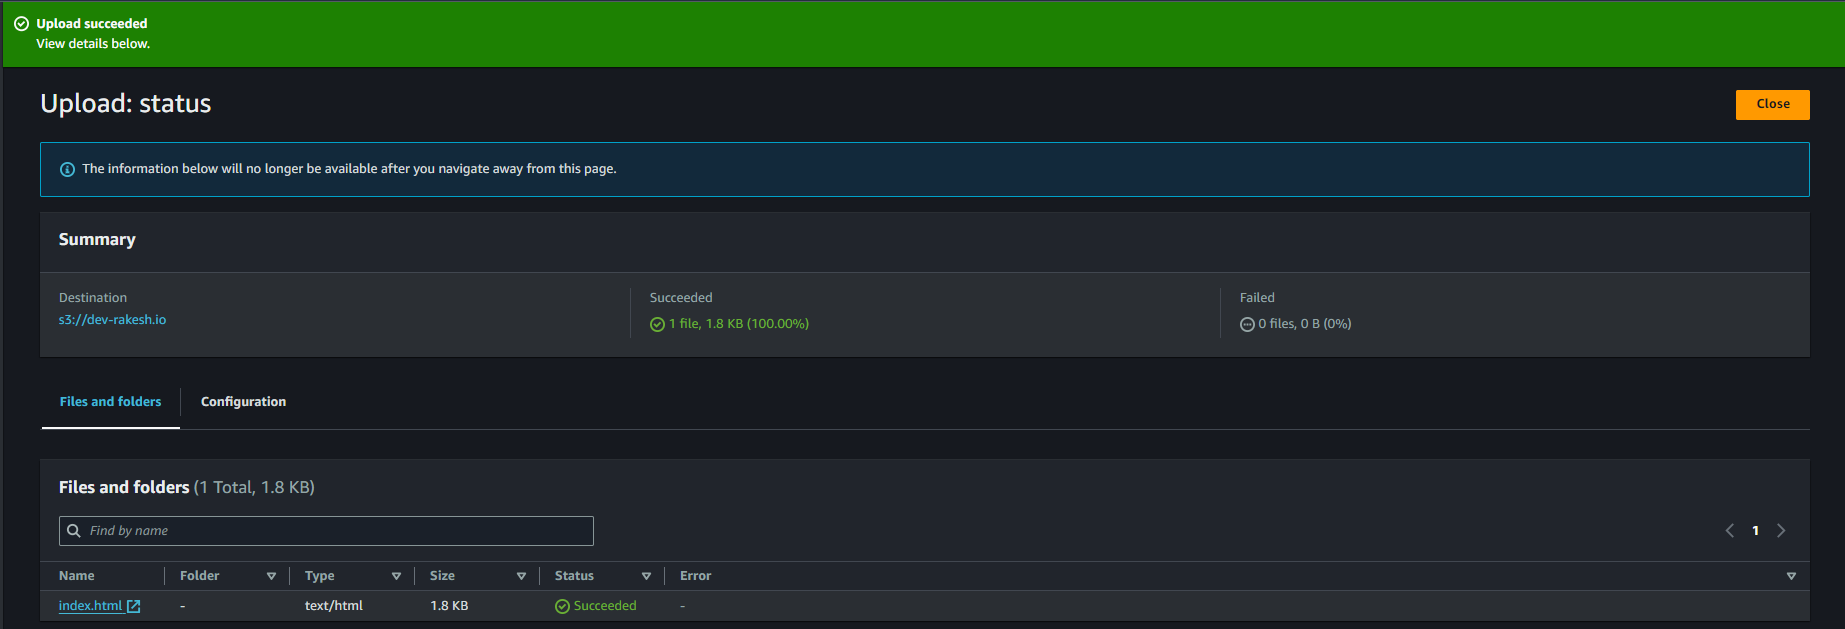
Step 14 : Here we uploaded a simple Index.html file from localto bucket and we can see the full code.
For index.html
<!DOCTYPE html>
<html lang="en">
<head>
    <meta charset="UTF-8">
    <meta name="viewport" content="width=device-width, initial-scale=1.0">
    <title>Web Page</title>
    <style>
        body {
            font-family: Arial, sans-serif;
            background-color: #f0f0f0;
            margin: 20px;
        }
        .container {
            max-width: 600px;
            margin: auto;
            padding: 20px;
            background-color: #fff;
            border-radius: 8px;
            box-shadow: 0 0 10px rgba(0,0,0,0.1);
        }
        h1 {
            color: #333;
        }
        p {
            line-height: 1.6;
            color: #666;
        }
        button {
            padding: 10px 20px;
            font-size: 16px;
            background-color: #007bff;
            color: #fff;
            border: none;
            cursor: pointer;
            border-radius: 4px;
        }
        button:hover {
            background-color: #0056b3;
        }
    </style>
    <script src="https://ajax.googleapis.com/ajax/libs/jquery/3.7.1/jquery.min.js"></script>
    <script>
        $(document).ready(function(){
            $("#div1").load("http://rakesh.io.s3-website-us-east-1.amazonaws.com/");
        });
    </script>
</head>
<body>
    <div class="container">
        <h1>Hello, Developer!</h1>
        <p>This is a sample HTML file with embedded CSS and JavaScript.</p>

        <button id="clickMeButton">Touch Me!</button>

        <!-- This div is where the content from "loading.html" will be loaded -->
        <div id="div1"></div>

        <script>
            // JavaScript code
            document.getElementById('clickMeButton').addEventListener('click', function() {
                alert('Button clicked!');
            });
        </script>
    </div>
</body>
</html>
Step 15 : Here is the loading.html page code.
For Loading.html
<!DOCTYPE html>
<html lang="en">
<head>
    <meta charset="UTF-8">
    <meta name="viewport" content="width=device-width, initial-scale=1.0">
    <title>Loading...</title>
    <style>
        /* Basic reset */
        * {
            margin: 0;
            padding: 0;
            box-sizing: border-box;
        }

        body {
            display: flex;
            justify-content: center;
            align-items: center;
            height: 100vh;
            background-color: #f0f0f0;
            font-family: Arial, sans-serif;
        }

        .loader-wrapper {
            text-align: center;
        }

        .loader {
            border: 8px solid #f3f3f3; /* Light grey */
            border-top: 8px solid #3498db; /* Blue */
            border-radius: 50%;
            width: 60px;
            height: 60px;
            animation: spin 1s linear infinite;
            margin-bottom: 15px;
        }

        @keyframes spin {
            0% { transform: rotate(0deg); }
            100% { transform: rotate(360deg); }
        }

        p {
            color: #333;
            font-size: 18px;
        }
    </style>
</head>
<body>
    <div class="loader-wrapper">
        <div class="loader"></div>
        <p>Loading...</p>
    </div>
</body>
</html>


Step 16 : After all that on the bucket permissions tab we can see CORS here we need to update the confuration.

Step 17 : We need to go on aws CORS documentation using it for S3 and copy that configuration file.

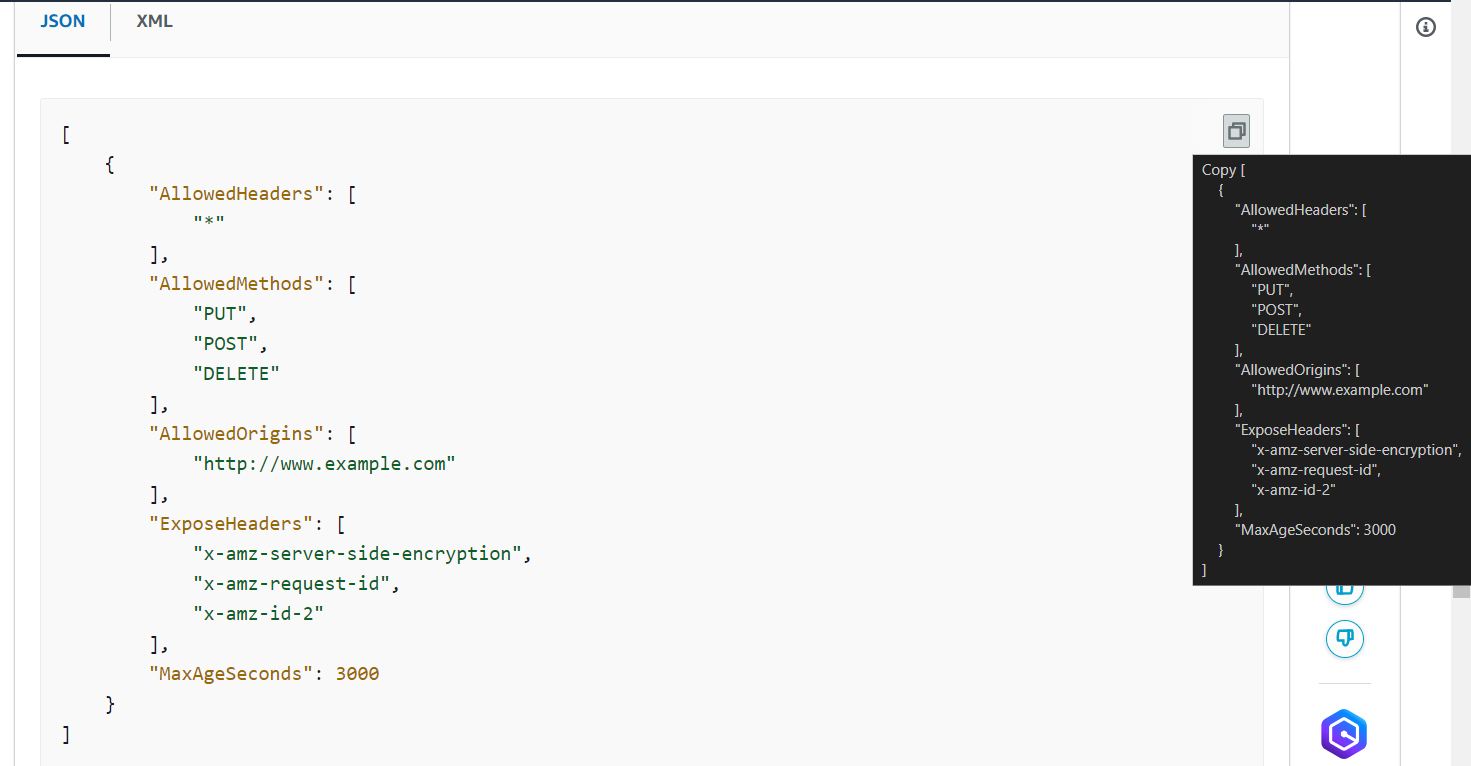
Step 18 : Back on the AWS Console and update the copied CORS and save the changes.

Step 19 : Here is now our website or webpage running smoothly with Cross Origin Resource Sharing. Refresh the page and Bang 💫 here we go again.
Step 20 : Important steps whatever resources you created and uploaded it with versions even with delete marker waive them off right now.

Thank Yu !!
Subscribe to my newsletter
Read articles from RAKESH DUTTA directly inside your inbox. Subscribe to the newsletter, and don't miss out.
Written by
