A Complete Guide to Project Notes
 Sayan Chakraborty
Hi,,🤨😮
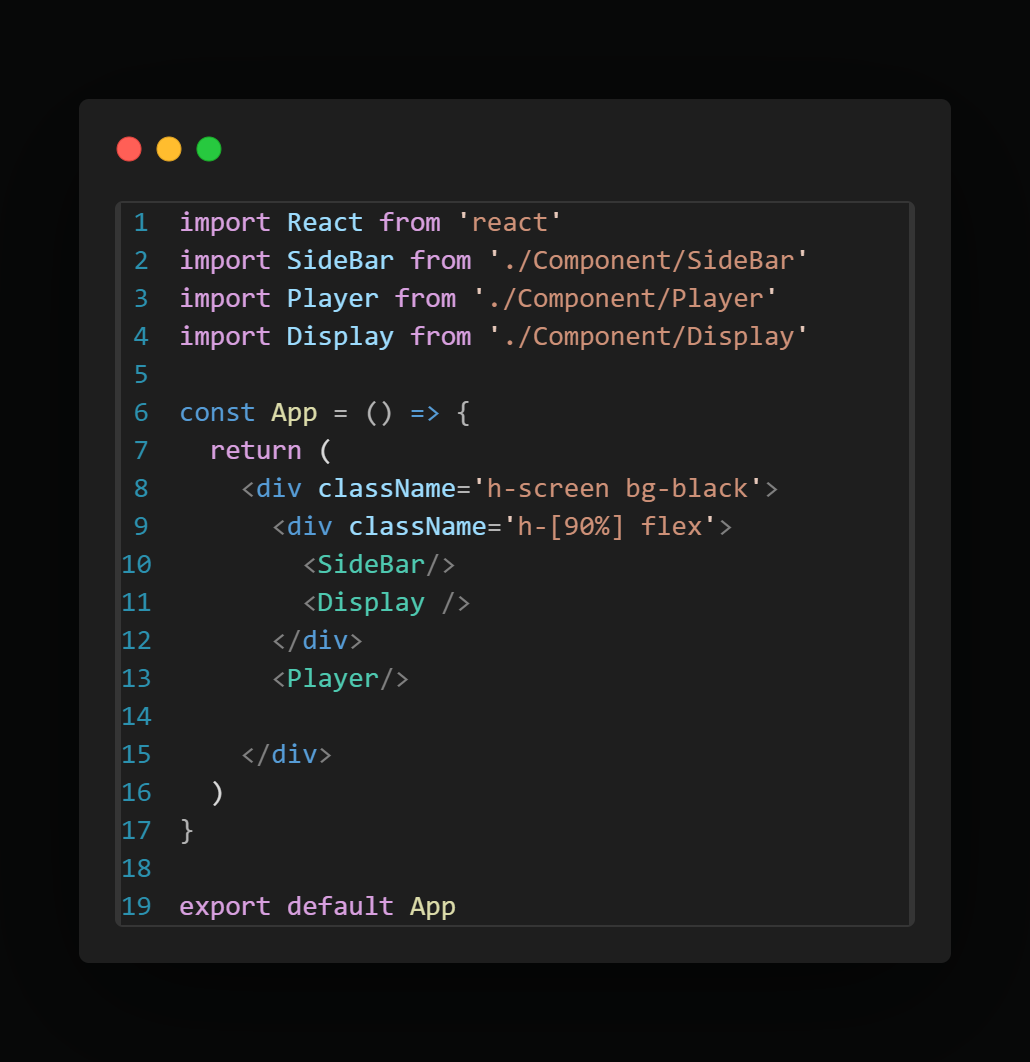
We use here tailwind css, delete the App.css and remove all data in index.css and also App.jsx.
So how to install this??
Ans:- 1st install (npm install -D tailwindcss postcss autoprefixer) and 2nd install (npx tailwindcss init -p)
after this put (content: [ "./index.html", "./src/**/*.{js,ts,jsx,tsx}", ],) in the index.css and rafce( in the App.jsx).
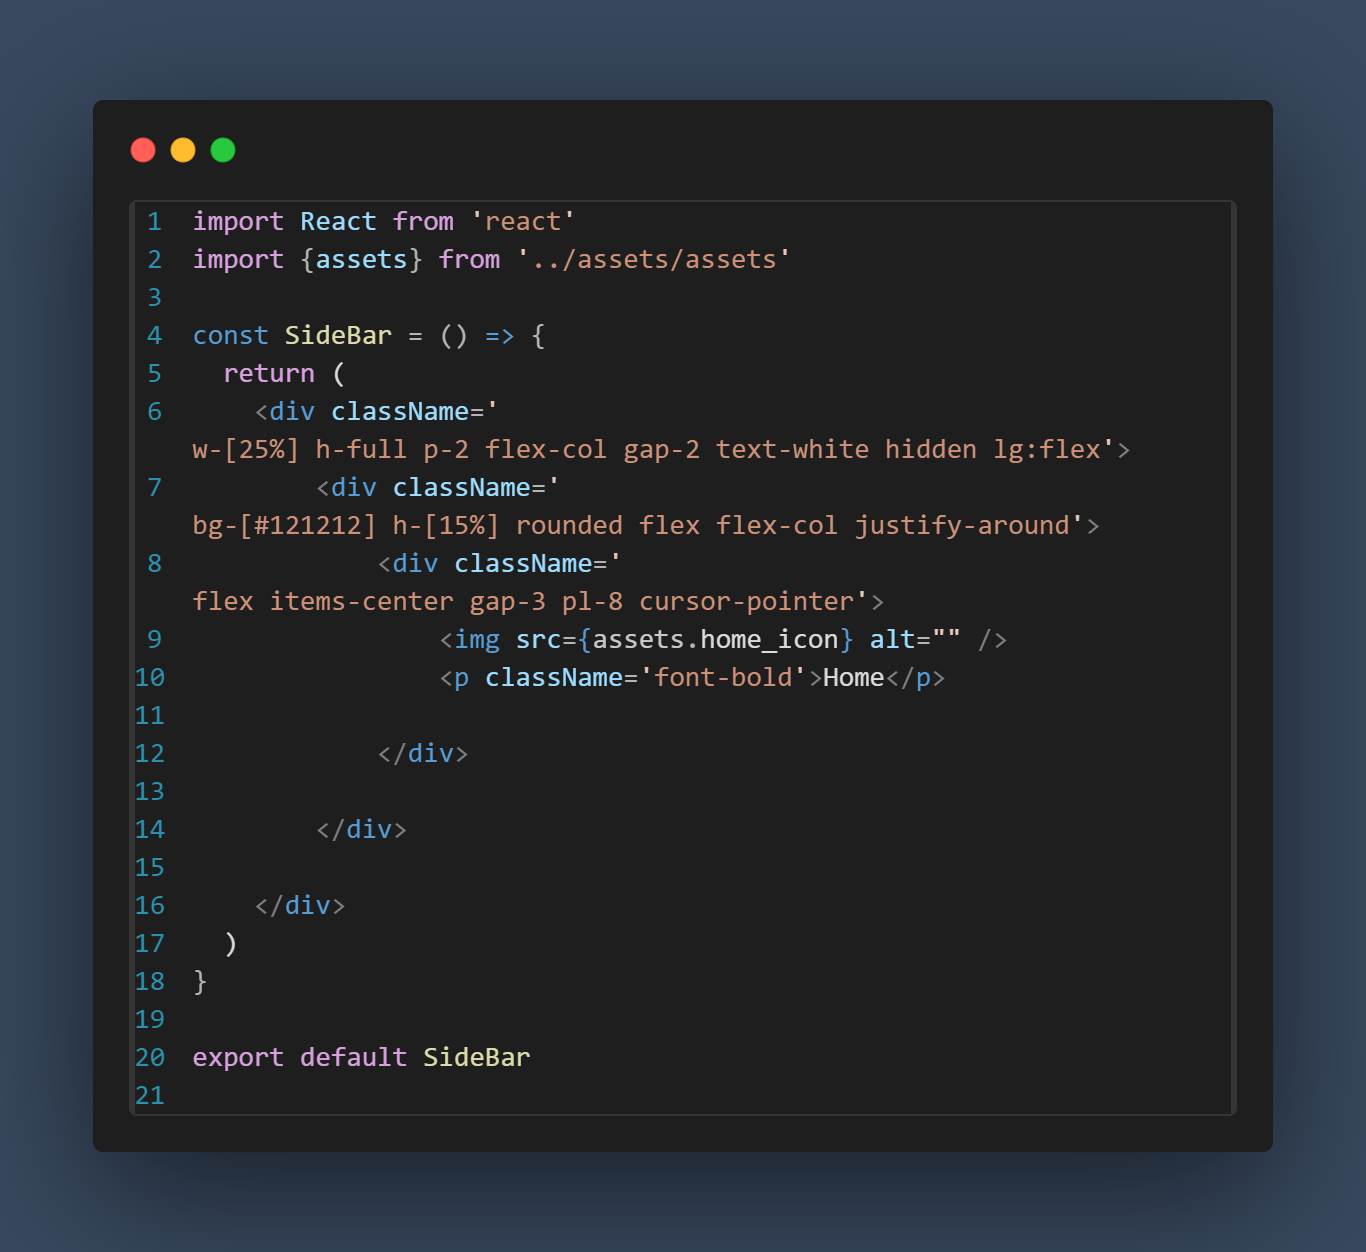
then create a [component] and [context] folder in the src and in the context folder store all the player logic at one place, in the component folder create one file name is [Sidebar.jsx]. and rafce, so we have mount this component to the App component.
Sidebar:
And the App .jsx:
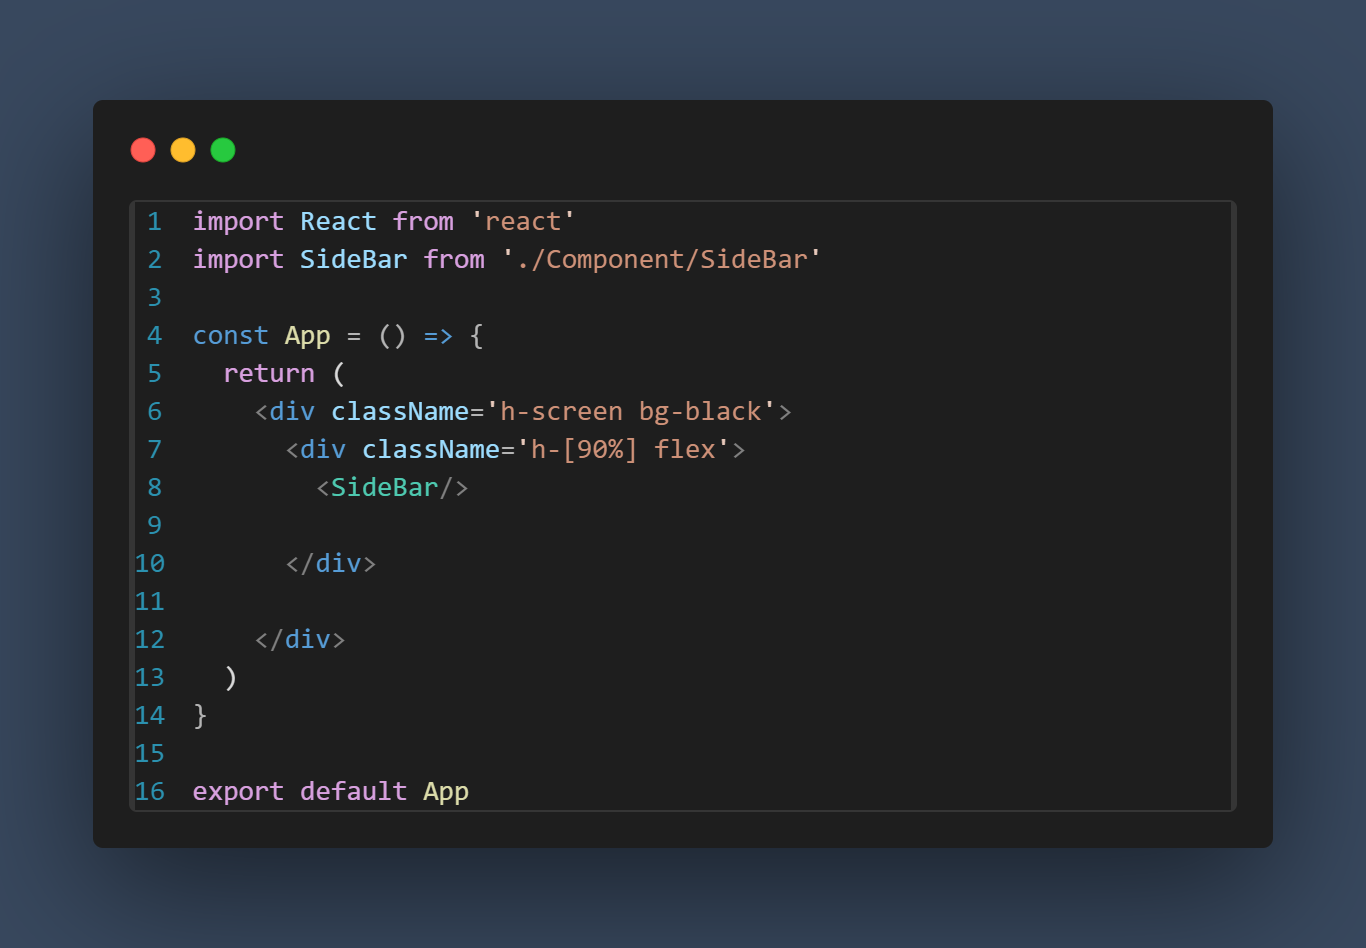
It shows the HOME icon in the page , for looking good we set a width for the img[classname='w-6]
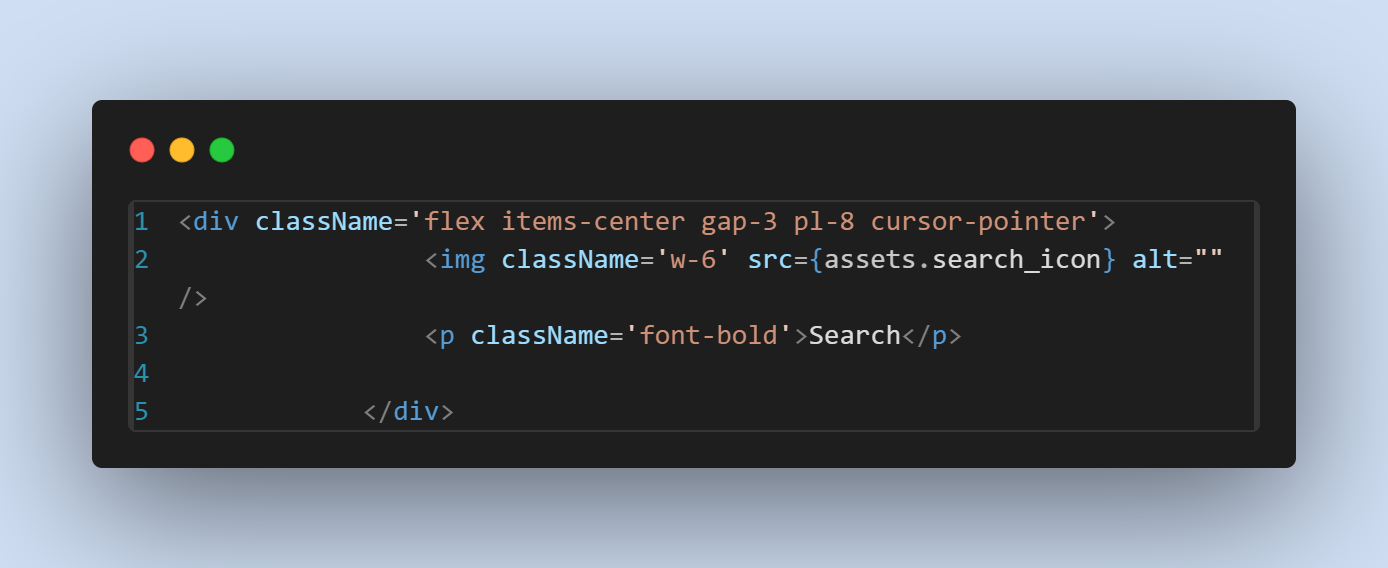
For same way we created the Search Icon
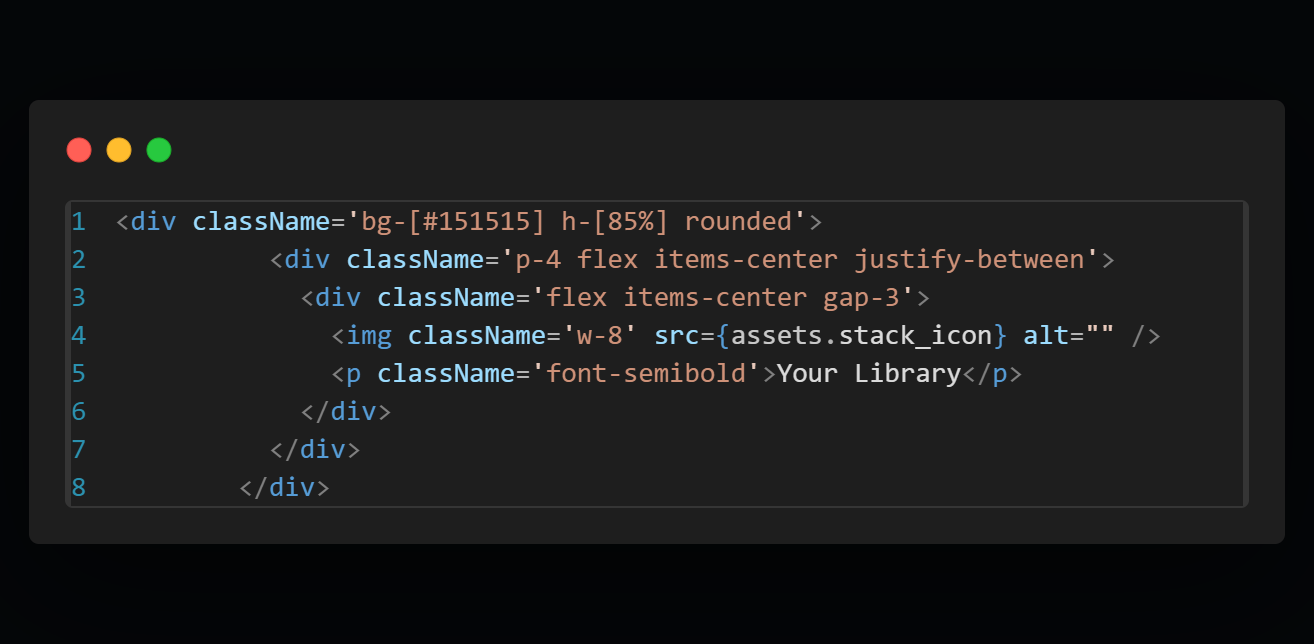
Here we we have another container and in this one we have this stack icon and this your library text : -
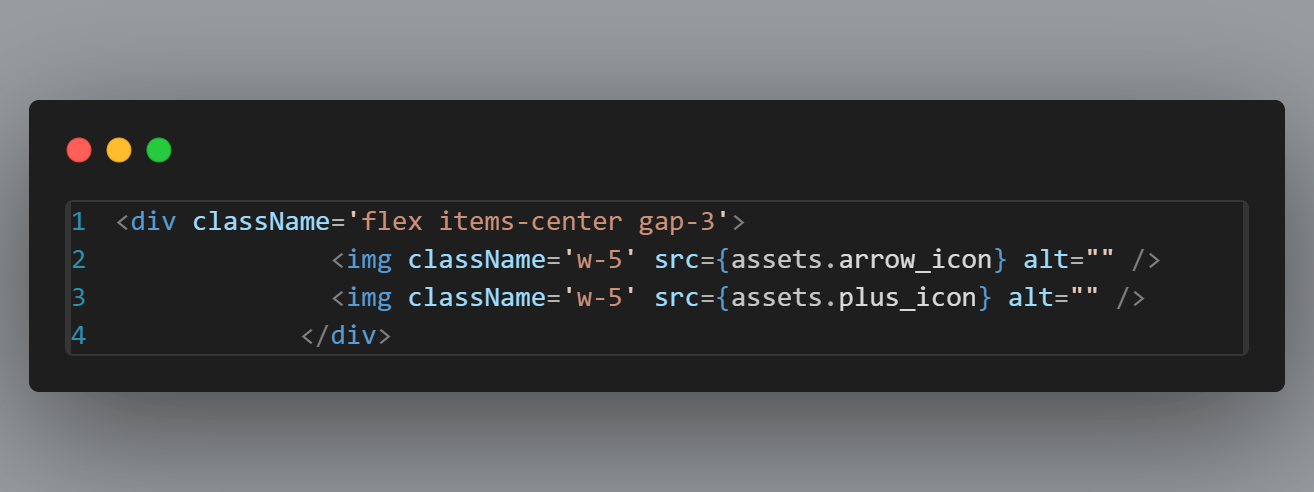
after this we created a arrow icon and plus icon in the library containers:
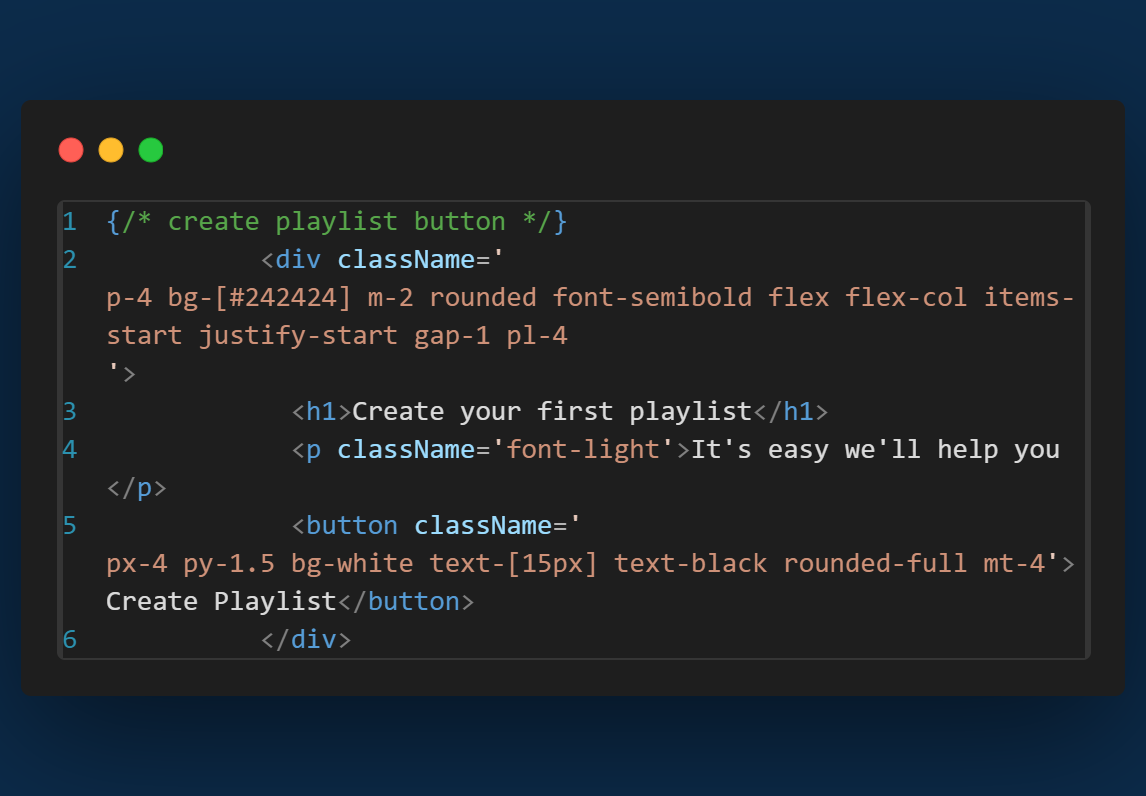
then create a playlist button in the library container:
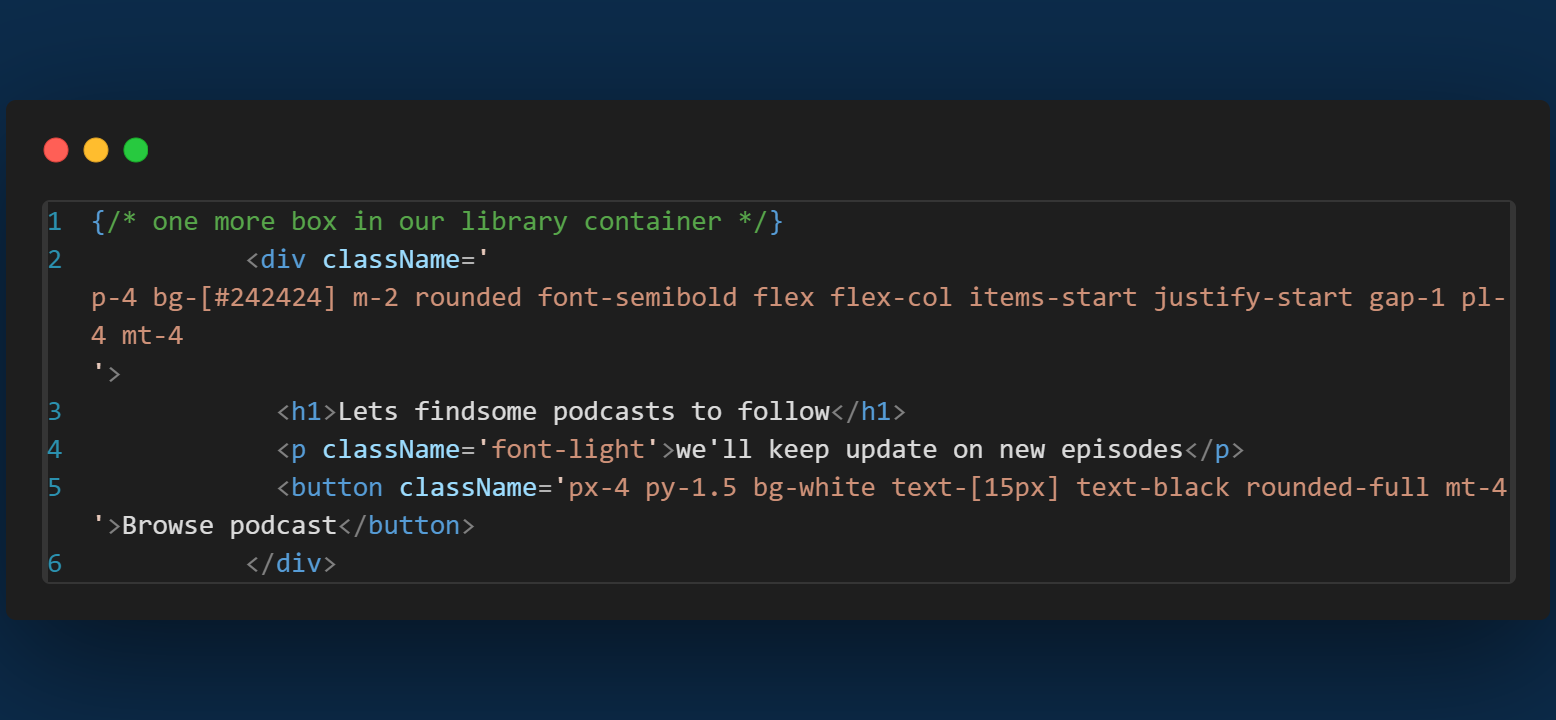
let's create another box in the library in the same way:
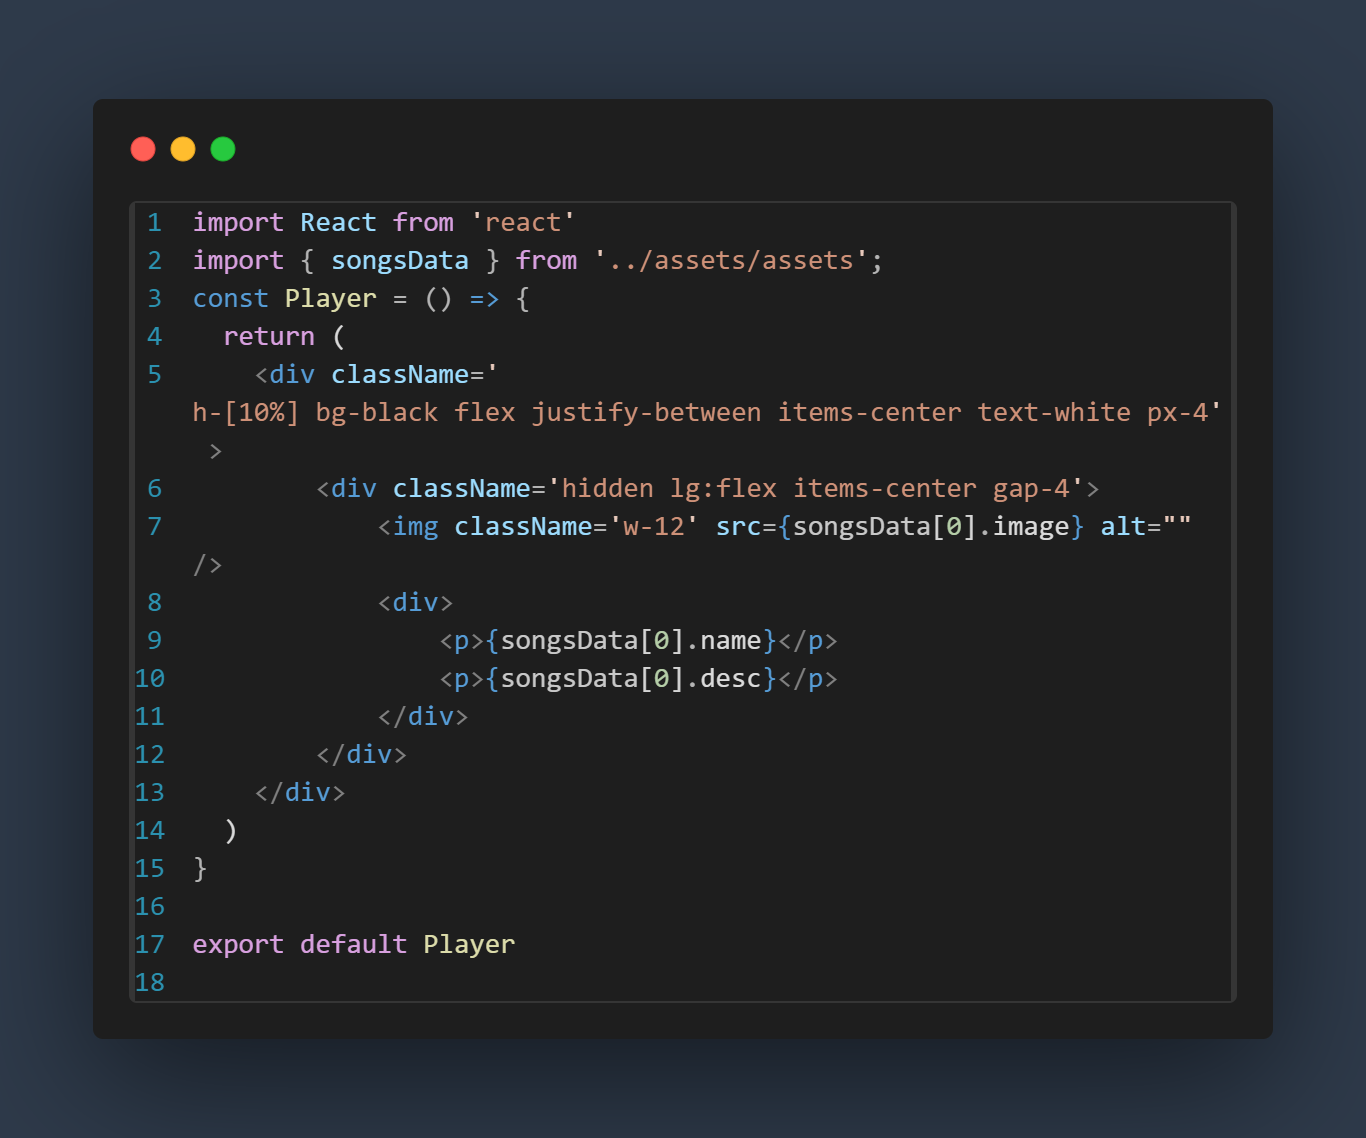
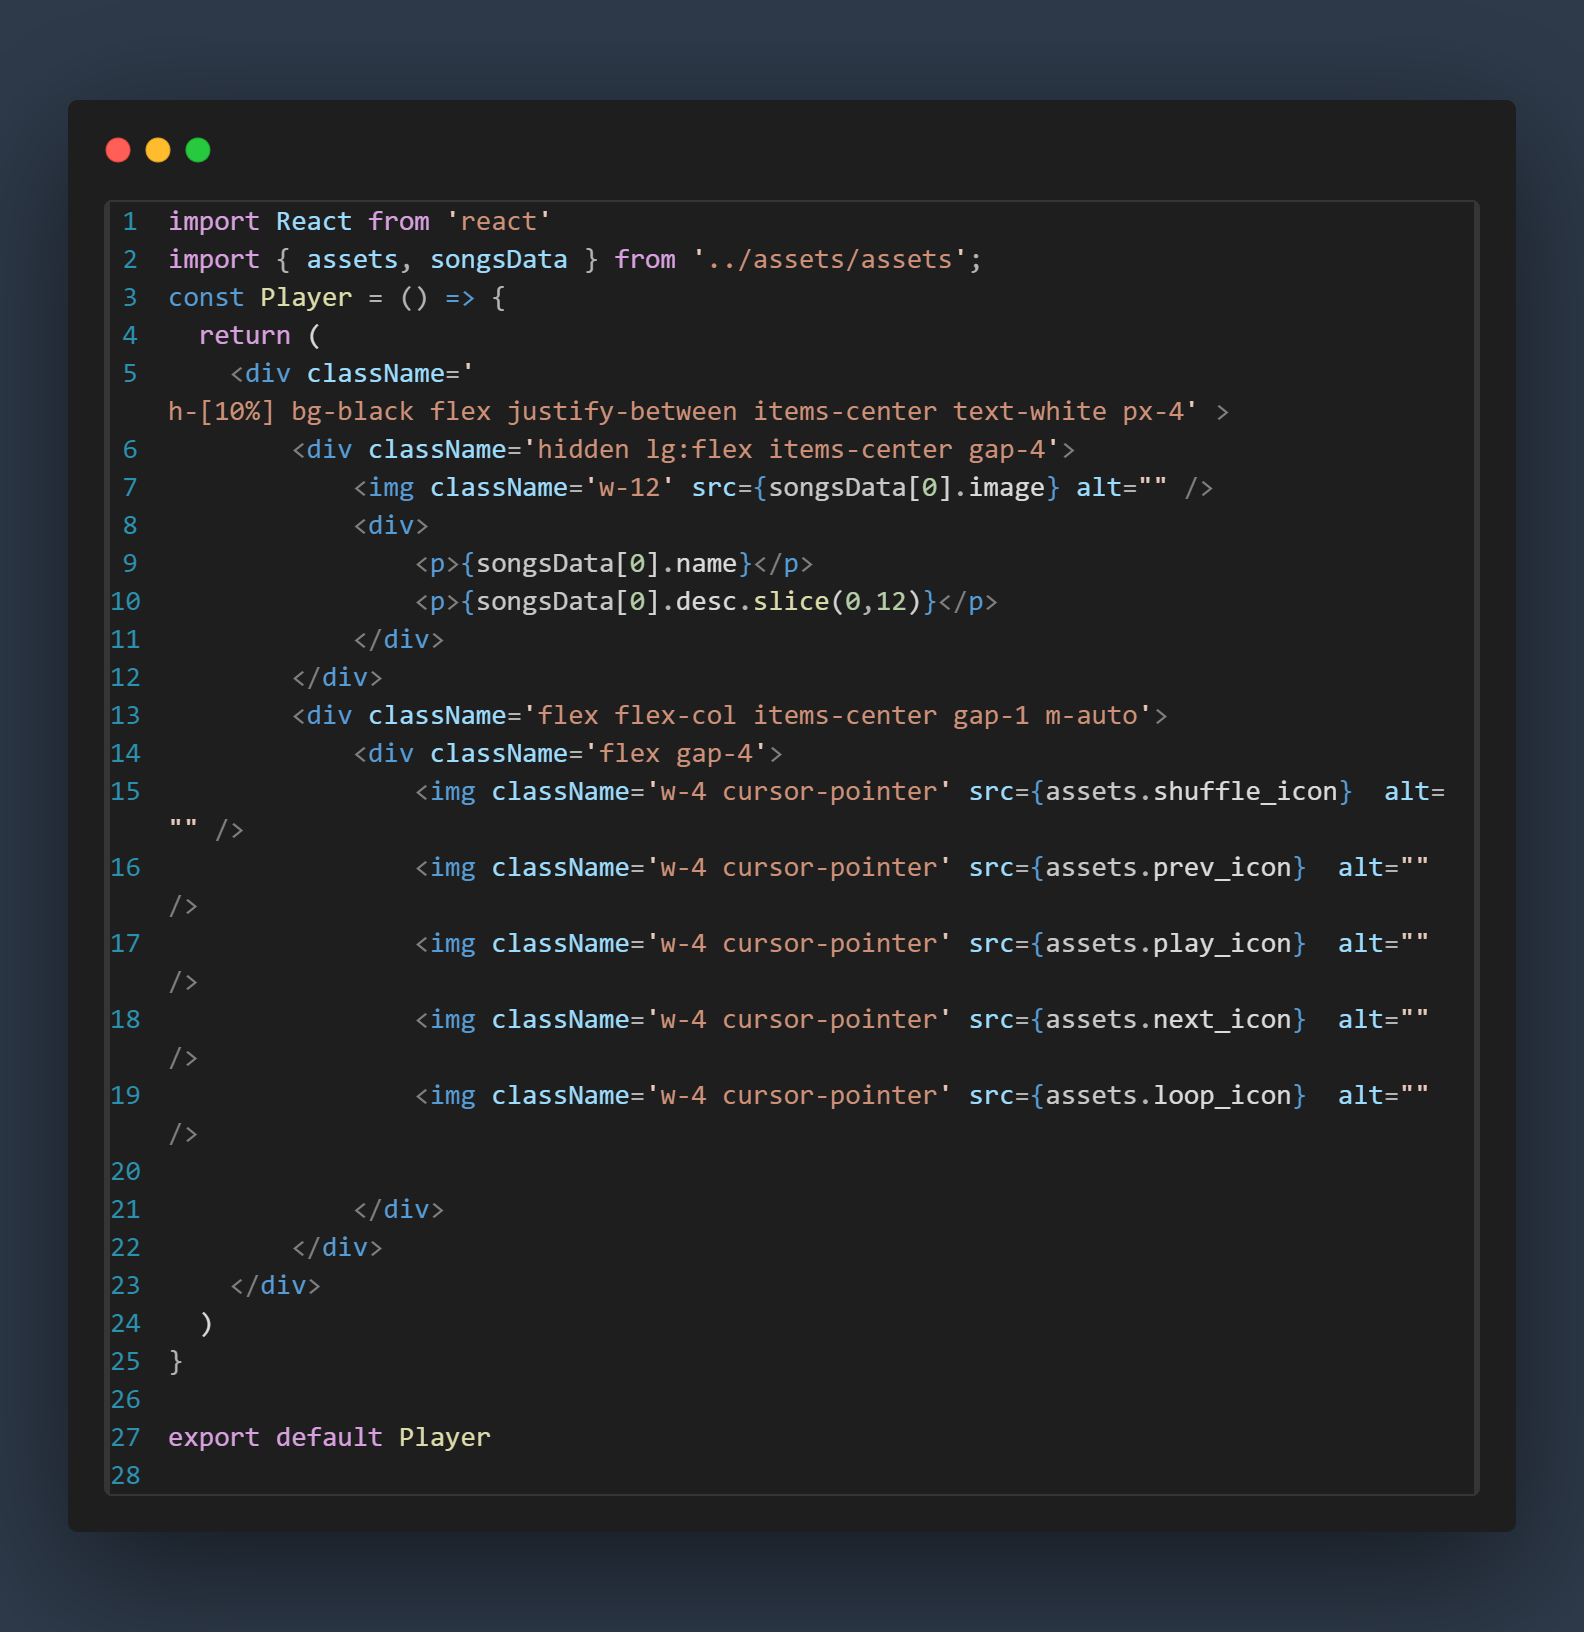
Now we'll create the UI for the player, for this open the component folder in the src and make new file Player.jsx. and we use rafce and mount this Player in the app component.
then create a shuffle icon and add four different icon in the player.jsx....
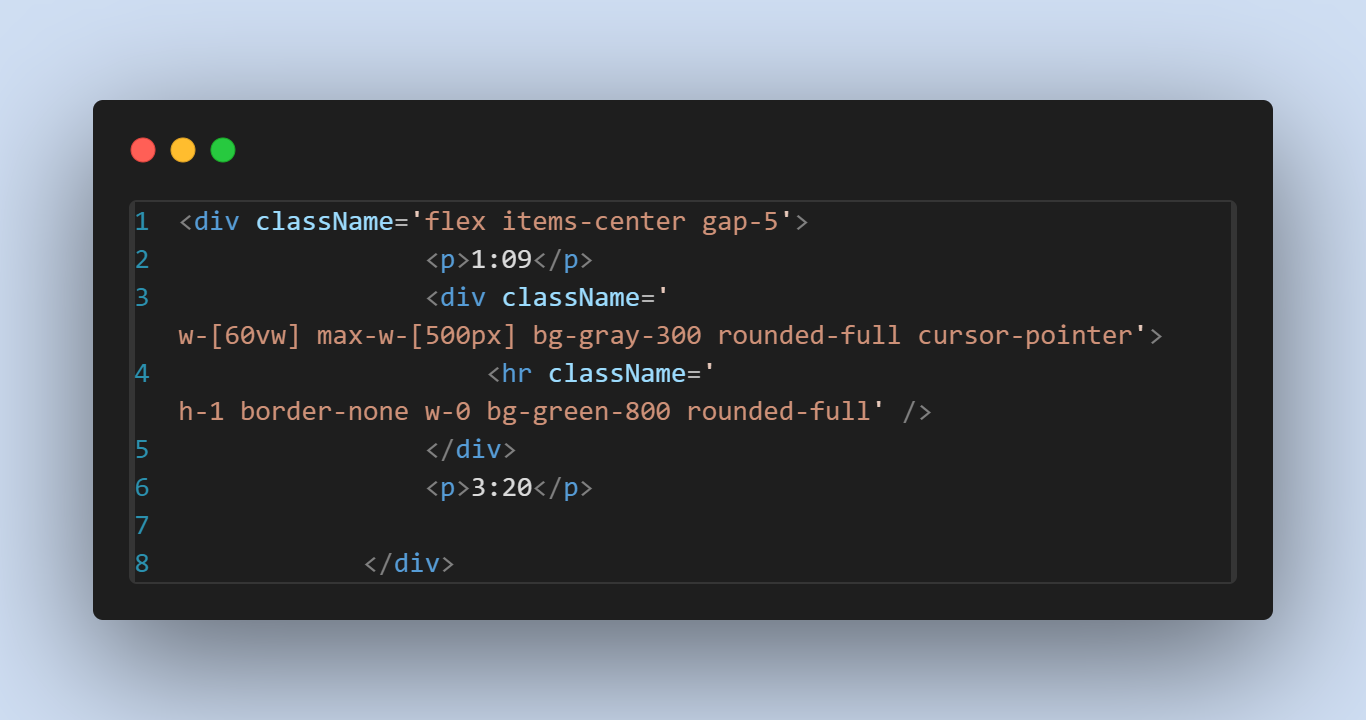
also some player bar for the song-------
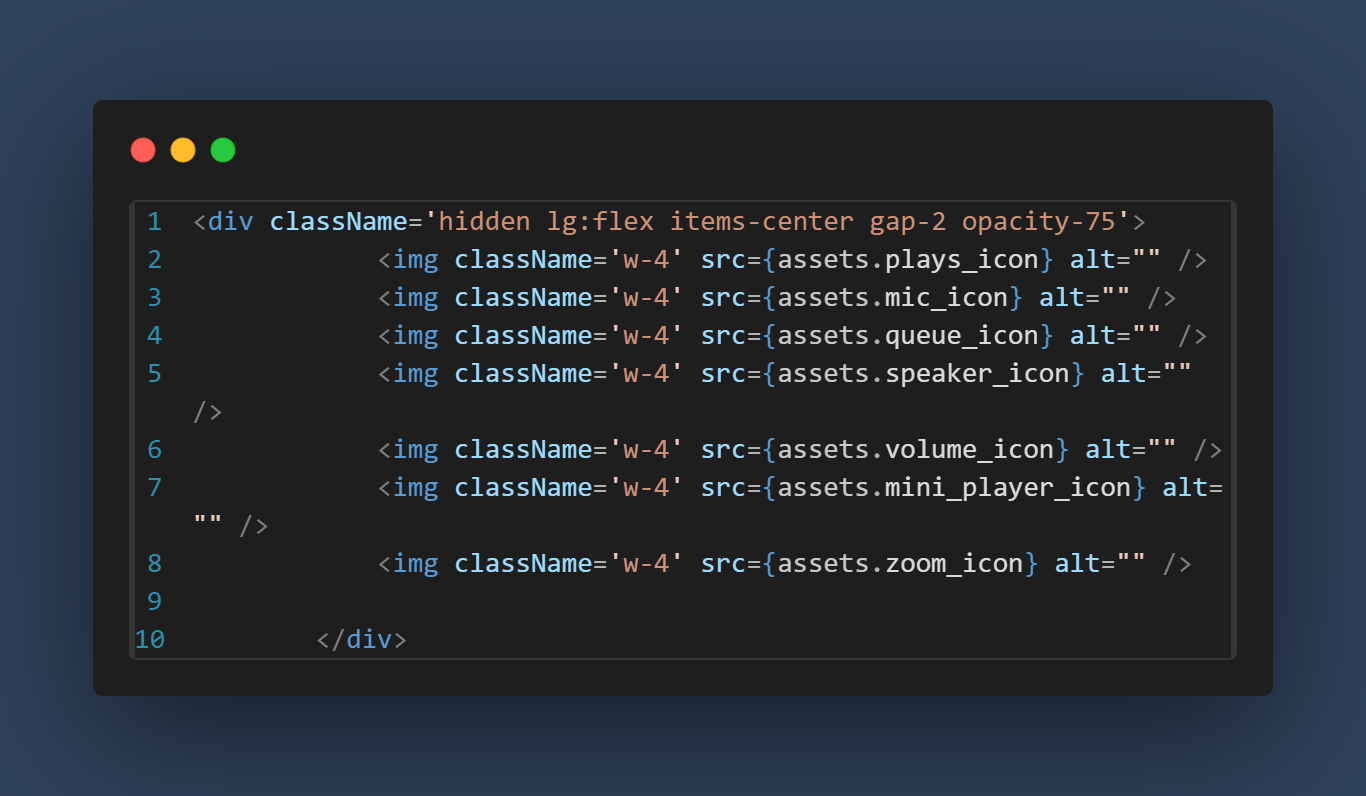
and just add some others icons in the bottom----
and also create the volume bar
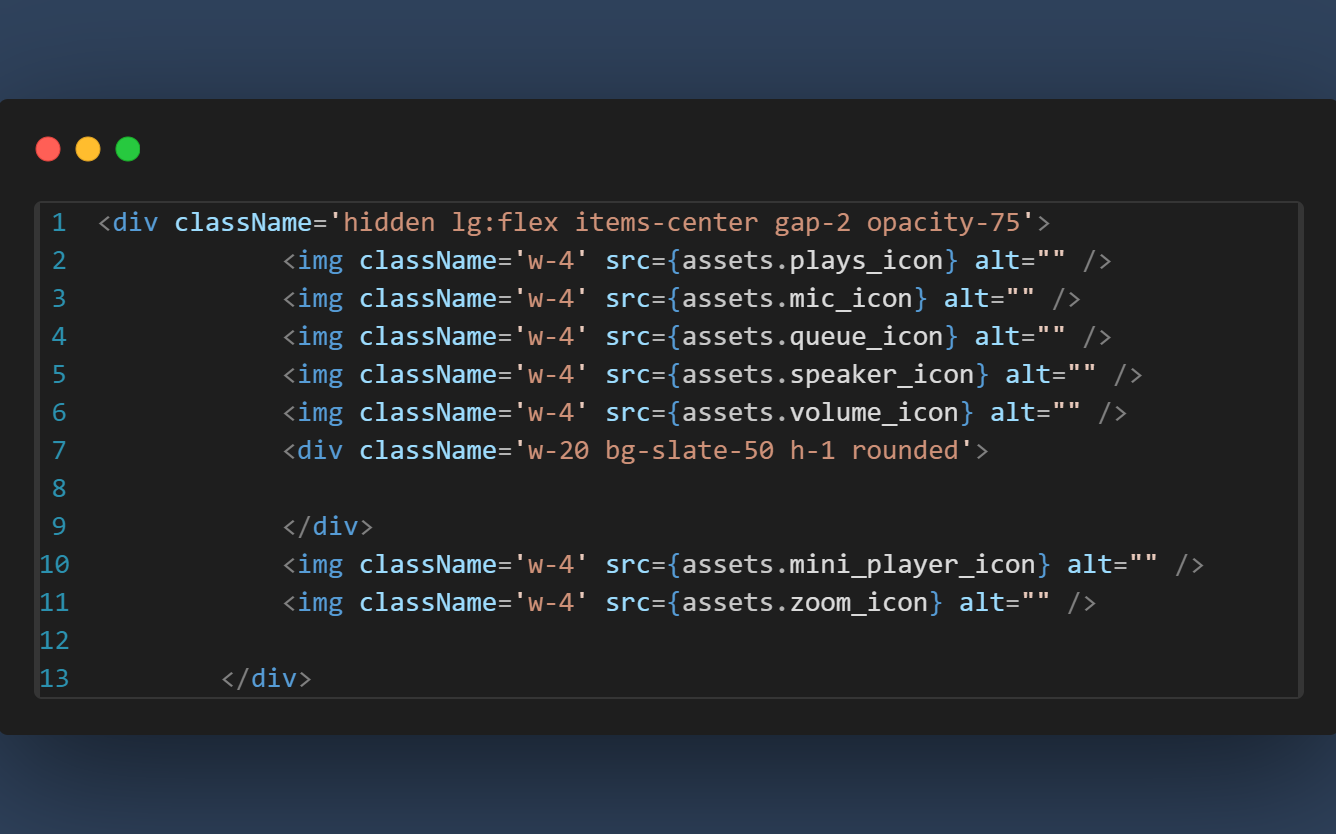
now UI for our player is ready, after this we'll create a new component and provide the name display, In the Component folder --> Display.jsx , in this Display component
we will display the home and album, for that we've to create the routes. to use the route we'll use the react-router dom package, for this open the terminal (npm I react-router-dom),
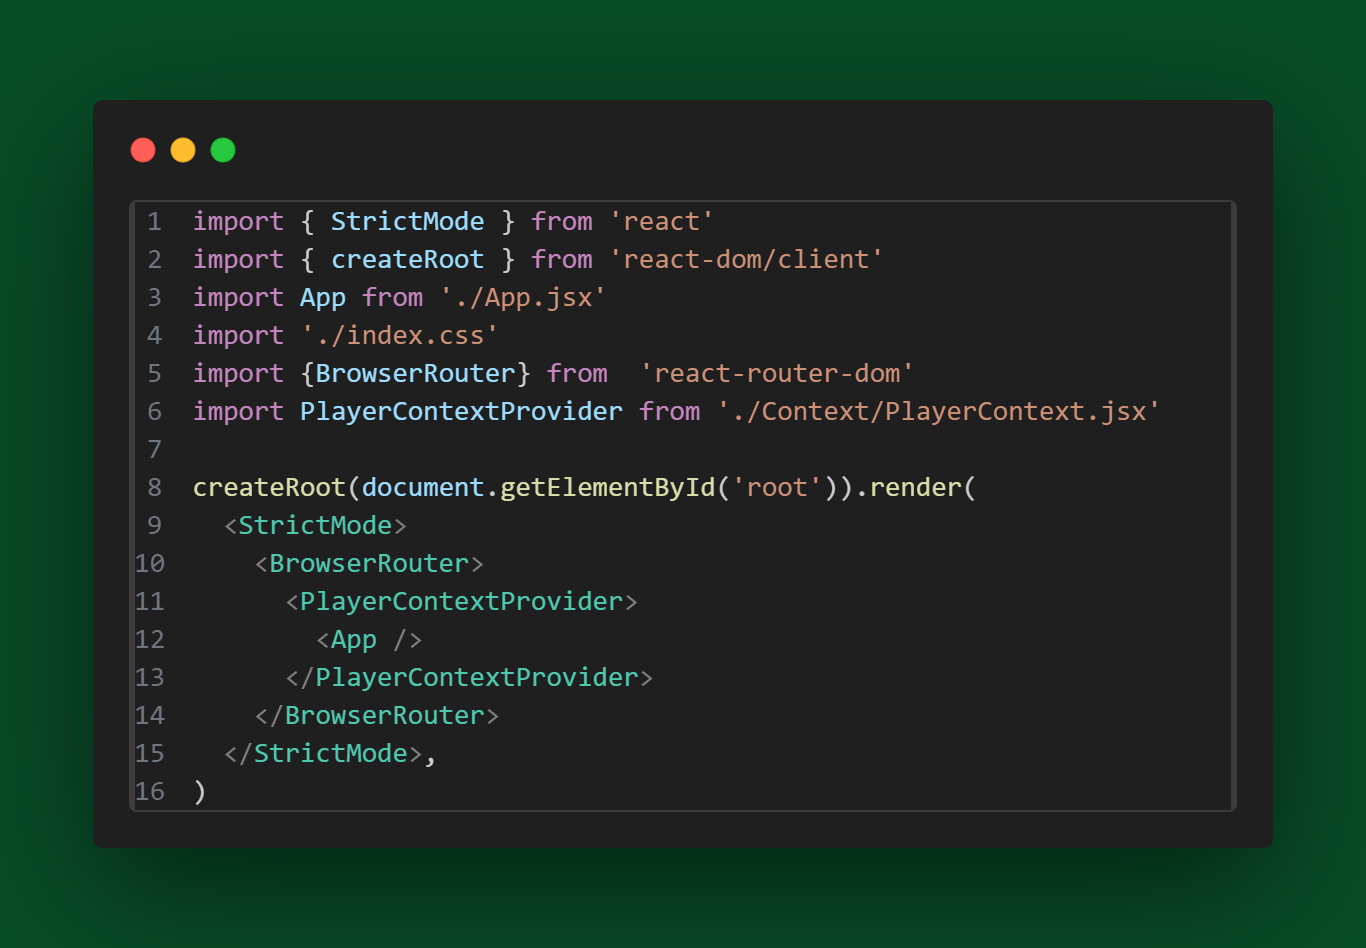
in this main.jsx file -- > import {BrowserRouter} from 'react-router-dom' and wrap the App component inside the BrowseRouter,
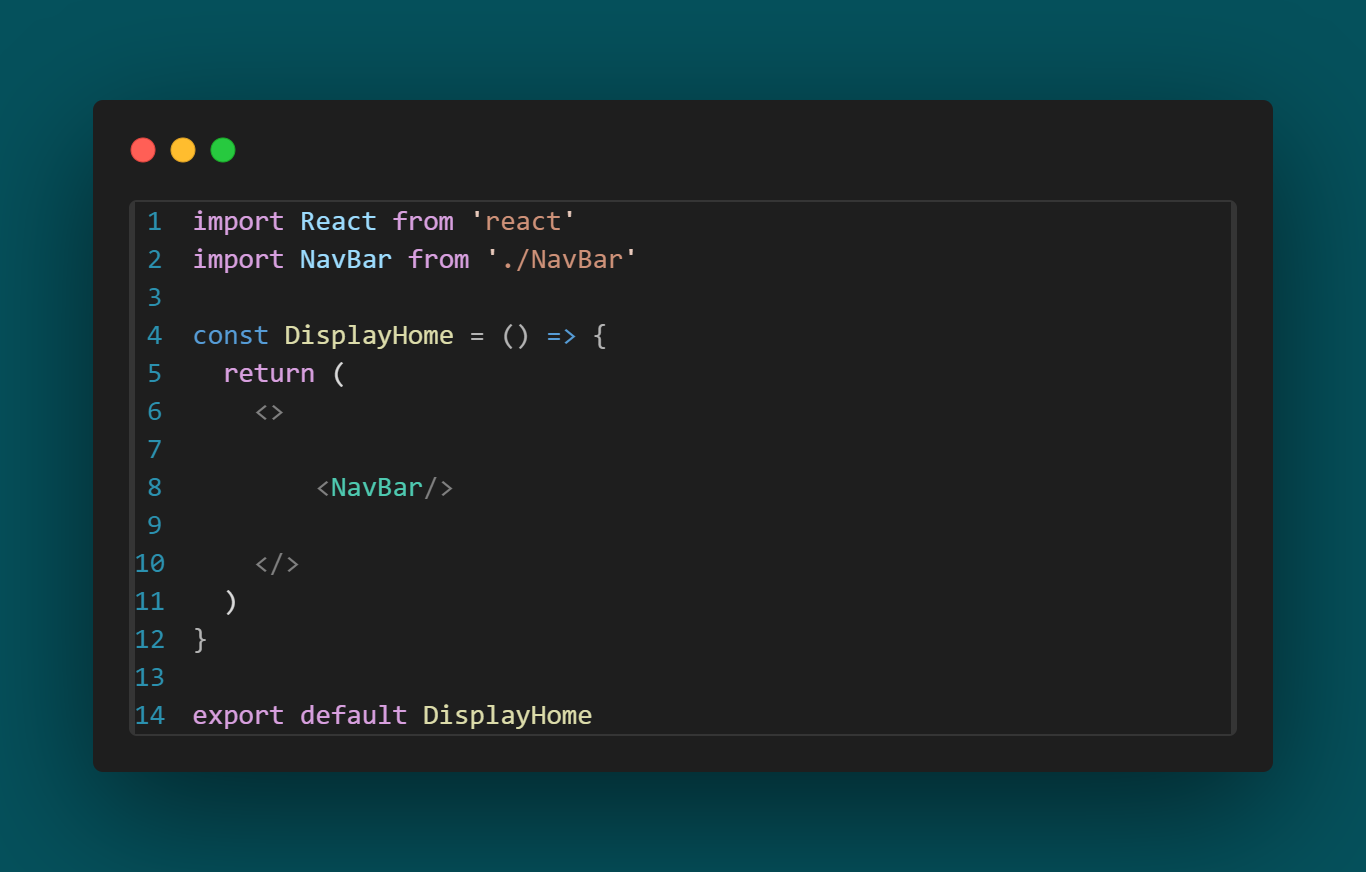
before creating the routes create another file in the component folder--> DisplayHome.jsx
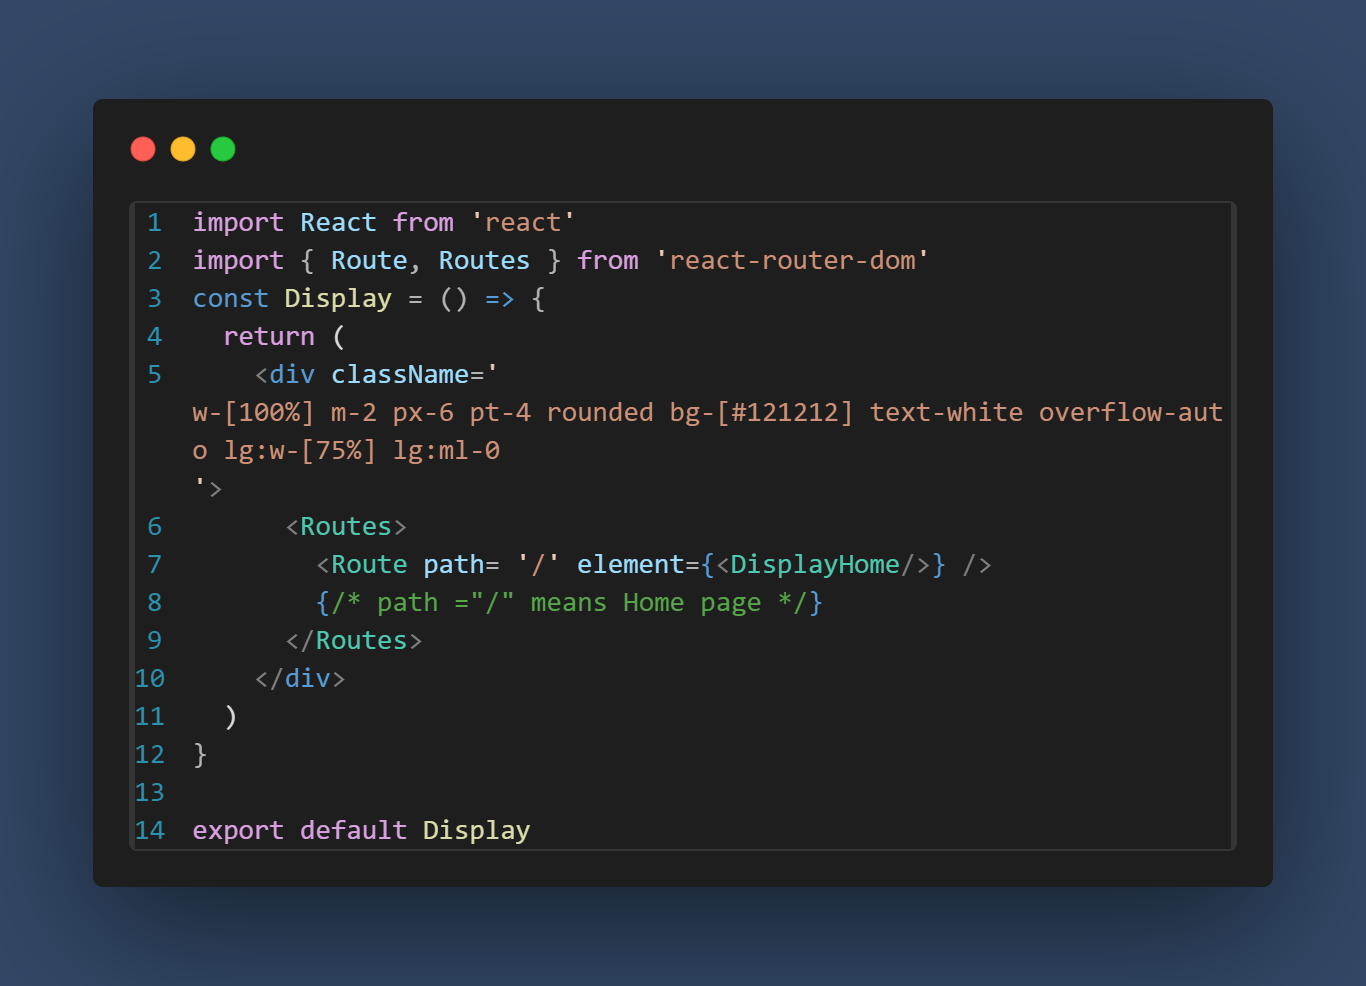
create another component named by navbar in component folder,(rafce), after that we'll mount this component in DisplayHome.jsx file.
the code for Navbar:--
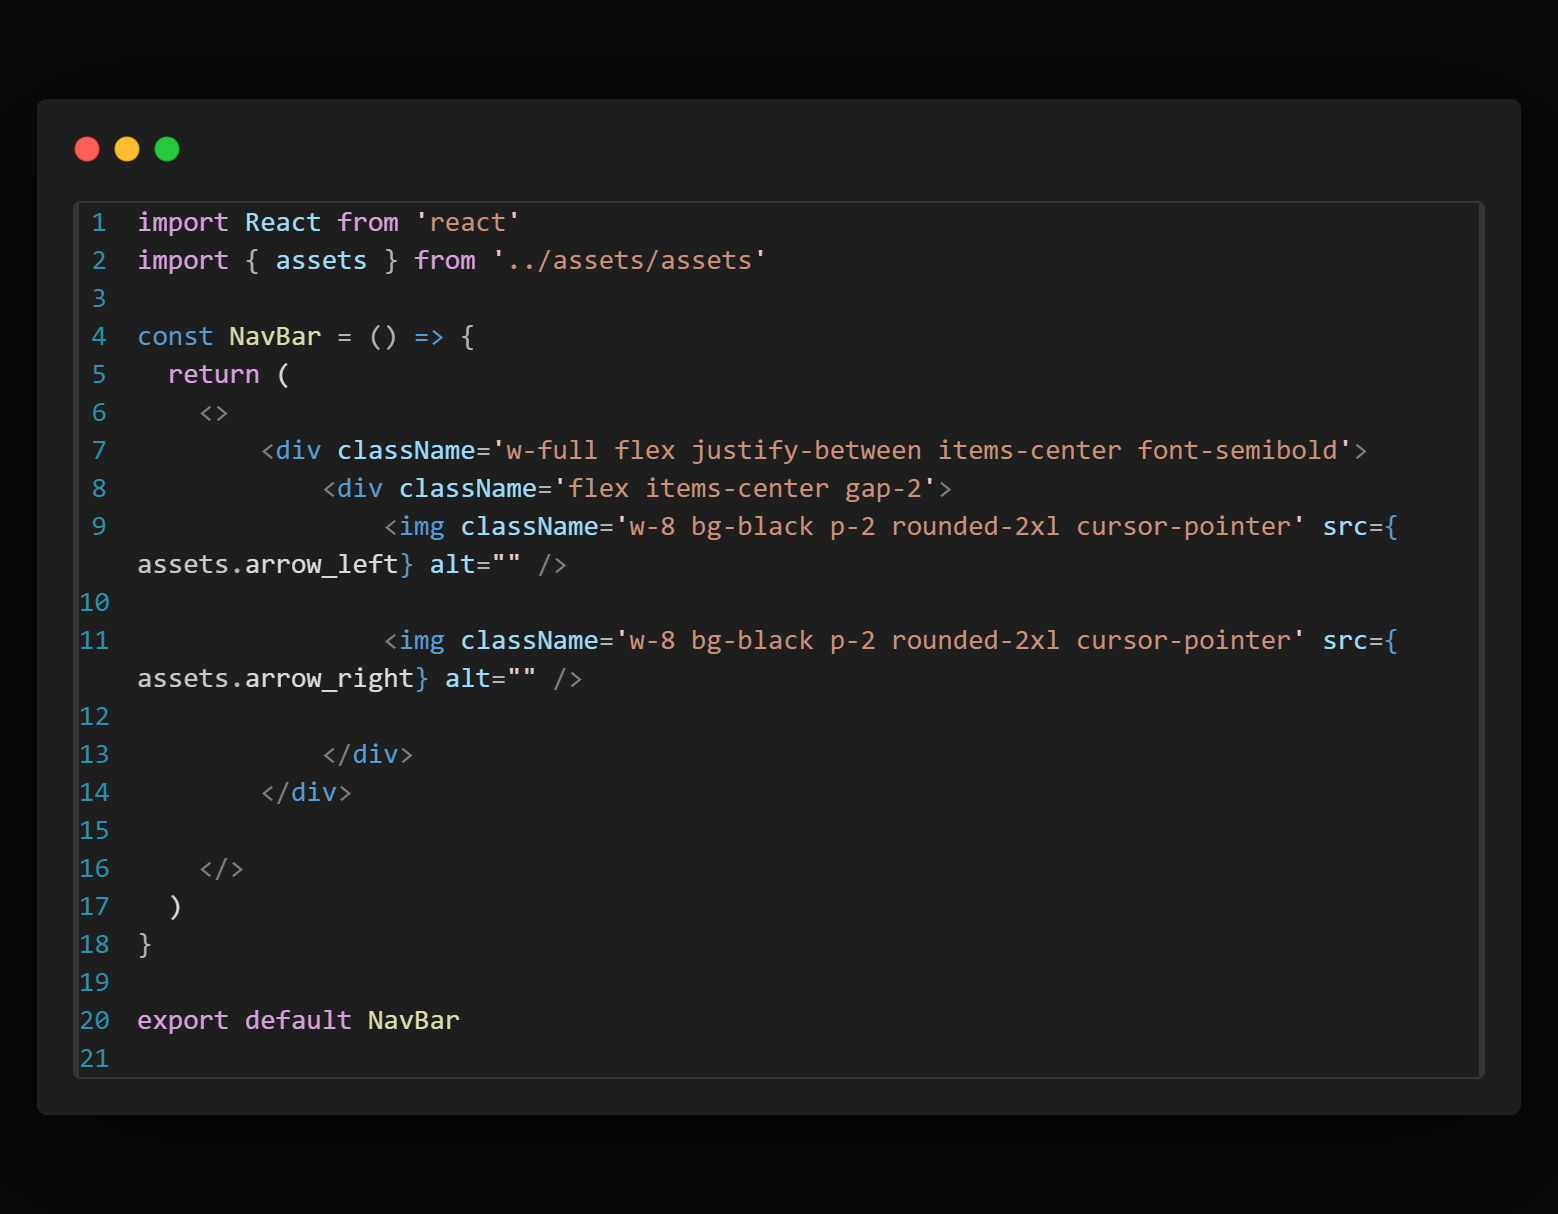
to create Explore button in Navbar
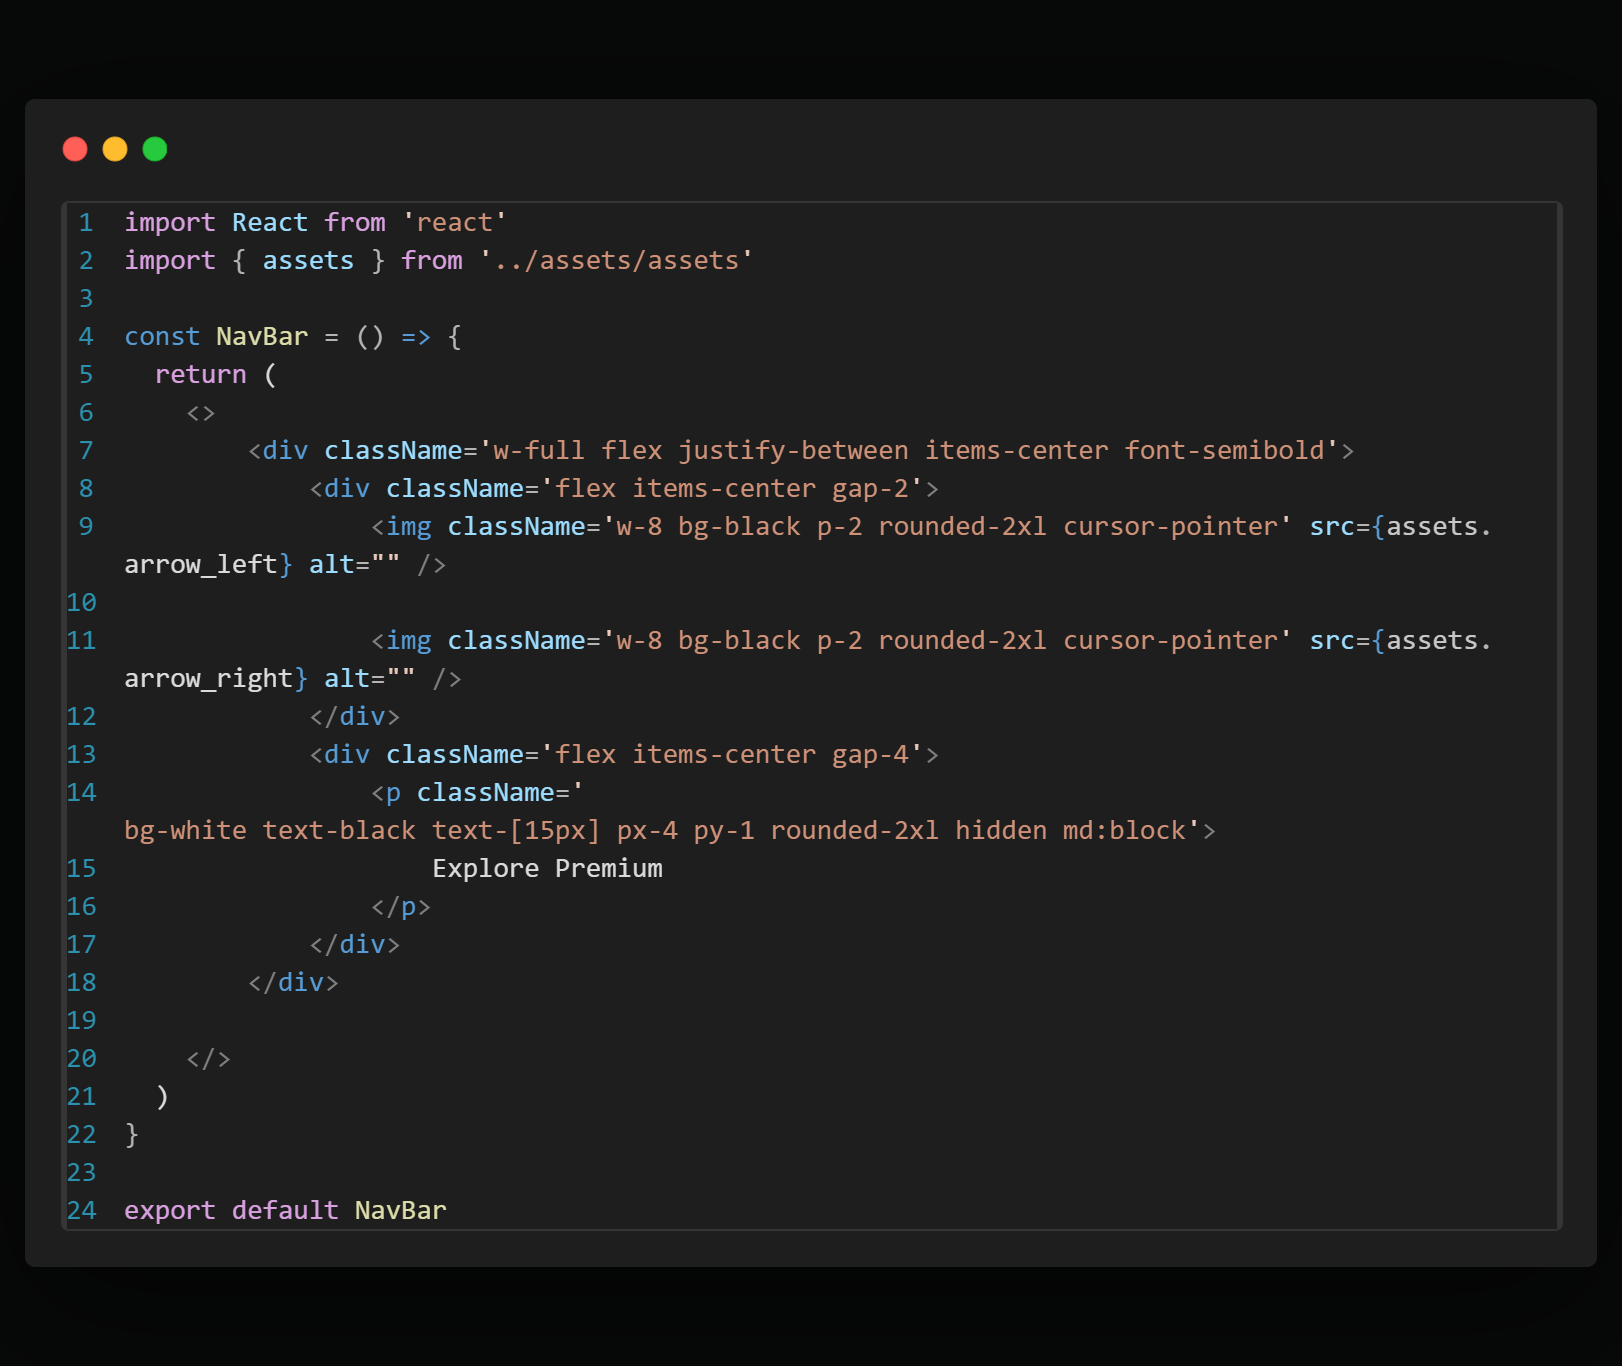
and another <p> tag in the same <div>
<p className='bg-black py-1 px-3 rounded-2xl text-[15px] cursor-pointer'>Install App</p>
<p className='bg-purple-500  text-black w-7 h-7 rounded-full flex items-center justify-center cursor-pointer'>S</p>
and also created the three button All , Music , Podcast
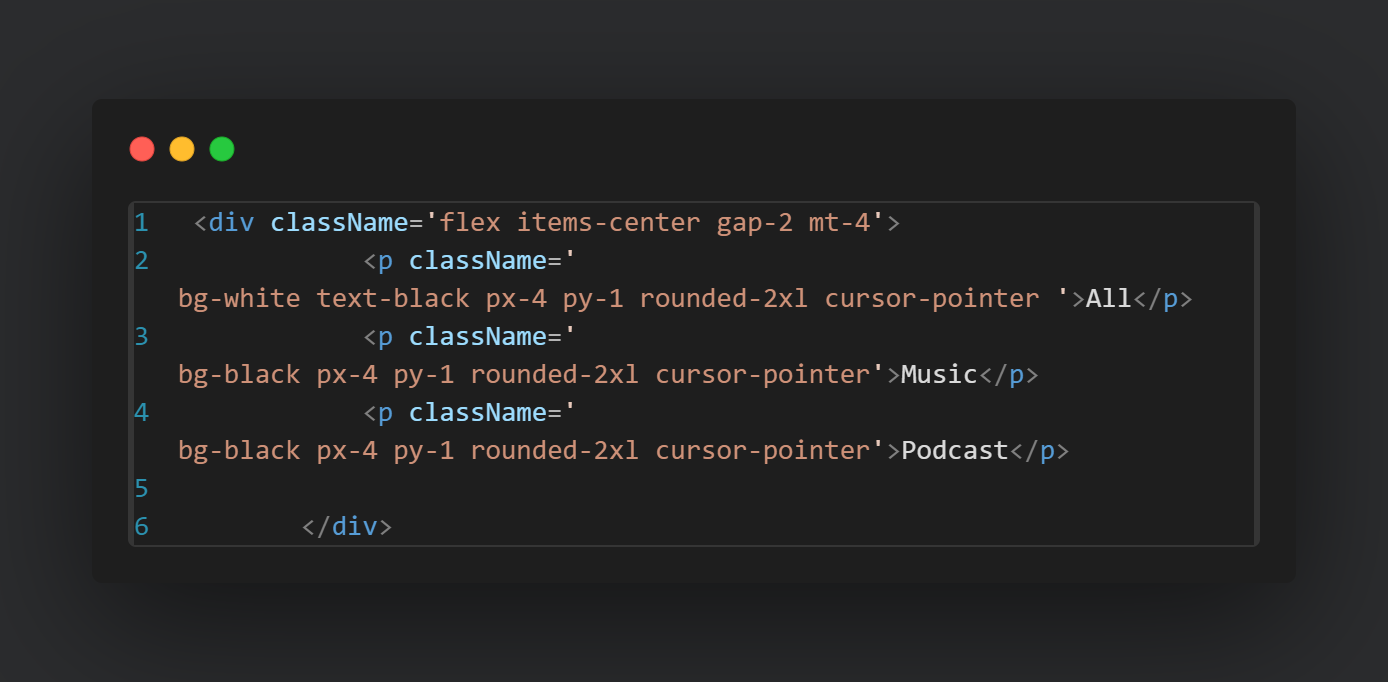
Now we're created the Navbar, after that we'll create the other UI for this one <div> is add in the DisplayHome.jsx. Here we'll created one component name AlbumItem.jsx. mapped the albumdata using the album id
code for Albumitem.jsx
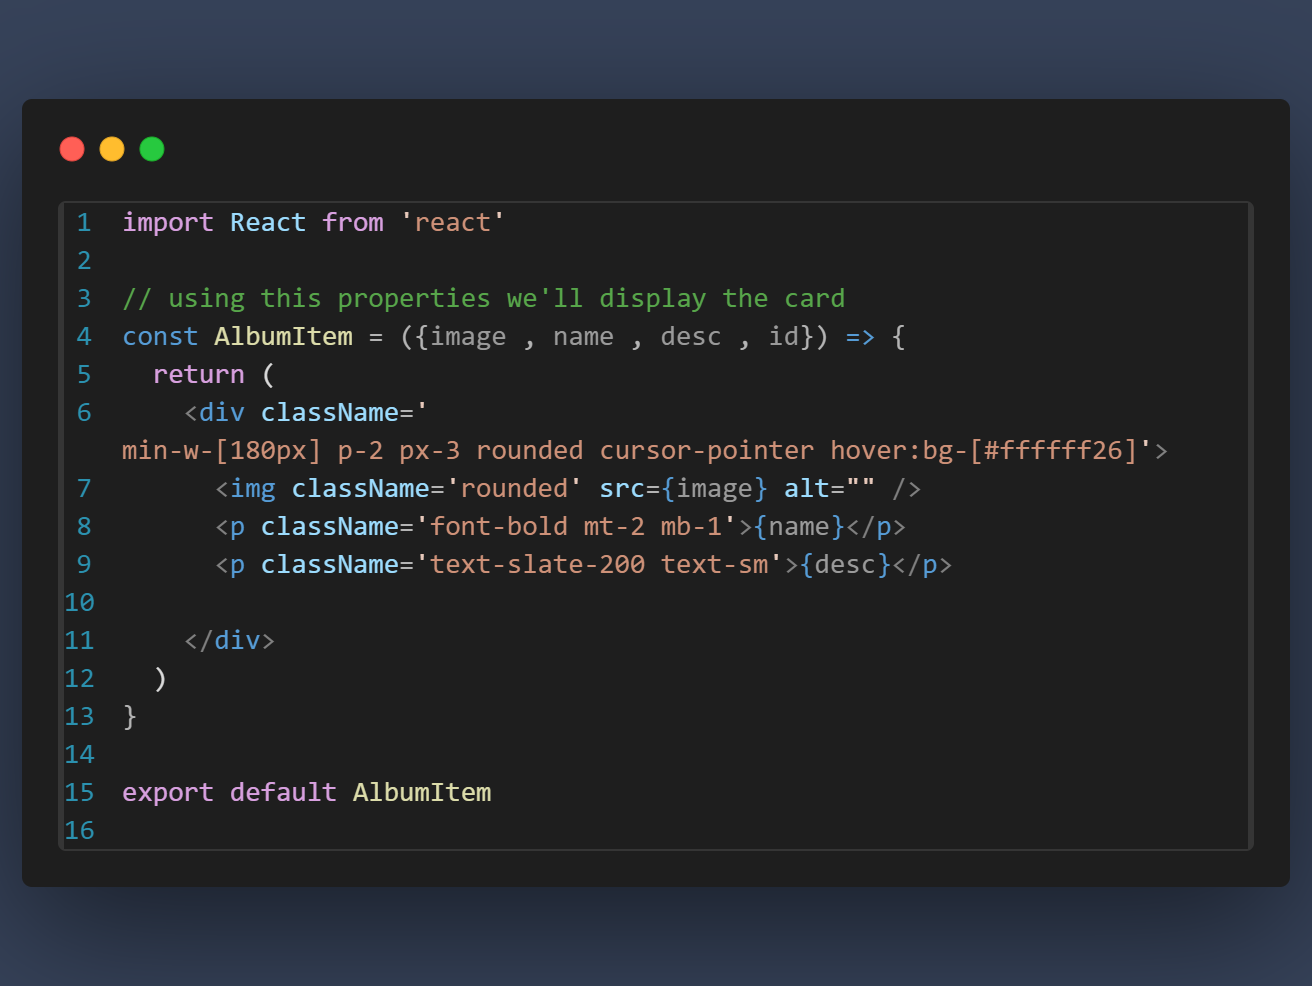
and mount this on the DisplayHome.jsx
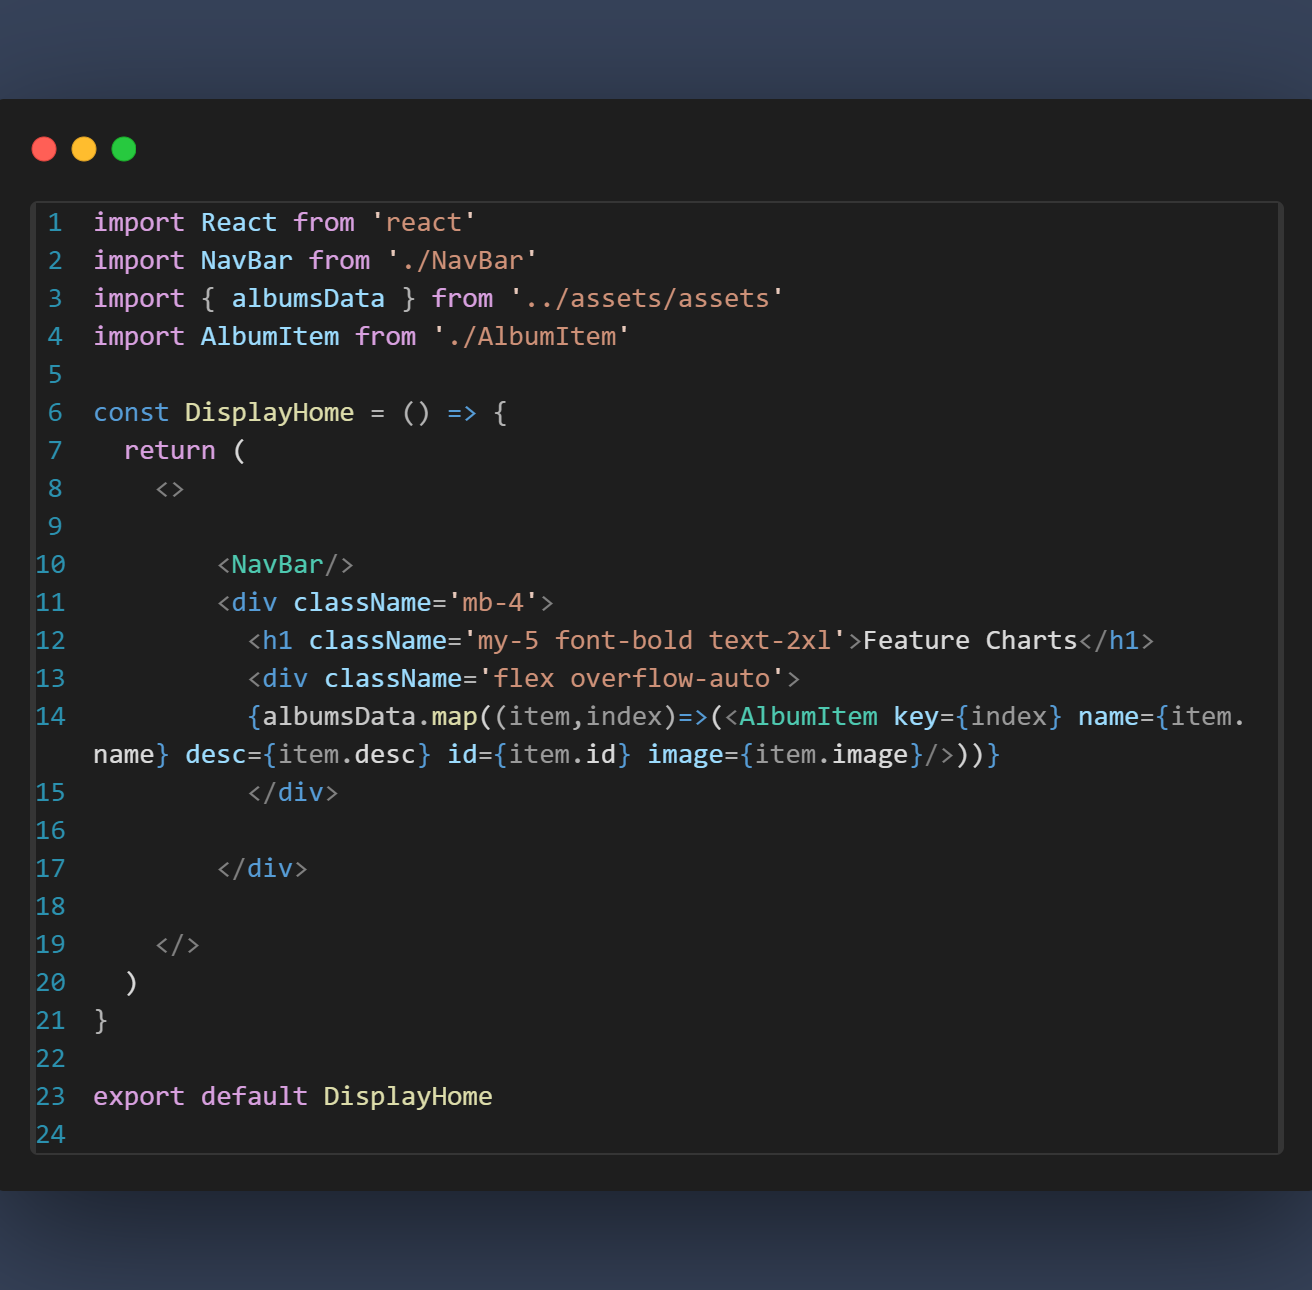
Now here we can see all the album are placed horizontally. if I right click select inspect and reduce the screen size we'll see that here we have a horizontally scroll bar because we've added overflow auto, now we've to hide this scroll bar ,for this got the index.css file and type (::-webkit-scrollbar{ display : none })
here we create another component which display the songs item name will be SongItem.jsx(rafce)
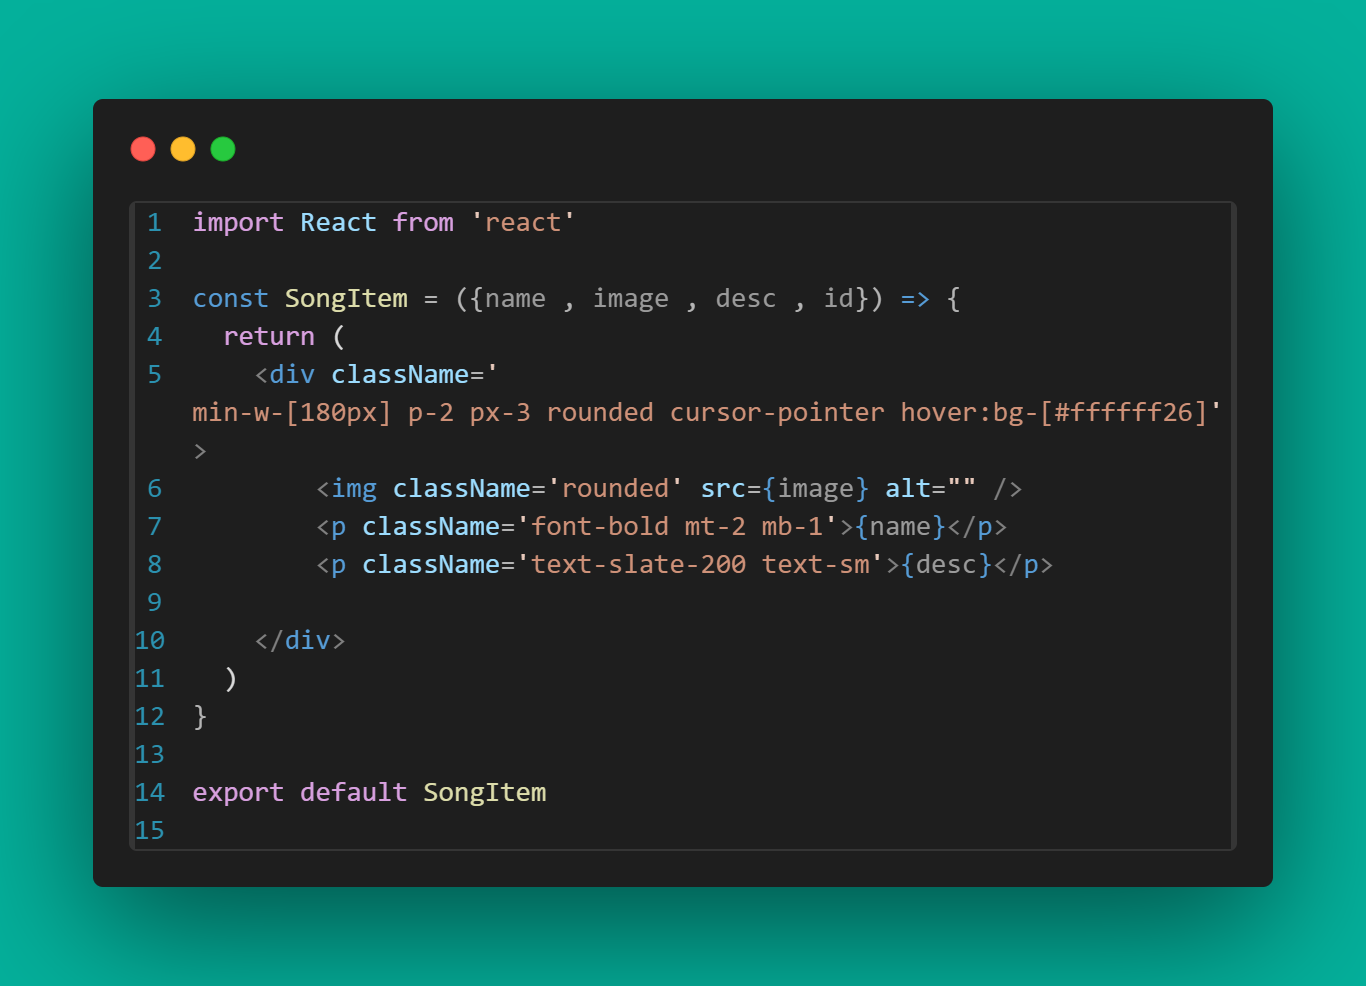
and mount this on the DisplayHome.jsx
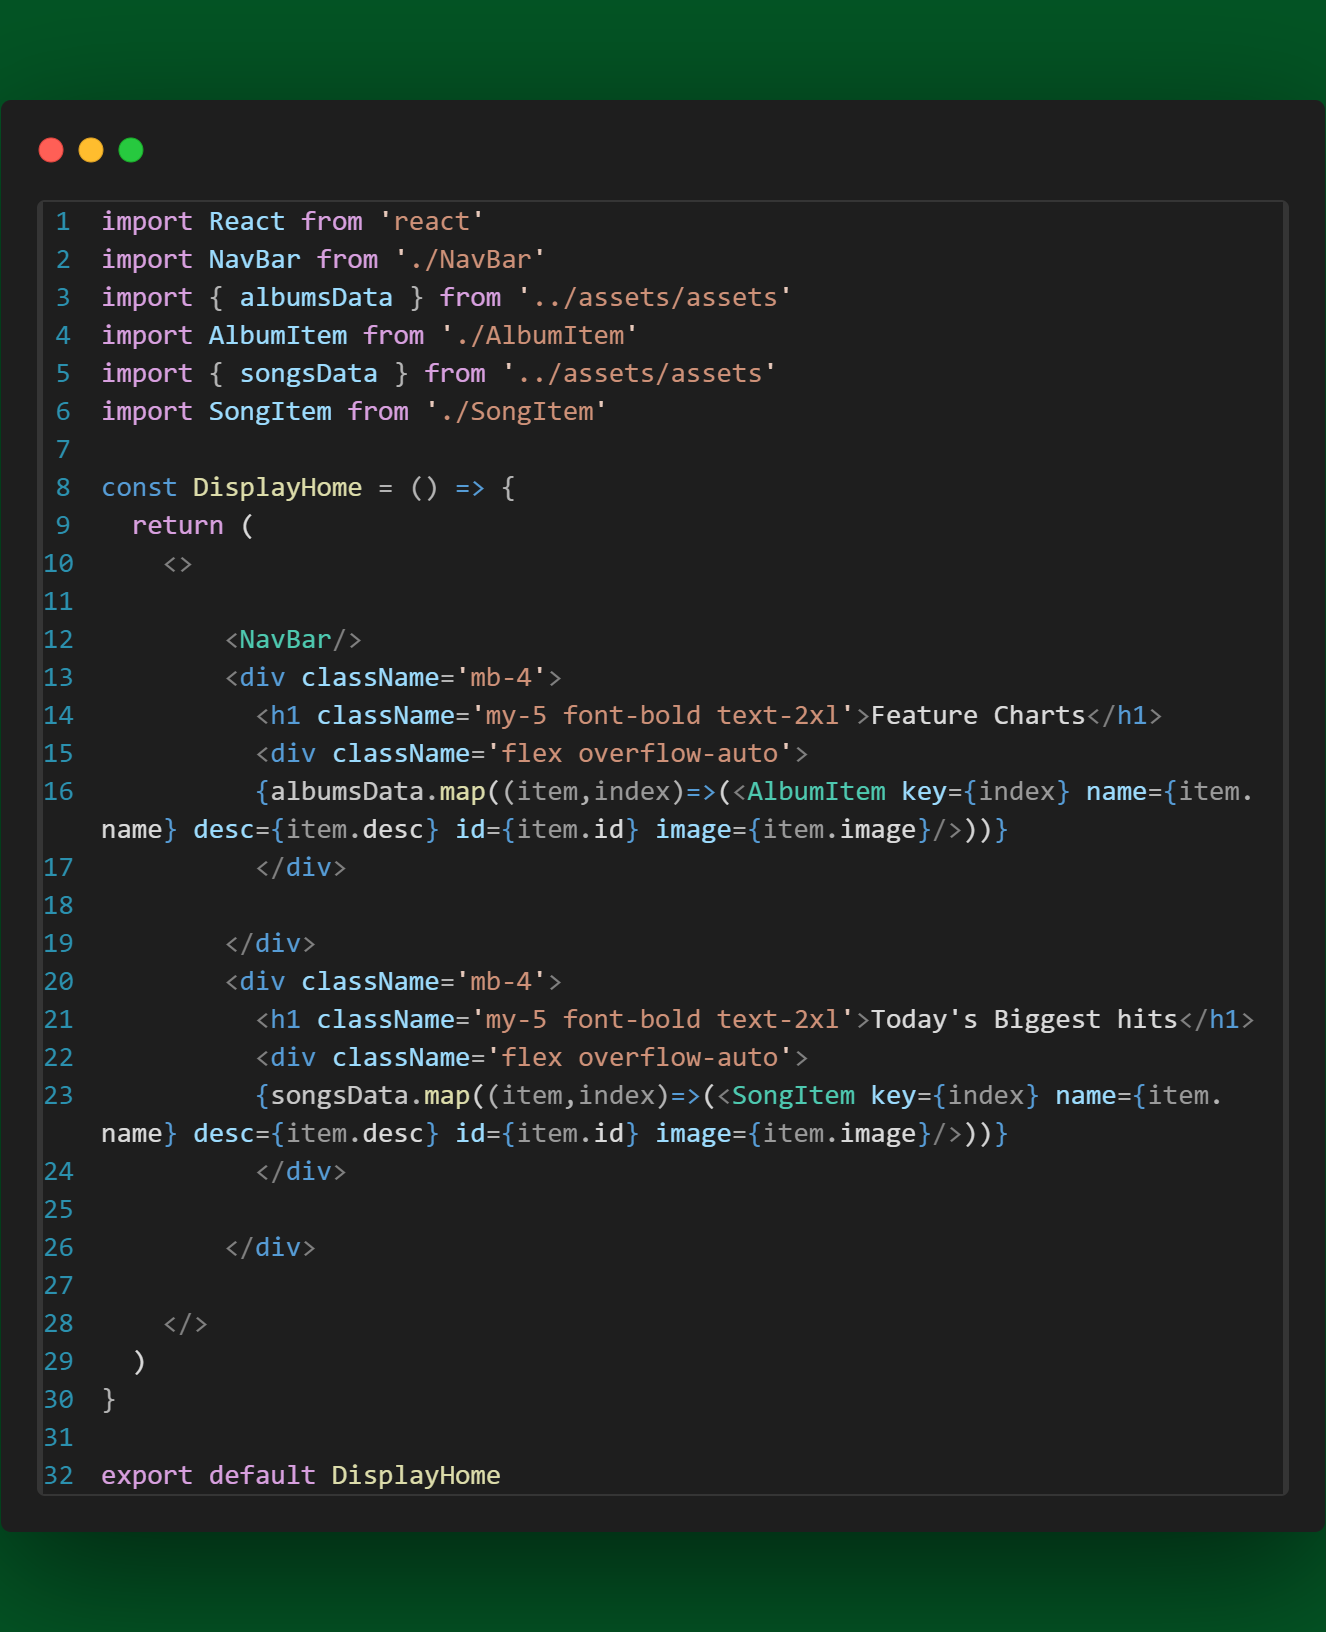
when we click on the feature chart it'll show the album for this we use the useNavigatehook and open AlbumItem.jsx
code
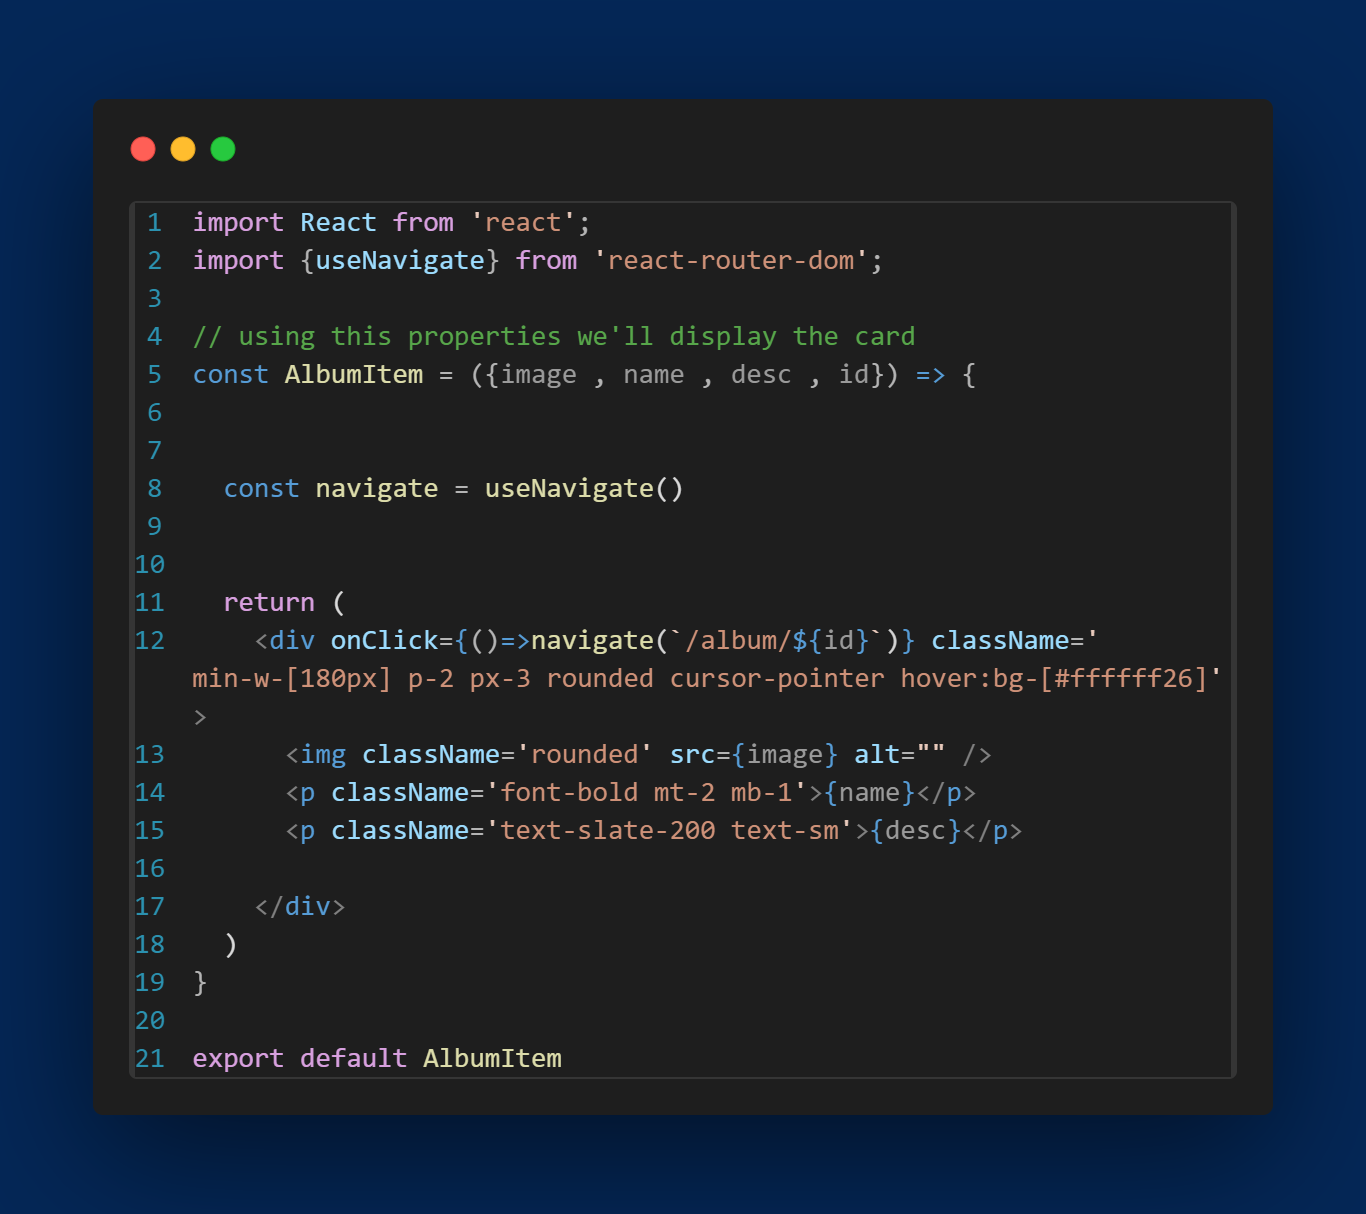
we can successfully navigate to different page---------------------- Now we'll create the another route where we'll display the album data, for this we'll create a the another component DisplayAlbum.jsx(rafce)
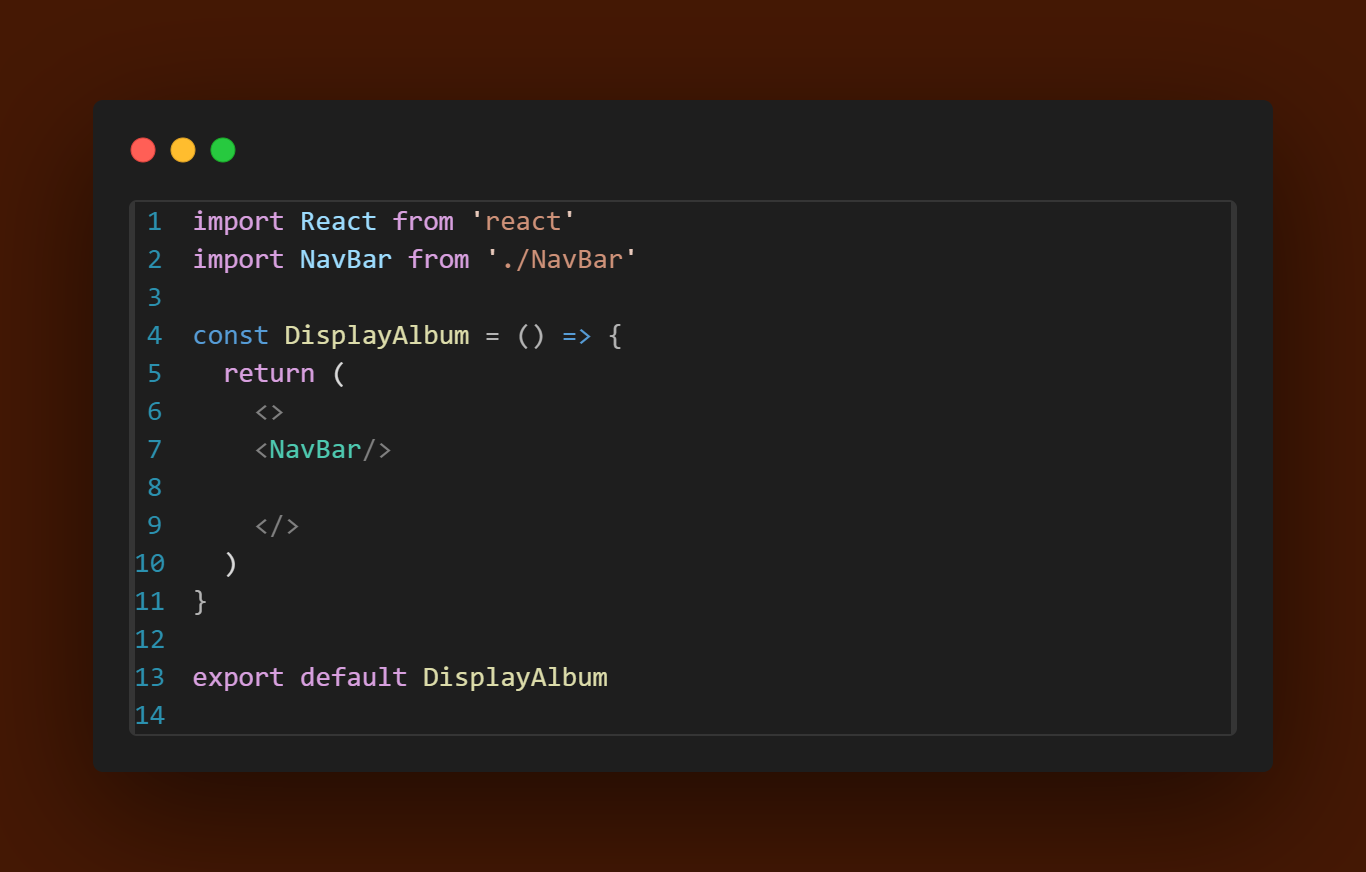
code for display.jsx
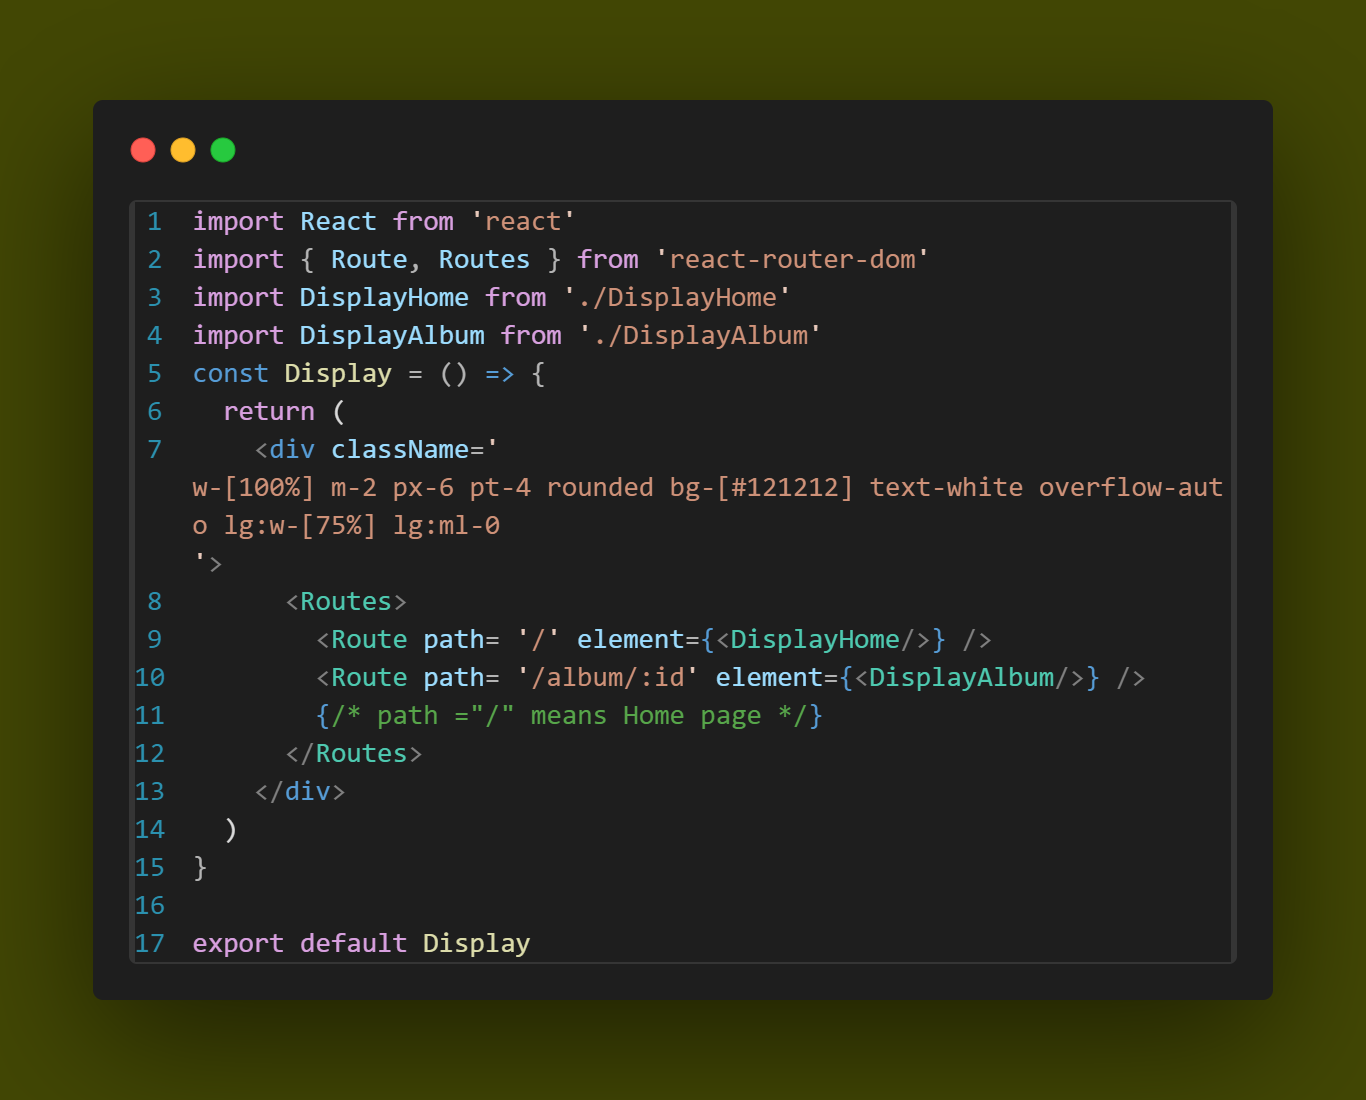
code for DisplayAlbum.jsx
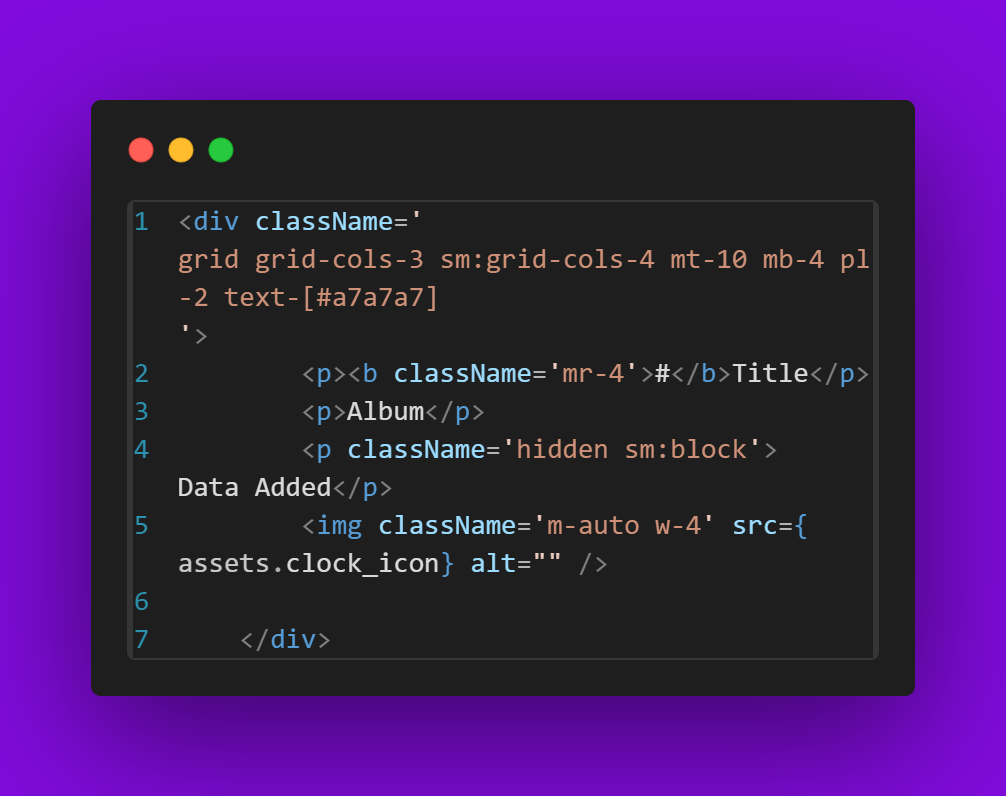
we add the clock _icon in the albums
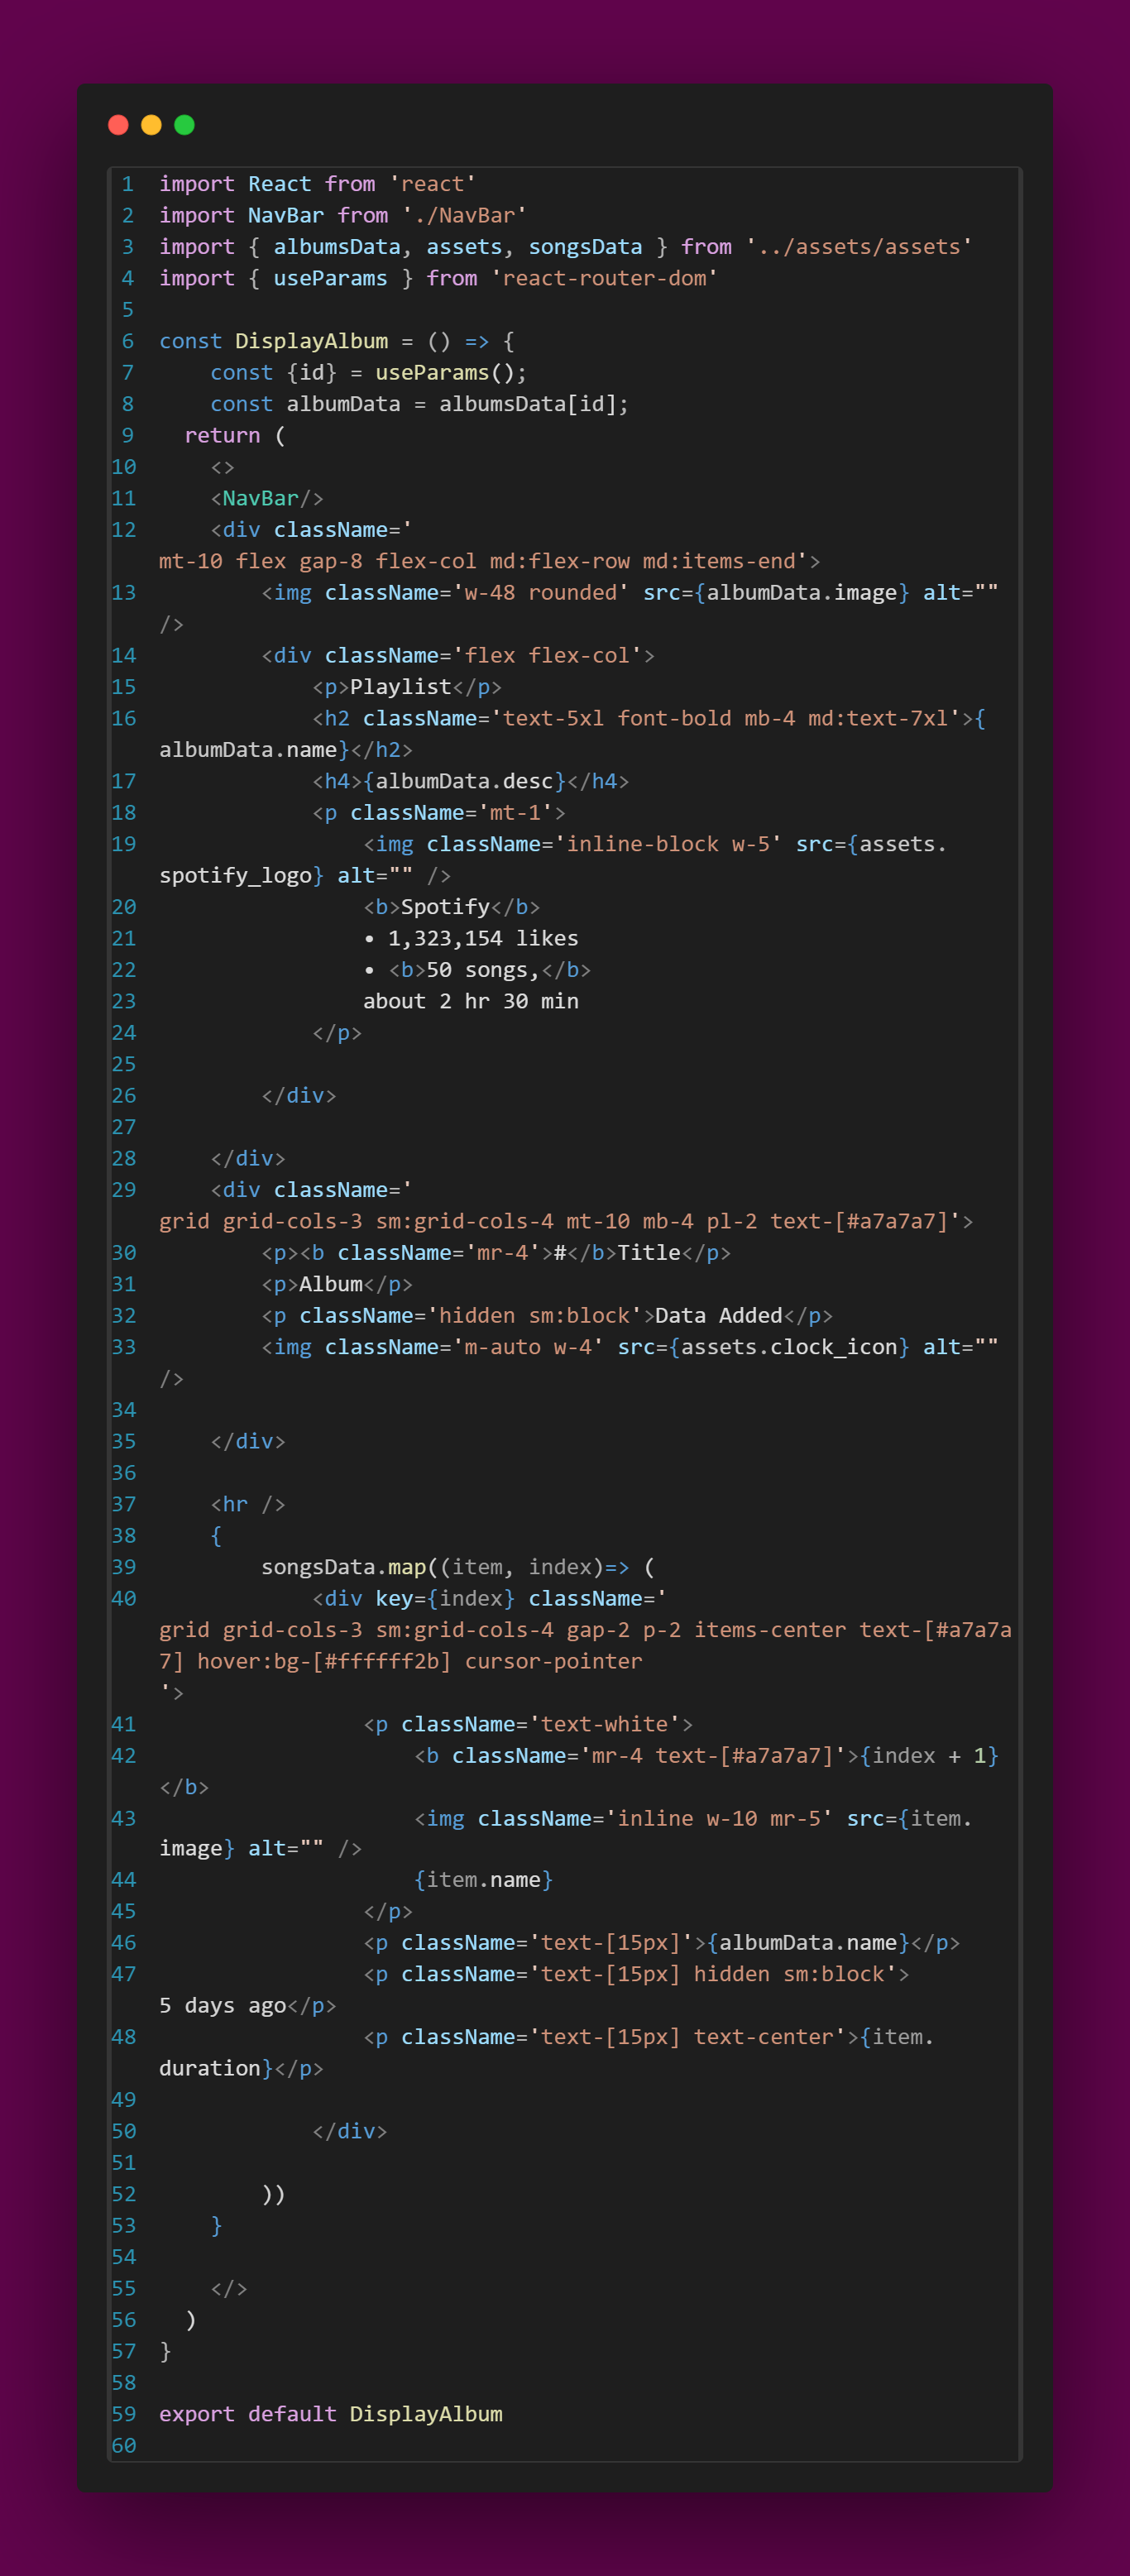
the code for DisplayAlbum.jsx
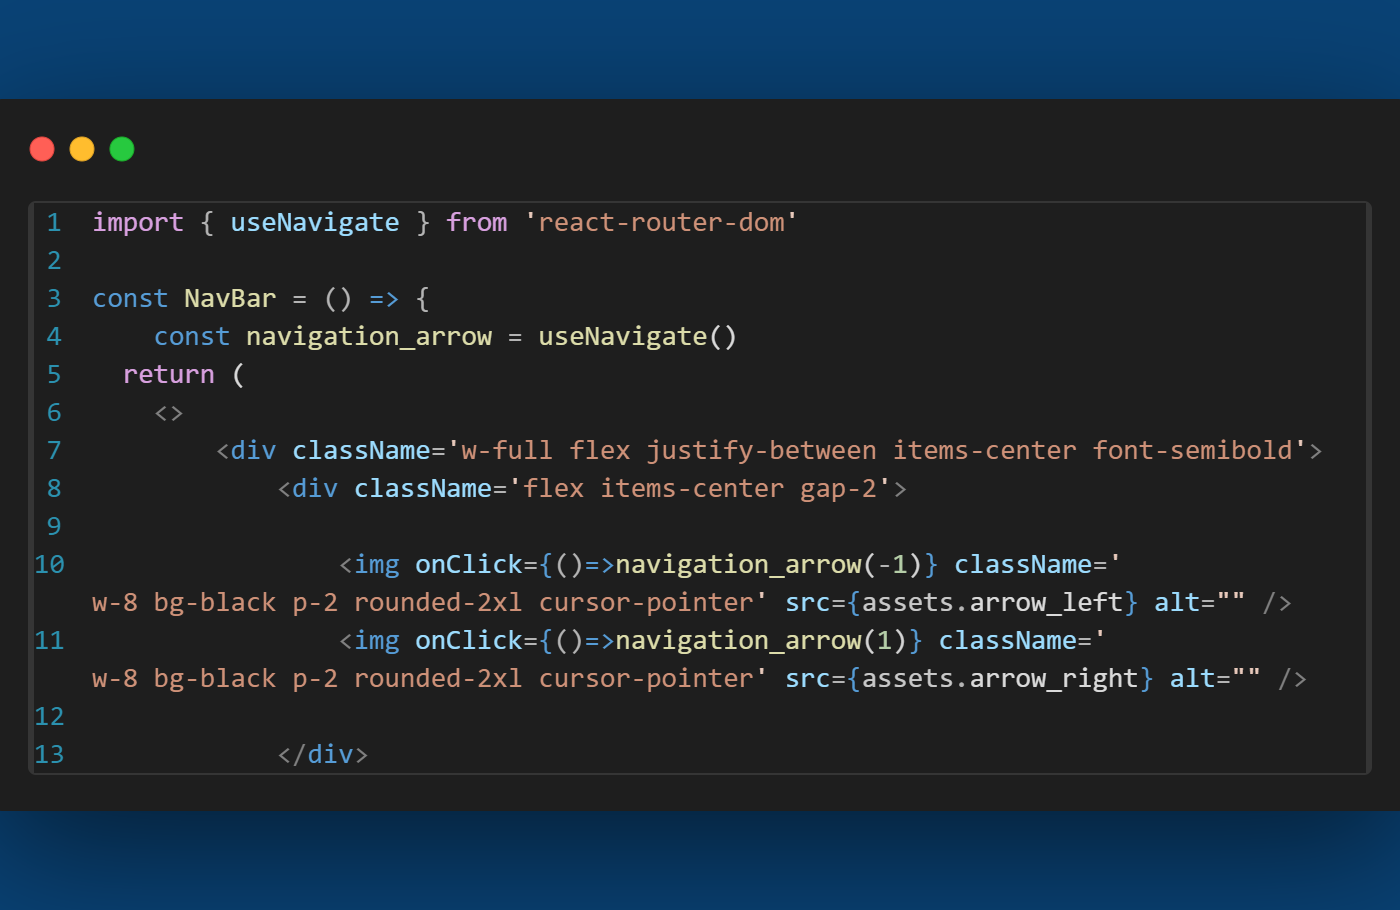
For navigation we use the forward and backward arrow for that we use usenavigatehook, open navbar and do some changes
For changing the bg colour according to the album use userefHook and uselocationhook by the basis of the URL(pathname)
navbar code:-
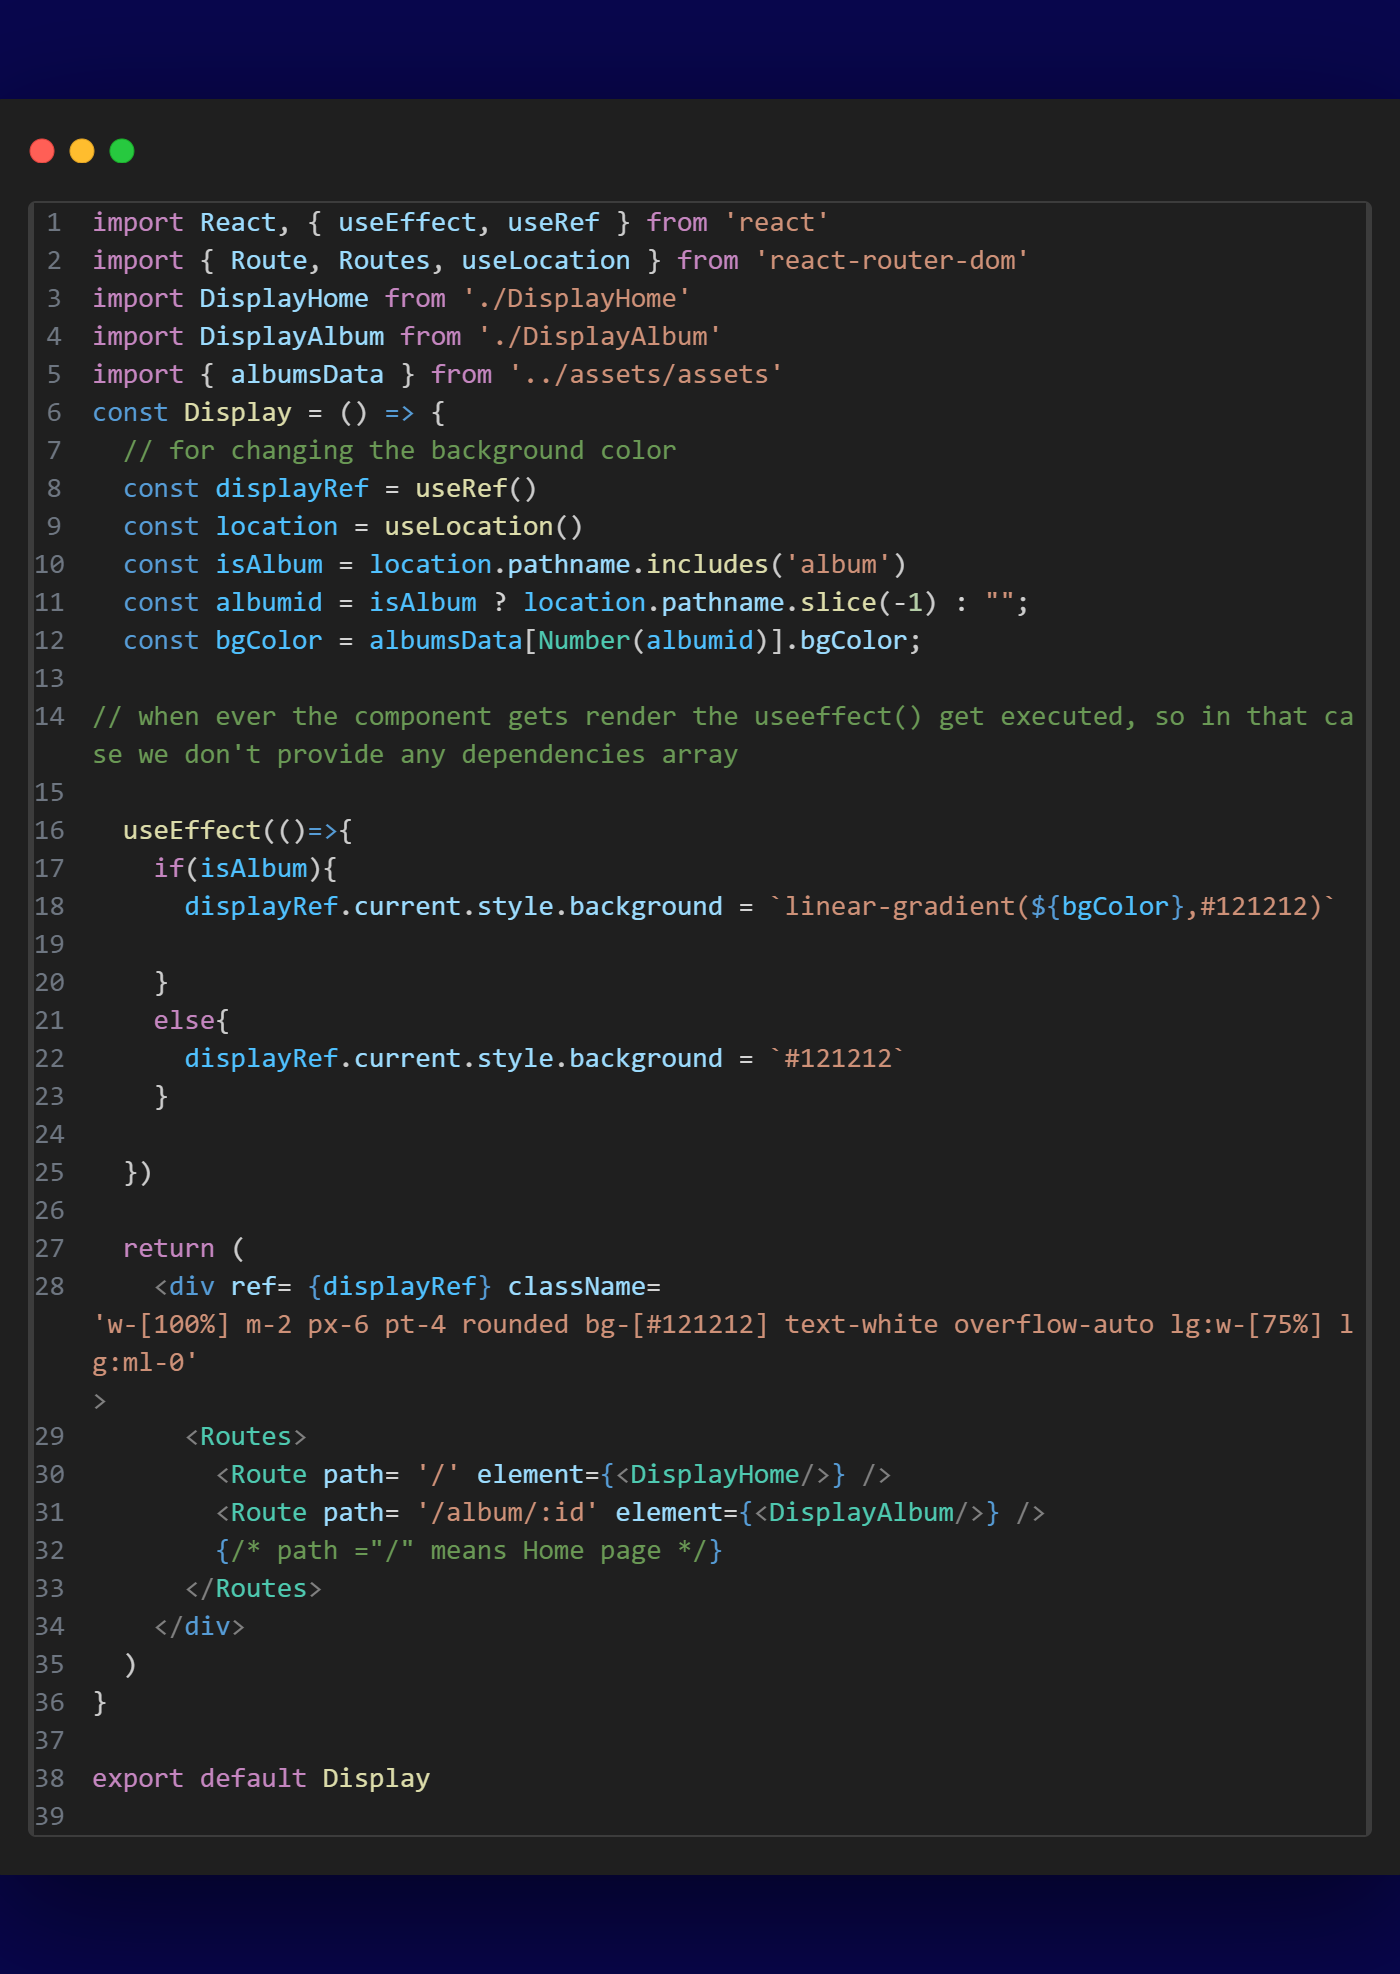
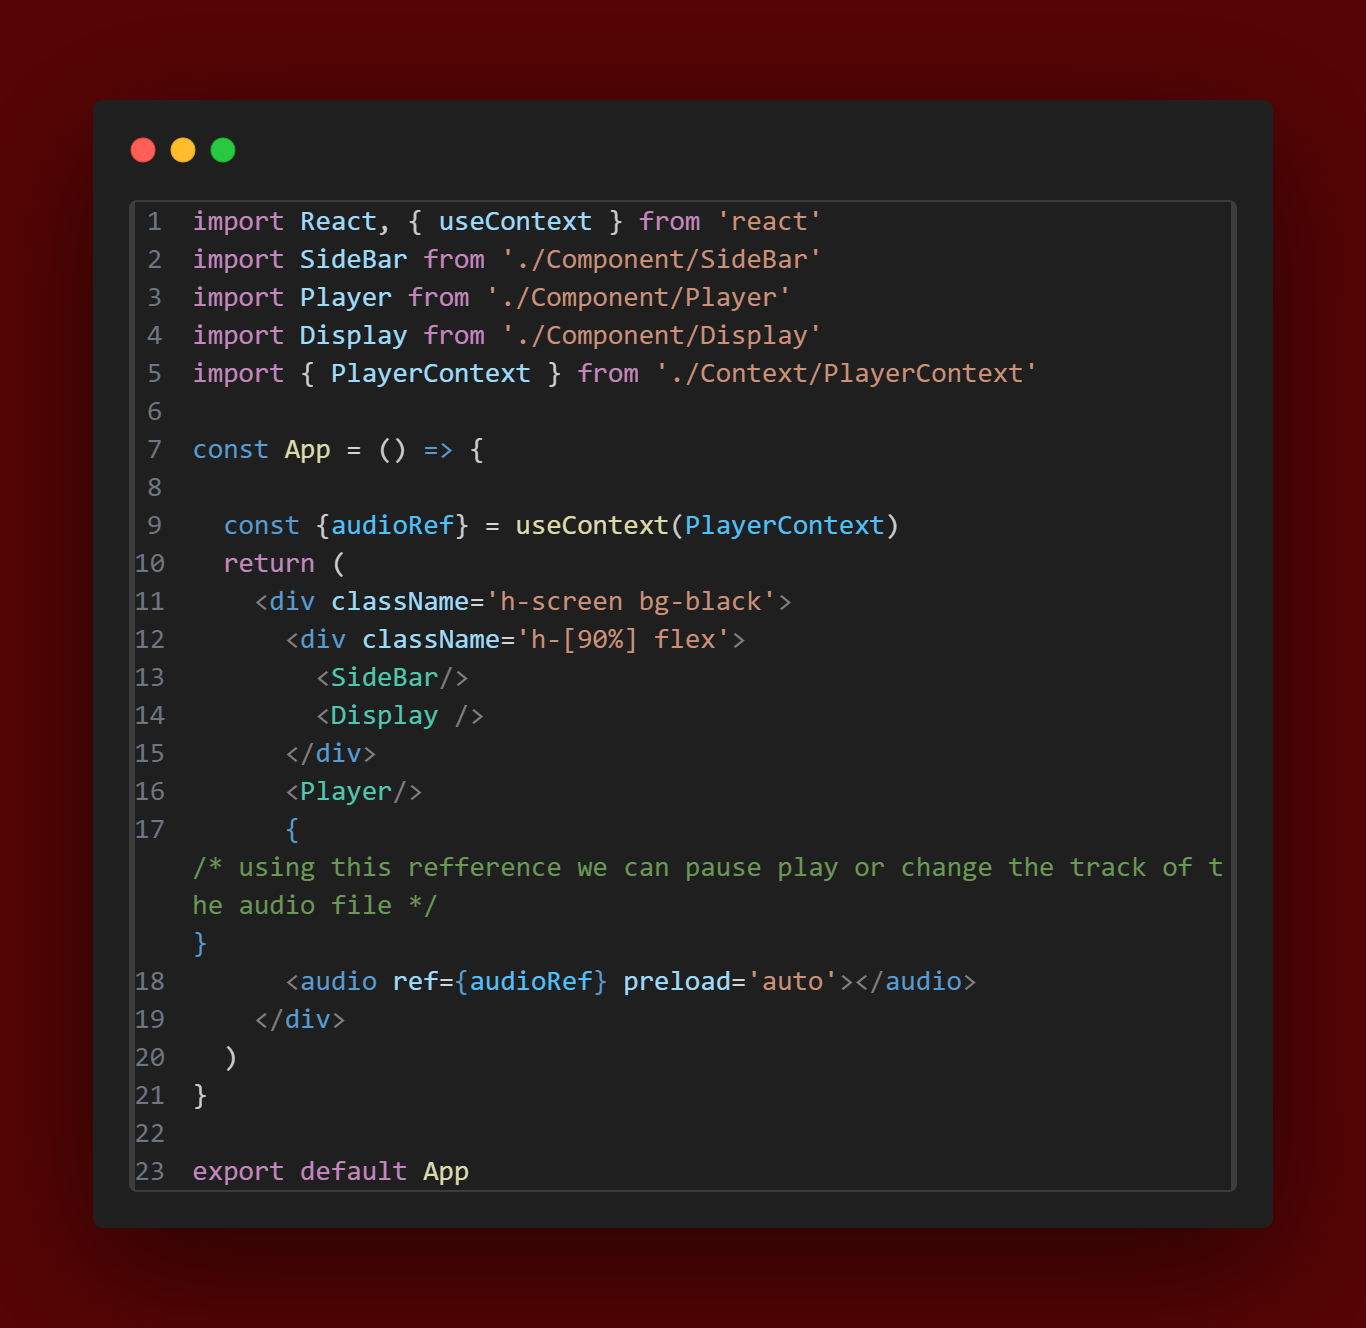
now we have to start the song with those buttons for this we add a <audio> in app.jsx, after that we start building the context, to build this we creating a file to the Context folder , PlayerContext.jsx
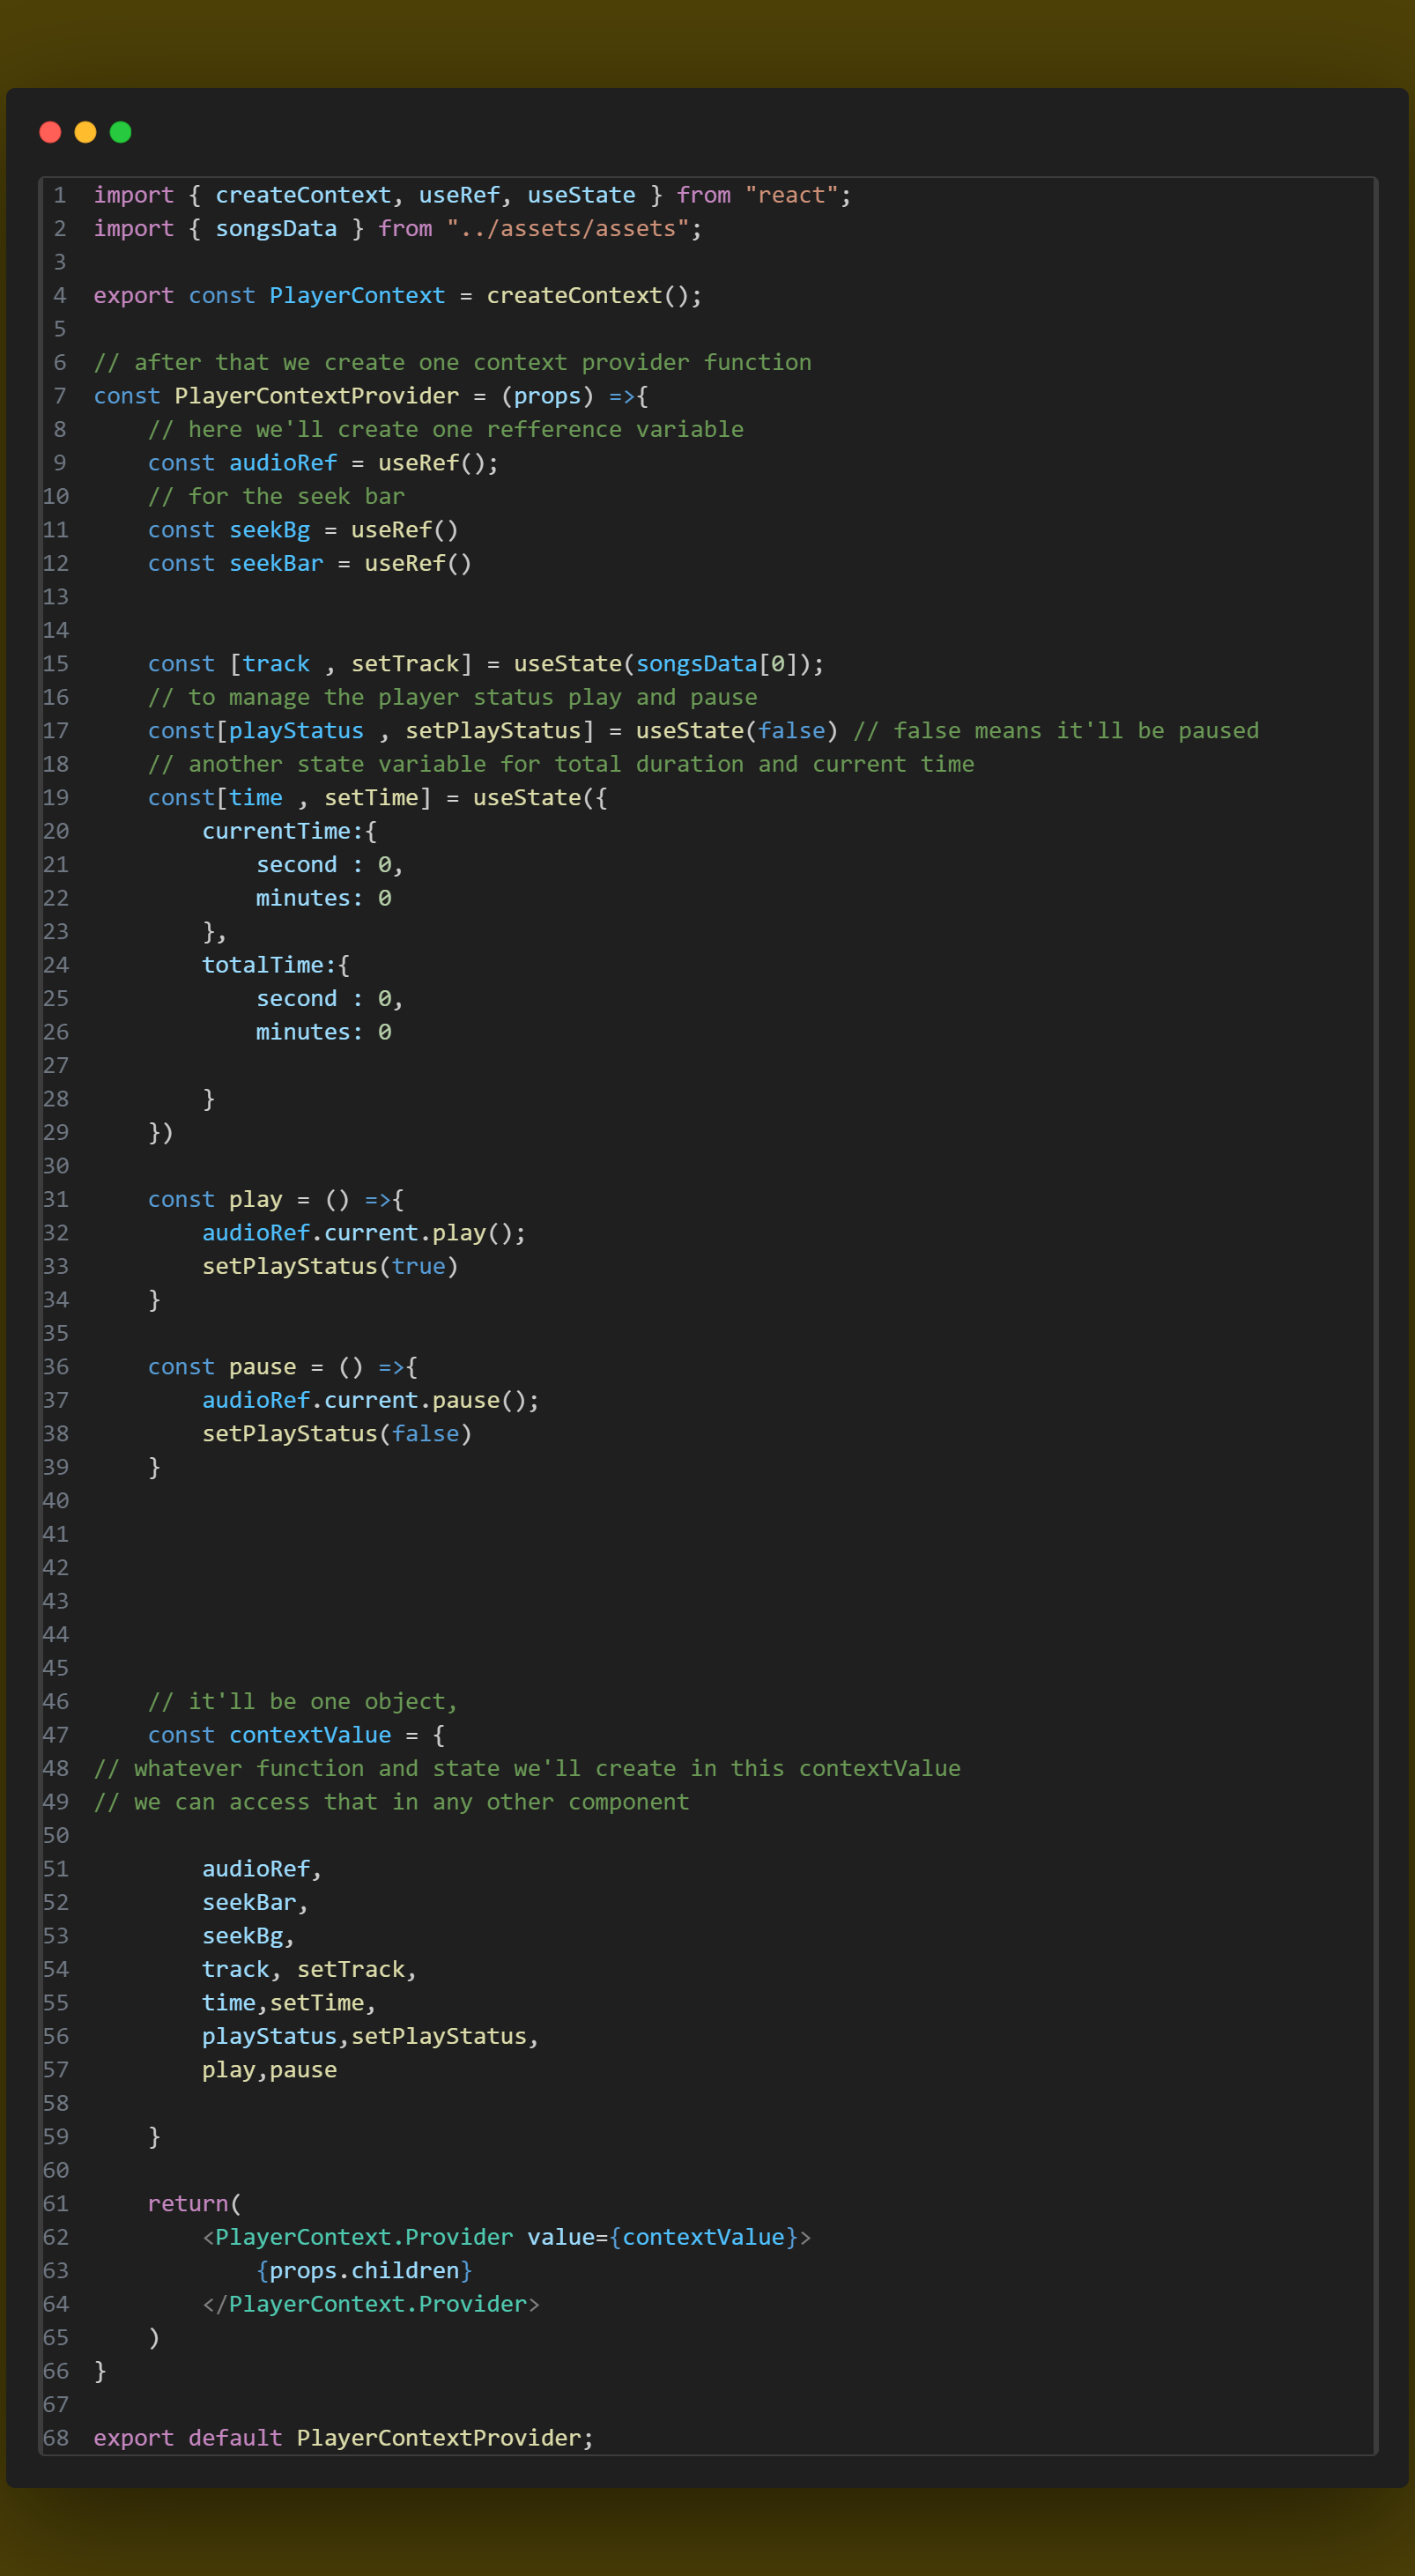
1st we’ll create one context for this we’ll use createcontext API
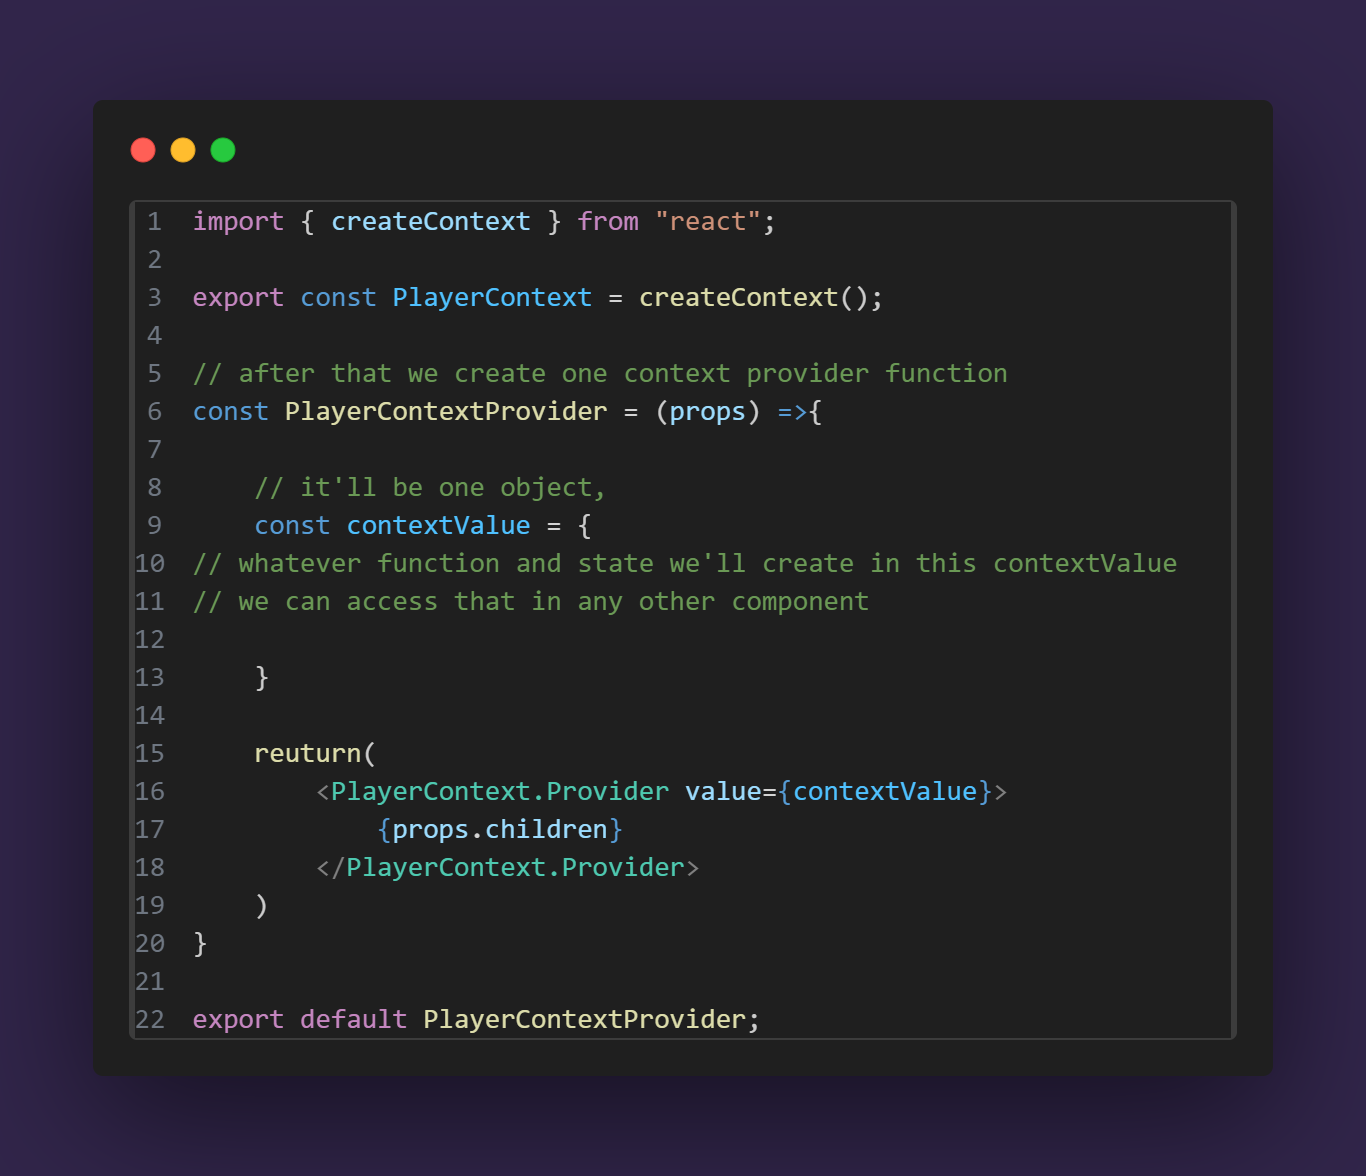
and code for app.jsx:
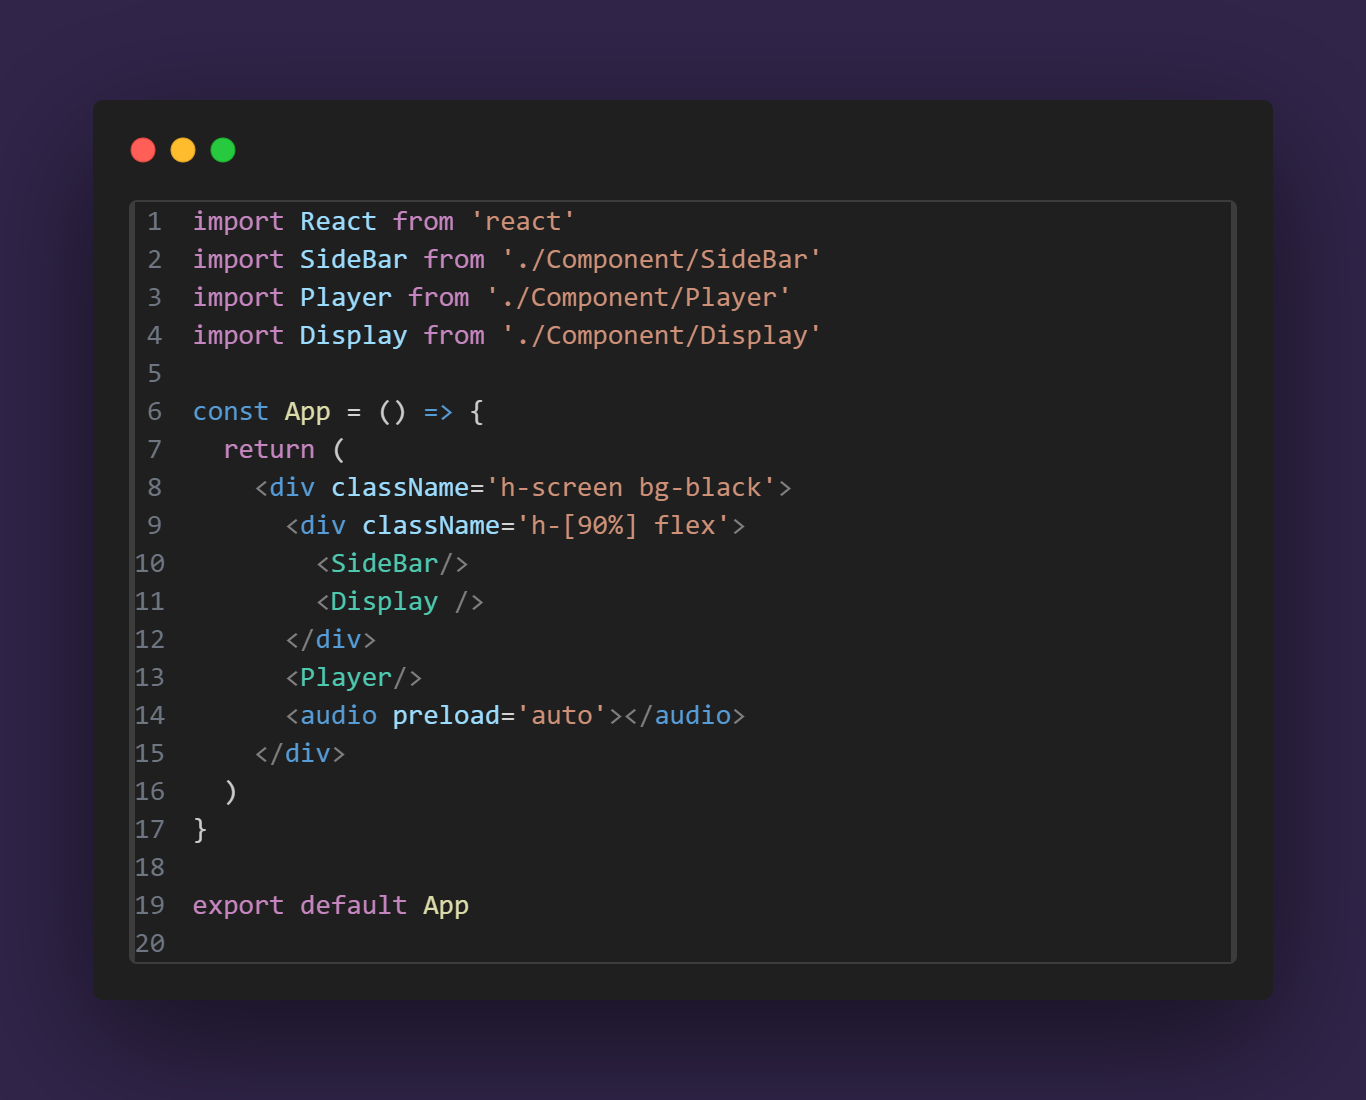
code for PlayerContext.jsx:
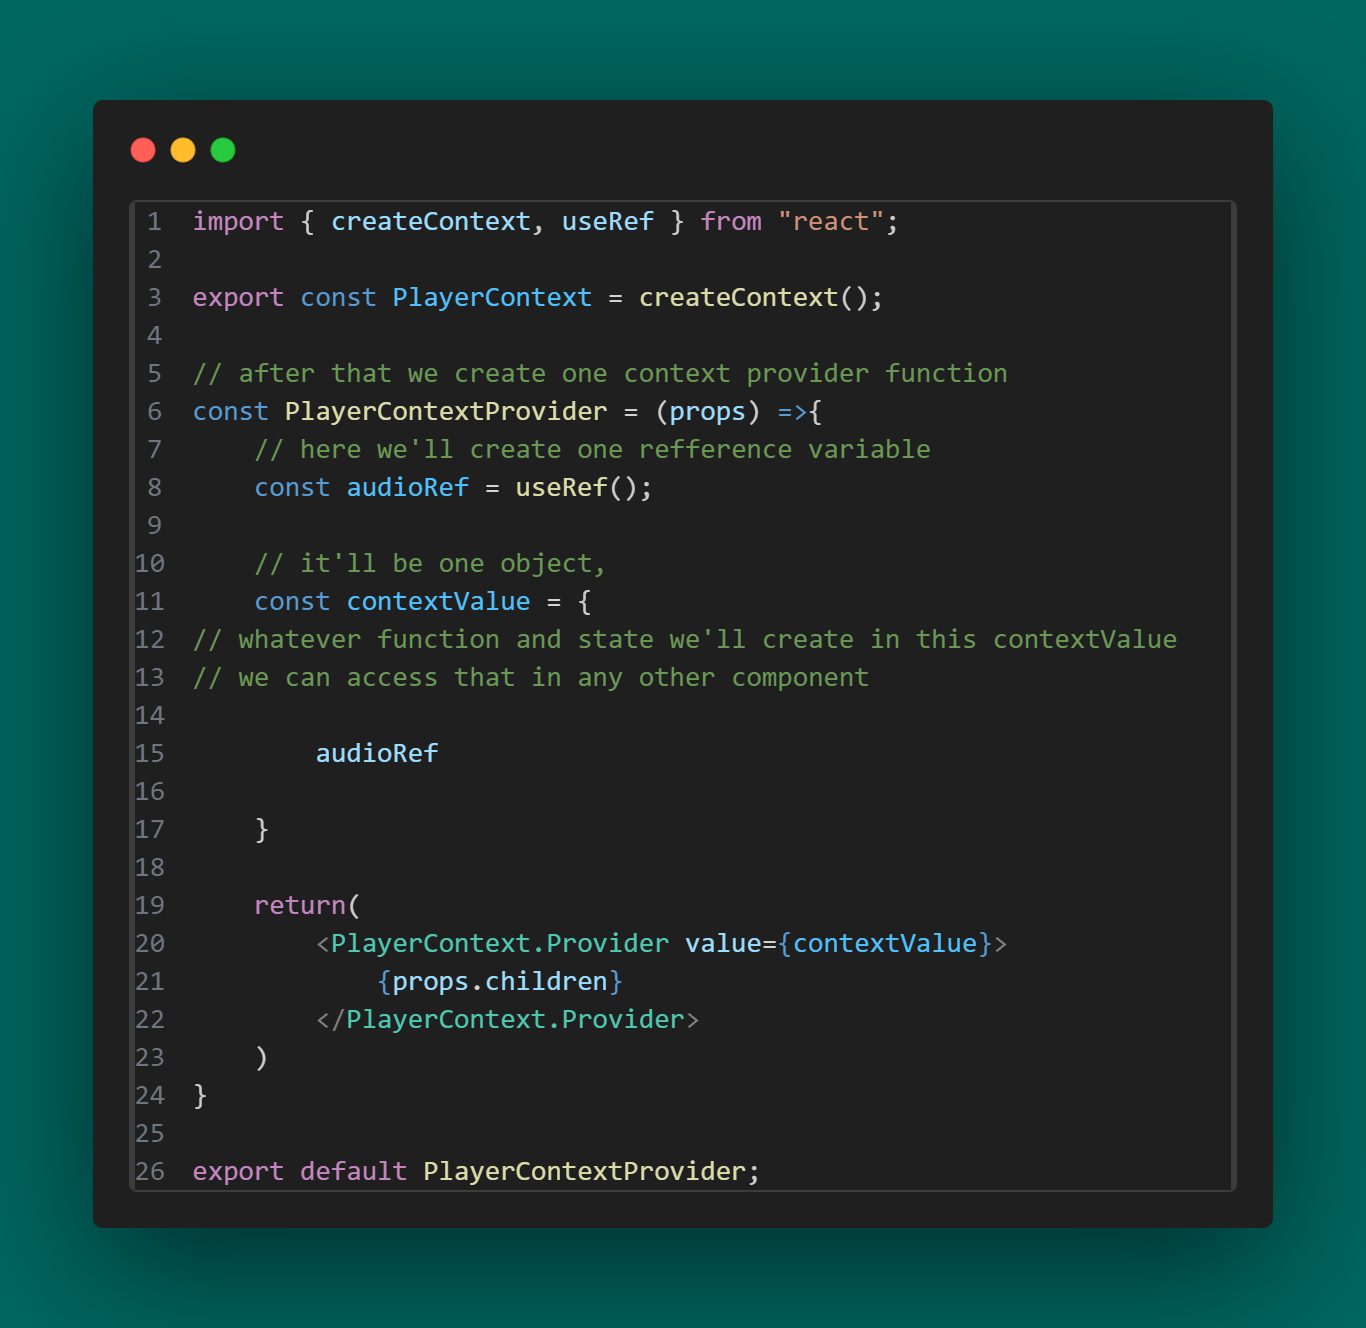
code for main.jsx:
code for App.jsx:
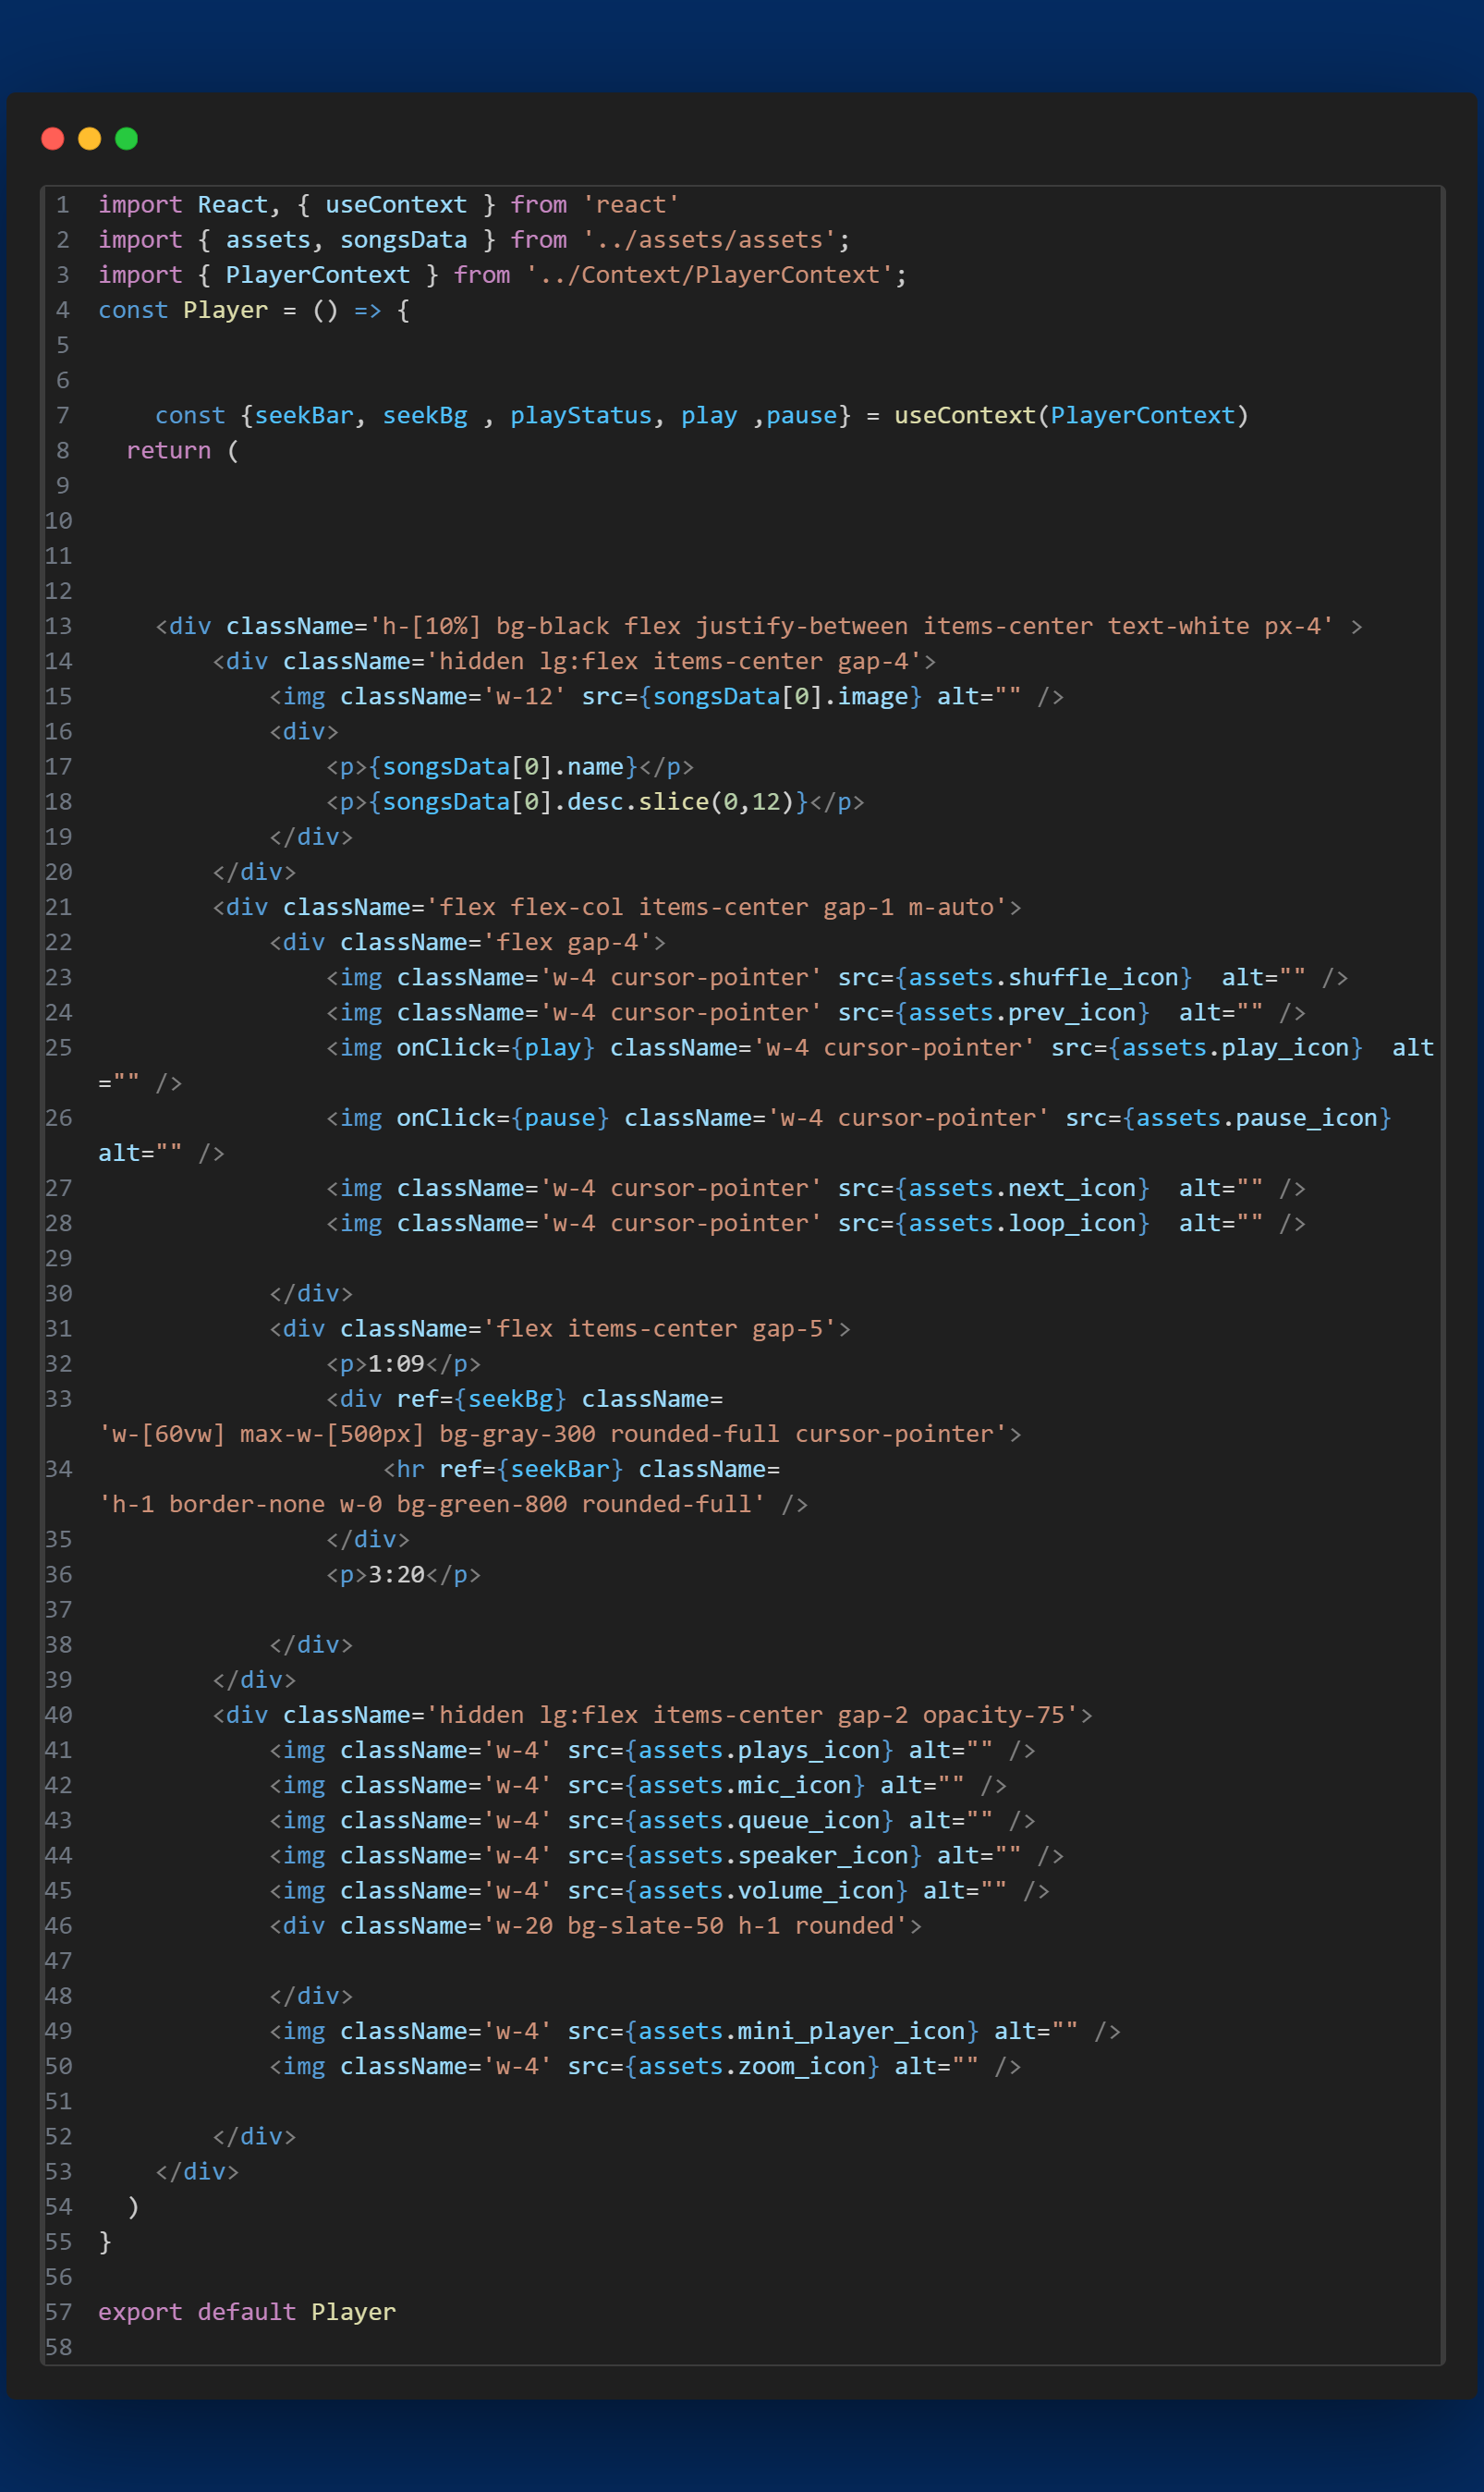
now we’ll create two other reference variables also for the seek bar and hr tag using that we can change it status
Player.jsx code:-
code of PlayerContextProvider:-
App.jsx code:-
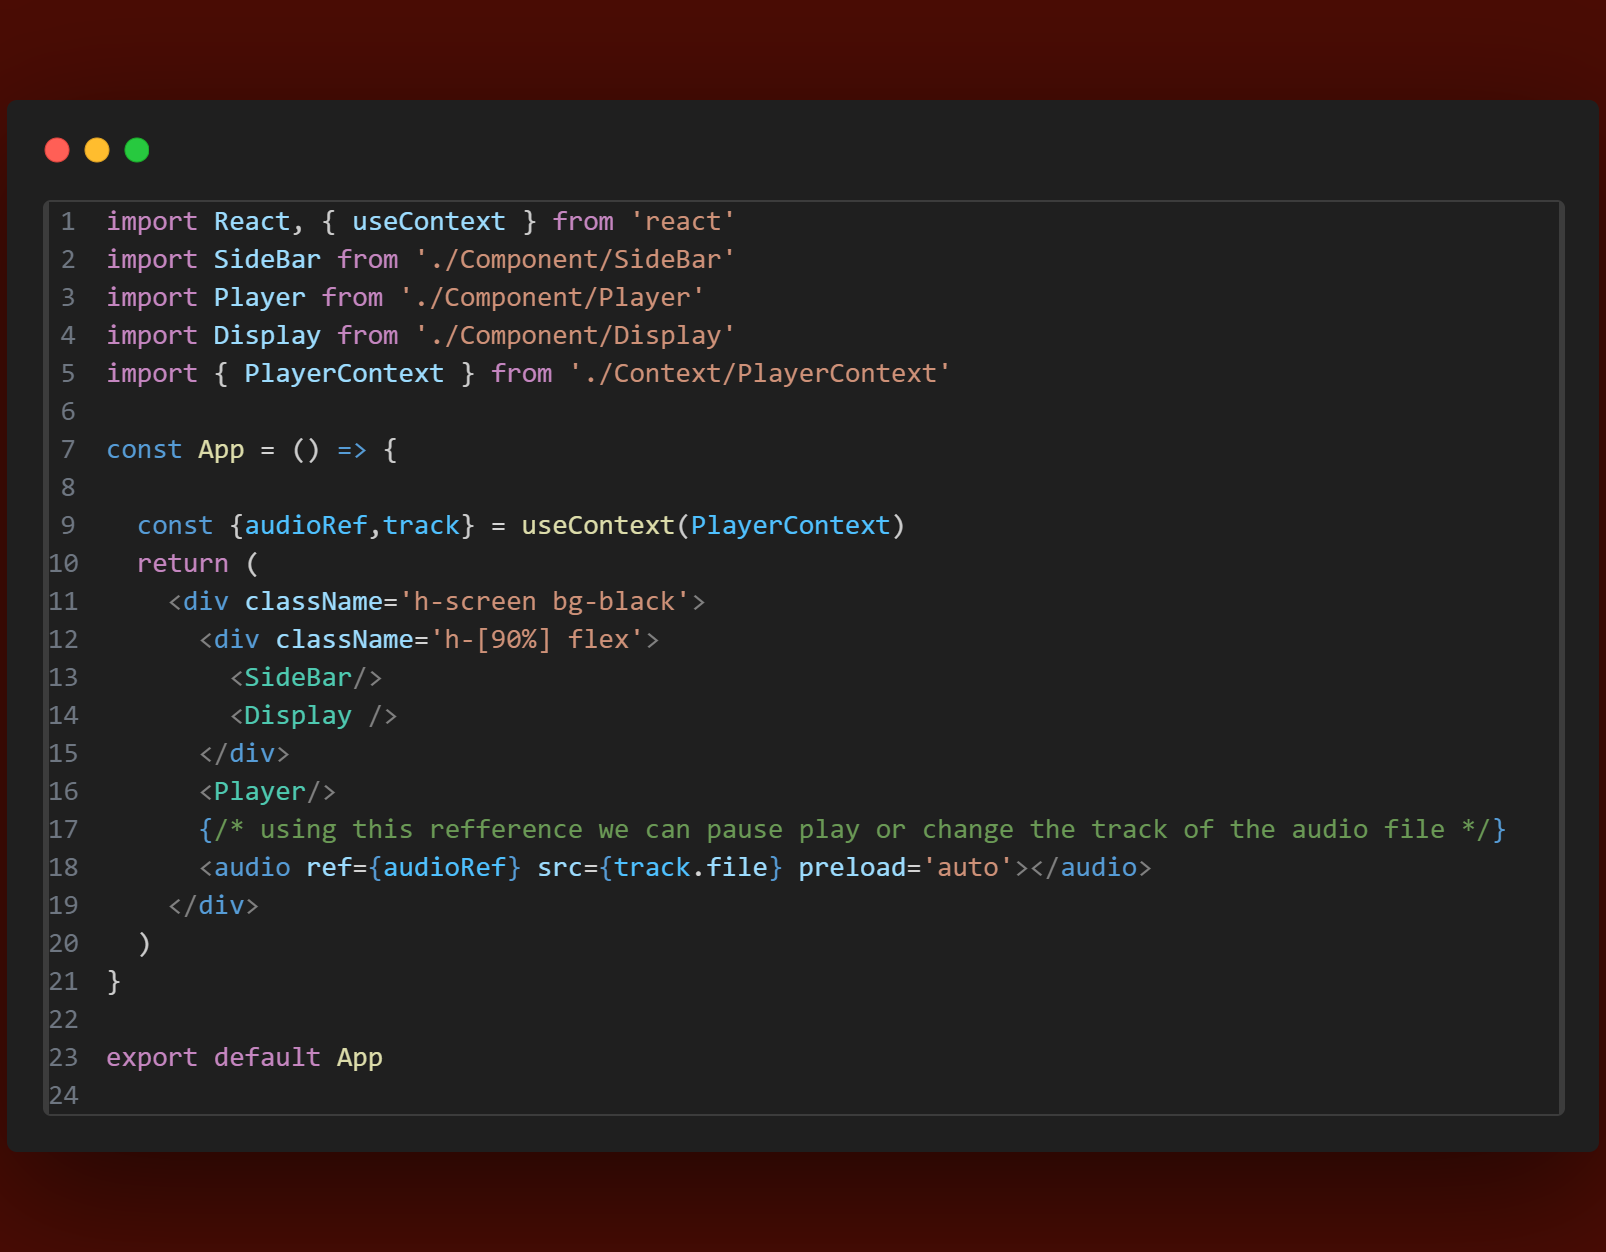
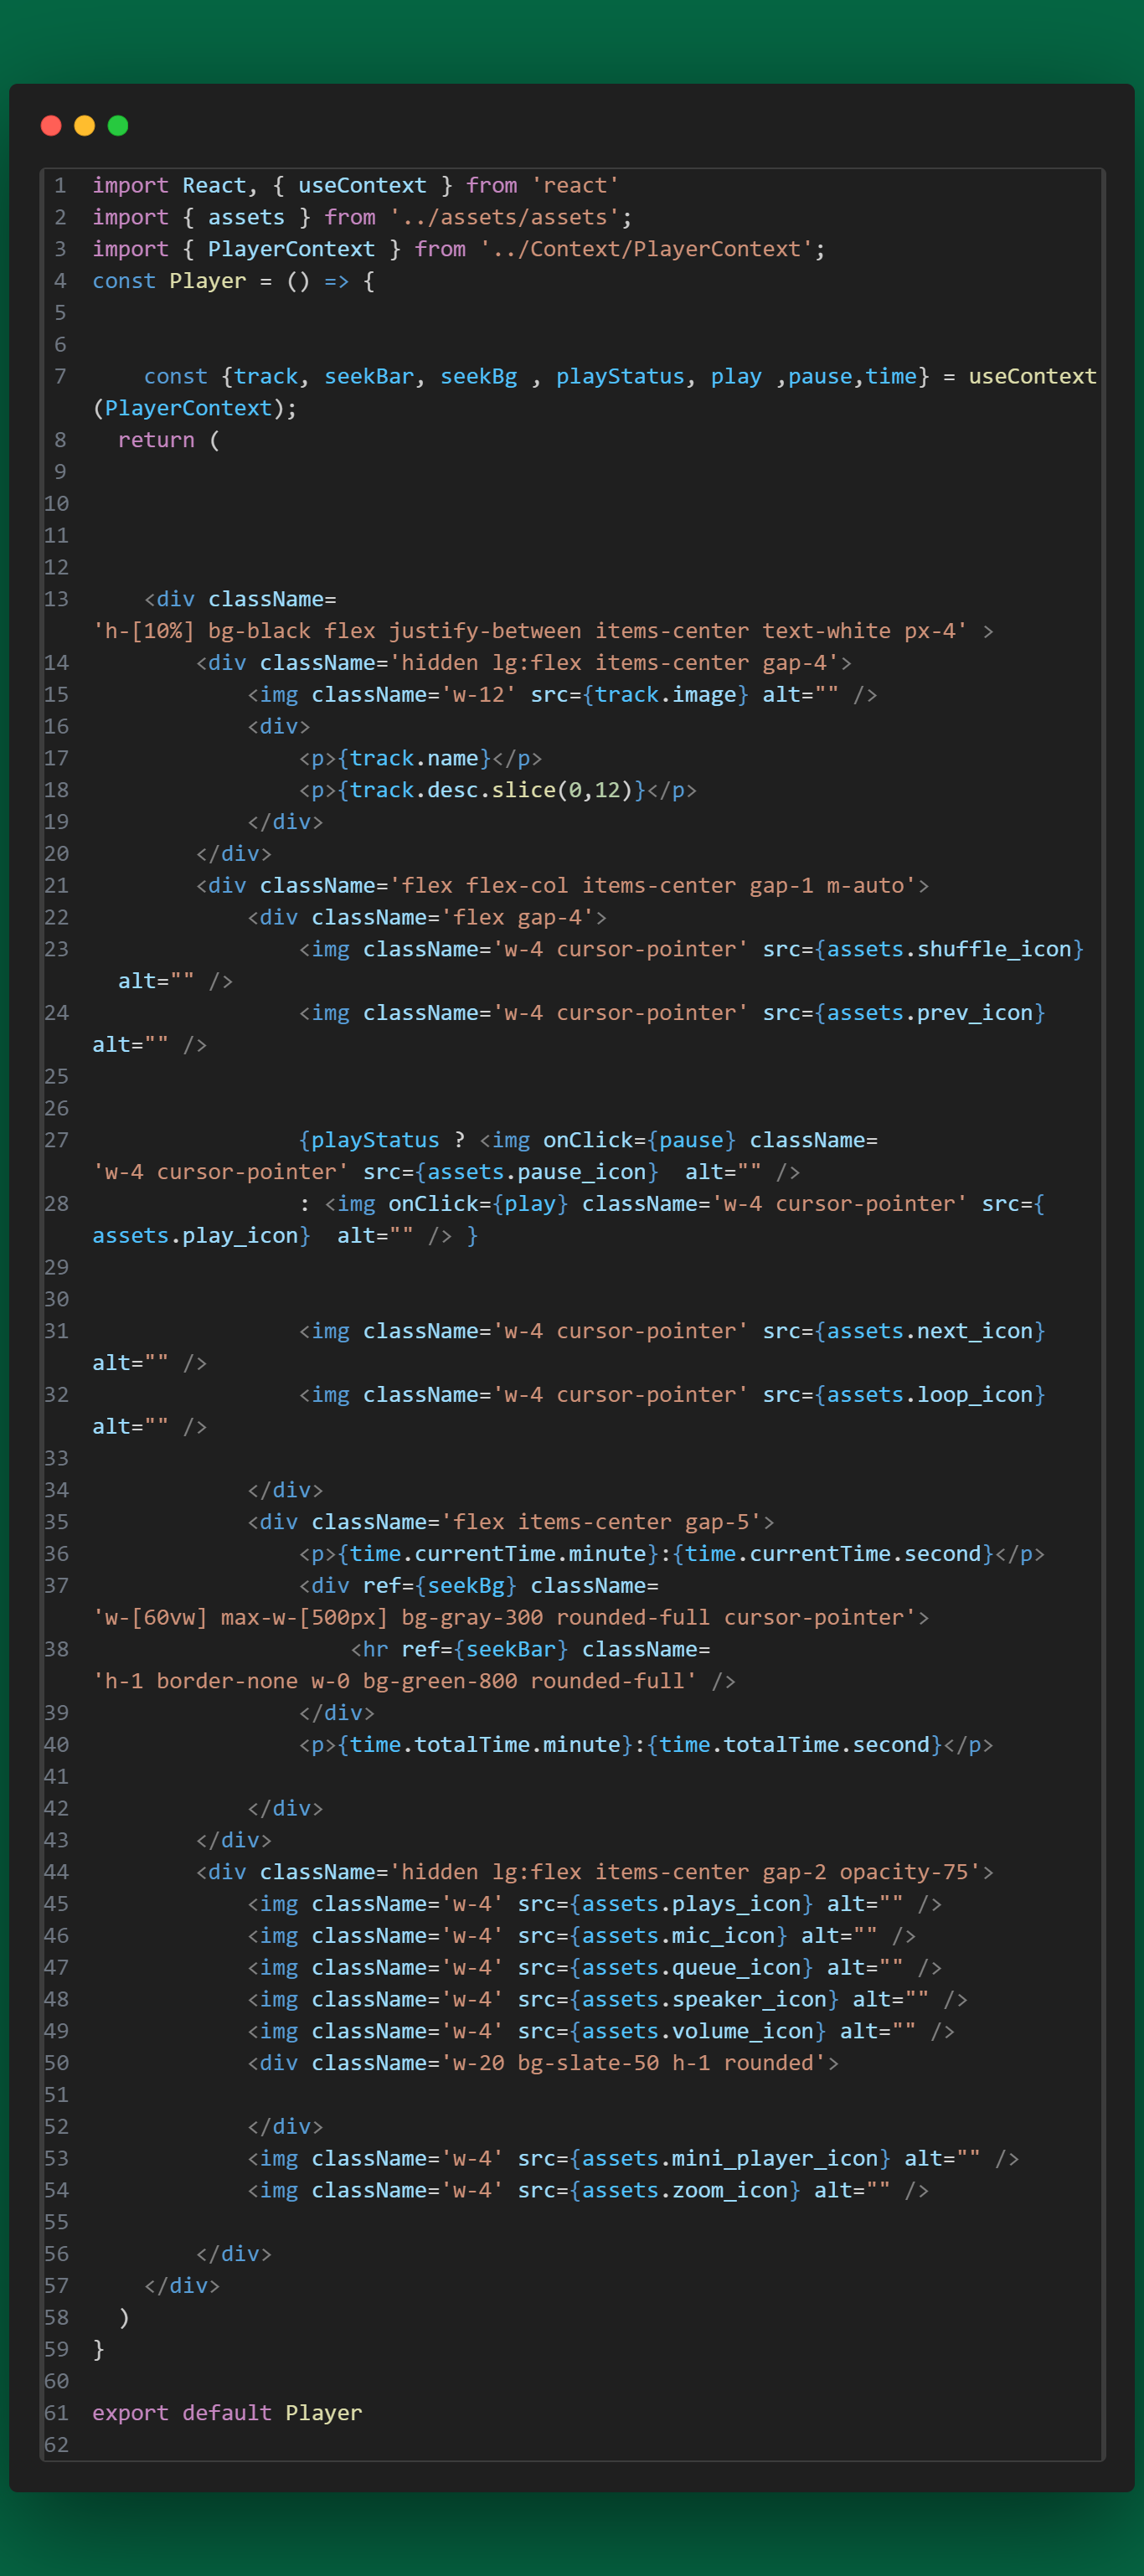
play pause is perfectly working……… but we want to see when we play the song we saw the pause icon and pause the song we’ll saw the play icon.

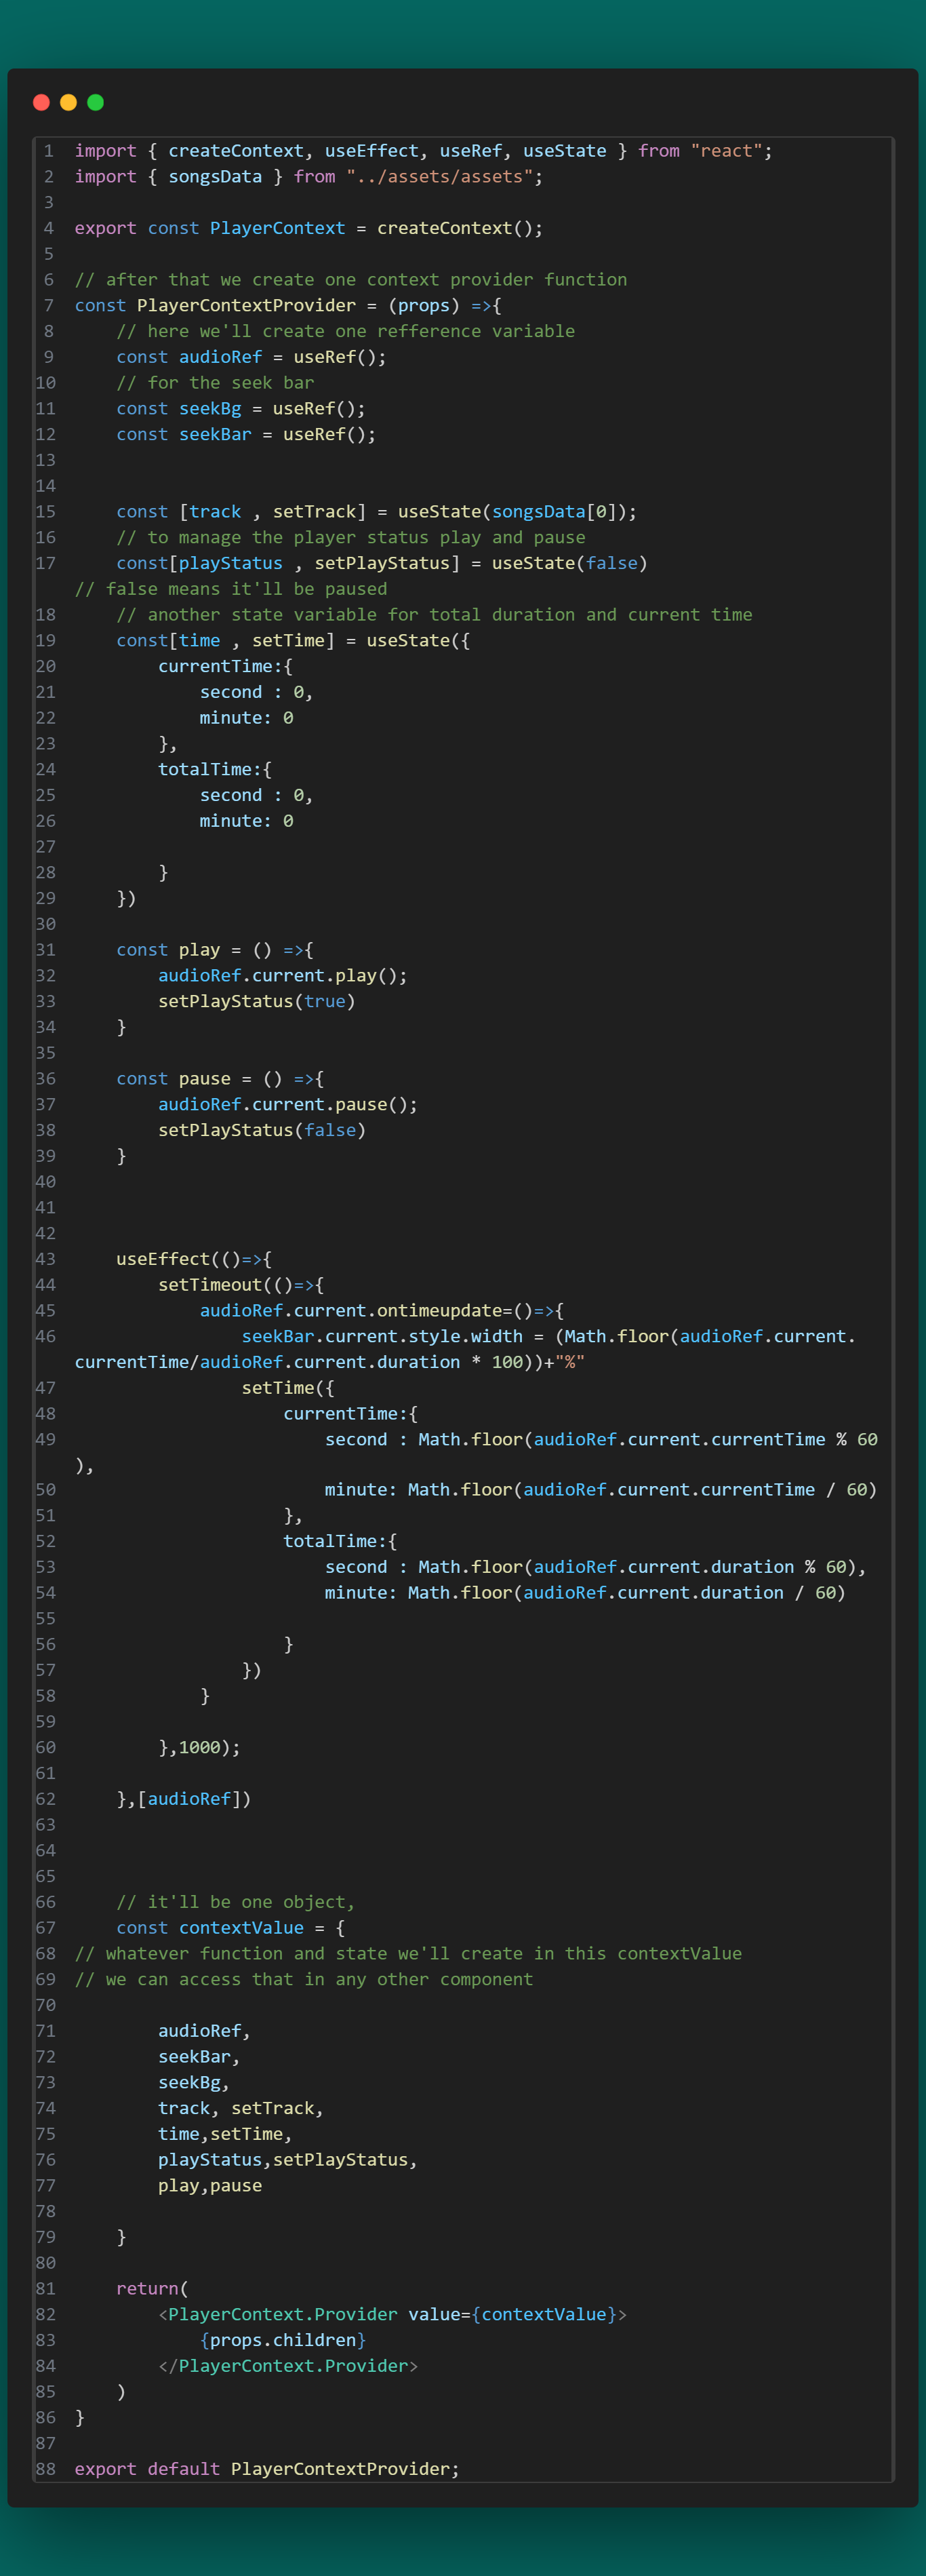
and adjust the seek bar and see exact time:—
PlayerContext.jsx code:-
Player.jsx code:-
App.jsx code:
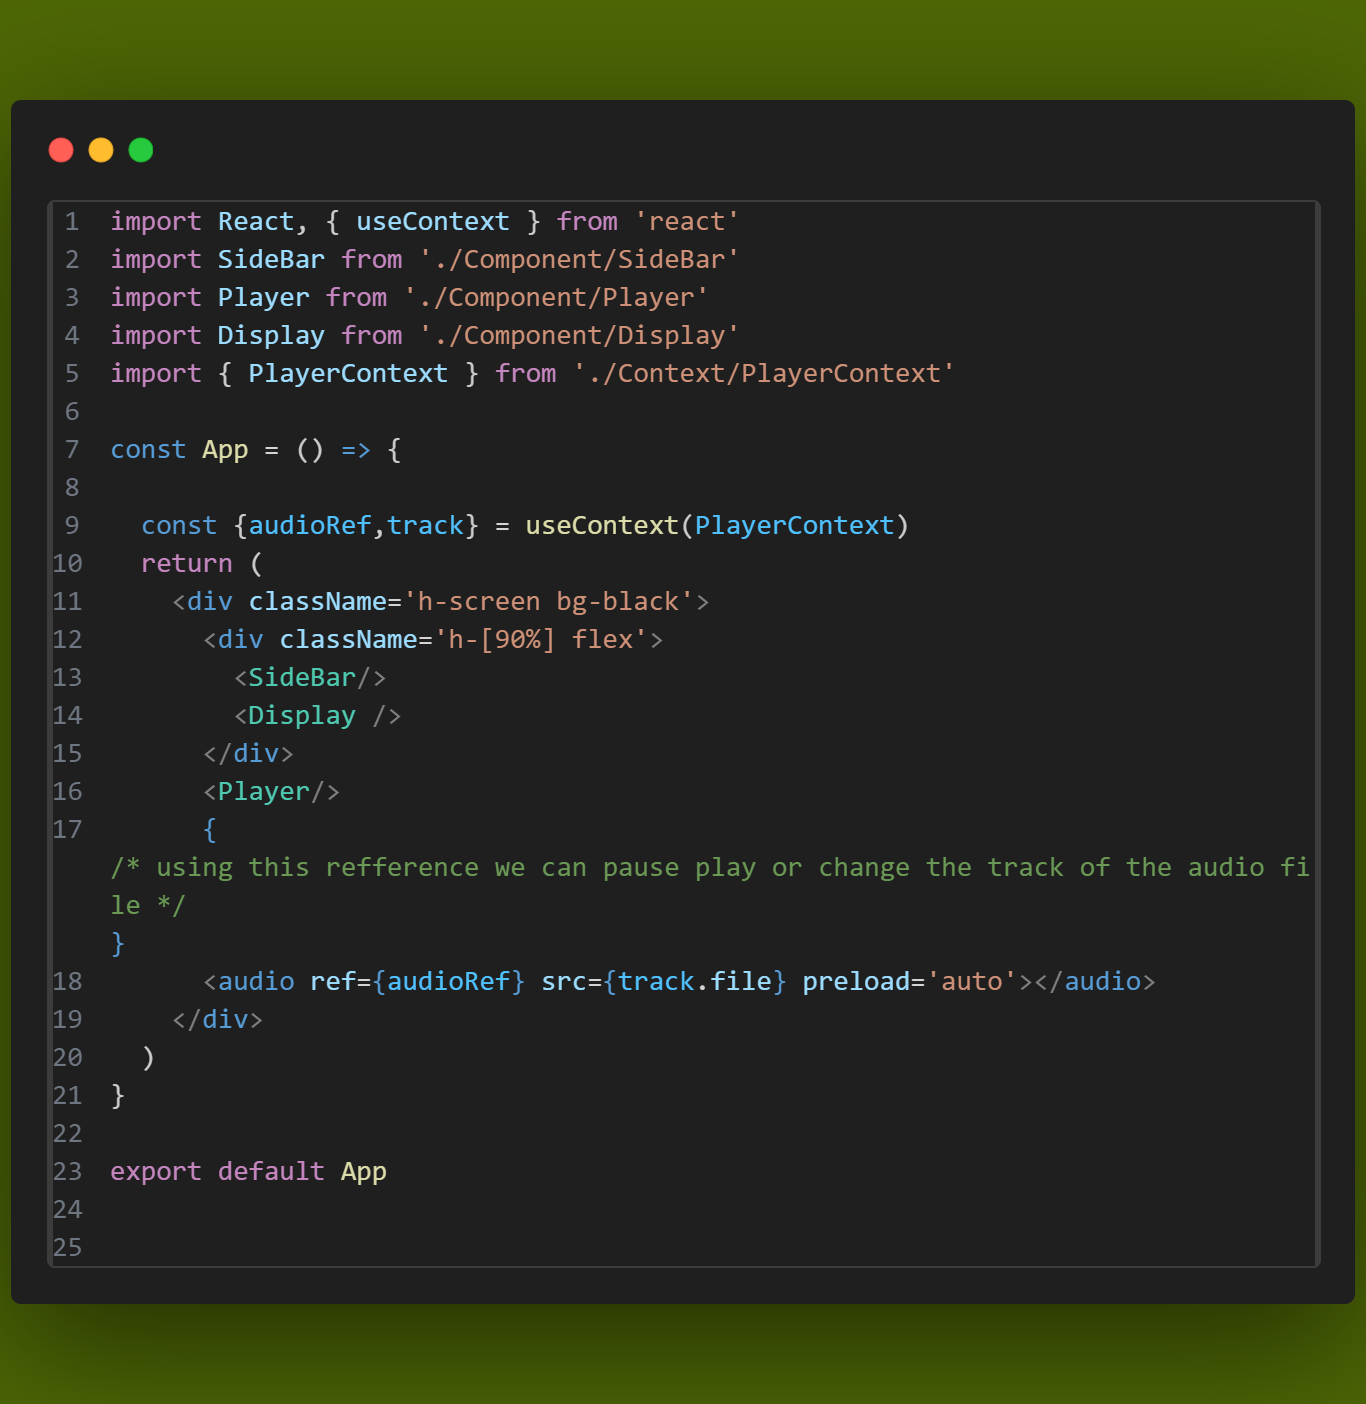
to Play any song in the web page
PlayerContext.jsx code:-
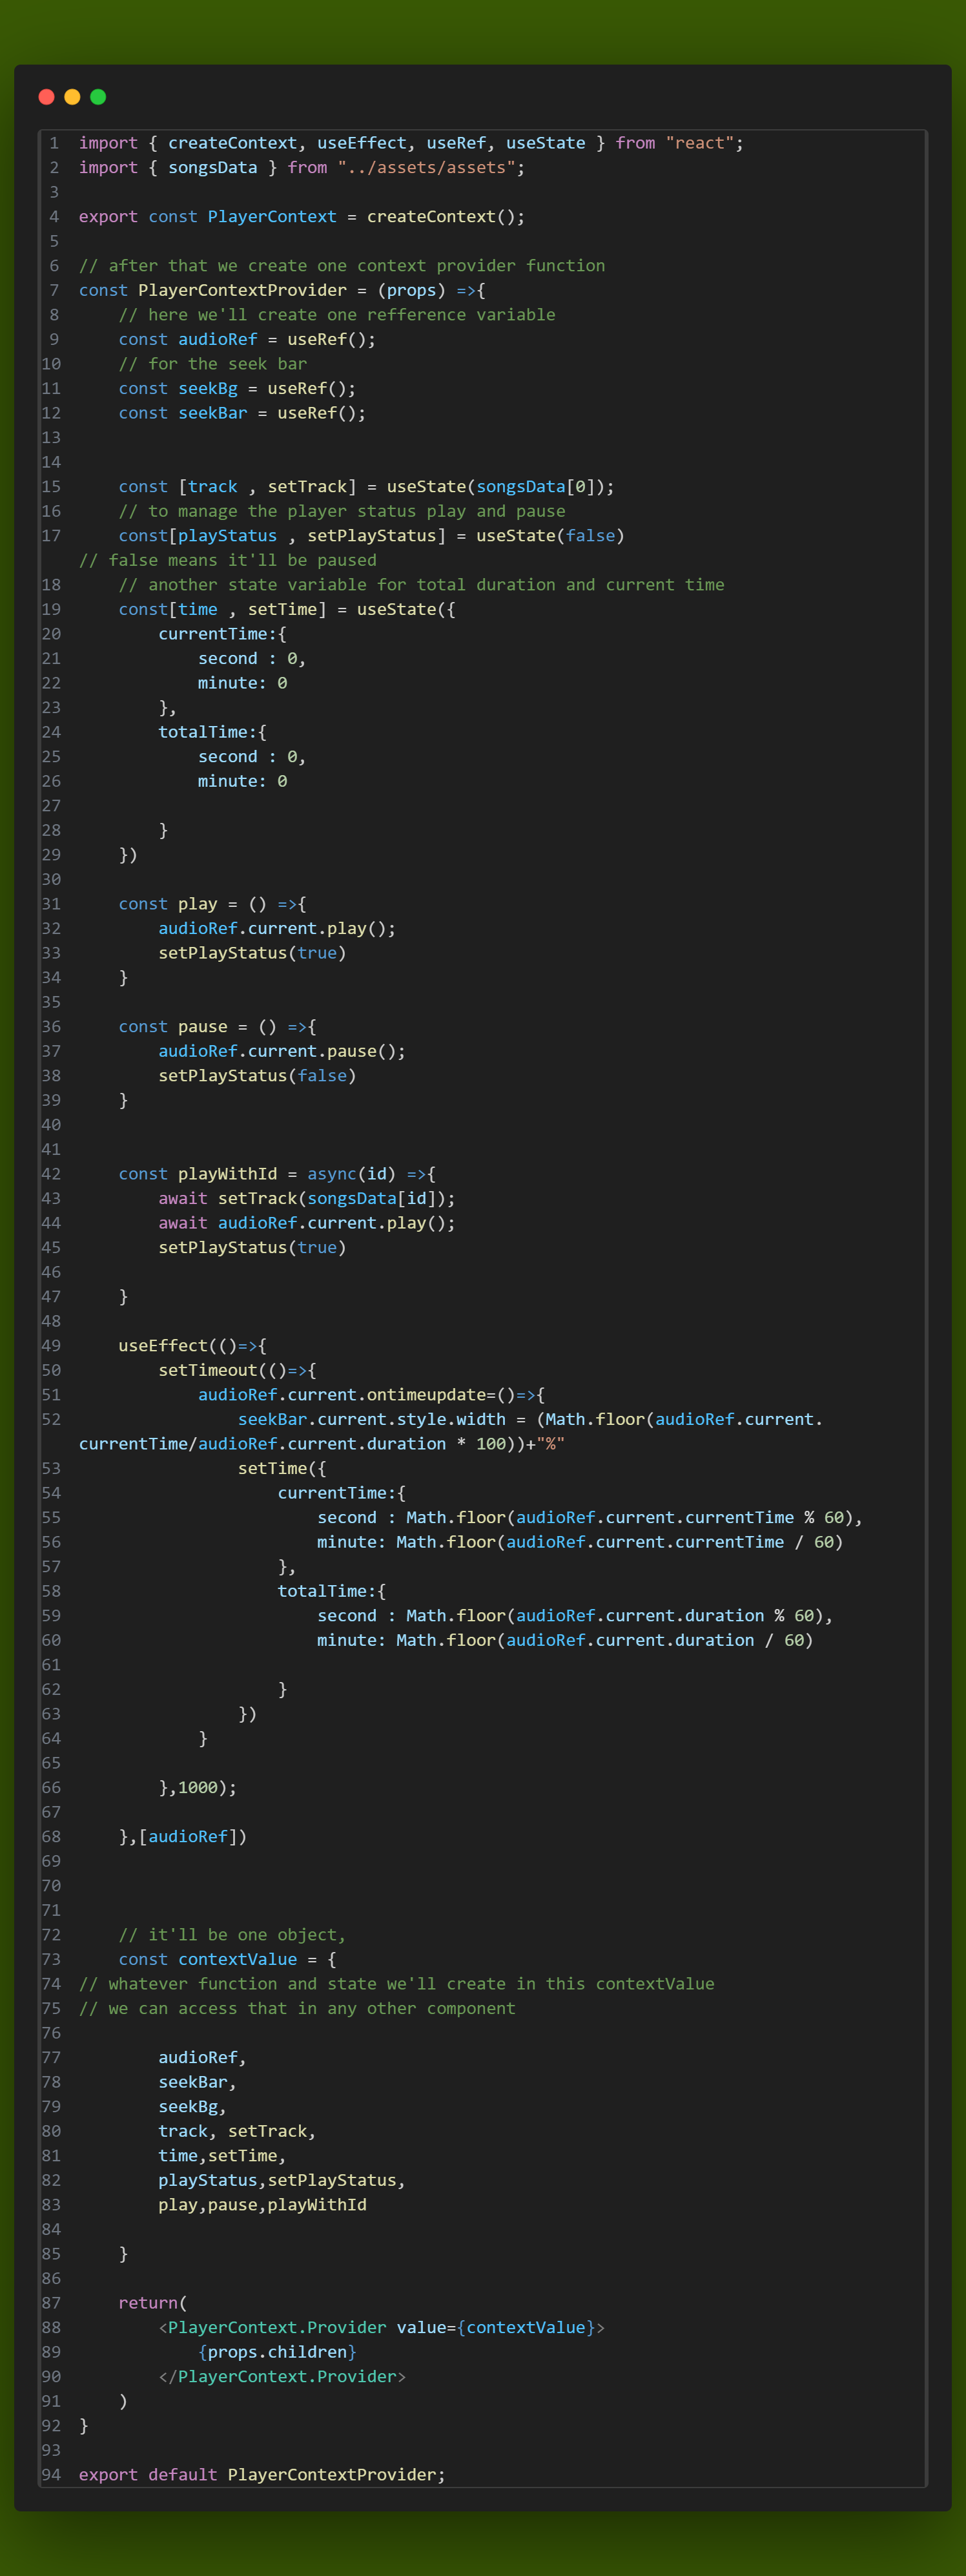
App.jsx code
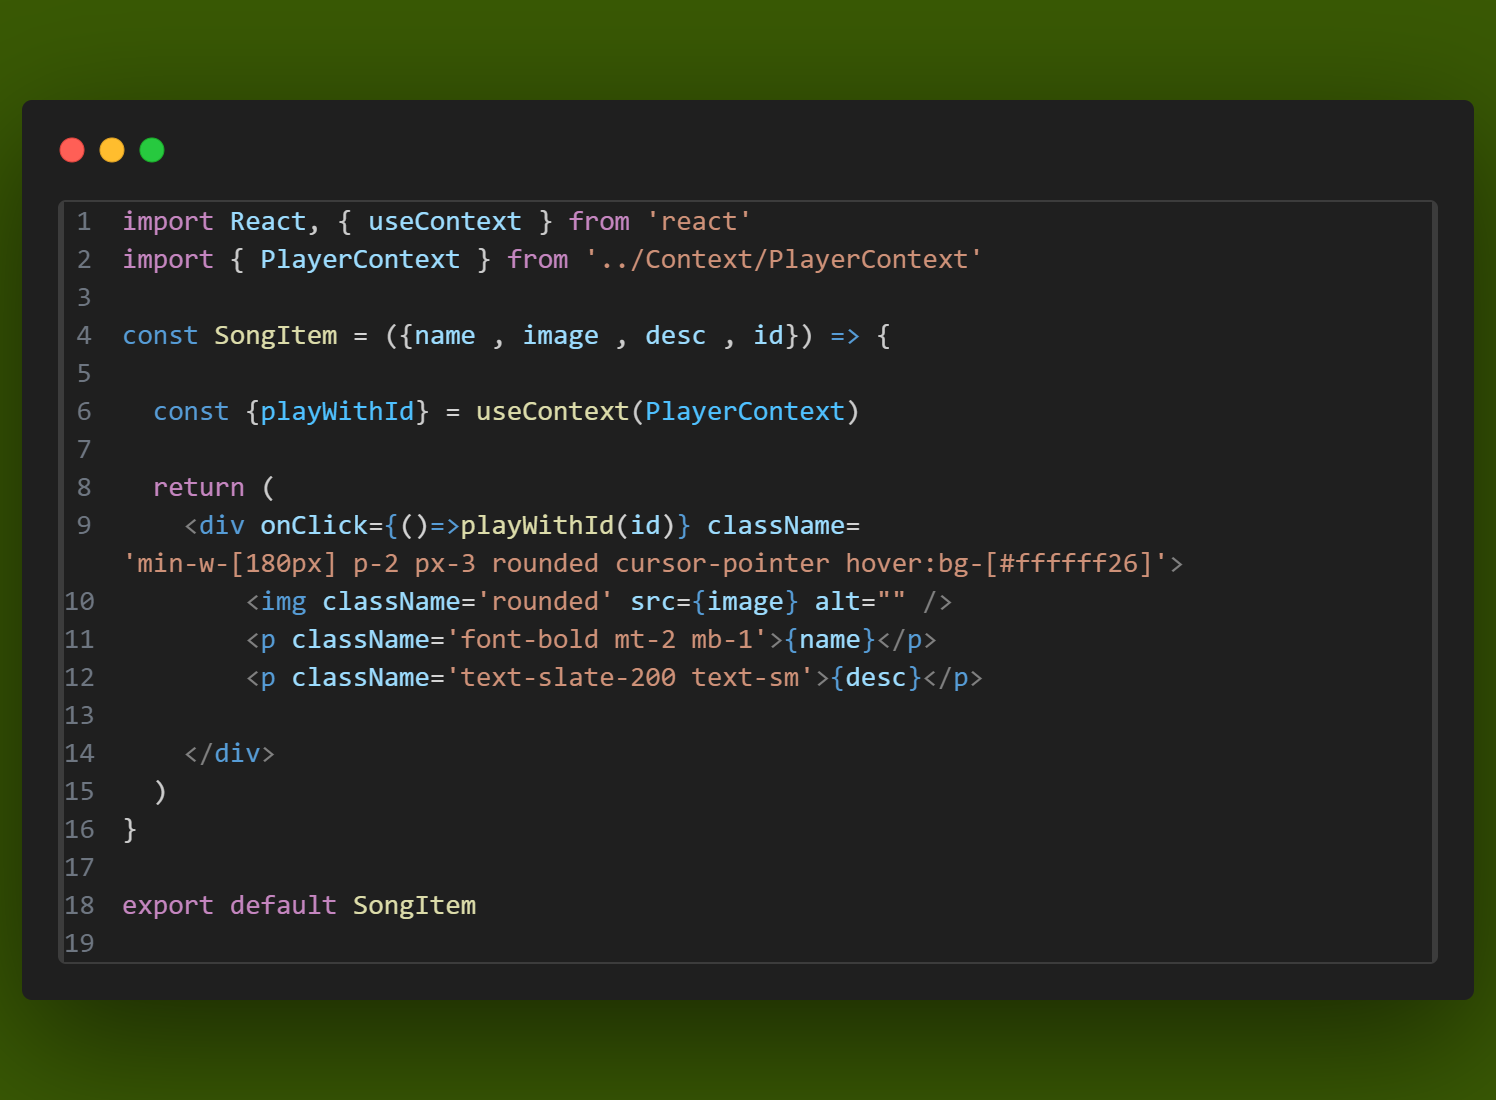
Now we added the function in the album also and whenever we click any song in the album that should play
Now we are working on prev and next button for song in PlayerContext.jsx file—————-
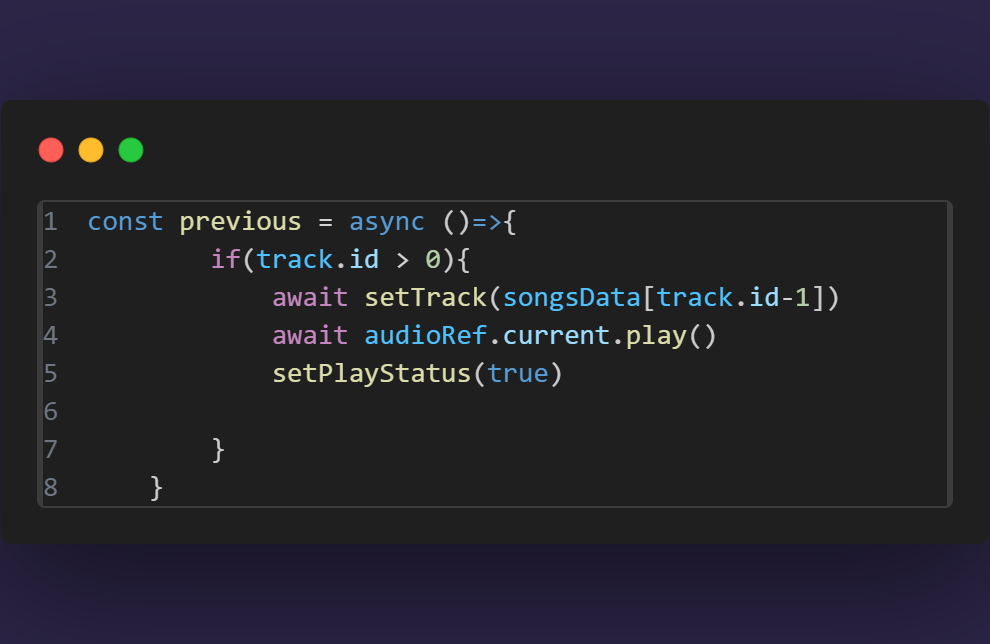
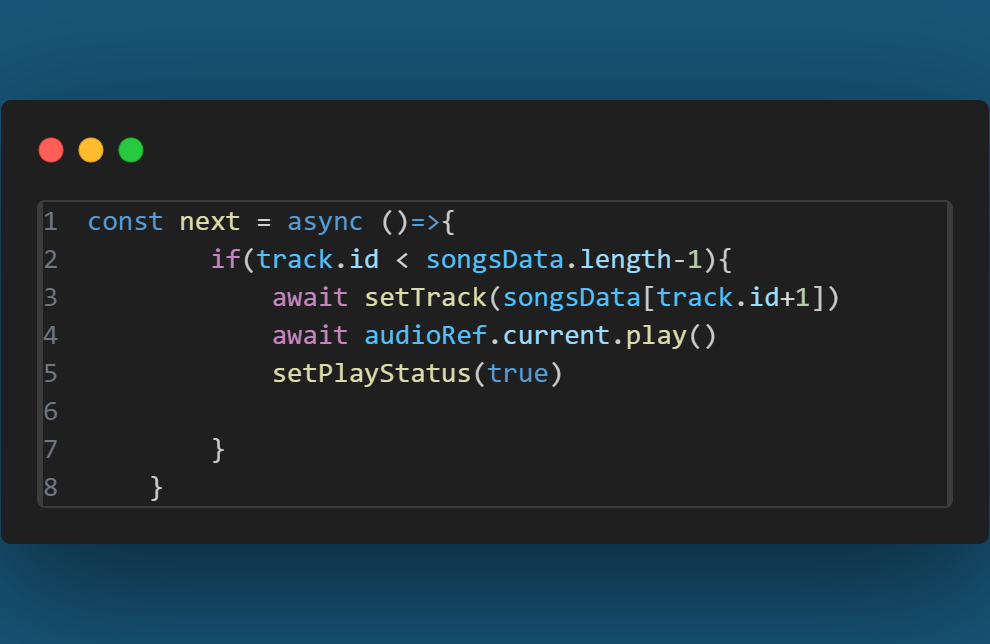
and add this to the contextvalue
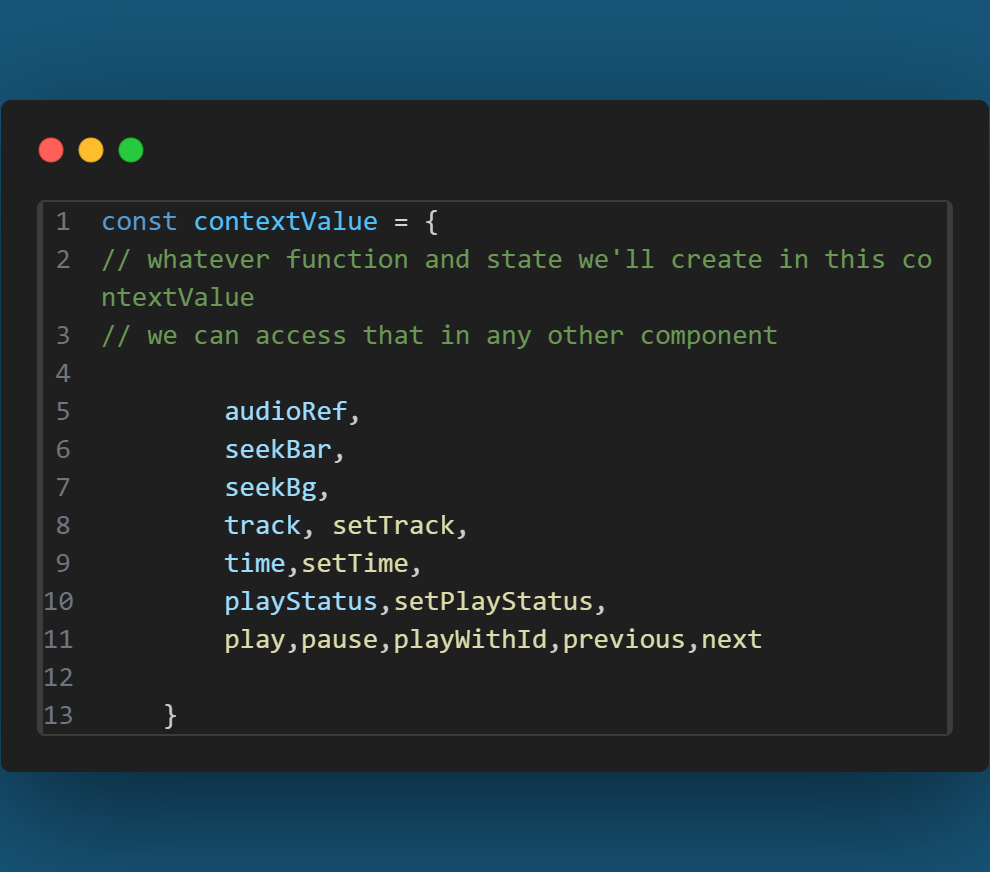
and this to Player.jsx
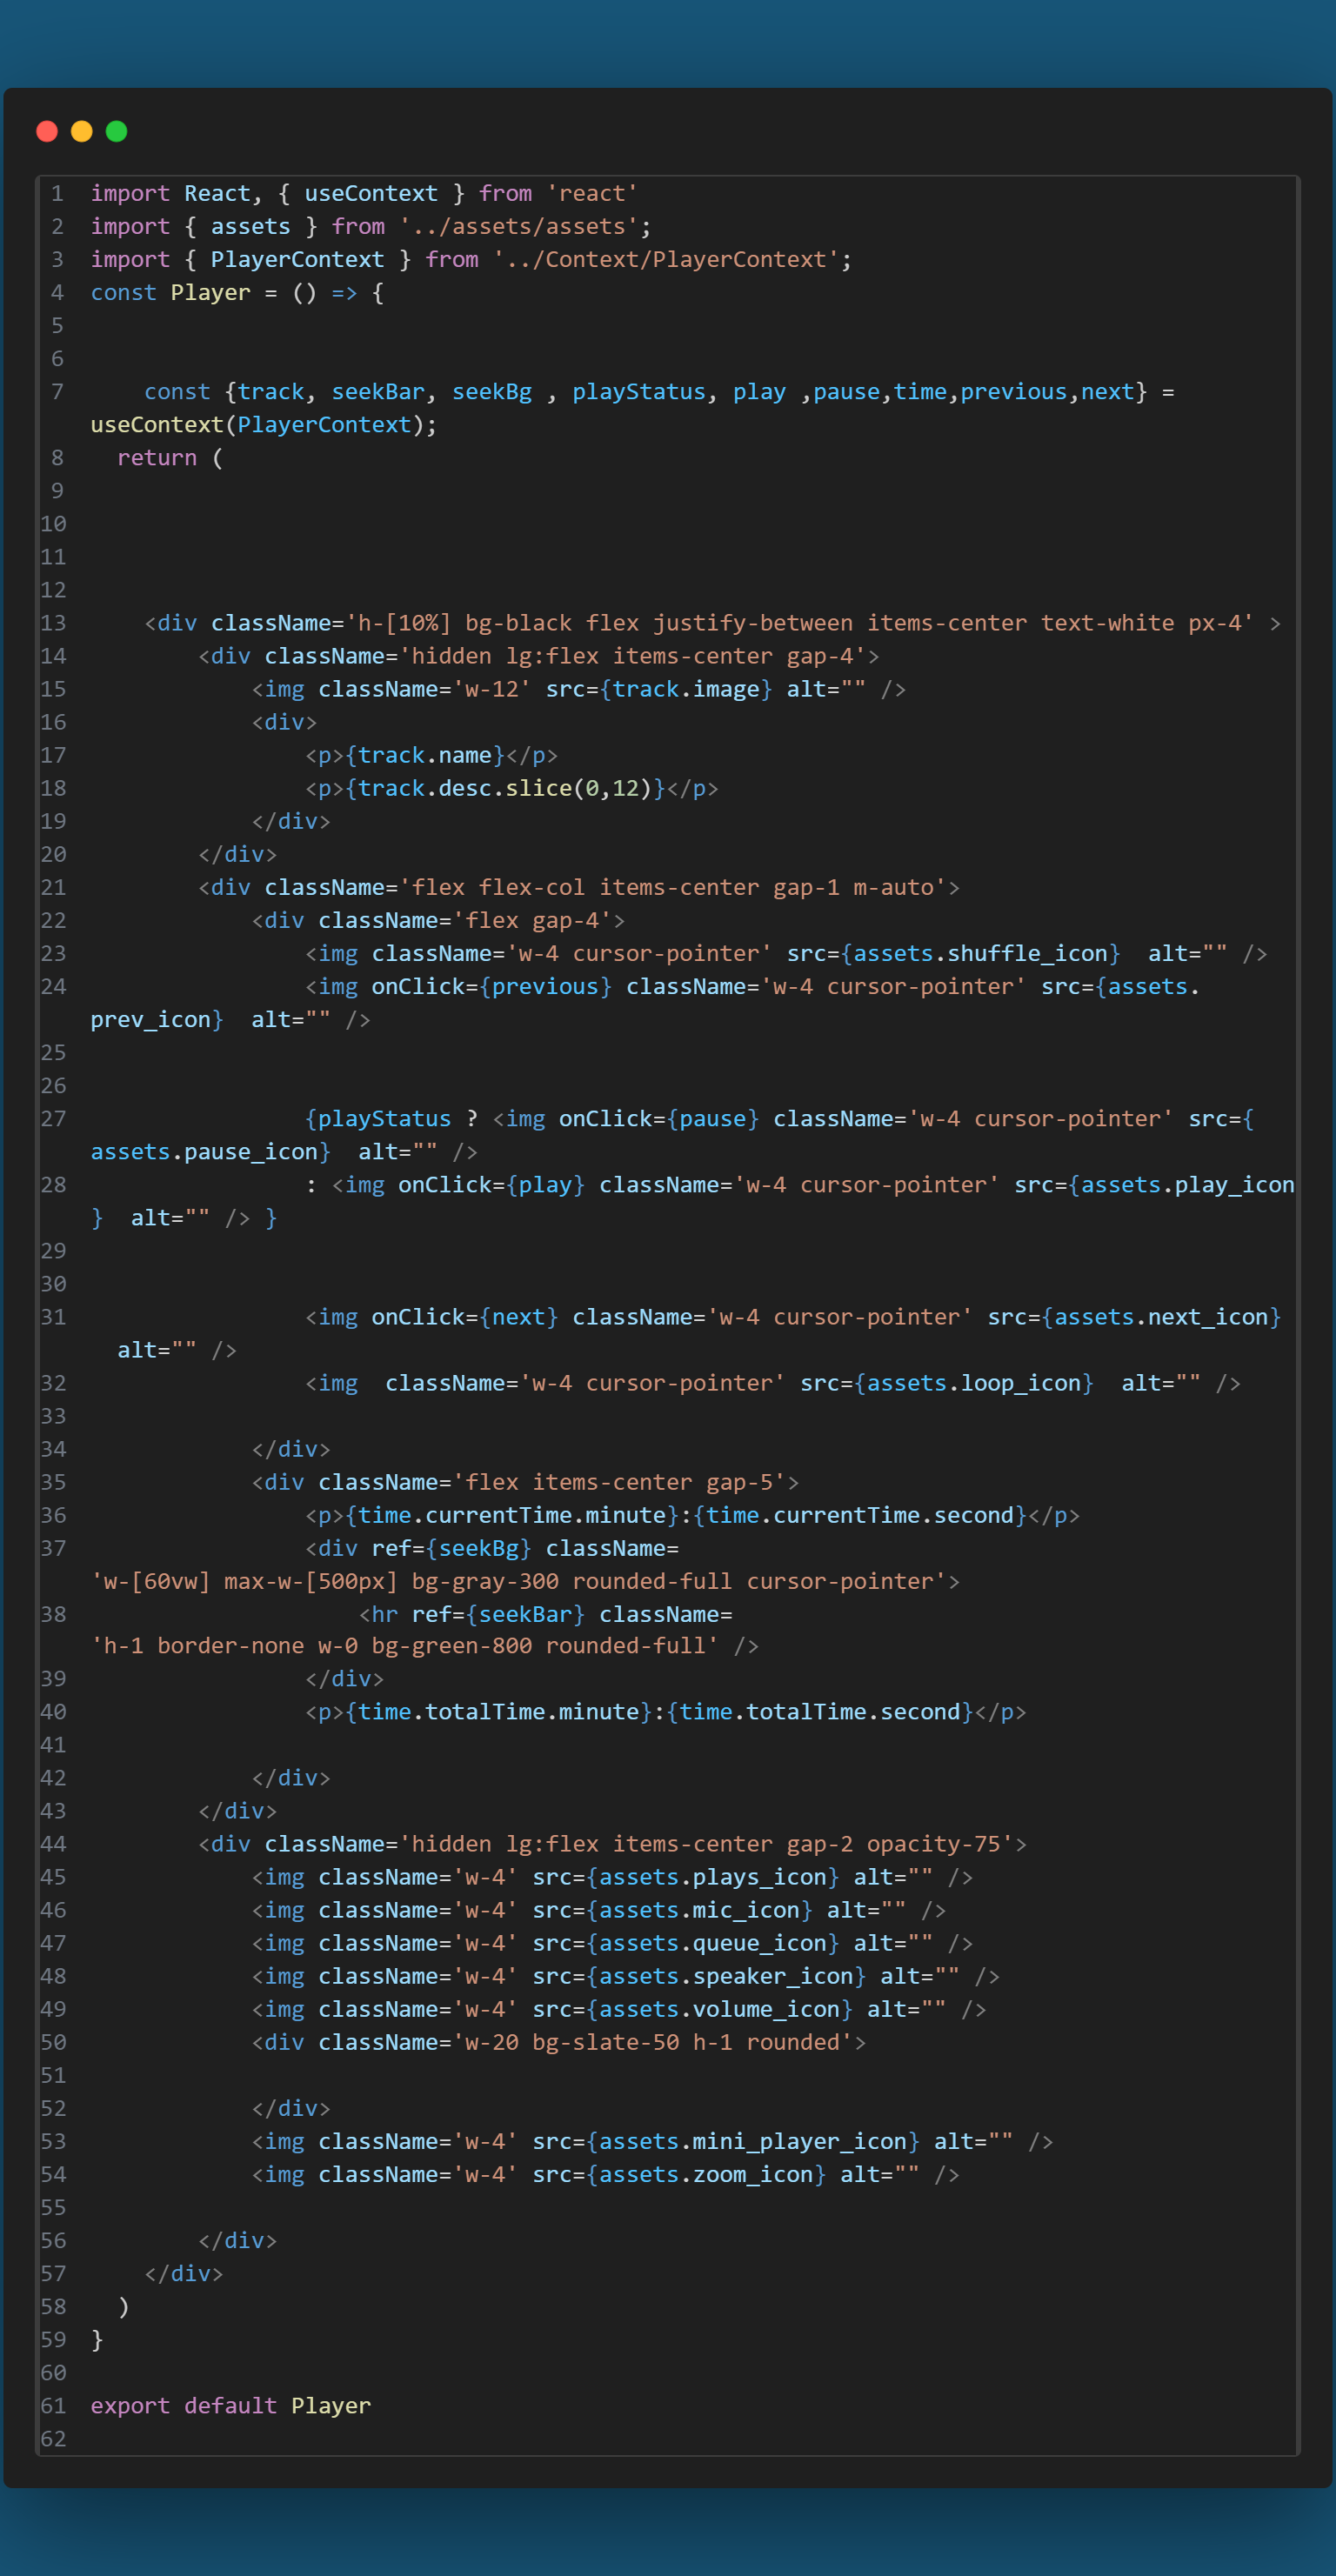
when we click on the seek bar it’ll start playing this sing at this duration
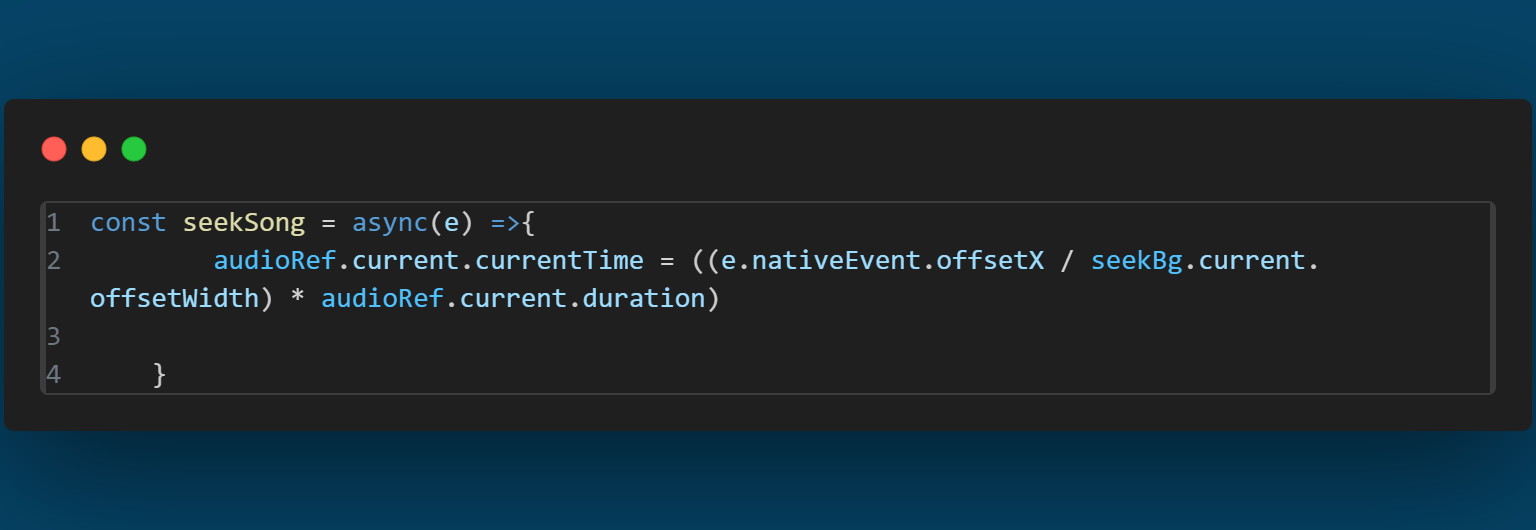
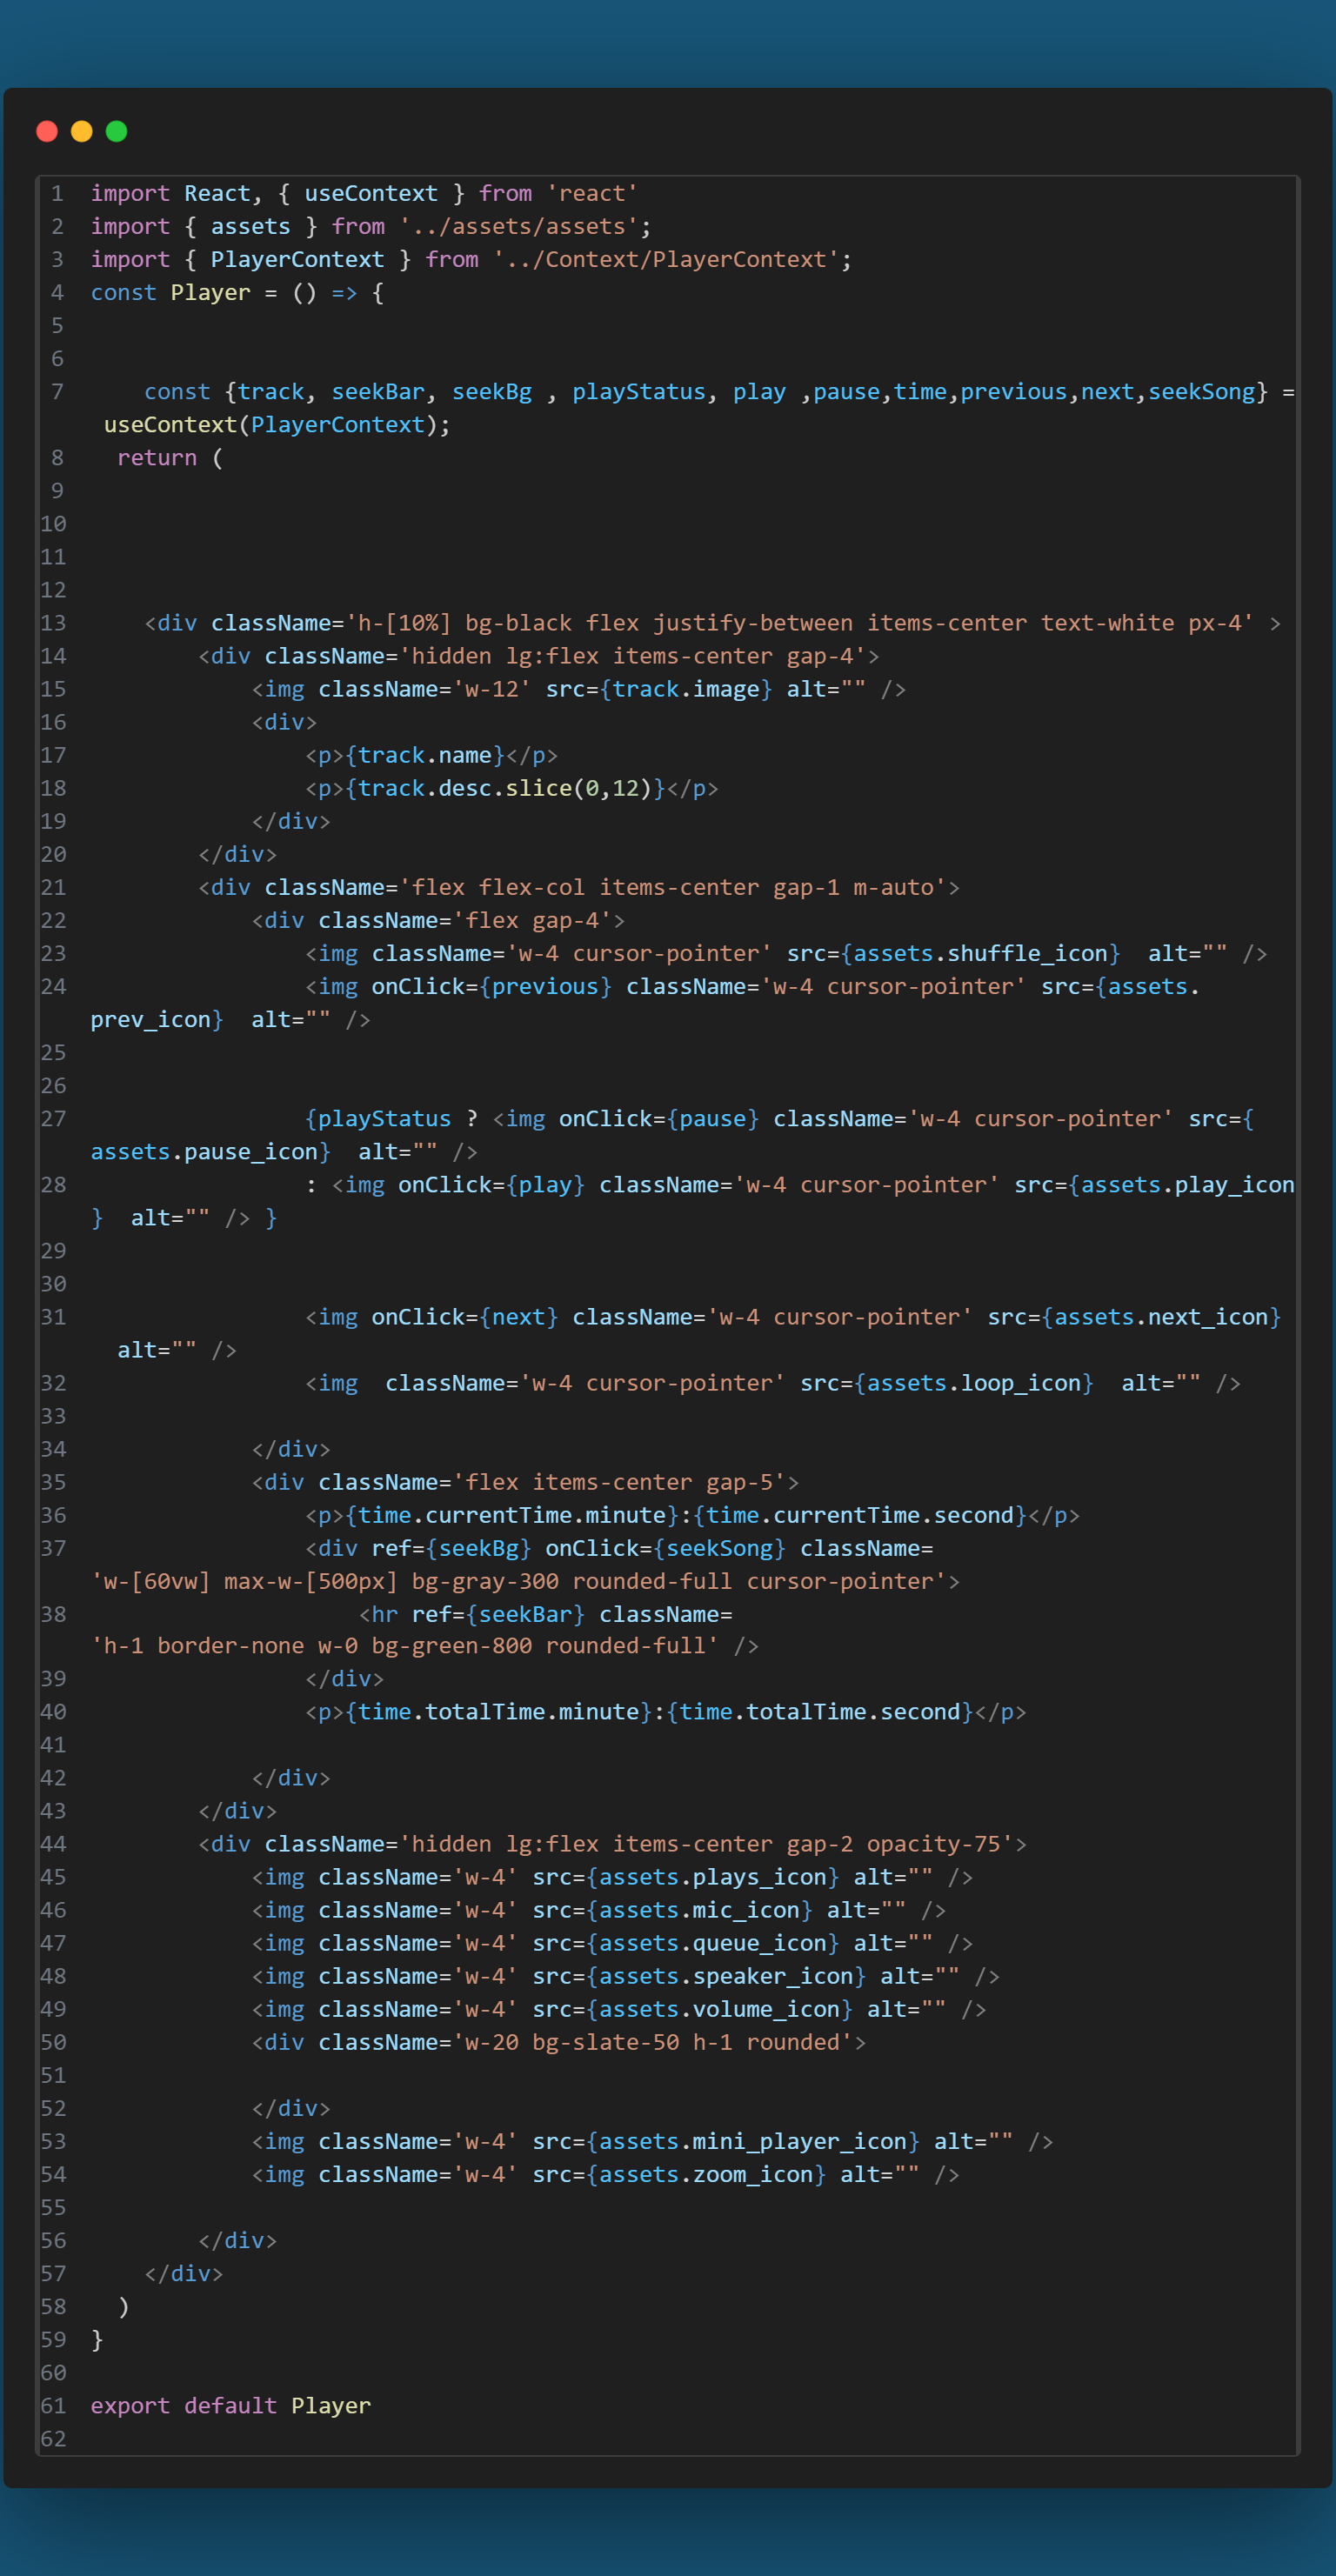
This is the end of the tutorial. Thank you for reading 🤗🙂.
Subscribe to my newsletter
Read articles from Sayan Chakraborty directly inside your inbox. Subscribe to the newsletter, and don't miss out.
Written by

Sayan Chakraborty
Sayan Chakraborty
"Programming is a craft, more than it is science" said by someone, supported by me 🤣