How to setup a custom domain in amplify?
 Mani Paliwal
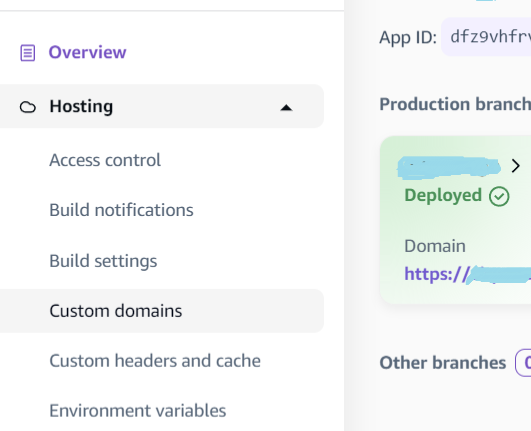
A custom domain is a powerful way to enhance your application's professional appearance, improve brand recognition, and provide a memorable web address for your users. AWS Amplify makes setting up a custom domain for your Next.js app simple, allowing you to link your existing domain or purchase a new one directly through the AWS platform. This guide will walk you through the steps to set up a custom domain for your Next.js app on AWS Amplify.
Why Set Up a Custom Domain?
Using a custom domain is offers multiple advantages, especially if you are a organization then setting up a custom domain will provide a more professional look than default amplify domain. A unique domain makes it easier and simpler for user to remember and find your website. Also, search engines favor custom domains, which can help improve your website’s search rankings.
Step-by-Step Guide to Adding a Custom Domain in AWS Amplify
Step 1: Access the AWS Amplify Console
Log in to AWS Amplify: Start by logging into your AWS Management Console. From the console, navigate to AWS Amplify.
Select Your Next.js App: Choose the app you have already deployed on Amplify that you want to link with a custom domain.
Step 2: Add Your Custom Domain
Click on Add Domain: Click the Add Domain button. You’ll be prompted to enter your custom domain name.

Enter Your Domain Name: Type your custom domain (e.g.,
www.xyzbrand.com) into the field provided. If you are using a domain provider like Amazon Route 53, GoDaddy, or Namecheap, select the corresponding option.Choose a Domain Verification Method: Amplify will provide two options for verifying ownership of your domain:
DNS Verification: This method is generally preferred and involves adding a CNAME record to your DNS settings( This method is more convenient in my opinion).
Email Verification: AWS sends a verification email to the registered domain owner.
Step 3: Verify Domain Ownership
Copy the Provided DNS Records: AWS Amplify will generate a set of DNS records (usually CNAME records) that you need to add to your domain registrar’s DNS settings. Copy these records.
Log in to Your Domain Registrar: Go to your domain registrar's website (e.g., Route 53, GoDaddy, Namecheap) and log in to your account.
Navigate to DNS Settings: Find the DNS settings or DNS management section. This is where you can add or edit DNS records for your domain.
Add the DNS Records: Paste the DNS records provided by AWS Amplify into the appropriate fields. For example, if AWS provided a CNAME record, add it under the CNAME section. Similarly, add any TXT records if required.
Save the DNS Settings: Save the changes to your DNS settings. Keep in mind that DNS changes can take some time (up to 48 hours, but typically much sooner) to propagate across the internet.
Step 4: Confirm Domain Verification in AWS Amplify
Return to the AWS Amplify Console: After adding the DNS records, return to the Amplify Console. Amplify will automatically check for the correct DNS settings.
Wait for Verification: The verification process may take a few minutes. AWS Amplify will display a notification once your domain has been verified.
Step 5: Configure Domain and Subdomain Settings
Choose the Default Subdomain: AWS Amplify allows you to set a default subdomain (e.g.,
www.xyzbrand.comvs.xyzbrand.com). Choose your preferred default subdomain.Set Up Subdomains (Optional): You can also set up additional subdomains like
blog.xyzbrand.comorshop.xyzbrand.comif required. Add these by clicking Add Subdomain in the Domain Management section and following the same verification steps.
Step 6: Deploy and Test Your Custom Domain
Deploy the Domain: Once your domain and subdomains are verified, AWS Amplify will begin configuring the domain to point to your Next.js app.
Test Your Domain: After deployment, test your new custom domain by entering it in your browser's address bar. Your Next.js app should now be accessible via the custom domain.
Troubleshooting Tips
DNS Propagation Delays: Remember that DNS changes may take time to propagate. If your domain is not working immediately, wait a few hours and check again.
Incorrect DNS Records: Double-check that the DNS records are correctly copied and saved in your domain registrar’s DNS settings.
Clear Browser Cache: If your new domain isn’t loading, clear your browser’s cache or try accessing the site in incognito mode.
SSL Certificates: Amplify creates and assings its own SSL, so if you have your own SSL connected to Route53, make sure not to attach same when setting up your custom domain.
Conclusion
By following these steps, you've successfully set up a custom domain for your Next.js app on AWS Amplify. This enhances your application's credibility and helps build a stronger brand identity.
Stay tuned for the next article!
Got any questions or feedback? Leave a comment below! Don’t forget to share this guide if you found it helpful. Let's learn and grow together. Happy learning!
Subscribe to my newsletter
Read articles from Mani Paliwal directly inside your inbox. Subscribe to the newsletter, and don't miss out.
Written by
