Configuring Group Policy on Windows Server
 Dinesh Kumar K
Group Policy is used to define and control what users and computers can do within an Active Directory (AD) environment. It works by applying settings from Group Policy Objects (GPOs) to Organizational Units (OUs), domains, or sites.
Prerequisites
Active Directory Domain Services (AD DS): Ensure you have AD DS installed and configured on your Windows Server.
Group Policy Management Console (GPMC): The GPMC is included with Windows Server and is used to manage Group Policy.
Step 1: Open Group Policy Management Console (GPMC)
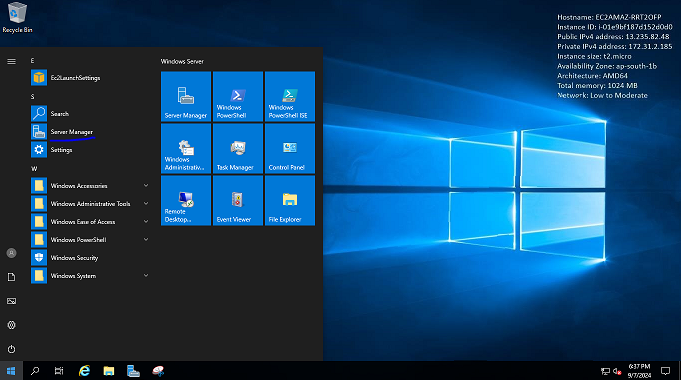
Launch Server Manager: Open Server Manager from the Start menu.
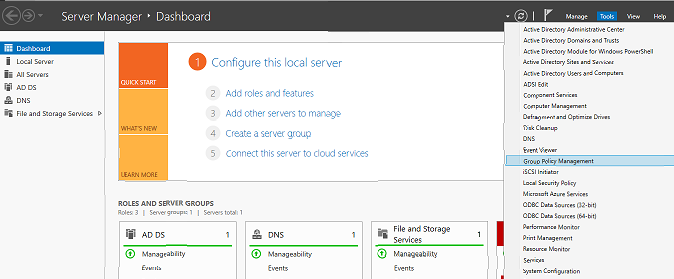
Open GPMC: Click on Tools and select Group Policy Management.
Step 2: Create a New Group Policy Object (GPO)
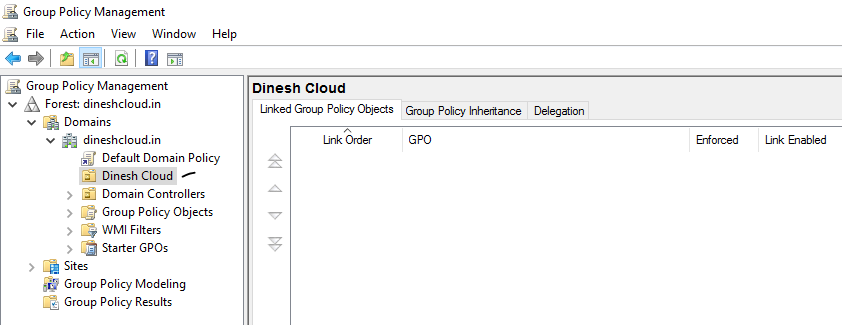
- In the Group Policy Management Console, navigate to the Domain or OU (Organizational Unit) where you want to apply the policy.
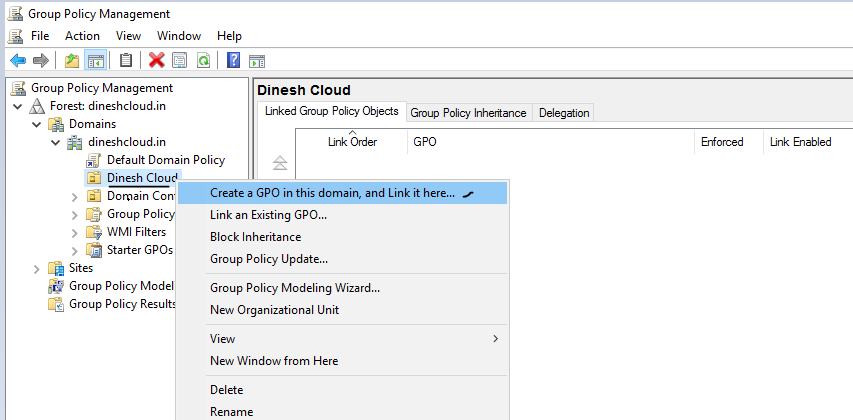
Right-click on the desired Domain or OU, and select Create a GPO in this domain, and Link it here….
Name the GPO (e.g., "Wallpaper Policy") and click OK.
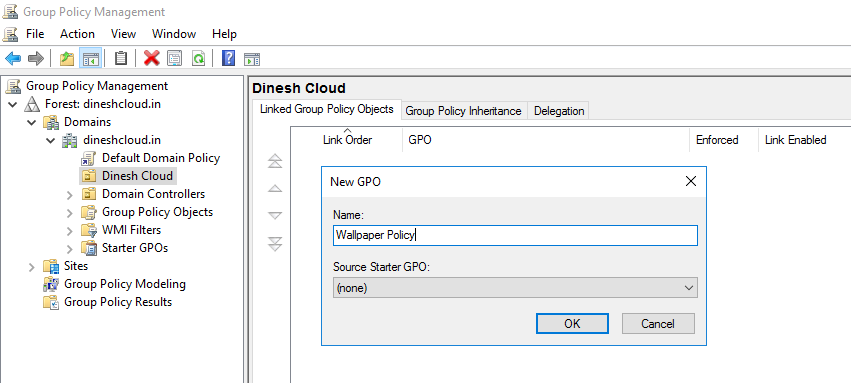
Step 3: Edit the GPO to Set the Wallpaper
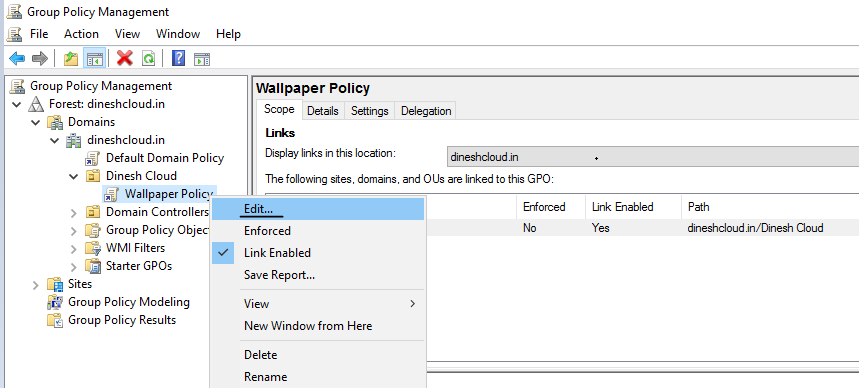
Right-click on the newly created GPO and select Edit.
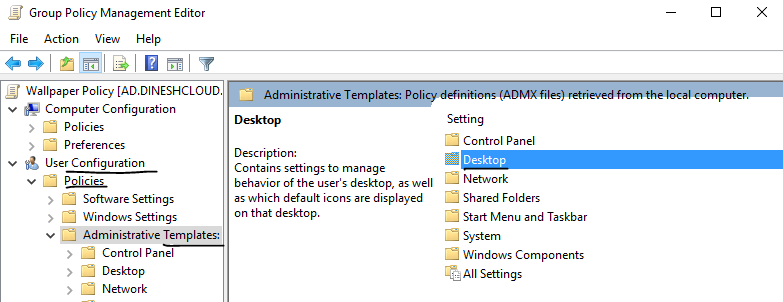
In the Group Policy Management Editor, navigate to:
User Configuration > Administrative Templates > Desktop > Desktop > Desktop Wallpaper
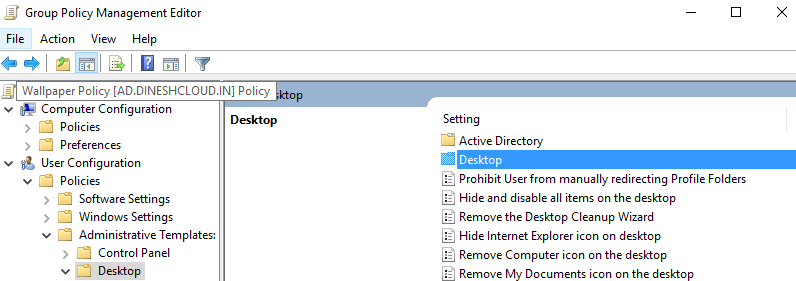
Double-click on Desktop Wallpaper.
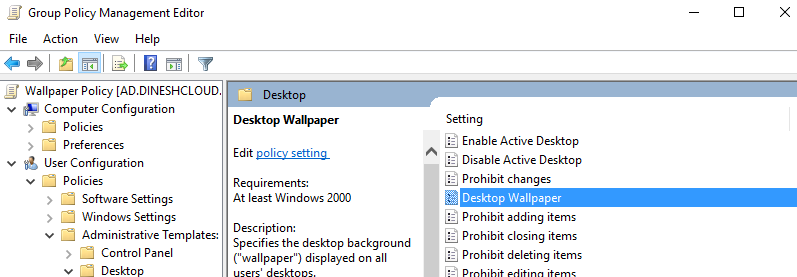
Step 4: Configure the Wallpaper Policy
In the Desktop Wallpaper settings, select Enabled. > Under the Wallpaper Name field, provide the full path of the wallpaper file. This should be a network path (e.g., \\ServerName\SharedFolder\Wallpaper.jpg) so it is accessible to all users. > Click Apply and OK.
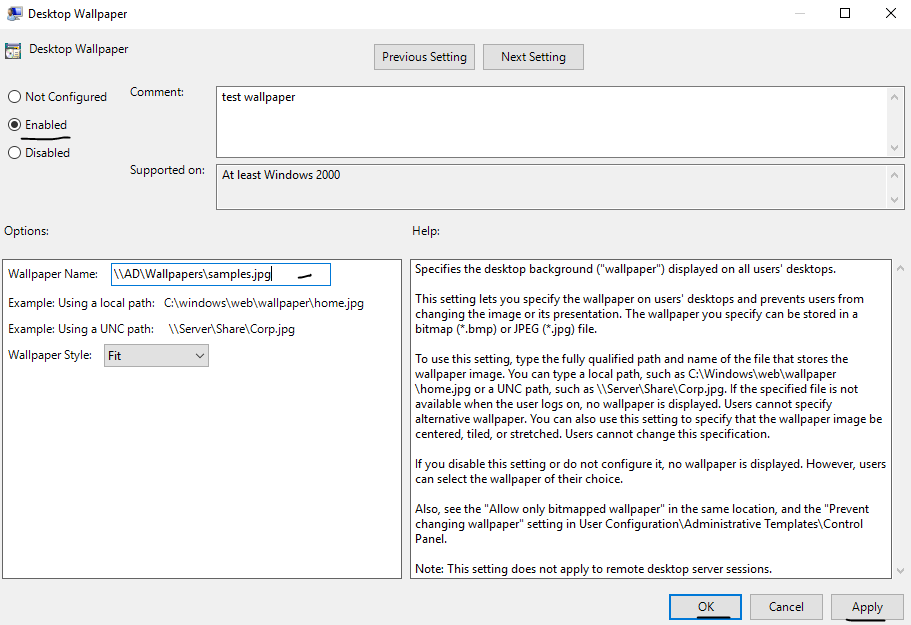
Step 5: Update the Group Policy
Once the policy is configured, you need to ensure that it is applied across the network.
Open Command Prompt as an administrator > Run the following command to force the update
gpupdate /force

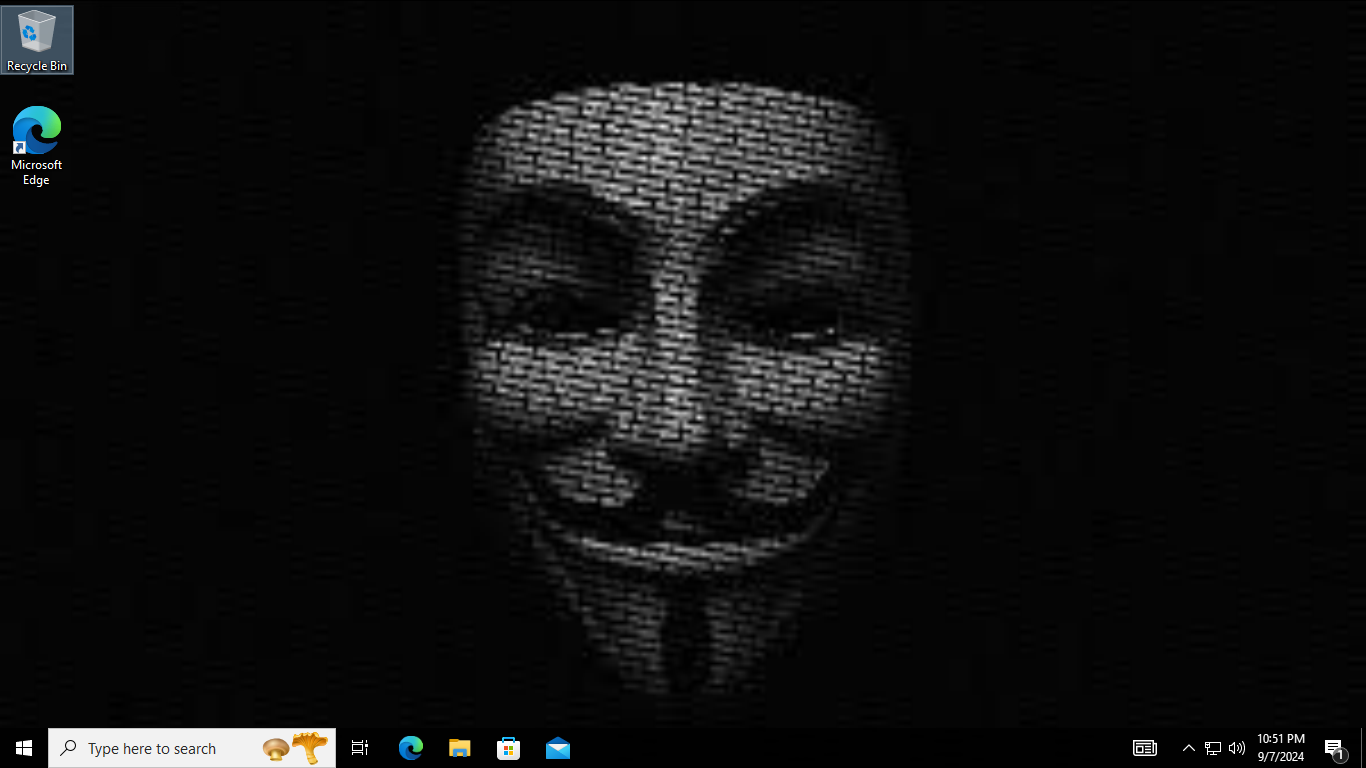
This will apply the policy and change the wallpaper for the users in the targeted domain or OU.
Step 6: Verify the Policy
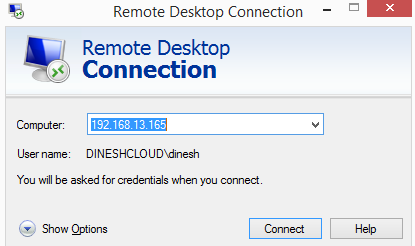
After the gpupdate command has been run, log in to a user machine in the domain to verify that the wallpaper has changed successfully.
Conclusion
Using Group Policy to change the wallpaper across multiple systems is a simple and effective way to maintain a consistent look and feel in your organization. Follow the steps outlined above, and you’ll have the new wallpaper deployed across your network in no time!
Subscribe to my newsletter
Read articles from Dinesh Kumar K directly inside your inbox. Subscribe to the newsletter, and don't miss out.
Written by

Dinesh Kumar K
Dinesh Kumar K
Hi there! I'm Dinesh, a passionate Cloud and DevOps enthusiast. I love to dive into the latest new technologies and sharing my journey through blog.