Days with DevOps | Project 02
 Paminda Kalpa Wickramasinghe
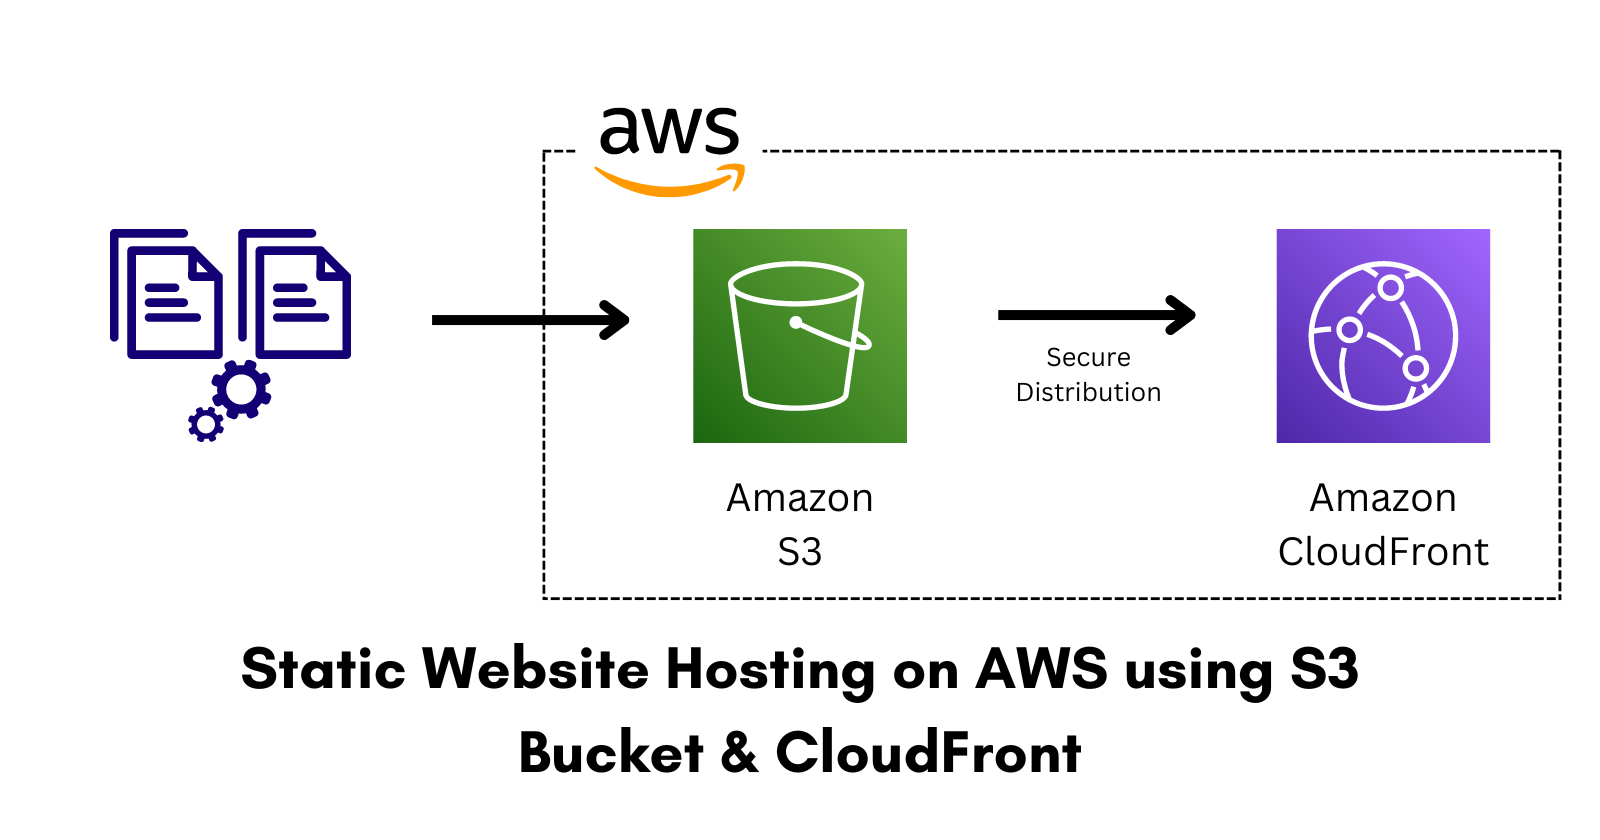
In this article, I will show how to host a Static website on AWS S3 and set up a secure connection using AWS CloudFront. Before we start this project, let's look at what is AWS S3 & AWS CloudFront.
What is Amazon S3 :
Amazon S3, also known as Simple Storage Service, is a cloud-based storage solution provided by Amazon Web Services. It's like a Google Drive or MediaFire where you can store and retrieve data from anywhere in the world, as long as you have an internet connection.
What is Amazon CloudFront :
Amazon CloudFront is a Content Delivery Network (CDN) that helps websites and applications deliver content to users all around the world securely and super fast. It's like having a network of delivery riders that bring your Items to your doorstep, no matter where they are in the world.
Requirements :
Before get into the project, ensure you have access and needs to the following:
An AWS account with permissions to create and manage S3 Bucket & CloudFront (free tier would be better).
Static website content files that need to be uploaded (HTML, JS, CSS)
Step 1 : Create an AWS S3 Bucket Service
First logging in to your created AWS Management Console. Select S3 Dashboard by searching "S3" from the service menu.
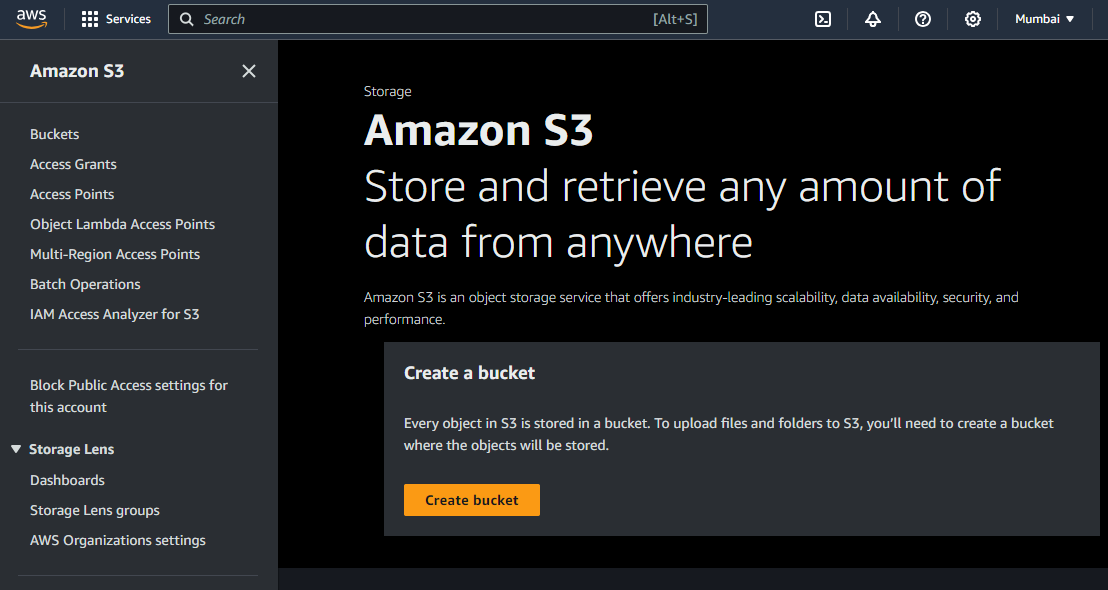
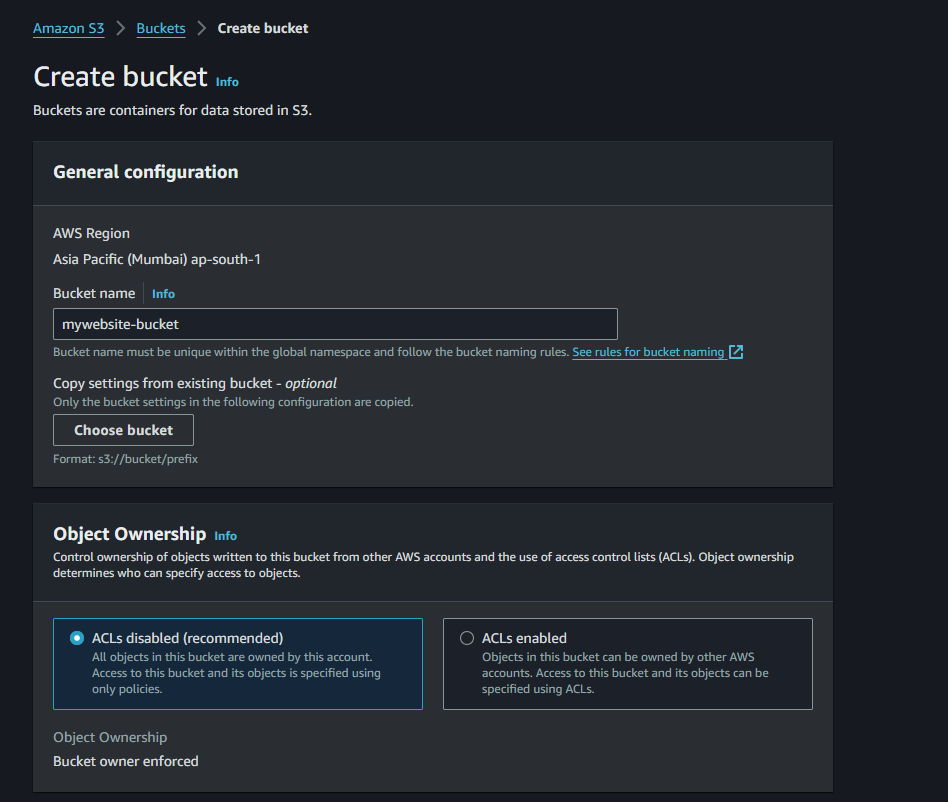
Click on “Create Bucket” to begin creating a new S3 bucket. This process involves selecting the appropriate configurations for your bucket storage.
Now, scroll down to the "Public access settings" section. You'll see a box that says "Block all public access" uncheck that box. Then, check the box that says you acknowledge the risks of making your bucket public.
Leave all the other settings alone, just keep them as they are & click on the "Create bucket" button.
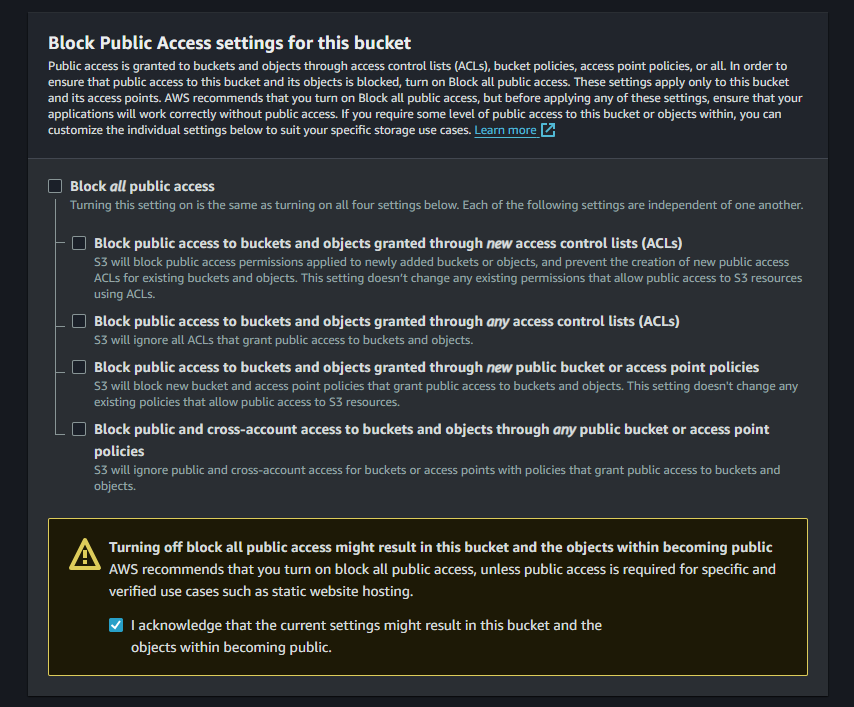
We're making the bucket contents publicly accessible because we're going to use it to host a static website. For this to work, the content needs to be readable by anyone. If you don't uncheck this, you won't be able to view our website. But we can still control who has access to it by using Bucket Policies or ACL (Access Control Lists) later on.
Step 2 : Uploading Files & Folders to Bucket
Once you've created and configured our bucket, the next step is to upload our static web files and folders to it. This is where you'll store all the HTML, CSS, JavaScript, and image files that make up our website.
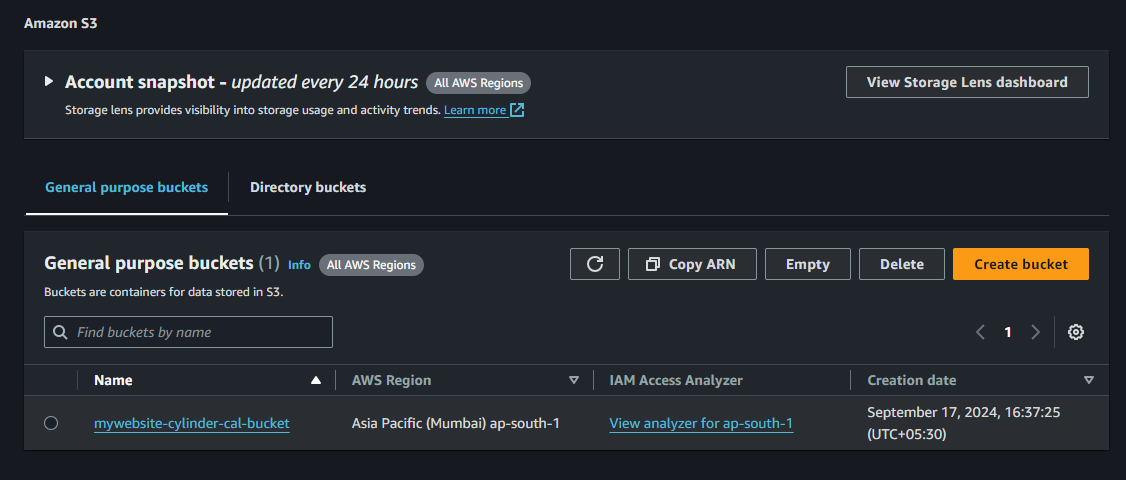
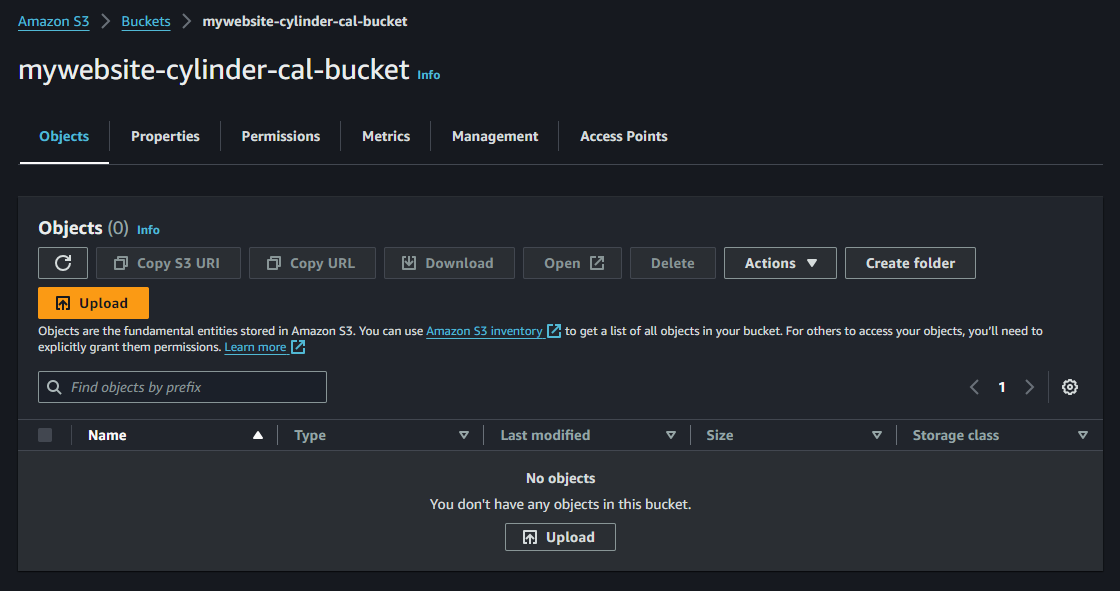
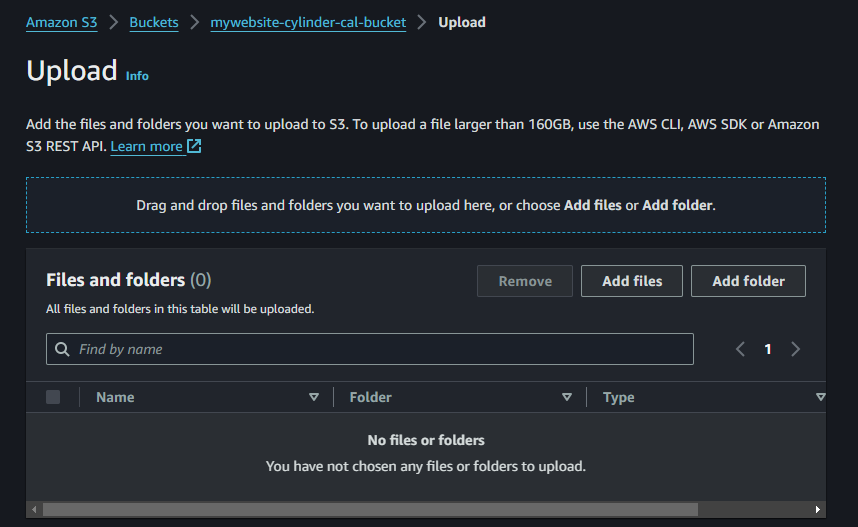
Click on the "Upload" button to start transferring your static website files and folders to the S3 bucket. This is where you'll select the files from your computer that you want to upload, and Amazon S3 will take care of storing them for you.
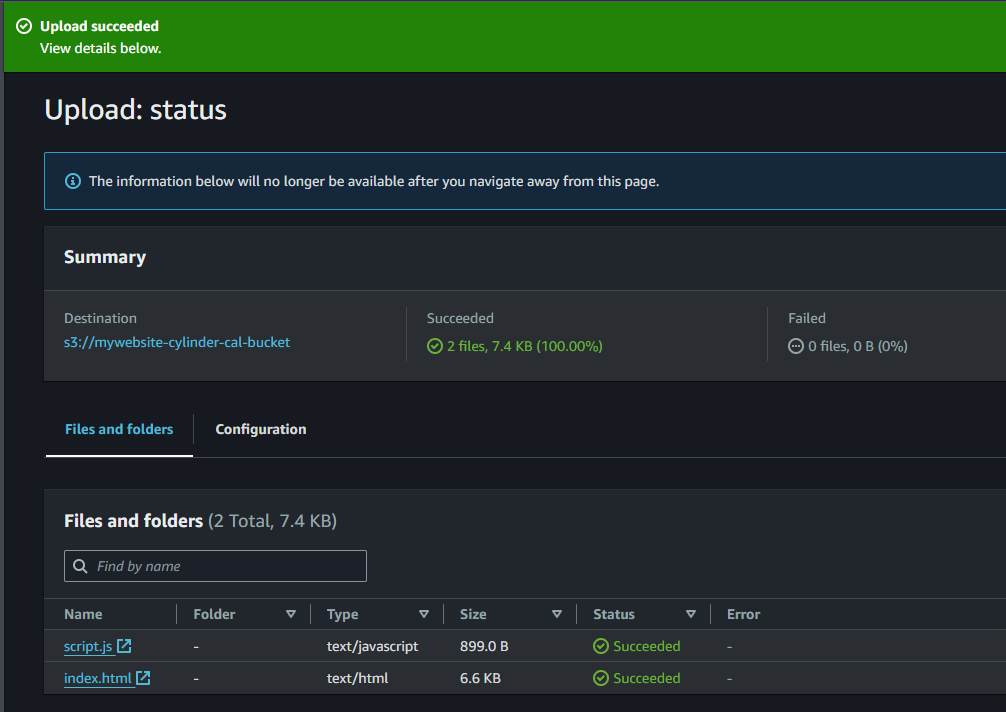
As upload your files, you'll see a notification on the screen showing the progress. This is just to let you know that everything is working as expected and your files are being transferred to the S3 bucket.
Step 3 : Configure the S3 Bucket Permission
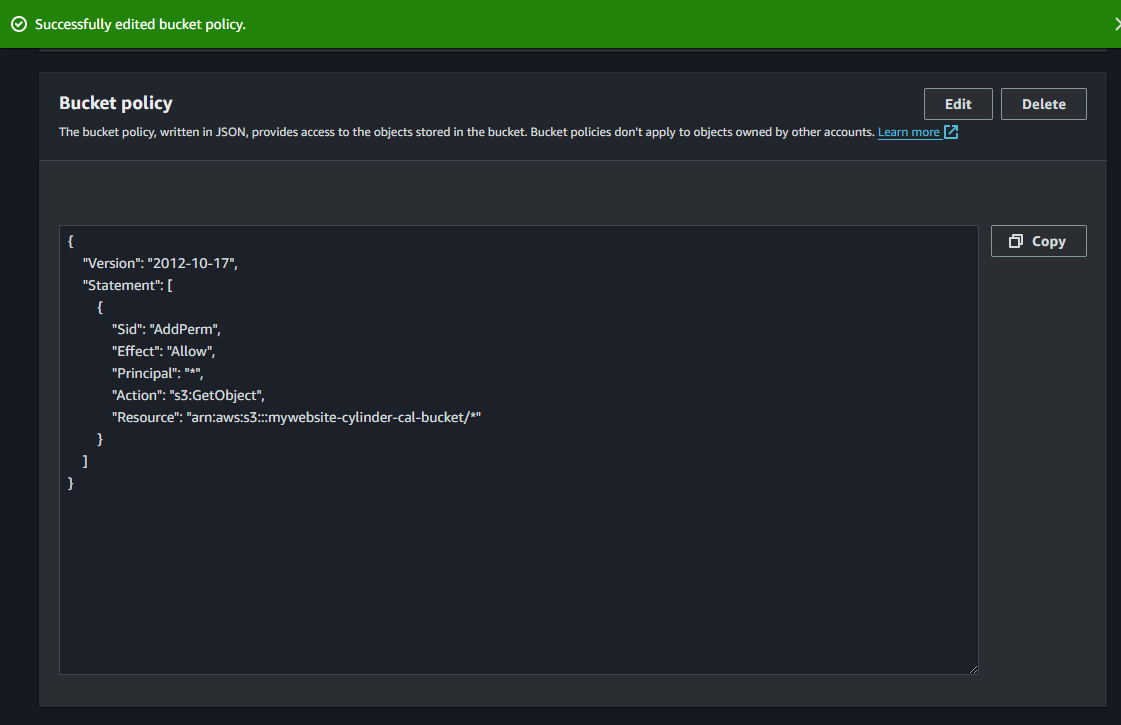
After the files are uploaded, you need to set the permissions for our S3 bucket so that people can actually access our website. To do this, click on the "Permissions" tab, and then click on "Edit bucket policy" and type the below code.
{
        "Version": "2012-10-17",
        "Statement": [
        {
            "Sid": "AddPerm",
            "Effect": "Allow",
            "Principal": "*"
            "Action": "s3:GetObject",
            "Resource": "arn:aws:s3:::YOUR-BUCKET-NAME/*"
        }
    ]
}
Make sure to replace 'YOUR-BUCKET-NAME' with the actual name of your S3 bucket. Take a look at the example below image.
Step 4 : Enable Static Hosting in S3 Bucket
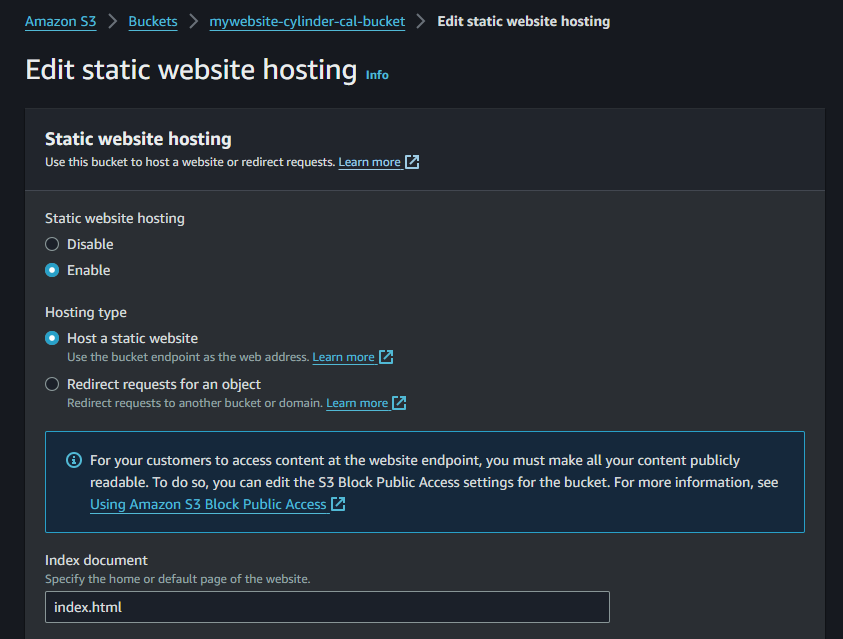
After updating the policies, it's time to enable static hosting for our S3 bucket. To do this, go to the "Properties" tab, scroll down until see the "Static website hosting" section and click on the "Edit" button.


By default, static website hosting is disabled. Click on the "Enabled" and enter the name of your main HTML file in the 'Index document' field, which is usually "index.html". This tells S3 bucket to serve up your index.html file as the main page of your website when someone visits your bucket's URL.
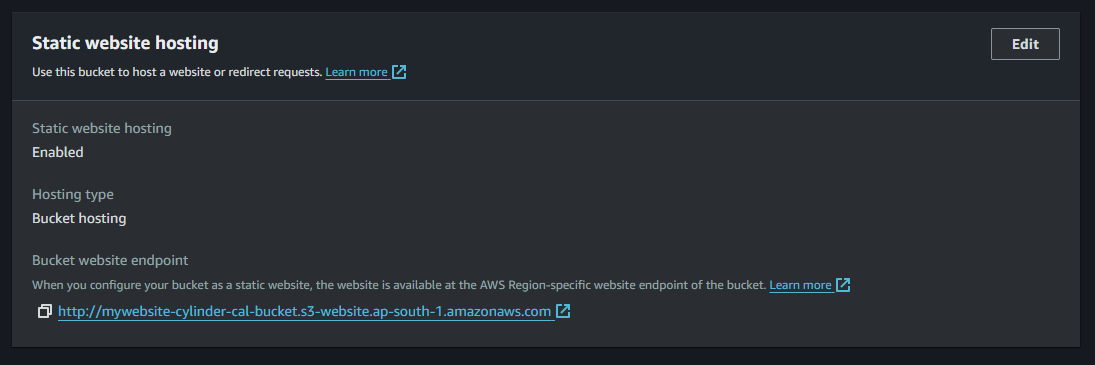
Now saved the changes, you'll see the bucket website endpoint URL appear. This is the URL that people will use to access your website. Copy this URL and Open it in the browser.
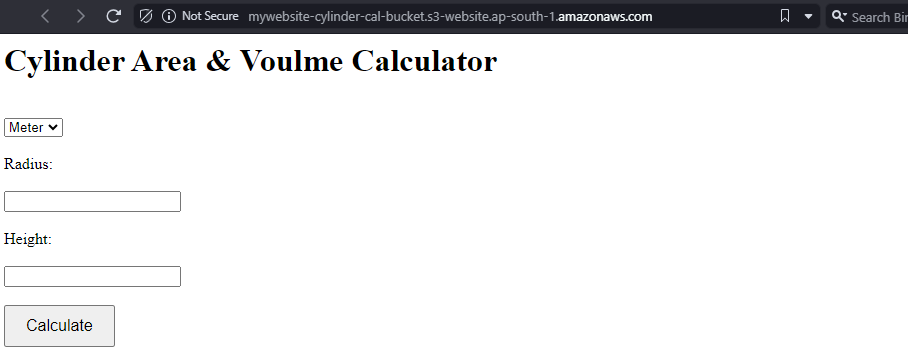
So We've successfully hosted our website in S3 Bucket!
However, if you take a closer look at the URL, you'll see that the connection it's not secure (it's HTTP, not HTTPS).
To fix this, we need to set up a CloudFront distribution to secure our website with HTTPS.
Step 5 : Configuring CloudFront for Static Website
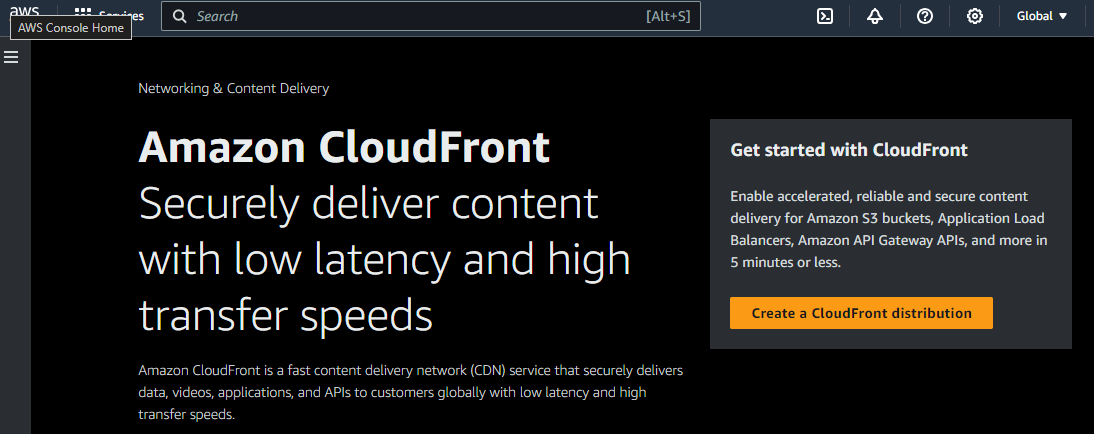
First search for "CloudFront" in the AWS Management Console and open, then click on the "Create a CloudFront distribution" button.
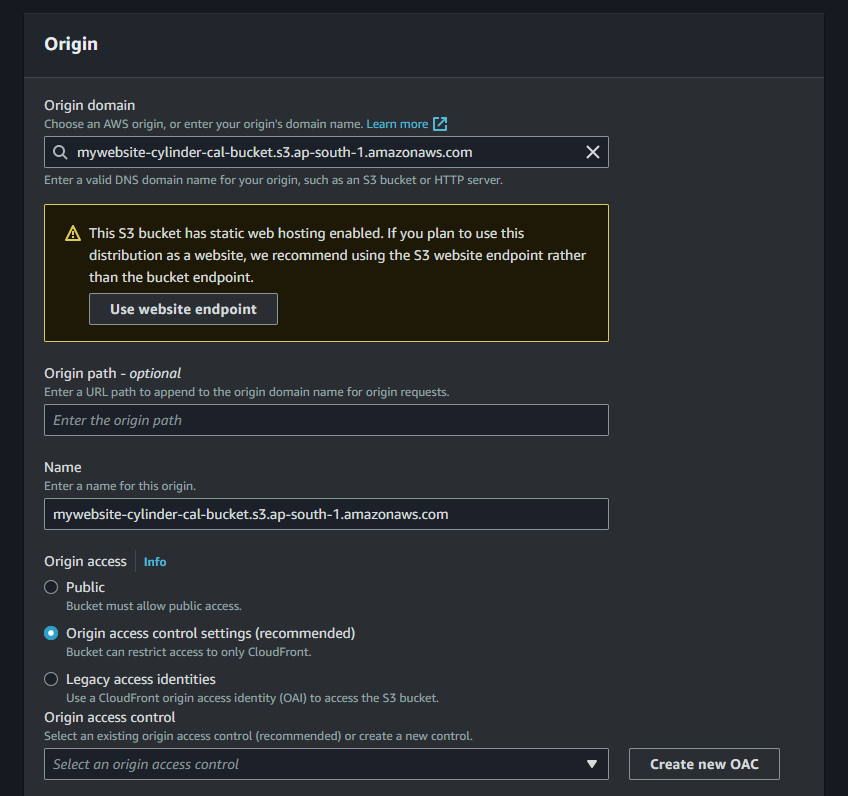
Next, select our S3 bucket as the origin domain. In the "Origin Domain Name" dropdown, select the name of the S3 bucket you created earlier. This will link our S3 bucket to our website files.
Leave the other settings alone, just keep them as they are and click "Create new OAC"
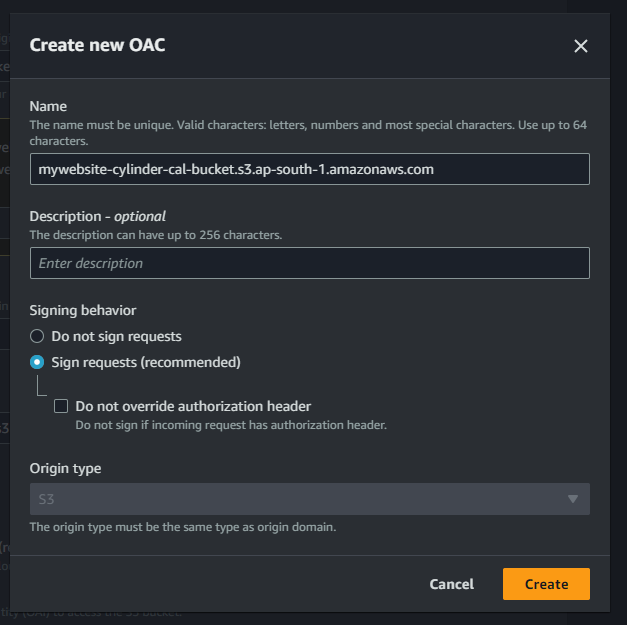
This will get this below dialogue box, check if the name of the bucket is right, the “Sign requestsˮ as the signing behavior and click on "Create".
Next, scroll down to the "Web Application Firewall (WAF)" section. For now, you don't need to enable any additional security protection, so select the option that says "Do not enable security protection".

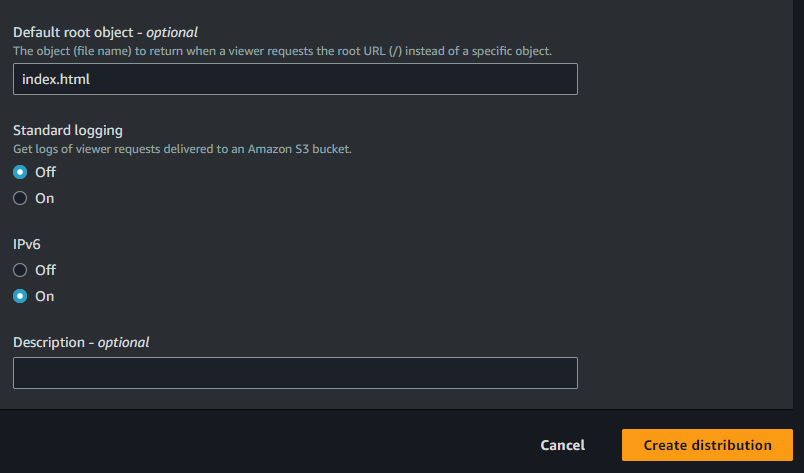
Next, scroll down to the "Default Root Object" section. In this field, enter the name of your main HTML file, which is usually "index.html" and create "Create distribution". This tells CloudFront to serve up your index.html file as the default page when someone visits your website's URL.
Your distribution is being created! Now, copy the bucket policy that's being displayed. You'll need to paste this policy into your current S3 bucket policy. Make sure to copy the entire policy, and then head over to your S3 bucket and paste it into the policy editor.
One more thing is you can also enable "Block Public Access" on the "Permissions" tab in your S3 bucket.
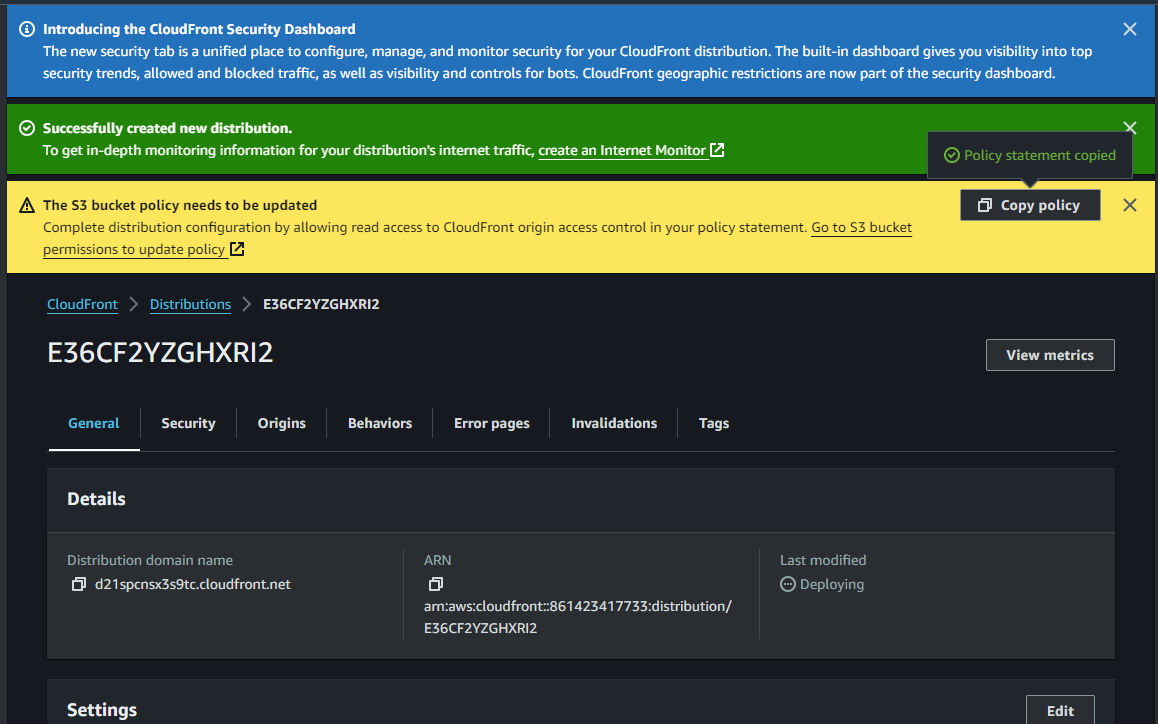
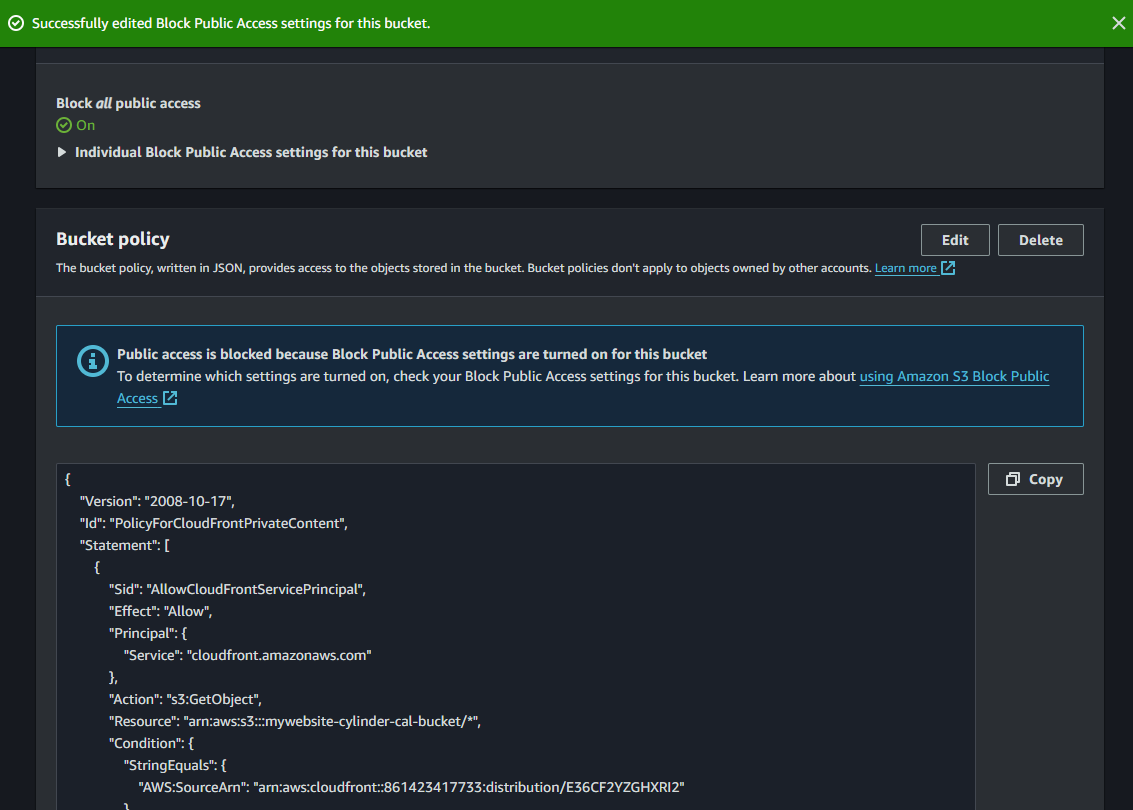
Finally, now that our bucket is all set up, let's get the domain name of our distribution. Copy the distribution domain name, and then open up your web browser. And this will take you to your live website, hosted on Amazon S3 and served through CloudFront!
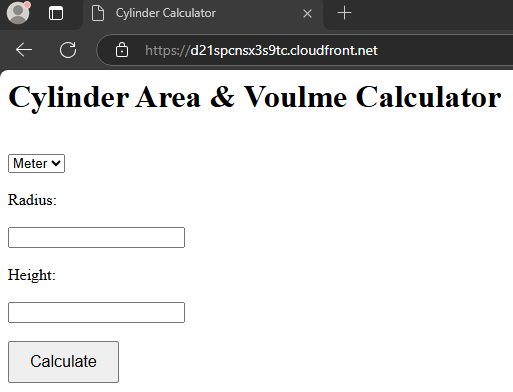
And that's it! I hope this step by step guide has been helpful in deploying your static website on Amazon S3 and serving it through Amazon CloudFront.
Thank you for reading my blog post! Your positive feedback inspires me to explore more about technology and innovation.
Make sure to follow me on LinkedIn and pamindatechtalk blog where I will be posting similar content in the future! 🙋♂️
Subscribe to my newsletter
Read articles from Paminda Kalpa Wickramasinghe directly inside your inbox. Subscribe to the newsletter, and don't miss out.
Written by

Paminda Kalpa Wickramasinghe
Paminda Kalpa Wickramasinghe
Hi folks ✌, I’m Paminda Kalpa Wickramasinghe from the beautiful city Galle, a charming coastal city in southern Sri Lanka 🌊. I hold a Bachelor’s degree in Information Technology from the University of Colombo School of Computing. With experience as an IT support professional in server management, backup solutions, and LAN administration, I'm passionate about transitioning to in demand fields like DevOps, Cloud Computing, Platform Engineering, Site Reliability Engineering and emerging technologies.