Hangman Game: A Fun & Interactive Project in React
 Ashish Prabhakar
The Hangman game is a classic word-guessing game where players try to guess a hidden word by suggesting letters within a limited number of attempts. It's a great project for beginner developers to learn how to implement game logic, manage state, and create an interactive user interface. In this blog, I'll walk you through the process of developing a Hangman game using React.
Building a Hangman game offers several benefits for developers:
Practice with React: The game helps reinforce React concepts such as state, components, and props.
Logic Building: It improves logical thinking and problem-solving skills as you implement game mechanics like tracking wrong guesses and ending the game when the player wins or loses.
UI/UX Development: It’s a great opportunity to practice designing an engaging and interactive user interface.
Features of the Hangman Game
Word Guessing: Players try to guess a hidden word by selecting letters.
Limited Attempts: The player has a fixed number of attempts before they lose the game.
Dynamic Feedback: As the player guesses letters, the game shows which letters are correct and which are incorrect.
Responsive Design: The game adjusts to different screen sizes, ensuring a smooth user experience across all devices.
Development Process
Step 1: Project Setup
First, we set up the project using
create-react-appto quickly bootstrap the React project. This command generates the initial file structure:$ npm create vite@latest .
. krne se all files aa jata aa jata automatically
npm install
npm run dev
In a typical Vite project, the folder structure is simple and organized. Here's a basic overview of the folder structure you would expect after initializing a Vite project:
my-vite-project/
│
├── node_modules/          # Contains installed dependencies
│
├── public/                # Static assets like images, favicon, etc.
│   └── favicon.ico
│
├── src/                   # Main application source code
│   ├── assets/            # Static assets, images, fonts, etc.
│   ├── components/        # Reusable React/Vue components
│   ├── App.jsx            # Main application file (for React)
│   ├── main.jsx           # Entry point for the React app (for React)
│   └── index.css          # Global styles
│
├── .gitignore             # Git ignore file
├── index.html             # Main HTML file
├── package.json           # Project metadata and dependencies
├── vite.config.js         # Vite configuration file
└── README.md              # Documentation for the project
Step 2: Game Logic Implementation
We start by defining the core logic of the game. The game requires:
A random word from a predefined list for the player to guess.
An array of guessed letters, both correct and incorrect.
A way to track the number of incorrect guesses, which we’ll use to decide when the game is over.
Here are the main file which operate all the data
import React from 'react';
import Hangman from './components/Hangman';

function App() {
  return (
    <div className="App">
      <h1>Hangman Game</h1>
      <Hangman />
    </div>
  );
}

export default App;
  const [word, setWord] = useState(words[Math.floor(Math.random() * words.length)]);
  const [guessedLetters, setGuessedLetters] = useState([]);
  const [wrongGuesses, setWrongGuesses] = useState(0);
  const maxWrongGuesses = 6;
Step 3: Handling User Input
Next, we handle user input, allowing the player to click on letters to guess them. Each letter guess updates the game state and checks whether the letter is part of the word.
  const handleGuess = (letter) => {
    if (!guessedLetters.includes(letter)) {
      setGuessedLetters([...guessedLetters, letter]);
      if (!word.includes(letter)) {
        setWrongGuesses(wrongGuesses + 1);
      }
    }
  };
Step 4: Winning and Losing Conditions
We check for two primary game states:
Winning: The player wins when all the letters in the word are guessed.
Losing: The player loses if the number of wrong guesses exceeds the allowed attempts.
  const isGameWon = word.split('').every(letter => guessedLetters.includes(letter));
    const isGameOver = wrongGuesses >= maxWrongGuesses;
Step 5: Building the User Interface
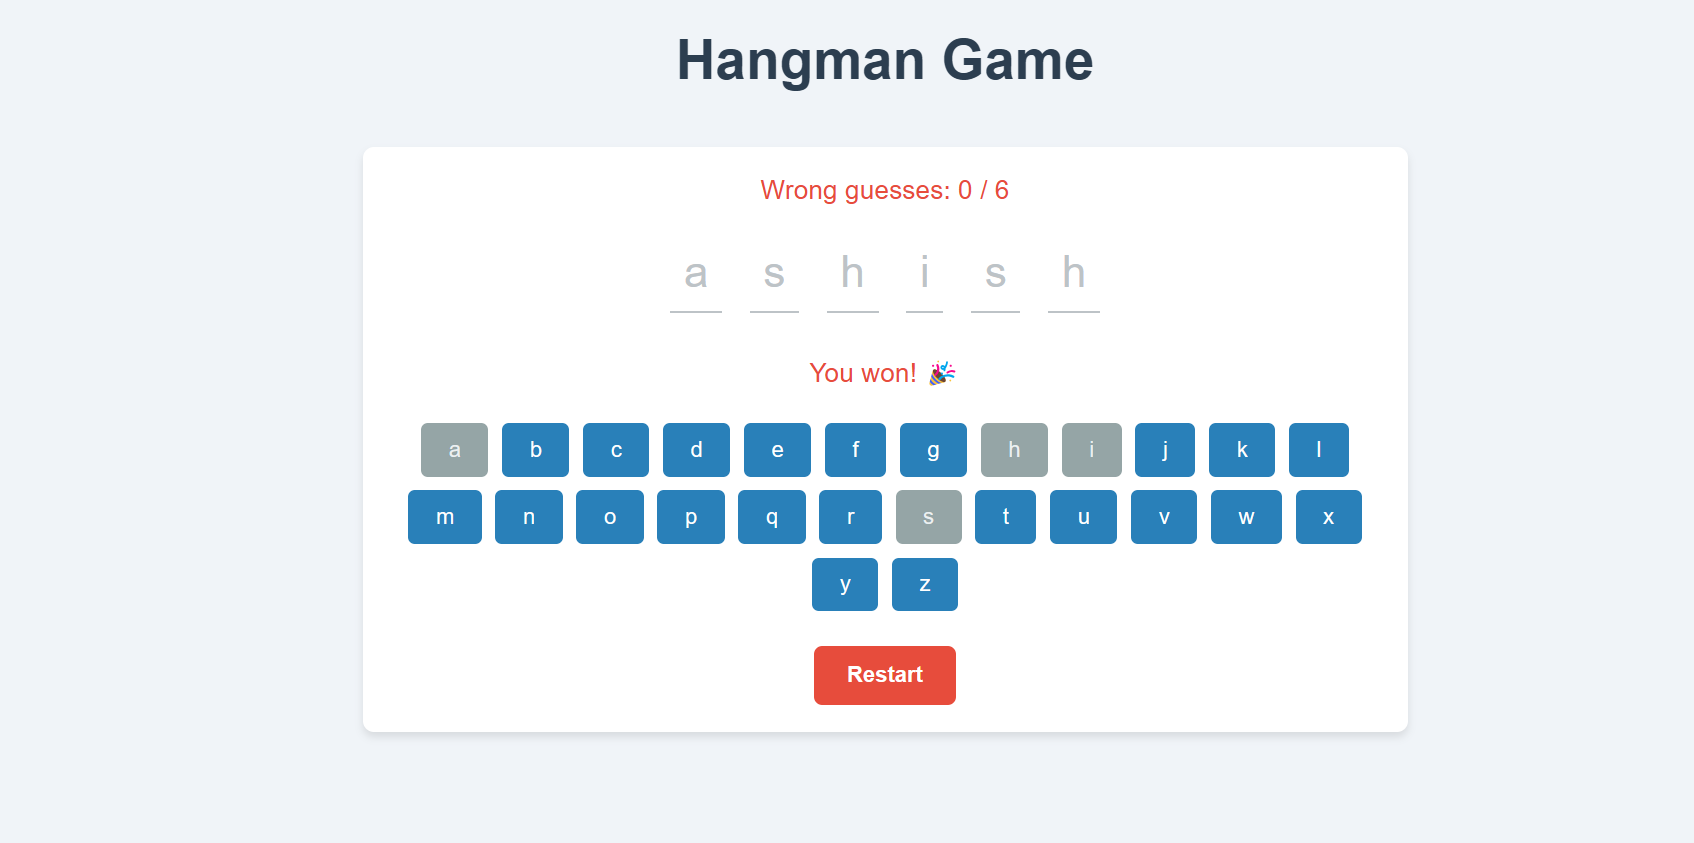
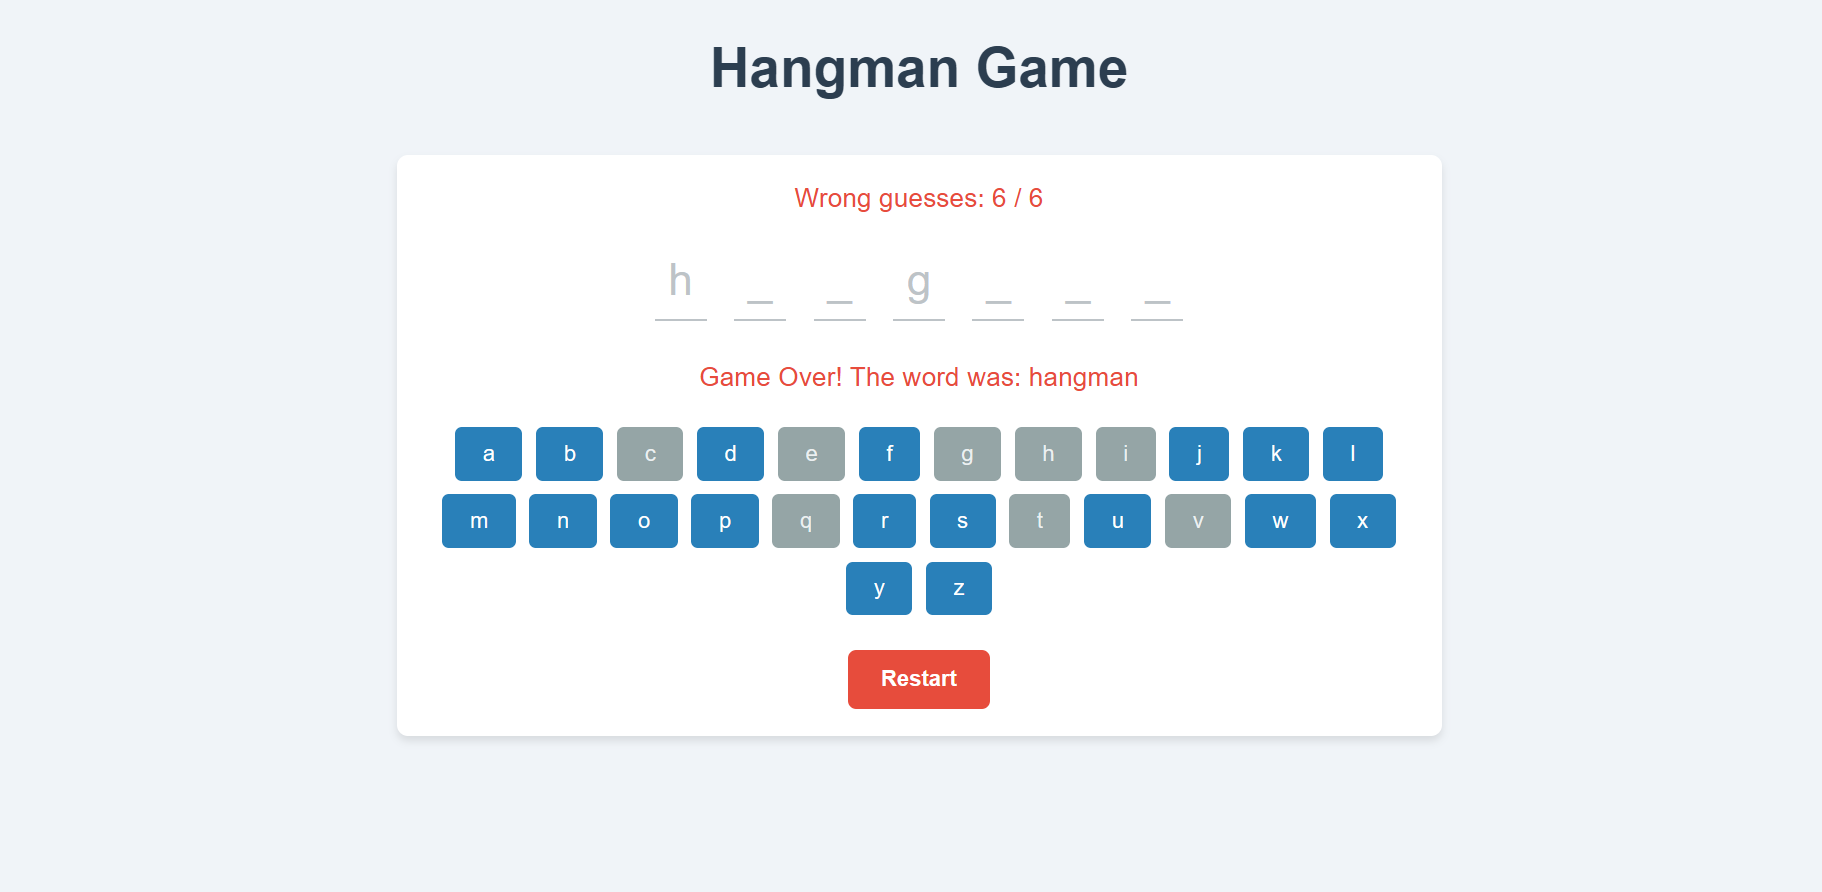
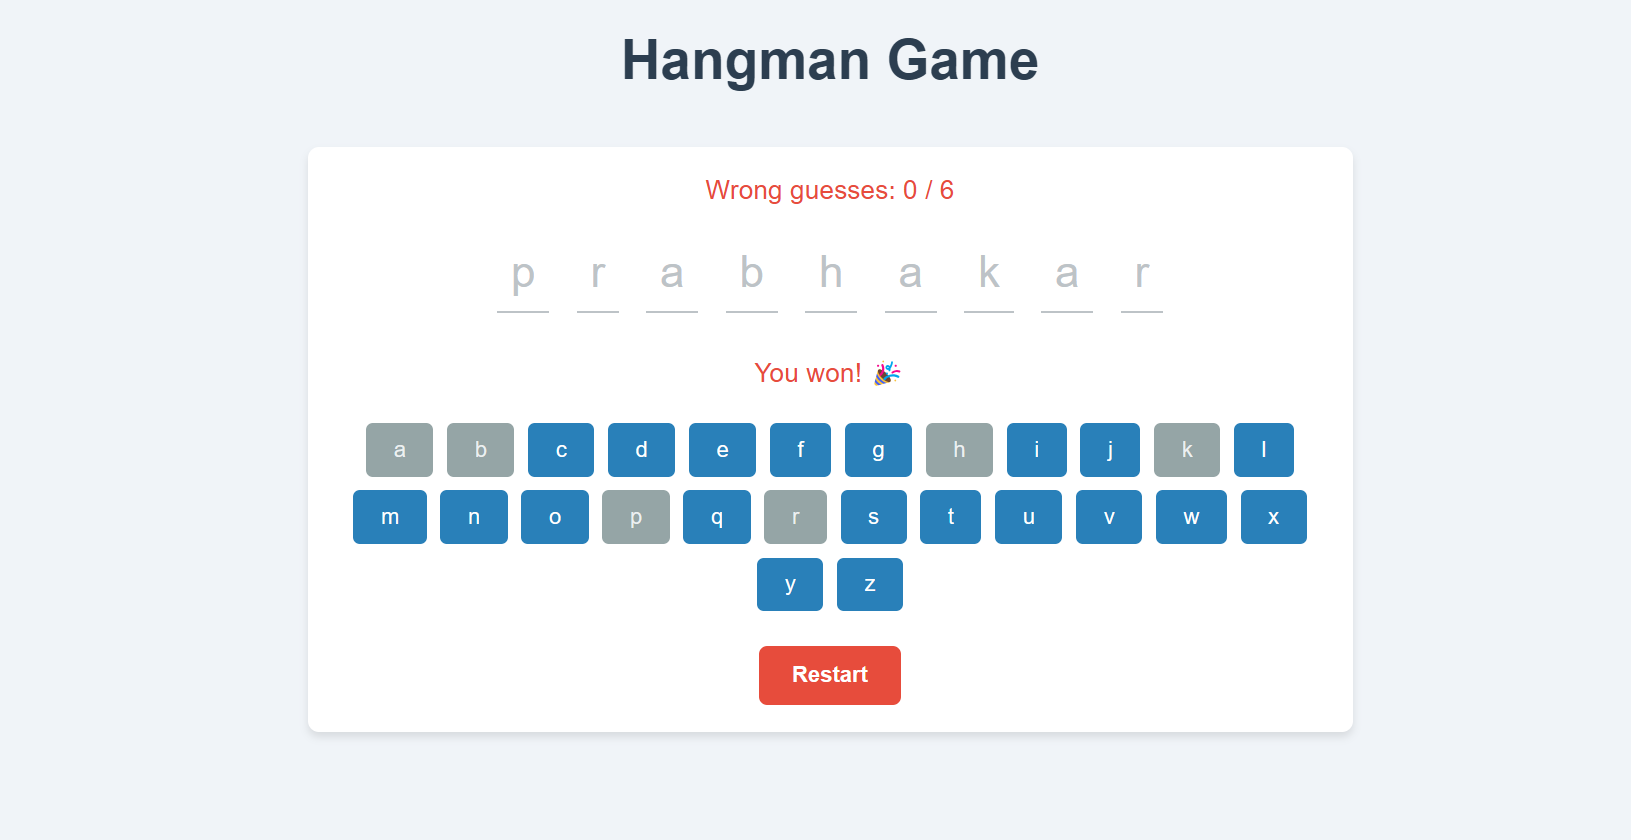
We designed the UI with Tailwind CSS to make it responsive and visually appealing. The game displays the word, underscores for unguessed letters, a keyboard for the player to click, and the hangman illustration to show how many wrong guesses have been made.
      <div className="Hangman">
        <p>Wrong guesses: {wrongGuesses} / {maxWrongGuesses}</p>
        <WordDisplay word={word} guessedLetters={guessedLetters} />
        {isGameWon && <p>You won! 🎉</p>}
        {isGameOver && <p>Game Over! The word was: {word}</p>}
        <Keyboard handleGuess={handleGuess} guessedLetters={guessedLetters} />
        {(isGameWon || isGameOver) && <button onClick={restartGame} className='reset-btn'> Restart</button>}
      </div>
Step 6: Adding Hangman Animation
For added fun, we created a hangman figure that dynamically appears with each wrong guess. Using simple CSS, we can draw parts of the hangman as the game progresses.
  .App {
      text-align: center;
    }

    .Hangman {
      margin-top: 20px;
    }

    .WordDisplay {
      font-size: 24px;
      margin-bottom: 20px;
    }

    .Keyboard {
      display: flex;
      flex-wrap: wrap;
      justify-content: center;
    }

    .Keyboard button {
      margin: 5px;
      padding: 10px;
      font-size: 18px;
    }

    button[disabled] {
      opacity: 0.5;
      cursor: not-allowed;
    }
Step 7: Making the Game Responsive
To ensure the game works on all devices, we used Tailwind CSS for responsive design. The game layout adjusts for different screen sizes, ensuring that players on mobile devices have the same experience as those on larger screens.
  /* Responsive Styles for Reset Button */
  @media (max-width: 768px) {
    .reset-btn {
      padding: 10px 20px;
      font-size: 0.9rem;
    }
  }

  @media (max-width: 480px) {
    .reset-btn {
      padding: 8px 18px;
      font-size: 0.8rem;
    }
  }

    /* Responsive Styles */
    @media (max-width: 768px) {
      h1 {
        font-size: 2rem;
      }

      .WordDisplay .letter {
        font-size: 1.5rem;
        margin: 0 5px;
      }

      .Keyboard button {
        padding: 8px 15px;
        margin: 4px;
        font-size: 0.9rem;
      }
    }

    @media (max-width: 480px) {
      h1 {
        font-size: 1.8rem;
      }

      .WordDisplay .letter {
        font-size: 1.2rem;
        margin: 0 3px;
      }

      .Keyboard button {
        padding: 6px 12px;
        margin: 3px;
        font-size: 0.8rem;
      }
    }
Challenges Faced
While developing this project, some of the challenges I faced were:
Managing State: Keeping track of the guessed letters and handling state updates without causing re-renders was tricky.
Responsive Design: Ensuring the game layout looked good on different screen sizes required several iterations.

Key Learnings
State Management in React: Handling multiple states like guessed letters, wrong guesses, and game status helped me understand state management in React.
CSS for Game Design: Designing a responsive and interactive game UI using CSS improved my CSS skills.
Handling User Input: Managing events, like letter clicks, and dynamically updating the UI based on user actions taught me how to handle user inputs efficiently.
so you can also contribute and make project more beautiful and make some changes in the project i have make some small react project and contribute open source which all can understanding and build the logic in the react js.

Conclusion
The Hangman game is a simple yet fun project that challenges you to think logically while practicing core web development skills. Whether you're a beginner or an experienced developer, it’s an enjoyable project that can be extended with more features and complexities. Try building it yourself and see how you can make it your own!
💻How to make Clone this Project form the github:-
📝 How to Install and Run
1. Clone the repository:
git clone https://github.com/ashish8513/React-Hangman-Game
Go to the directories
cd repository-name
Installing project dependencies:
Once you've cloned the project, install the dependencies (usually specified in the package.json file):
If you’re using npm, run:
npm run devI hope this blog gave you insights into how to build a Hangman game using React. Happy coding!
For any quieres please contact 📱ashishpabhakar1010@gmail.com📩
Subscribe to my newsletter
Read articles from Ashish Prabhakar directly inside your inbox. Subscribe to the newsletter, and don't miss out.
Written by

Ashish Prabhakar
Ashish Prabhakar
Heyy!! I am Ashish Prabhakar Final Year Student on Bachelor of Computer Application with a passionate Full Stack Developer with a strong focus on building scalable and efficient web applications. My expertise lies in the MERN stack (MongoDB, Express.js, React.js, Node.js), Open to new opportunities in software development and eager to contribute to innovative projects on Full Stack Development