Installing FTP Server (VSFTPD) on Ubuntu 22.04
 Dinesh Kumar K
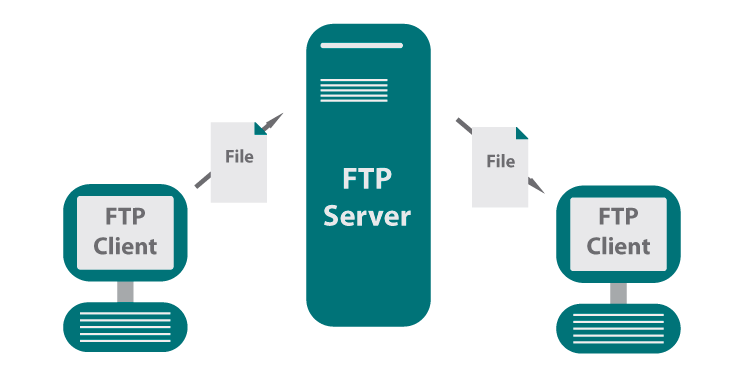
An FTP (File Transfer Protocol) server in Linux is a service that allows users to transfer files between computers over a network. FTP servers are commonly used for uploading and downloading files, and they can be accessed via various FTP client applications.
Key Features of an FTP Server:
File Transfer: Facilitates the upload and download of files between clients and the server.
Authentication: Users can authenticate with a username and password, allowing controlled access to files.
Directory Listing: Users can view and navigate through directories on the server.
File Management: Supports operations like renaming, deleting, and moving files.
Passive and Active Modes: FTP can operate in active or passive mode, affecting how connections are established.
Step 1: Install VSFTPD Server
First, open your terminal and execute the following commands to install VSFTPD:
sudo apt update

sudo apt install vsftpd -y

Once installed, check the status of the VSFTPD service:
sudo service vsftpd status
This command ensures that the VSFTPD server is running correctly.
Step 2: Configure Firewall
To allow FTP connections, configure your firewall settings. Execute these commands:
sudo ufw allow 20/tcp
sudo ufw allow 21/tcp
sudo ufw allow 40000:50000/tcp
sudo ufw allow 990/tcp

These commands open the necessary ports for FTP communication.
Step 3: Create an FTP User
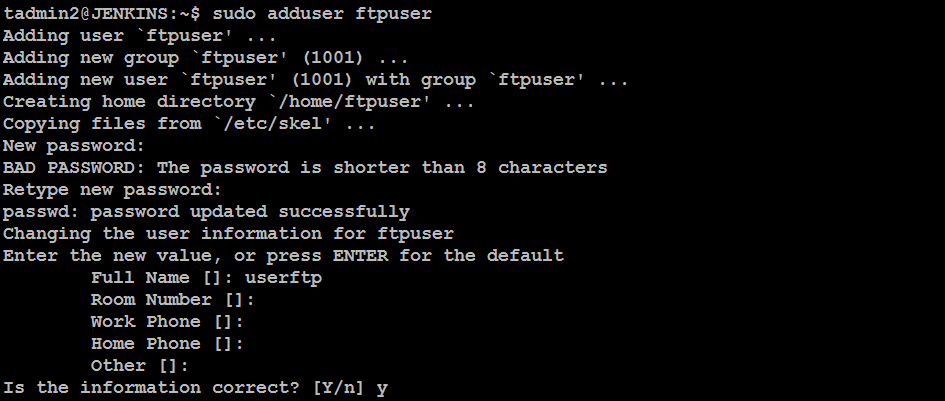
Next, create a dedicated FTP user to manage file uploads and downloads. Run the following commands:
sudo adduser ftpuser
sudo mkdir /home/ftpuser/ftp
sudo chown nobody:nogroup /home/ftpuser/ftp
sudo chmod a-w /home/ftpuser/ftp
sudo mkdir /home/ftpuser/ftp/files
sudo chown ftpuser:ftpuser /home/ftpuser/ftp/files

This setup creates a user directory structure that restricts write permissions for the main FTP directory.
Step 4: Configure VSFTPD
Backup the original configuration file before making changes:
sudo mv /etc/vsftpd.conf /etc/vsftpd.conf.origin

Now, open the VSFTPD configuration file:
sudo nano /etc/vsftpd.conf
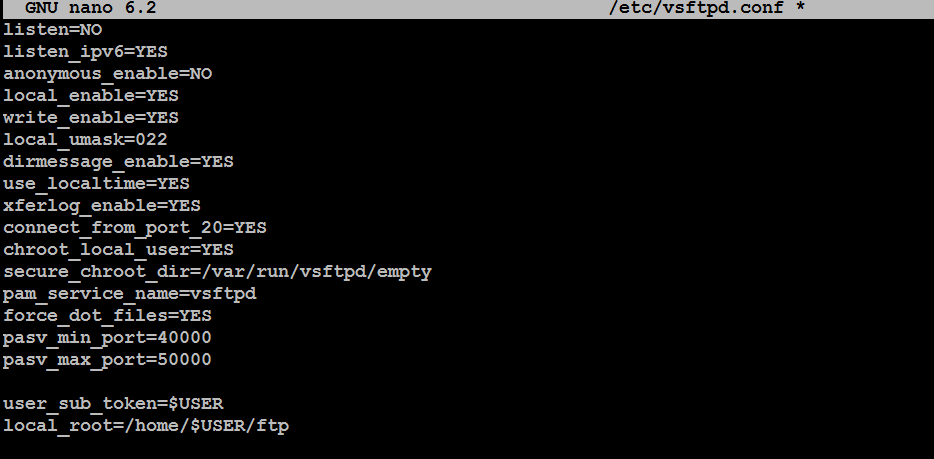
Modify or add the following settings to the file:
listen=NO
listen_ipv6=YES
anonymous_enable=NO
local_enable=YES
write_enable=YES
local_umask=022
dirmessage_enable=YES
use_localtime=YES
xferlog_enable=YES
connect_from_port_20=YES
chroot_local_user=YES
secure_chroot_dir=/var/run/vsftpd/empty
pam_service_name=vsftpd
force_dot_files=YES
pasv_min_port=40000
pasv_max_port=50000

user_sub_token=$USER
local_root=/home/$USER/ftp
After saving the changes, restart the VSFTPD service to apply the new configuration:
sudo systemctl restart vsftpd.service

Step 5: Test FTP Connection
Log in to your client machine and run:
ftp ftp-server-ip
Replace ftp-server-ip with your server’s actual IP address. Log in with the ftpuser credentials you created earlier. If you connect successfully, your FTP server is ready for use!

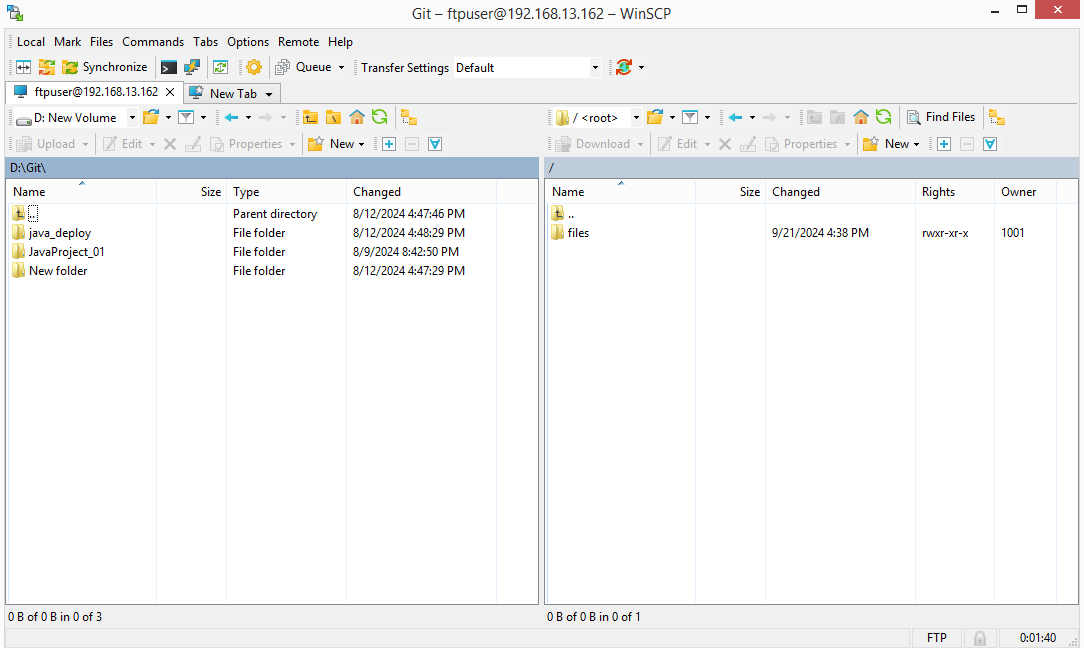
Using WinSCP as a GUI FTP Client
- Open the WinSCP after installation.
Configure the Connection:
In the Login dialog, enter the following details:
File Protocol: Select FTP > Host name: Enter your server’s IP address > Port number: Enter 21 (default FTP port) > User name: Enter the FTP user you created (e.g., ftpuser) > Password: Enter the password for the FTP user
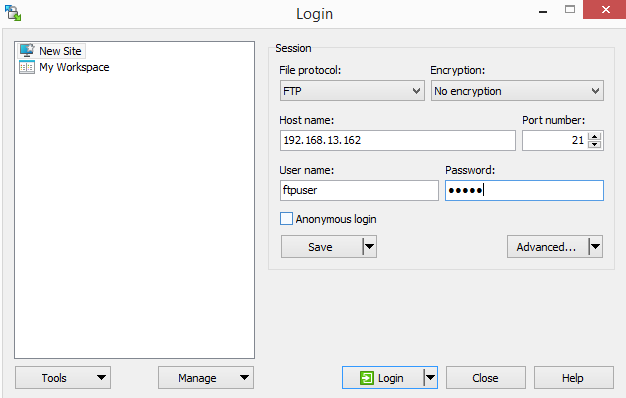
You should now be connected successfully!
Conclusion
Setting up a VSFTPD server on Ubuntu is straightforward and provides a secure method for file transfer. With this guide, you can now manage your FTP server effectively. If you have any questions or comments, feel free to reach out!
Subscribe to my newsletter
Read articles from Dinesh Kumar K directly inside your inbox. Subscribe to the newsletter, and don't miss out.
Written by

Dinesh Kumar K
Dinesh Kumar K
Hi there! I'm Dinesh, a passionate Cloud and DevOps enthusiast. I love to dive into the latest new technologies and sharing my journey through blog.