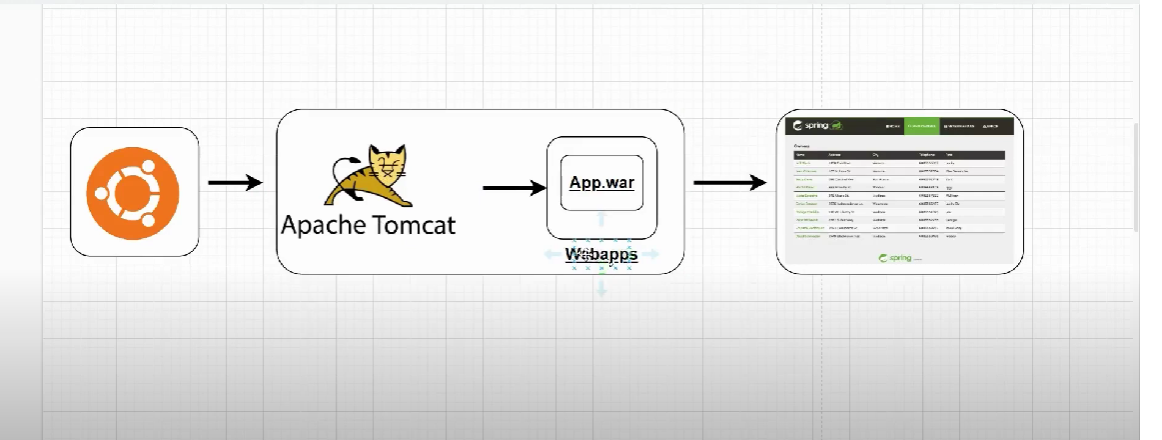
Deploying a Java Application on Apache Tomcat: A Step-by-Step Guide
 Rishabh Varshney
1 min read

1.Commands To Setup Tomcat :
##################----INSTALL TOMCAT----##################
cd /opt
sudo wget https://archive.apache.org/dist/tomcat/tomcat-9/v9.0.65/bin/apache-tomcat-9.0.65.tar.gz
sudo tar -xvf apache-tomcat-9.0.65.tar.gz

cd /opt/apache-tomcat-9.0.65/conf
sudo vi tomcat-users.xml
# ---add-below-line at the end (2nd-last line)----
# <user username="admin" password="admin1234" roles="admin-gui, manager-gui"/>

sudo ln -s /opt/apache-tomcat-9.0.65/bin/startup.sh /usr/bin/startTomcat
sudo ln -s /opt/apache-tomcat-9.0.65/bin/shutdown.sh /usr/bin/stopTomcat

sudo vi /opt/apache-tomcat-9.0.65/webapps/manager/META-INF/context.xml

comment:
<!-- Valve className="org.apache.catalina.valves.RemoteAddrValve"
  allow="127\.\d+\.\d+\.\d+|::1|0:0:0:0:0:0:0:1" /> -->

sudo vi /opt/apache-tomcat-9.0.65/webapps/host-manager/META-INF/context.xml

comment:
<!-- Valve className="org.apache.catalina.valves.RemoteAddrValve"
  allow="127\.\d+\.\d+\.\d+|::1|0:0:0:0:0:0:0:1" /> -->

sudo stopTomcat
sudo startTomcat
2.Install java application & maven & git
sudo yum install java -y
sudo yum install maven -y
sudo yum install git -y
3:Git clone from url
git clone https://github.com/jaiswaladi246/Petclinic.git
4: Go to code directory (petclinic) & build war file using maven
cd petclinic
mvn clean package
# war file is created on /home/ec2-user/Petclinic/target/petclinic.war
# then cp the war file on webapps (/opt/apache-tomcat-9.0.65/webapps/)
cp /home/ec2-user/Petclinic/target/petclinic.war /opt/apache-tomcat-9.0.65/webapps/
# also check the webapps directory permission
start tomcat
 sudo startTomcat
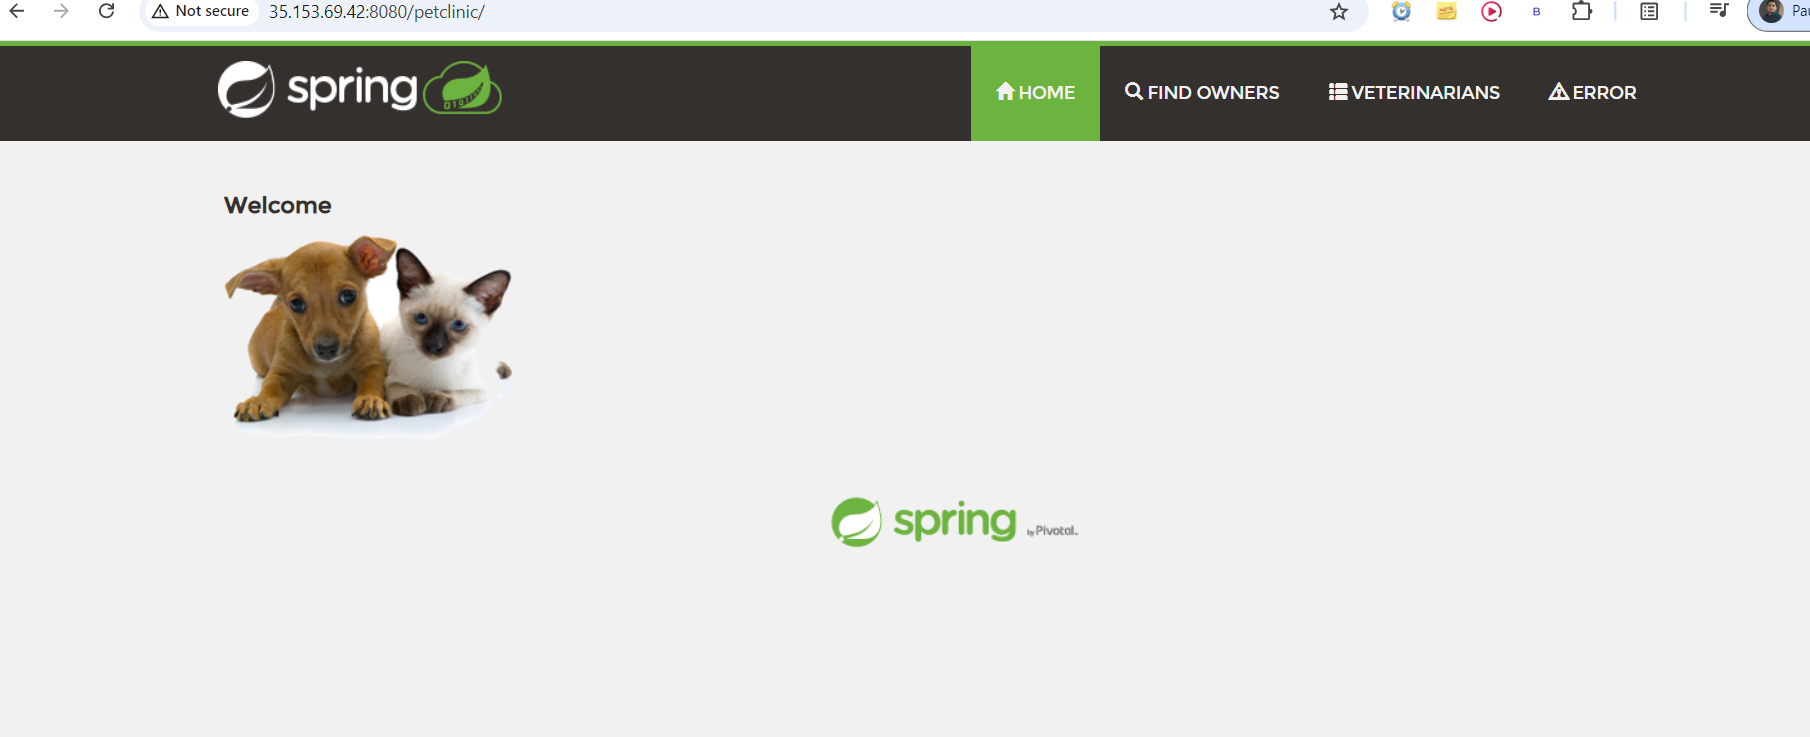
 # check through public url on port 8080
 http://35.xxx.69.xx:8080/petclinic/
Final result:

0
Subscribe to my newsletter
Read articles from Rishabh Varshney directly inside your inbox. Subscribe to the newsletter, and don't miss out.
Written by
