Real-Time Video Conferencing Made Simple with WebRTC and PeerJS
 Swami Buddha Chaitanya
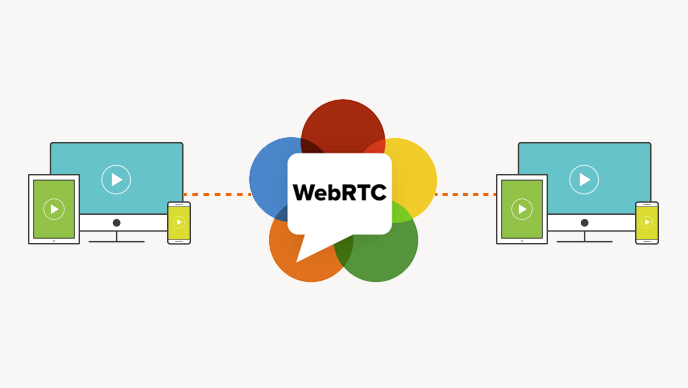
WebRTC (Web Real-Time Communication) has revolutionized how we build applications with real-time media streaming directly in the browser. Whether it's video conferencing, voice calls, or live streaming, WebRTC provides the foundation for peer-to-peer (P2P) connections without the need for plugins or third-party installations.
In this article, I’ll walk you through my journey of building a real-time video conferencing app using WebRTC, PeerJS, and React. This project was part of Week 23 of the 100xDevs Cohort 2.0, a program run by Harkirat Singh to develop full-stack development skills.
Overview of the Project
The project focuses on creating a minimal yet functional video conferencing app where:
One producer can stream video and audio to multiple consumers.
Users can toggle between start/stop video and mute/unmute audio.
Peer-to-peer connections are managed using PeerJS, and the app supports two-way communication between participants.
By the end of this tutorial, you'll have a basic understanding of how to set up a WebRTC app using PeerJS and build the necessary UI components using React.
Step 1: Setting Up WebRTC with PeerJS
WebRTC is designed to establish direct media connections between participants. However, it needs a signaling server to negotiate these connections. This is where PeerJS comes in. PeerJS simplifies WebRTC by managing signaling, error handling, and connection establishment.
Installation
First, let's set up PeerJS on both the frontend and backend.
Install PeerJS in the backend to create a signaling server:
npm install peerInstall PeerJS in the frontend:
npm install peerjs
Step 2: Backend Setup
Our backend serves as a PeerJS signaling server. Here’s a simplified version of the backend (server.ts):
import express from 'express';
import { ExpressPeerServer } from 'peer';
import http from 'http';

const app = express();
const server = http.createServer(app);

// Setup PeerJS server
const peerServer = ExpressPeerServer(server, {
  debug: true,
  path: '/myapp',
});

app.use('/peerjs', peerServer);

// Start the server
server.listen(9000, () => {
  console.log('Server is running on port 9000');
});
This backend sets up an Express server with a PeerJS signaling server at the /peerjs path. When participants connect to the app, PeerJS handles the signaling necessary to establish peer-to-peer connections.
Step 3: Frontend Setup with React
Next, let's build the frontend using React and PeerJS for peer-to-peer communication. Here's a simplified implementation of the video conferencing component:
import React, { useEffect, useRef, useState } from 'react';
import Peer from 'peerjs';

const VideoConference: React.FC = () => {
  const [peer, setPeer] = useState<Peer | null>(null);
  const myVideoRef = useRef<HTMLVideoElement>(null);
  const [myStream, setMyStream] = useState<MediaStream | null>(null);

  useEffect(() => {
    const peerInstance = new Peer({
      host: 'localhost',
      port: 9000,
      path: '/peerjs/myapp',
      secure: false,
    });
    setPeer(peerInstance);

    peerInstance.on('open', (id) => {
      console.log(`My peer ID is ${id}`);
    });

    // Cleanup on unmount
    return () => {
      peerInstance.disconnect();
      peerInstance.destroy();
    };
  }, []);

  useEffect(() => {
    const startStream = async () => {
      const stream = await navigator.mediaDevices.getUserMedia({ video: true, audio: true });
      setMyStream(stream);
      if (myVideoRef.current) {
        myVideoRef.current.srcObject = stream;
      }
    };
    startStream();
  }, []);

  return (
    <div>
      <h2>Video Conference</h2>
      <video ref={myVideoRef} autoPlay muted playsInline style={{ width: '400px' }} />
    </div>
  );
};

export default VideoConference;
Key Highlights:
PeerJS Setup: We initialize a PeerJS instance and set up the necessary signaling for peer-to-peer communication.
Media Stream Handling: We use
navigator.mediaDevices.getUserMedia()to access the user's camera and microphone.Video Display: The video feed is displayed in a
<video>element by assigning the media stream tovideoRef.current.srcObject.
Step 4: Managing Peer-to-Peer Calls
Now that we have our basic setup, let’s implement the logic for managing peer-to-peer calls, where one user can produce video and multiple participants can consume it.
We’ll update the video conferencing component to handle incoming and outgoing calls:
useEffect(() => {
  if (peer) {
    // Incoming call
    peer.on('call', (call) => {
      call.answer(myStream); // Answer the call with our video/audio stream
      call.on('stream', (remoteStream) => {
        // Display the remote video stream
        addRemoteStream(call.peer, remoteStream);
      });
    });

    // Call other peers
    const connectToPeers = async () => {
      const response = await fetch('/peers'); // Fetch peer IDs from backend
      const peers = await response.json();
      peers.forEach((peerId) => {
        if (peerId !== peer.id) {
          const call = peer.call(peerId, myStream);
          call.on('stream', (remoteStream) => {
            addRemoteStream(call.peer, remoteStream);
          });
        }
      });
    };

    connectToPeers();
  }
}, [peer, myStream]);
This code handles both incoming and outgoing peer-to-peer calls. When a user connects, the app fetches available peers from the server and initiates calls to them.
Step 5: Adding UI Controls
For a better user experience, let's add UI controls to mute/unmute the microphone and start/stop the camera:
const toggleAudio = () => {
  if (myStream) {
    myStream.getAudioTracks().forEach((track) => (track.enabled = !track.enabled));
  }
};

const toggleVideo = () => {
  if (myStream) {
    myStream.getVideoTracks().forEach((track) => (track.enabled = !track.enabled));
  }
};

return (
  <div>
    <h2>Video Conference</h2>
    <video ref={myVideoRef} autoPlay muted playsInline style={{ width: '400px' }} />
    <div>
      <button onClick={toggleAudio}>Toggle Audio</button>
      <button onClick={toggleVideo}>Toggle Video</button>
    </div>
  </div>
);
This adds two simple buttons to toggle the video and audio streams on and off, making it easy for users to control their media during the conference.
Step 6: Learning Outcomes
This project was a great learning experience, and here’s what I took away:
Understanding WebRTC: WebRTC allows real-time media streams in the browser without plugins.
PeerJS for P2P Signaling: PeerJS simplified managing signaling and peer-to-peer connections, reducing the complexity of using raw WebRTC.
React Hooks for State Management: Used React hooks (
useState,useEffect) to manage media streams, peer connections, and UI state efficiently.Media Handling: Gained deeper insights into how browsers manage media devices like microphones and cameras.
Next Steps
Here are some potential future enhancements for the app:
Add Room Logic: Implement room-based logic where users can join specific rooms for video conferencing.
Use SFU (Mediasoup): Shift from P2P to an SFU (Selective Forwarding Unit) architecture using something like Mediasoup for better scalability.
Conclusion
WebRTC and PeerJS provide a powerful combination for building real-time communication apps. By leveraging these technologies, we can create fully functional video conferencing solutions without relying on third-party services.
Check out the GitHub repo for this project:
🔗 [https://github.com/swamibuddhachaitanya/webrtc-peerjs-video-conferencing.git]
Subscribe to my newsletter
Read articles from Swami Buddha Chaitanya directly inside your inbox. Subscribe to the newsletter, and don't miss out.
Written by