Automate Disabling/Enabling New Relic Alerts with a Jenkins Job
 GANESH KOPPULA
In today's dynamic software environments, monitoring and alerting are crucial to maintaining the health and performance of our applications. New Relic is a popular monitoring solution that provides in-depth insights and alerts to help teams quickly identify and resolve issues.
However, there may be times when you need to temporarily disable certain New Relic alerts, such as during planned maintenance or development activities. Rather than manually disabling alerts through the New Relic UI, you can automate this process using a Jenkins job. This not only saves time, but also ensures the alerts are disabled consistently and accurately.
In this blog post, I'll walk you through the steps to create a Jenkins job that disables a specific New Relic alert.
Prerequisites
New Relic Account: You'll need a New Relic account with the necessary permissions to manage alerts.
New Relic Infra Agent: You should have the New Relic Infra Agent installed and configured to monitor your systems.
Jenkins Setup: You'll need a Jenkins server set up and accessible from the environment where you want to run the alert disabling job.
Steps to Disable New Relic Alerts using Jenkins
Create a New Relic Alert Policy and Condition
Log in to your New Relic account and navigate to the Alerts section.
Create a new Alert Policy and define the alert condition you want to temporarily disable.
Take note of the Condition ID, as you'll need it in the Jenkins job.
Set up the Jenkins Job
Log in to your Jenkins server and create a new "Freestyle" project.
In the "Build" section, select "Execute Shell" and paste the following script:
    API_KEY="-------------------------------"
    CONDITION_ID=44704744
    QUERY='{
      "nrql_condition": {
        "name": "Disk Usage Alert",
        "enabled": false,
        "nrql": {
          "query": "SELECT latest(diskUsedPercent) AS Used % FROM StorageSample WHERE entityGuid = ''NDCxNzAxOHxJTkZSQXwQQx5MzIwWjg1NTkxNzIyNzMwNTI'' FACET device"
        },
        "terms": [
          {
            "duration": "5",
            "operator": "above",
            "priority": "warning",
            "threshold": "40",
            "time_function": "all"
          },
          {
            "duration": "5",
            "operator": "above",
            "priority": "critical",
            "threshold": "80",
            "time_function": "all"
          }
        ]
      }
    }'

    curl -X PUT "https://api.newrelic.com/v2/alerts_nrql_conditions/${CONDITION_ID}.json" \
      -H "X-Api-Key:${API_KEY}" \
      -H "Content-Type: application/json" \
      -d "${QUERY}"
- Replace the
API_KEYandCONDITION_IDvariables with the appropriate values for your New Relic account and alert condition.
Run the Jenkins Job
Save the Jenkins job and click "Build Now" to execute the script and disable the specified New Relic alert.
You can monitor the job's progress and check the build logs for any errors or issues.
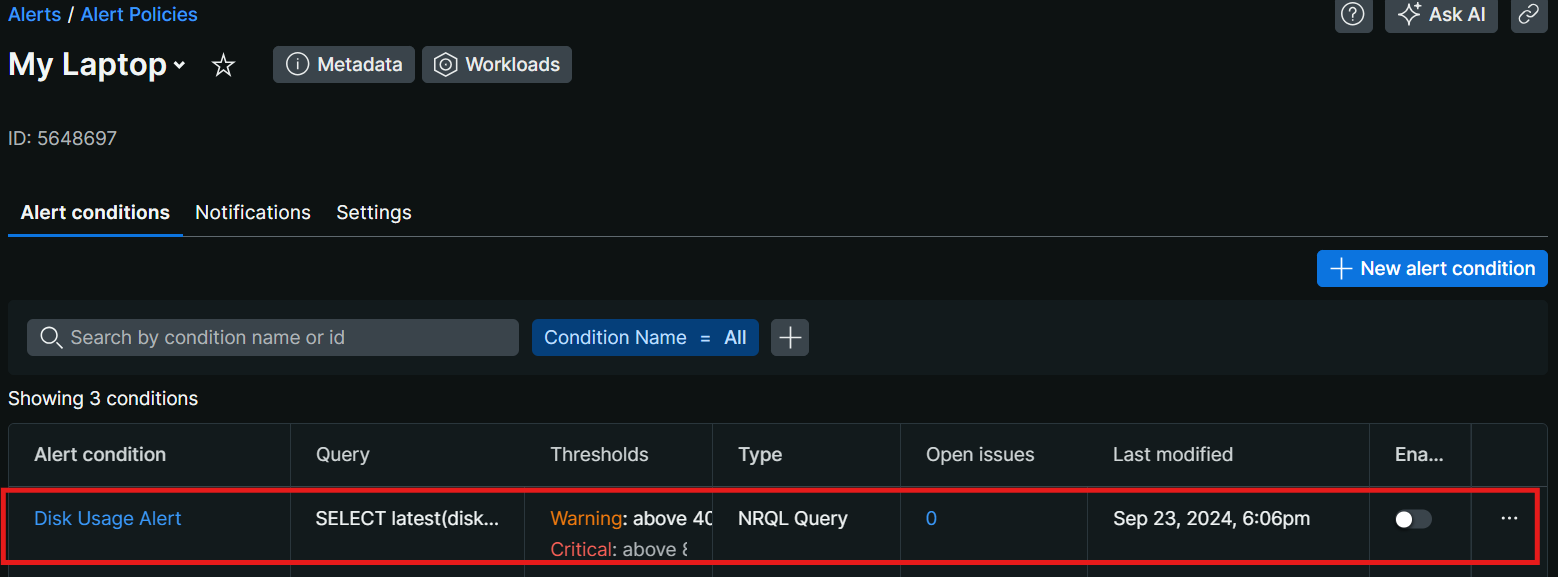
Verify the Alert Disabling
Log in to your New Relic account and navigate to the Alerts section.
Confirm that the alert condition you specified in the Jenkins job has been successfully disabled.

By automating the process of disabling New Relic alerts using a Jenkins job, you can ensure that this task is performed consistently and efficiently, without the need for manual intervention. This can be especially useful during times of planned maintenance or development activities, where you need to temporarily suppress certain alerts to avoid unnecessary interruptions or false alarms.
Subscribe to my newsletter
Read articles from GANESH KOPPULA directly inside your inbox. Subscribe to the newsletter, and don't miss out.
Written by
