Let's Dockerize a Application
 Vijay Patil
Context
In previous blog we looked at Docker fundamentals , Docker Architecture , Docker Work flow etc. You can find the blog here .
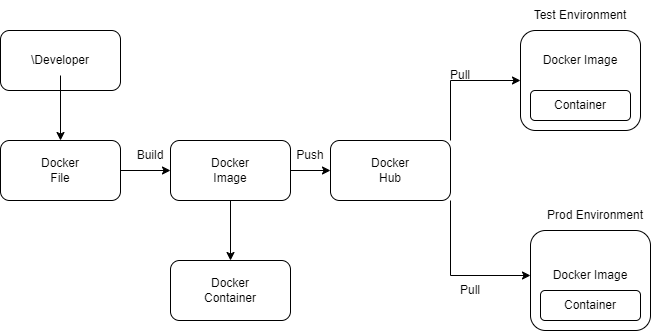
In this blog we will go through some basic docker command and Dockerize a application. We have basic Docker Work Flow as seen below :

- We need to have a docker file with set of instruction having OS details to be used for image , some tasks to build the image etc.
Assuming we have docker installed on our machine , if not due to some machine constraint , you can always use docker play , an interactive environment to perform docker command Link
Let’s Dockerize a application
Create a Directory in any location that you like and change directory into the folder. To create a folder/directory we use “mkdir” command and to get inside the folder/directory we use “cd” command
 mkdir <folder_name>
 cd <folder_name>
Clone this to-do list project Link . Now cd into the project
 git clone https://github.com/docker/getting-started-app.git
 cd getting-started-app
Let’s make a Dockerfile , as we know it has number of instructions required for project to run in isolated container. “touch“ command to make a file and if we do “ls“ we can see list of files and folders as seen in image below
 touch Dockerfile
 ls

Let’s insert few instructions in our Docker File , type command “vim Dockerfile“ to edit the file
 ~vim Dockerfile
 we will enter in file enter below instructions:
FROM node:18-alpine WORKDIR /app COPY . . RUN yarn install --production CMD ["node", "src/index.js"] EXPOSE 3000Here instruction start with a base image,
FROM <base_image> : This is used to specify our base image onto which our application will run . In above example we have used alpine that is linux based OS with node installed in it
WORKDIR <path> : This specifies the directory in the image where our files will be copied and commands will be ran . In above example , we have mentioned our Working Directory at the root level inside /app directory.
COPY <host_path> <image_path> : We will be having some files in our local path that needs to be copied in our image , this is where COPY command is used . In above examples as we are in the directory from where the files needs to be copied that is current directory, we used <host_path> as “.“ and we are already in the “/app” folder we used <image_path> as “.“ which
specifies image’s current directory.
RUN <command> : This instruction tells the builder to run the specified command. In above example , we ran the yarn package manager command to install its required dependencies.
CMD ["<command>", "<arg1>"] : This instruction is executed when we run the actual image. In above example we want to run a node js based application , so we give the node as command and the file location which needs to be ran as argument.
EXPOSE <port_expose> : We need to expose this image on a port. This is used to specify which ports within a Docker container should be accessible to other containers or the host system. In above example we have exposed the port
let’s save the file and exit now press Esc key, type :wq! and hit Enter key.
Now lets build the image . Now what is build and -t flag. Well let’s have a look and docker --help , and docker build --help .
“build” command is to build the image , -t is to give a name , and used all files of current directory specified by “.“ .
After running the command run command “docker images“ to see what images and build and pull by us. You will be seeing your image based on what name of image you passed.
docker build -t <name_of_iamge> .
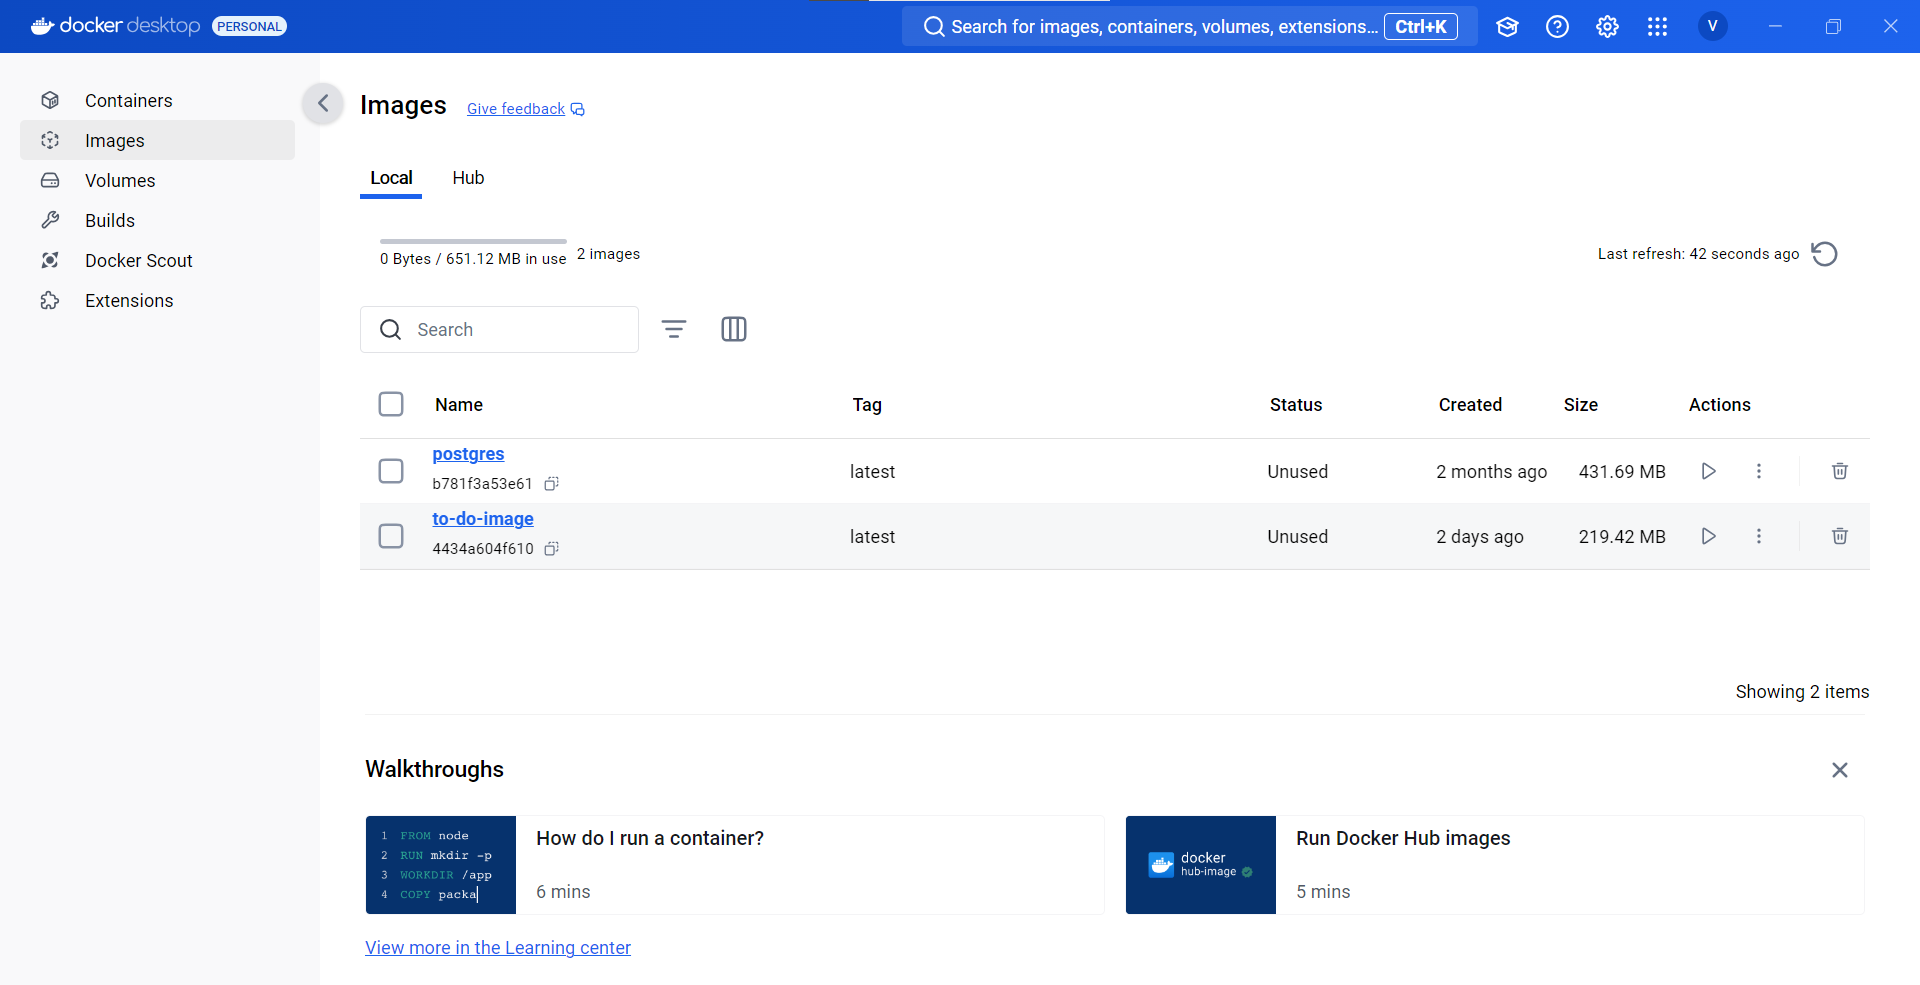
We can see the same in Docker Desktop on our local machine

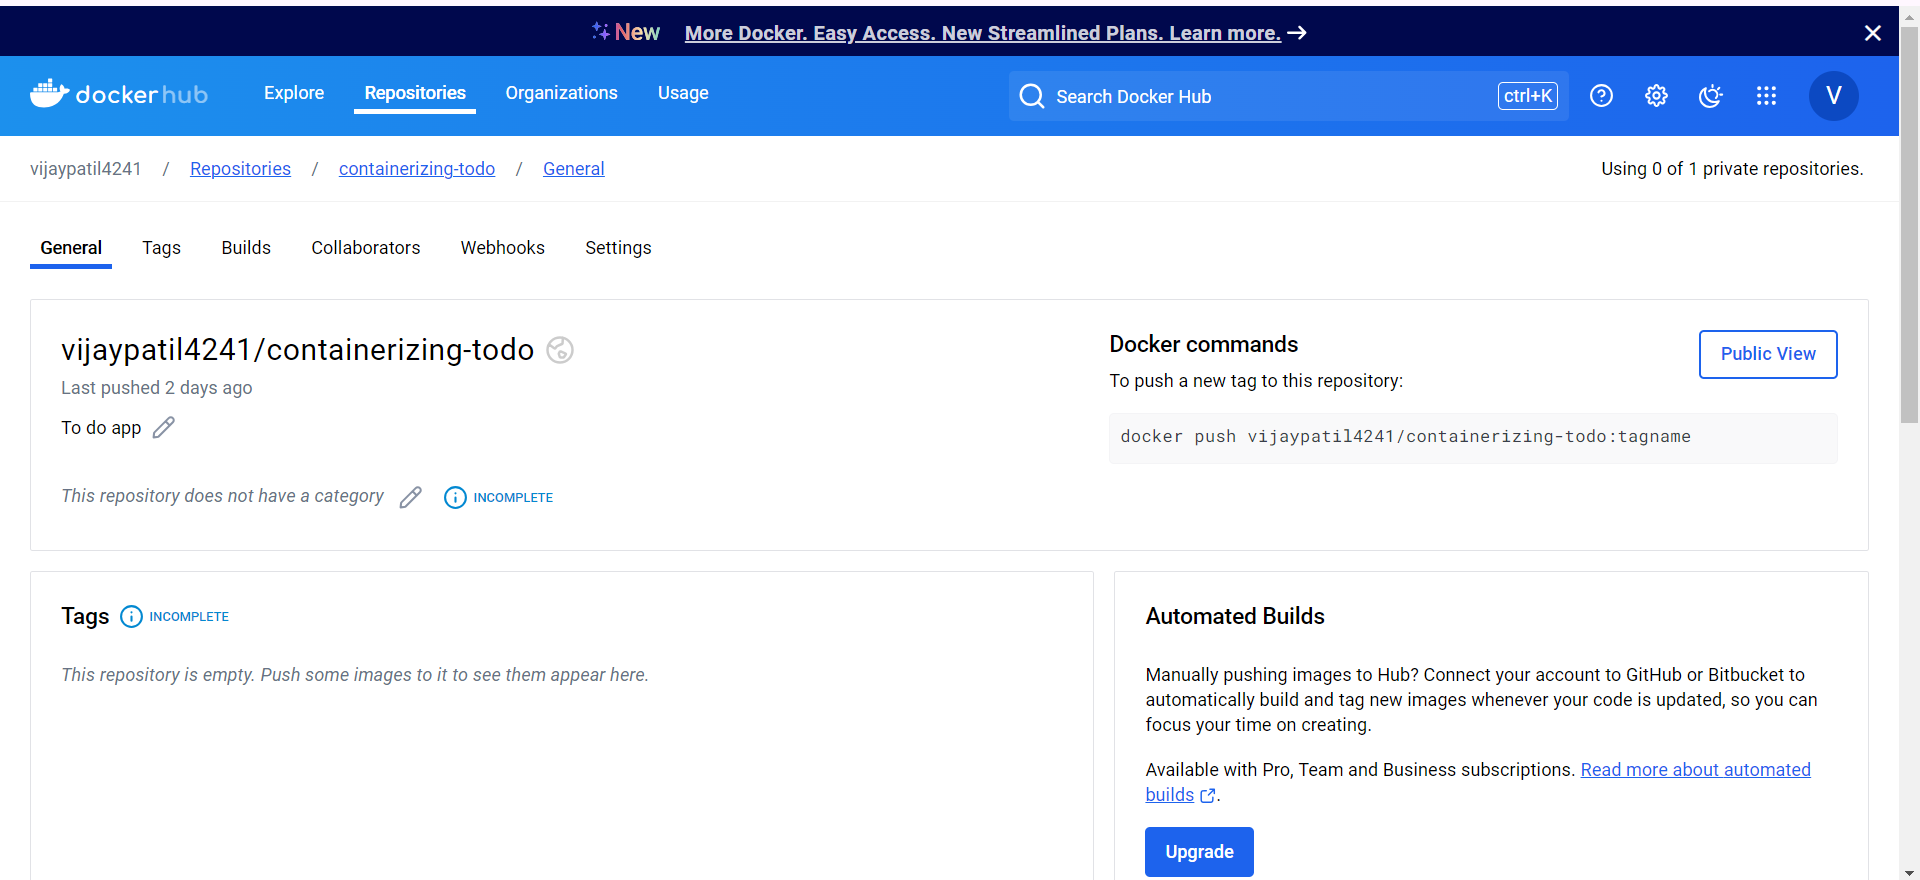
Now to push this image to Docker Hub(unaware of this term visit my previous blog . Navigate to Docker Hub repository section . Create a repository , name the repository and click on create. Repository gets created as below

Now before pushing the image to the repository we need to tag the image.
docker tag will create a tag TARGET_IMAGE that refers to SOURCE_IMAGE . Please see the screen of how I have implemented it .
If you run the docker images command then it will show you new image created the new target image
docker tag <source_image>[:TAG] <target_image>[:TAG]
Now lets push the latest image build, we will do this with docker push command . You may get a issue when pushing that request access to resource denied , you can just run the command “docker login” , enter the username and password .
Below is just the placeholders in command , you can just copy paste the target image created with : and tag.
docker push YOUR_DOCKER_USERNAME/<repository_name>:<tag>

- Now you can see in docker hub repositories section that a new image is pushed in tags section.

This image can be pulled to different environments using docker pull command. You can find the docker pull command in tags section . This will download the image on your local machine.
docker pull vijaypatil4241/containerizing-todo:latest
Let’s run this image downloaded using docker run command -d flag is to run the image in detached mode(background) and p is to mention port , to publish container’s port to host. Now, any traffic sent to port 3000 on your host machine will be forwarded to port 3000 within the container . Run the command “docker ps” to see active running containers
docker run -dp <host_port>:<container_port> <image_name>:<tag>

docker ps

- Now let run localhost:3000 on browser. Application is up! Congratulations🐱🏍

To stop the container , docker ps will give us id with other details of running containers , copy the id and run below command
docker stop <container_id>To go inside the container , we can use docker exec to execute a command in a running container . -it is to open container in interactive environment and then give container_name/container_id .
docker exec -it <container_name/container_id> sh
Here is my GitHub repo with source code and Docker File : Link
Docker making our lives easier!
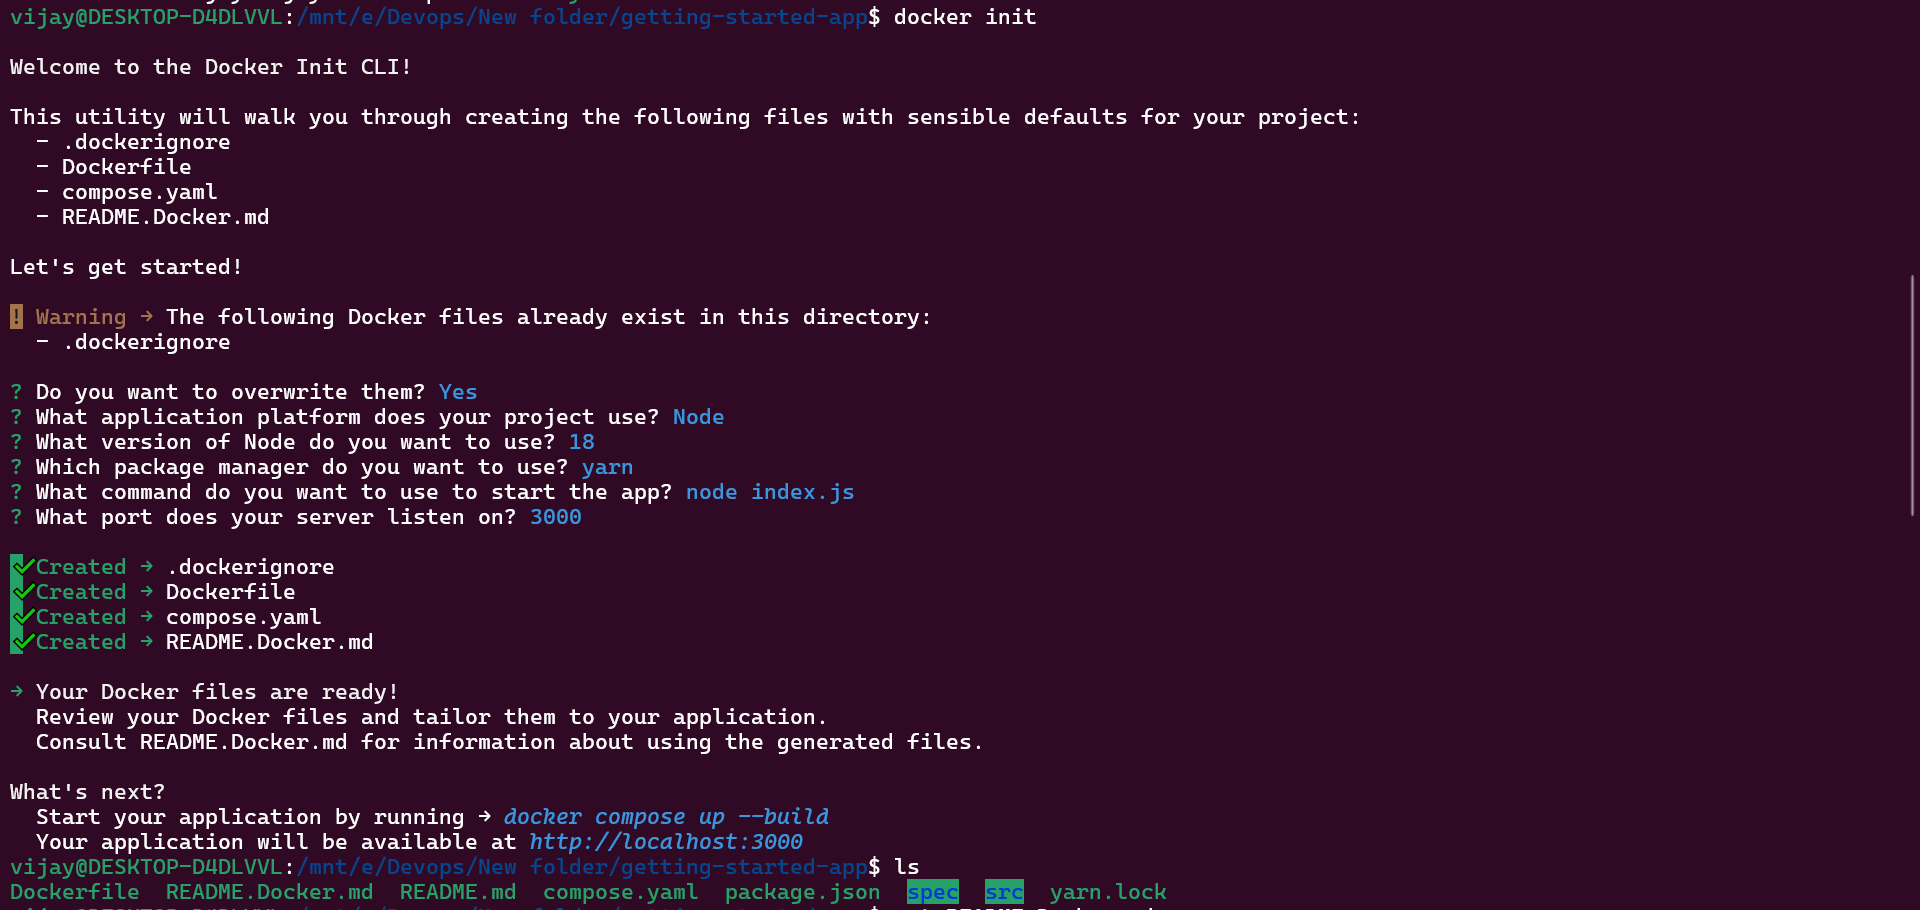
Docker provide a command docker init , This command was introduced to simplify the process of creating the necessary configuration files for building Docker images in a project. It automatically generates a Dockerfile for your project, making it easier to get started with Docker.

Here we come to end of our blog , we have few more basic command to cover in next blog. I enjoyed it , I am sure you will also enjoy this !
Resources:
Subscribe to my newsletter
Read articles from Vijay Patil directly inside your inbox. Subscribe to the newsletter, and don't miss out.
Written by
