Jenkins CI/CD ( Declarative Pipeline ) with GitHub Integration ( Deploying Django Notes Application )
 Amitabh soni
Table of contents
- Project Overview
- Steps to Implement the Project
- 1. Create an AWS EC2 Instance
- 2. Update the EC2 Instance
- 3. Install Java
- 4. Install Jenkins
- 5. Configure Jenkins Access
- 6. Create a New Jenkins Pipeline Job
- 7. Create the Jenkinsfile on GitHub
- 8. Set Up Docker Hub
- 9. Set Up Jenkins Credentials for Docker Hub
- 10. Install Docker on EC2 Instance
- 11. Install Docker Compose
- 12. Set Up Webhooks for Automatic Deployment
- 13. Build the Project in Jenkins
- 14. Automatic Deployment
- Conclusion
- Output Images of Project ( Which I have done while practicing CI/CD for this Project which ensure that it works properly)
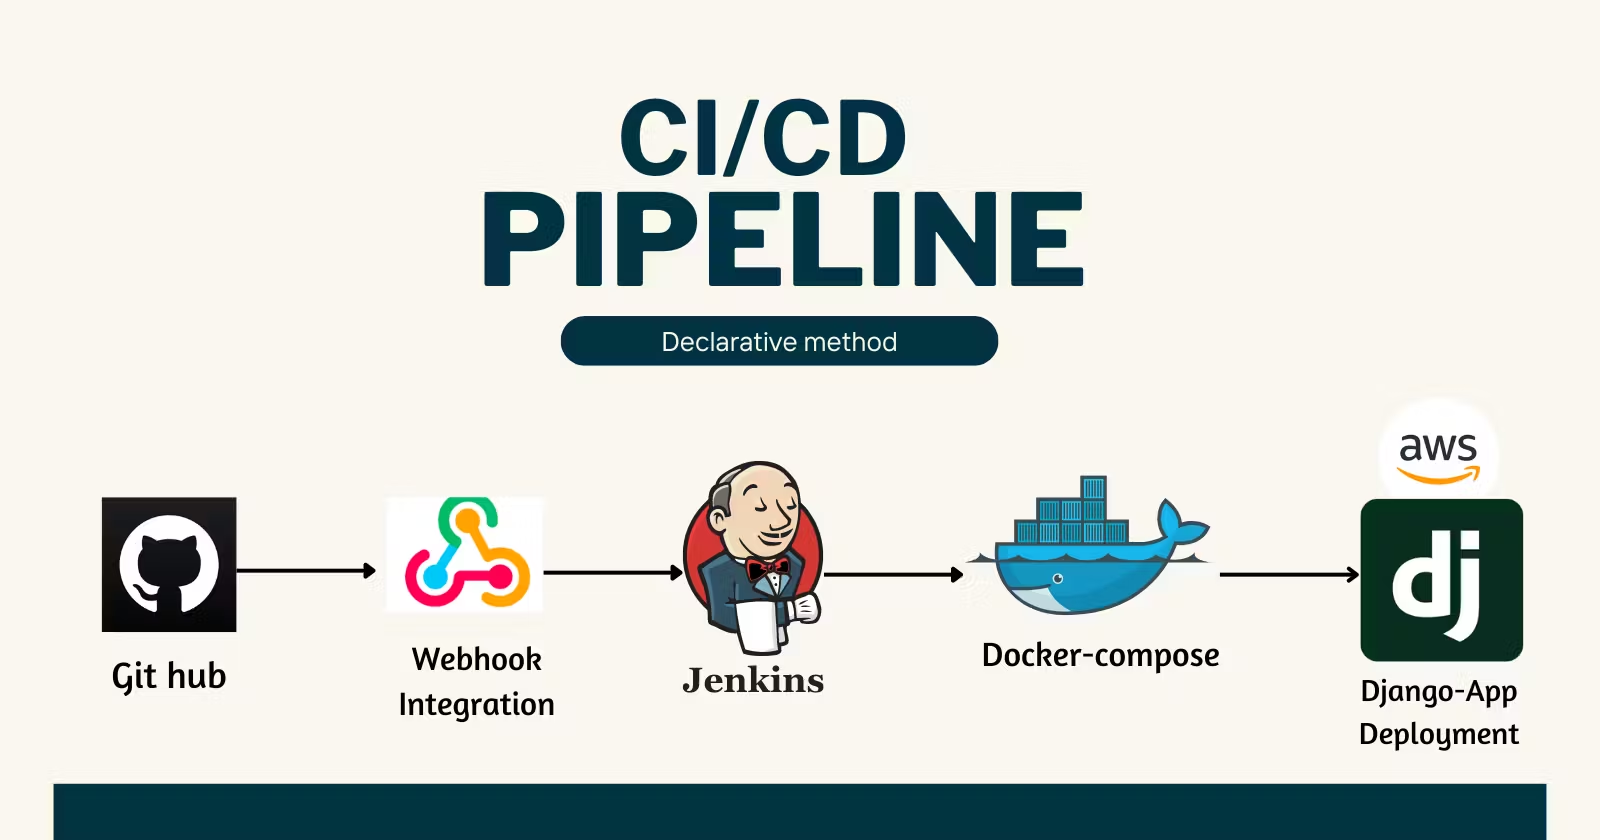
This comprehensive documentation outlines the process of setting up a CI/CD pipeline using Jenkins, GitHub, and Docker for deploying a Django Notes Application. The integration allows for seamless deployments whenever changes are made in the GitHub repository. This guide includes detailed steps and descriptions to ensure no important information is left out.
Project Overview
In this project, we will:
Create an EC2 instance on AWS to host Jenkins and Docker.
Set up Jenkins to automate the CI/CD process.
Use Docker to containerize the Django application.
Integrate GitHub for automatic deployments upon code changes.
Steps to Implement the Project
1. Create an AWS EC2 Instance
To host the Jenkins server, we first need to create an EC2 instance on AWS.
Login to AWS:
- Navigate to the AWS Console and log in with your credentials.
Launch an EC2 Instance:
Go to the EC2 Dashboard and click on Launch Instance.
Select the Ubuntu 24.04 LTS AMI from the list of available Amazon Machine Images (AMIs).
Choose the t2.micro instance type, which is eligible for the free tier.
Click Next: Configure Instance Details and proceed through the default settings.
In the Configure Security Group section, create a new security group allowing SSH (port 22) for connecting to the instance and HTTP (port 80) for web traffic.
Connect to EC2 Instance:
- After launching the instance, you can connect to it using SSH. Open your terminal and run the following command, replacing
<your-key>.pemwith your key file and<your-ec2-public-ip>with your instance's public IP address:
- After launching the instance, you can connect to it using SSH. Open your terminal and run the following command, replacing
ssh -i <your-key>.pem ubuntu@<your-ec2-public-ip>
2. Update the EC2 Instance
Before installing any packages, it is essential to ensure that your instance is up-to-date. This practice helps prevent issues related to outdated packages.
Run the following command:
sudo apt updateThis command updates the package lists for upgrades and new package installations.
3. Install Java
Since Jenkins is built using Java, you need to install a Java Runtime Environment (JRE) to ensure Jenkins runs correctly.
Install OpenJDK 17:
- Run the following command to install the latest version of OpenJDK:
sudo apt install openjdk-17-jre
Verify the Java Installation:
- To check whether Java was installed successfully, run:
java -version
This command displays the installed Java version, confirming the installation.
4. Install Jenkins
Jenkins is the core tool that will be used to create the CI/CD pipeline. Follow these steps to install it.
Install Dependencies:
- Run the following command to install necessary dependencies:
sudo apt-get install -y ca-certificates curl gnupg
Add the Jenkins Repository Key:
- This command adds the Jenkins key to your system:
curl -fsSL https://pkg.jenkins.io/debian/jenkins.io-2023.key | sudo tee /usr/share/keyrings/jenkins-keyring.asc > /dev/null
Add Jenkins to the APT Sources List:
- This command adds the Jenkins repository to your APT sources:
echo deb [signed-by=/usr/share/keyrings/jenkins-keyring.asc] https://pkg.jenkins.io/debian binary/ | sudo tee /etc/apt/sources.list.d/jenkins.list > /dev/null
Update APT Package List:
- Run the following command to update your package list:
sudo apt-get update
Install Jenkins:
- Install Jenkins using the following command:
sudo apt-get install jenkins
This command installs Jenkins and all required dependencies.
Enable and Start Jenkins:
- Enable Jenkins to start automatically on boot with:
sudo systemctl enable jenkins
- Start the Jenkins service with:
sudo systemctl start jenkins
Check Jenkins Status:
- To verify that Jenkins is running, execute:
sudo systemctl status jenkins
This command shows the current status of the Jenkins service.
5. Configure Jenkins Access
Jenkins operates on port 8080 by default. To access Jenkins, you must allow inbound traffic on this port in your EC2 instance’s security group.
Edit Security Group:
Go to the EC2 Dashboard, select Security Groups, and choose the security group associated with your EC2 instance.
Click on Edit Inbound Rules and add a rule for Custom TCP Rule with port 8080.
Access Jenkins:
- In your web browser, navigate to:
http://<your-ec2-public-ip>:8080
Replace <your-ec2-public-ip> with the actual public IP of your EC2 instance.
Retrieve the Admin Password:
- Jenkins will prompt you for an admin password. You can retrieve this password by running:
sudo cat /var/lib/jenkins/secrets/initialAdminPassword
Copy the displayed password and paste it into the Jenkins login page.
Complete the Initial Setup:
After logging in, you will be prompted to install suggested plugins. Click on the Install suggested plugins button to proceed.
Once the plugins are installed, create a new admin user and password to enhance security.
6. Create a New Jenkins Pipeline Job
To set up your CI/CD pipeline, you need to create a new Jenkins job.
Create a New Job:
From the Jenkins dashboard, click on New Item.
Enter a name for your job (e.g.,
Django Notes CI/CD), select Pipeline, and click OK.
Configure GitHub Integration:
In the General section, check the GitHub project option.
Provide the URL of your GitHub repository (e.g.,
https://github.com/your-username/repo-name).Optionally, set a display name to help identify the project.
7. Create the Jenkinsfile on GitHub
The Jenkinsfile defines the pipeline stages for Jenkins. This file must be created in your GitHub repository.
Create a
Jenkinsfile:- In your GitHub project repository, create a file named
Jenkinsfileand paste the following pipeline script:
- In your GitHub project repository, create a file named
    pipeline {

        agent any

        stages{
            stage("Clone The code..."){
                steps{
                    echo "Cloning the code"
                    git url: "<Your_github_project_repo_url>", branch: "main"
                }
            }
            stage("Build and Test..."){
                steps{
                    echo "Building the Docker image(Container)"
                    sh "docker build . -t cicd-note-app:latest"
                }
            }
            stage("Push build to Docker Hub"){
                steps{
                    echo "Pushing build to DockerHub..."
                    withCredentials([
                        usernamePassword(
                            credentialsId: "dockerHub",
                            passwordVariable: "dockerHubPass",
                            usernameVariable: "dockerHubUser"
                        )
                    ]){
                        sh "docker tag cicd-note-app ${env.dockerHubUser}/cicd-note-app:latest"
                        sh "docker login -u ${env.dockerHubUser} -p ${env.dockerHubPass}"
                        sh "docker push ${env.dockerHubUser}/cicd-note-app:latest"
                    }
                }
            }
            stage("Deploy the Container"){
                steps{
                    echo "Deploying docker Container..."
                    sh "docker compose down && docker compose up -d"

                }
            }
        }
    }
- This script includes multiple stages: cloning the code from GitHub, building the Docker image, pushing it to Docker Hub, and deploying the container.
Commit the Changes:
- Save and commit the
Jenkinsfileto your GitHub repository.
- Save and commit the
8. Set Up Docker Hub
Create a Docker Hub Account:
If you do not already have an account, create one at Docker Hub.
Note your Docker Hub username and password, as they will be used in Jenkins.
9. Set Up Jenkins Credentials for Docker Hub
To allow Jenkins to push images to Docker Hub, you need to add your Docker Hub credentials to Jenkins.
Go to Jenkins:
- Navigate to Manage Jenkins > Security > Credentials.
Add Credentials:
Click on System, then Global credentials (unrestricted), and click Add Credentials.
Set Kind to Username with password.
Enter your Docker Hub username and password.
Set an ID (e.g.,
dockerHub) to refer to these credentials in the Jenkinsfile and add a description for clarity.Click OK to save.
10. Install Docker on EC2 Instance
Jenkins will require Docker to build and run the application. Install Docker on your EC2 instance using the following commands.
Install Docker:
sudo apt install docker.ioAdd Jenkins User to Docker Group:
- Run the following command to allow the Jenkins user to execute Docker commands:
sudo usermod -aG docker jenkins
- Reboot the EC2 instance to apply changes:
sudo reboot
11. Install Docker Compose
Docker Compose is required to manage multi-container Docker applications. Follow these steps to install Docker Compose.
Update the Package List:
sudo apt-get updateInstall Required Dependencies:
sudo apt-get install apt-transport-https ca-certificates curl software-properties-commonAdd Docker's Official GPG Key:
curl -fsSL https://download.docker.com/linux/ubuntu/gpg | sudo gpg --dearmor -o /usr/share/keyrings/docker-archive-keyring.gpgSet Up the Docker Repository:
echo "deb [arch=$(dpkg --print-architecture) signed-by=/usr/share/keyrings/docker-archive-keyring.gpg] https://download.docker.com/linux/ubuntu $(lsb_release -cs) stable" | sudo tee /etc/apt/sources.list.d/docker.list > /dev/nullInstall Docker Compose:
 sudo apt-get update
 sudo apt-get install docker-ce docker-ce-cli containerd.io
Install Docker Compose Binary:
sudo curl -L "https://github.com/docker/compose/releases/download/v2.20.0/docker-compose-$(uname -s)-$(uname -m)" -o /usr/local/bin/docker-composeSet Permissions for Docker Compose:
sudo chmod +x /usr/local/bin/docker-composeVerify Installation:
- Check the installed versions of Docker and Docker Compose:
    docker --version
    docker-compose --version
Ensure Docker is Running:
- Verify the Docker service status:
sudo systemctl status docker
Start Docker Daemon:
- If Docker is not running, start it with:
sudo systemctl start docker
Enable Docker to Start on Boot:
sudo systemctl enable docker
12. Set Up Webhooks for Automatic Deployment
To trigger the Jenkins pipeline automatically on code changes, set up webhooks in your GitHub repository.
Go to GitHub Repository Settings:
- Navigate to your GitHub repository, and click on Settings.
Set Up Webhooks:
In the left sidebar, click on Webhooks and then Add webhook.
Enter the Payload URL:
http://<your-ec2-public-ip>:8080/github-webhook/
Set Content type to default one and enable Just the push event.
Click on Add webhook and wait for it to show a green tick, indicating successful setup.
13. Build the Project in Jenkins
Trigger the First Build:
Go back to the Jenkins dashboard and click on the Build Now button for your pipeline job.
This action will initiate the pipeline and deploy your Django application.
Access the Application:
To allow incoming traffic to your application, go to your EC2 security group and add an inbound rule for port 8000.
After the build completes successfully, visit your deployed Django application at:
http://<your-ec2-public-ip>:8000
14. Automatic Deployment
From this point on, any changes you make and push to the GitHub repository will automatically trigger Jenkins to run the pipeline, rebuild the Docker image, and redeploy the application. This completes the CI/CD setup for your Django Notes Application.
Conclusion
By following these steps, you have successfully set up a CI/CD pipeline to automate the deployment of your Django Notes Application using Jenkins, GitHub, and Docker. This setup not only simplifies the deployment process but also enhances productivity by ensuring that every code change is automatically tested and deployed.
Output Images of Project ( Which I have done while practicing CI/CD for this Project which ensure that it works properly)
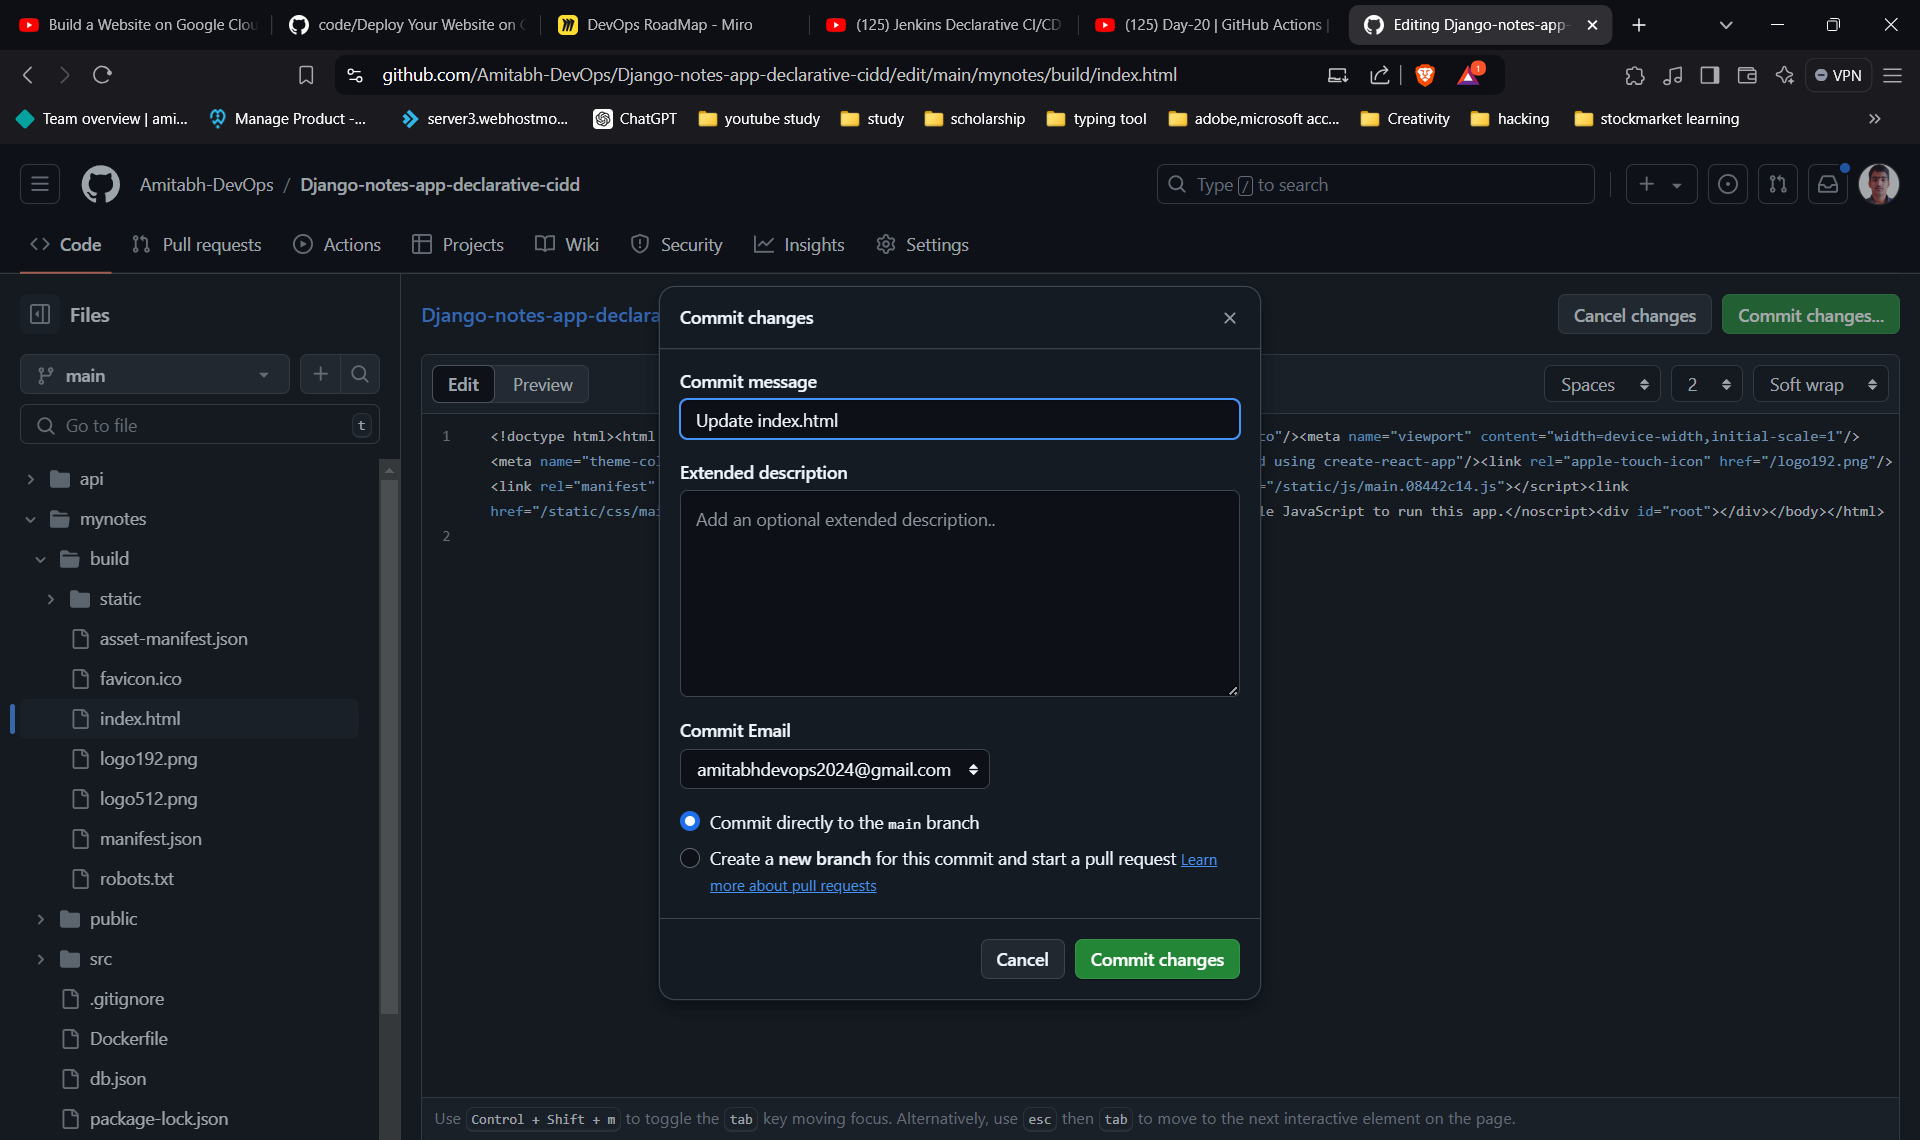
1 ) Commiting the changes on Github Repo :
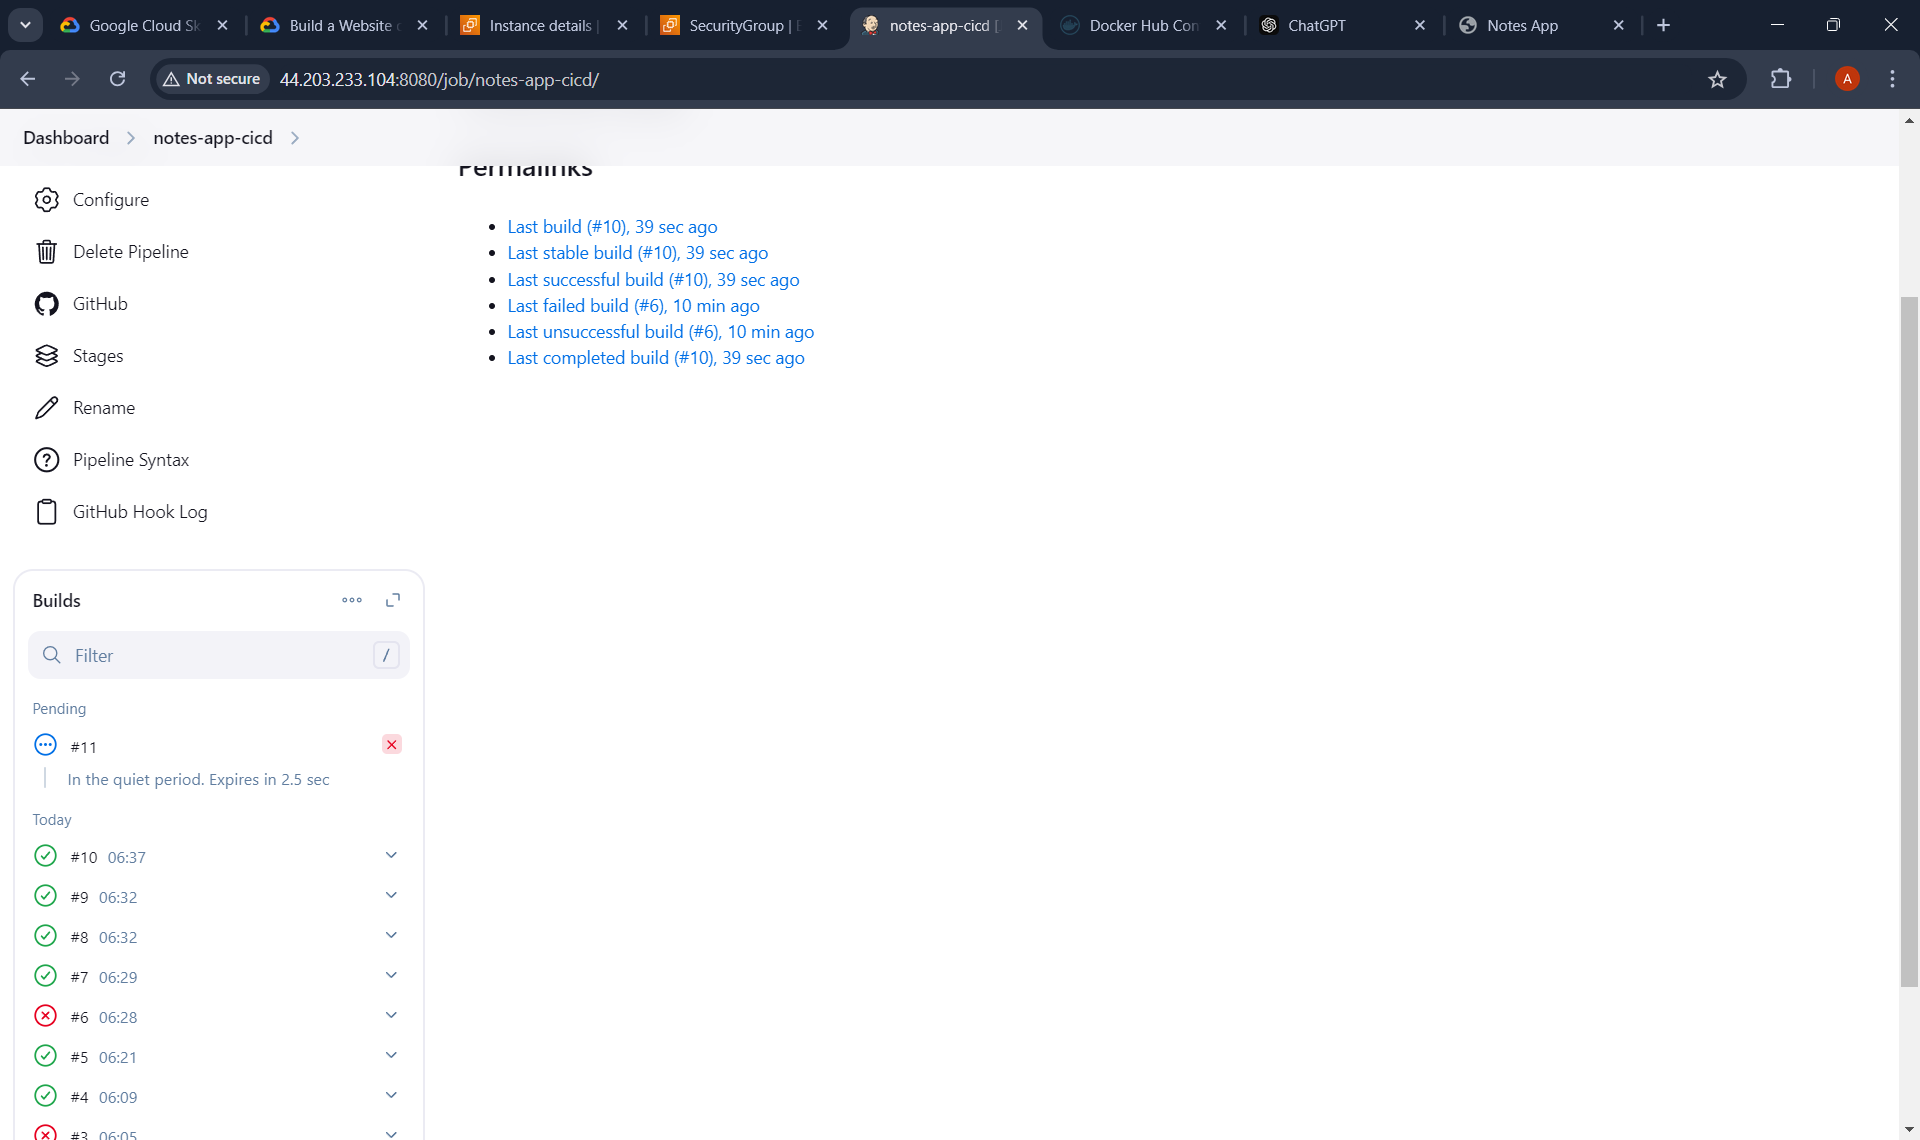
2 ) It successully Trigger the pipeline on Github push :
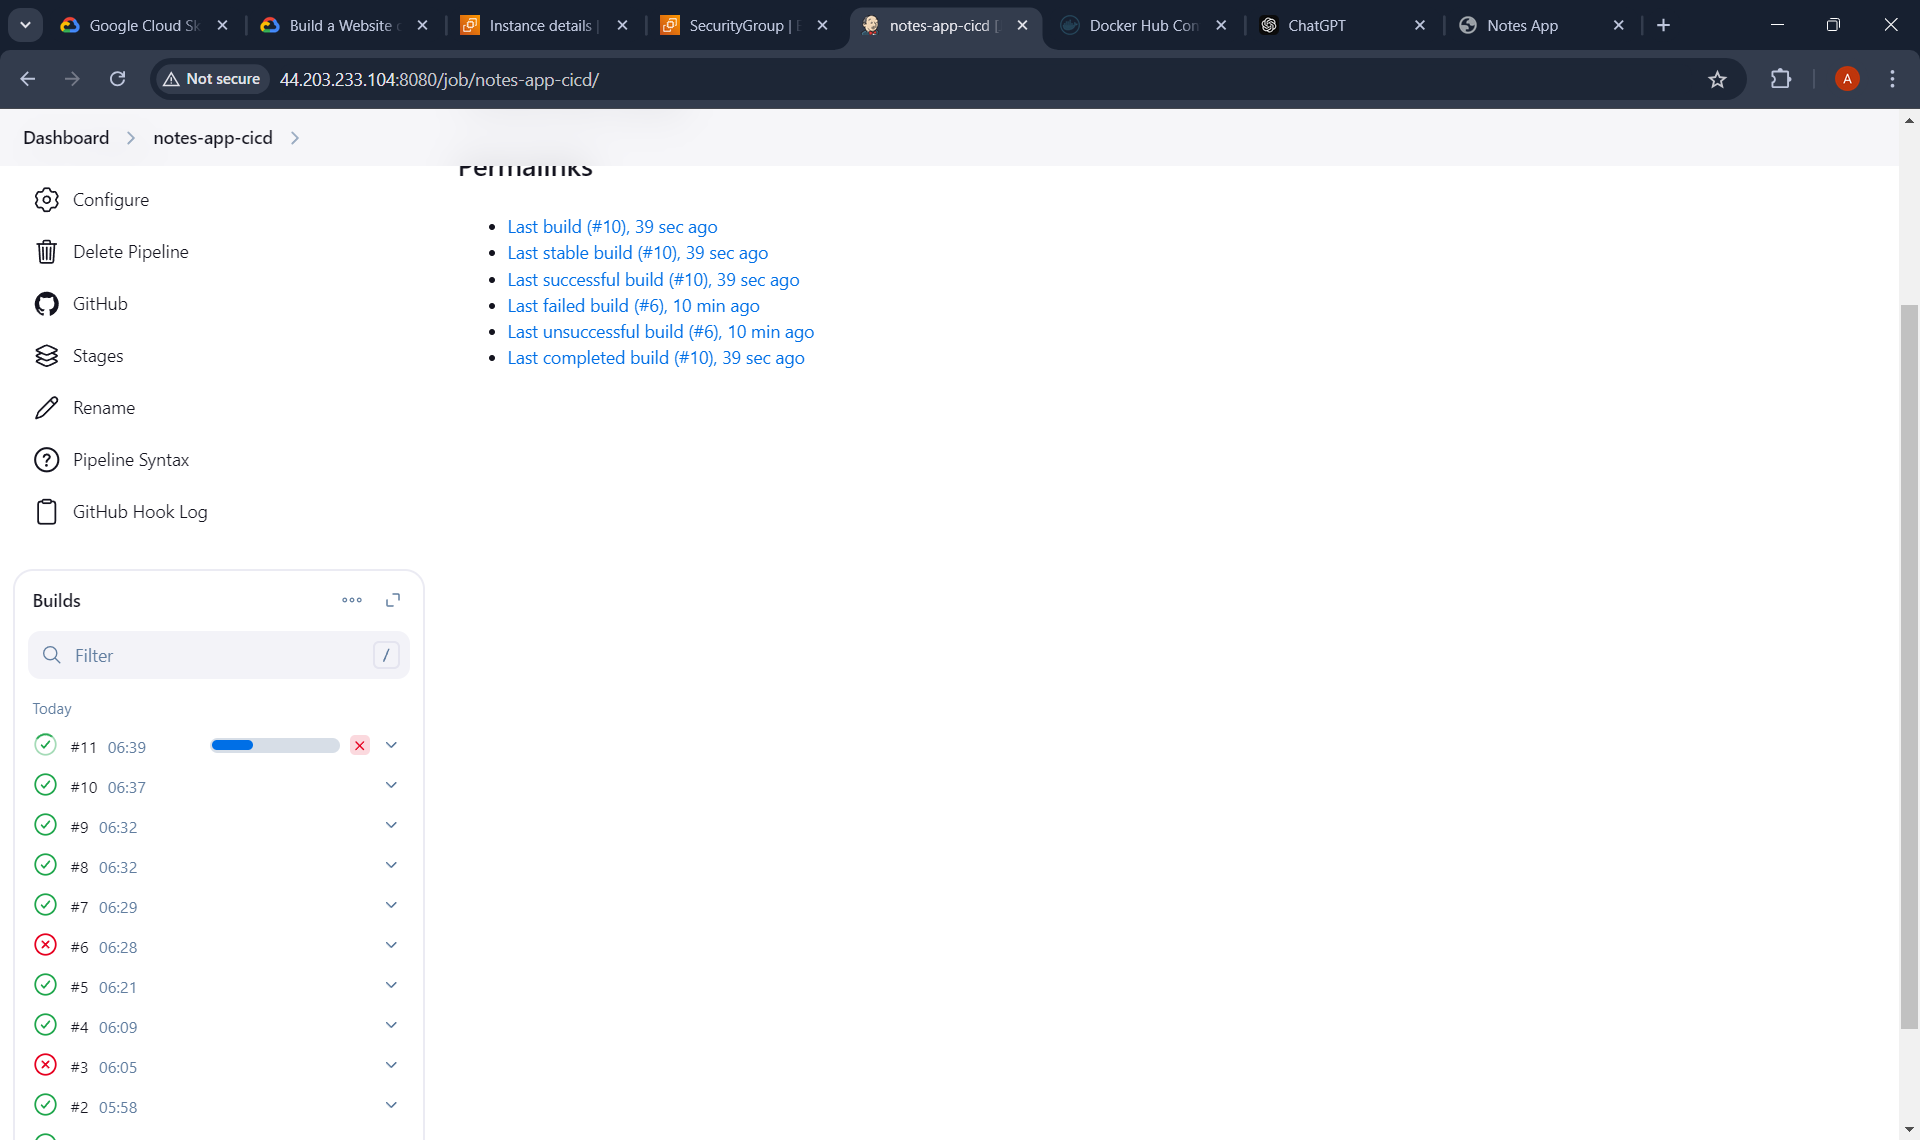
3 ) Running the Pipeline Script :
4 ) Successfully Run the Pipeline script :
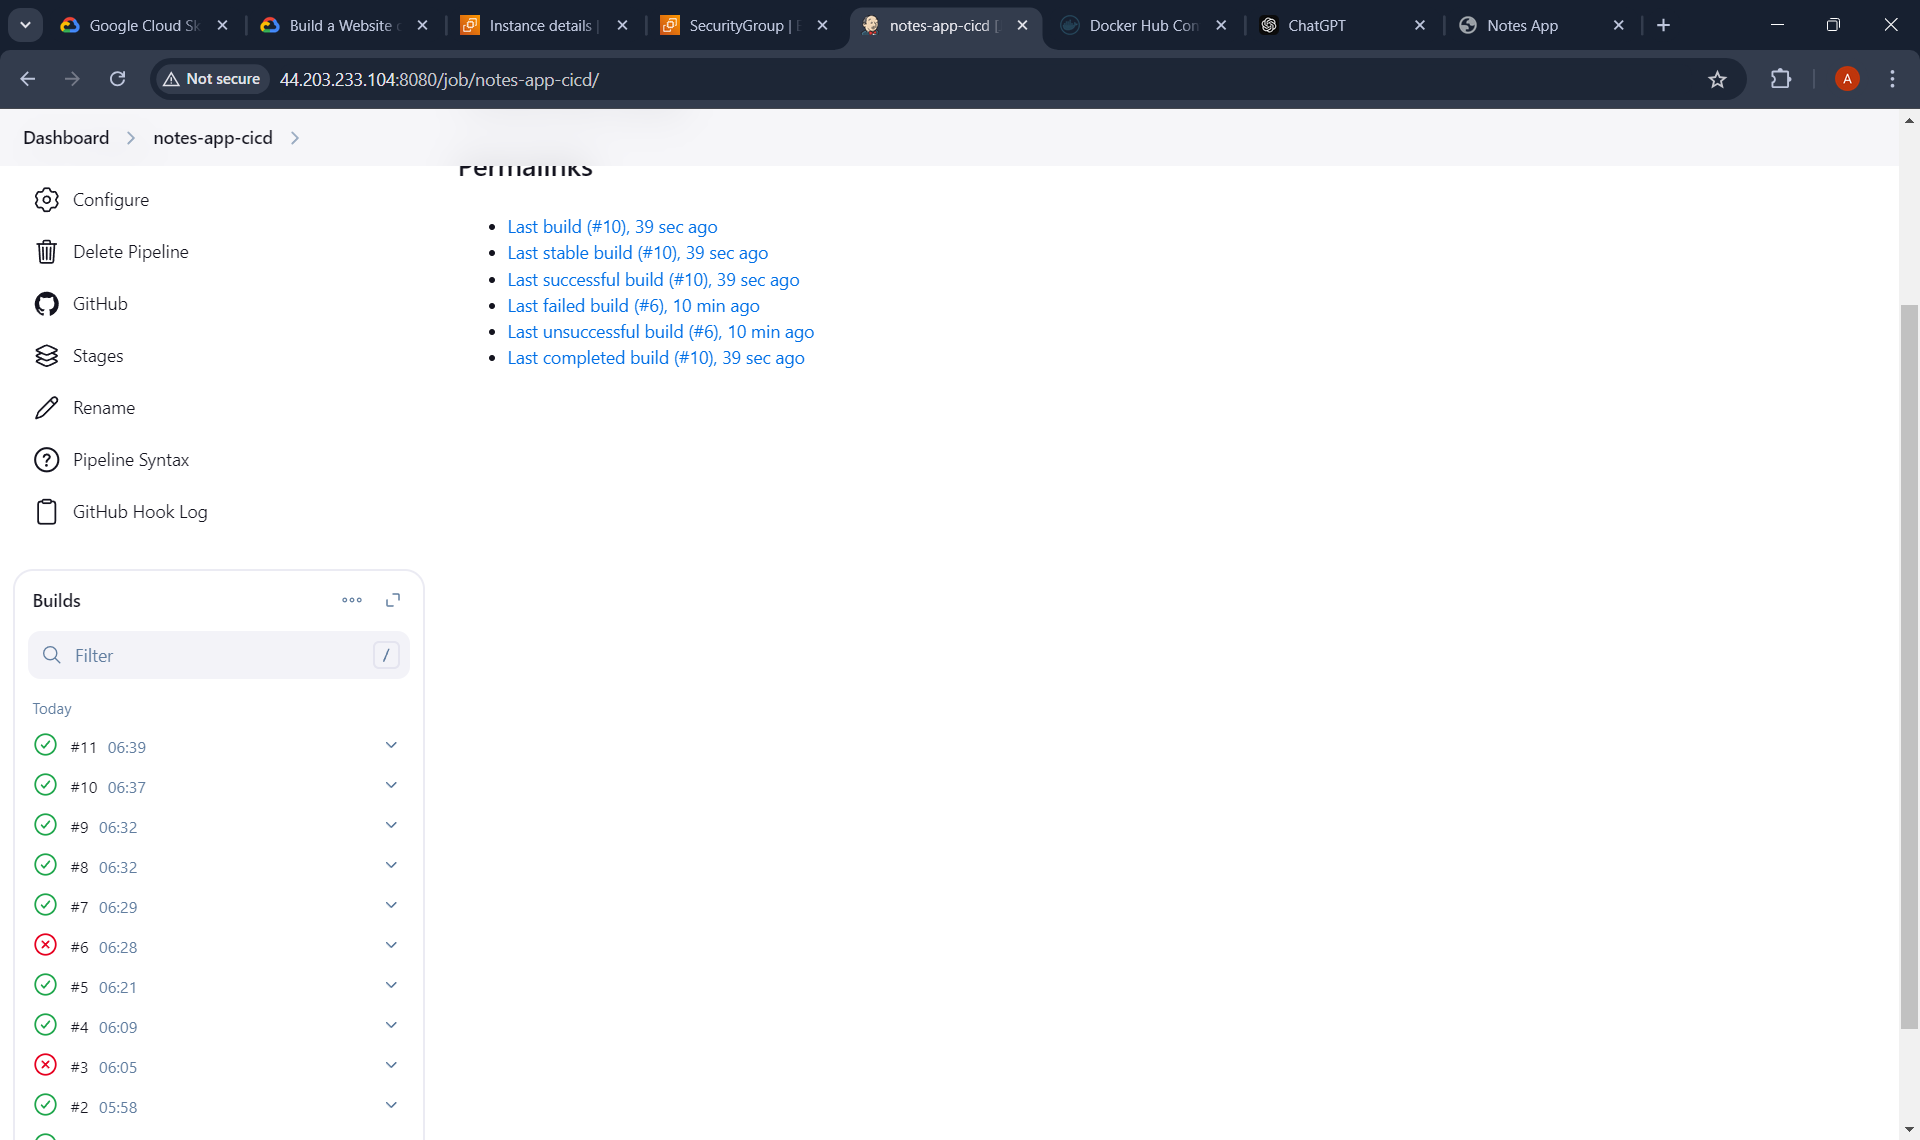
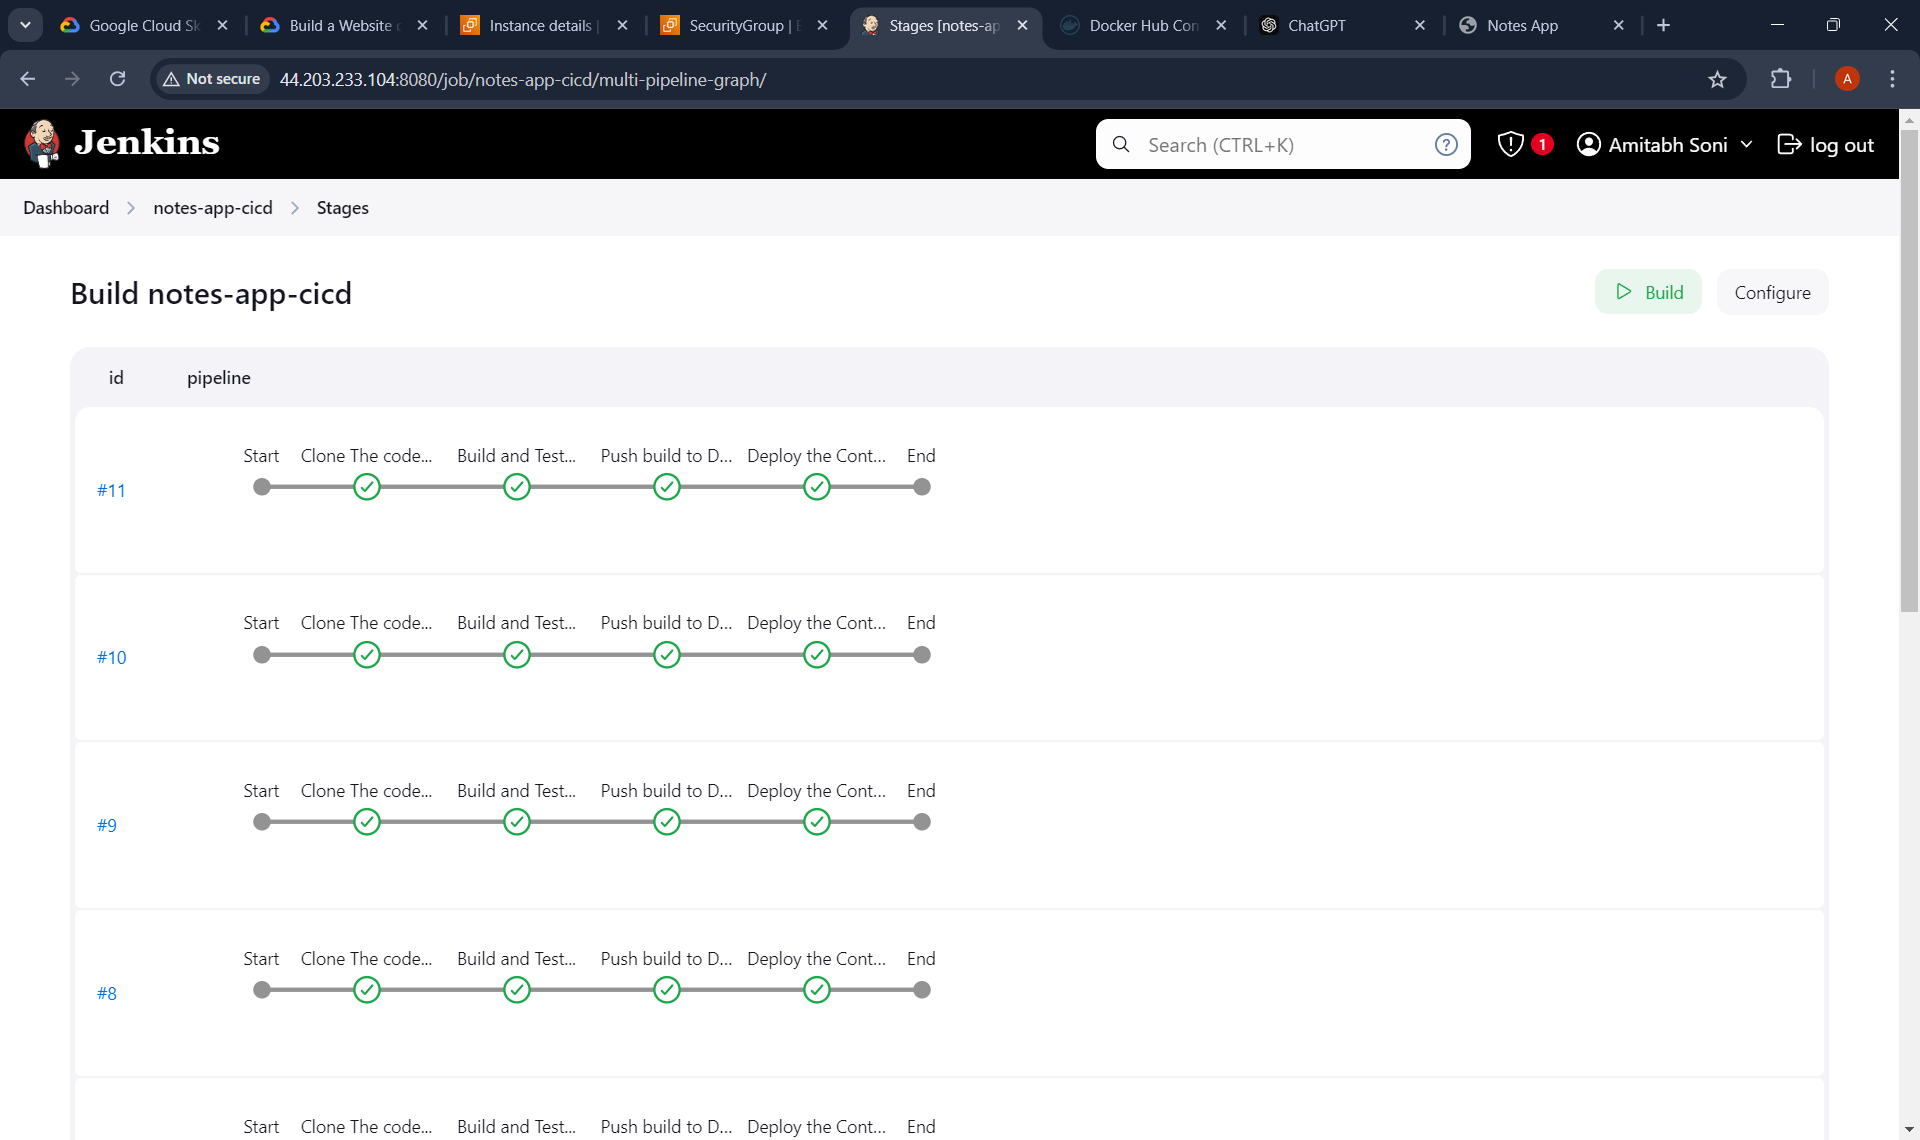
5 ) Viewing Stages of that Jenkins Job ( Which works properly ) :
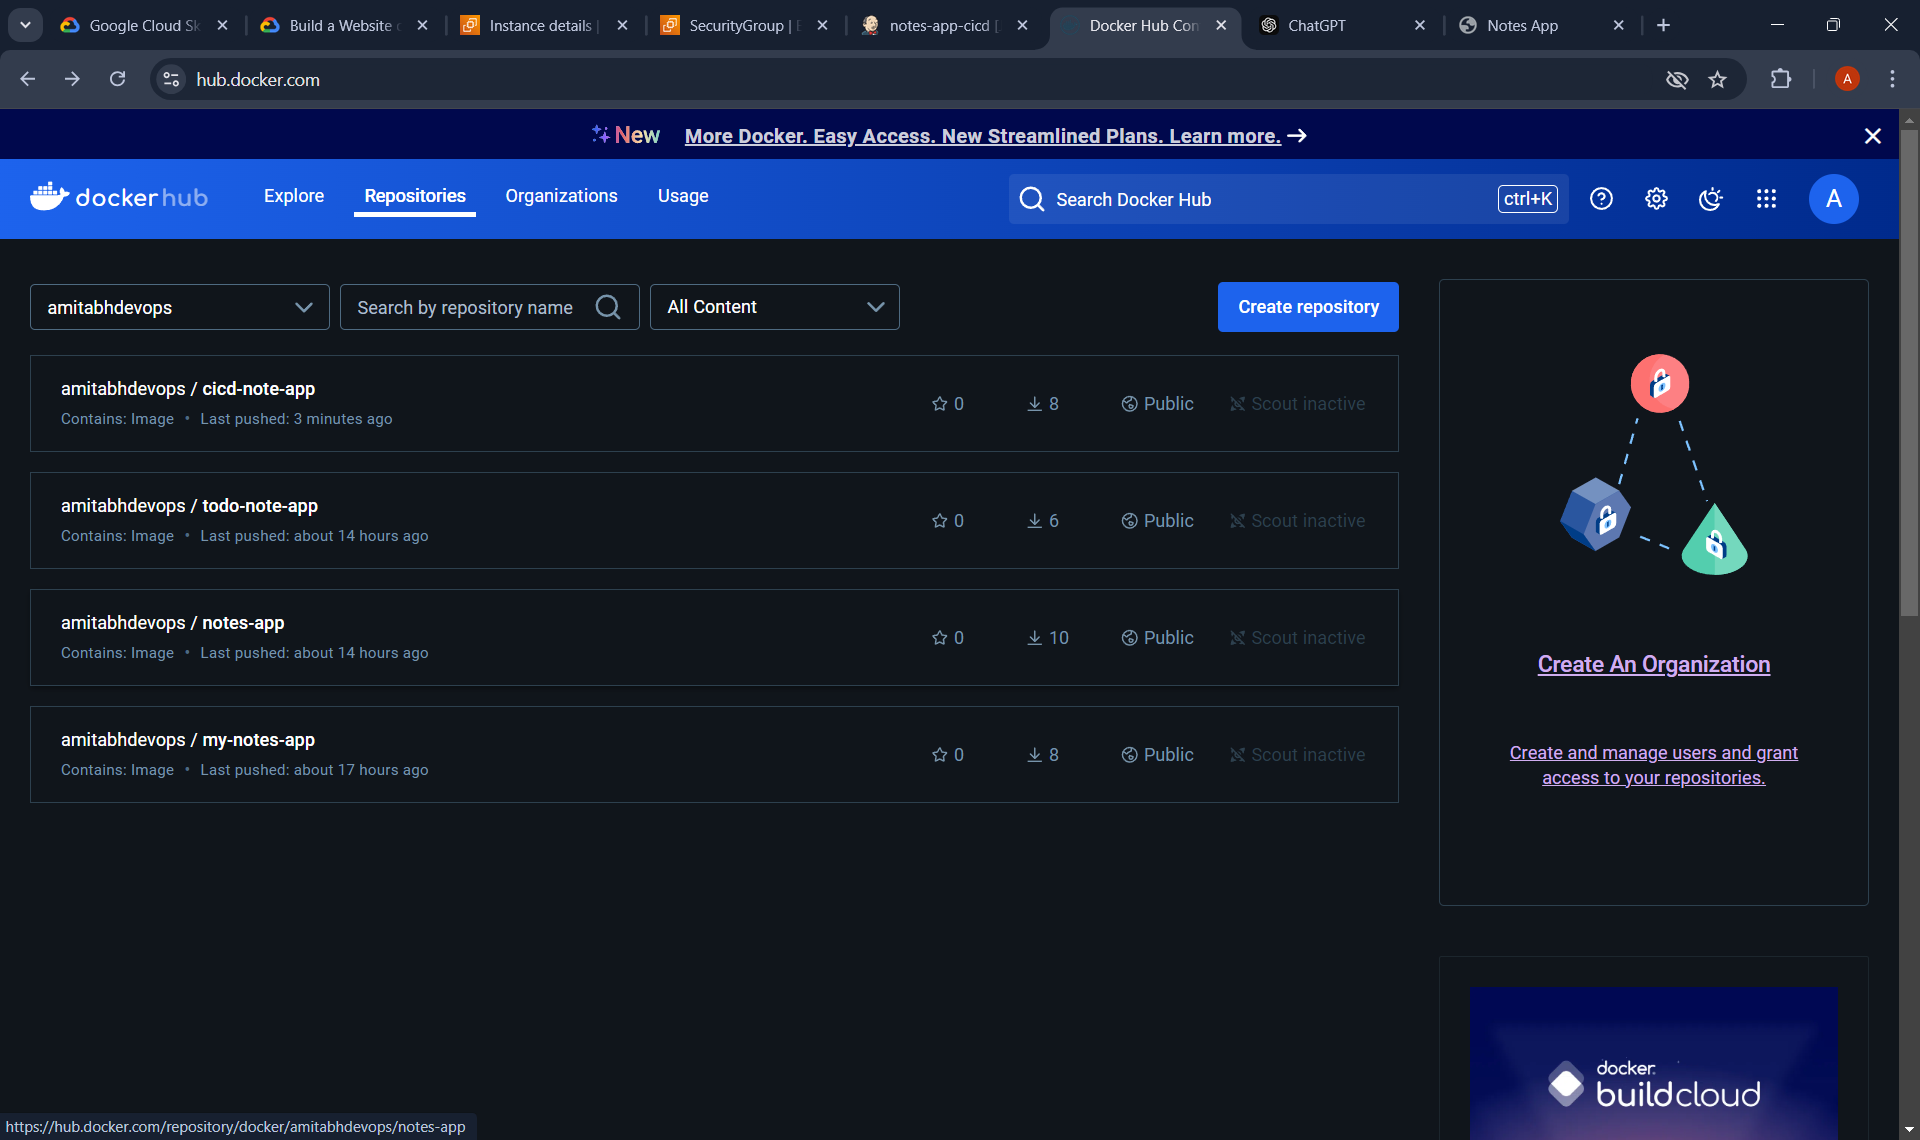
6 ) Docker hub Repositary successfully created using pipeline script :
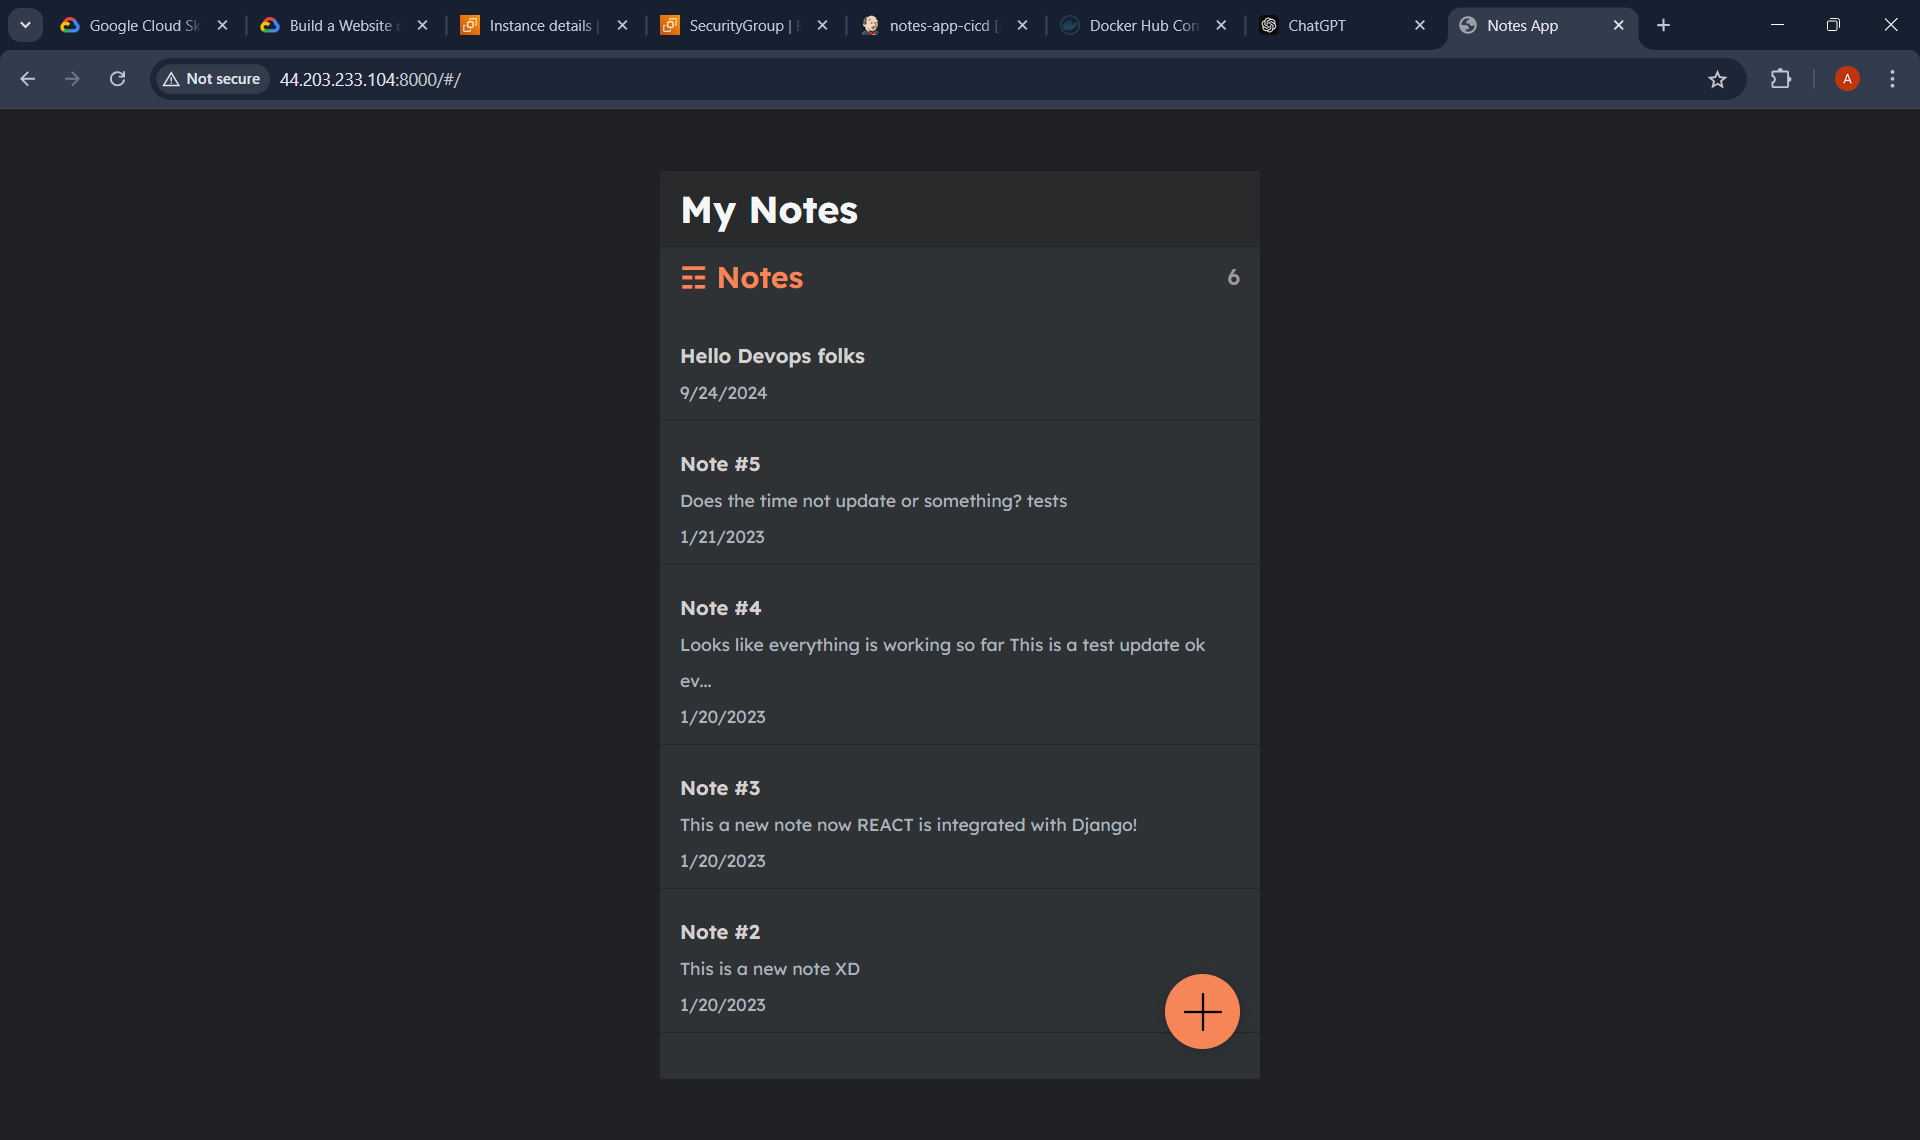
7 ) Output of The Project ( All features of it working properly ) :
Subscribe to my newsletter
Read articles from Amitabh soni directly inside your inbox. Subscribe to the newsletter, and don't miss out.
Written by

Amitabh soni
Amitabh soni
DevOps Enthusiast | Passionate Learner in Tech | BSc IT Student I’m a second-year BSc IT student with a deep love for technology and an ambitious goal: to become a DevOps expert. Currently diving into the world of automation, cloud services, and version control, I’m excited to learn and grow in this dynamic field. As I expand my knowledge, I’m eager to connect with like-minded professionals and explore opportunities to apply what I’m learning in real-world projects. Let’s connect and see how we can innovate together!