Creating & uploading Data to Azure Blob Storage (With a Dash of Humor)
 Azure Bytes
Welcome, fellow cloud enthusiasts! Today, we're diving into the world of Azure Blob Storage—the magical, ever-expanding cloud folder that makes storing your data as easy as ordering pizza online (but without the guilt of eating a whole pizza by yourself).
If you’ve ever found yourself wondering, “How do I get my precious data into this mystical blob thing?”—you’re in the right place. Grab your coffee (or tea, or whatever fuels your coding adventures), and let’s upload some data!
Why Use Azure Blob Storage?
Azure Blob Storage offers several benefits:
Scalability: Easily scale from gigabytes to petabytes of data.
Durability: Provides 99.999999999% durability for your data.
Accessibility: Access your data from anywhere via HTTP/HTTPS.
Step-by-Step Guide to Uploading Data via the Azure Portal
Let’s jump into the steps. Don’t worry—it’s easier than teaching your grandparents how to use emojis.
Step 1: Log in to the Azure Portal
First things first, we need to get into the Azure Portal. Think of it as the front door to your cloud kingdom:
Open your browser and mosey on over to Azure portal.
Sign in with your Azure credentials—no secret handshakes required.
Step 2: Navigate to Your Storage Account
Now that you’re in the portal, it’s time to find your storage account. This is where the magic happens:
In the Azure Portal, type “Storage accounts” into the search bar—like a wizard searching for a spell—and select it from the results.

Click on the create option on the options bar

Choose an exisiting resource group or create a new one
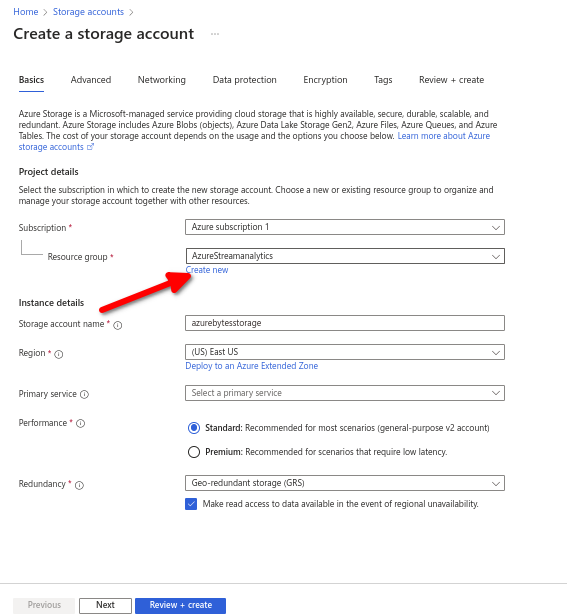
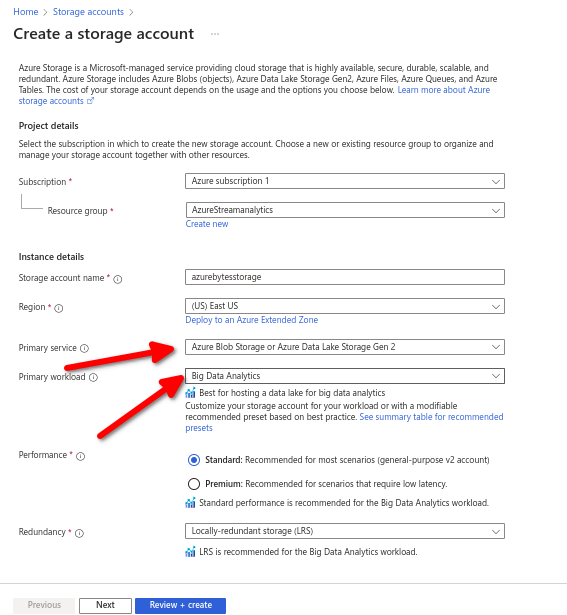
Give your blob storage a name choose the geographical location closest to you and select the Azure Blob Storage /Azure Data Lake Storage gen 2 as the primary service , standard for the performance and make the redundancy local.
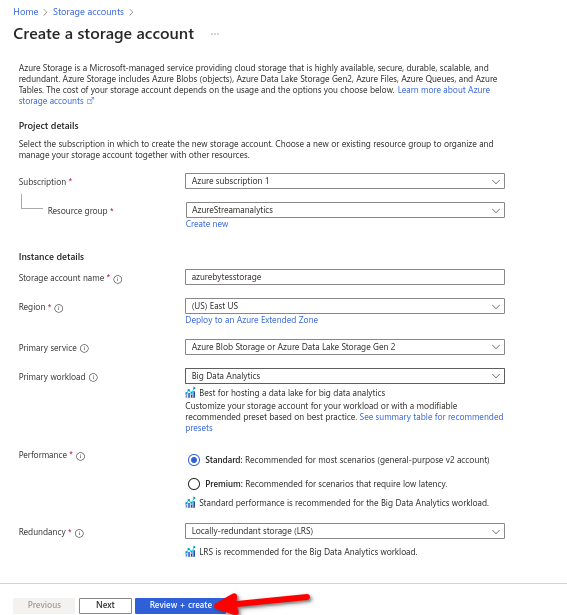
Click review and create.
Step 3: Navigate to Your Storage Account
Now that you’re in theAzure portal, it’s time to find your storage account. This is where the magic happens:
In the Azure Portal, type “Storage accounts” into the search bar—like a wizard searching for a spell—and select it from the results.
Pick your storage account from the list .
Step 3: Create a New Container
Containers in Azure Blob Storage are like the boxes you use to organize your garage—except these won’t get filled with old gym equipment and mystery cables:
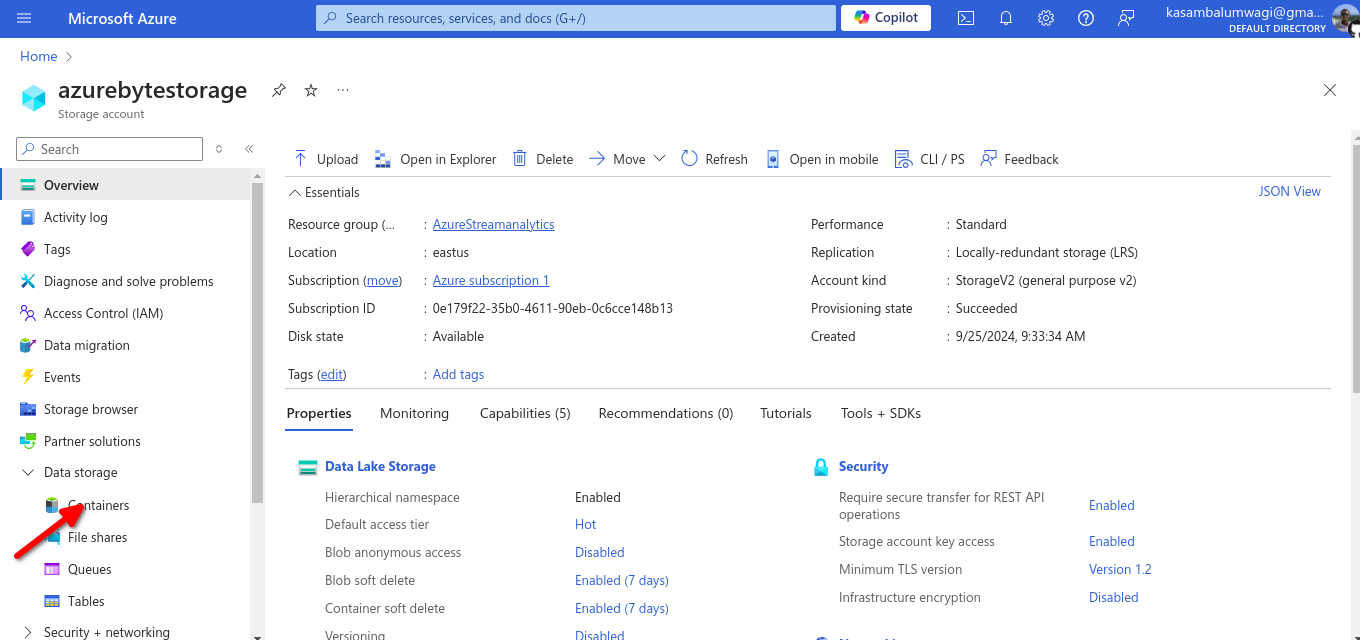
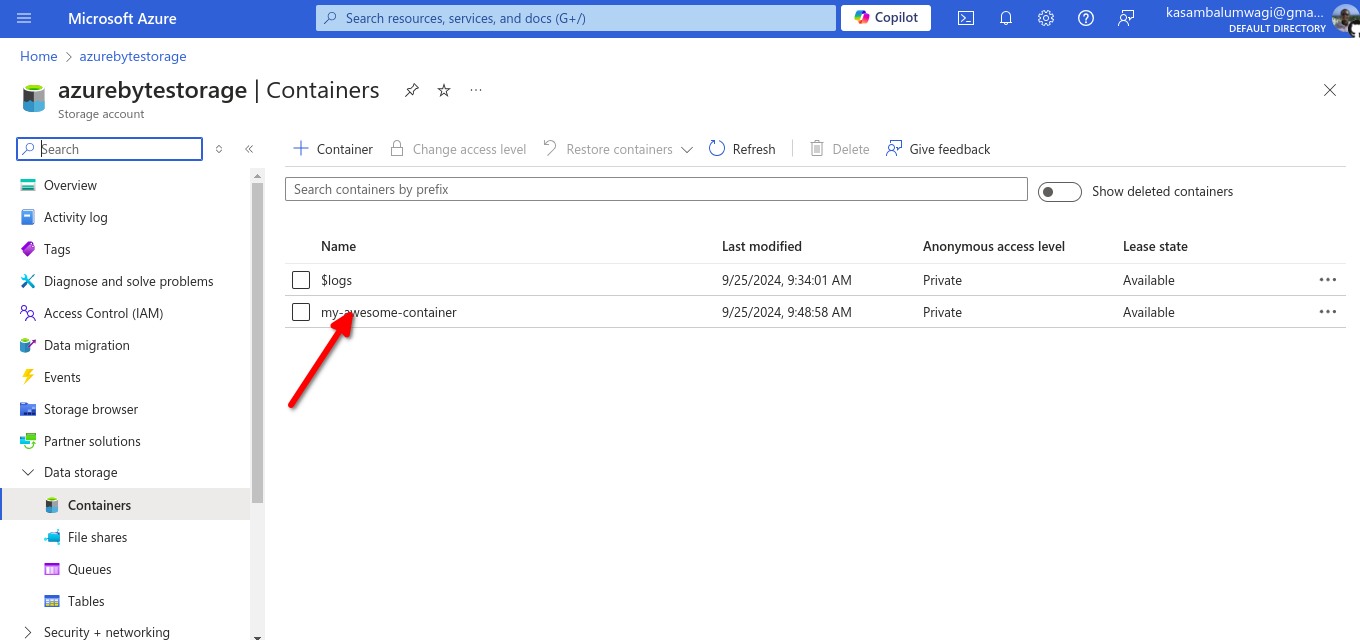
On your storage account’s overview page, find “Data storage” in the left-hand menu, and click on “Containers”.
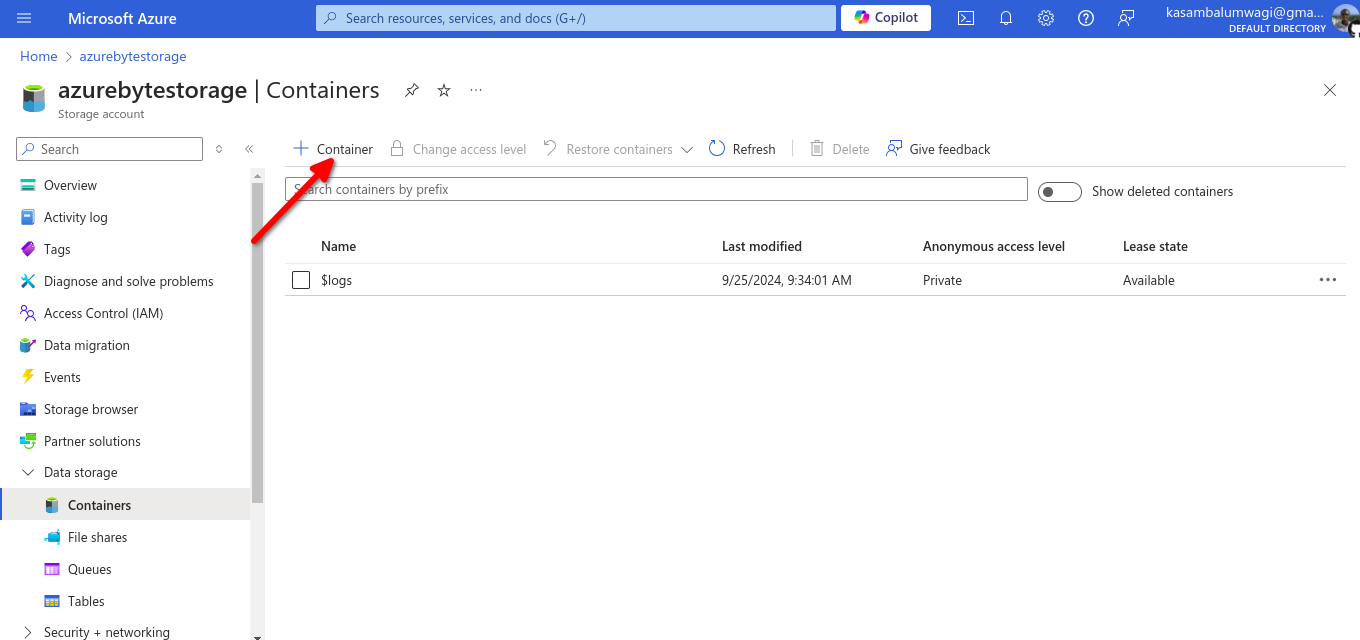
Click “+ Container” at the top of the page. It’s like adding a new shelf in that garage, but way more satisfying.
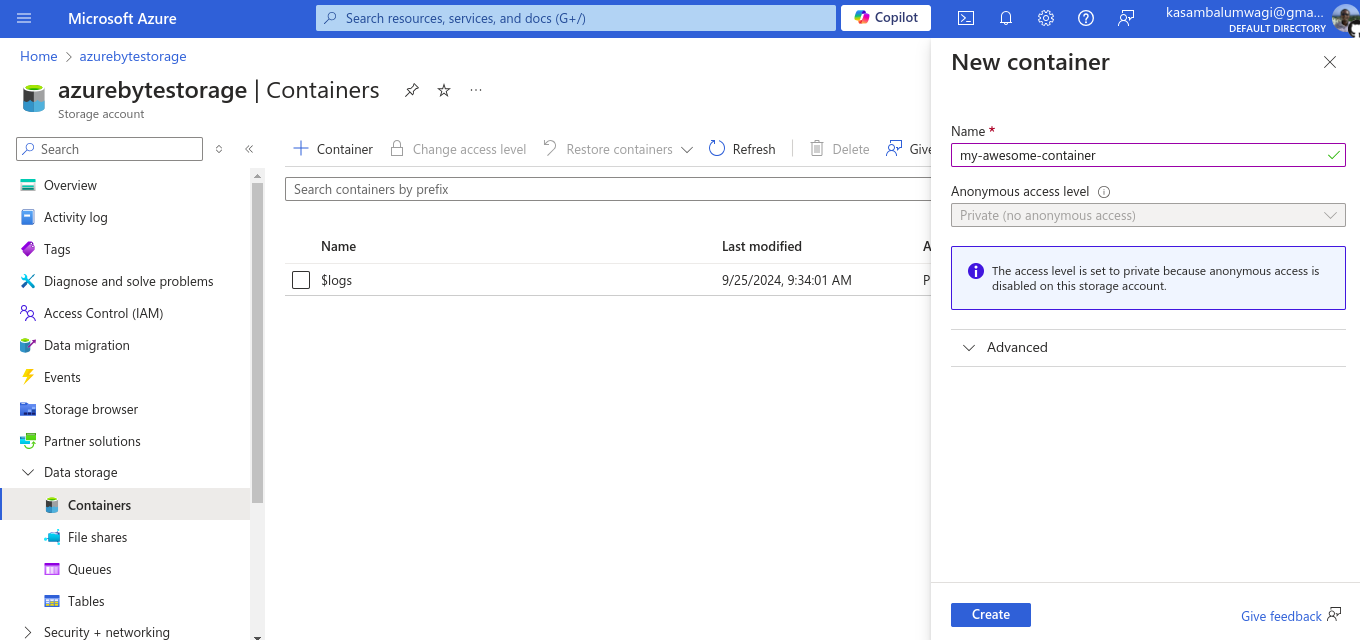
Give your container a name (something cool, like
my-awesome-container).Choose the Public access level. Unless you’re feeling super generous, go with Private.
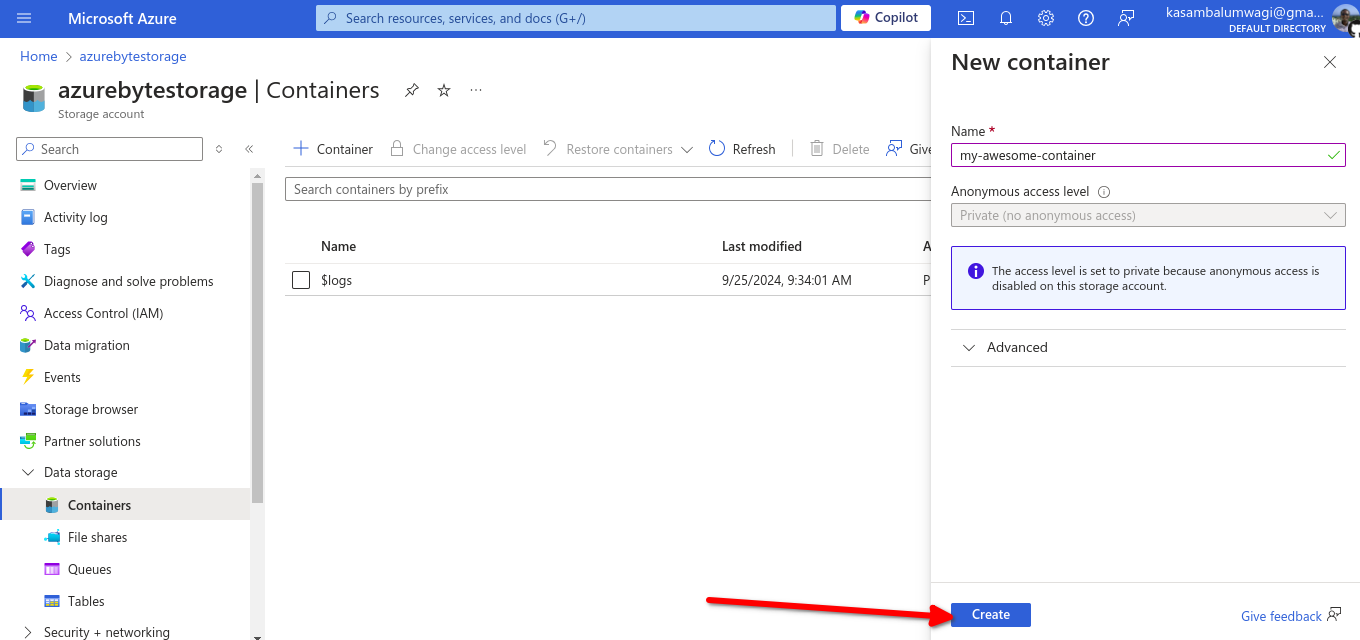
Click “Create”—congrats, you now have a shiny new container!
Step 4: Upload Data to the Container
Now for the main event—uploading your data. It’s time to make it rain files!
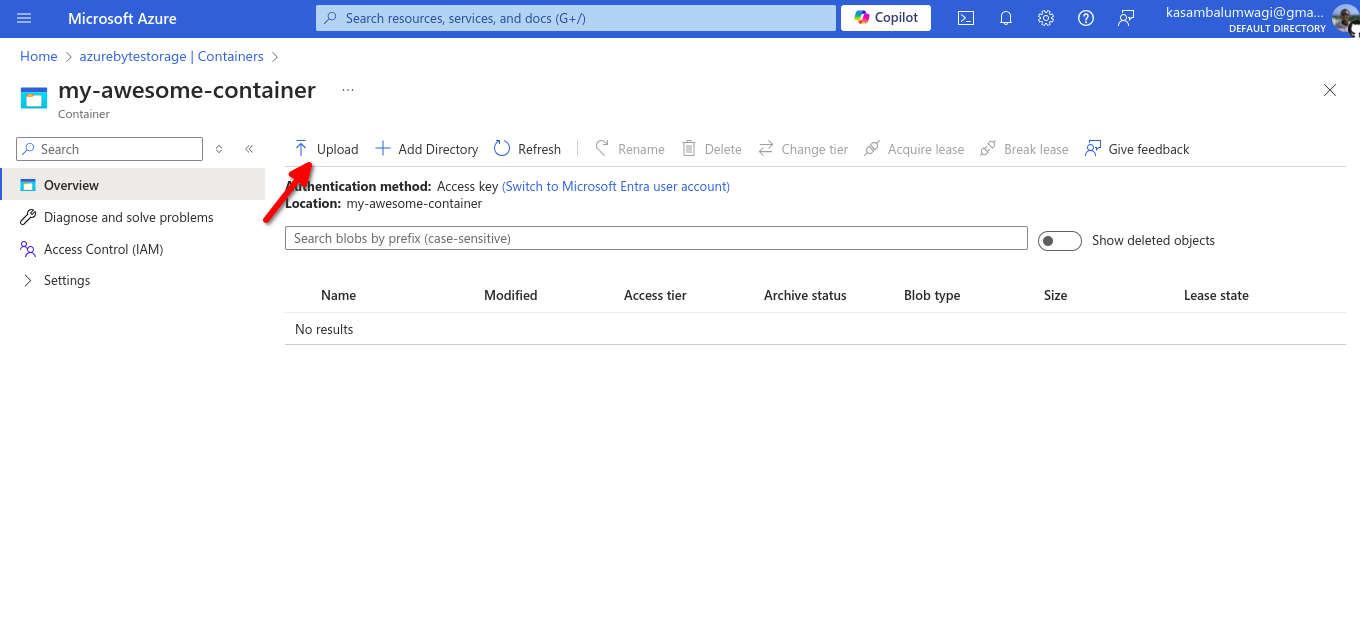
Click on your container’s name to open it. It’s like opening a treasure chest—but the treasure is data.
Click the “Upload” button at the top. This is where the magic happens.
In the Upload blob window:
Files: Click “Browse” to pick the files you want to upload from your local machine. It’s like picking your favorite songs for a playlist—only geekier.
Upload to folder (optional): If you’re the organized type, feel free to create a folder. No judgment if you just throw everything in the root.
Advanced settings (optional): If you’re feeling fancy, check out the advanced settings. Otherwise, click “Upload” to start the upload.
Step 5: Verify the Upload
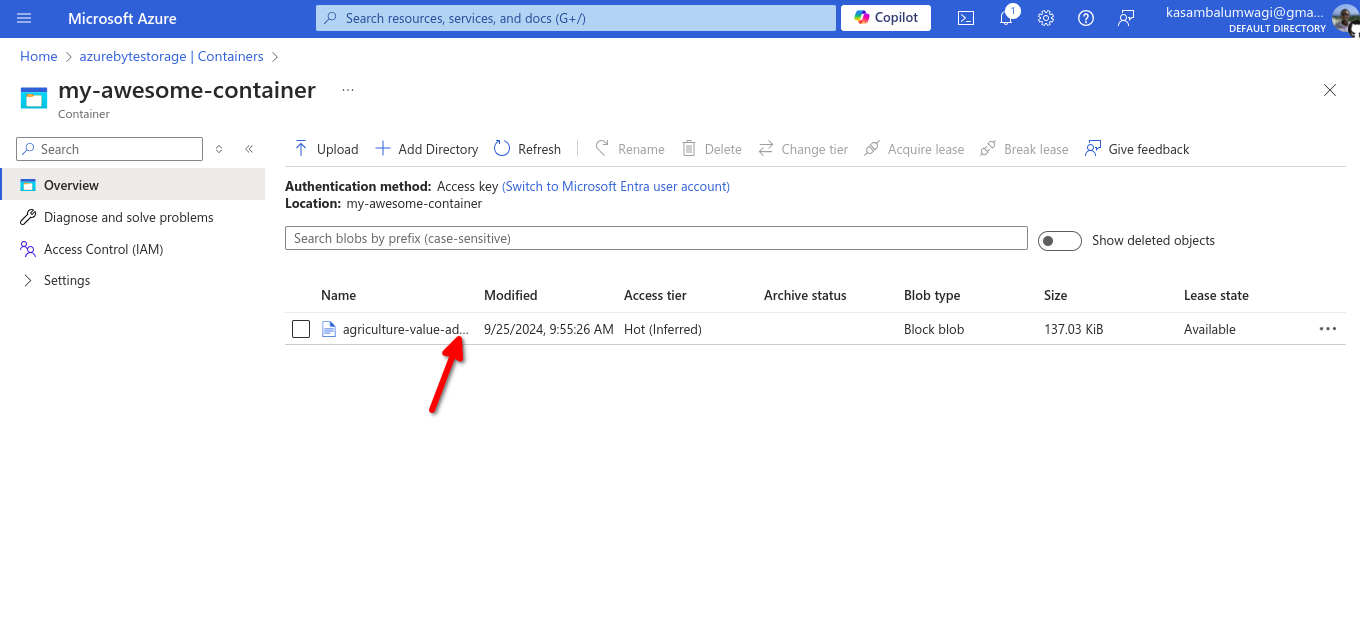
Now that you’ve uploaded your files, let’s make sure they didn’t get lost in the cloud (literally):
Your files should be listed in the container—like a menu at your favorite restaurant, but with blobs instead of burgers.
Subscribe to my newsletter
Read articles from Azure Bytes directly inside your inbox. Subscribe to the newsletter, and don't miss out.
Written by

Azure Bytes
Azure Bytes
Dynamic and results-oriented Data Engineer with expertise in ETL, data warehousing, data modelling, and data integration. Proficient in designing and implementing robust data pipelines and architectures using big data technologies such as Apache Spark and Hadoop. Experienced in leveraging cloud platforms like Azure for scalable data solutions. Skilled in database management systems including SQL and NoSQL, ensuring data governance and quality assurance. Specialized in Python programming for data manipulation and analysis, with proficiency in libraries like Pandas and NumPy. Knowledgeable in machine learning models and natural language processing (NLP) techniques. Microsoft Certified: Azure Data Engineer with strong analytical thinking, problem-solving, and communication skills. Proven ability to work collaboratively in teams and manage projects effectively.