Kubernetes Namespaces
 Subbu Tech Tutorials
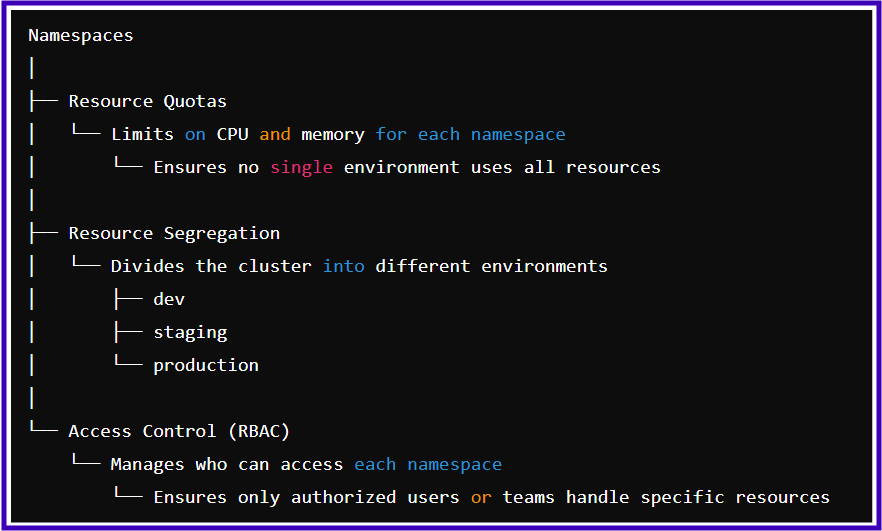
What is a Namespace in K8s?
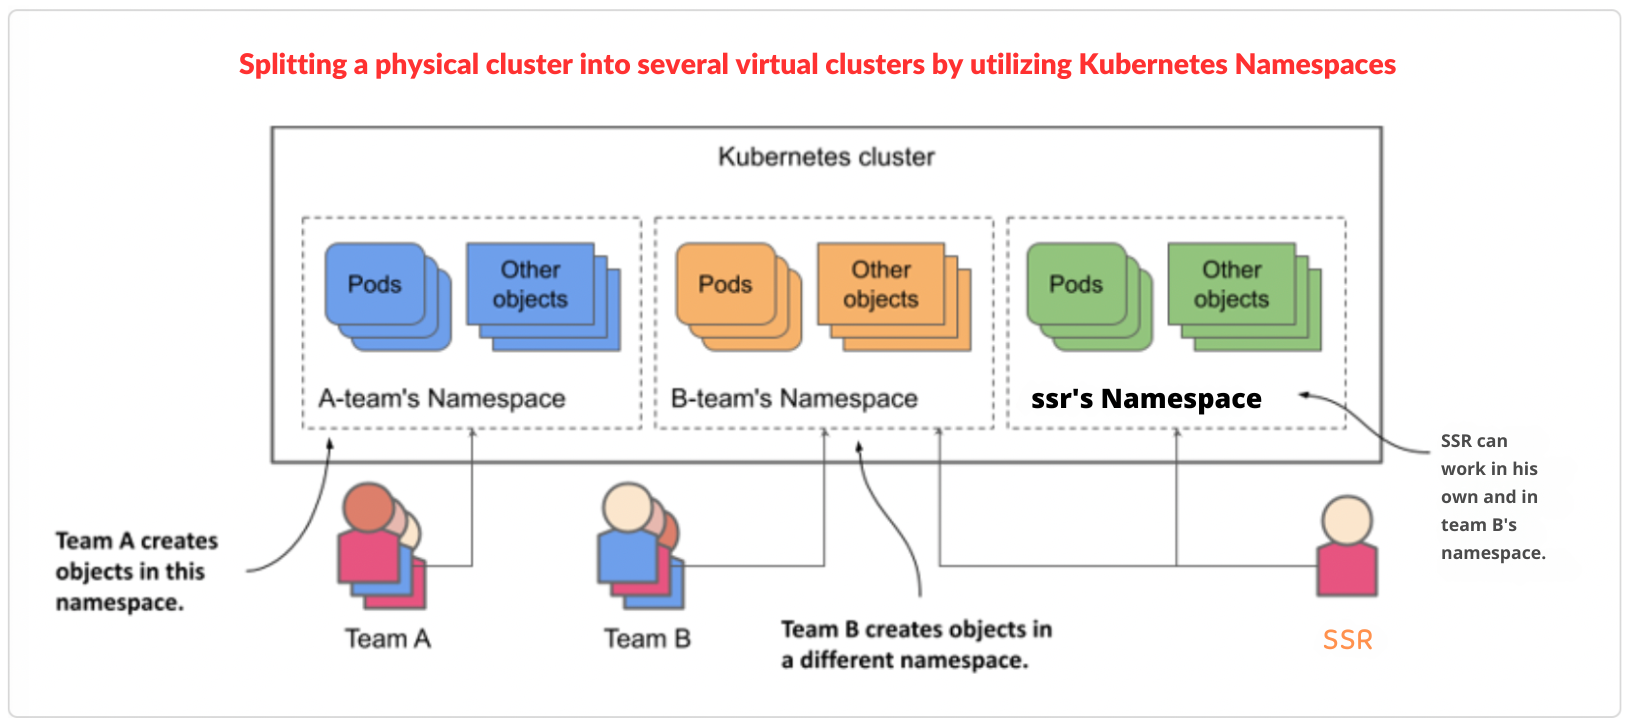
In Kubernetes, namespaces provide a mechanism for isolating groups of resources within a single cluster. It acts like a virtual cluster within your main cluster, allowing you to group resources (like pods, services, and deployments) separately from one another.
Names of resources need to be unique within a namespace, but not across namespaces.
Note:
Nesting of Namespaces isn't allowed as all the Kubernetes resources can only be in one namespace.
For example, You can’t have a nested structure like:

Why Use Namespaces?
Organization*: Helps you categorize resources based on teams, environments (like dev, staging, prod), or projects.***
Isolation**: Resources in one namespace don't affect resources in another, which is useful for security and managing multiple applications.
*Resource Management: You can apply quotas and limits to specific namespaces, controlling how much CPU, memory, or storage they can use.
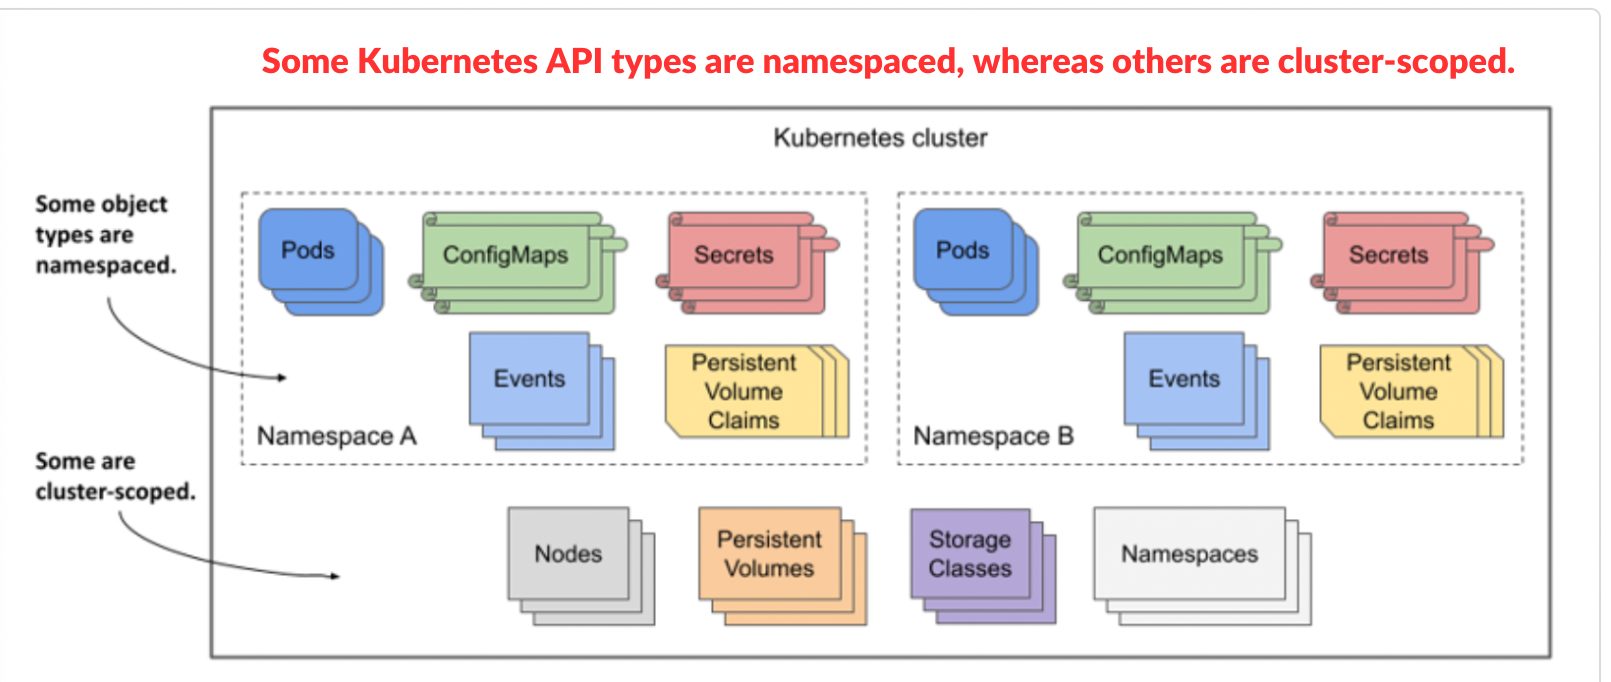
Namespace-based scoping is applicable only for namespaced objects (e.g. Deployments, Services, etc.) and not for cluster-wide objects (e.g. StorageClass, Nodes, PersistentVolumes, etc.).
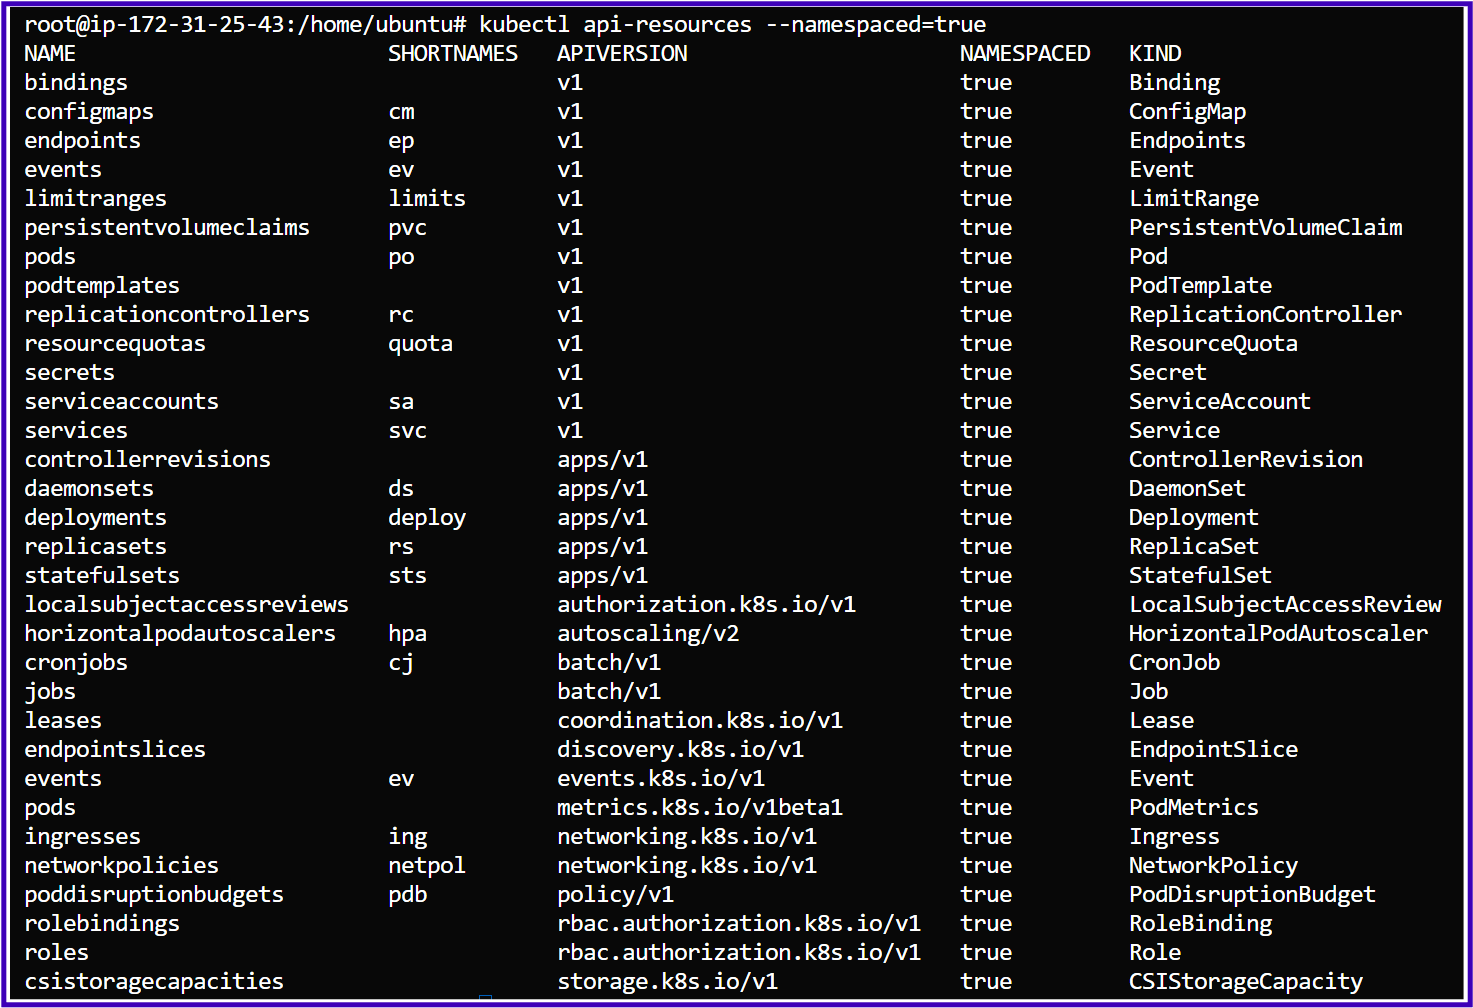
The command kubectl api-resources --namespaced=true is used to list all Kubernetes resources that are namespaced in the cluster.
In the same we can use the command kubectl api-resources --namespaced=false to list all Kubernetes resources that are not namespaced, meaning these resources are cluster-wide and are not scoped within any specific namespace.
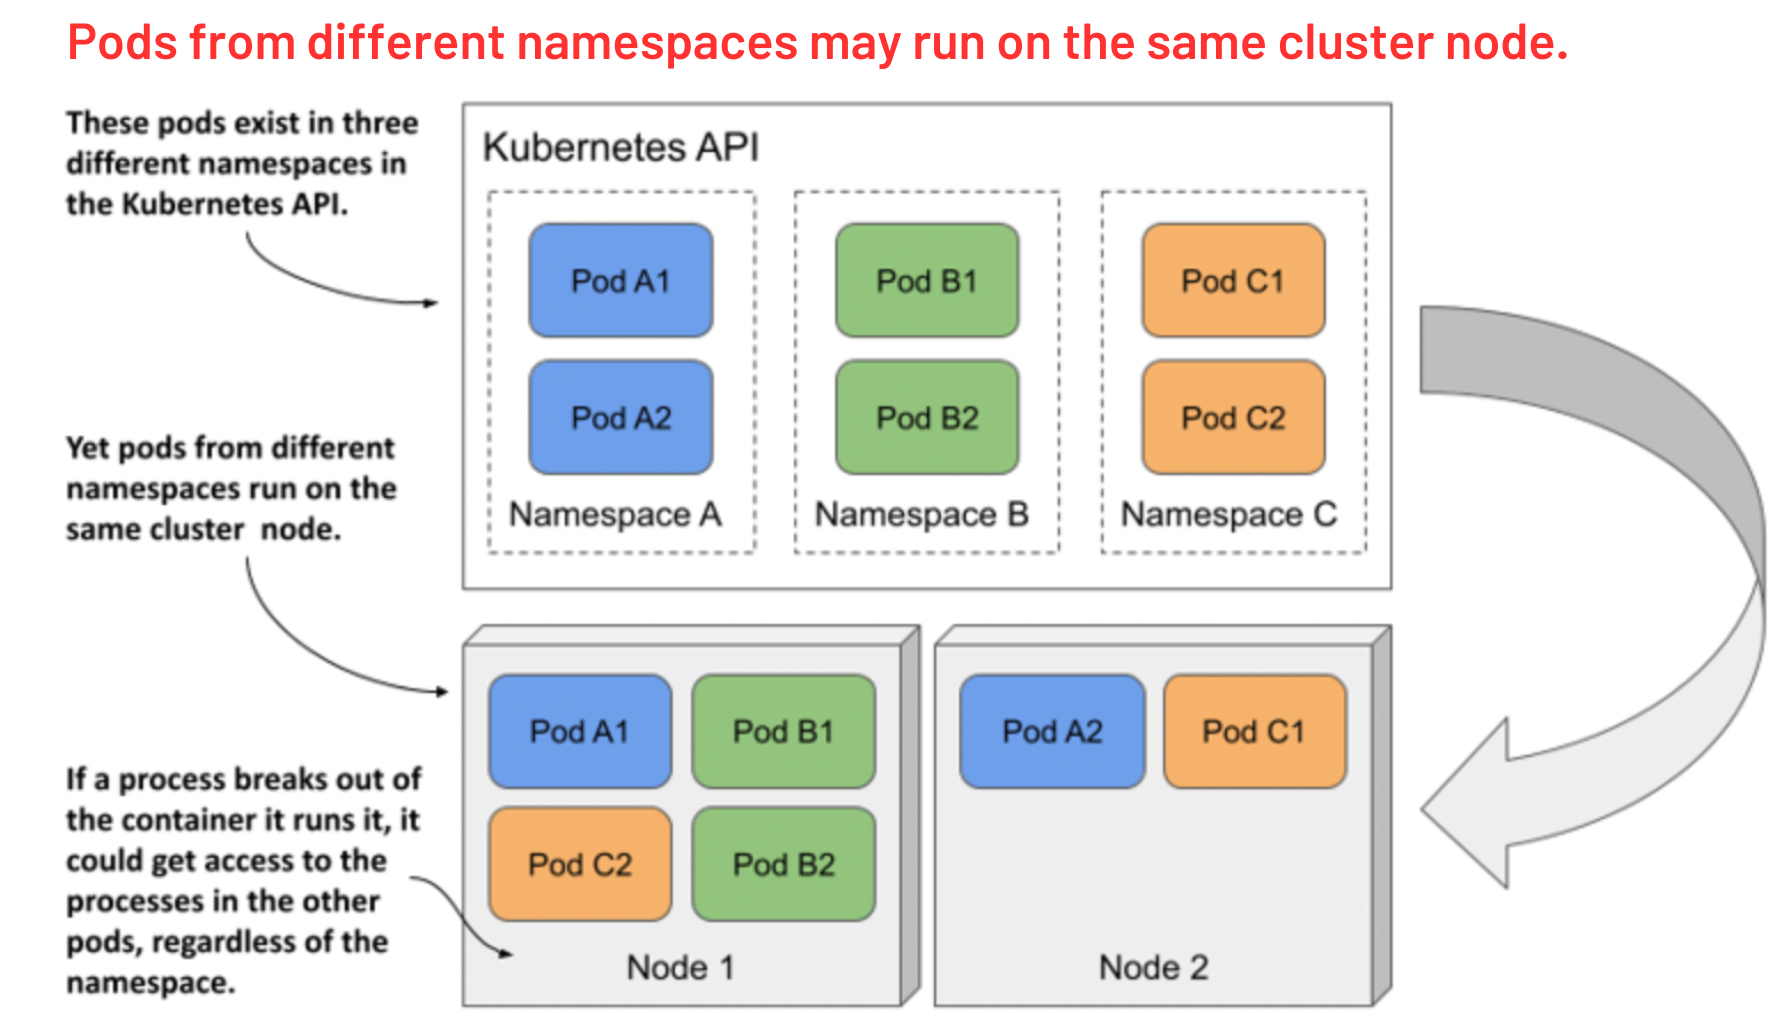
Understanding the runtime isolation between pods in different namespaces:
Namespaces in Kubernetes give each user their own space to create resources without name conflicts, like separate folders. But since everyone shares the same physical machines, the separation between pods isn’t as strong as if they were on completely different machines. They can still interact unless extra security measures are in place.
You can set role-based access control (RBAC) policies to restrict access to certain namespaces, only authorized users or teams can interact with the resources.
Initial namespaces:
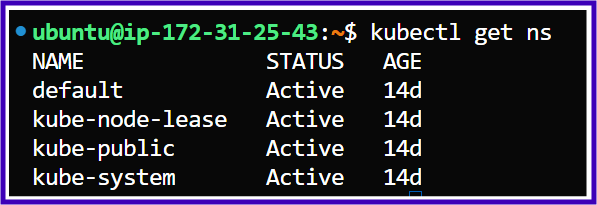
Kubernetes starts with four initial namespaces:
Namespaces
│
├── default
│   ├── Purpose: Main space for user-created resources (e.g., pods, services)
│   └── Initially: Empty until apps are deployed
│
├── kube-system
│   ├── Purpose: Holds core components that keep Kubernetes running
│   ├── Includes:
│   │   ├── Core components: kube-apiserver, kube-scheduler, kube-proxy
│   │   └── Network management tools: CoreDNS (DNS), Weavenet (networking plugin)
│
├── kube-public
│   ├── Purpose: Namespace for resources visible to everyone (including unauthenticated users)
│   └── Initially: Usually empty unless something is configured as public
│
└── kube-node-lease
    ├── Purpose: Tracks node health through lease objects, improving node status checks
    └── Includes: Small objects that help efficiently track node activity
User-defined Namespaces: Custom namespaces for organizing resources by projects, teams, or environments.
- How to Create a Namespace:
Command: kubectl create namespace <ns-name
# kubectl create ns dev
namespace/dev created
# kubectl get ns
NAME              STATUS   AGE
default           Active   15d
dev               Active   21s
kube-node-lease   Active   15d
kube-public       Active   15d
kube-system       Active   15d
- Alternative Way to create a Namespace:
Ex: ns-qa.yaml
Command: kubectl apply -f ns-qa.yaml
apiVersion: v1
kind: Namespace
metadata:
  name: qa
  labels:
    name: qa
# kubectl apply -f ns-qa.yaml
namespace/qa created
# /home/ubuntu# kubectl get ns
NAME              STATUS   AGE
default           Active   15d
dev               Active   8m18s
kube-node-lease   Active   15d
kube-public       Active   15d
kube-system       Active   15d
qa                Active   12s
- List all namespaces:
# kubectl get ns
Ex: I have created 3 namespaces as dev, qa, and prod and other are system defined namespaces:
# kubectl get ns
NAME              STATUS   AGE
default           Active   18d
dev               Active   3d17h
kube-node-lease   Active   18d
kube-public       Active   18d
kube-system       Active   18d
prod              Active   3d17h
qa                Active   3d17h
- Switch to a specific namespace for a single command:
kubectl get pods -n <namespace-name>
Ex:
# kubectl get pods -n default
No resources found in default namespace.
- Set the Default Namespace for kubectl Context:
Now, I will explain how to set a default namespace for an easier workflow using the set-context command:
kubectl config set-context --current --namespace=<your-ns-name>
This command is useful because:
**Saves Time: You don’t have to keep typing --namespace in every command, making it quicker to use.
Avoids Mistakes: It ensures you're always working in the correct namespace, so you don’t accidentally create or modify resources in the wrong one.
*Simplifies Workflow: When you're focused on a specific project or environment, setting a default namespace makes your tasks easier and more organized.
Ex: To set the dev namespace as your default namespace for deploying your projects, you can use the following command:
kubectl config set-context --current --namespace=dev
# kubectl config set-context --current --namespace=dev
Context "kubernetes-admin@kubernetes" modified.
#:/home/ubuntu/My-Projects# kubectl get pod
No resources found in dev namespace.
- List only the custom namespaces:
To list only the custom namespaces (i.e., namespaces that are not default system namespaces like kube-system, kube-public, etc.), you can use the following kubectl command with grep to filter out the system namespaces.
# kubectl get namespaces | grep -v 'kube-system\|kube-public\|kube-node-lease'
NAME              STATUS   AGE
default           Active   18d
dev               Active   3d18h
prod              Active   3d17h
qa                Active   3d18h
- Describe a namespace:
To provide detailed information about the dev namespace in Kubernetes:
kubectl describe namespace <your-ns-name>
# kubectl describe namespace dev
Name:         dev
Labels:       kubernetes.io/metadata.name=dev
Annotations:  <none>
Status:       Active

No resource quota.

No LimitRange resource.
- Delete a namespace:
kubectl delete namespace <your-ns-name>
- Get all resources in a namespace:
kubectl get all -n <namespace-name>
Ex:
# kubectl get all -n kube-system
NAME                                          READY   STATUS    RESTARTS       AGE
pod/coredns-6f6b679f8f-fzqqx                  1/1     Running   8 (55m ago)    18d
pod/coredns-6f6b679f8f-kznll                  1/1     Running   8 (55m ago)    18d
pod/etcd-ip-172-31-25-43                      1/1     Running   8 (55m ago)    18d
pod/kube-apiserver-ip-172-31-25-43            1/1     Running   8 (55m ago)    18d
pod/kube-controller-manager-ip-172-31-25-43   1/1     Running   8 (55m ago)    18d
pod/kube-proxy-29v2d                          1/1     Running   8 (55m ago)    18d
pod/kube-proxy-9pszf                          1/1     Running   8 (55m ago)    18d
pod/kube-proxy-lrqpv                          1/1     Running   8 (55m ago)    18d
pod/kube-scheduler-ip-172-31-25-43            1/1     Running   8 (55m ago)    18d
pod/metrics-server-587b667b55-774k9           1/1     Running   3 (55m ago)    6d5h
pod/weave-net-9gpqz                           2/2     Running   17 (55m ago)   18d
pod/weave-net-dxvcz                           2/2     Running   17 (55m ago)   18d
pod/weave-net-pjjtt                           2/2     Running   17 (55m ago)   18d

NAME                     TYPE        CLUSTER-IP      EXTERNAL-IP   PORT(S)                  AGE
service/kube-dns         ClusterIP   10.96.0.10      <none>        53/UDP,53/TCP,9153/TCP   18d
service/metrics-server   ClusterIP   10.108.247.55   <none>        443/TCP                  6d6h

NAME                        DESIRED   CURRENT   READY   UP-TO-DATE   AVAILABLE   NODE SELECTOR            AGE
daemonset.apps/kube-proxy   3         3         3       3            3           kubernetes.io/os=linux   18d
daemonset.apps/weave-net    3         3         3       3            3           <none>                   18d

NAME                             READY   UP-TO-DATE   AVAILABLE   AGE
deployment.apps/coredns          2/2     2            2           18d
deployment.apps/metrics-server   1/1     1            1           6d6h

NAME                                        DESIRED   CURRENT   READY   AGE
replicaset.apps/coredns-6f6b679f8f          2         2         2       18d
replicaset.apps/metrics-server-587b667b55   1         1         1       6d5h
Tips & Tricks for Real-Time Use:
Limit Resource Usage Per Namespace (Resource Quotas):
You can create ResourceQuotas* to limit the resources that can be consumed by objects within a namespace:
kubectl create -f resource-quota.yaml
Example resource-quota.yaml:
apiVersion: v1
kind: ResourceQuota
metadata:
  name: dev-quota
  namespace: dev
spec:
  hard:
    requests.cpu: "1"
    requests.memory: 1Gi
    limits.cpu: "2"
    limits.memory: 2Gi
Tip: This is important for multi-tenant clusters where teams or applications share the same cluster.
Isolate Environments using Namespaces:
For DevOps, namespaces are useful for setting up isolated environments like development, testing, staging, and production in the same Kubernetes cluster.
Example of organizing namespaces:
devstagingprodLabel Namespaces for Organization:
- You can add labels to namespaces to better organize or select them in commands
kubectl label namespace <namespace-name> env=production
Ex:
kubectl label namespace prod env=production
Use kubectl get namespaces --selector env=production to filter namespaces by labels.
Test in Namespaces Before Moving to Production:
- Use different namespaces to deploy your application in staging environments first. This allows you to test in an isolated environment without affecting production workloads.
“An investment in knowledge always pays the best interest." — Benjamin Franklin
Thank you
Subscribe to my newsletter
Read articles from Subbu Tech Tutorials directly inside your inbox. Subscribe to the newsletter, and don't miss out.
Written by
