Installing Apache Tomcat in Amazon Linux
 Vidushi Bansal
Apache Tomcat is an open-source implementation of the Java Servlet, JavaServer Pages, and WebSocket technologies. It allows users to run Java-based web applications in a lightweight and flexible environment. In this blog, we'll walk through the steps to install Apache Tomcat on an Amazon Linux EC2 instance.
In this blog, we will walk through the steps of installing Apache Tomcat in Amazon Linux.
Prerequisites
Before you begin, ensure you have the following:
An active AWS account.
An Amazon Linux EC2 instance running.
SSH access to the EC2 instance.
Installing Apache Tomcat
Step 1: Update the System
After launching and connecting to your EC2 instance, it is essential to update the system packages to ensure the system is up to date.
sudo yum update -y
Step 2: Install java
Apache Tomcat requires Java to run, so the next step is to install the OpenJDK package:
sudo yum install java-17 -y
Step 3: Create a Tomcat User
It's good practice to run Tomcat as a non-root user. We'll create a new user and group for Tomcat:
sudo groupadd tomcat
sudo useradd -g tomcat -d /opt/tomcat -s /bin/false tomcat
Step 4: Download and Install Tomcat
Install apache-tomcat in the opt/ directory
cd /tmp
wget https://dlcdn.apache.org/tomcat/tomcat-9/v9.0.95/bin/apache-tomcat-9.0.95.tar.gz
sudo tar -xvf apache-tomcat-9.0.95.tar.gz -C /opt/tomcat --strip-components=1
Step 5: Configure Permissions
Set the correct ownership and permissions for the Tomcat files:
sudo chown -R tomcat:tomcat /opt/tomcat
sudo chmod -R 755 /opt/tomcat
Go to the bin directory and make the startup and shutdown scripts executable
cd /opt/tomcat/bin
sudo chmod +x startup.sh shutdown.sh
Step 6: Create a Systemd Service File
To make Tomcat easier to manage, create a systemd service file:
sudo vi /etc/systemd/system/tomcat.service
Add the following configuration to the file:
[Unit]
Description=Apache Tomcat Web Application Container
After=network.target

[Service]
Type=forking

User=tomcat
Group=tomcat

Environment="JAVA_HOME=/usr/lib/jvm/jre"
Environment="CATALINA_PID=/opt/tomcat/temp/tomcat.pid"
Environment="CATALINA_HOME=/opt/tomcat"
Environment="CATALINA_BASE=/opt/tomcat"
Environment="CATALINA_OPTS=-Xms512M -Xmx1024M -server -XX:+UseParallelGC"
Environment="JAVA_OPTS=-Djava.awt.headless=true -Djava.security.egd=file:/dev/./urandom"

ExecStart=/opt/tomcat/bin/startup.sh
ExecStop=/opt/tomcat/bin/shutdown.sh

[Install]
WantedBy=multi-user.target
Step 7: Reload the Systemd Daemon
Reload the systemd daemon to register the new service:
sudo systemctl daemon-reload
Step 8: Start and Enable Tomcat
Now you can start the Tomcat service and enable it to start on boot:
sudo systemctl start tomcat
sudo systemctl enable tomcat
Step 9: Check the status of the service
sudo systemctl status tomcat

Step 10: Opening Tomcat
Before opening tomcat in your web browser, ensure that port 8080 is open in the security group of your instance.
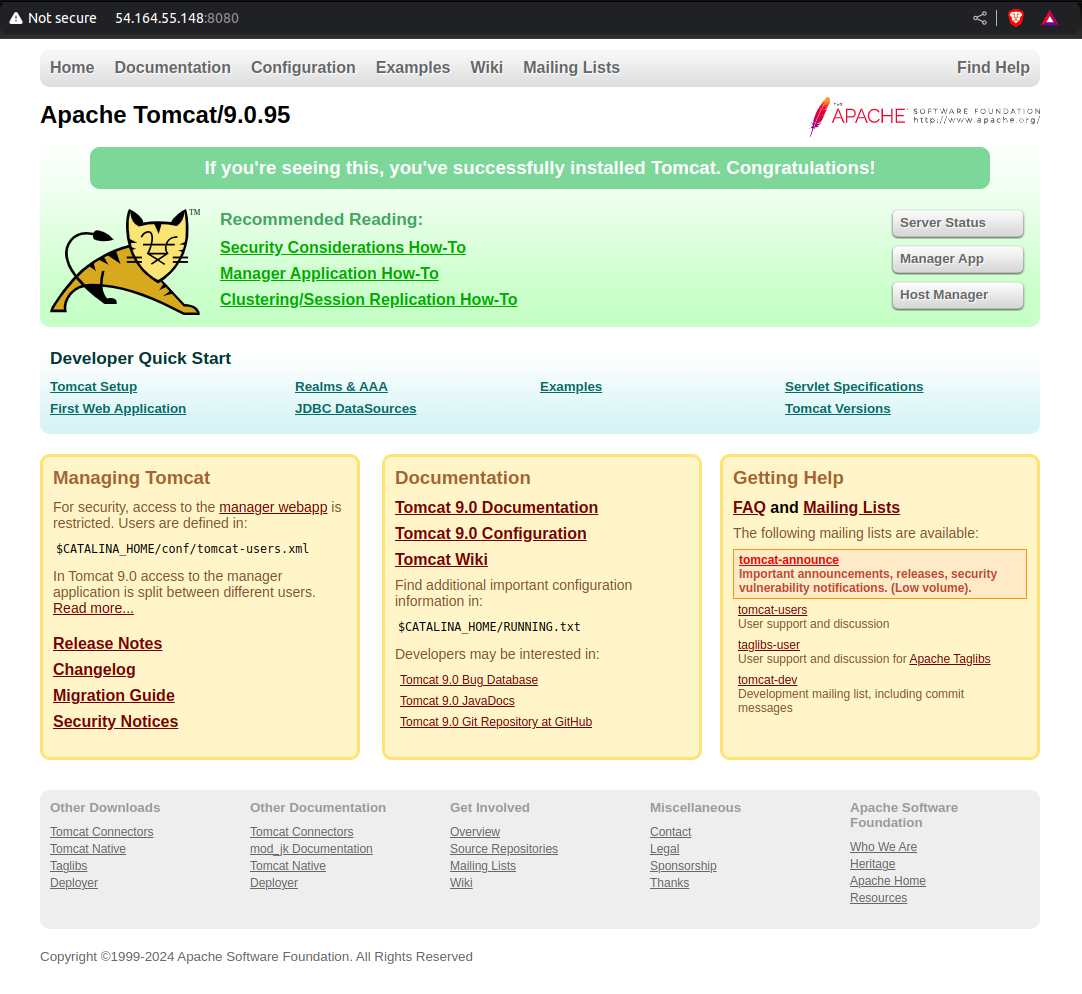
In the web browser open, http://<ec2-instance-IP>:8080

Apache Tomcat is up and running. By following these steps, you have successfully installed and configured Apache Tomcat on Amazon Linux. This lightweight application server will now allow you to run Java-based web applications. You can further secure and customize your setup, such as enabling SSL or connecting Tomcat to an external database.
Subscribe to my newsletter
Read articles from Vidushi Bansal directly inside your inbox. Subscribe to the newsletter, and don't miss out.
Written by

Vidushi Bansal
Vidushi Bansal
DevOps enthusiast on a constant quest for knowledge! From wrangling complex pipelines to exploring the latest tech stacks, I’m all about learning, leveling up, and debugging with a smile. Whether it’s automating, collaborating, or diving into the world of cloud, I’m always ready to build and improve. Let’s innovate together!