Docker Project: Making a Dockerfile for a Django-Notes App on AWS
 Deepesh Gupta
In this blog, we will learn how to containerize a Django Noters Application using Docker and deploy it on Amazon Web Services (AWS). This makes it easy to run your app anywhere and scale it as needed. Let's get started!

🧰 What You’ll Need
Before we begin, make sure you have these tools installed:
☁️ AWS Account
🐙 Git (optional but useful)
🐳 Docker Commands
📂 GitHub Repository for the app (optional, but in this blog, you’ll get a GitHub repository for your convenience) 🎉
To make things easier, we’ll provide a link to the GitHub repository containing the complete code for the Django To-Do app, so you can follow along or clone it directly to your machine!
Step 1: Clone the GitHub Repository
First, clone the Django To-Do app from the GitHub repository I’ve prepared for you:
GitHub Repository: https://github.com/deepeshmlgupta/Notes-Application/
git clone https://github.com/deepeshmlgupta/Notes-Application.git
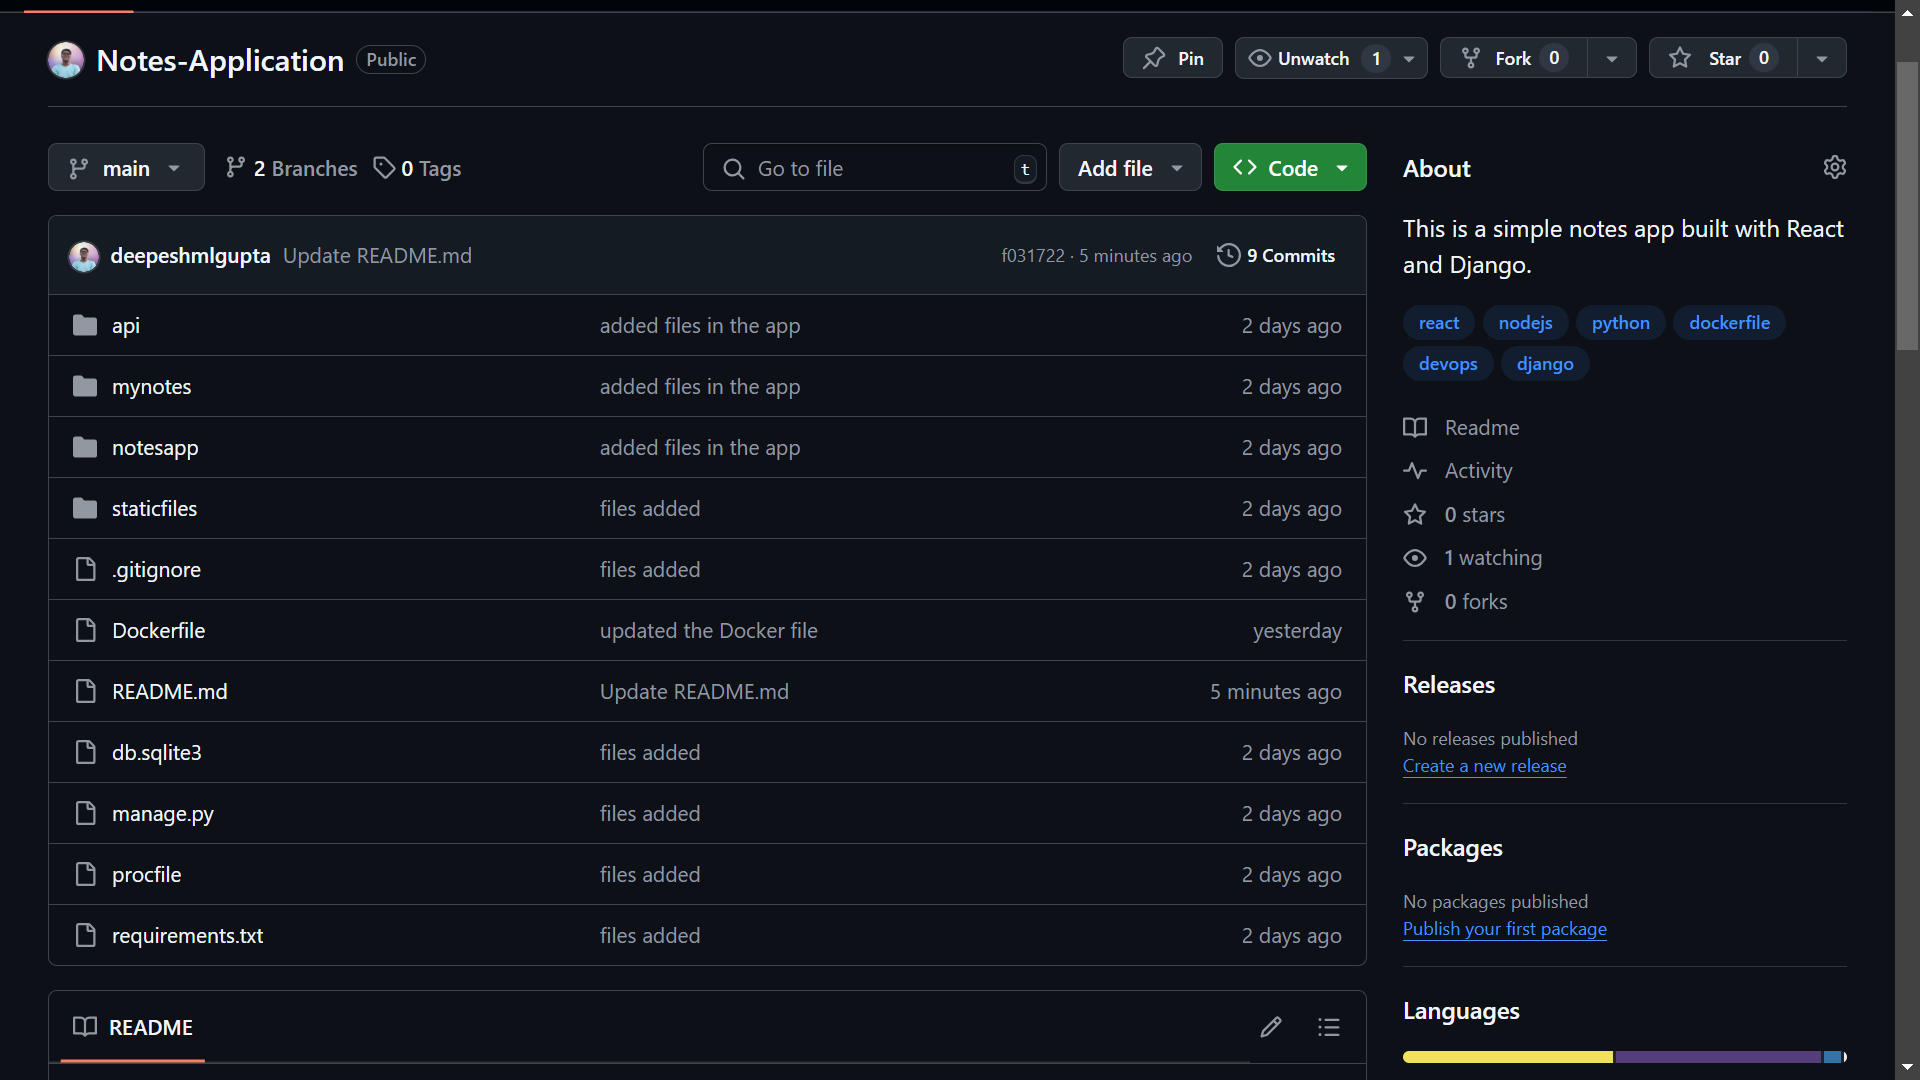
Once cloned, move into the project folder:
cd Notes-Application
Step 2: Create the Dockerfile 🐳
Now we’re going to create the Dockerfile, which tells Docker how to build and run our Django app.
Create a Dockerfile: In the root directory of your project (same folder as
manage.py), create a file namedDockerfile(no file extension, justDockerfile).Set Up the Base Image: We need to use a Python image because our app is built in Django (which is Python-based). Add this to the Dockerfile:
 # Use Python 3.8 as the base image
 FROM python:3.9
The
FROMline tells Docker which base image to use. Here, we're using a lightweight version of Python.Set the Working Directory: We now tell Docker where our app will live inside the container:
 # Set the working directory inside the container
 WORKDIR /deepesh
This creates a folder
/deepeshin the container where our code will be stored.Install Dependencies: We need to install the Django app’s dependencies, so first, we’ll copy the
requirements.txtfile (this file contains all Python packages) and then install the dependencies:# Copy the requirements file COPY requirements.txt . # Install the dependencies from the requirements file RUN pip install -r requirements.txtThe
COPYcommand copies therequirements.txtfile into the container. TheRUNcommand installs the dependencies usingpip.Copy the Application Code: Now, we’ll copy the rest of our Django app files into the container:
 # Copy all project files into the working directory
 COPY . .
Expose the Container on Port 8000: We need to expose port
8000so the Django app can be accessed from outside the container:# Expose port 8000 for external access EXPOSE 8000Run the Django Development Server: Finally, we tell Docker how to start the Django app when the container runs:
 # Command to run the Django app
 CMD ["python", "manage.py", "runserver", "0.0.0.0:8000"]
This command starts the Django development server on port
8000and binds it to all IP addresses (0.0.0.0) so it can be accessed from outside the container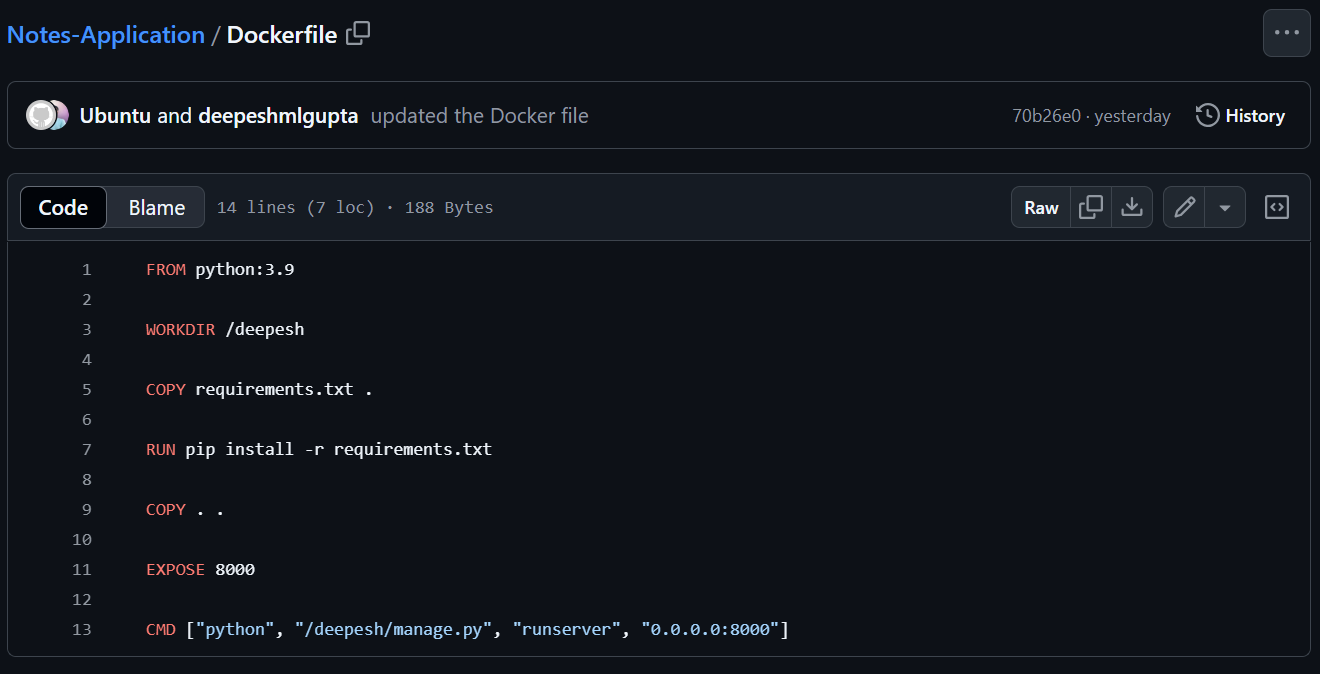
.
📂 Get the Full Code of Dockerfile from GitHub
Here’s the link to the GitHub repository where you can access all the code for this project, including the Dockerfile: GitHub Repo Link.
Step 3: Build and Test the Docker Container 🏗️
Now that we have the Dockerfile ready, let’s build and run the container.
Build the Docker Image: In the terminal, run the following command in the project folder to build the image:
docker build -t notes-app .The
-toption allows you to name the image (django-todo-app), and the.tells Docker to use the current directory to build the image.Run the Docker Container: Once the build is complete, you can run the container with this command:
docker run -d -p 8000:8000 notes-app:latestThe
-doption runs the container in detached mode (in the background), and the-p 8000:8000option maps your local port8000to the container’s port8000.Test the App: Before testing the app, make sure to open the inbound traffic access on port 8000 on your AWS EC2 instance.
After setting the inbound rules, open your browser and go to
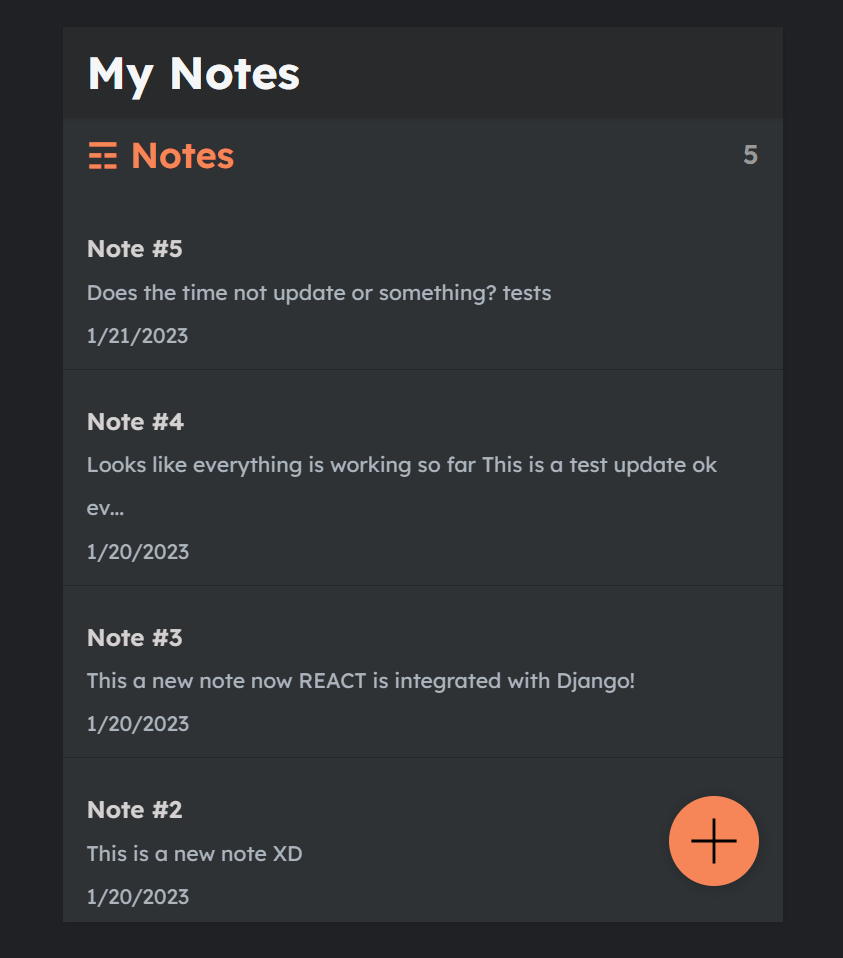
http://<your-ec2-public-ip>:8000. You should see the Django To-Do app running! 🎉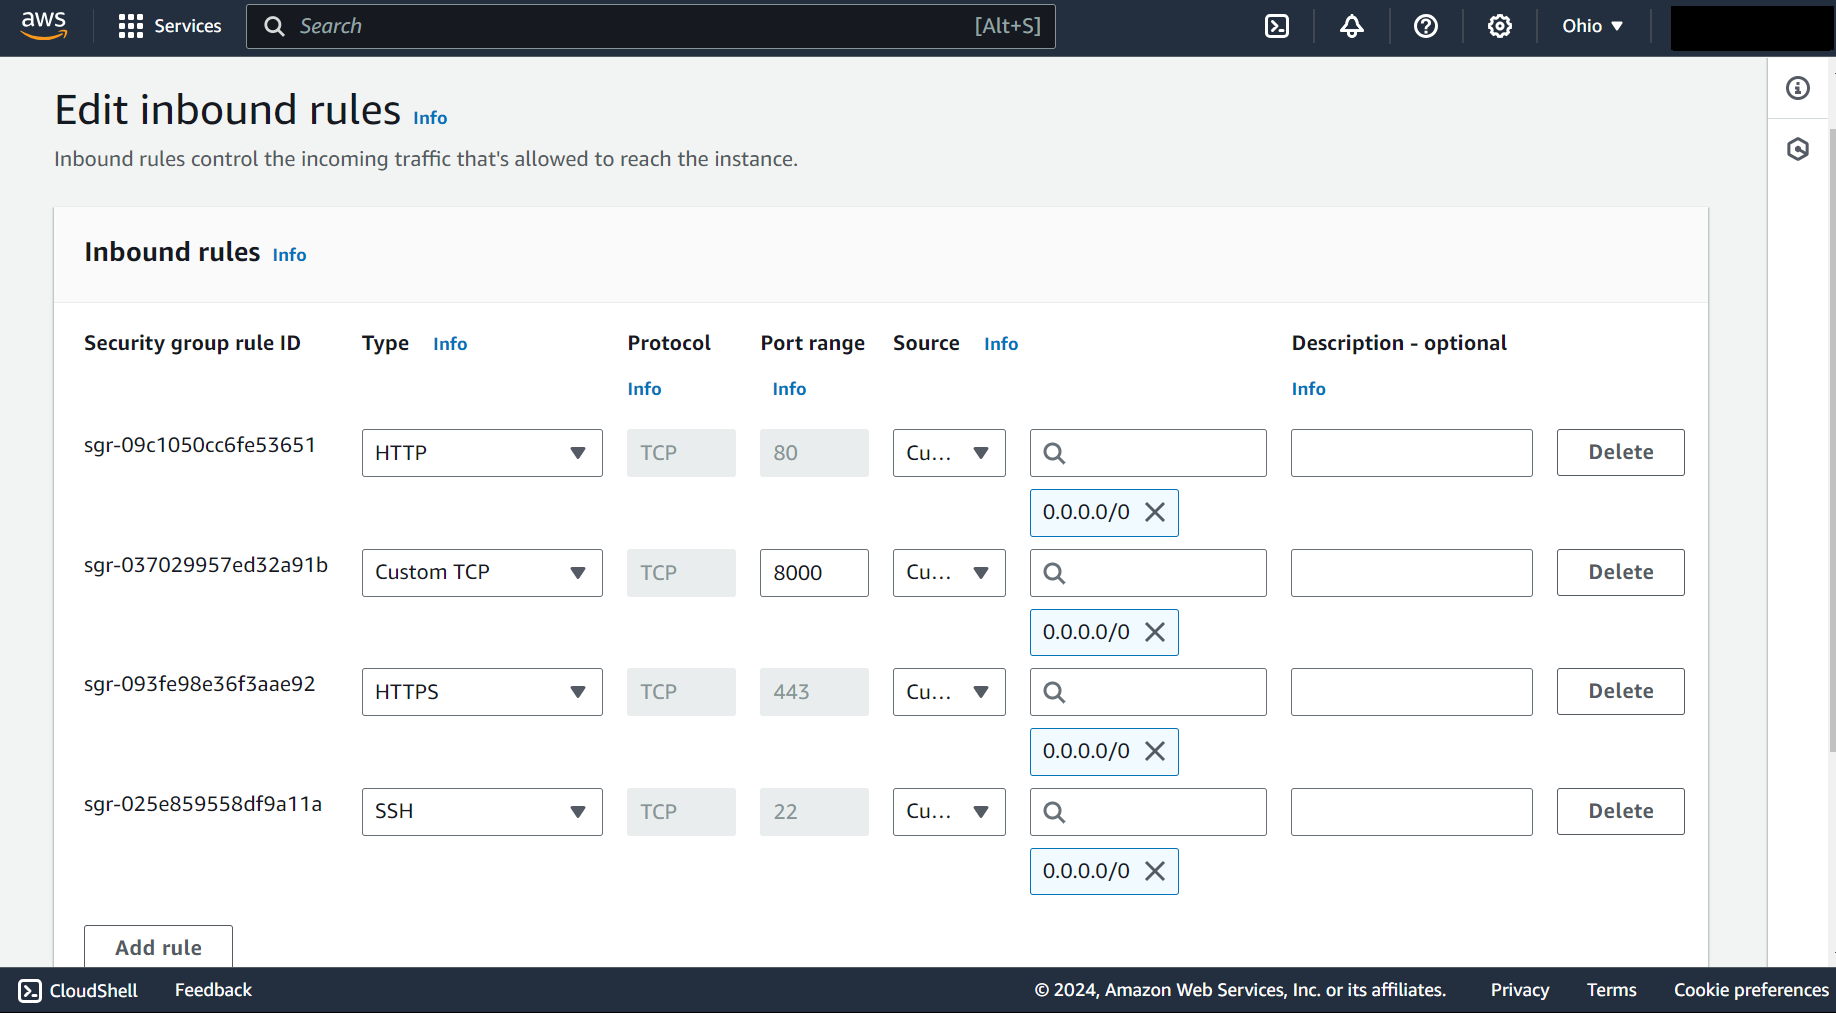
After successfully following the above steps, your application should be running like this:
Conclusion
And that’s it! 🎊 You’ve successfully created a Dockerfile for your Django To-Do app. Now your app is packaged and ready to run anywhere using Docker. You can easily push the image to a cloud provider like AWS or share it with others.
For your convenience, here’s the link to the GitHub repository where you can find all the code: GitHub Repo Link.
Happy coding! 🚀
Subscribe to my newsletter
Read articles from Deepesh Gupta directly inside your inbox. Subscribe to the newsletter, and don't miss out.
Written by

Deepesh Gupta
Deepesh Gupta
DevOps & Cloud Enthusiast | Open Source Contributor | Driving Technological Excellence in DevOps and Cloud Solutions