Exploring Reacts Component Lifecycle: From Mounting To Unmounting In Details
 Daniel Efe
All living things go through the cycle of life: being born, growing up, and eventually dying. React components are no different. From components being created (mounting), to growing (updating), and eventually dying (unmounting), these series of steps are what we refer to as the React component lifecycle. Having a basic understanding of the component lifecycle equips developers with the necessary skills to manage component behavior and generally optimize the performance of React applications.
In this article, we will explore the React component lifecycle in detail, diving into each phase and its respective lifecycle methods while exploring how they apply to both class and functional components.
What is the React Component Lifecycle
The React component lifecycle is the series of stages that a React component goes through from its creation to its eventual removal from the DOM. These stages/phases are divided into three:
Mounting phase.
Updating phase.
Unmounting phase.
Each phase contains its own methods, responsible for carrying out specific actions in a component's lifecycle. For developers, understanding the various phases helps them manage the interaction between React components and the DOM, thereby improving code efficiency and performance. While the phases tend to remain the same for class and functional components, the lifecycle methods in both differ.
Mounting Phase
The React mounting phase is the birth phase of a React component. It is the phase where a component is created and inserted into the DOM. Several actions, such as fetching data or setting up subscriptions, typically occur during this phase, as the initial setup of the component usually happens here.
Four lifecycle methods are provided in the mounting phase for class components, they are:
constructor() method.
getDerivedStateFromProps() method.
render() method.
componentDidMount() method.
These methods allow you to control actions that occur just before or after the component is rendered for the first time.
The Constructor () Lifecycle method
The constructor() lifecycle method is the first method called when a React component is initialized. It is an important lifecycle method in React as initial state, other initial values, and the binding of event handler methods occur here.
It is worth mentioning that the constructor() method takes props as an argument. Additionally, calling super(props) before anything else in this method is mandatory, as it allows the component to access this.props inside the constructor method.
Below is a code example showing the use of React’s constructor() method in the creation of a simple counter app.
import React from "react";
import "./Counter.css";

class Counter extends React.Component {
  constructor(props) {
    super(props);
    this.state = { count: 0 };
  }

  render() {
    return (
      <div className="counter">
        <h1>{this.state.count}</h1>
        <button>+</button>
      </div>
    );
  }
}

export default counter;
Our above code illustrates a simple counter application with the constructor() method set as the first method in the Counter component. In our counter method, the initial value of our state is set to zero.
Output:
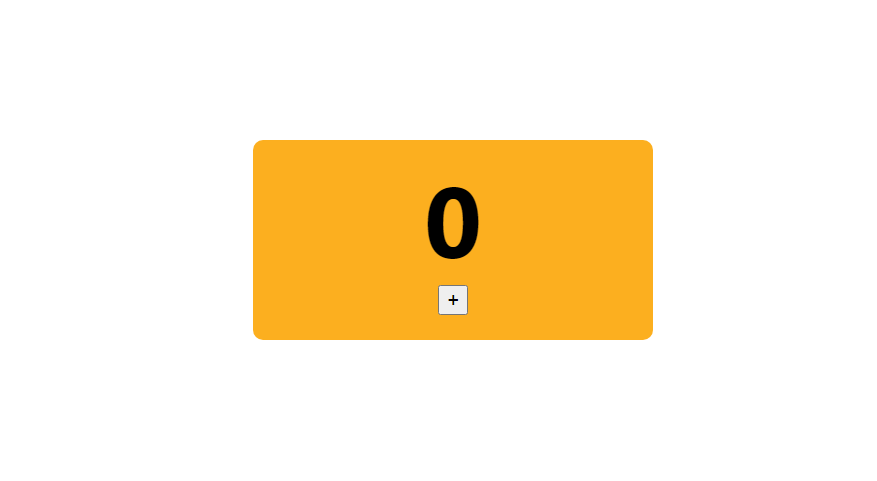
The above image shows a simple counter app with the initial count set to zero and an increment button to increase the count value. The initial value of the count was set, thanks to our constructor() method.
The getDerivedStateFromProps() Lifecycle Method
The getDerivedStateFromProps() lifecycle method is called after the constructor() method and before the render() method. It is called just before elements are rendered in the DOM and allows the component to update its internal state whenever there’s a change in props.
The getDerivedStateFromProps() method takes two parameters: the first is props, which signifies the component's updated props, and the second is state, which signifies the component's current state. Essentially, this method takes the state as an argument and returns an object with changes to the state.
It is important to mention that getDerivedStateFromProps() is a static method. This means it cannot interact with the component's instance methods or properties as it has no access to the this keyword.
Below is a code example that shows the use of the getDerivedStateFromProps() method in a simple counter app.
import React from "react";
import "./Counter.css";

class Counter extends React.Component {
  constructor(props) {
    super(props);
    this.state = { count: 0 };
  }

  static getDerivedStateFromProps(props, state) {
    return { count: props.newcount };
  }

  render() {
    return (
      <div className="counter">
        <h1>{this.state.count}</h1>
        <button>+</button>
      </div>
    );
  }
}

export default Counter;
The code above places the getDerivedStateFromProps() method between the constructor() and the render() method. In our code, this method takes two parameters: props and state. It updates the count value, which was initially set to zero in the constructor() method, to match the value of props.newcount.
import React from "react";
import Counter from "./components/Navbar/Counter";

const App = () => {
  return (
    <div>
      <Counter newcount="10" />
    </div>
  );
};

export default App;
The code above shows our App component, which is the parent of the Counter component where we set the getDerivedStateFromProps() method. In this code, the App component passes a prop called newcount with a value of ten to the Counter component. This means the Counter component will receive ten as the new value for the newcount prop.
Since the getDerivedStateFromProps() method in our Counter component updates the component's state based on the incoming props, the initial count value set to zero in the constructor() method is now updated to ten.
Output:

The above image shows our counter app displaying a value of ten instead of the initial value of zero set in our constructor () method, all thanks to our getDerivedStateFromProps() method.
The render() Lifecycle Method
The render() lifecycle method is responsible for outputting HTML elements in the DOM. It is so important that it is included in every React component. In a situation where there’s nothing to render, a value of null or false is usually returned.
The code below shows the role of the render() method in a simple React counter app.
import React from "react";
import "./Counter.css";

class Counter extends React.Component {
  constructor(props) {
    super(props);
    this.state = { count: 0 };
  }

  render() {
    return (
      <div className="counter">
        <h1>{this.state.count}</h1>
        <button>+</button>
      </div>
    );
  }
}

export default Counter;
The code above shows our render() method containing HTML-like elements such as the div tag, the h1 tag, and the button tag. Inside the h1 tag, we display the value of this.state.count. This means that the current count value, managed within our component’s state, will be shown in the h1 tag, thanks to our render() method.
Output:
The above image illustrates our counter app rendered in the Dom
The componentDidMount() Lifecycle Method
The componentDidMount() lifecycle method is called after the component gets rendered in the DOM. Necessary event listeners, timers, or even API calls and data fetching are initialized in this method.
A perfect use case of the componentDidMount() method is in the updating of the count in a simple React counter app, as shown in the code example below.
import React from "react";
import "./Counter.css";

class Counter extends React.Component {
  constructor(props) {
    super(props);
    this.state = { count: 0 };
  }

  componentDidMount() {
    setInterval(() => {
      this.setState({ count: this.state.count + 5 });
    }, 1000);
  }

  render() {
    return (
      <div className="counter">
        <h1>{this.state.count}</h1>
        <button>+</button>
      </div>
    );
  }
}

export default Counter;
The code above demonstrates our componentDidMount() method, which contains a setInterval function. This function updates our state by increasing the count by five. Essentially, the componentDidMount() method includes a function that increases the app's count by five every second (one thousand milliseconds).
Output:

The above image illustrates our counter app, where the count increases by five every second.
Updating Phase
The React updating phase is synonymous with the growth phase of living things. It is the phase where a component is updated due to changes that occur in its state or props. Several actions are often carried out in the updating phase, like passing data between components and managing user interaction.
Five built-in lifecycle methods are called when a React class component gets updated. They are:
getDerivedStateFromProps() method.
shouldComponentUpdate() method.
render() method.
getSnapshotBeforeUpdate() method.
componentDidUpdate() method.
The getDerivedStateFromProps() lifecycle method
While listed in the mounting phase, the getDerivedStateFromProps also serves as a built-in lifecycle method in the updating phase. It is the first lifecycle method called when a component gets updated and remains the natural place to set the state object depending on the value of the initial props.
Our code below shows a use case of the getDerivedStateFromProps() method.
import React from "react";
import "./Counter.css";

class Counter extends React.Component {
  constructor(props) {
    super(props);
    this.state = { count: 0 };
  }

  static getDerivedStateFromProps(props, state) {
    return { count: props.newcount };
  }

  changeCount = () => {
    this.setState({ count: this.state.count + 10 });
  };

  render() {
    return (
      <div className="counter">
        <h1>{this.state.count}</h1>
        <button onClick={this.changeCount}>+</button>
      </div>
    );
  }
}

export default Counter;
import React from "react";
import Counter from "./components/Navbar/Counter";

const App = () => {
  return (
    <div>
      <Counter newcount="6" />
    </div>
  );
};

export default App;
The code above shows how the getDerivedStateFromProps() method works during the updating phase. In this code, our Counter component starts with an initial count value. This value is updated using the getDerivedStateFromProps() method, which receives a property called newcount.
Within the Counter component, there is a function to update the count value by adding ten to the current count. This function is triggered by the button in our counter app. So, each time the button is clicked, the count should increase by ten. However, because getDerivedStateFromProps() is set to use the newcount property, which is defined as six in our app component, the counter app behaves differently. It resets the count to the newcount value (six) and keeps it there, even when the button meant to increase the count is clicked.
Output:

The image above shows our count value staying at six, even when we click the increment button repeatedly. This happens because our getDerivedStateFromProps() method takes priority during the updating phase, overriding any changes made by the button's click event.
The shouldComponentUpdate() Lifecycle Method
The shouldComponentUpdate() lifecycle method is called just before a component gets updated. This method takes in two arguments, nextprops and nextstate, and returns a Boolean value that determines if React should continue rendering or not.
A Boolean value of true, which is the default value of this method, signifies that the component should get updated, while a value of false indicates that the component will not get updated.
The code example below shows a perfect use case for the shouldComponentUpdate() method.
import React from "react";
import "./Counter.css";

class Counter extends React.Component {
  constructor(props) {
    super(props);
    this.state = { count: 0 };
  }

  shouldComponentUpdate() {
    return true;
  }

  changeCount = () => {
    this.setState({ count: this.state.count + 10 });
  };

  render() {
    return (
      <div className="counter">
        <h1>{this.state.count}</h1>
        <button onClick={this.changeCount}>+</button>
      </div>
    );
  }
}

export default Counter;
The code above demonstrates a simple counter app with a function that increases the count by ten each time the increment button is clicked. The Counter component includes the shouldComponentUpdate() method, which is set to true, allowing the count value to increase by ten whenever the increment button is clicked.
Output:
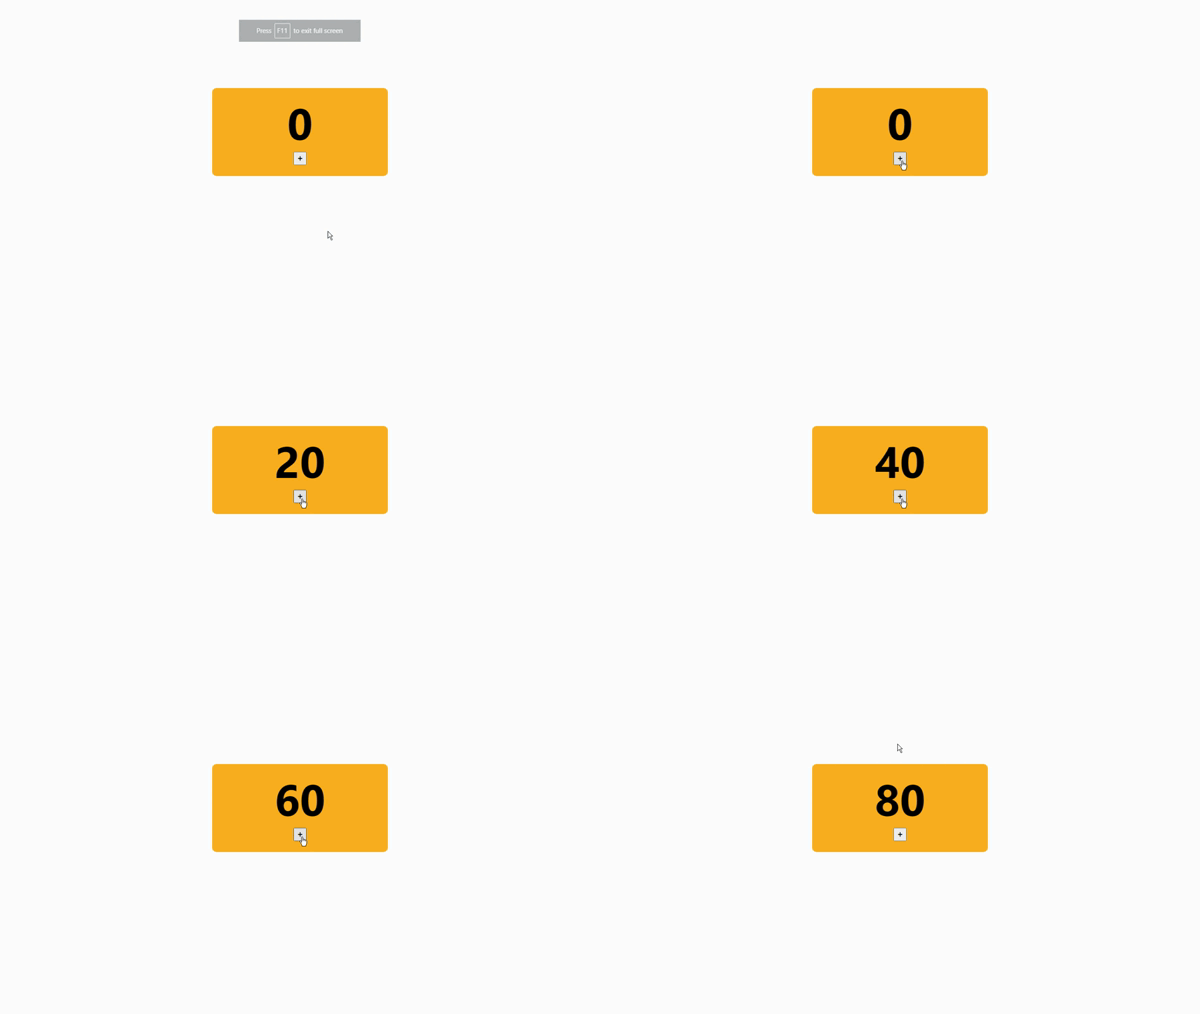
The image above shows our count increase by ten each time the increment button is clicked. This is due to the shouldComponentUpdate() method being set to true.
So what do you think will happen if our shouldComponentUpdate() method is set to false?
import React from "react";
import "./Counter.css";

class Counter extends React.Component {
  constructor(props) {
    super(props);
    this.state = { count: 0 };
  }

  shouldComponentUpdate() {
    return false;
  }

  changeCount = () => {
    this.setState({ count: this.state.count + 10 });
  };

  render() {
    return (
      <div className="counter">
        <h1>{this.state.count}</h1>
        <button onClick={this.changeCount}>+</button>
      </div>
    );
  }
}

export default Counter;
The code above shows the shouldComponentUpdate() method set to false in our Counter component. This will stop the app from incrementing because the Counter component is told not to update.
Output:
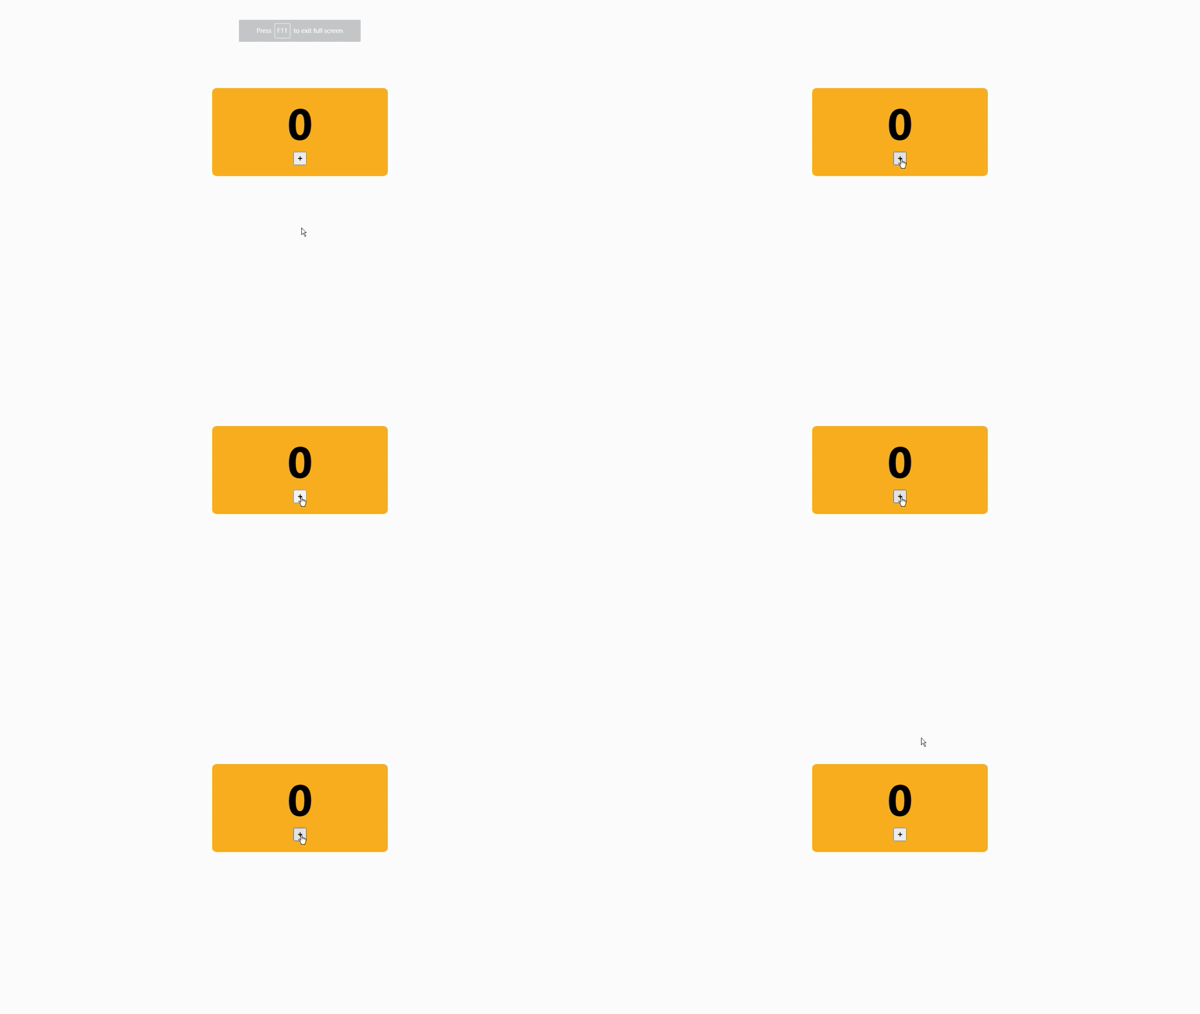
The image above shows that the count on our counter app stays the same (zero) even though we click the increment button repeatedly. This happens because our shouldComponentUpdate() method is set to false.
The render() lifecycle method
The render() lifecycle method is another React built-in method called in both the mounting and updating phases. In the updating phase, this method is responsible for re-rendering the HTML to the DOM once new changes are made to the state or props.
Our code below shows the role of the render() method in the React updating phase.
import React from "react";
import "./Counter.css";

class Counter extends React.Component {
  constructor(props) {
    super(props);
    this.state = { count: 0 };
  }

  changeCount = () => {
    this.setState({ count: this.state.count + 10 });
  };

  render() {
    return (
      <div className="counter">
        <h1>{this.state.count}</h1>
        <button onClick={this.changeCount}>+</button>
      </div>
    );
  }
}

export default Counter;
The code above demonstrates the role of the render() method during the updating phase. In our Counter component, the initial value of count is set to zero. We have a function that updates the count by adding ten to the previous count. This function is linked to our button element, which is part of the render() method. This means that each time the button is clicked, the count increases by ten. The render method ensures that whenever there is a change in count (indicating a change in the component's state), the new count value is displayed in the DOM.
Output:
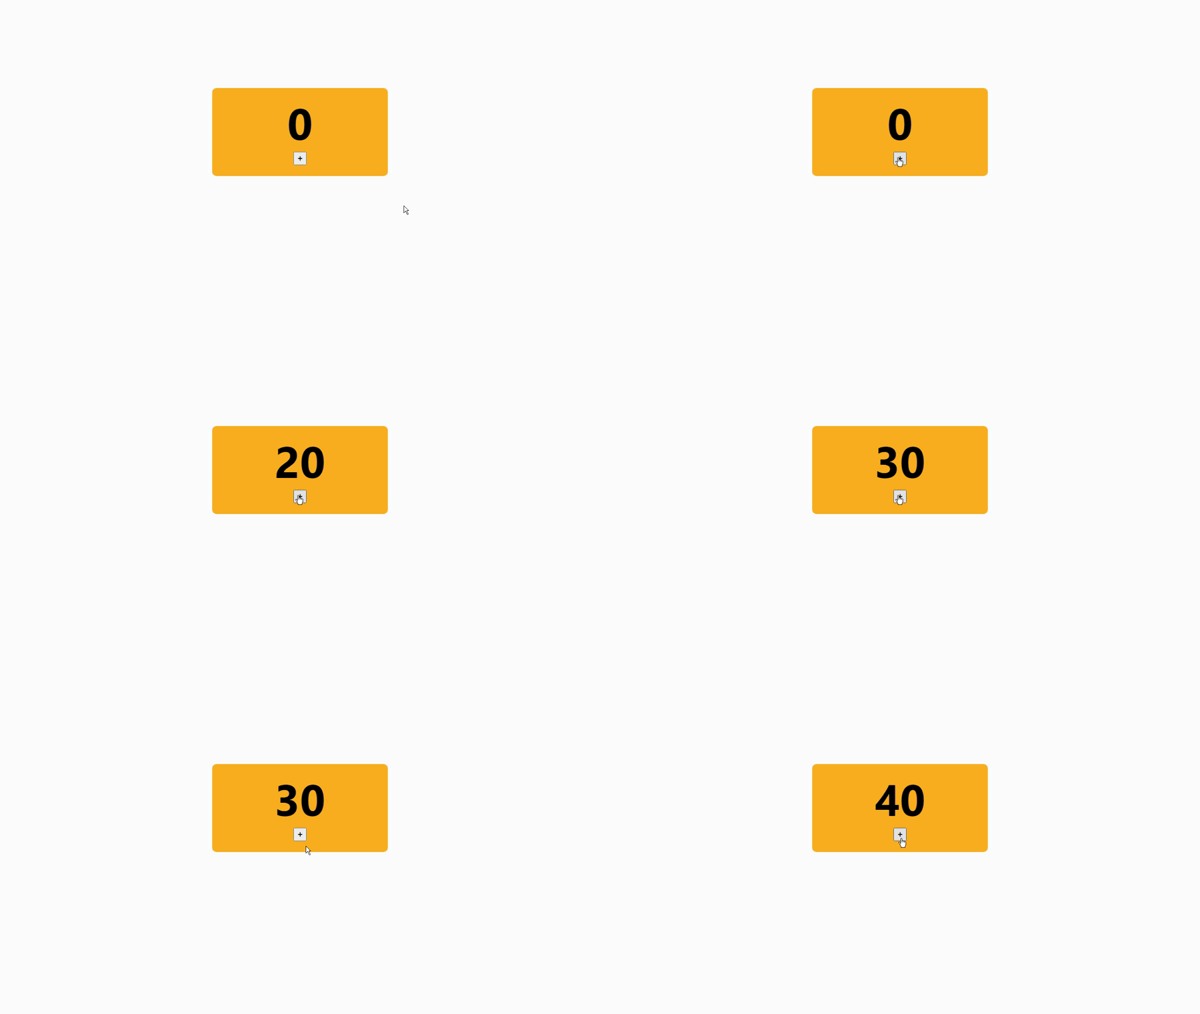
The image above shows our count increasing by ten each time the increment button is clicked. This updated count is displayed in the DOM each time it changes, thanks to the render() method.
The getSnapshotBeforeUpdate() lifecycle method
The getSnapshotBeforeUpdate() lifecycle method gives developers access to the component's props and state before they get updated. This means that after an update, the values of the component's state and props before the update can still be accessed.
It is mandatory to use the componentDidUpdate() lifecycle method alongside the getSnapshotBeforeUpdate() method to prevent React from logging an error message to the browser's console. This is because the getSnapshotBeforeUpdate() method returns a value that is passed as the third parameter to the componentDidUpdate() method.
The code example below shows a perfect use case for the getSnapshotBeforeUpdate() method.
import React from "react";
import "./Counter.css";

class Counter extends React.Component {
  constructor(props) {
    super(props);
    this.state = { count: 0 };
  }

  componentDidMount() {
    setInterval(() => {
      this.setState({ count: this.state.count + 5 });
    }, 1000);
  }

  getSnapshotBeforeUpdate(prevProps, prevState) {
    document.getElementById("div1").innerHTML =
      "Before updating my counter, the count was " + prevState.count;
  }

  componentDidUpdate() {
    document.getElementById("div2").innerHTML =
      "The updated count is " + this.state.count;
  }

  render() {
    return (
      <div>
        <div id="div1"></div>
        <div id="div2"></div>
        <div className="counter">
          <h1>{this.state.count}</h1>
          <button>+</button>
        </div>
      </div>
    );
  }
}

export default Counter;
The code above shows a Counter component that increases the initial count value by five every second. Inside our component, we have the getSnapshotBeforeUpdate() method, which takes two parameters: prevProps and prevState.
Additionally, the method uses document.getElementById().innerHTML to display a message with the previous state value to the DOM.
Since getSnapshotBeforeUpdate() doesn't work on its own, the componentDidUpdate() method is also defined in our component. This method displays the updated count value using getElementById().innerHTML to the DOM.
Output:
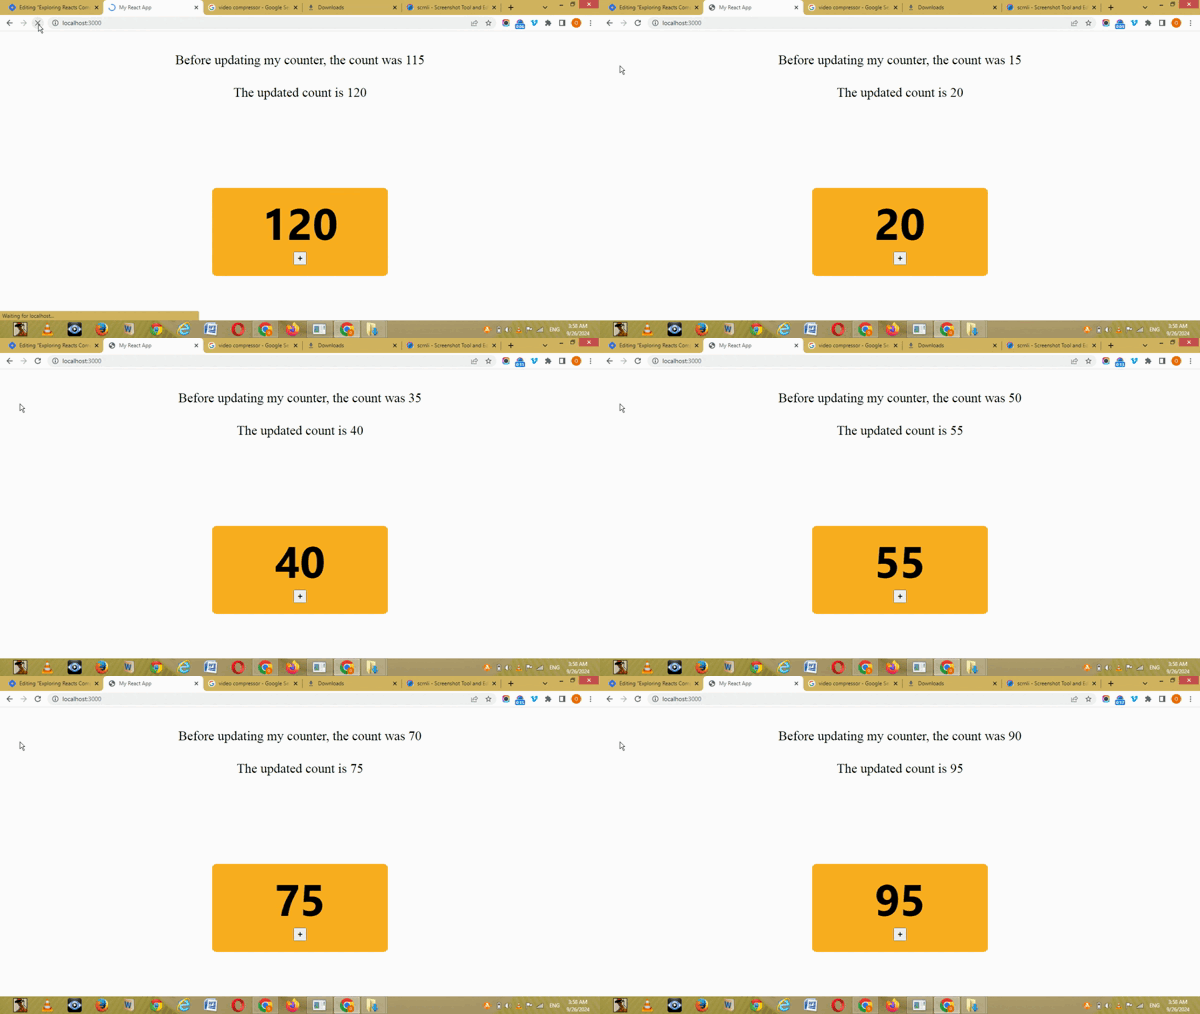
The image above shows the count in our app increasing by five every second. Each time the count goes up, we see a message with the previous count value and another with the new count value. This happens because of the getSnapshotBeforeUpdate() and componentDidUpdate() methods in our Counter component.
The componentDidUpdate() Lifecycle Method
The componentDidUpdate() lifecycle method is called after a React component has been updated or re-rendered in the DOM. This lifecycle method is useful for carrying out various actions like making network requests, executing side effects dependent on changes in props or state, and triggering additional state updates, to mention a few.
The code example below shows the use of the componentDidUpdate() lifecycle method in a simple React counter app.
import React from "react";
import "./Counter.css";

class Counter extends React.Component {
  constructor(props) {
    super(props);
    this.state = { count: 0 };
  }

  componentDidMount() {
    setInterval(() => {
      this.setState({ count: this.state.count + 5 });
    }, 1000);
  }

  componentDidUpdate() {
    document.getElementById("div1").innerHTML =
      "The updated count is " + this.state.count;
  }

  render() {
    return (
      <div>
        <div id="div1"></div>
        <div className="counter">
          <h1>{this.state.count}</h1>
          <button>+</button>
        </div>
      </div>
    );
  }
}

export default Counter;
The code above shows a Counter component that increases the app's count by five every second. This component includes the componentDidUpdate() method, which accesses the DOM using document.getElementById and displays the updated count value on the app.
Output:

The image shows a simple counter app where the count increases by five every second. Each time the count goes up, the new value is displayed on the app, thanks to the componentDidUpdate() method.
Unmounting phase
The React unmounting phase can be likened to the death phase of living things. It is the phase where a React component is completely removed from the DOM and is no longer accessible or re-rendered. It is worth mentioning that the unmounting phase is the last phase of the React component lifecycle, making it crucial for cleaning up resources, preventing memory leaks, or even ensuring proper state management.
The unmounting phase has only one built-in lifecycle method called:
- componentWillUnmount() method.
The componentWillUnmount() Lifecycle Method
The componentWillUnmount() lifecycle method is called just before a component is completely removed from the DOM. This method is necessary for performing clean-up actions like clearing data, removing event listeners, and canceling timers.
It is important to note that once a component is unmounted, remounting it becomes impossible, and the only option left is to re-render the component again.
The code below shows the use of the componentWillUnmount() method.
import React, { Component } from "react";
import "./Counter.css";

class Counter extends React.Component {
  constructor(props) {
    super(props);
    this.state = { count: 0 };
  }

  increment = () => {
    this.setState({ count: this.state.count + 1 });
  };

  componentWillUnmount() {
    alert("Counter app is about to be unmounted!");
  }

  render() {
    return (
      <div className="counter">
        <h1>{this.state.count}</h1>
        <button onClick={this.increment}>+</button>
      </div>
    );
  }
}

export default Counter;
The code above demonstrates a simple React counter app with an increment button that increases the count by one each time it is clicked. Inside the Counter component, we have the componentWillUnmount() method. This method includes an alert function to notify users when the counter app is about to be unmounted.
import React from "react";
import Counter from "./counter";
import "./Counter.css";

class unmountCounter extends React.Component {
  constructor(props) {
    super(props);
    this.state = { showCounter: true };
  }

  toggleCounter = () => {
    this.setState({ showCounter: false });
  };
  render() {
    return (
      <div>
        <button onClick={this.toggleCounter} className="unmount">
          Click to unmount
        </button>
        {this.state.showCounter && <Counter />}
      </div>
    );
  }
}

export default unmountCounter;
Having set up our componentWillUnmount() method within the Counter component, it's time to use it. We create another component called UnmountCounter, which will serve as the parent of the Counter component.
In this new component, we set up the constructor() method, which includes an initial state called showCounter with a value of true. Next, we create a function named toggleCounter to update the showCounter state to false. This function is connected to a button element and rendered to the DOM through the render() method. This means that each time the unmount button in our app is clicked, the counter app will be unmounted. However, before this happens, the user will receive an alert notifying them that the counter is about to be unmounted.
Remember, the alert function is set in our Counter component within the componentWillUnmount() method.
Output:
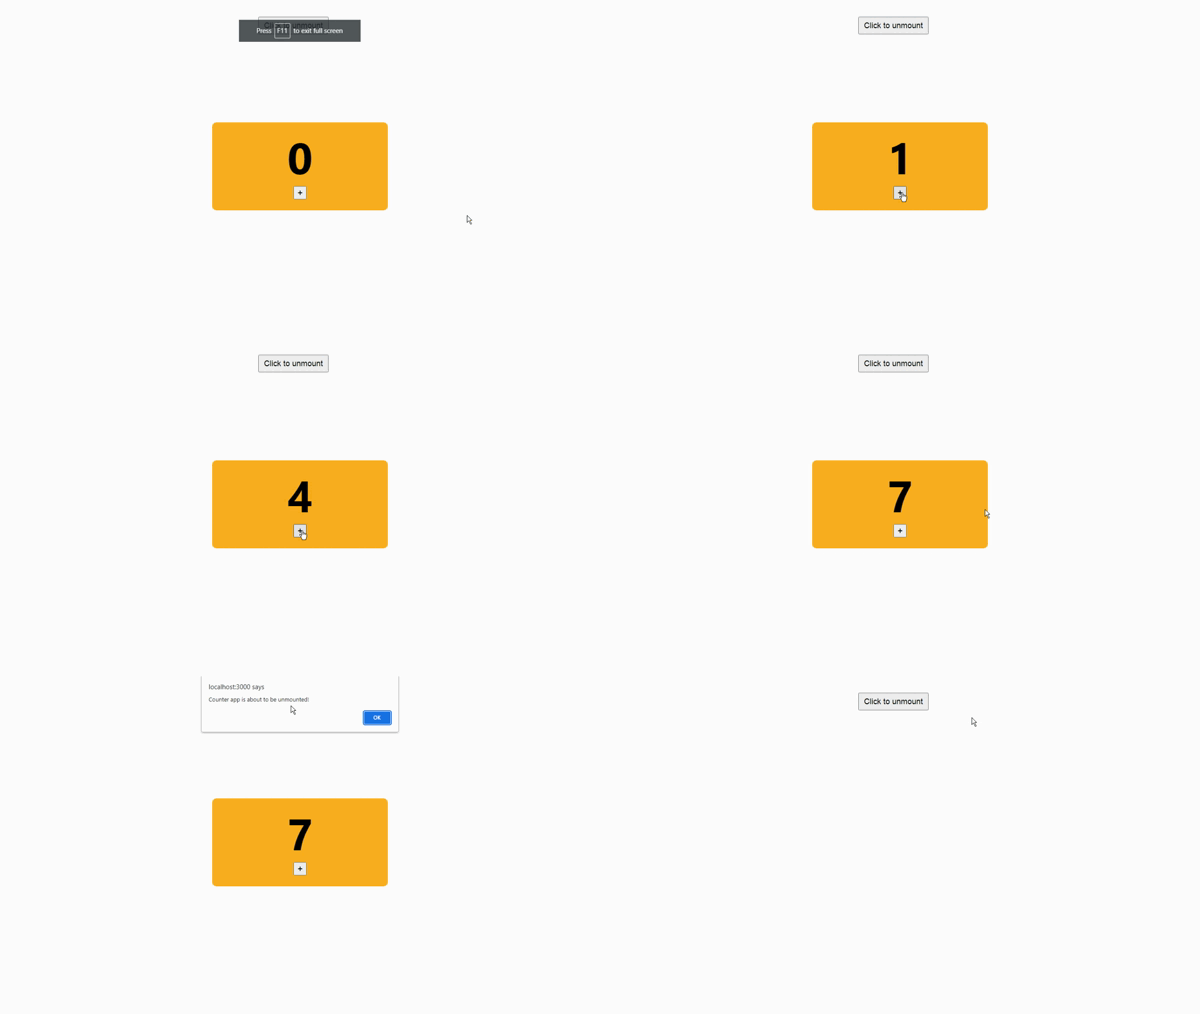
The image above shows a counter app where the count goes up by one each time the increment button is clicked. At the top of this app is a "click to unmount" button. When you click this button, an alert pops up, telling you that the counter app is about to be unmounted. If you click "okay," the counter app is permanently removed from the screen. This is made possible by the componentWillUnmount() method.
The useEffect Hook As A Lifecycle Method
We have so far explored how the different phases of a class component are handled using specific lifecycle methods in React. However, these lifecycle methods don’t apply directly to functional components as they are replaced with a better alternative known as the useEffect hook.
Hooks introduced in React version 16.8, are functions that allow the use of state and other React features in functional components. As a lifecycle method, the useEffect hook is a hybrid that replicates the behavior of certain React lifecycle methods in class components, some of which include:
The
componentDidMount()method (for the mounting phase).The
componentDidUpdate()method (for the updating phase).The
componentWillUnmount()method (for the unmounting phase).
The above makes the useEffect hook a perfect tool for handling side effects in functional components. For a more detailed guide on the use of useEffect hooks as a lifecycle method, click the link below.
https://manikandan-b.medium.com/react-functional-component-lifecycle-e8525f8fadea
Error Handling With Lifecycle Method
Error handling is a crucial challenge React developers need to overcome in order to successfully create user-friendly React applications. Errors can occur at various stages of a component's lifecycle, and effectively handling these errors is the only way to ensure a smooth user experience. React is aware of this, hence the introduction of error boundaries in React 16.
What Is Error Boundary
Error boundary introduced in React 16 is a component that looks out for JavaScript errors, regardless of where they occur in the component tree below it, thereby preventing these errors from crashing entire React programs by showing a fallback user interface. In essence, error boundaries are error-catching mechanisms for component trees below them.
The use of error boundaries is quite simple; all that is required is wrapping the component tree you wish to protect with an error boundary component. Doing this will enable the error boundaries to detect errors and show the fallback UI when they happen within the component tree.
To properly handle errors within a component tree, React introduced two lifecycle methods specifically for error boundaries.
getDerivedStateFromError() lifecycle method
componentDidCatch() lifecycle method
The getDerivedStateFromError() Lifecycle Method
The getDerivedStateFromError() lifecycle method is triggered when an error occurs during the rendering phase in a child component, allowing the parent component to update its state in response to the error. This method is used alongside the componentDidCatch() lifecycle method to effectively handle errors in React applications.
The componentDidCatch() Lifecycle Method
The componentDidCatch() lifecycle method is used to handle errors that occur in the rendering phase of a React component tree. This method is phenomenal at catching errors generated by child components, logging these errors to the console, and finally displaying a fallback UI instead of allowing these errors to crash the entire React application.
Having discussed the role of getDerivedStateFromError() and componentDidCatch() lifecycle methods in error handling, it is now time to see how these methods practically handle errors in code. The code example below shows how these lifecycle methods handle errors in React components.
import React, { Component } from "react";
import "./Counter.css";

class Counter extends React.Component {
  constructor(props) {
    super(props);
    this.state = { count: 0 };
  }

  increment = () => {
    this.setState({ count: this.state.count + 1 });
  };

  render() {
    if (this.state.count > 5) {
      throw new Error("counter exceeded limit of 5!");
    }
    return (
      <div className="counter">
        <h1>{this.state.count}</h1>
        <button onClick={this.increment}>+</button>
      </div>
    );
  }
}

export default Counter;
The code above shows a Counter component with an initial count set to zero in the constructor method. The component includes a function that increases the count by one. This function is called when the button element is clicked, meaning each button click increases the count by one. In the render() method, a conditional statement is used to throw an error if the count exceeds five, ensuring the app handles this situation.
import React from "react";

class ErrorBoundary extends React.Component {
  constructor(props) {
    super(props);
    this.state = { hasError: false };
  }
  static getDerivedStateFromError(error) {
    return { hasError: true };
  }
  componentDidCatch(error, info) {
    console.log("Error: ", error);
    console.log("Error Info: ", info);
  }
  render() {
    if (this.state.hasError) {
      return <h2>Something went wrong</h2>;
    }
    return this.props.children;
  }
}

export default ErrorBoundary;
With our Counter component ready, we now create an ErrorBoundary component. In the constructor() method of our ErrorBoundary, we set the initial state hasError to false. This means that when the app first loads, there are no errors.
Next, we define the getDerivedStateFromError() method, which takes an error parameter and updates hasError to true. This means that if an error occurs in the counter app, such as when the count goes over five, hasError changes from false to true.
Our ErrorBoundary component also includes the componentDidCatch() method, which takes two parameters: error and info. This method logs any errors in the counter app to the console, along with error details.
In the render() method, we use a conditional statement to check for errors before rendering. If there is an error, it displays a "Something went wrong" message in the DOM.
import React from "react";
import Counter from "./components/Navbar/Counter";
import ErrorBoundary from "./components/Navbar/ErrorBoundary";

const App = () => {
  return (
    <div>
      <h1>React counter with error boundary</h1>
      <ErrorBoundary>
        <Counter />
      </ErrorBoundary>
    </div>
  );
};

export default App;
With our error handling methods set up, it's time to call all our components within the parent component, the App component. To do this, our ErrorBoundary component wraps the Counter component. This way, if an error occurs (like the count going over five), the error type, error details, and a message indicating an error are displayed for the user to see.
Output:
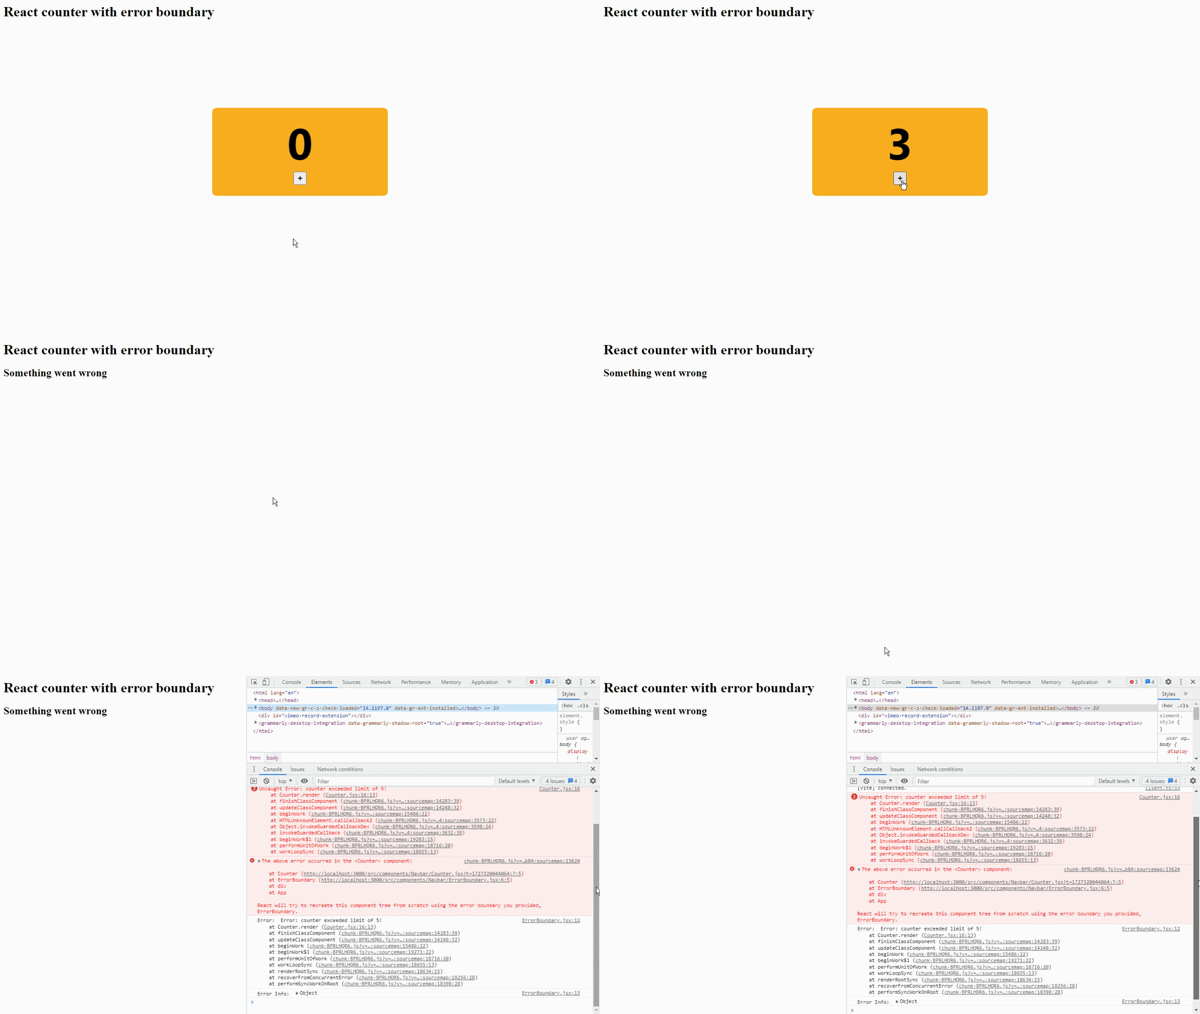
The image above shows a counter app where the count increases by one each time the increment button is clicked. When the count goes over five, an error message appears on the screen. By checking the browser's console, we can see the type of error and detailed information clearly displayed. This is due to the error handling lifecycle method used in our app.
It is important to note that the getDerivedStateFromError() and componentDidCatch() lifecycle methods are used specifically to handle errors in class components, as React has yet to introduce error boundaries for functional components. However, there are alternative ways to manage errors in functional components, typically by using hooks like useEffect to perform similar tasks, though they are not as robust as class-based error boundaries.
Conclusion
Mastering React’s component lifecycle is key to building efficient and highly maintainable applications. The lifecycle consists of three phases – mounting, updating, and unmounting – and each has different methods for class and functional components. Methods like componentDidMount, componentDidUpdate, and componentWillUnmount manage these phases in class components, while the useEffect hook serves functional components.
Additionally, handling errors in React is necessary for creating robust applications. Built-in methods like getDerivedStateFromError and componentDidCatch ensure errors in the component tree are caught early, thereby preventing entire applications from crashing.
Whether you are working with a class or functional component, a solid understanding of React's lifecycle and error handling methods will help you write cleaner and more efficient code. By mastering these tools, you can develop high-performance components that gracefully handle errors.
Subscribe to my newsletter
Read articles from Daniel Efe directly inside your inbox. Subscribe to the newsletter, and don't miss out.
Written by

Daniel Efe
Daniel Efe
Hello, I'm Daniel. A front-end developer and a professional technical writer. I enjoy documenting my projects and learning new things.