How to install PostgreSQL on ubuntu System
 Ankita Lunawat
PostgreSQL is a powerful, reliable, and extensible open-source relational database management system (RDBMS) known for its advanced features.
PostgreSQL is a powerful, versatile, and reliable database management system, suitable for both small and large-scale applications, and is popular among developers and organizations for its extensibility and adherence to standards.
Key Features of PostgreSQL -
Open Source: PostgreSQL is free to use, modify, and distribute. It has a large community of developers and users who contribute to its development and support.
Relational Database: It stores data in a structured format using tables, allowing for complex queries and data relationships.
Rich Query Language: PostgreSQL supports SQL (Structured Query Language) for querying and managing data. It also supports advanced features like window functions, common table expressions (CTEs), and recursive queries.
Support for JSON: PostgreSQL has built-in support for JSON (JavaScript Object Notation), allowing for the storage and querying of JSON data, making it a great choice for applications that require both relational and non-relational data management.
Concurrency Control: PostgreSQL uses Multi-Version Concurrency Control (MVCC) to handle multiple transactions simultaneously without locking the database, allowing for high levels of concurrency.
**************************************************************************
Pre -Data -
SSH Access with admin privileges
Ubuntu 24.04 LTS with minimal installation
Install PostgreSQL on Ubuntu System
Update Your System - sudo apt update
Install PostgreSQL using the package manager
sudo apt install -y postgresql-common -y
execute the PostgreSQL APT repository script -
sudo /usr/share/postgresql-common/pgdg/apt.postgresql.org.sh
Install the PostgreSQL database server package -
sudo apt install -y postgresql
Start the PostgreSQL database server -
sudo systemctl restart postgresql
Verify the status -
sudo systemctl status postgresql
Secure the PostgreSQL Database Server on Ubuntu System
Log in to the PostgreSQL database server -
sudo -u postgres psql
Change the Default Password -
ALTER USER postgres WITH ENCRYPTED PASSWORD 'strong_password';
Create a new user db_manager with a new password -
CREATE USER db_manager ENCRYPTED PASSWORD 'strong_password';
Exit the console with cntrl+d
To change the default peer value to scram-sha-256 in the pg_hba.conf file and enable password authentication on the server, run the following command.
sudo sed -i '/^local/s/peer/scram-sha-256/' /etc/postgresql/16/main/pg_hba.conf
Restart the server -
sudo systemctl restart postgresql
Access the PostgreSQL Database Server command line
To create a new sample table called 'Eng‘ in PostgreSQL on Ubuntu 24.04, follow these steps:
Switch to the postgres user (the default PostgreSQL superuser):
sudo -i -u postgres
Access the PostgreSQL prompt -
psql
after giving above command it will ask for the password
Create a Database: If you don’t have a database yet, you can create one first. This is optional if you’re using the default postgres database.
CREATE DATABASE sample_db;
Connect to the newly created database -
\c sample_db
Create the Engineer Table -
Once you’re connected to your desired database, you can create the Engineer table.
Create the doctors table with columns such as id, name, specialization, experience_years, and phone:
CREATE TABLE Engineer (
id SERIAL PRIMARY KEY,
name VARCHAR(100) NOT NULL,
specialization VARCHAR(100) NOT NULL,
experience_years INT NOT NULL,
phone VARCHAR(15)
);
id SERIAL PRIMARY KEY: Auto-incrementing primary key.
name VARCHAR(100): Doctor’s name (string of up to 100 characters).
specialization VARCHAR(100): Doctor’s specialization (string of up to 100 characters).
experience_years INT: Years of experience (integer).
phone VARCHAR(15): Doctor’s phone number (optional).
Insert Sample Data into the doctors Table -
You can now insert some sample data into the table to test it.
INSERT INTO Engineer (name, specialization, experience_years, phone)
VALUES
(‘Er. Ankita', 'Computer Sci', 4, '123-456-7890'),
('Er. Pushpak, 'Civil', 6, '098-765-4321'),
('Er. Sach, 'IT',9, '567-890-1234');
Query the Table -
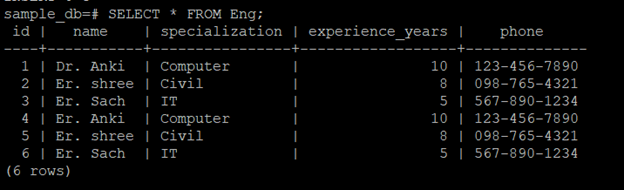
After inserting data, you can query the table to verify the records:
SELECT * FROM Engineer;
Exit the PostgreSQL Prompt -
To exit the PostgreSQL command-line interface, type - \q
Subscribe to my newsletter
Read articles from Ankita Lunawat directly inside your inbox. Subscribe to the newsletter, and don't miss out.
Written by
Ankita Lunawat
Ankita Lunawat
Hi there! I'm a passionate AWS DevOps Engineer with 2+ years of experience in building and managing scalable, reliable, and secure cloud infrastructure. I'm excited to share my knowledge and insights through this blog. Here, you'll find articles on: AWS Services: Deep dives into core AWS services like EC2, S3, Lambda, and more. DevOps Practices: Best practices for CI/CD, infrastructure as code, and automation. Security: Tips and tricks for securing your AWS environments. Serverless Computing: Building and deploying serverless applications. Troubleshooting: Common issues and solutions in AWS. I'm always eager to learn and grow, and I hope this blog can be a valuable resource for fellow DevOps enthusiasts. Feel free to connect with me on [LinkedIn/Twitter] or leave a comment below!