Streamlining Jenkins Pipelines with Docker: A Step-by-Step Guide
 Manoj Bharadwaja
In this article, we will discuss how to use Docker with Jenkins.
Why to use Docker with Jenkins.
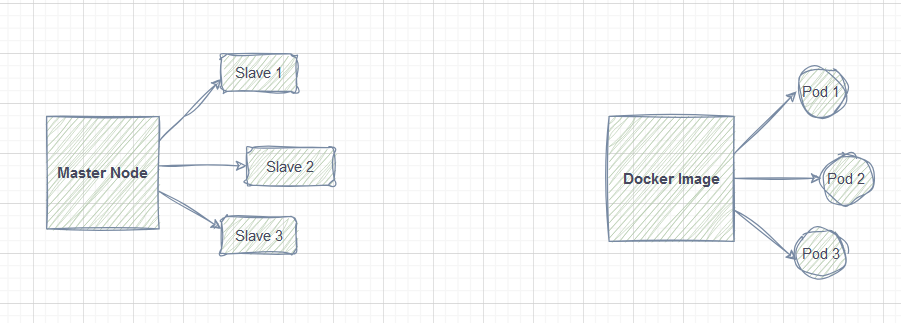
In traditional way of configuring jenkins pipeline. It works on master-slave architecture. In that architecture multiple machines must be in running state even they were not in use. But when you use docker it uses the concept of pods where the created pod automatically tears down once the execution is completed which can save lot of cost.

In Docker actual diagram will be without those pods since they were teared down once the build is completed.
Initial Steps
Prerequisite
Java should be installed in your machine use command
sudo apt install openjdk-17-jre.Deploy Jenkins in any of the cloud provider console and access it through port 8080. Go to jenkins documentation and choose the installation script according to your server’s distribution.
Install docker in your machine use command
sudo apt install docker.io.
Adding required permissions
First things first, once you did all the above steps perfectly you will be able to access the jenkins via port 8080.
After that you should add jenkins and your distribution user group to docker group. To do that use command usermod -aG docker jenkins, usermod -aG docker ubuntu. After that you should add Docker pipeline plugin to jenkins. So from your jenkins web UI navigate to mange jenkins from dashboard. From there you can see plugins click on it and go to available plugins and search for docker pipeline install it. Once you installed you must restart your jenkins portal to update those changes in it. To do that in your url add /restart and press enter and click on yes. It will restart the jenkins and then login to the jenkins.
Congratulations you are done with initial set up steps for using jenkins with docker.
In this article, I will explain how to build a pipeline in jenkins to ensure that docker is perfectly integrated and working with our continuous integration. The aim of this pipeline is to verify that the Node.js environment is properly set up by outputting the version of Node.js available in the container.
Implementation
Now lets build a simple jenkins pipeline and understand how docker work with jenkins.
Take New item and name it as NodeJS. Select item type as Pipeline and Click OK.
Now you can configure your job from the dashboard opened. Describe your job if you wish.
If you scroll down you can see pipeline scripting. If you are familiar with groovy scripting you can write the pipeline script to dedicate a pipeline to run our task, else you can take the help of Pipeline syntax.
If you have the Jenkins file in git-hub. Select Pipeline from SCM under Definition drop down of pipeline section and give details of repo and build it.
If you don’t have jenkins file you can select pipeline script and add the below code snippet in it.
 pipeline {
   agent {
     docker { image 'node:16-alpine' }
   }
   stages {
     stage('Test') {
       steps {
         sh 'node --version'
       }
     }
   }
 }
The above script helps you to install node js with docker and tests the file whether it is installed or not.
Once configured click on Save and click on Build Now.
This builds your task. To verify, Click on Stages and click on id of your build. It shows you the details and different stages of your build. Click on any stage to verify the output.
To view detailed console information click on three dots in top right corner and select View Classic Console. This shows you the detailed information regarding your build.
Congratulations for configuring your first pipeline in jenkins. To build even bigger builds all you have to do is adding more stages to the pipeline.
Subscribe to my newsletter
Read articles from Manoj Bharadwaja directly inside your inbox. Subscribe to the newsletter, and don't miss out.
Written by
